
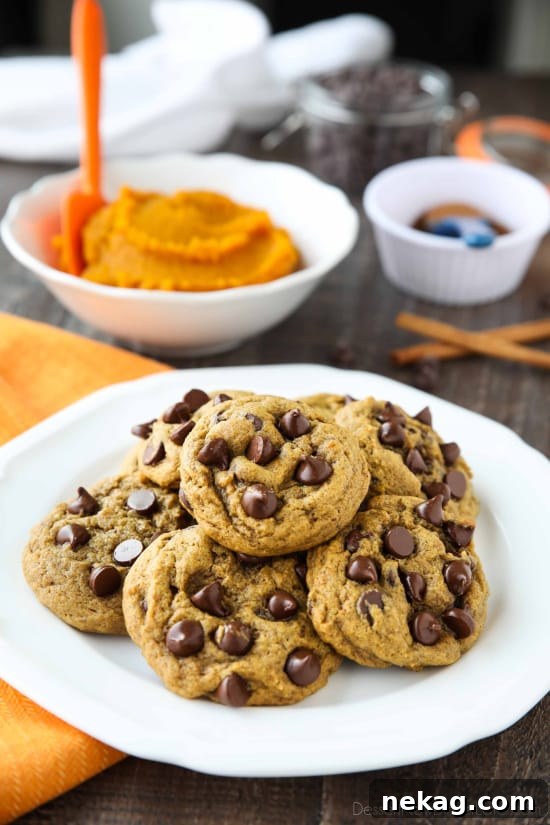
There’s a special magic that descends upon us with the crisp autumn air, inspiring a yearning for warmth, comfort, and the unmistakable aroma of pumpkin spice. Among the pantheon of fall desserts, the Pumpkin Chocolate Chip Cookie holds a revered spot. These delightful treats masterfully blend the earthy, comforting notes of pumpkin and a symphony of autumn spices with the sweet, melty indulgence of chocolate. Imagine a cookie that is perfectly soft, subtly chewy at the edges, and wonderfully cakey in the center, each bite bursting with flavor. That’s precisely what these soft-baked Pumpkin Chocolate Chip Cookies deliver – an easy, utterly delicious, and truly essential fall indulgence.
The Ultimate Fall Cookie: Pumpkin Chocolate Chip Cookies
Pumpkin Chocolate Chip Cookies are more than just a seasonal snack; they’re a celebration of autumn flavors. The rich, velvety pumpkin puree brings an unparalleled moistness, while a carefully balanced blend of spices evokes memories of cozy evenings and festive gatherings. Paired with creamy chocolate chips that melt gloriously with each chew, it’s no wonder these cookies become an instant favorite every year. This recipe captures the essence of fall in a single, irresistible bite, making it a must-have for your autumn baking repertoire.
Understanding Cookie Texture: Cakey vs. Chewy
When it comes to homemade cookies, texture is paramount, and Pumpkin Chocolate Chip Cookies offer a fascinating dichotomy: cakey or chewy. Both styles have their devoted fans, and understanding the nuances of each can help you bake your perfect batch.
The Charm of Cakey Pumpkin Cookies
Cakey pumpkin chocolate chip cookies are characterized by their light, airy crumb, reminiscent of a muffin top or a soft piece of cake. This texture is typically achieved by a few key factors:
- **Liquid Content:** Ingredients like oil, eggs, and, of course, pumpkin puree, contribute significant moisture and volume. The more liquid, the more tender and cake-like the result.
- **Leavening Agents:** A generous amount of baking soda or baking powder reacts with the moisture and heat to create air pockets, giving the cookies a noticeable lift and soft, fluffy interior.
- **Fat Type:** Often, recipes for cakey cookies utilize oil, which distributes easily through the dough, keeping it moist and contributing to a softer texture without the chewiness that butter can provide.
If you’re a fan of this delightful fluffiness, many recipes prioritize these elements. For instance, my mom’s recipe for pumpkin chocolate chip cookies is a perfect example of a wonderfully cakey version, focusing on a straightforward blend of oil, eggs, and pumpkin to achieve that coveted tender crumb.
Achieving Chewy Pumpkin Cookies
On the other hand, crafting truly chewy pumpkin chocolate chip cookies can be a bit more challenging. Pumpkin and eggs naturally lean towards a cakey texture due to their leavening and moisturizing properties. However, with a few adjustments, a satisfyingly chewy cookie is well within reach:
- **Butter over Oil:** Switching from oil to butter introduces a different fat profile. Butter contributes to spread and browning, and its milk solids help create a crispier edge and chewier center, especially when creamed properly.
- **Reduced Eggs or Egg Yolks Only:** Eggs are powerful leavening agents. By omitting whole eggs or using only egg yolks (which add richness and fat without as much leavening protein from the whites), you can reduce the rise and promote a denser, chewier texture.
- **Strategic Chilling:** As we’ll delve into further, chilling the dough is a secret weapon for chewiness. It allows the flour to fully hydrate, the butter to firm up, and slows down the leavening process, resulting in less spread and a denser, more substantial cookie.
If a deeply chewy texture is your goal, recipes like this one designed for chewiness specifically manipulate these elements to achieve that desired bite.
The Best of Both Worlds: This Recipe’s Perfect Balance
This particular pumpkin chocolate chip cookie recipe strikes a beautiful balance, offering the best of both worlds. It delivers a cookie that is wonderfully moist and delightfully chewy, yet still possesses a subtle, tender cake-like quality. In my opinion, it’s the PERFECT combination – satisfying that craving for a substantial, flavorful cookie without being overly dense or too light. It’s the ideal middle ground that appeals to almost everyone.
The Magic of Chilling Cookie Dough
The decision to chill your cookie dough or bake it immediately is not a trivial one; it profoundly impacts the final texture of your cookies. This recipe highlights the importance of chilling, especially if you desire a chewier outcome.
The Science Behind Chilling
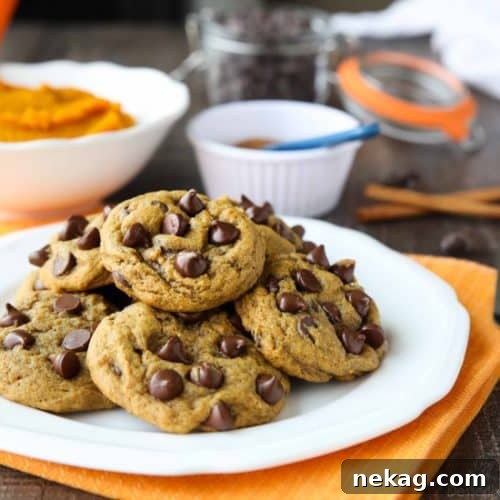
I put this recipe to the test twice to observe the effects. The first batch, baked after an hour of chilling, yielded the beautifully spread, slightly crinkled, and perfectly chewy cookies you see in the photos. The second batch, baked immediately without chilling, turned out noticeably more cakey and didn’t spread as much. This observation provides a clear demonstration of how chilling works.
Think of it like pancake batter or biscuits. If you bake them right away, the leavening agents react quickly to the liquid and heat, causing a significant rise. This quick, vigorous rise often results in a lighter, fluffier, or more cakey texture. However, when you allow dough to rest, especially in the cold, several key processes occur:
- **Slowed Leavening:** Chilling the dough delays the chemical reaction of leavening agents (like baking soda or powder) when they eventually hit the oven. The cold temperature and extended time weaken their initial reactivity, leading to a slower, more controlled rise. This slow rise helps create a denser, chewier cookie rather than a rapidly puffed-up, cakey one.
- **Fat Solidification:** Butter, being a solid fat at room temperature, re-solidifies in the cold. This means the cookies will spread less rapidly in the oven, allowing them to bake more evenly and develop a thicker, chewier body. Warm dough with soft butter will spread out quickly before the edges can set, leading to thinner, crispier cookies.
- **Flavor Development:** Chilling allows the flour to fully hydrate and the sugars to dissolve more thoroughly. This results in a more uniform texture and a deeper, more developed flavor profile, as the ingredients have more time to meld together.
- **Gluten Relaxation:** The gluten strands in the flour relax during chilling. This relaxation prevents the dough from becoming tough and contributes to a more tender and chewy final product.
Therefore, if your heart desires cakey pumpkin chocolate chip cookies, simply bake the dough right away. But if you’re aiming for that irresistible soft and chewy texture with a lovely spread, then chilling the dough is a non-negotiable step!
The Role of Leavening When Chilling Dough
You might wonder why we don’t simply reduce or eliminate the leavening agents when aiming for a chewier cookie that benefits from chilling. The answer lies in balance. While chilling helps achieve a denser texture, baking soda (or powder) is crucial for creating that delightful softness and slight puffiness we expect from a cookie. Completely removing it might result in a very flat, dense, or hard cookie, lacking the beloved tender crumb.
Baking soda reacts with acidic ingredients (like brown sugar or even the slight acidity in pumpkin) to produce carbon dioxide gas, which gives cookies their signature rise and tenderness. By allowing the dough to chill, we merely temper this reaction, creating a slower, more controlled expansion that results in a chewiness while still retaining the essential softness. Feel free to experiment with slight adjustments if you’re curious, but for this recipe, the combination of specific leavening and chilling time is key to its perfect texture. For best results, follow the recipe below!
Rated 5 out of 5 stars by 2 ratings
Pumpkin Chocolate Chip Cookies
Amber Brady
10 mins
7 mins
1 hr
1 hr 17 mins
Pin Recipe
24
cookies
Ingredients
- ½ cup (113 g) unsalted butter, (1 stick) melted
- ½ cup (100 g) brown sugar, gently packed
- ¼ cup (50 g) granulated sugar
- 1 tsp vanilla extract
- 6 Tbsp pumpkin puree
- 1 large egg yolk, (discard whites, or save for another recipe)
- 1 ½ cups (180 g) all-purpose flour, (Stir, spoon into cup, and level off.)
- ¼ tsp salt
- ½ tsp baking soda
- 1 ½ tsp ground cinnamon
- ½ tsp ground allspice
- ¼ tsp ground ginger
- ⅛ tsp ground cloves
- ⅛ tsp ground nutmeg
- 1 cup (170 g) semi-sweet chocolate chips
Instructions
-
In a stand mixer with the paddle attachment, cream the melted butter with both brown and granulated sugars until light and fluffy. Add the vanilla extract, pumpkin puree, and egg yolk. Mix until just combined, being careful not to overmix. Scrape down the sides of the bowl to ensure all ingredients are incorporated.
-
In a separate medium-sized bowl, whisk together the dry ingredients: all-purpose flour, salt, baking soda, ground cinnamon, ground allspice, ground ginger, ground cloves, and ground nutmeg. Gradually add the dry ingredient mixture to the wet ingredients in the stand mixer, mixing on low speed until just incorporated and no streaks of flour remain. Be careful not to overmix, as this can lead to tough cookies.
-
Gently fold in the semi-sweet chocolate chips*. Once combined, cover the dough and CHILL the dough in the refrigerator for at least 1 hour. This crucial step helps prevent spreading and promotes a chewier texture. (*Consider saving about 1/3 cup of chocolate chips to press into the top of the dough balls before baking for a picture-perfect finish.)
-
Preheat your oven to 350 degrees Fahrenheit (175°C). Line a baking sheet with parchment paper or a silicone baking mat (or grease lightly with cooking spray). Scoop the chilled dough into balls, approximately 1 ¾ Tablespoons each (a #40 cookie scoop works perfectly), and gently roll them in your hands to form a smooth sphere. Place the dough balls onto the prepared cookie sheet, leaving enough space between them for spreading. If desired, press a few extra chocolate chips into the top of each dough ball for an enhanced visual appeal.
-
Bake for 7-9 minutes. The cookies are done when the edges are set and lightly golden, but the centers still look slightly soft and underbaked. Do not over-bake, as this will result in dry cookies. Allow the cookies to cool on the baking sheet for a few minutes before carefully transferring them to a wire rack to cool completely. Store leftover cookies in an airtight container at room temperature for up to 1 week to maintain their freshness and soft texture.
Notes
Spice Substitution: For convenience, you may substitute the individual spices (cinnamon, allspice, ginger, cloves, and nutmeg) with 2 ½ teaspoons of pre-mixed pumpkin pie spice. Ensure your pumpkin pie spice blend is fresh for the best flavor.
Chocolate Variety: While semi-sweet chocolate chips are recommended, feel free to experiment with milk chocolate, dark chocolate, or even white chocolate chips for a different flavor profile. Chocolate chunks can also be used for larger pockets of melted chocolate.
Storage & Freezing: Baked cookies can be stored in an airtight container for up to 5-7 days. For longer storage, freeze cooled cookies in a freezer-safe bag for up to 3 months. Dough can also be scooped into balls, frozen on a baking sheet, then transferred to a freezer bag for baking at a later date. Bake from frozen, adding a minute or two to the baking time.
Preventing Spreading: If your cookies spread too much, ensure your butter is not too warm (melted but not hot), your flour is measured accurately (spooned and leveled, not scooped), and that you don’t skip the chilling step. A slightly higher ratio of flour or a colder baking sheet can also help.
Sharing this recipe with a link is both encouraged and appreciated. Copying/pasting and/or screenshots of full recipes to any social media is strictly prohibited. Content and photographs are copyright protected.
Did you make this?
Don’t forget to leave a rating below and make sure to follow on Pinterest and Instagram for more delicious recipes and baking inspiration!