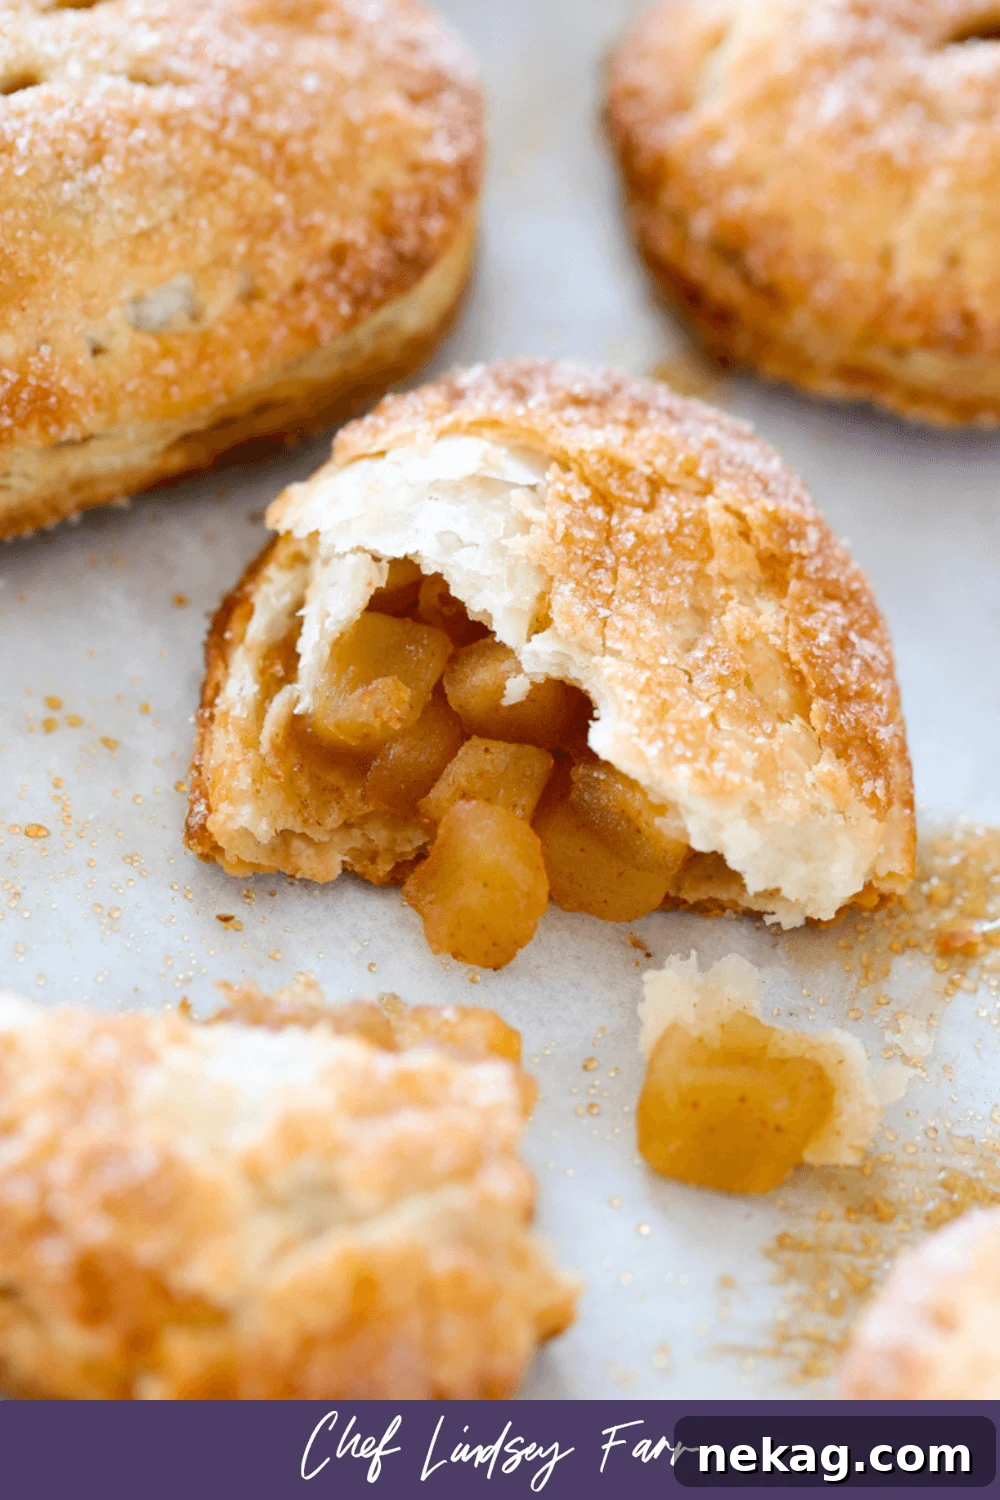
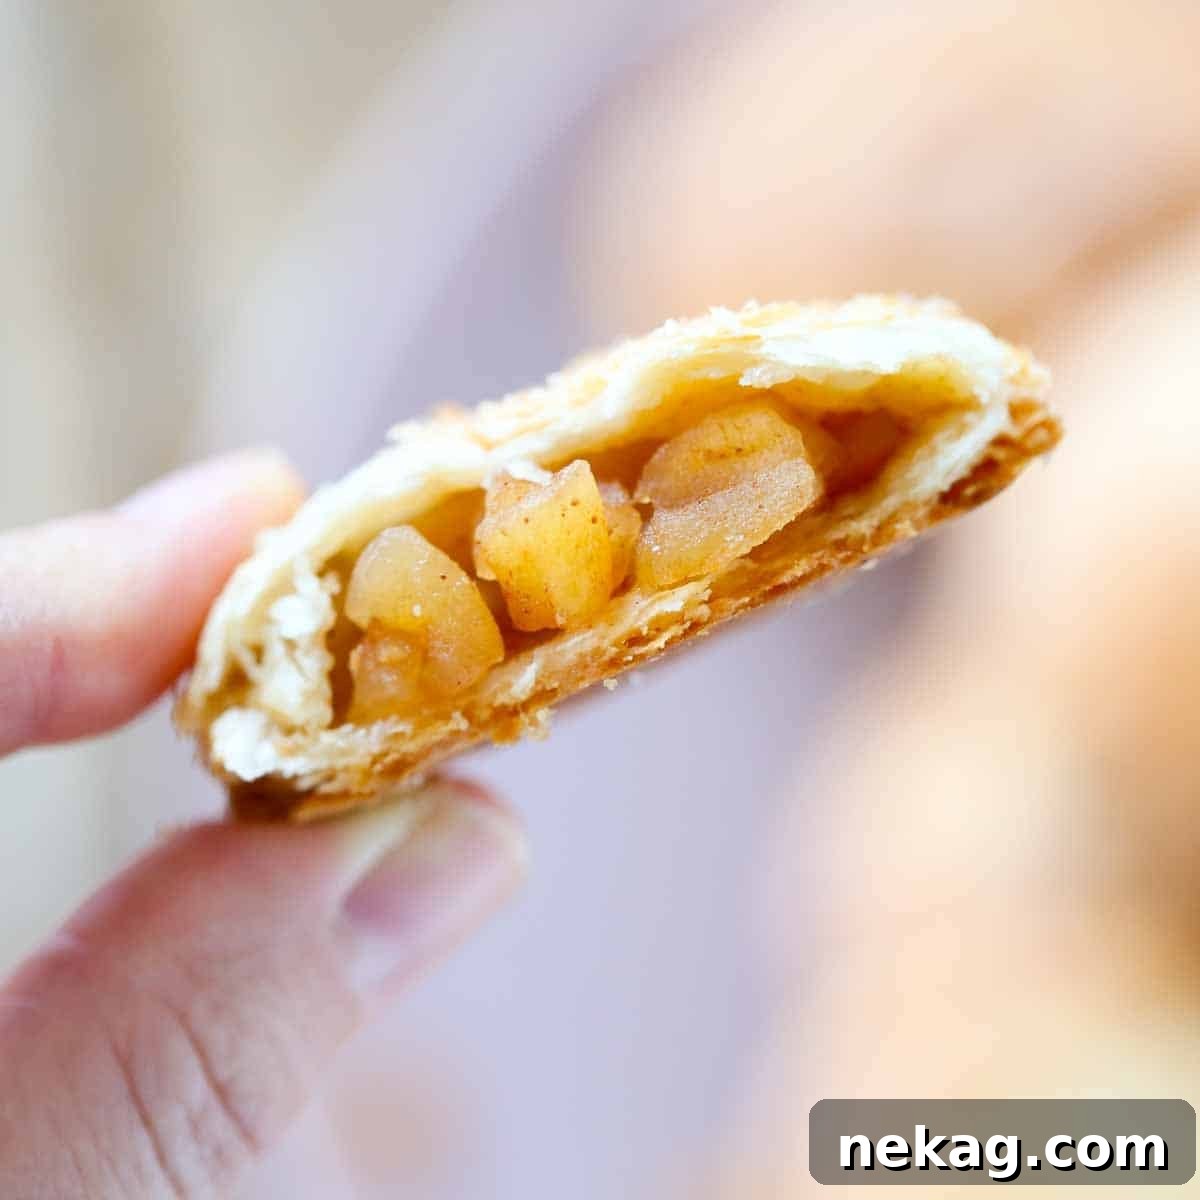
Indulge in the irresistible charm of these easy Apple Hand Pies! Imagine a golden, incredibly flaky all-butter pie crust enveloping a luscious, homemade cinnamon-spiced apple filling, all crowned with a glistening cinnamon sugar topping. These delightful pastries are not only surprisingly simple to create but also bake to perfection in under 20 minutes, making them the ideal hand-held treat for any time of year. Whether you’re craving a sweet snack, a delightful dessert, or a portable breakfast bite, these apple hand pies promise a taste of pure comfort and joy.

A Quick Look at This Delicious Recipe
Get ready to bake! Here’s a brief overview of what it takes to bring these delightful apple hand pies to life:
- Prep Time: 30 minutes
- Cook Time: 20 minutes
- Chill Time: 30 minutes (essential for that flaky crust!)
- Total Time: Approximately 1 hour 20 minutes
- Yields: 9 delightful hand pies
- Calories: ~268 kcal per pie (based on nutrition panel)
- Key Technique: Crafting an exceptional all-butter pie crust, filling it with a tender spiced apple compote, expertly sealing, chilling for texture, and baking until golden brown and bubbling.
- Flavor Profile: A harmonious blend of buttery, crisp pastry with a warm, aromatic cinnamon apple filling, finished with a sweet, caramelized sugared crust.
- Difficulty Level: Intermediate. While the individual steps are straightforward, mastering the dough handling and proper sealing requires a touch of care to achieve perfection. But don’t worry, the results are well worth the effort!
Featured Comment
⭐⭐⭐⭐⭐ “The pie dough truly elevates these hand pies! It’s wonderfully crispy, incredibly flaky, and tastes absolutely divine! I decided to prepare the pie dough on the first day, the filling on the second, and then assembled everything on the third. This approach made the entire process feel remarkably easy and stress-free.” – Mara
Why These Apple Hand Pies Will Become Your Favorite Treat
Beyond their delightful taste, these apple hand pies offer a multitude of reasons to fall in love with them:
- Effortlessly Easy & Perfectly Portable. Say goodbye to forks and plates! These grab-and-go desserts are designed for convenience. They’re perfect for picnics, lunchboxes, road trips, or simply enjoying on the couch. Their easy-to-eat format makes them a stress-free option for any occasion, proving that delicious desserts don’t need to be complicated.
- A Surprisingly Versatile Dessert for Any Occasion. What makes hand pies truly special is their adaptability. Enjoy them warm straight from the oven, at room temperature, or even chilled for a refreshing twist. Serve them as a standalone snack, or elevate the experience with a decadent dipping sauce like our homemade salted caramel sauce. For a more elegant plated dessert, pair them with a scoop of creamy vanilla bean ice cream or a rich vanilla bean crème anglaise. The possibilities are endless!
- An Ideal Solution for Feeding a Crowd. Hosting a party or looking for a crowd-pleasing dessert? Apple hand pies are your answer! They offer all the beloved flavors of a classic apple pie in a convenient, individual serving size. This recipe is fantastic for gatherings, holiday parties, or potlucks. Plus, you can assemble them in advance, freeze them, and bake them straight from frozen whenever you’re ready to serve. This makes party planning a breeze and ensures fresh, warm pies every time.
Table of Contents
- A Quick Look at This Delicious Recipe
- Why These Apple Hand Pies Will Become Your Favorite Treat
- Essential Ingredients for Perfect Apple Hand Pies
- Troubleshooting: Why Did My Apple Hand Pies Leak?
- Delicious Variations and Creative Customizations
- Professional Tips for Baking Flawless Hand Pies
- Step-by-Step Guide: How to Make Apple Hand Pies
- Chef Lindsey’s Expert Recipe Tip
- Frequently Asked Questions About Apple Hand Pies
- Recommended Apple Dessert Recipes
- Apple Hand Pies Full Recipe Card
- Before You Go
These individual apple hand pies are a testament to how easy and rewarding homemade baking can be. Featuring an incredibly simple yet flavorful cinnamon apple filling crafted with just six ingredients in under 30 minutes, they deliver all the rich, comforting taste of a classic easy apple pie or a towering mile-high apple pie, but with a fraction of the effort and commitment. For those really short on time, using a high-quality store-bought pie dough can make this dessert even quicker.
While their portability makes them ideal for on-the-go enjoyment, I wholeheartedly recommend savoring these warm hand pies with a generous scoop of creamy vanilla bean ice cream, a luscious drizzle of salted caramel sauce, or a velvety pour of vanilla crème anglaise. These pairings transform a simple treat into an unforgettable dessert experience.
Essential Ingredients for Perfect Apple Hand Pies
Crafting the perfect apple hand pie begins with understanding each ingredient’s role. Here’s a detailed look at what you’ll need and why it matters:
- Pie Crust: The foundation of our hand pies! For an unparalleled flaky texture, I highly recommend my easy vodka pie crust. The vodka evaporates during baking, leaving behind an exceptionally tender and flaky crust. Alternatively, you can use my traditional all-butter pie crust, or for a vegan option, a crisco pie crust works beautifully. Store-bought pie dough is also a fantastic shortcut!
- Egg (for Egg Wash): A single beaten egg is your secret weapon for both sealing the pie crusts together and achieving that gorgeous, golden-brown sheen. It acts as a powerful adhesive, ensuring your pies stay intact, and contributes significantly to the crust’s appealing color during baking. If an egg isn’t an option, a little water can serve as a suitable, though less effective, sealant.
- Heavy Cream: A light brush of heavy cream on the pie crust before baking isn’t just for browning; it’s also crucial for helping the cinnamon sugar topping adhere beautifully. Without it, your sugar might simply fall off, and you’d miss out on that desirable caramelized, crisp, and sugary crust.
- Cinnamon Sugar: This simple topping provides the perfect balance of sweetness and spice, creating a delightful crunch. You can purchase pre-made cinnamon sugar for convenience or easily mix your own using the proportions from my snickerdoodle cookie recipe.
- Apples: The star of the show! For the best texture and flavor in these mini apple pies, I highly recommend using a mix of different apple varieties. In this recipe, I typically use a combination of Honeycrisp (for sweetness and crispness), Granny Smith (for tartness and firmness), and Cripps Pink (for balanced flavor). The key is to select apples that hold their shape well after being cooked, particularly since they’ll be cooked twice. Avoid softer varieties like McIntosh, which tend to become mushy.
- Sugar (Granulated & Brown Sugar): A blend of both granulated and light brown sugar provides depth of sweetness. Granulated sugar offers clean sweetness, while brown sugar introduces subtle molasses notes and a touch of moisture, enhancing the overall richness of the apple filling.
- Ground Spices (Ginger & Cinnamon): This combination of ground ginger and cinnamon infuses the filling with a warm, comforting aroma and a delightful depth of flavor. While this duo is fantastic, feel free to experiment with homemade apple pie spice mix, or simply use the filling from my easy apple compote recipe. Pro tip: double the compote recipe and use the extra to make delicious apple cinnamon rolls!
- Lemon Juice: A squeeze of fresh lemon juice is essential. It brilliantly tempers the sweetness of the sugars, preventing the filling from being cloyingly sweet, and more importantly, it brightens and amplifies the natural apple flavors, creating a more vibrant and well-rounded taste.
Troubleshooting: Why Did My Apple Hand Pies Leak?
Leaky hand pies can be disheartening after all your effort, but understanding the common culprits can help you avoid them in the future. Here are the top reasons why hand pies might leak and how to prevent it:
- The Dough Shrank, Losing Its Containment. This is a very common issue, often occurring when the pie dough hasn’t been adequately chilled between steps. Warm dough is more elastic and prone to shrinking during baking, which can cause it to pull away from the filling and rupture. Always ensure your dough is cold and rested to maintain its shape and structural integrity.
- They Were Overfilled. While the idea of a “double stuffed” hand pie sounds appealing, it’s a recipe for disaster. Too much filling puts excessive pressure on the seams, causing them to burst during baking. Strive for a generous but manageable amount of filling – enough to taste great without compromising the pie’s seal.
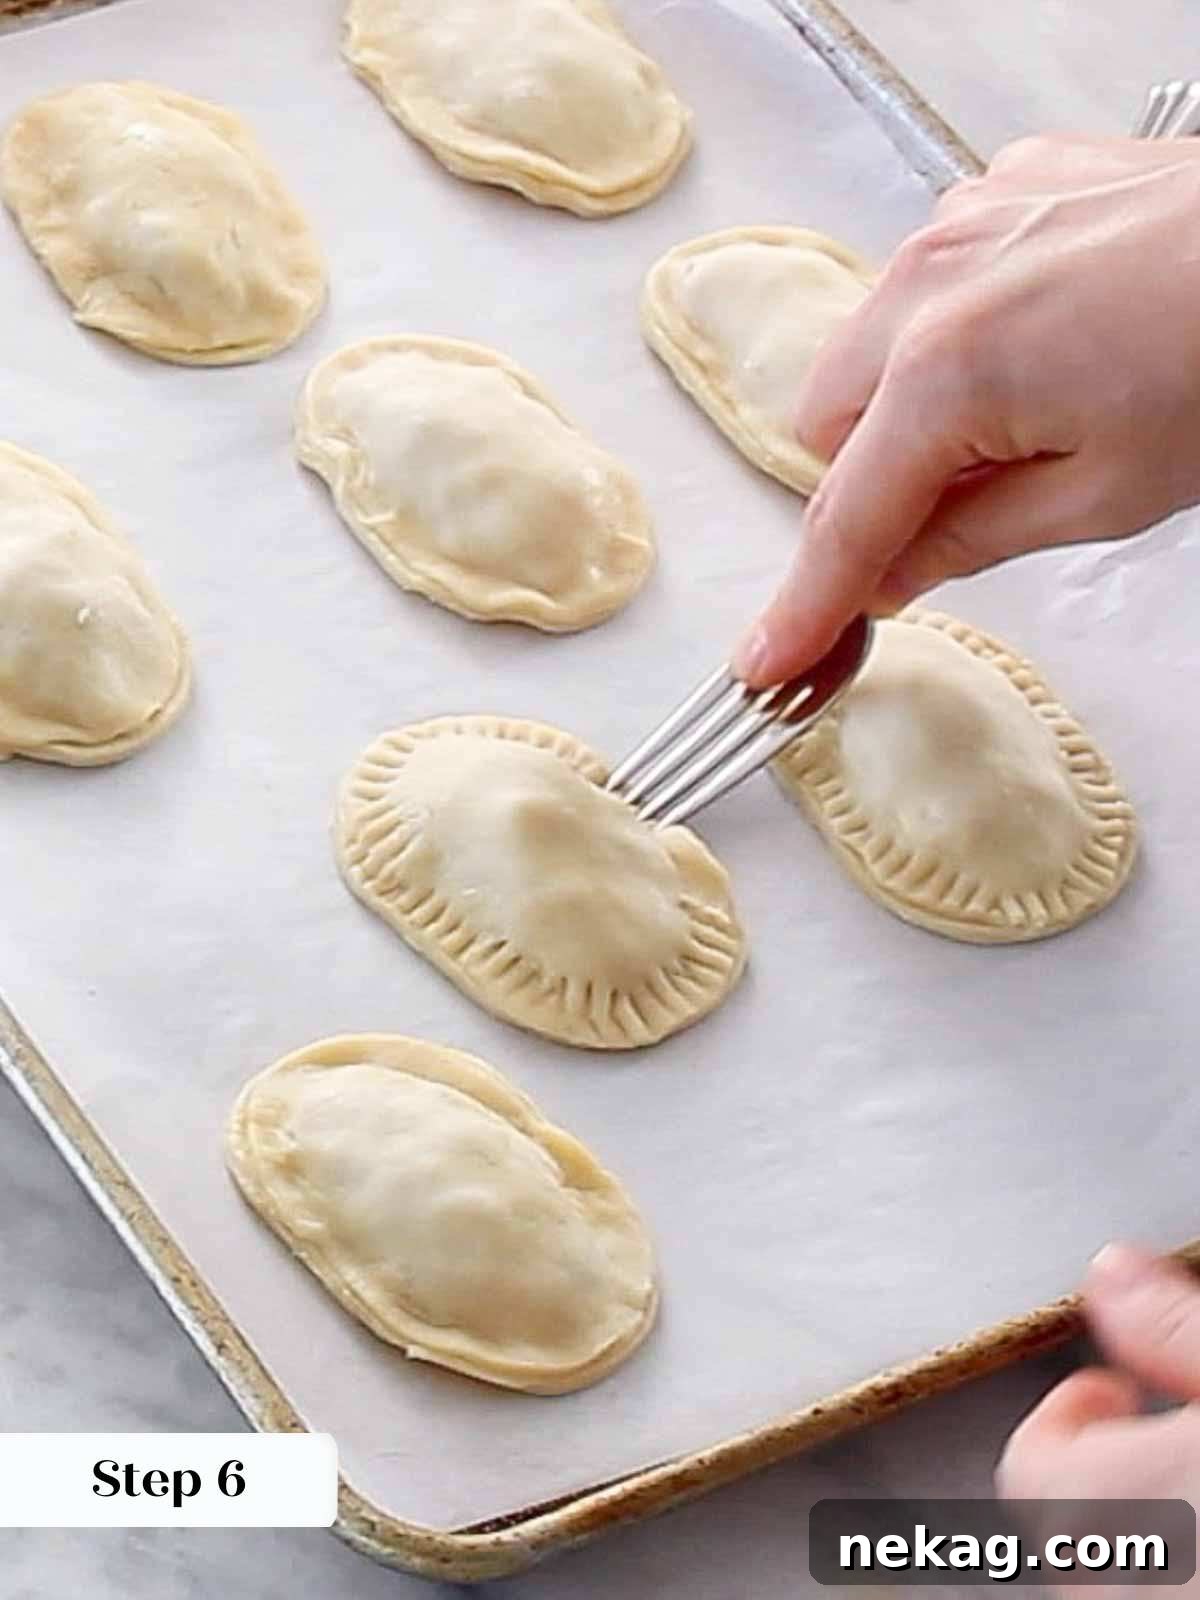
- The Dough Wasn’t Sealed Properly. A secure seal is paramount. I always brush the edges of one crust with a thin layer of egg wash (beaten egg) before placing the top crust. This acts as a powerful adhesive. In a pinch, water can work, but egg wash provides a stronger bond. After pressing the edges together, I reinforce the seal by firmly crimping them with the tines of a fork – a technique that is both pretty and functional.
- Too Much Egg Wash Was Used. Counterintuitively, applying an excessive amount of egg wash or water can actually prevent the two crusts from sticking. Too much liquid creates a slippery barrier, causing the dough to slide apart rather than bonding. A light, even brush is all you need to moisten the dough sufficiently for adhesion. Apply it only to one surface (either the top or bottom crust edge), not both.
- You Forgot to Vent Them! This is a crucial, easily overlooked step. As the apple filling heats up during baking, it releases steam. If there’s no escape route, this steam will build pressure and find the weakest point to burst through – usually your carefully sealed edges. Always cut a few small slits in the top crust before baking to allow steam to escape gracefully, preventing unsightly leaks.
- The Dough Was Handled Too Perfectly (Least Common). In rare instances, if the pie dough is handled so meticulously that it develops layers similar to puff pastry, the edges might expand and separate, giving the appearance of a leak even if the seal was technically intact. If your edges puff up beautifully, congratulate yourself on superb dough handling! They will still taste amazing, even if they look a little different.
To further mitigate stress, consider using a shortening pie crust. While it might yield a more crumbly rather than exquisitely flaky texture, shortening crusts are often more forgiving and less prone to shrinking or leaking.
Delicious Variations and Creative Customizations
While classic apple hand pies are undeniably delicious, this recipe serves as a fantastic canvas for your culinary creativity. Here are some exciting variations to inspire your next batch:
- Experiment with Different Filling Flavors: Don’t limit yourself to just apples! These hand pies are incredibly versatile. You can easily swap out the apple filling for other fruit compotes, whether homemade or store-bought. Explore the rich flavors of a cherry pie filling, the vibrant sweetness of an amazing blueberry pie filling, the juicy goodness of an old-fashioned peach pie filling, or a medley from a mixed berry pie. You could even substitute pears for apples in the original recipe for a subtle change!
- Transform Them into Caramel Apple Hand Pies: For an irresistible twist, combine two classic flavors that were simply meant to be together: caramel and apples. Before assembling your hand pies, simply stir a generous amount of your favorite salted caramel sauce or even a rich maple caramel sauce directly into the cooled apple filling. This adds a chewy, decadent layer that will have everyone asking for more.
- Unleash Your Creativity with Any Shape You’d Like: Who says hand pies have to be simple squares or circles? I often use oval cookie cutters just for fun! Feel free to use any cookie cutter that brings a smile to your face – but choose wisely. Select shapes that offer enough space for a good amount of filling and ample room to crimp and seal the edges properly. Intricate shapes like delicate snowflakes might be too challenging for a secure seal. Instead, consider charming stars, classic apple shapes, elegant fluted circles, or even modern diamonds for a unique presentation! If you’re looking to change the format entirely, you might enjoy making these adorable apple pie cookies next.
Professional Tips for Baking Flawless Hand Pies
Achieving bakery-quality hand pies at home is entirely possible with a few professional secrets. These tips will ensure your pies are flaky, flavorful, and perfectly leak-free every time:
- Always Keep Your Pie Dough Cold. This is perhaps the most critical rule for a truly flaky, crispy exterior. Throughout the entire assembling process, from rolling to sealing, ensure your pie dough remains thoroughly chilled. Cold butter in the dough creates steam pockets during baking, resulting in those desirable flaky layers. Keeping the dough cold also prevents excessive gluten development, which can lead to a tough, shrinking crust. If your dough becomes too warm, simply pop it back into the refrigerator for 10-15 minutes before continuing.
- Master the Art of Filling Quantity. Underfilling hand pies can lead to a sad, empty bite, but overfilling is a direct path to leaks and frustration. The key is to find that “just right” balance. Aim for a generous dollop that allows the edges of the top and bottom crusts to meet and seal comfortably without stretching the dough. A good rule of thumb is about 2 tablespoons for a 3-inch pie. If you find the filling spilling when you try to seal, you’ve added too much.
- Seal the Edges with Precision. A proper seal is your best defense against a leaky hand pie. After placing the filling on one crust, lightly brush its edges with a beaten egg (egg wash). Then, carefully place the second crust on top and gently press the edges together with your fingers to remove any air pockets. For a secure and decorative finish, firmly press the tines of a fork all around the perimeter of the pie. This not only creates a beautiful pattern but also ensures a robust, locked-in seal that won’t burst during baking.
- Pre-Cook and Cool Your Filling Thoroughly. Hand pies bake relatively quickly, often not long enough to fully soften raw apples and meld the flavors. Pre-cooking your apple filling on the stovetop ensures the apples are perfectly tender and the spices have ample time to infuse. This crucial step guarantees a consistent, delicious texture in every bite. Equally important is to cool the filling completely before assembling your pies. Warm filling will warm up your cold pie dough, making it sticky, difficult to work with, and increasing the risk of shrinkage and leaks. A cooled filling preserves the integrity of your flaky crust.
- Don’t Forget to Vent! Steam buildup is the enemy of a perfectly sealed pie. Before baking, use a sharp knife to cut a few small slits (usually 2-3) into the top crust of each hand pie. These vents provide a controlled escape route for the steam generated by the cooking apples, preventing it from forcing its way out through the pie’s seams and causing leaks.
Step-by-Step Guide: How to Make Apple Hand Pies
Follow these detailed instructions to create consistently perfect, flaky, and flavorful apple hand pies every time. You’ll find further details, including precise measurements, in the comprehensive recipe card located below.
Part 1: Prepare the Irresistible Apple Filling
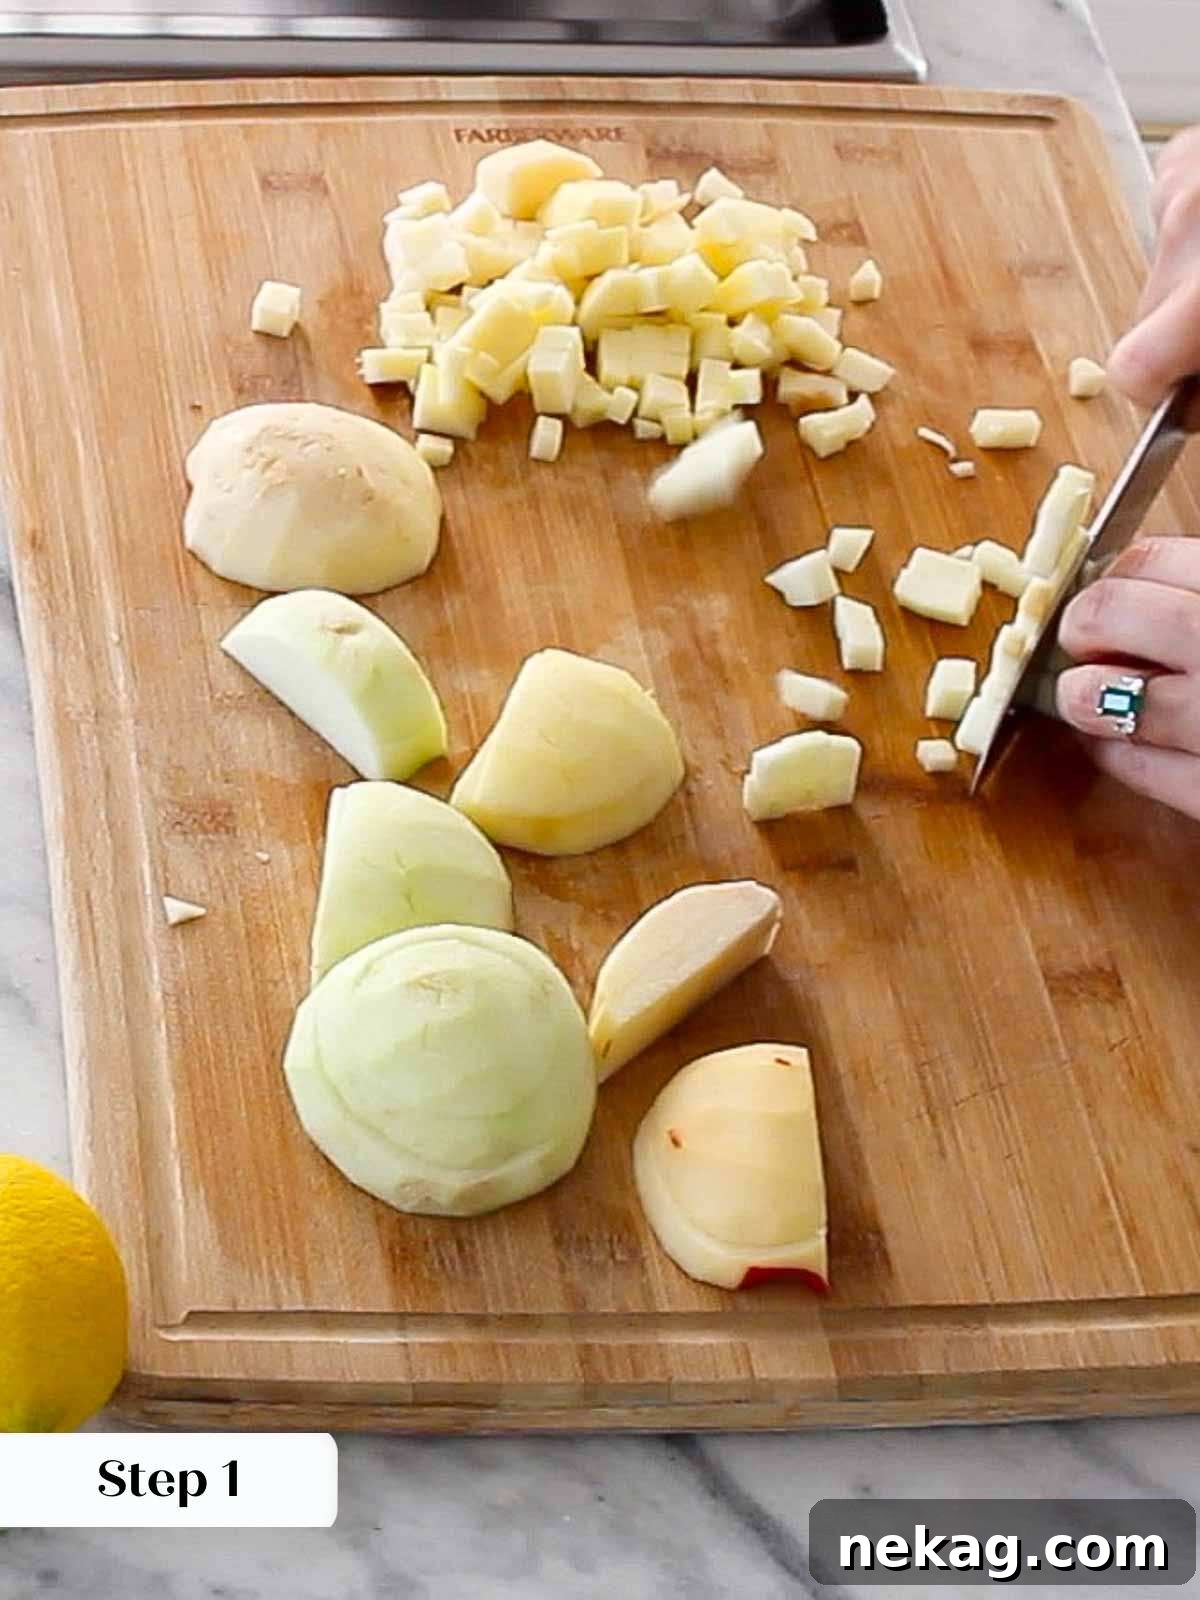
Step 1: Dice the Apples. Begin by peeling and dicing your chosen apples into small, uniform pieces, ideally about ½ to 1 centimeter (¼ to ½ inch) in diameter. Consistency in size ensures even cooking and a pleasant texture in your filling.
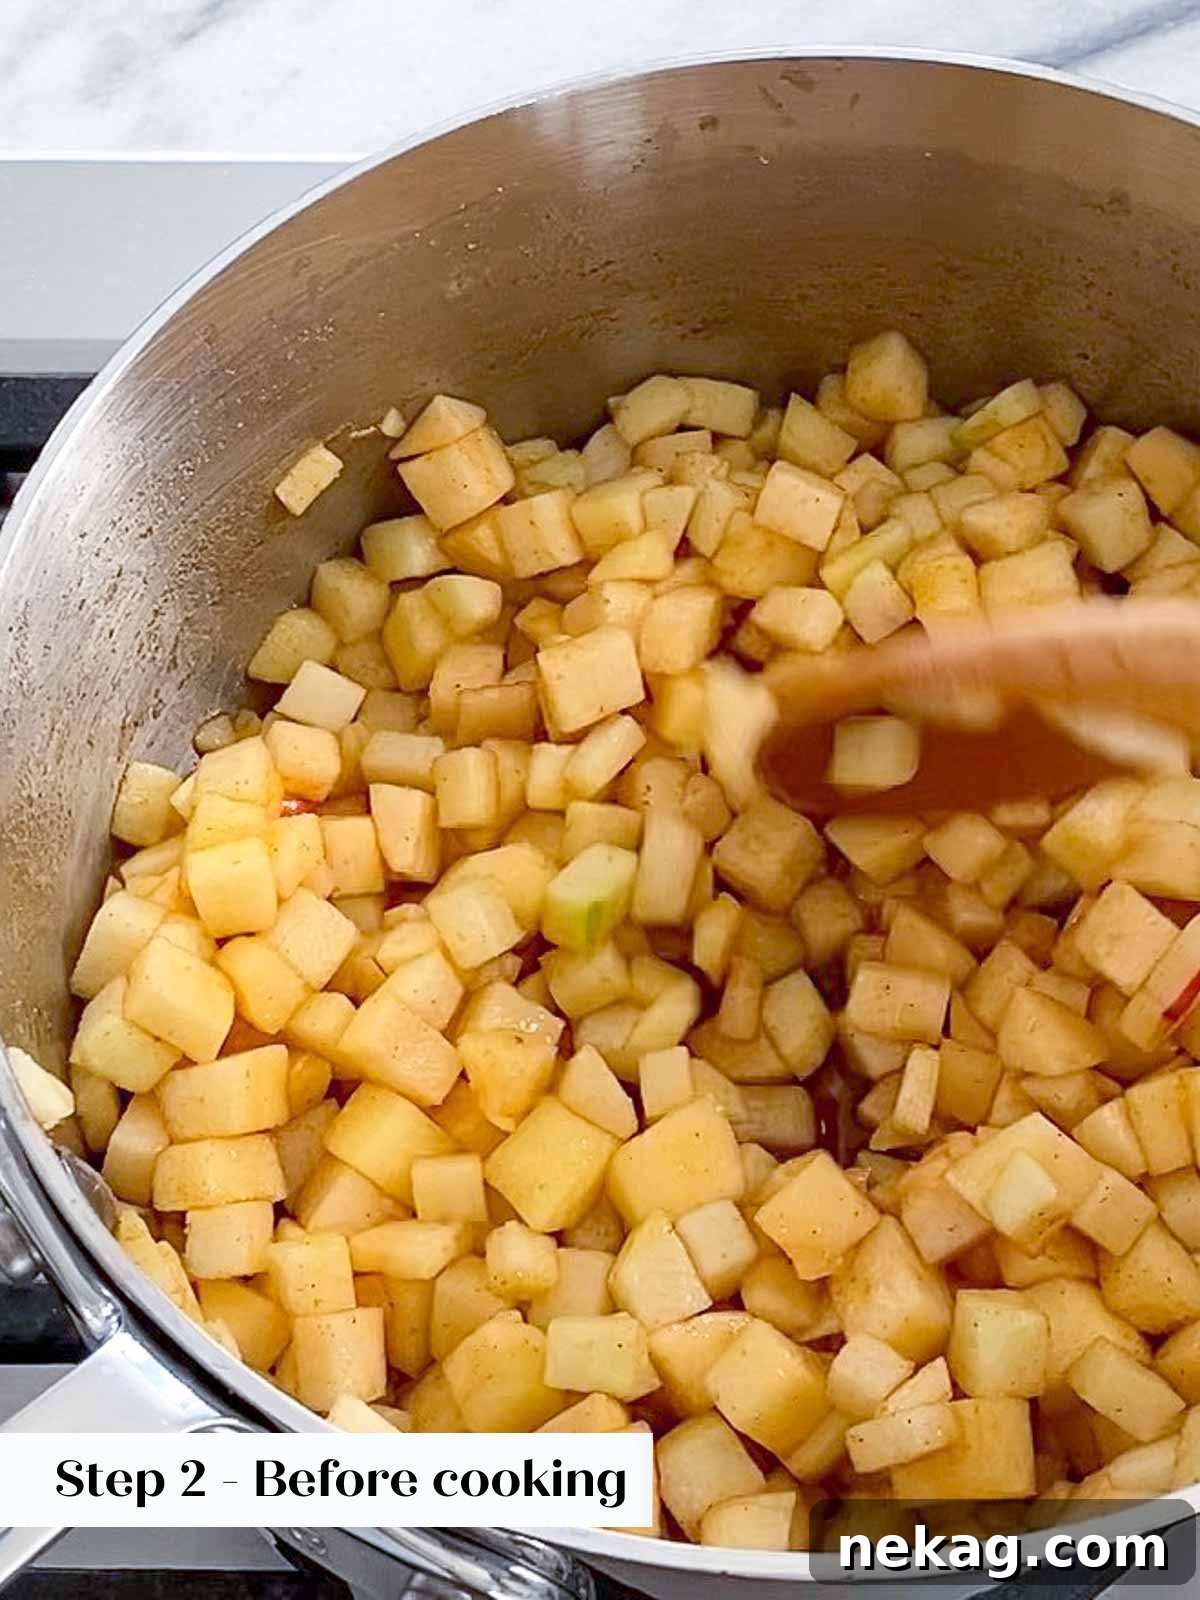
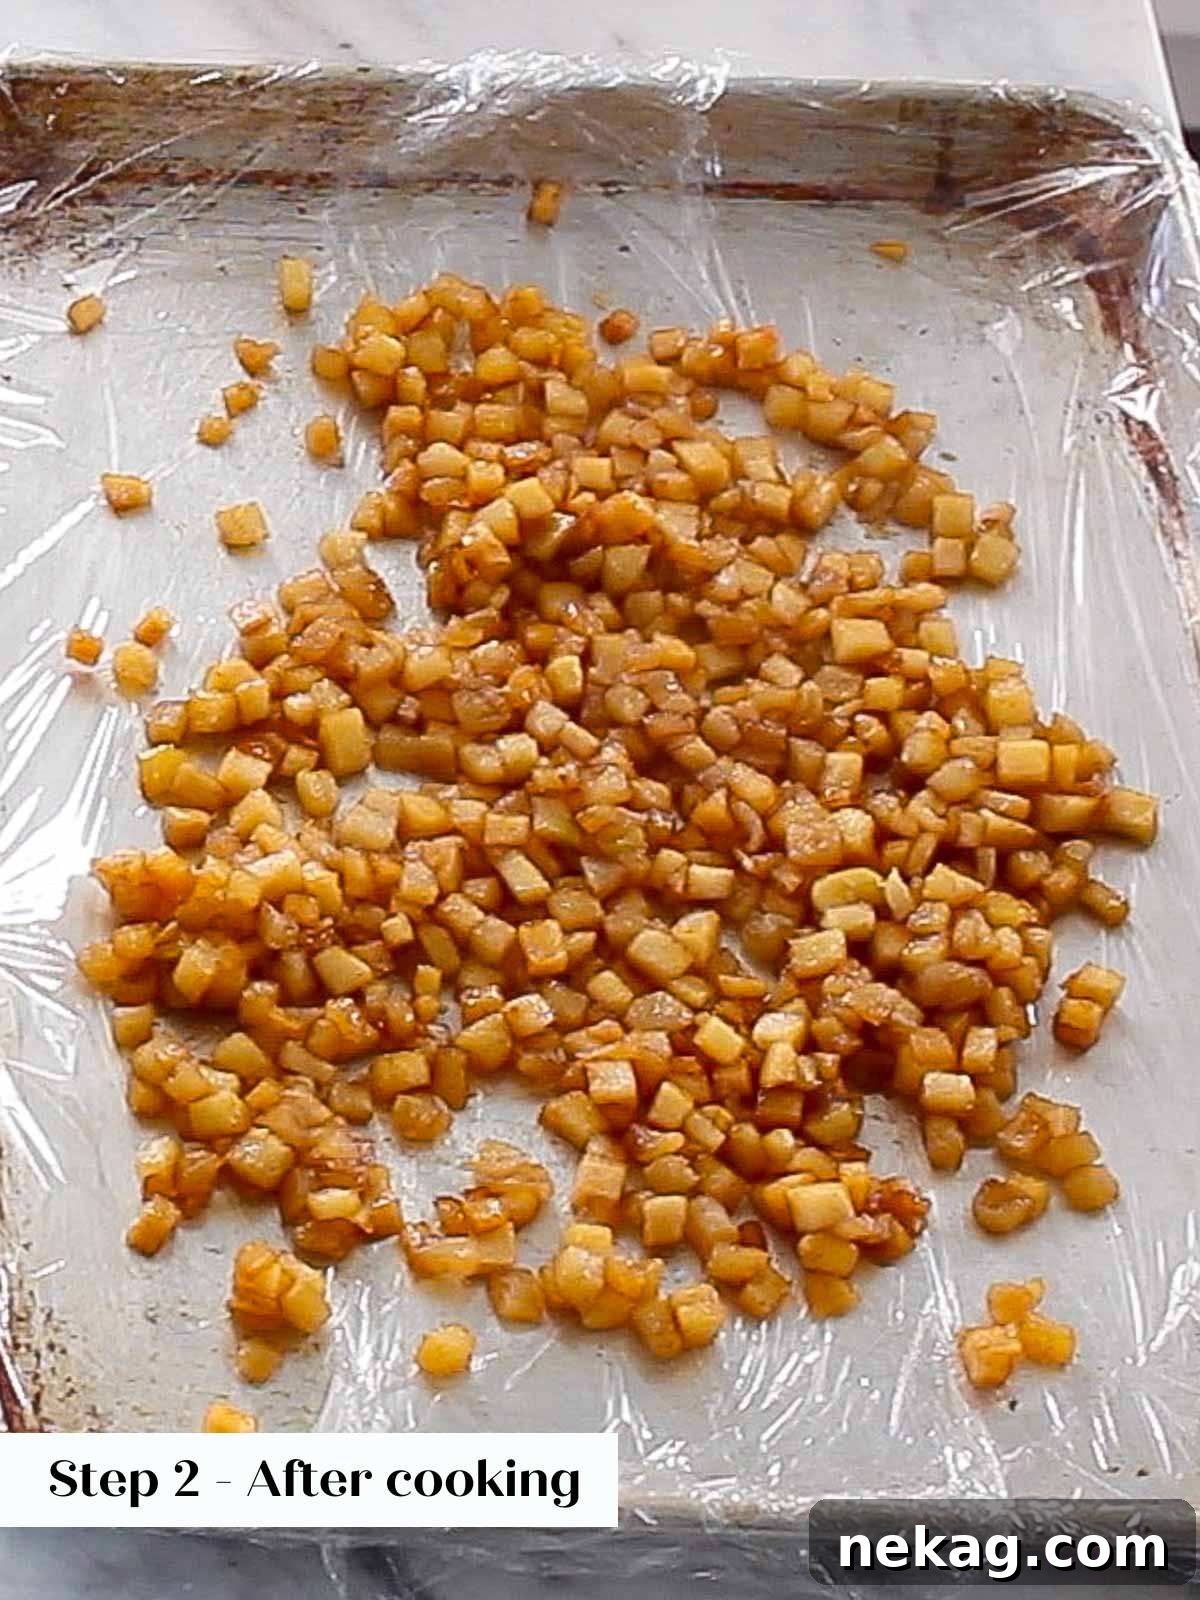
Step 2: Cook the Apple Filling. In a small saucepan, combine the diced apples with white sugar, light brown sugar, ground ginger, cinnamon, and fresh lemon juice. Stir gently to ensure all the apples are coated with the spice mixture. Place the pot over medium-low heat and cook until the apples just begin to release their natural juices, softening slightly. Increase the heat to medium-high and continue to cook, stirring occasionally, until the juices have thickened into a syrup and the apples are tender but still hold their shape. The filling should be jam-like. Once cooked, immediately transfer the hot apple filling to a parchment paper-lined rimmed baking dish, spreading it out into a single, thin layer. This step is crucial for rapid cooling. Refrigerate or even freeze it for about 10-15 minutes until it is completely cool to the touch. This prevents the warm filling from compromising your cold pie crust.
Quick Cooling Tip: To rapidly cool your apple pie filling, spread it thinly in a single layer on a parchment paper-lined baking sheet. Place it in the refrigerator or freezer for about 10 to 15 minutes, or until thoroughly chilled. This prevents the filling from warming up your delicate pie dough.
Part 2: Assemble & Bake Your Hand Pies
Step 3: Preheat Your Oven. Adjust your oven rack to the middle position and preheat your oven to 375°F (190°C).
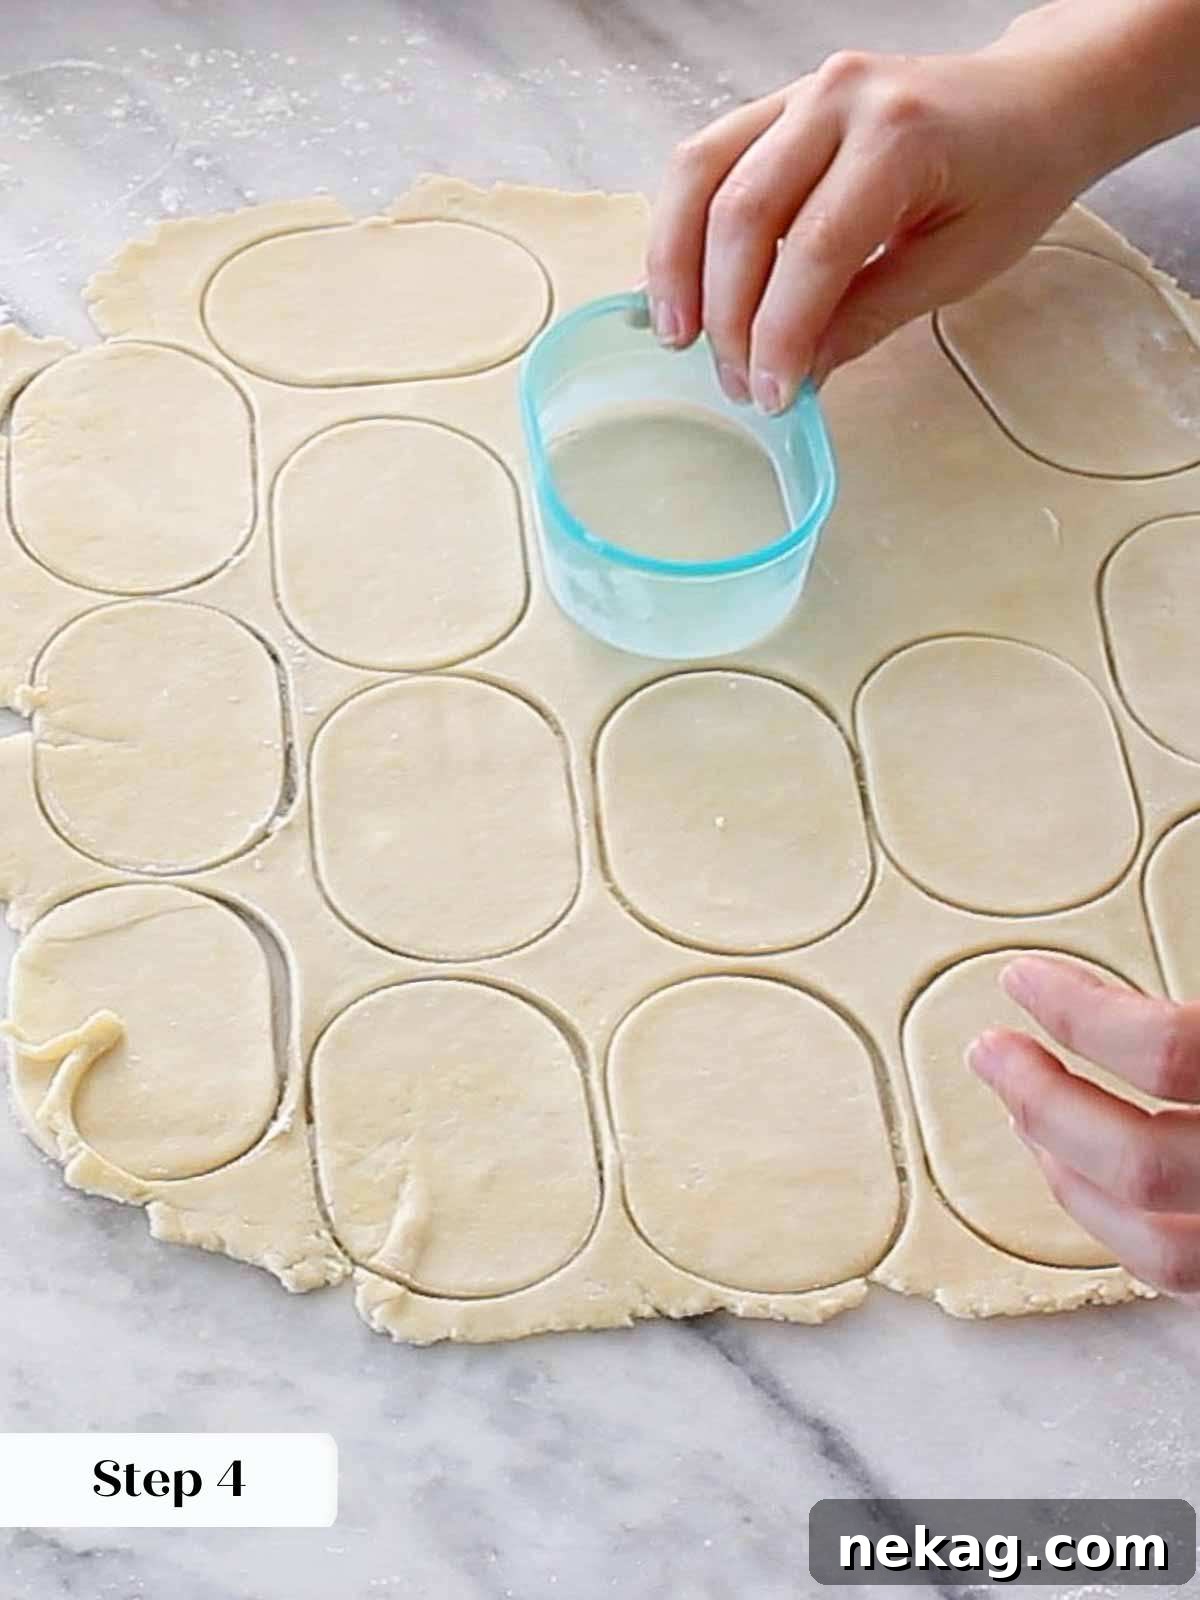
Step 4: Roll and Cut the Pie Crust. On a lightly floured surface, carefully roll out your chilled pie crust to an even thickness of about ⅛th inch (0.3 cm). Using your preferred cookie cutter – whether it’s an oval, square, circle, or a festive shape – cut out an even number of shapes. If you don’t have a cutter, a fluted pastry wheel or a knife can be used to cut neat squares or rectangles. Remember, you’ll need one shape for the bottom and one for the top of each pie, so ensure you have an even count!
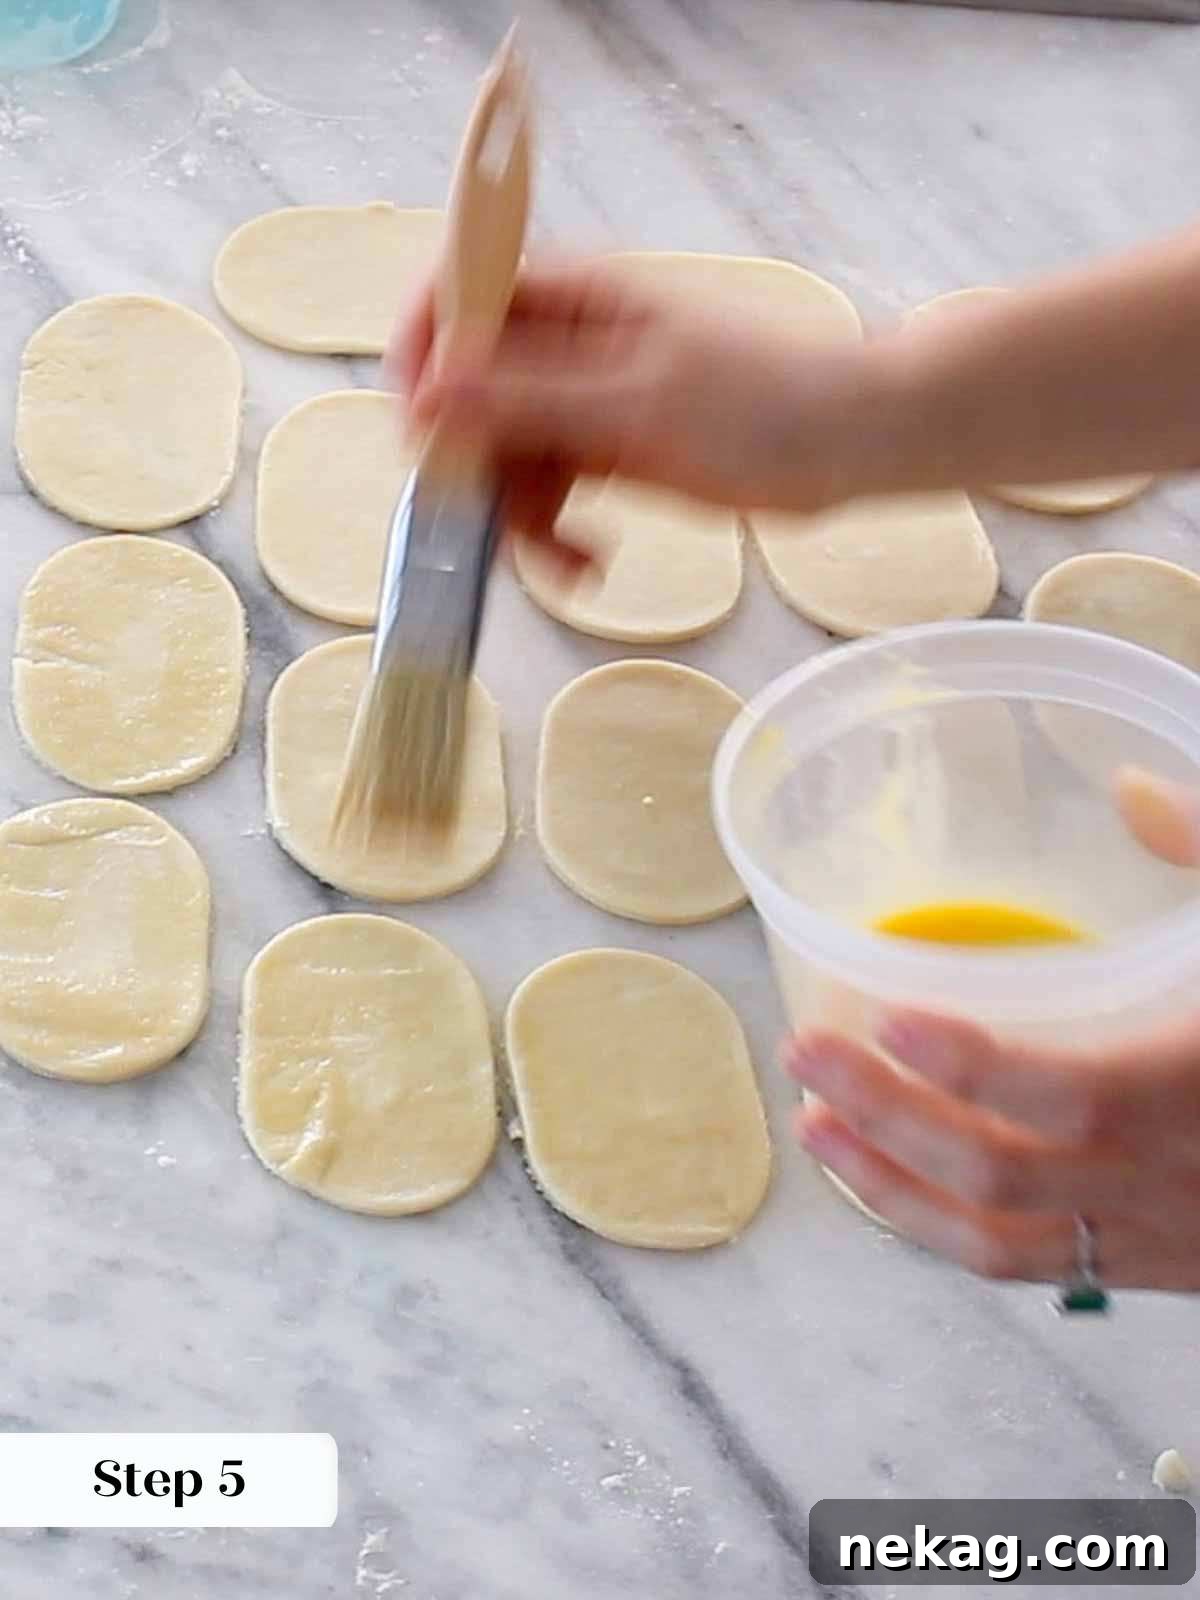
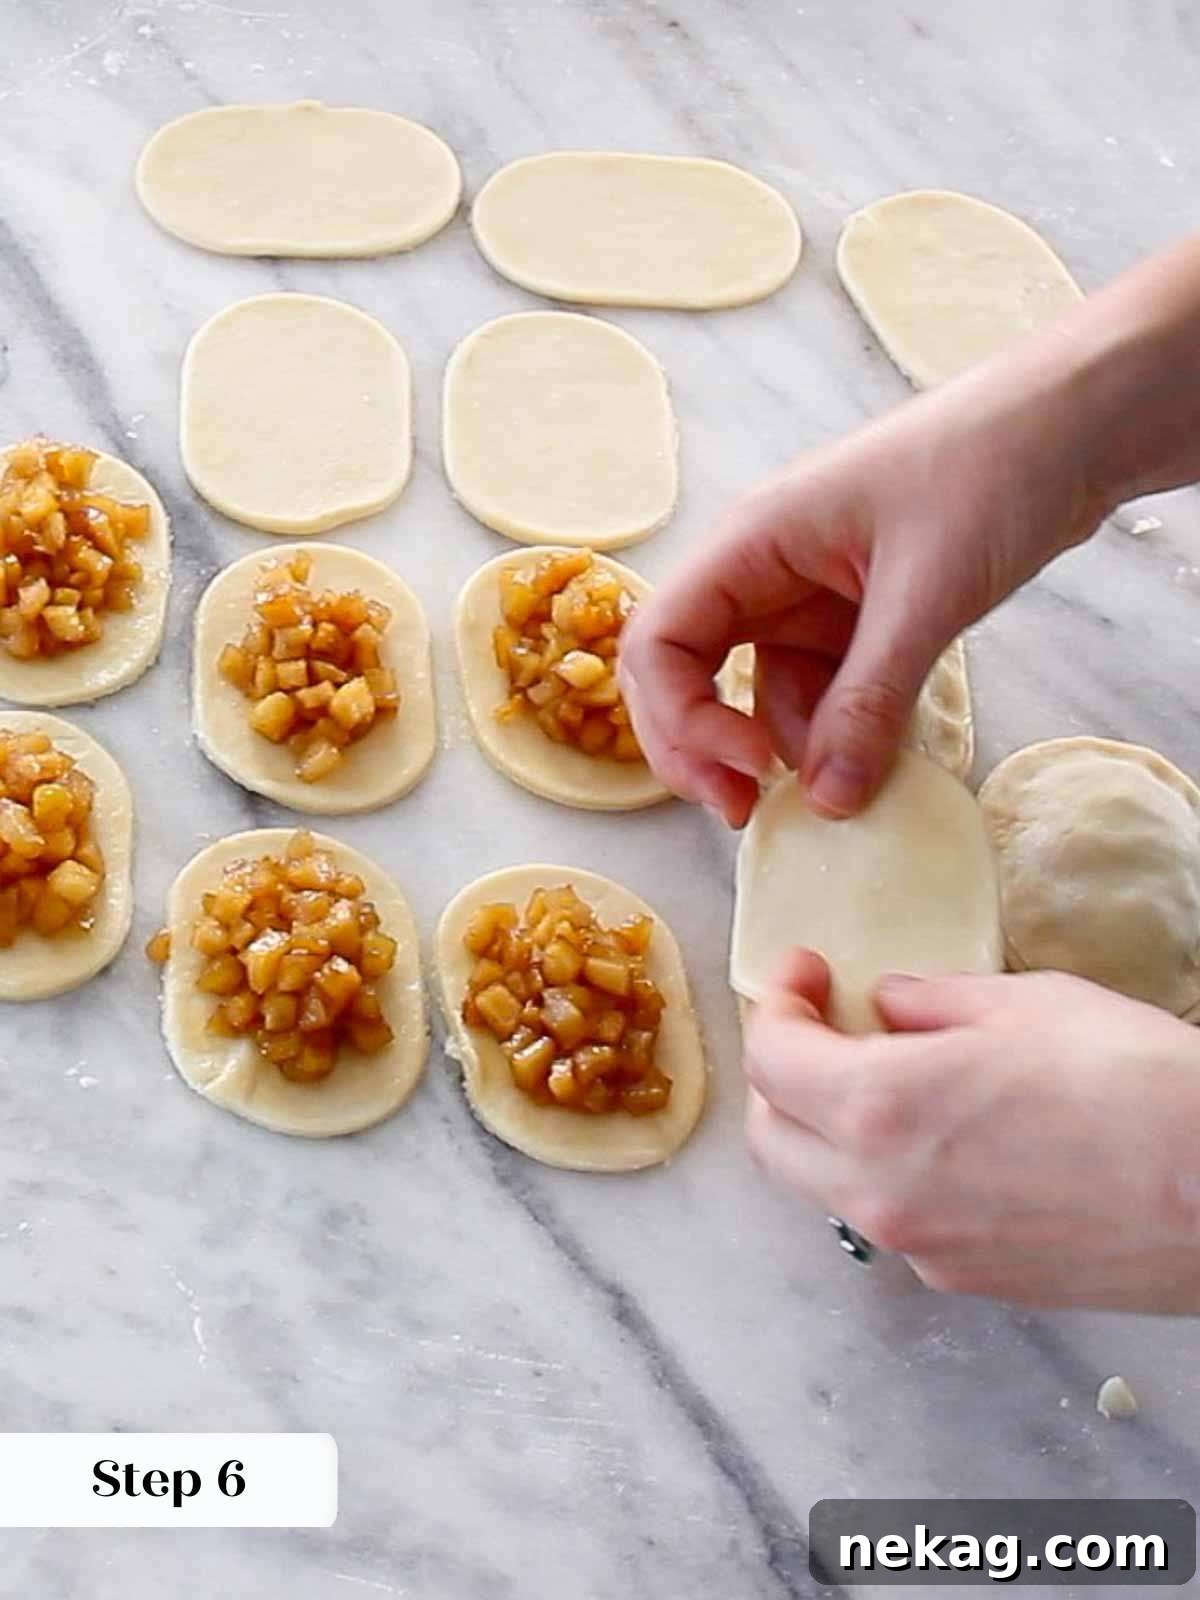
Step 5: Fill the Hand Pies. Take one of your cut pie dough shapes and lightly brush its perimeter with the beaten egg (egg wash). Then, dollop approximately 2 generous tablespoons of the completely cooled apple filling into the center of the dough. The goal is a substantial amount of filling without it overflowing or reaching the edges, which would make sealing difficult. You want just enough space around the filling to create a firm seal.
Perfect Filling Test: Unsure if you’ve added too much filling? Try a quick test: gently fold one pie in half (or place an empty top crust over it). If you find yourself having to stretch the dough to meet or if the filling is encroaching on the very edges where you need to seal, you’ve likely overfilled it. Use slightly less filling for the remaining pies to ensure a perfect seal.
Step 6: Seal and Chill. Carefully place an unfilled pie dough shape directly over the filling-laden shape. Align the edges and gently press down with your fingers all around the perimeter to create an initial seal, expelling any trapped air. For a stronger, more decorative seal, firmly press the tines of a fork around the entire edge of each hand pie. Once sealed, transfer the assembled hand pies to a baking sheet lined with parchment paper. Chill them in the refrigerator for at least 30 minutes. This chilling step is vital for preventing shrinkage and maintaining the flaky texture of the crust during baking. At this point, you can also freeze them for later baking!
Sealing with Care: When using a fork to crimp the edges, press firmly to ensure a strong seal. However, be mindful not to accidentally puncture the dough above the sealed edge with the fork, as these tiny holes could become points for the filling to leak out during baking!
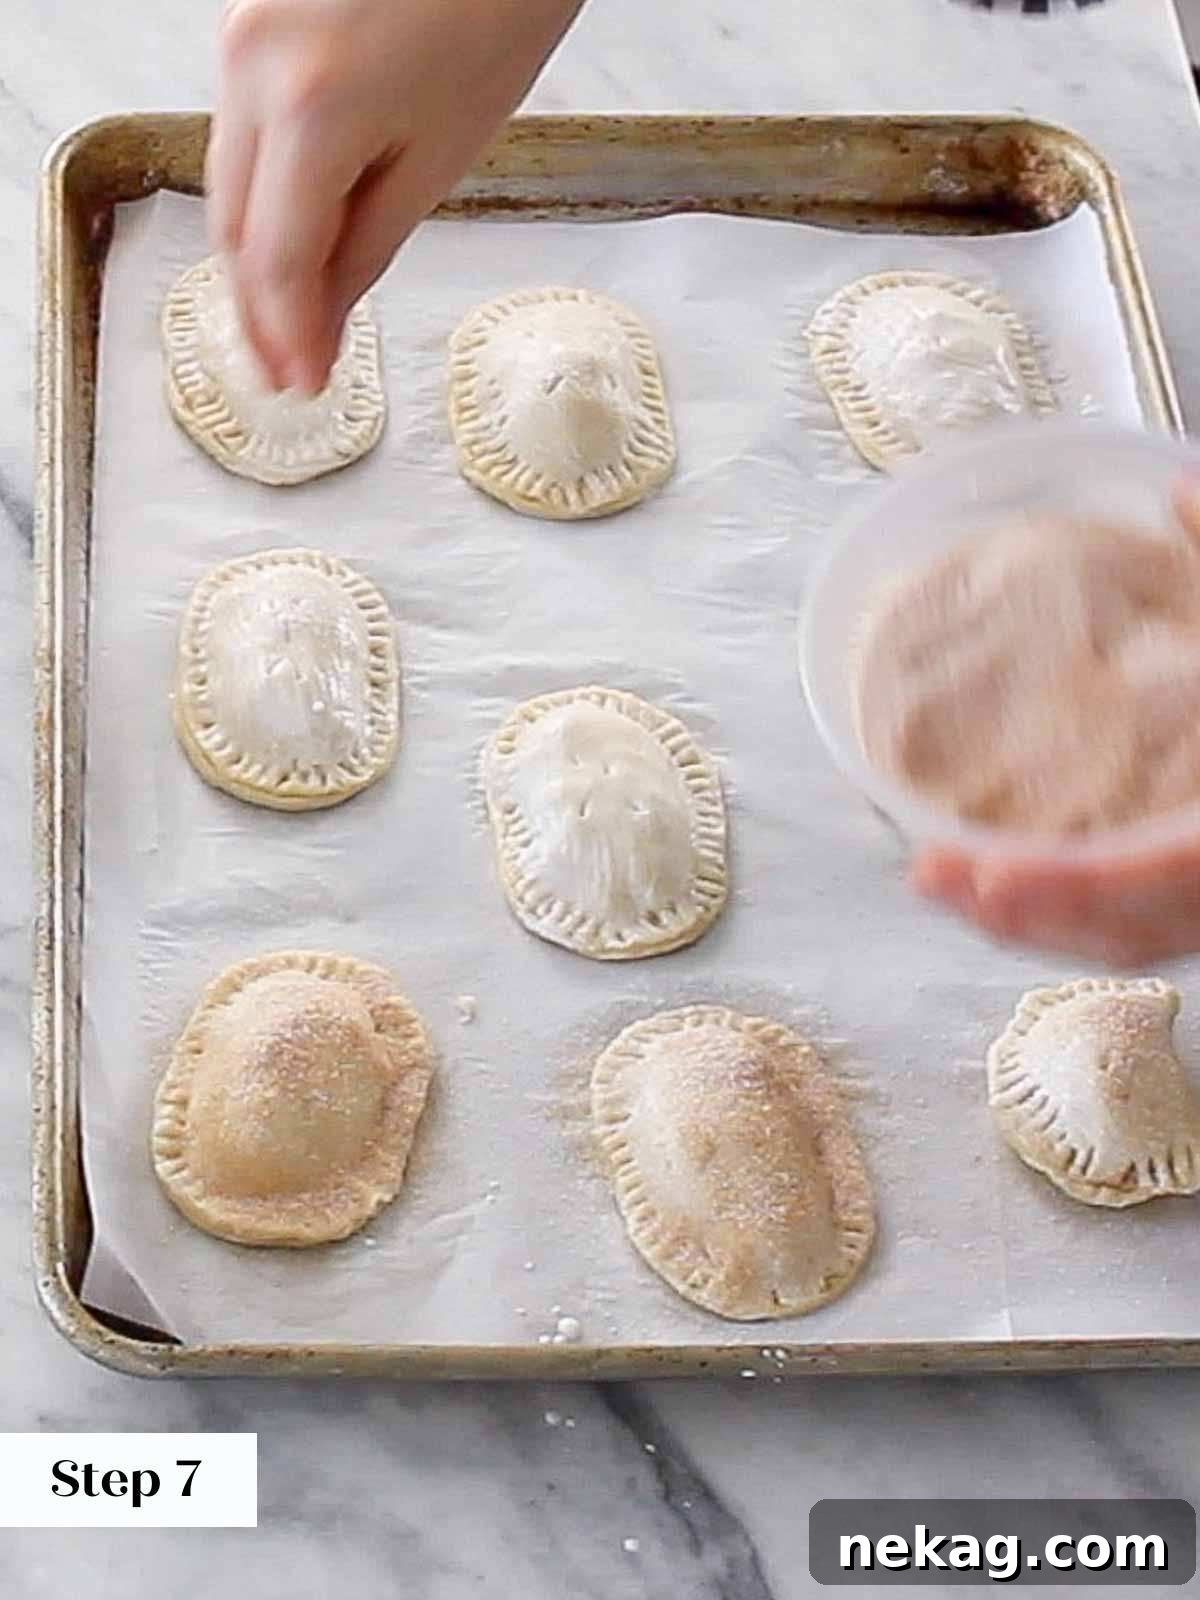
Step 7: Vent, Brush, and Sugar. Before placing the pies in the oven, use a sharp knife to cut 2-3 small slits on the top of each hand pie. These are essential ventilation holes for steam to escape. Then, brush the tops with a light coating of heavy cream – this helps with browning and acts as an adhesive. Finally, generously sprinkle each pie with a mixture of cinnamon sugar or turbinado sugar for a beautiful, crunchy, caramelized crust.
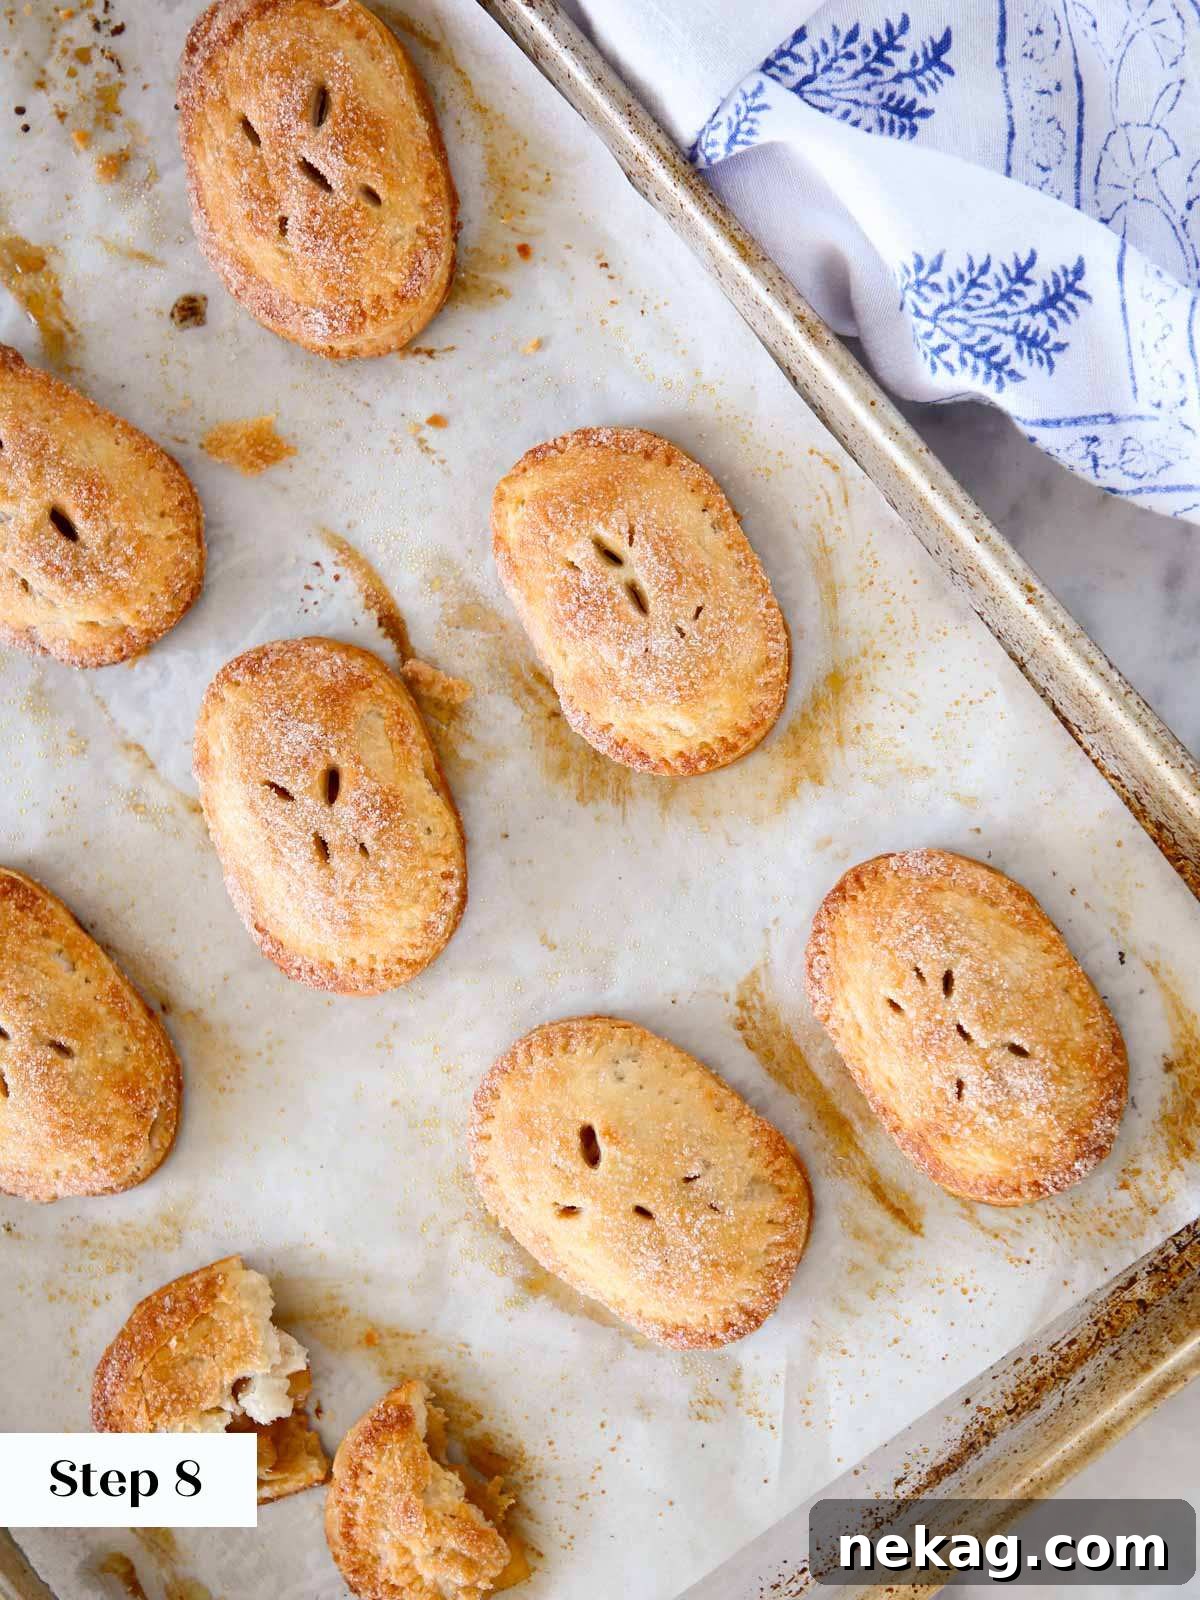
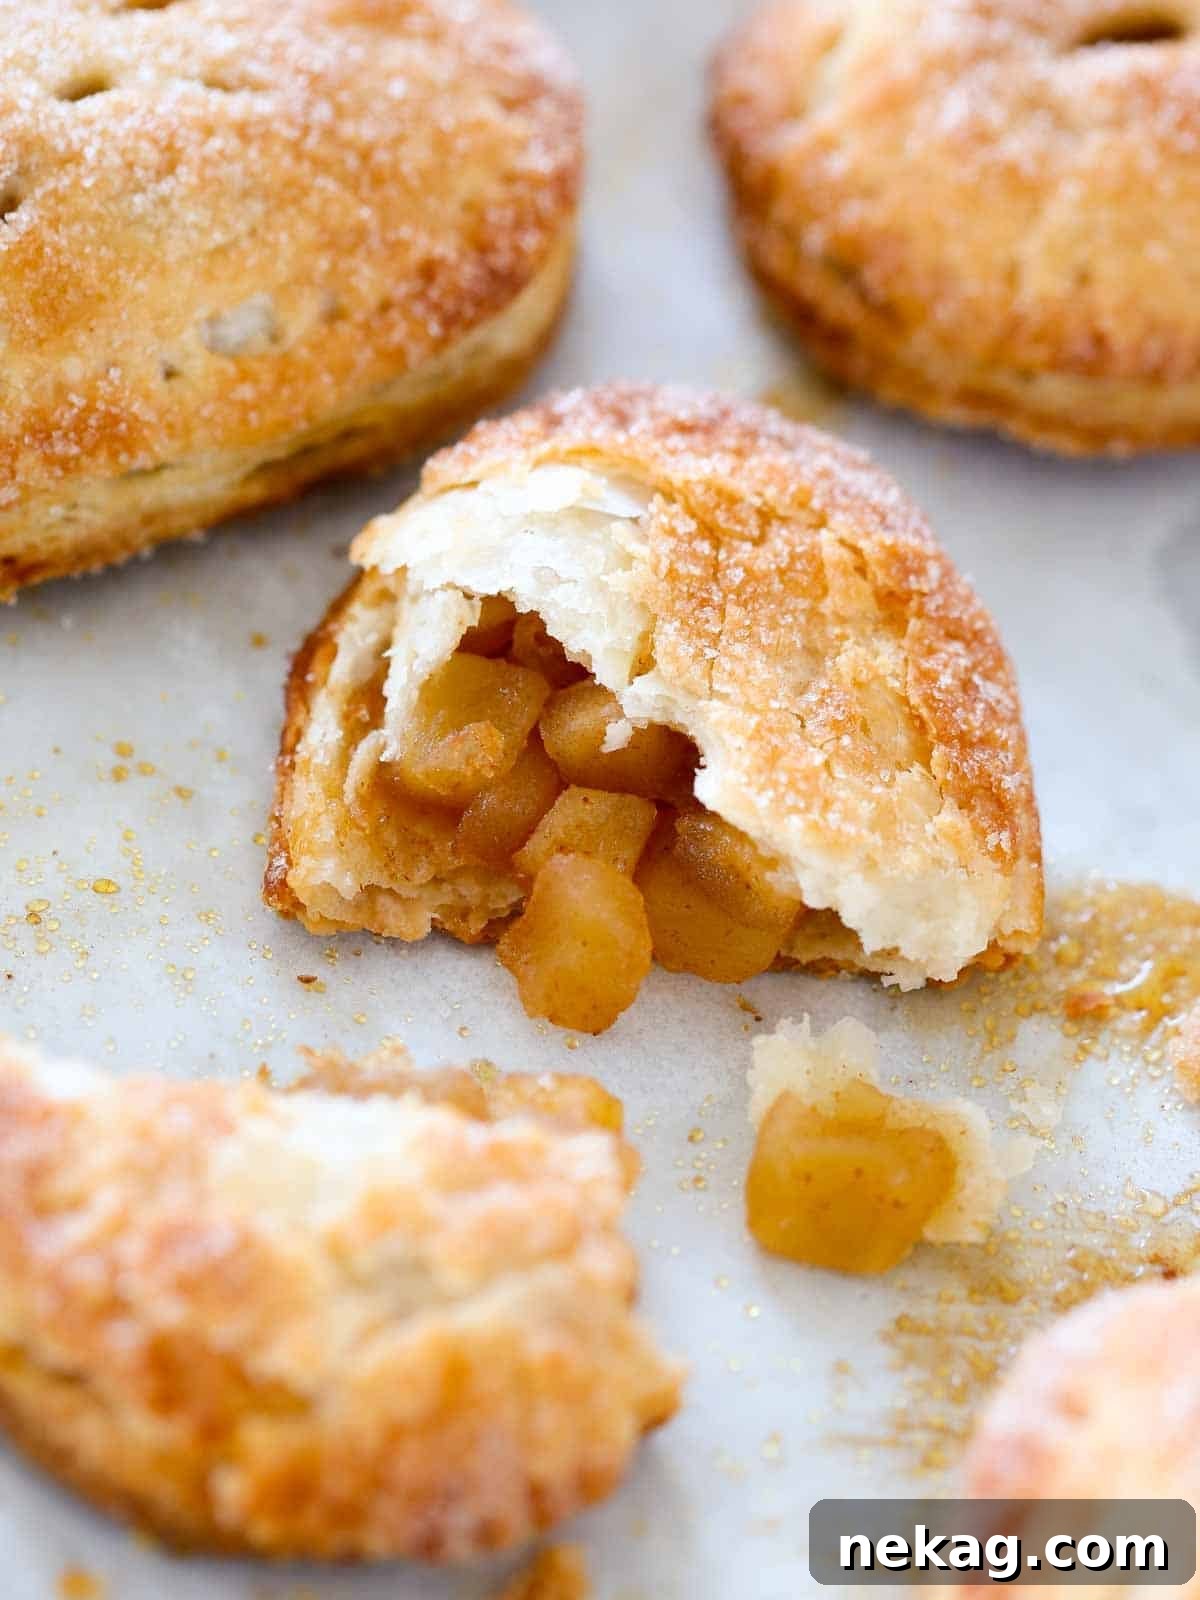
Step 8: Bake to Golden Perfection. Place the baking sheet with the prepared hand pies into the preheated oven. Bake for approximately 18-22 minutes, or until the crusts are a beautiful deep golden brown and you can see the apple filling bubbling enticingly through the vents. This bubbling indicates that the filling is hot and fully cooked. Once baked, remove the pies from the oven and let them cool slightly on the baking sheet before serving. They are best enjoyed warm!
Chef Lindsey’s Expert Recipe Tip
Pre-cooking your apple filling is an absolute must for these hand pies. Unlike a large pie that bakes for an hour or more, hand pies have a shorter baking time, which isn’t sufficient to properly soften raw apples or allow their flavors to fully meld. Pre-cooking the filling on the stovetop guarantees perfectly tender apples and a rich, developed flavor in every single bite. Moreover, it’s crucial to cool the filling completely before you even think about assembling your hand pies. Introducing warm filling to cold pie dough will quickly melt the butter in the crust, undoing all your hard work and leading to a tough, less flaky result.
Frequently Asked Questions About Apple Hand Pies
For assembled but unbaked hand pies, freeze them solid on a baking sheet first, then transfer them to a freezer-safe ziptop bag or airtight container. They can be stored in the freezer for up to 2 months and baked directly from frozen (adding a few extra minutes to the baking time). Baked hand pies should be cooled completely before storing. Keep them in an airtight container at room temperature for up to 3-5 days. For extended freshness, refrigerate them for up to 10 days or freeze for up to 2 months. I always recommend briefly warming them in the oven (at 300°F/150°C for 5-10 minutes) before serving to restore their crispness.
The inherent charm of hand pies is their perfect hand-held nature, making them a delicious dessert that needs no accompaniments. However, as a pastry chef, I always find ways to enhance any treat! For an elevated experience, serve 3 mini hand pies with a selection of complementary dipping sauces, such as a rich bourbon caramel sauce or a delicate orange crème anglaise. They are also absolutely sublime with a scoop of classic vanilla ice cream or a decadent caramel ice cream.
The primary distinctions between turnovers and hand pies lie in their crust and shape. Turnovers are traditionally crafted with classic puff pastry, cut into larger squares. The filling is centered, and the square is folded diagonally, resulting in their characteristic triangular shape. Hand pies, on the other hand, are typically made with a more rustic pie crust and can be formed into various shapes, though circles, ovals, or rectangles are most common.
Preventing leaks is key to perfect hand pies. The first crucial step is to keep your pie dough consistently cold throughout the assembly process, which prevents shrinking. Ensure you don’t overfill the pies, as excess filling will inevitably push through the crust. Create a firm, secure seal around the edges using a touch of egg wash and then pressing them together firmly with a fork. Lastly, always remember to cut small vent holes in the top crust before baking to allow steam to escape.
Absolutely! Using store-bought pie crust is a fantastic time-saver and makes this recipe even easier. Just ensure it’s a high-quality brand for the best results. You will still want to keep it cold and follow the chilling steps as outlined in the recipe.
For hand pies, you want apples that hold their shape well and offer a good balance of sweetness and tartness. Excellent choices include Granny Smith (for tartness), Honeycrisp (for crisp sweetness), Fuji, Braeburn, and Golden Delicious. A mix of varieties often yields the most complex and satisfying flavor profile. Avoid overly soft or mealy apples like McIntosh or Red Delicious, as they tend to turn into mush during cooking.
Recommended Apple Dessert Recipes You’ll Love
Fall Dessert Recipes
21 Best Apple Dessert Recipes
4th of July Recipes
Mile High Apple Pie
Crisps & Crumble Recipes
Easy Apple Cobbler Recipe
Christmas Cookie Recipes
Mini Apple Pies
If you tried this recipe and absolutely loved it, please take a moment to leave a 🌟 star rating and share your experience in the comments below. I genuinely love hearing from you; your feedback and comments truly make my day!

⭐
⭐
⭐
⭐
Apple Hand Pies
Comment
Print Recipe
Ingredients
For the Pie Crust:
- 1 ¼ cups all-purpose flour
- ½ teaspoon kosher salt
- 1 tablespoons sugar
- ½ cup unsalted butter cubed and very cold
- 2 tablespoons vodka frozen
- 2 tablespoons ice water
For the Filling:
- 3 apples (I recommend a mix of Honeycrisp, Granny Smith & Cripps Pink)
- 3 tablespoons granulated sugar
- 3 tablespoons light brown sugar
- ½ teaspoon ground ginger
- 1 teaspoon cinnamon
- 1 lemon, juiced
For the Assembly:
- 1 egg, beaten (for egg wash)
- 1 tablespoon heavy cream
- ¼ cup granulated sugar (or cinnamon sugar mixture)
- 1 teaspoon cinnamon (if mixing your own cinnamon sugar)
Instructions
Make the Pie Crust:
- In the bowl of a stand mixer fitted with the paddle attachment, combine the all-purpose flour, kosher salt, sugar, and very cold cubed unsalted butter. On low speed, mix until the butter is cut into the flour. You should have some larger pea-sized pieces of butter, but most of the butter should be worked into the flour, which will appear slightly darker.
- Stop the mixer and pour the frozen vodka over the top of the flour mixture. Turn the mixer back on low speed and slowly drizzle in the ice water. Mix just until the flour is hydrated and moistened, but a fully cohesive dough has not yet formed. Avoid overmixing.
- Turn the crumbly mixture out onto a clean countertop. Gently press the mixture together with your hands until a shaggy, cohesive dough forms. It will feel a little wet, which is perfectly normal. Divide the dough in half and gently form each half into a flat disk. Wrap each disk tightly in plastic wrap.
- Refrigerate the pie dough for a minimum of 2 hours, or ideally overnight, and up to 3 days. This chilling period is crucial for developing flavor and ensuring a flaky, manageable dough. Alternatively, you can freeze the dough for up to 2 months. If frozen, thaw it in the refrigerator overnight before use. Always ensure the dough remains cold throughout the handling process.
Make the Filling:
- Peel and dice the apples into small pieces, about ½ -1 cm (¼ – ½ inch) in diameter.
- In a small pot, combine all the diced apples, granulated sugar, light brown sugar, ground ginger, cinnamon, and lemon juice. Mix thoroughly to coat the apples evenly with the spices.
- Place the pot over medium-low heat and cook gently until the apples begin to release their juices. Increase the heat to medium-high and continue cooking, stirring frequently, until the juices have thickened into a glossy syrup and the apples are tender but still slightly firm. Immediately pour the hot filling onto a parchment-lined baking sheet or shallow dish, spreading it into a single layer to cool rapidly. Place in the refrigerator or freezer until completely chilled.
Assembling the Hand Pies:
- Preheat your oven to 375°F (190°C).
- On a lightly floured surface, roll out one disk of the chilled pie crust to approximately ⅛th inch thick. Use your desired cookie cutters or a fluted cutter to cut out an even number of shapes (e.g., ovals, squares, circles). Ensure you have two matching pieces of dough for each hand pie.
- Take half of your cut dough shapes and brush a thin layer of the beaten egg (egg wash) around the edges of each one. Then, place about 2 generous tablespoons of the completely cooled apple filling in the center of each brushed dough piece. Make sure to leave a clear border for sealing.
- Carefully place an un-brushed, unfilled dough shape on top of each filled piece. Press down gently around the filling to remove any air, then firmly seal the edges together either with your fingers or by pressing with the tines of a fork all the way around the perimeter.
- Transfer the assembled hand pies to a baking sheet lined with parchment paper. Chill them in the refrigerator for at least 30 minutes before baking. For make-ahead options, you can also freeze them at this stage.
- Before baking, use a sharp knife to cut 2-3 small slits on the top of each hand pie for ventilation. Brush the tops lightly with heavy cream, and then generously sprinkle with cinnamon sugar or turbinado sugar for a beautiful golden crust.
- Bake the hand pies in the preheated oven for approximately 18-22 minutes, or until the crusts are deeply golden brown and you can see the apple filling gently bubbling through the vents.
Video
Notes
Presentation & Leak Prevention – To ensure your hand pies look as good as they taste and prevent any leaks, remember these crucial steps: chill the dough thoroughly between each stage, avoid overfilling, use a light egg wash to seal the edges, firmly crimp with a fork, and always cut vent holes on top!
Variations – Feel free to get creative with your fillings! You can use any variety of homemade or high-quality store-bought fruit pie fillings. The pie crust recipe provided above is for 1 single crust, which is exactly half of my complete vodka pie crust recipe. If you make the full recipe, you can easily freeze the second piece of dough for future use.
Storage – Baked hand pies should be cooled to room temperature before storing in an airtight container for up to 5 days. They can be refrigerated for up to 10 days or frozen for up to 2 months. To bake ahead, assemble the hand pies but do not bake; freeze them solid on a baking sheet, then transfer to a freezer bag for up to 2 months. Bake directly from frozen, adding a few extra minutes to the baking time.
Yield: 9 delicious 3-inch oval hand pies.
Nutrition
Carbohydrates: 38g |
Protein: 3g |
Fat: 12g |
Saturated Fat: 7g |
Polyunsaturated Fat: 1g |
Monounsaturated Fat: 3g |
Trans Fat: 0.4g |
Cholesterol: 47mg |
Sodium: 141mg |
Potassium: 120mg |
Fiber: 3g |
Sugar: 21g |
Vitamin A: 403IU |
Vitamin C: 9mg |
Calcium: 24mg |
Iron: 1mg
Enjoyed this recipe? Leave a comment below!
Before You Go
I sincerely hope you enjoyed preparing and savoring this professional chef-tested recipe for apple hand pies. It’s a truly delightful treat that combines flaky pastry with a heartwarming apple filling. Don’t stop here – I encourage you to explore our other delicious, chef-developed pie recipes, each crafted to bring gourmet flavors to your home kitchen. You might also find inspiration in our comprehensive collection of the 21 Best Apple Dessert Recipes, perfect for any apple lover or baking enthusiast!