
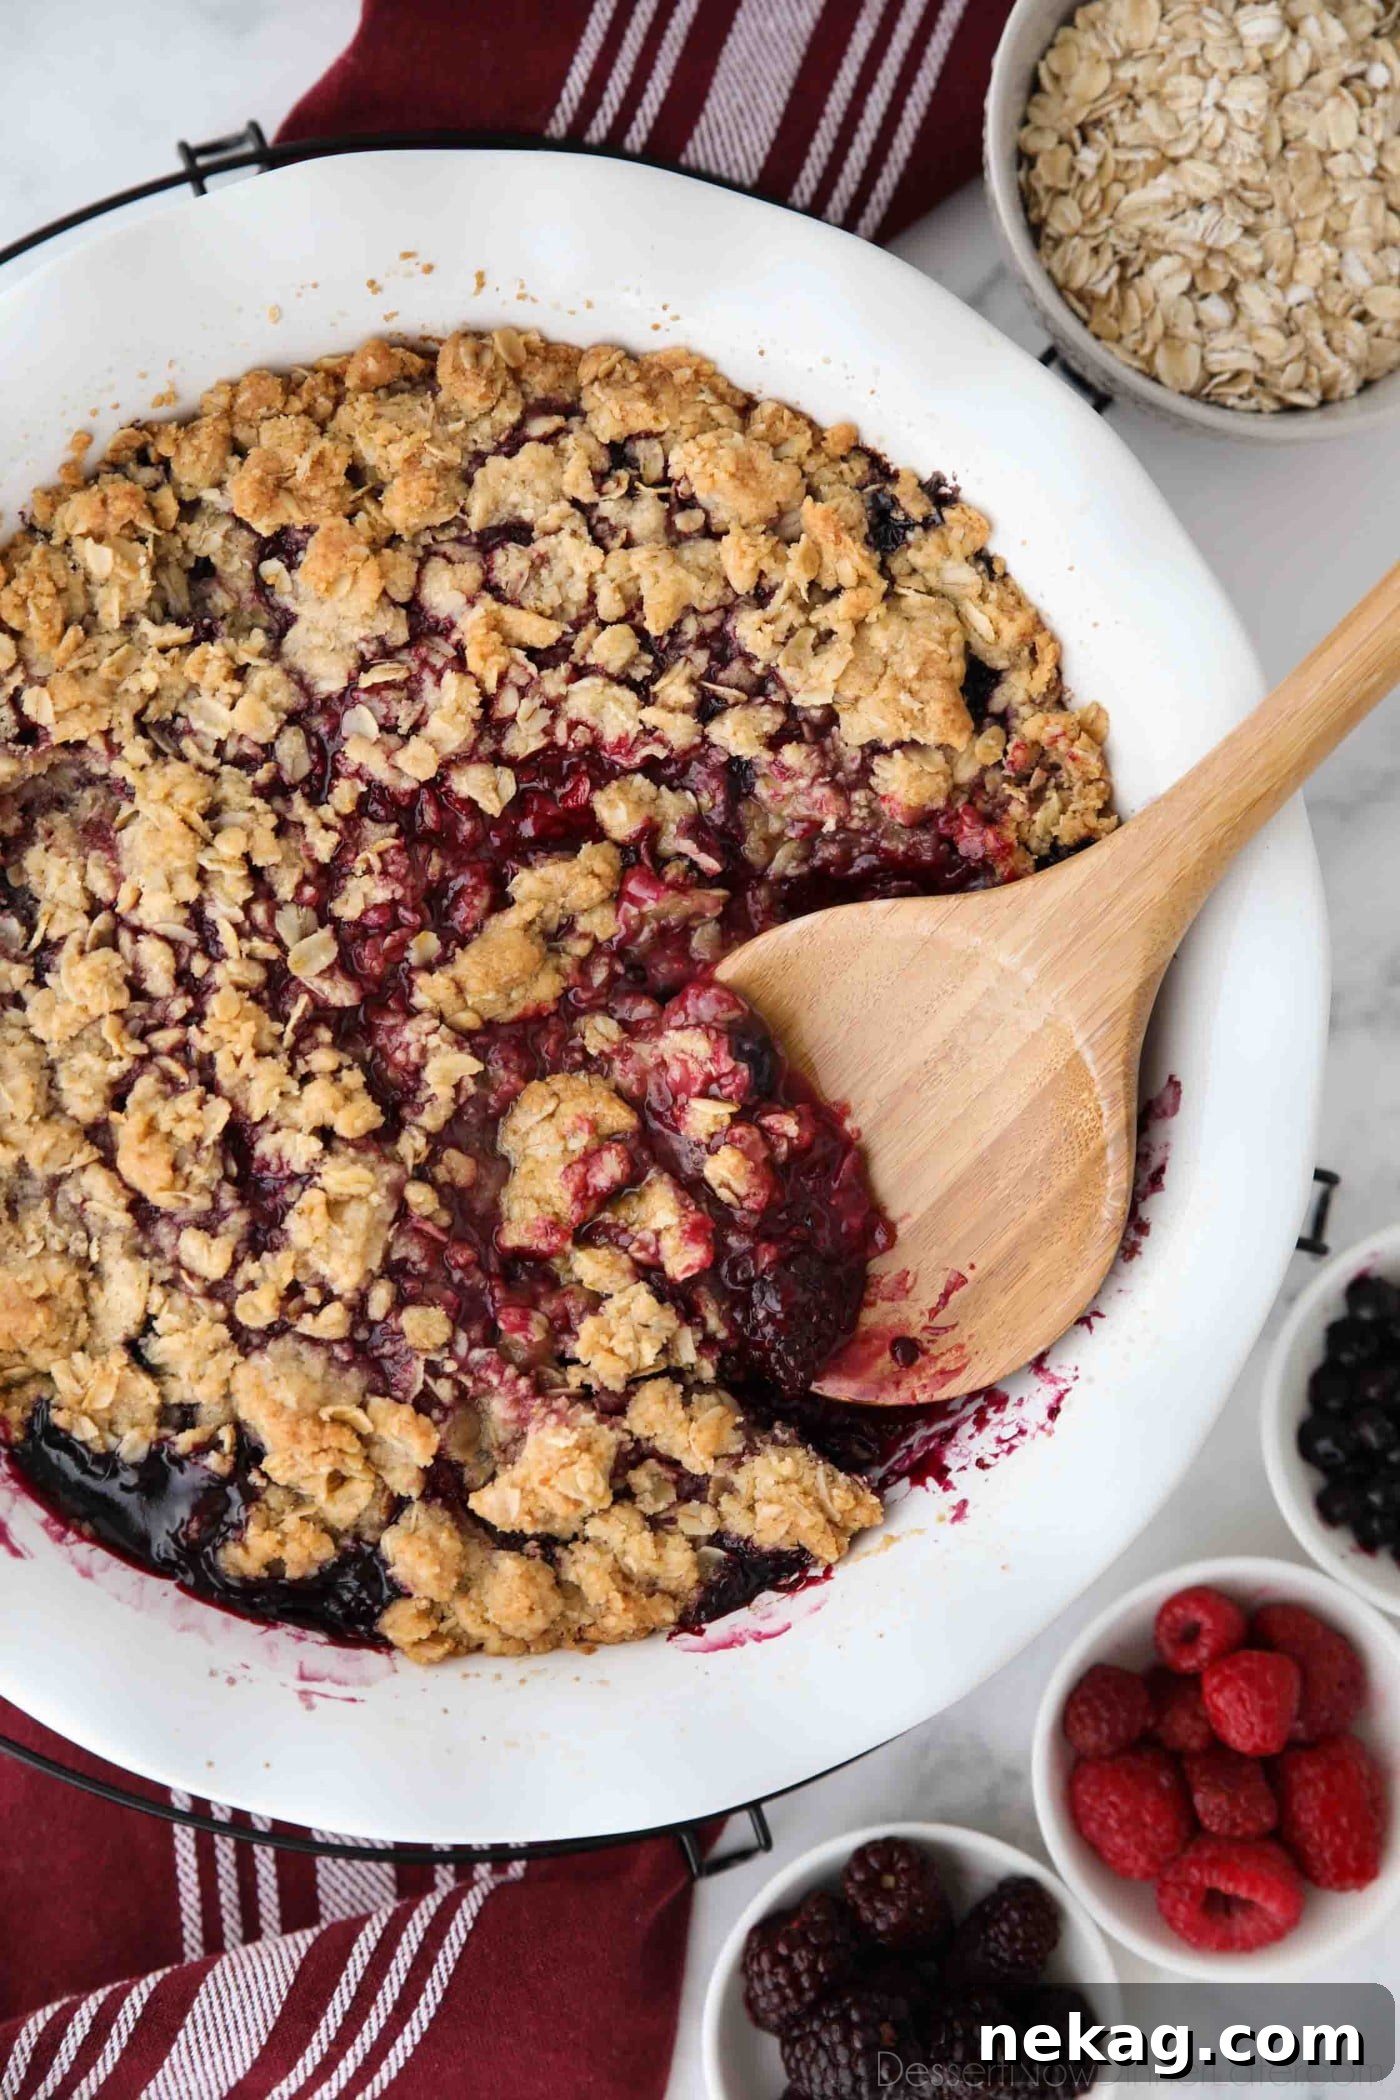
Easy & Delicious Triple Berry Crisp Recipe (aka Berry Crumble)
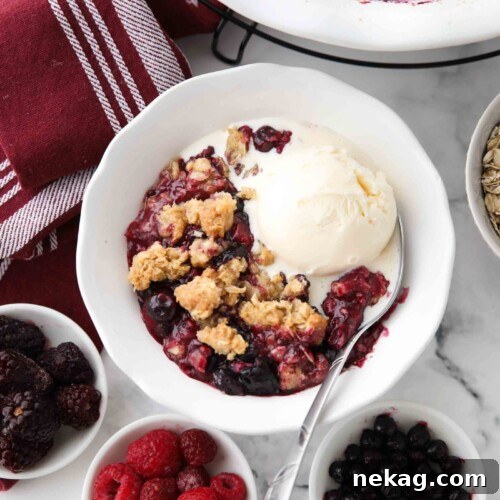
There’s nothing quite like a warm, bubbling fruit crisp to comfort the soul and delight the taste buds. This incredibly easy Berry Crisp recipe, also affectionately known as Berry Crumble, brings together the vibrant flavors of a triple berry blend – frozen raspberries, blueberries, and blackberries – all crowned with a golden, buttery brown sugar and oat crumble. It’s a dessert that perfectly balances tart fruit with sweet, crunchy texture, making it an irresistible treat for any occasion, all year round.
If you’re a fan of fruit crisps and crumbles, you’re in for a treat! This recipe is a fantastic addition to your dessert repertoire, especially if you love classics like Strawberry Crumble, a cozy Peach Crisp, or the ever-popular Apple Crumble. This berry version offers a unique blend of flavors that is both familiar and exciting.

Why This Berry Crisp Recipe Will Become Your New Favorite
When the craving for a simple yet show-stopping dessert strikes, this berry crisp recipe is the ultimate solution. Its thoughtful design ensures maximum flavor with minimal effort, making it ideal for both seasoned bakers and beginners. Here’s what makes it truly special:
- Frozen Berry Filling for Year-Round Enjoyment: The brilliance of this recipe lies in its use of frozen fruit. This means you can indulge in a fresh-tasting berry crisp regardless of the season. No need to wait for summer; grab a bag of mixed berries from your freezer and you’re halfway to a delightful dessert! Frozen berries also tend to release more juice, which, when properly thickened, creates an intensely flavorful and rich filling.
- Irresistible Buttery Oat Crumble Topping: Who can resist a sweet, buttery, and perfectly crisp crumb topping? This streusel-like layer adds a delightful textural contrast to the soft, juicy fruit filling. Made with oats, flour, brown sugar, and butter, it’s incredibly easy to prepare—often best mixed simply with your hands—and bakes into a golden-brown crown of deliciousness.
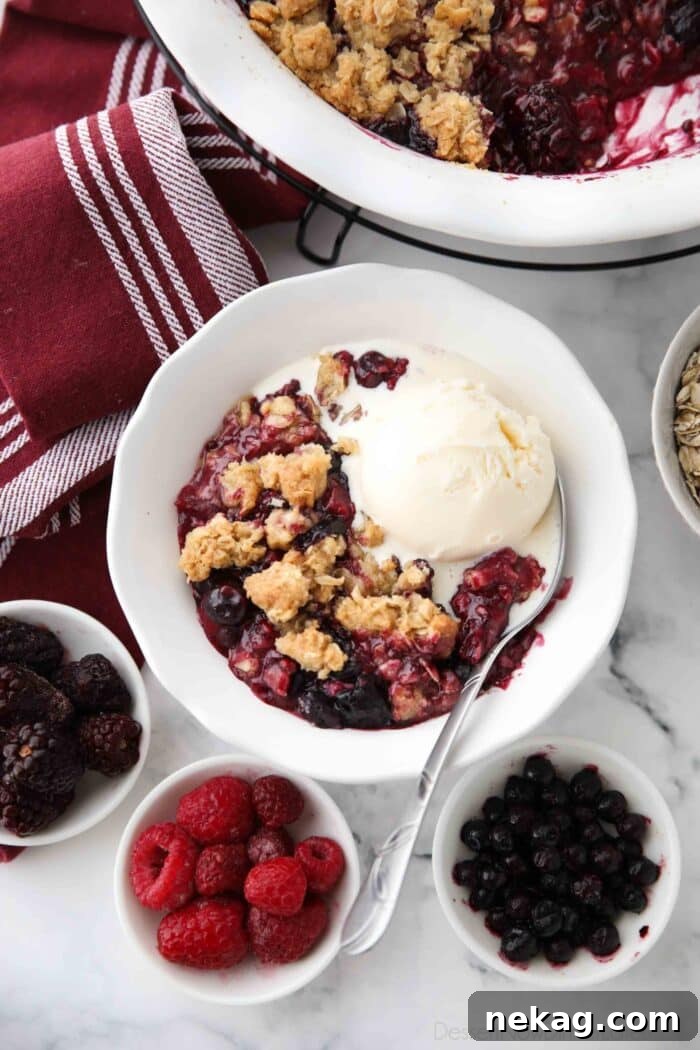
- The Ultimate Warm Dessert Experience: Fresh from the oven, this berry crisp is a symphony of warmth and flavor. The bubbling fruit and toasted topping create an inviting aroma that fills your kitchen. While fantastic on its own, it truly shines when served warm with a generous scoop of cold vanilla ice cream melting gloriously over the top, creating a blissful hot-and-cold sensation.
Perfecting the Berry Crisp: A Journey to Culinary Success
My freezer is almost always stocked with a large bag of frozen berries, usually from Costco or Sam’s Club. They’re perfect for my frozen berry pie, so naturally, I thought, “Why not a berry crisp?” What seemed like a straightforward idea proved to be more challenging than anticipated.
While I frequently use frozen fruit for pies, crisps and crumbles traditionally call for fresh fruit. The main hurdle with frozen berries is managing their higher moisture content. My initial attempts resulted in a filling that was either too runny or too jelled, and a topping that sometimes melted into the fruit instead of staying crisp and golden. It took three dedicated tries to achieve that perfect balance: a thick, luscious filling that wasn’t overly gummy, and a beautifully browned, crunchy crumble that maintained its distinct texture.
The key was discovering the right ratio of thickener (cornstarch) and optimal baking time to ensure the fruit juices properly set without becoming overly firm. I’m thrilled to share the fabulous results of this testing journey with you, offering a reliable recipe that guarantees success every time. Let’s dive into how you can create this amazing dessert.
Crafting the Luscious Berry Filling
Keeping this berry crumble recipe as simple as possible was a priority, which is why we’re embracing frozen fruit. There’s no need to thaw the berries completely beforehand, though they will soften slightly as you prepare the topping, which is perfectly fine and actually beneficial for the filling’s texture. The combination of raspberries, blueberries, and blackberries provides a complex flavor profile that is both sweet and tart, making each bite an adventure.
Key Ingredients for the Berry Filling:
- Frozen Mixed Berries: The stars of our show! A blend of raspberries, blueberries, and blackberries creates a dynamic flavor and vibrant color. Using frozen berries makes this a convenient, accessible dessert any time of year.
- Granulated Sugar: To sweeten the berries and balance their natural tartness. The amount can be slightly adjusted based on the sweetness of your specific berry blend and personal preference.
- Cornstarch: This is our essential thickening agent. It helps to absorb the excess moisture from the frozen berries, ensuring your filling is wonderfully thick and gooey, not watery.
- Fresh Lemon Juice: A splash of lemon juice is crucial. It brightens the fruit flavors, preventing the crisp from tasting flat, and also aids in the activation of the cornstarch.
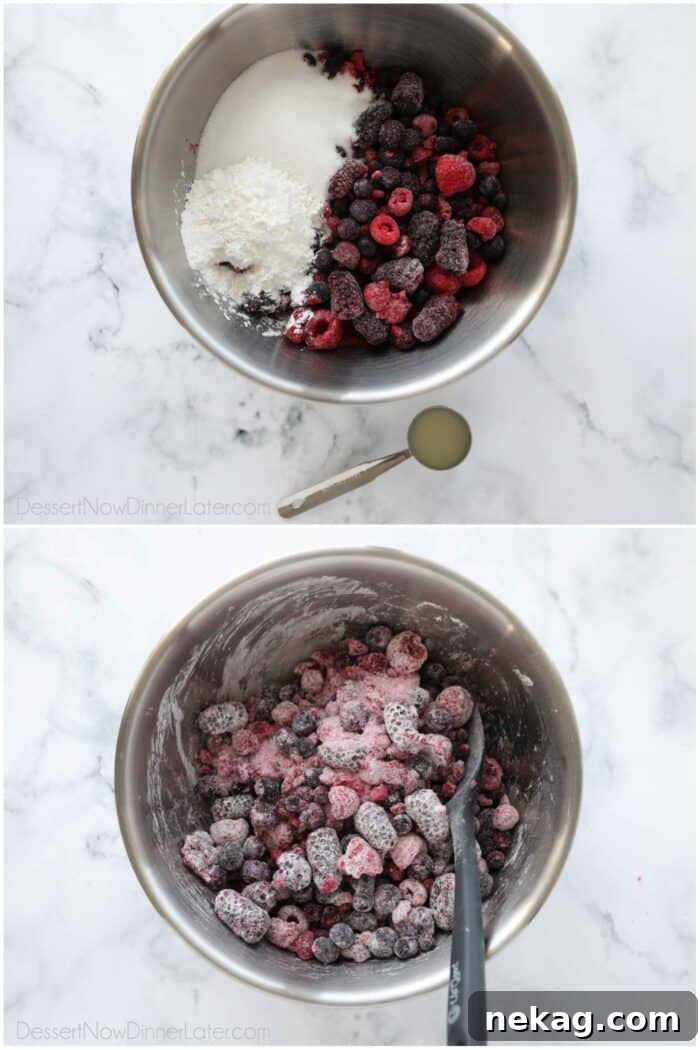
Preparation Steps:
- In a large bowl, combine the frozen berries, granulated sugar, cornstarch, and lemon juice.
- Stir thoroughly to ensure all the berries are evenly coated with the sugar and cornstarch mixture.
- Set the bowl aside while you prepare the crumb topping. This brief resting period allows the sugar to begin dissolving and the fruit to thaw just enough.
Crafting the Irresistible Crumb Topping
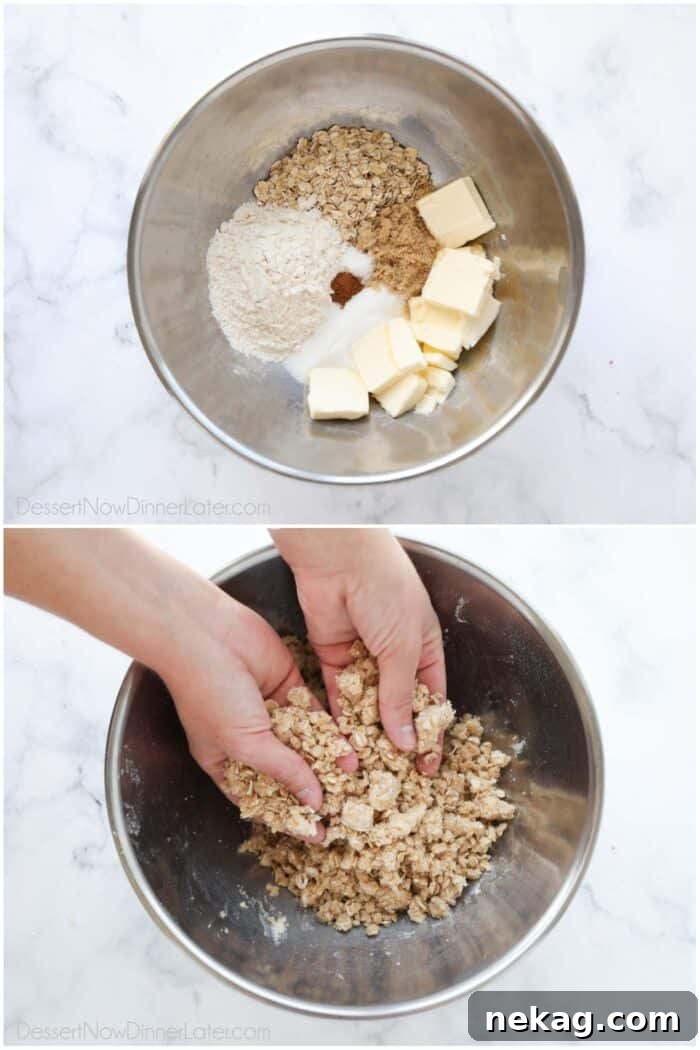
The crumb topping is what gives this berry crisp its signature texture and name. It’s a delightful mix of chewy oats and buttery crumbles, offering the perfect contrast to the soft fruit below. While you can use tools, the absolute best way to achieve an ideal crumb topping is by using your fingers. This allows you to feel the texture evolve and control the size of your crumbs. If you prefer to avoid getting your hands messy, a fork or a pastry blender will also work, though they might require a bit more effort to achieve the desired consistency.
Key Ingredients for the Crumb Topping:
- Old-Fashioned Oats: These are crucial for the “crisp” in berry crisp, providing a chewy, satisfying texture and a nutty flavor when baked. Avoid instant oats, as they can become too mushy.
- All-Purpose Flour: The foundational ingredient that binds the topping together, creating those lovely crumbly bits. Ensure it’s spooned and leveled for accurate measurement.
- Light Brown Sugar: Contributes a rich, molasses-like sweetness and helps create a chewier, more moist crumb.
- Granulated Sugar: Adds an extra layer of sweetness and aids in the caramelization, giving the topping its golden-brown crispness.
- Salt: A pinch of salt is vital to balance the sweetness and enhance all the other flavors in the topping.
- Ground Cinnamon: A warm, aromatic spice that beautifully complements the berries and adds depth to the overall flavor profile of the crisp.
- Cold Unsalted Butter: The secret to a truly great crumb. Using cold butter and cutting it into small pieces helps it incorporate into the dry ingredients without melting too quickly, resulting in distinct, flaky crumbs rather than a cohesive dough.
Preparation Steps:
- In a separate large bowl, combine the old-fashioned oats, all-purpose flour, light brown sugar, granulated sugar, salt, and ground cinnamon. Stir these dry ingredients together thoroughly.
- Add the cold, thinly sliced unsalted butter to the dry mixture.
- Using your fingertips, squeeze and rub the butter into the dry ingredients. Continue this motion until the mixture is no longer dry and begins to clump together, resembling coarse crumbs. Some larger pea-sized clumps are desirable for that authentic crisp texture.
PRO TIP: To make incorporating the cold butter faster and easier, use a knife to cut it into thin slices or small cubes before adding it to the dry ingredients. This increases the surface area, allowing you to achieve a perfectly crumbly texture more efficiently.
Assemble and Bake Your Perfect Berry Crumble
Once both your vibrant berry filling and your irresistible crumb topping are prepared, the assembly is wonderfully straightforward. It’s simply a matter of layering these two delicious components together and letting your oven work its magic to transform them into a golden, bubbling masterpiece.
Assembly Instructions:
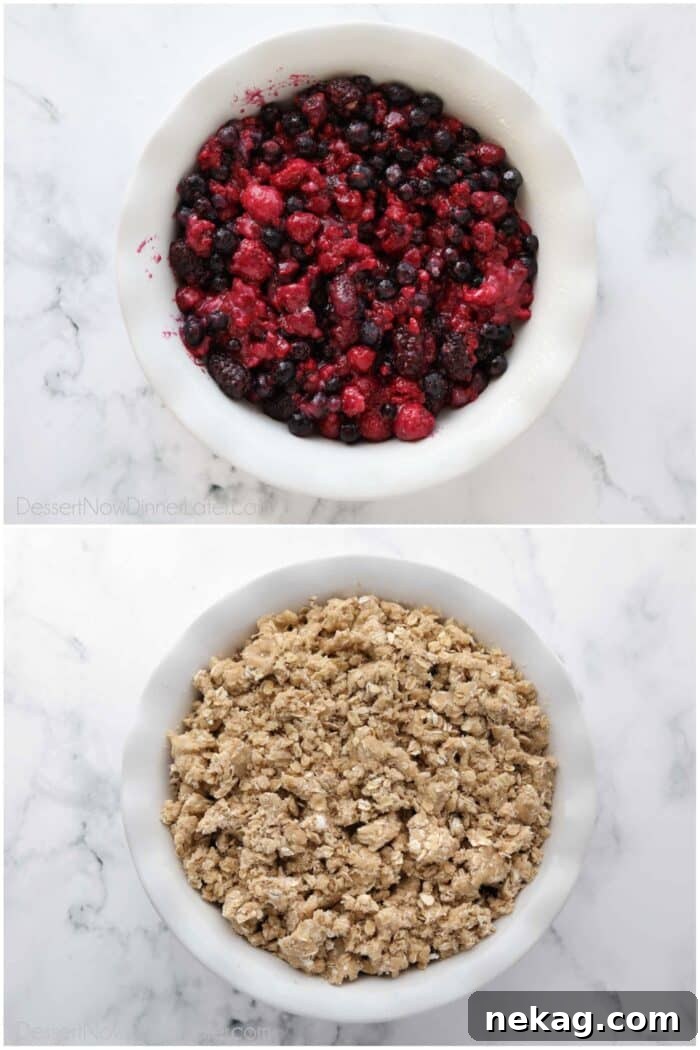
- Carefully pour the berry fruit mixture into your lightly greased 9-inch round deep pie dish or a 9×9-inch square baking dish. Ensure the fruit is distributed evenly across the bottom of the dish.
- Generously sprinkle the prepared crumb topping over the fruit layer. You have control over the texture here: gently squeeze handfuls of the topping together before sprinkling for bigger, more rustic crumbs, or rub it between your fingers as you distribute it for a finer, more even crumb texture.
Baking Instructions:
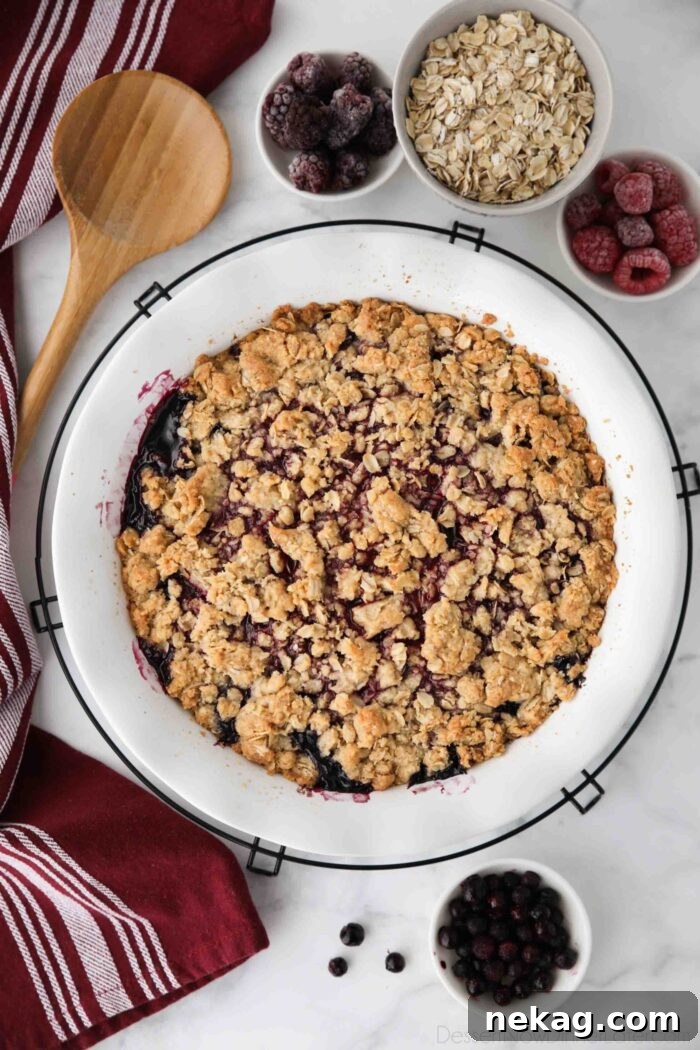
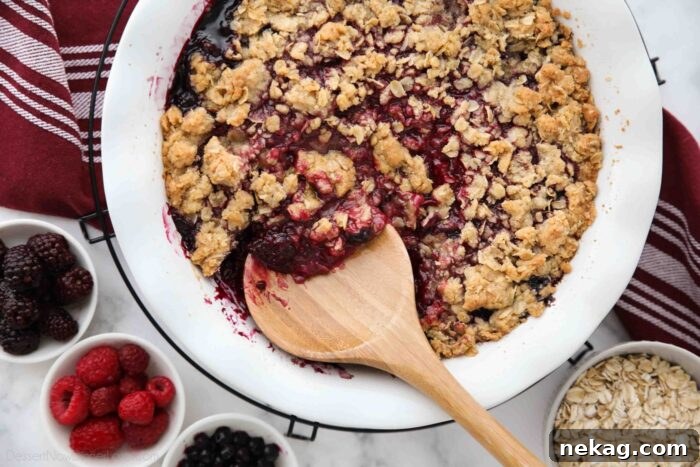
- Bake in your preheated 350˚F (175˚C) oven for 45-50 minutes. The crisp is ready when the topping turns a beautiful golden brown and the fruit filling is visibly bubbling well around the edges of the dish. Don’t be alarmed if the fruit in the very center still looks somewhat thin or wet; it will continue to thicken significantly as it cools.
- The vigorous bubbling at the edges is a key indicator that the cornstarch has fully activated and is thickening the fruit juices, ensuring your filling sets properly.
Serving & Storage Tips for Optimal Enjoyment
Once your berry crisp is out of the oven, a little patience goes a long way to ensure the best possible experience. Proper serving and storage will keep your dessert delicious for days.
Serving Your Berry Crisp:
- Wait 10-15 minutes before serving: This crucial cooling period allows the fruit filling to settle and continue thickening. Diving in too early might result in a runnier filling than desired.
- Serve warm: Berry crisp is undeniably best served warm, offering a comforting contrast of temperatures and textures.
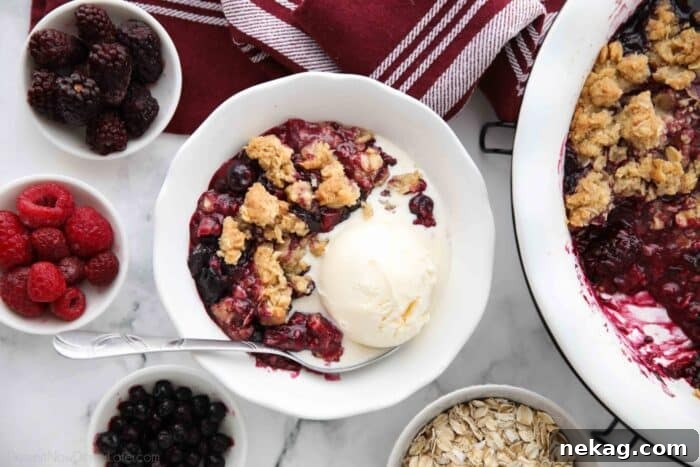
- Pair with toppings: While delicious on its own, a scoop of vanilla ice cream is the classic accompaniment, melting into the warm fruit and creating a creamy, dreamy experience. Other excellent choices include a dollop of fresh whipped cream, a spoonful of tangy crème fraîche, or even a swirl of Greek yogurt for a lighter touch.
Storing Your Berry Crisp:
- At Room Temperature: Cover the crisp tightly with plastic wrap or foil and store it at room temperature (around 68-72˚F or 20-22˚C) for 2-3 days.
- In the Refrigerator: For extended freshness, cover tightly and store in the refrigerator for 4-5 days.
- To Reheat:
- Microwave: For individual servings, place a portion on a plate and microwave for 30-60 seconds, or until warmed through.
- Oven: To reheat the entire baking dish, cover it loosely with foil and bake in a 350˚F (175˚C) oven for 15-20 minutes, or until bubbling and warm. This method helps the topping regain some of its crispness.
- To Freeze: Once completely cooled, wrap the entire crisp (or individual portions) in an airtight freezer-safe container or tightly with multiple layers of plastic wrap and foil. It can be stored in the freezer for up to 3 months. Thaw overnight in the refrigerator before reheating as desired.
Recipe Notes, Tips & Delicious Variations
Here are some additional insights to ensure your berry crisp is always a triumph, along with ideas for customizing it to your liking.
Fresh vs. Frozen Berries: What You Need to Know
- Frozen Berries: As designed, this recipe excels with frozen berries, particularly a blend of raspberries, blueberries, and blackberries. We recommend using good quality, whole frozen berries rather than fruit crumbs, and weighing them if possible for accuracy. The filling will have a slightly thicker texture at the edges and a bit thinner towards the center due to the moisture release from frozen fruit, which is perfectly normal and delicious.
- Fresh Berries: If you prefer using fresh fruit, this recipe will work beautifully! The filling will likely have a more evenly textured consistency. The primary difference will be the baking time, which will be shorter – typically around 30-40 minutes. Keep an eye on the golden-brown topping and the bubbling edges as your indicators of doneness.
- Measuring Fruit: Whether fresh or frozen, aim for whole, high-quality berries. Avoid using broken fruit bits or ice crystals as your measurement, as this can affect the filling’s consistency. A kitchen scale offers the most accurate measurement for frozen fruit.
Customizing Your Berry Crisp:
- Different Berry Combinations: While the triple berry blend is fantastic, feel free to experiment! Try an all-blueberry crisp, a raspberry-peach mix, or even add some chopped strawberries. Adjust sugar content if your chosen fruits are exceptionally sweet or tart.
- Adding Nuts to the Topping: For an extra layer of crunch and flavor, consider adding ½ cup of chopped pecans, walnuts, or almonds to your crumb topping mixture. They toast beautifully in the oven, adding a delightful depth.
- Spice It Up: Beyond cinnamon, a pinch of nutmeg, cardamom, or even a tiny bit of ginger can add intriguing warmth and complexity to the topping or the fruit filling.
- Citrus Zest: For an even brighter flavor, add a teaspoon of fresh orange or lemon zest to your berry filling mixture.
Frequently Asked Questions About Berry Crisps
- What’s the difference between a crisp and a crumble?
- The terms “crisp” and “crumble” are often used interchangeably, and they are indeed very similar! Traditionally, a crisp’s topping includes oats, which become crispy when baked. A crumble, on the other hand, typically features a streusel topping made from just flour, sugar, and butter, yielding a more uniform, cake-like crumb. This recipe, with its oat-based topping, leans more towards a crisp but captures the best qualities of both, resulting in a perfectly balanced dessert.
- Can I use other types of fruit in this recipe?
- Absolutely! This recipe is incredibly versatile. Feel free to substitute the mixed berries with other fruits like sliced peaches, apples (mix with a bit more lemon juice), cherries, or even rhubarb. You may need to slightly adjust the amount of sugar and cornstarch depending on the juiciness and sweetness of your chosen fruit. For very juicy fruits, you might add an extra tablespoon of cornstarch.
- My crisp filling is too runny after baking. What went wrong?
- A runny filling is usually due to two main reasons: either the filling didn’t get hot enough or bake long enough for the cornstarch to fully activate and thicken the fruit juices, or it wasn’t given enough time to cool and set. Ensure the crisp bakes until the edges are vigorously bubbling and the topping is deeply golden brown. Also, the 10-15 minutes of cooling time before serving is crucial for the filling to thicken to the perfect consistency.
- Is this berry crisp recipe suitable for a gluten-free diet?
- As written, this recipe contains all-purpose flour and conventional oats, so it is not gluten-free. However, you can easily adapt it! Simply substitute the all-purpose flour with a 1:1 gluten-free baking flour blend (ensure it contains xanthan gum) and use certified gluten-free old-fashioned oats. The taste and texture will remain wonderfully delicious.
- How do I know when the crisp is fully cooked?
- Look for a rich golden-brown color on the crumb topping. More importantly, observe the fruit filling around the edges of the dish. It should be actively bubbling and thick. If the center still looks very liquidy, give it a few more minutes in the oven. Remember, it will continue to thicken as it cools.
Printable Recipe Card: Easy Triple Berry Crisp
Berry Crisp
Rating: 4.80 from 5 ratings
Created by: Amber Brady
Prep: 10 mins
Cook: 50 mins
Total: 1 hr
Frozen berries are transformed into a delicious fruit crisp with a buttery-sweet crumb topping, perfect for any occasion.
Pin
Rate
Save
Yields: 6 servings
Ingredients
Berry Filling:
- 4 cups (560 g) frozen mixed berries (raspberries, blueberries, blackberries), approximately 18 ounces
- ⅓ cup (68 g) granulated sugar
- 3 Tbsp cornstarch
- 1 Tbsp lemon juice
Crumb Topping:
- 1 cup (80 g) old-fashioned oats
- 1 cup (120 g) all-purpose flour, stirred, spooned & leveled
- ½ cup (100 g) light brown sugar, gently packed
- ¼ cup (50 g) granulated sugar
- ¼ tsp salt
- ¼ tsp ground cinnamon
- 10 Tbsp (141 g) unsalted butter, cold, cut into thin pieces
Equipment
- 6-Quart Steel Mixing Bowl
- Silicone Spatula Set
- White Pie Plate 9″
Instructions
- Preheat your oven to 350˚F (175˚C). Lightly grease a 9-inch round deep pie dish or a similar 9×9-inch square baking dish. Set aside.
- In a large mixing bowl, combine the frozen berries, granulated sugar, cornstarch, and lemon juice. Stir gently to ensure all berries are thoroughly coated. Let the mixture sit for 5-10 minutes while you prepare the topping, allowing the sugar to dissolve and the fruit to thaw slightly.
- In a separate large bowl, combine the old-fashioned oats, all-purpose flour, light brown sugar, granulated sugar, salt, and ground cinnamon. Add the cold butter pieces. Using your fingertips, squeeze and rub the butter into the dry ingredients until the mixture resembles coarse crumbs, with some larger pea-sized clumps.
- Pour the prepared berry mixture evenly into your greased baking dish.
- Evenly sprinkle the crumb topping over the fruit filling. For larger, more rustic crumbs, gently squeeze handfuls of the topping together before sprinkling. For finer crumbs, rub the mixture between your fingers as you sprinkle.
- Bake in the preheated oven for 45-50 minutes, or until the topping is golden brown and the berry filling is actively bubbling around the edges. The fruit in the center may still appear slightly thinner, but it will thicken as it cools.
- Remove from the oven and let the berry crisp cool for 10-15 minutes before serving. This crucial cooling time allows the filling to set and thicken to the perfect consistency.
- Serve warm, ideally with a generous scoop of vanilla ice cream, a dollop of whipped cream, or a drizzle of crème fraîche. Enjoy!
Notes
- Frozen Berries: This recipe works best with a blend of raspberries, blueberries, and blackberries. Look for high-quality frozen blends at stores like Costco or Sam’s Club.
- Fresh Fruit: You can absolutely use fresh mixed berries in the same quantities. The texture of the filling may be slightly more even, and the baking time might be a bit shorter, typically 30-40 minutes. Watch for the golden-brown topping and bubbling edges.
- Storage: Store leftover berry crisp tightly covered at room temperature (68-72˚F or 20-22˚C) for 2-3 days, or in the refrigerator for 4-5 days.
- Reheating: To reheat individual servings, microwave for 30-60 seconds. For the entire dish, reheat in a 350˚F (175˚C) oven for 15-20 minutes, until warmed through and bubbly.
- Freezing: For longer storage, freeze cooled crisp in an airtight freezer-safe container for up to 3 months. Thaw overnight in the refrigerator before reheating.
Nutrition Information
| Serving | Calories | Carbohydrates | Protein | Fat | Saturated Fat | Polyunsaturated Fat | Cholesterol | Sodium | Fiber | Sugar |
|---|---|---|---|---|---|---|---|---|---|---|
| 1 serving | 489 kcal | 73 g | 5 g | 21 g | 12 g | 7 g | 51 mg | 107 mg | 6 g | 40 g |
Disclaimer: Nutritional values are estimated using a third-party tool and are provided for informational purposes only. Actual values may vary.
Sharing this recipe with a link is both encouraged and appreciated. Copying/pasting and/or screenshots of full recipes to any social media is strictly prohibited. Content and photographs are copyright protected.
Did you make this delicious Berry Crisp?
We’d love to hear from you! Don’t forget to leave a rating below and share your experience. For more delightful dessert ideas and cooking inspiration, make sure to follow us on Pinterest and Instagram!