
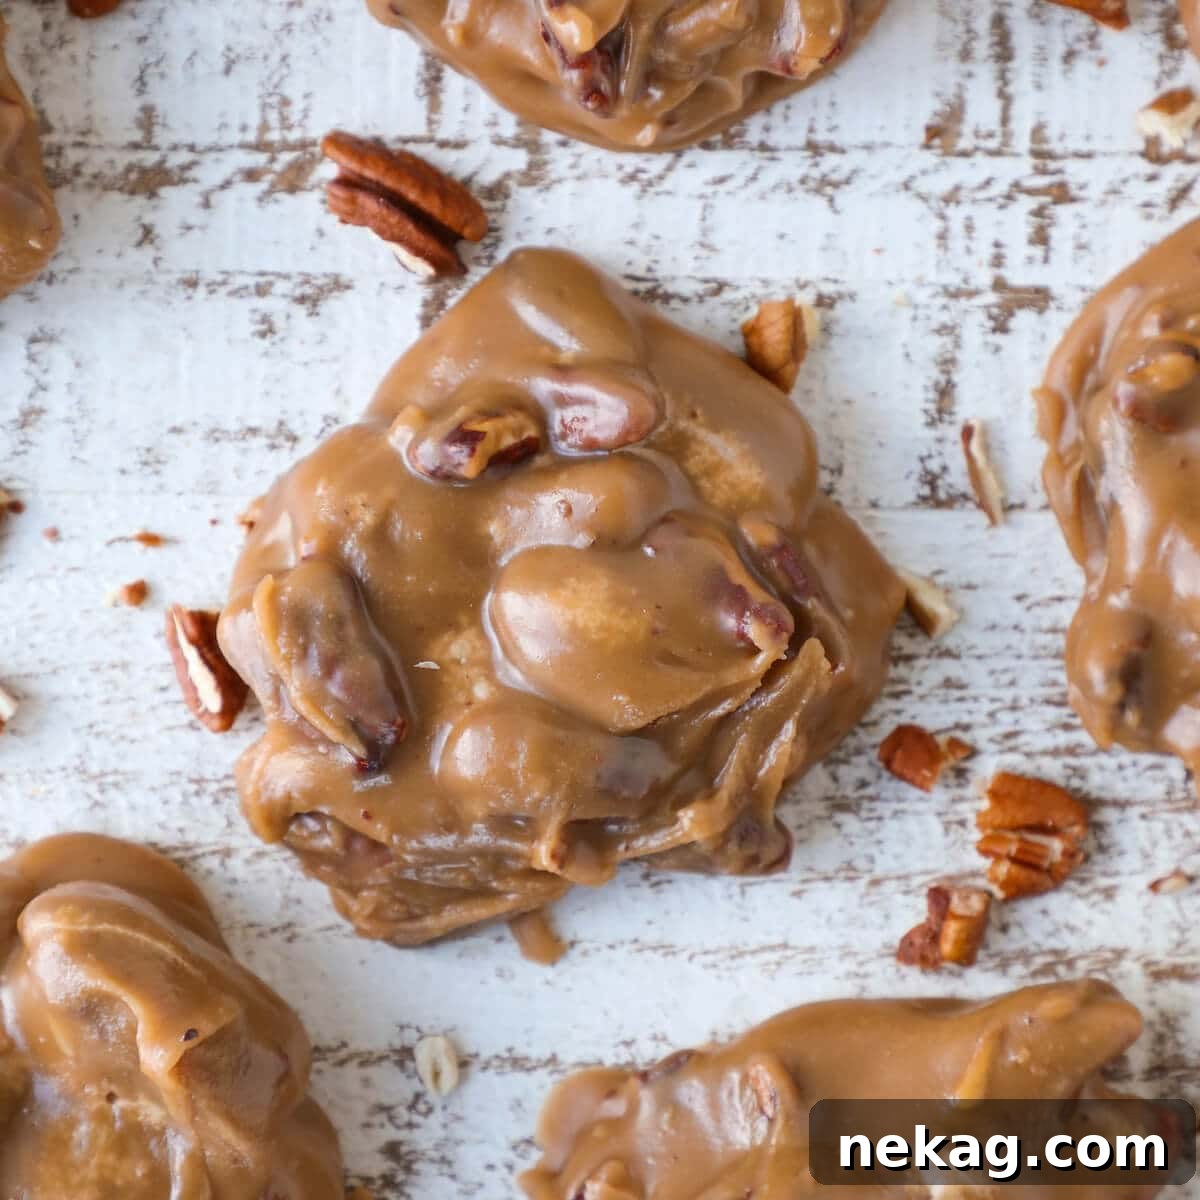
The Ultimate Southern Pecan Pralines Recipe: Achieve Perfection Every Time
Discover an easy-to-follow Pecan Praline Recipe that yields incredibly flavorful and wonderfully thick praline candies! I’m sharing all my professional pastry chef tips and secrets to ensure your pralines are beautifully shiny, smooth, and free from crystallization. Best of all, you can whip up a batch of these Southern delights in under 30 minutes!
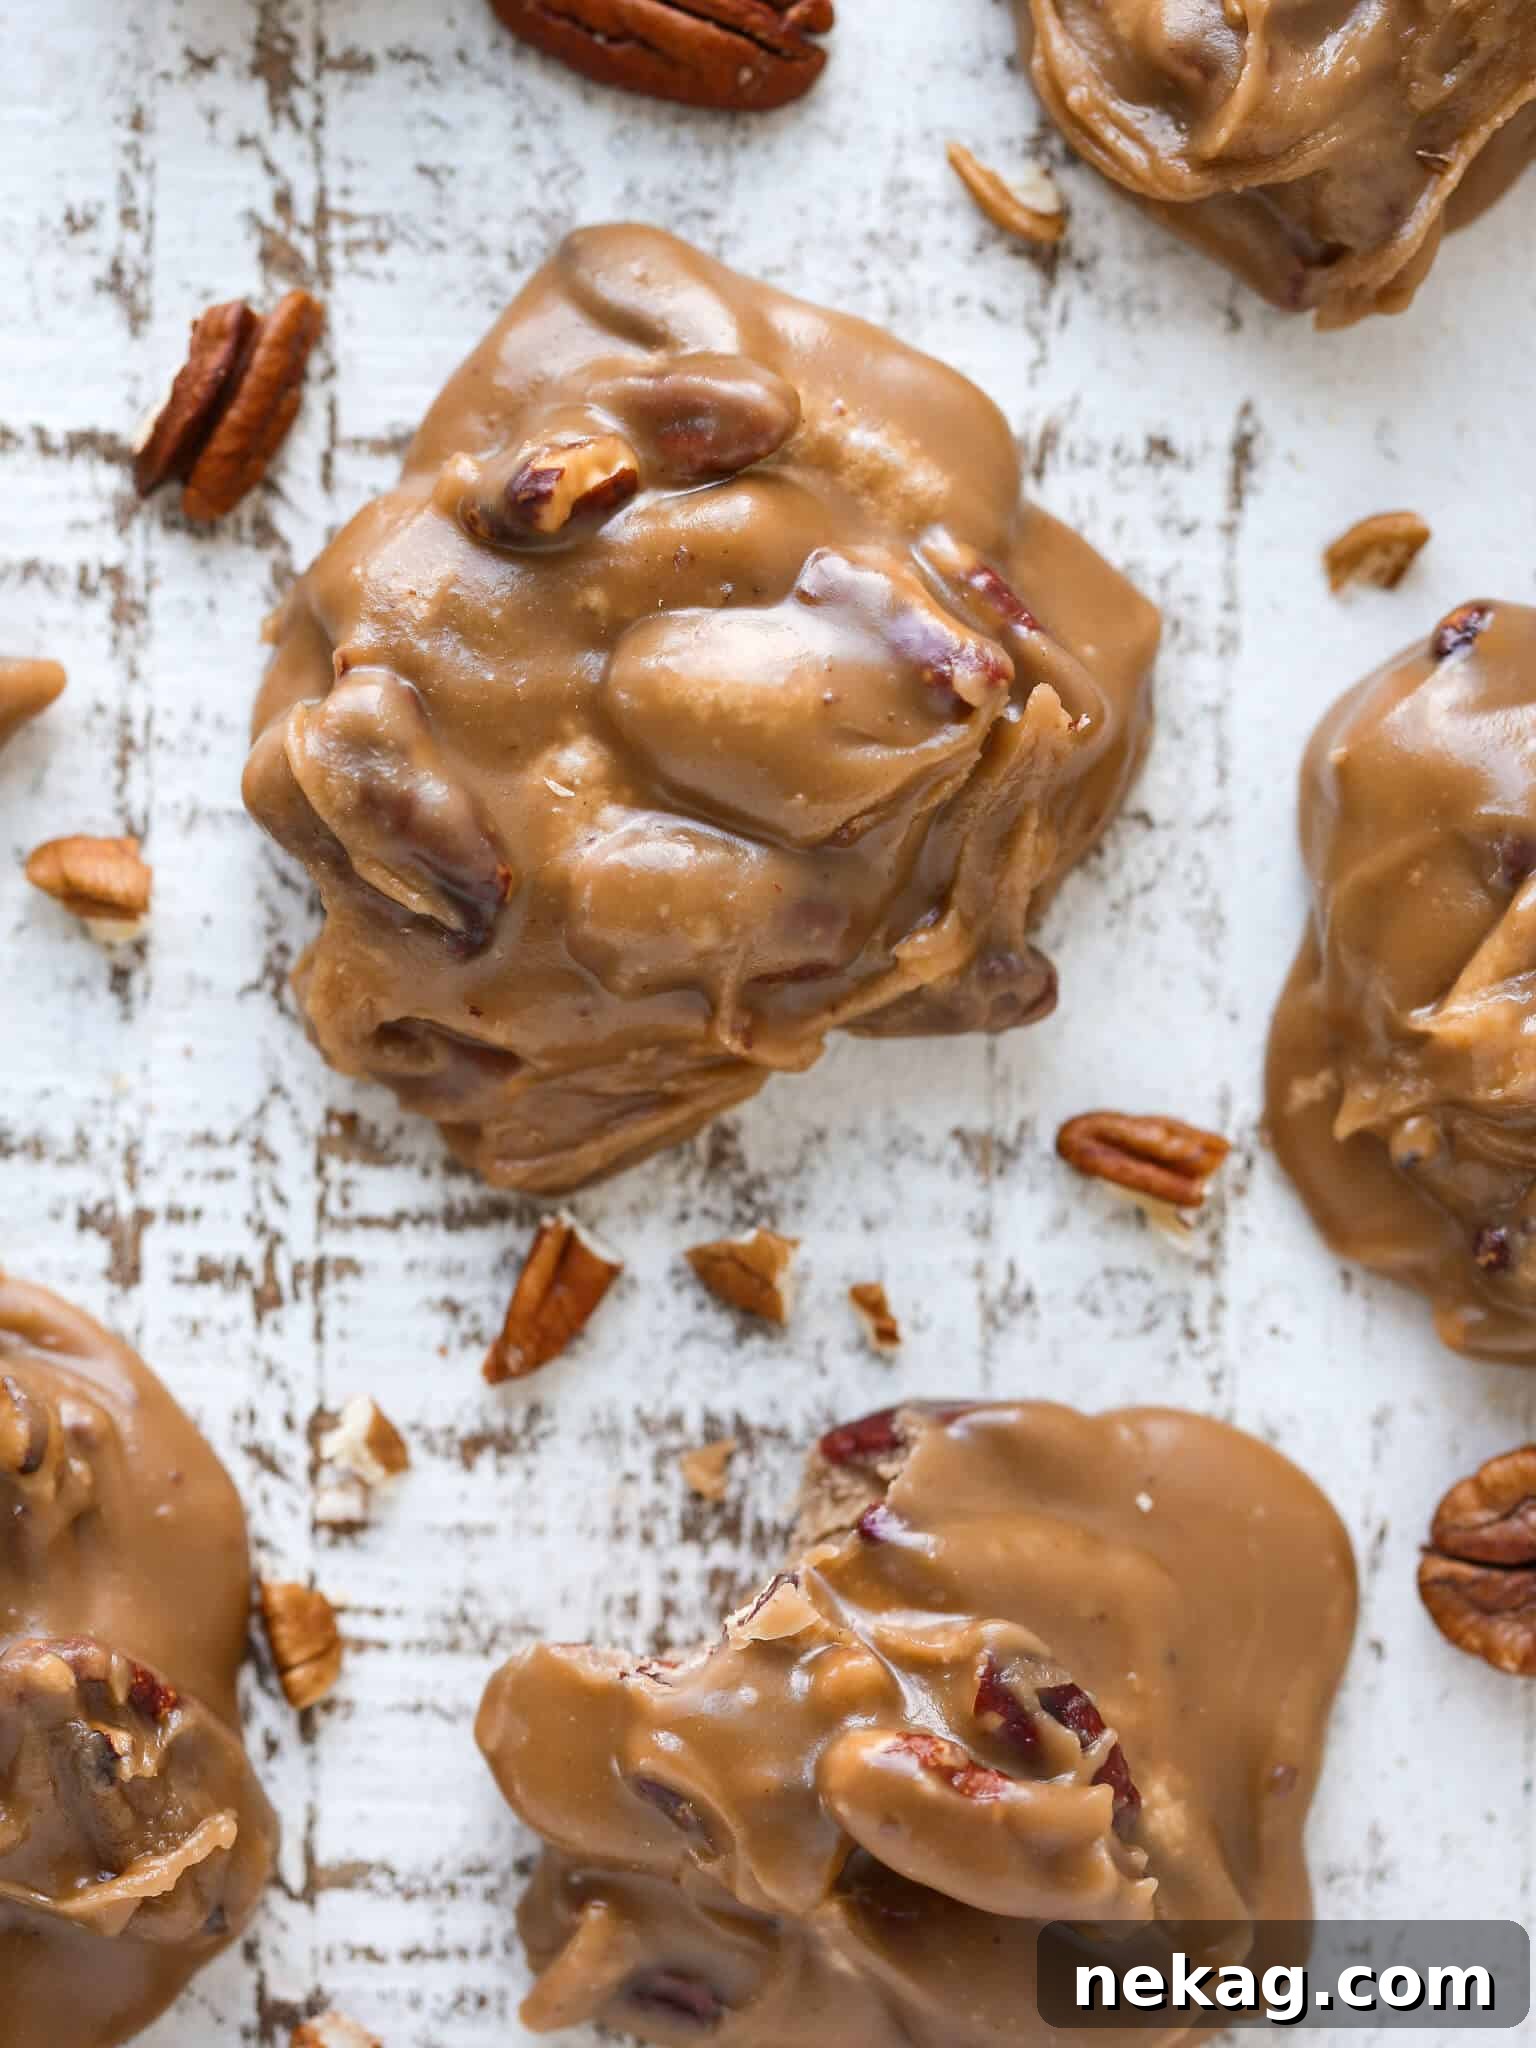
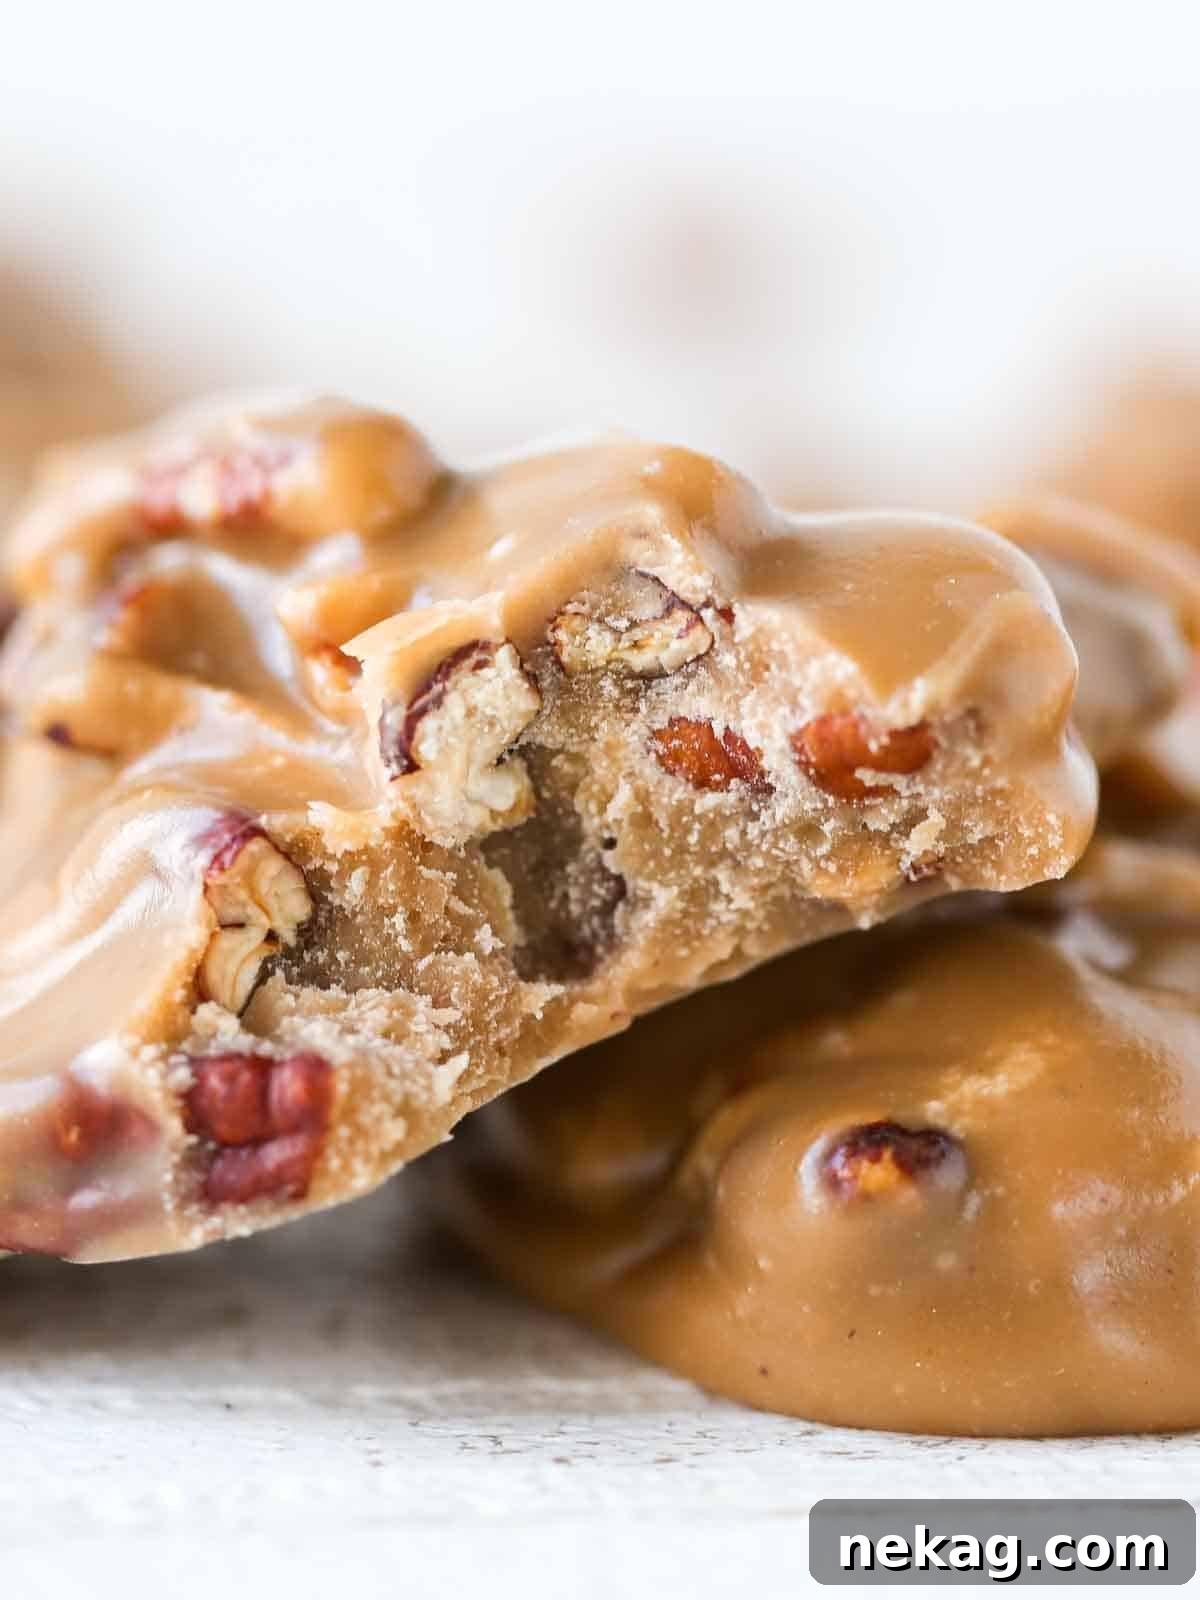
This traditional Southern pecan praline recipe delivers exquisite results: thick, rich candies bursting with toasted pecans and a distinctive caramelized brown sugar flavor. As a professional pastry chef, I’m providing all my insider tips for achieving that coveted glossy finish and preventing common issues like crystallization. These pralines boast a soft, slightly crumbly texture that melts delightfully in your mouth, reminiscent of classic old-fashioned fudge but with their own unique charm.
While fantastic any time of year, this recipe, much like homemade toffee and sticky toffee pudding, becomes a cherished treat during the holidays. Pralines make for wonderful homemade gifts for colleagues, friends, and teachers. Present them elegantly in a decorative tin or a simple clear gift bag tied with a festive ribbon for a truly personal touch.
Table of Contents
- Why You’ll Adore This Pecan Praline Recipe
- Professional Pastry Chef Tips for Perfect Pralines
- What Exactly Are Pecan Pralines?
- Essential Ingredients for Pecan Pralines
- Smart Substitutions for Your Pralines
- Step-by-Step Guide: How to Make Pecan Pralines
- Chef Lindsey’s Expert Recipe Tip
- Frequently Asked Questions About Pecan Pralines
- Pecan Pralines Recipe Card
- Explore More Delicious Recipes
Why You’ll Adore This Pecan Praline Recipe
Once you try these homemade pecan pralines, you’ll understand why they are a beloved Southern tradition. This recipe is designed to impress and deliver a truly gourmet experience:
- Unforgettable Rich, Caramelized Flavor: Imagine the comforting taste of pecan pie captured in a delightful candy. These pralines offer a unique, deep caramelized brown sugar flavor beautifully balanced by the nutty richness of pecans. Each bite is a symphony of sweet and savory notes that will leave you craving more.
- Perfect, Melt-in-Your-Mouth Texture: Achieving the ideal praline texture can be tricky, but this recipe guarantees success. You’ll create candies with that characteristic soft, slightly crumbly consistency that melts away deliciously. To elevate the experience, I recommend toasting the pecans beforehand, adding a delightful crunch that perfectly contrasts the praline’s smooth base.
- Quick and Efficient: Made in Under 30 Minutes: Don’t let the thought of candy making intimidate you! This recipe is surprisingly fast, coming together in under half an hour. My secret? Having all your ingredients measured and ready before you begin, allowing for a seamless transition from one step to the next and ensuring a stress-free cooking process.
- Expert Guidance from a Pastry Chef: You’re not just getting a recipe; you’re getting a masterclass! Chef Lindsey shares all her professional secrets for crafting perfect, glossy pralines that are free from sugar crystals. Follow her detailed step-by-step tutorial and accompanying video for visual guidance, making it impossible to fail.
Professional Pastry Chef Tips for Perfect Pecan Pralines
Making pralines can seem daunting, but with these professional insights, you’ll achieve flawless results every time. These tips address common challenges and ensure your pralines are shiny, smooth, and delicious.
- Patience is Your Best Ingredient: Successful candy making, especially with pralines, hinges on patience. Allow the sugar to fully dissolve before the mixture comes to a boil. Ensure the candy reaches the precise temperature of 235°F (softball stage). Crucially, respect the cooling period and beat the mixture for the adequate duration. Each of these steps is vital for preventing crystallization and achieving that perfect, smooth texture.
- Don’t Skip the 10-Minute Cooling Period: This cooling step is non-negotiable! Immediately after removing the candy mixture from the heat, let it rest undisturbed for 10 minutes. This allows the temperature to drop without agitating the sugar molecules, significantly reducing the risk of crystallization that often occurs from stirring too early.
- Troubleshooting: If the Mixture Seizes or Becomes Too Thick: It happens! If your praline mixture thickens too quickly during the beating process or begins to seize, don’t panic. Gently add a small amount of hot water, about a teaspoon at a time, to thin it back to a workable consistency. While these specific pralines might have a slightly more granulated texture than those that didn’t seize, they will still be delicious.
- Pre-Toast Your Pecans for Enhanced Flavor and Texture: This simple step makes a world of difference. Toasting pecans before adding them to the praline mixture deepens their natural nutty flavor and provides a delightful, crisp crunch that contrasts beautifully with the soft candy. Spread them on a baking sheet and toast in a preheated oven at 350°F (175°C) for 5-7 minutes, or until fragrant.
What Exactly Are Pecan Pralines?
Pralines are a beloved confectionery, particularly famous in the Southern United States, with roots dating back to France. The original French praline involved almonds coated in caramelized sugar, a creation attributed to Marshal du Plessis-Praslin’s chef in the 17th century. When this sweet concept arrived in Louisiana, it evolved. Local cooks adapted the recipe using the abundant pecan nuts and added cream or milk, resulting in the creamy, fudgy candy we know today as the Southern Pecan Praline.
At their core, pralines are a stove-top candy made by carefully cooking a mixture of brown sugar, butter, milk, and flavorings (most notably vanilla and pecans) until it reaches the specific “soft-ball stage,” typically around 235°F (113°C). The mixture is then removed from the heat, allowed to cool slightly, and vigorously beaten with a spoon. This beating process, similar to the technique used for making old-fashioned fudge, encourages the sugar crystals to form finely and evenly, creating a smooth, chewy, and slightly crumbly texture that melts delightfully in your mouth.
The dominant flavors are a rich, caramelized brown sugar sweetness combined with the earthy, buttery notes of pecans and a hint of vanilla. Many describe the taste as being wonderfully similar to pecan pie in candy form, making them an irresistible Southern confection!
Essential Ingredients for Pecan Pralines
Each ingredient in this recipe plays a crucial role in developing the distinct flavor and texture of these Southern pecan pralines. Using high-quality ingredients will yield the best results.
- Light Brown Sugar: The star of the show! Cooking light brown sugar is fundamental to creating the unique caramelized flavor and characteristic chewy-yet-crumbly texture of these pecan pralines. Its molasses content adds depth and moisture, distinguishing pralines from other sugar candies.
- Butter: I always use unsalted butter for baking and candy making, allowing precise control over the salt content. In pralines, butter is essential for adding a luscious smoothness, richness, and a desirable mouthfeel, contributing to the overall decadent experience.
- Kosher Salt: Often underestimated, kosher salt is vital for balancing the sweetness of the sugar and preventing the pralines from tasting overly sweet or bland. It enhances all the other flavors, making them pop. Remember, kosher salt is less dense than table salt, so don’t substitute directly by volume.
- Vanilla Extract: Vanilla extract is more than just a flavor; it’s a flavor enhancer. It adds a beautiful aromatic note of its own while simultaneously boosting the complex caramel and nutty flavors of the other ingredients, creating a more harmonious and rich taste profile.
- Granulated Sugar: Along with brown sugar, granulated sugar provides the essential structure and sweetness for the candy. I prefer using extra-fine granulated sugar as it dissolves more evenly and is less prone to crystallization. However, any standard granulated sugar will work perfectly fine – no need to stress about finding a specialty type!
- Dark Corn Syrup: This ingredient acts as a crucial anti-crystallization agent. The dark corn syrup stabilizes the sugar mixture, helping to prevent the formation of large sugar crystals that can make your pralines grainy. It also adds a subtle complexity to the flavor. You can substitute it with glucose or light corn syrup, or even omit it, but be aware that omitting it increases the risk of crystallization significantly.
- Whole Milk: The fat content in whole milk is key for candy making. It helps to prevent sugar crystallization and contributes significantly to the richness and creamy texture of the final praline. Using whole milk ensures a smooth, decadent product.
- Pecans: As a Southern chef, I have a deep appreciation for high-quality pecans. Nothing quite beats fresh, plump Southern pecans, especially when they are the star of the show! For the best flavor and texture, use pecan halves. If you’re not using them immediately or live in a warm climate, store them in the freezer to maintain their freshness and prevent them from going rancid. Have extra pecans? Consider making some delicious pecan sticky buns next!
Smart Substitutions for Your Pecan Pralines
While this recipe is crafted for optimal results, sometimes you need to make adjustments based on what you have or personal preference. Here are some possible substitutions and their implications:
- Brown Sugar Variations: This pecan praline recipe specifies light brown sugar for its delicate molasses flavor. However, if you prefer a deeper, more robust molasses flavor and a slightly darker praline, you can absolutely use dark brown sugar. This will intensify the caramel notes.
- Corn Syrup Alternatives: The dark corn syrup in this recipe is paramount for preventing crystallization and adding a nuanced flavor. You can substitute it with glucose syrup or light corn syrup. Both will still provide the anti-crystallization properties. While you can omit corn syrup entirely, be aware that doing so significantly increases the risk of your pralines turning out grainy or crystallized. It’s a risk often not worth taking for beginners.
- Exploring Different Nuts: While pecans are traditional and undoubtedly delicious, feel free to get creative with other nuts! Walnuts make an excellent substitute, offering a slightly more bitter note that pairs well with the sweet caramel. You could also experiment with a mixture of several nuts, such as almonds or even macadamias, for a gourmet twist. Just be sure to toast any nuts you use to enhance their flavor and crunch.
- Milk Choices: For the best fudge-like texture and rich flavor, I strongly recommend sticking to whole milk. The higher fat content of whole milk is crucial for preventing crystallization and contributing to the desired creaminess. I would not suggest substituting with non-dairy milk, evaporated milk, or low-fat milk, as these alternatives lack the necessary fat and may lead to a different texture and consistency in your pralines.
Step-by-Step Guide: How to Make Pecan Pralines
Follow these detailed instructions to achieve perfect, glossy pecan pralines every single time. For precise measurements and a full recipe card, please scroll down!
Phase 1: Prepare Your Workstation
Step 1: Begin by lining two sturdy baking sheets with waxed paper. As an alternative, you can use aluminum foil lightly sprayed with a non-stick cooking spray. Next, prepare your cooking vessel: butter the inner sides of a 3-quart heavy-bottomed saucepot. This buttering helps prevent sugar crystals from clinging to the pot walls as the mixture cooks.
Using a heavy-bottomed pot is crucial! It distributes heat more evenly, preventing scorching and ensuring your pralines cook consistently for the best results.
Phase 2: Cooking Your Praline Mixture
Step 2: In your prepared 3-quart pot, combine the light brown sugar, granulated sugar, kosher salt, dark corn syrup, and whole milk. Stir these ingredients carefully but thoroughly to ensure all the sugars are moistened. Make an effort to keep as little sugar as possible from clinging to the sides of the pot; sugar crystals on the side can cause the entire batch to crystallize later.
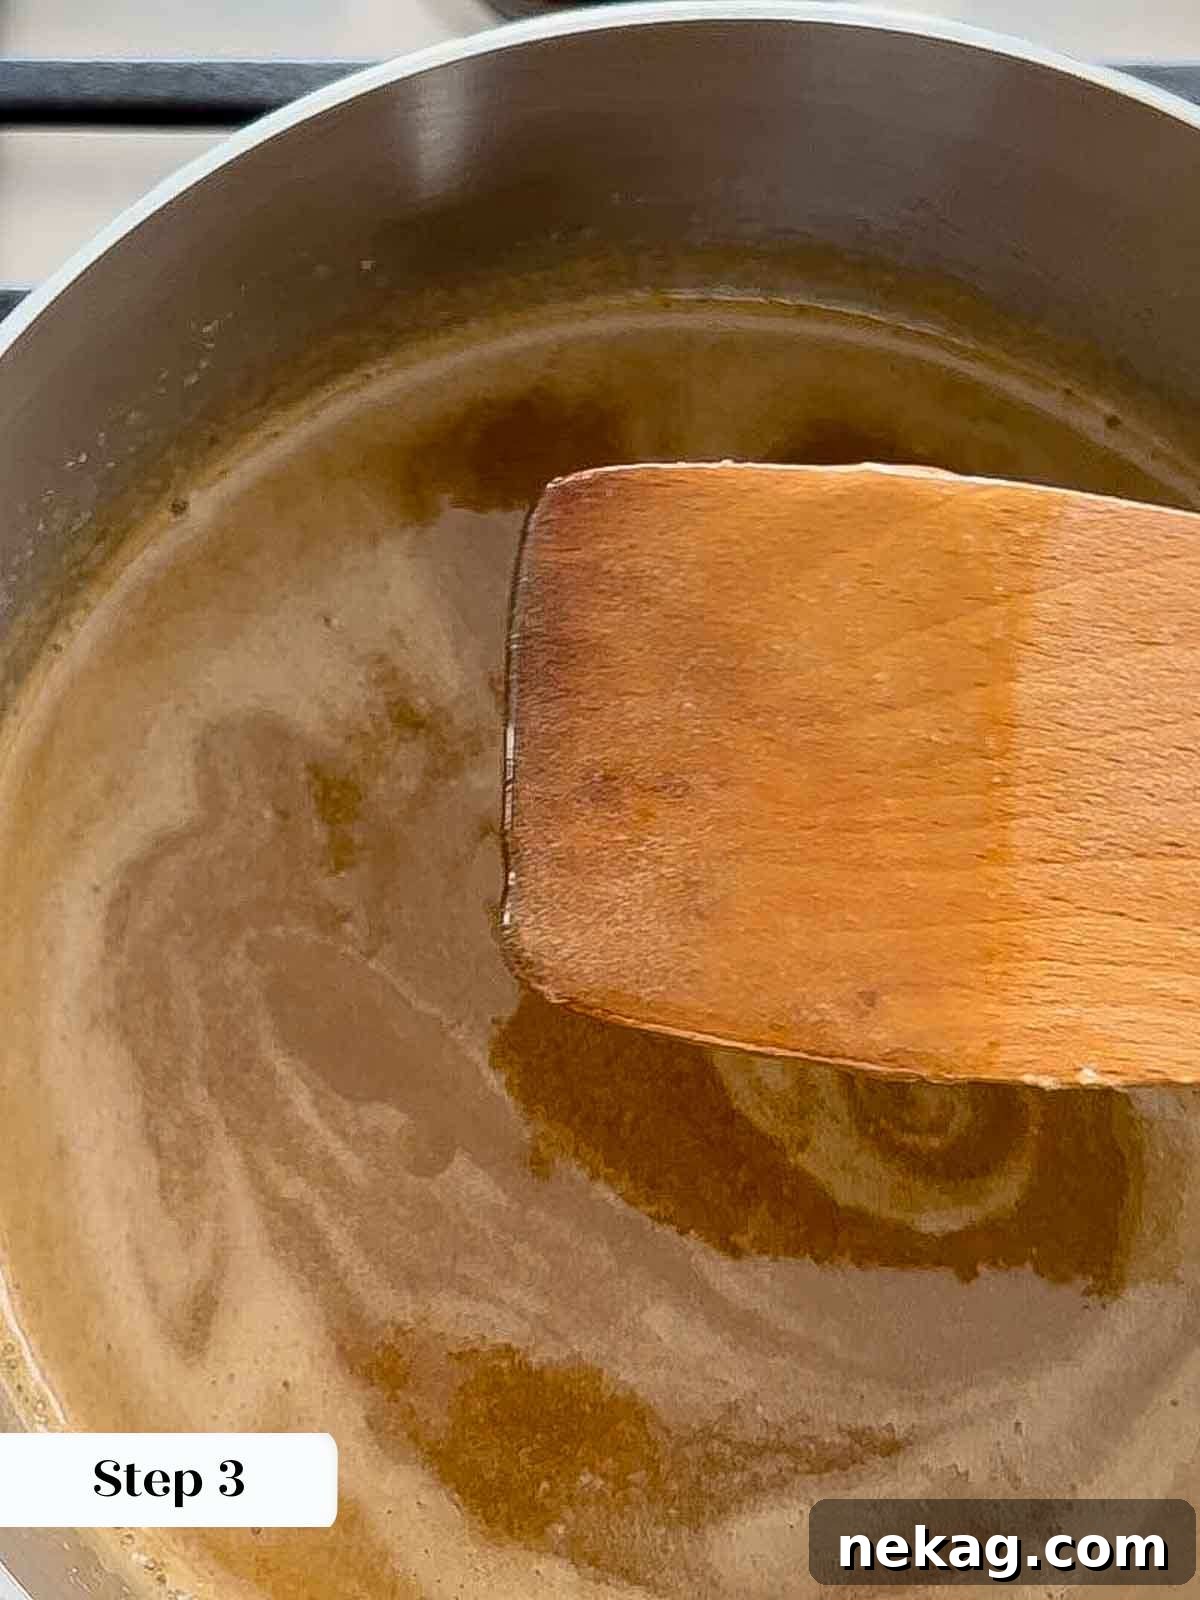
Step 3: Place the pot over medium heat. Continue stirring the mixture frequently until all the sugar crystals have completely dissolved. You’ll notice the mixture becoming clear and smooth. This step is critical and requires patience.
The key to non-crystallized pralines is ensuring all the sugar fully dissolves *before* the mixture comes to a boil. This pre-dissolving stage is a vital preventative measure against grainy pralines.
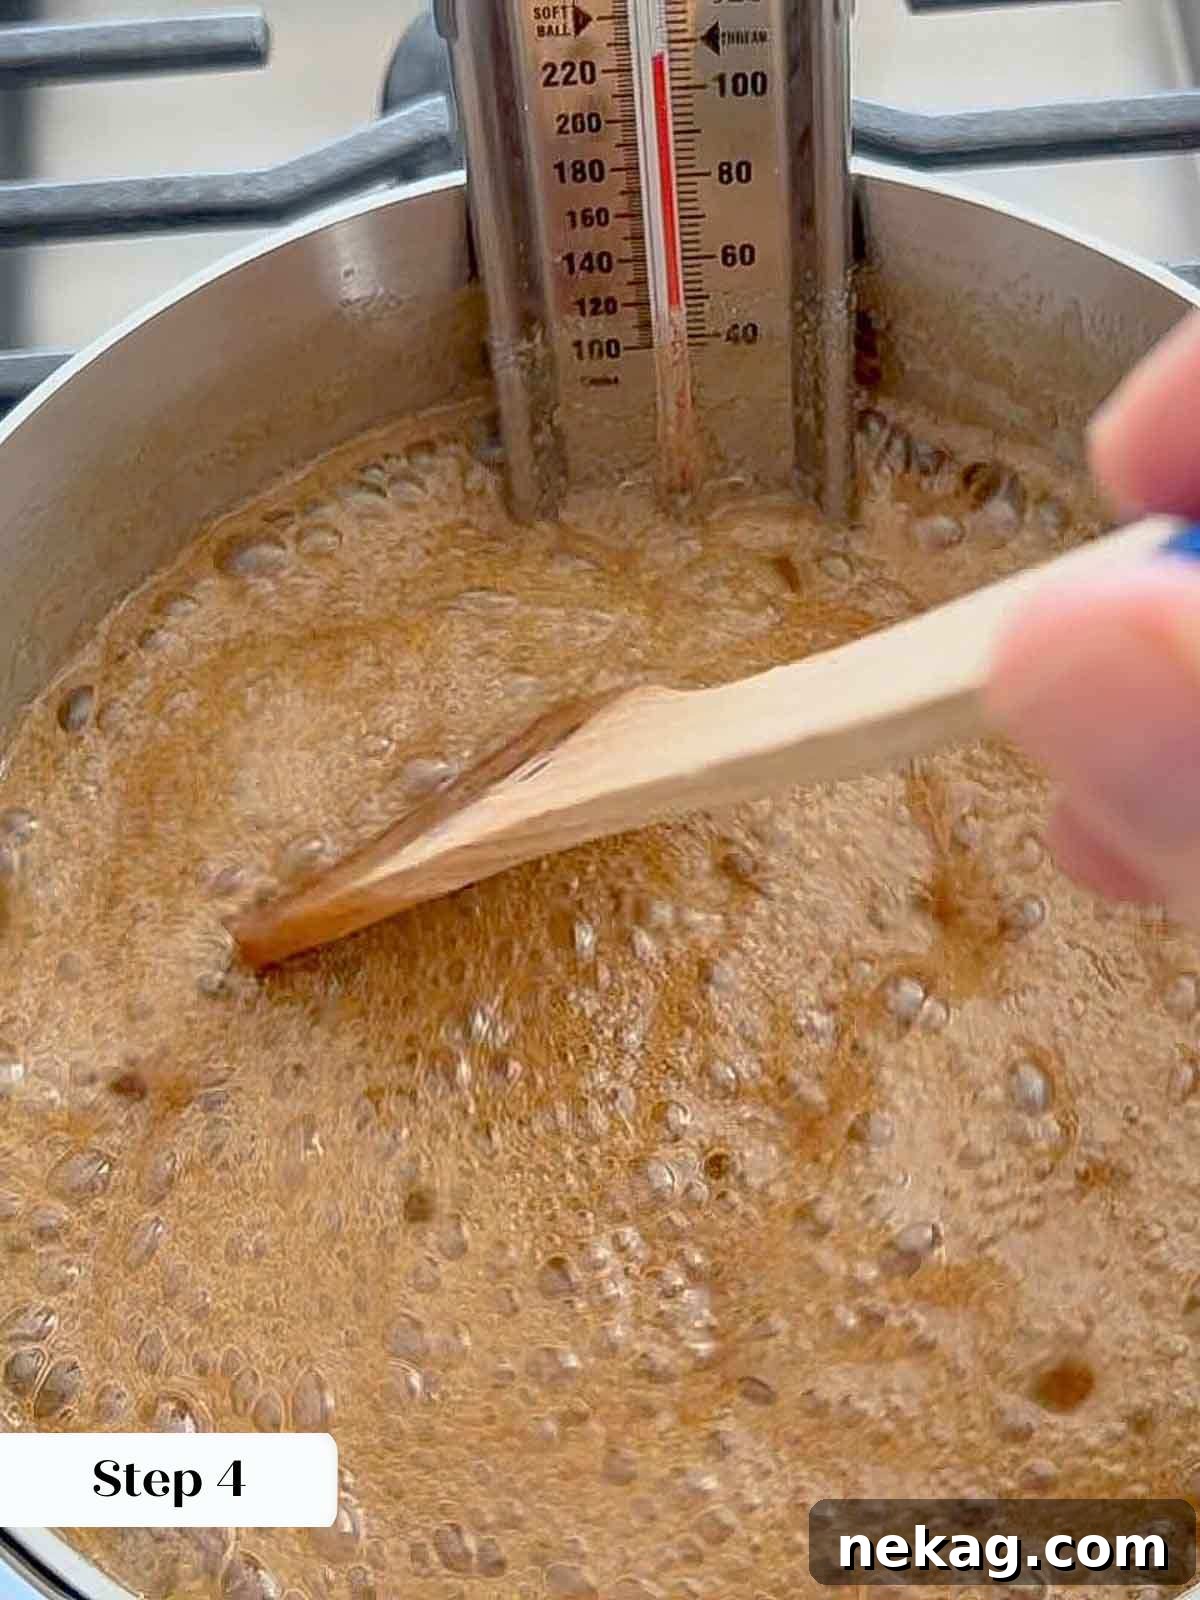
Step 4: Once the sugar is fully dissolved, bring the mixture to a rolling boil. Carefully affix a reliable candy thermometer to the side of the pot, ensuring its tip is submerged in the candy mixture but not touching the bottom. Continue to cook, stirring only occasionally to prevent sticking, until the thermometer registers 235°F (113°C). This temperature signifies the “softball stage,” where a drop of syrup forms a soft, pliable ball in cold water.
Phase 3: Developing Texture and Portioning
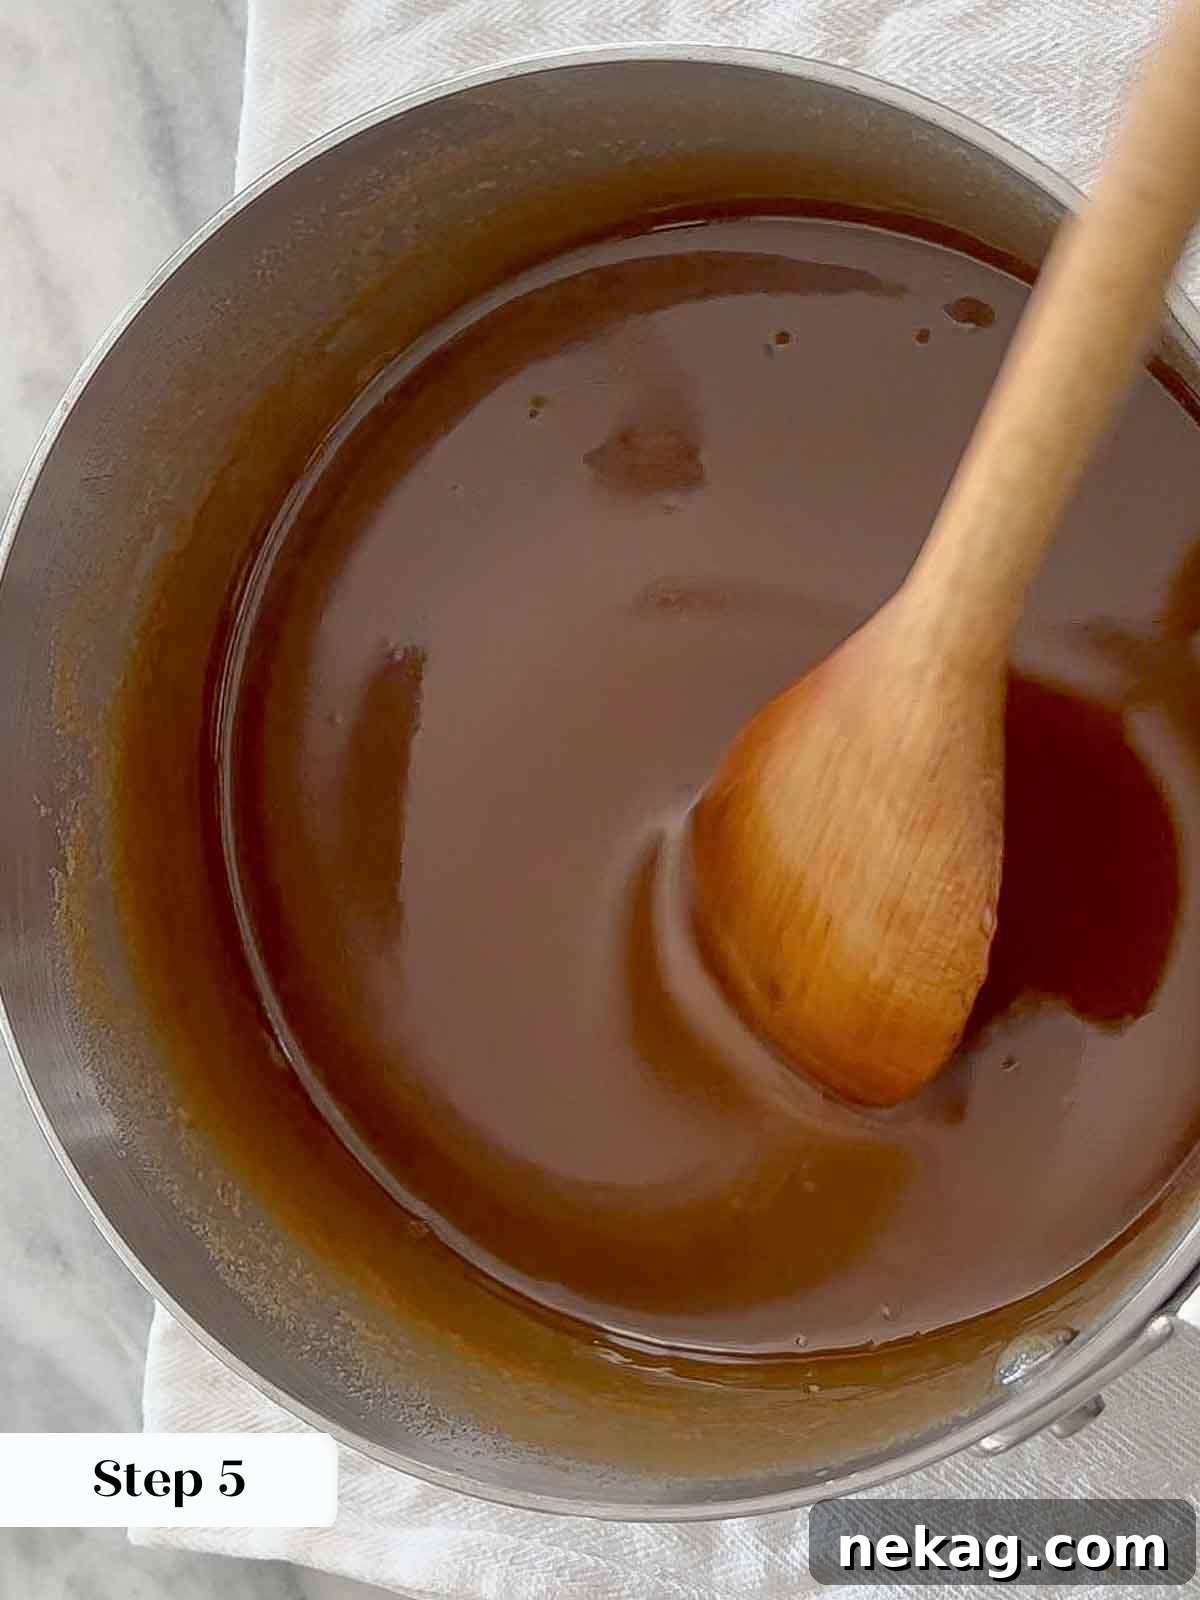
Step 5: Once the mixture reaches 235°F, immediately remove the pot from the heat. Allow the candy to cool undisturbed for precisely 10 minutes. This hands-off cooling period is essential for preventing premature crystallization and achieving the desired smooth texture.
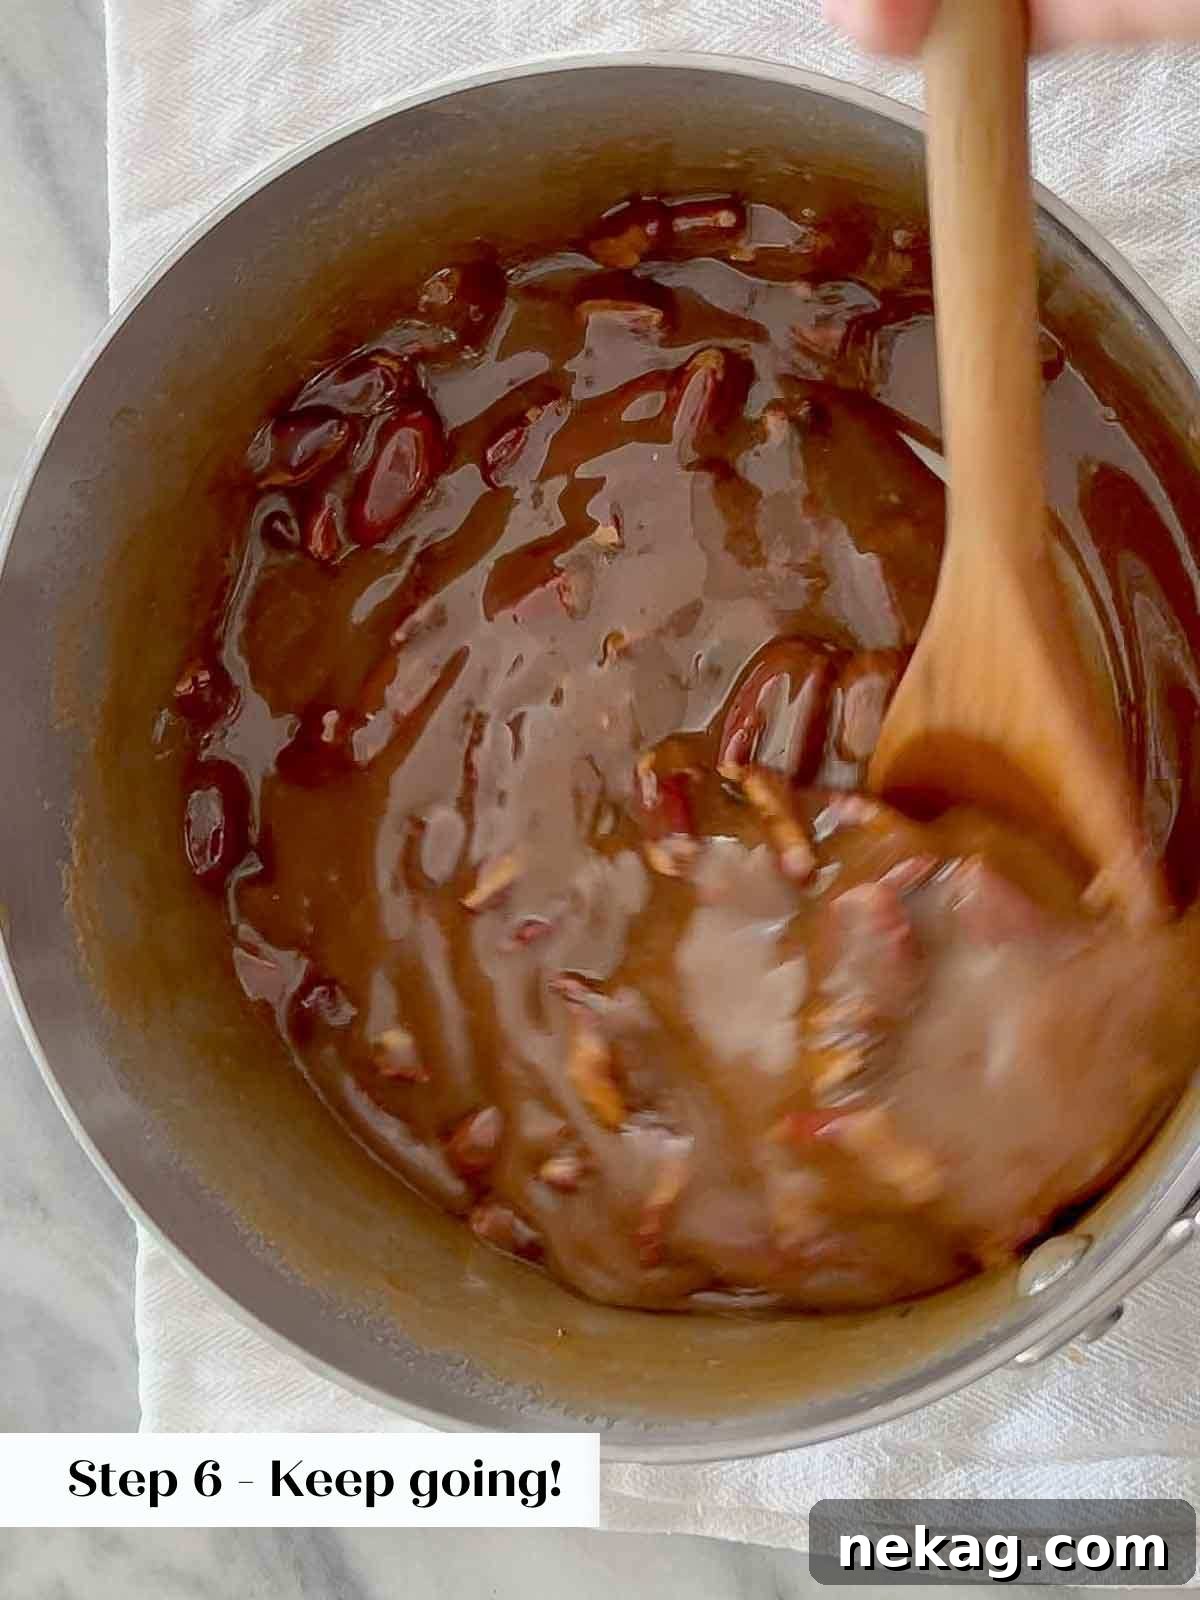
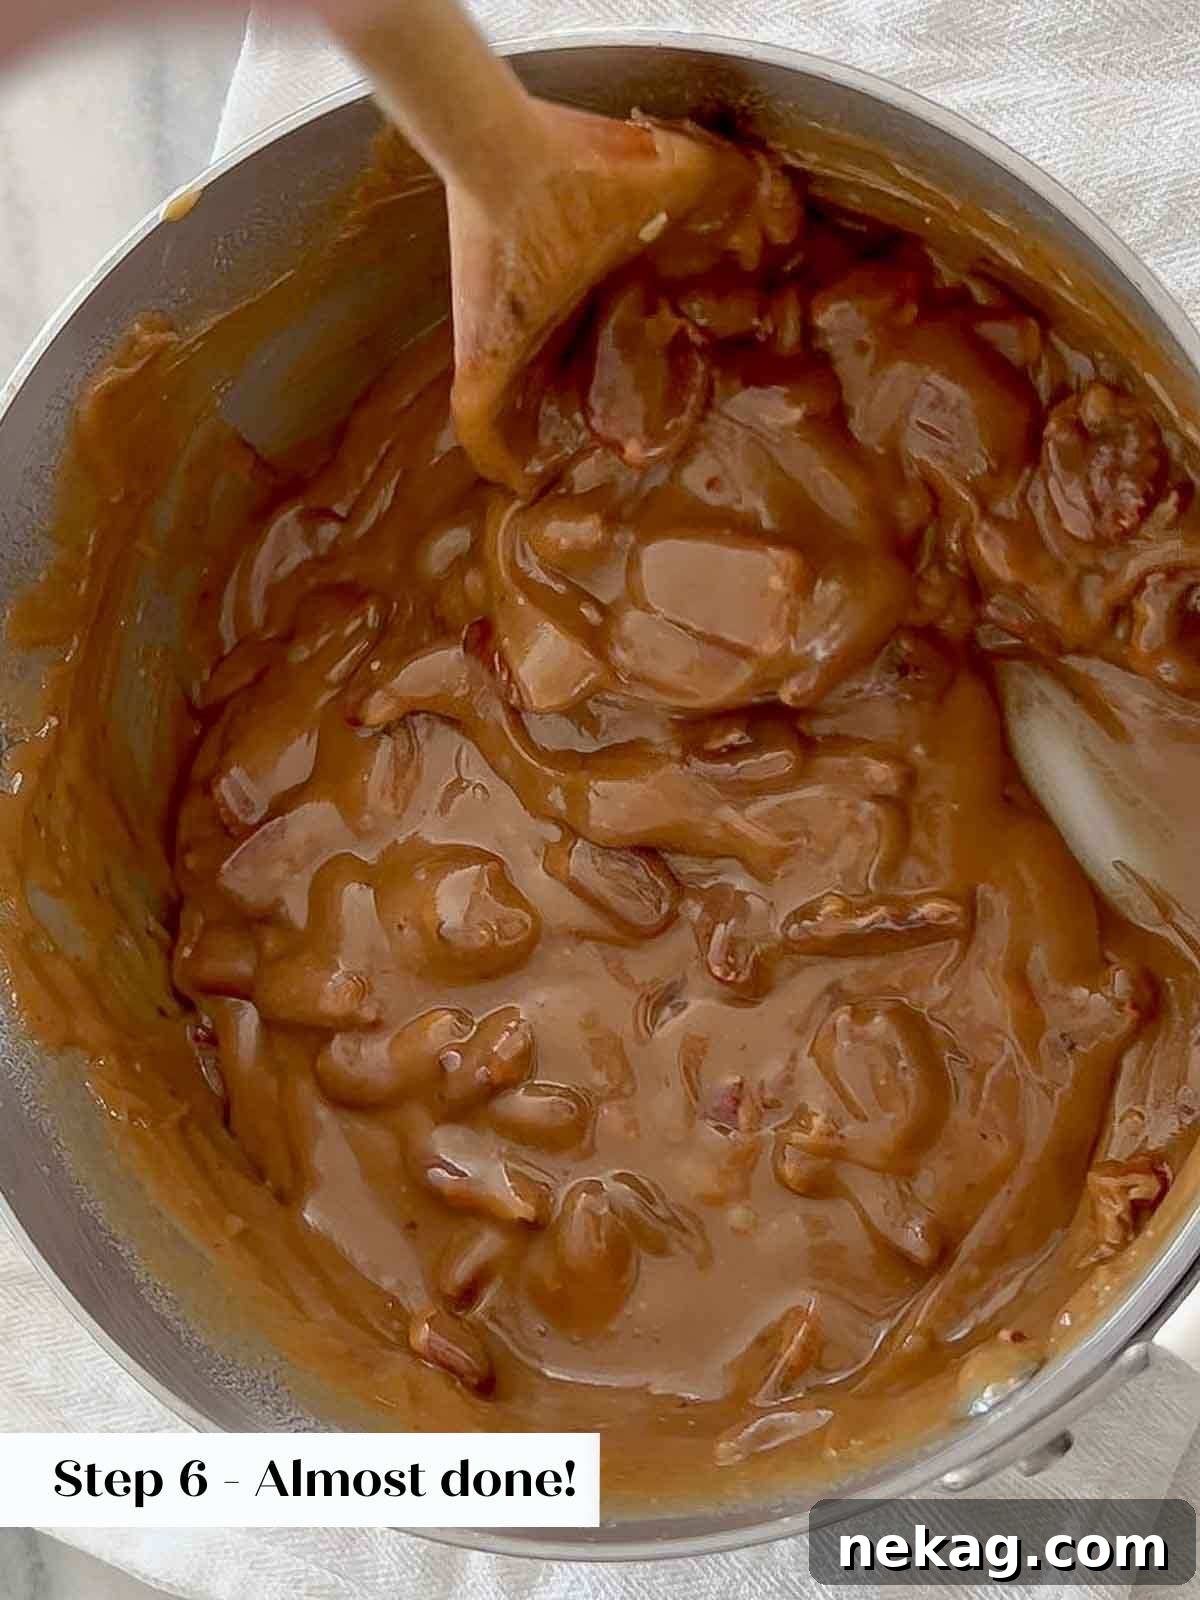
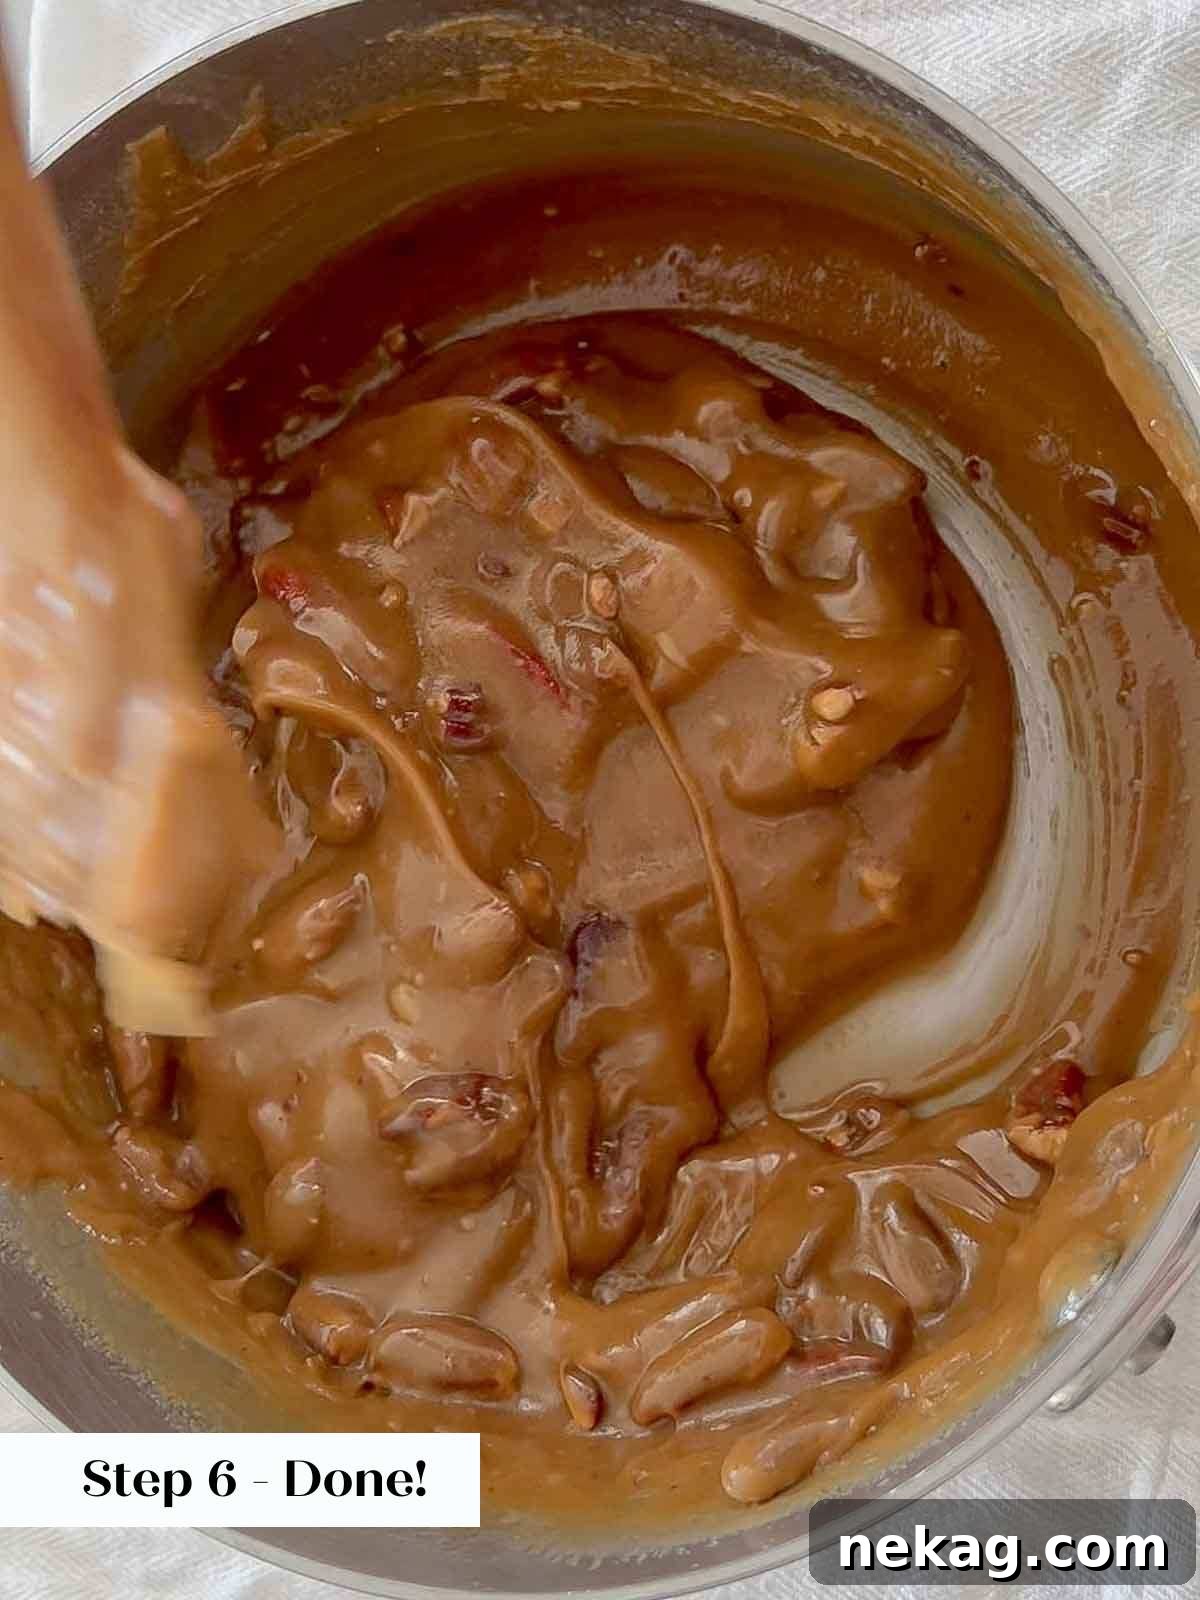
Step 6: After the 10-minute cooling period, add the vanilla extract to the mixture. Begin beating the candy vigorously by hand with a sturdy wooden spoon for about 2 minutes. The mixture will start to thicken and change texture. Next, stir in the toasted pecans. Continue beating by hand until the mixture visibly loses its glossy sheen and takes on a duller, more opaque appearance. This indicates it’s ready for portioning.
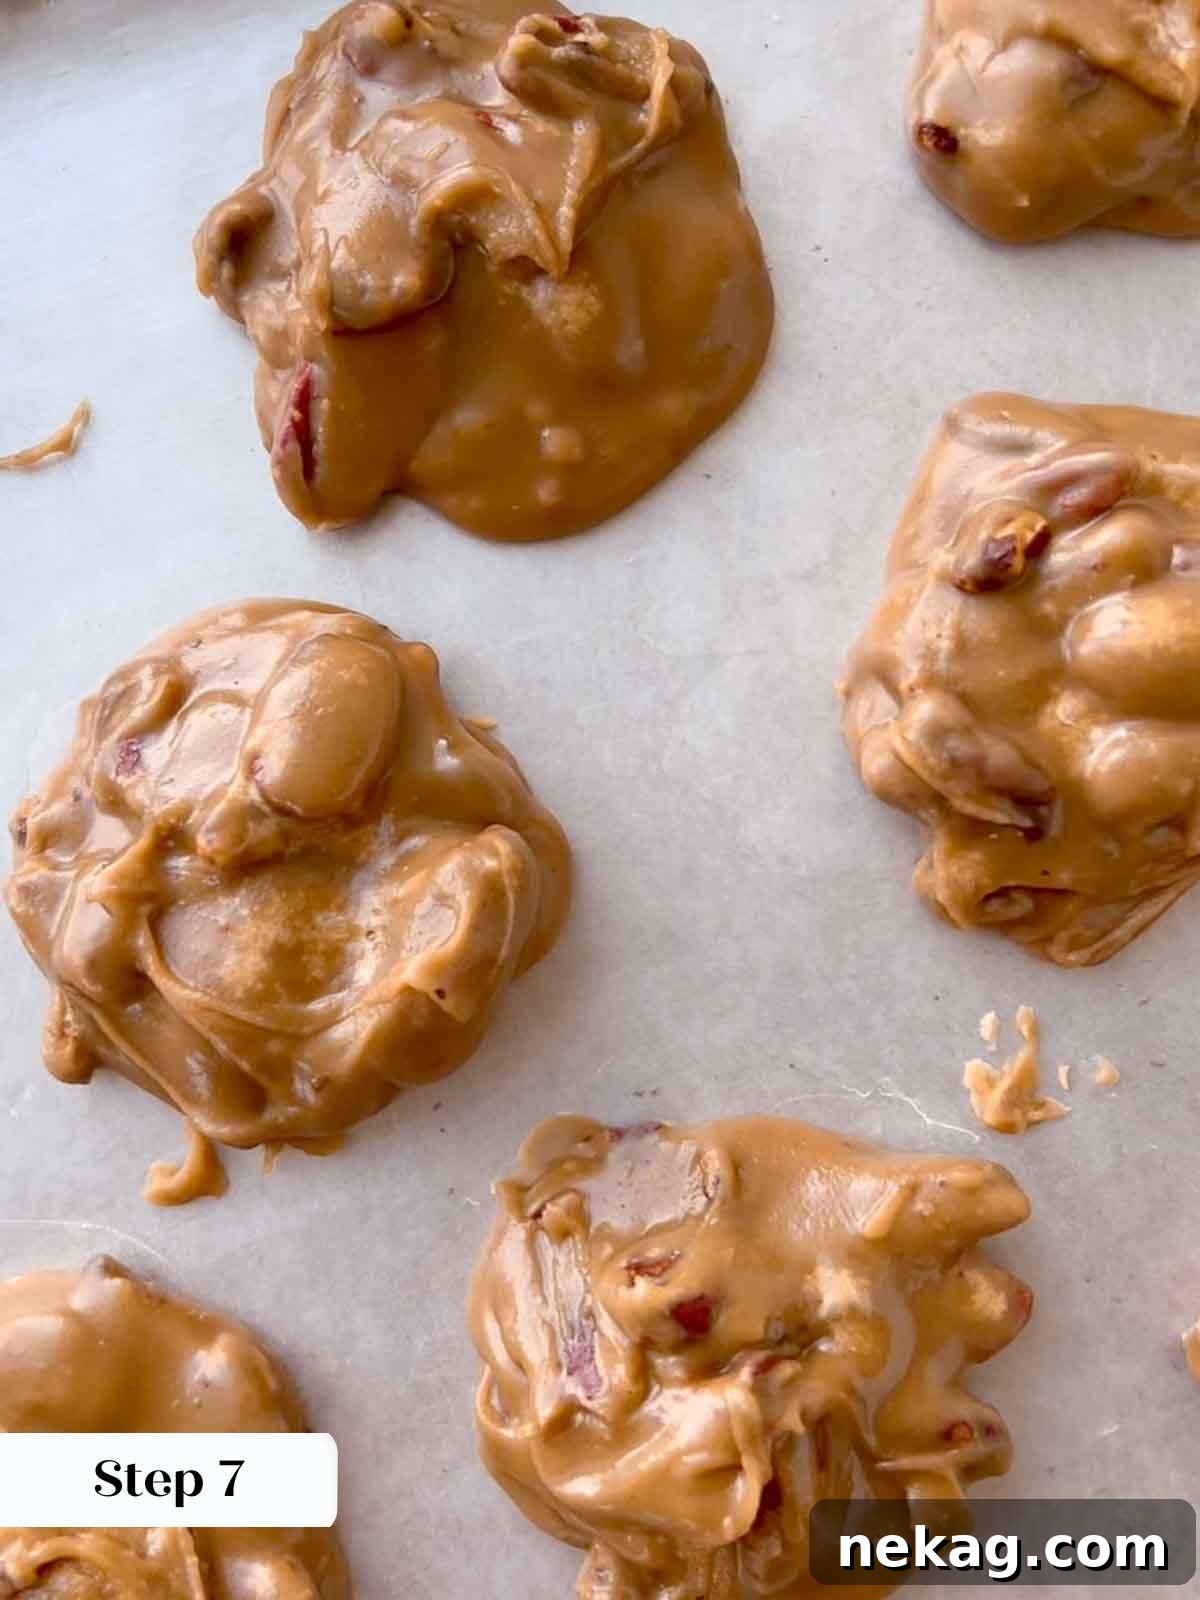
Step 7: Working quickly, use a spoon to drop spoonfuls of the praline mixture onto your waxed paper-lined baking sheets. The mixture will stiffen rapidly as it cools, so efficiency is key. It’s important not to scrape the sides or bottom of the pot at this stage. Similar to fudge, the outermost layer of candy in contact with the pot often crystallizes, and incorporating it will result in grainy pralines.
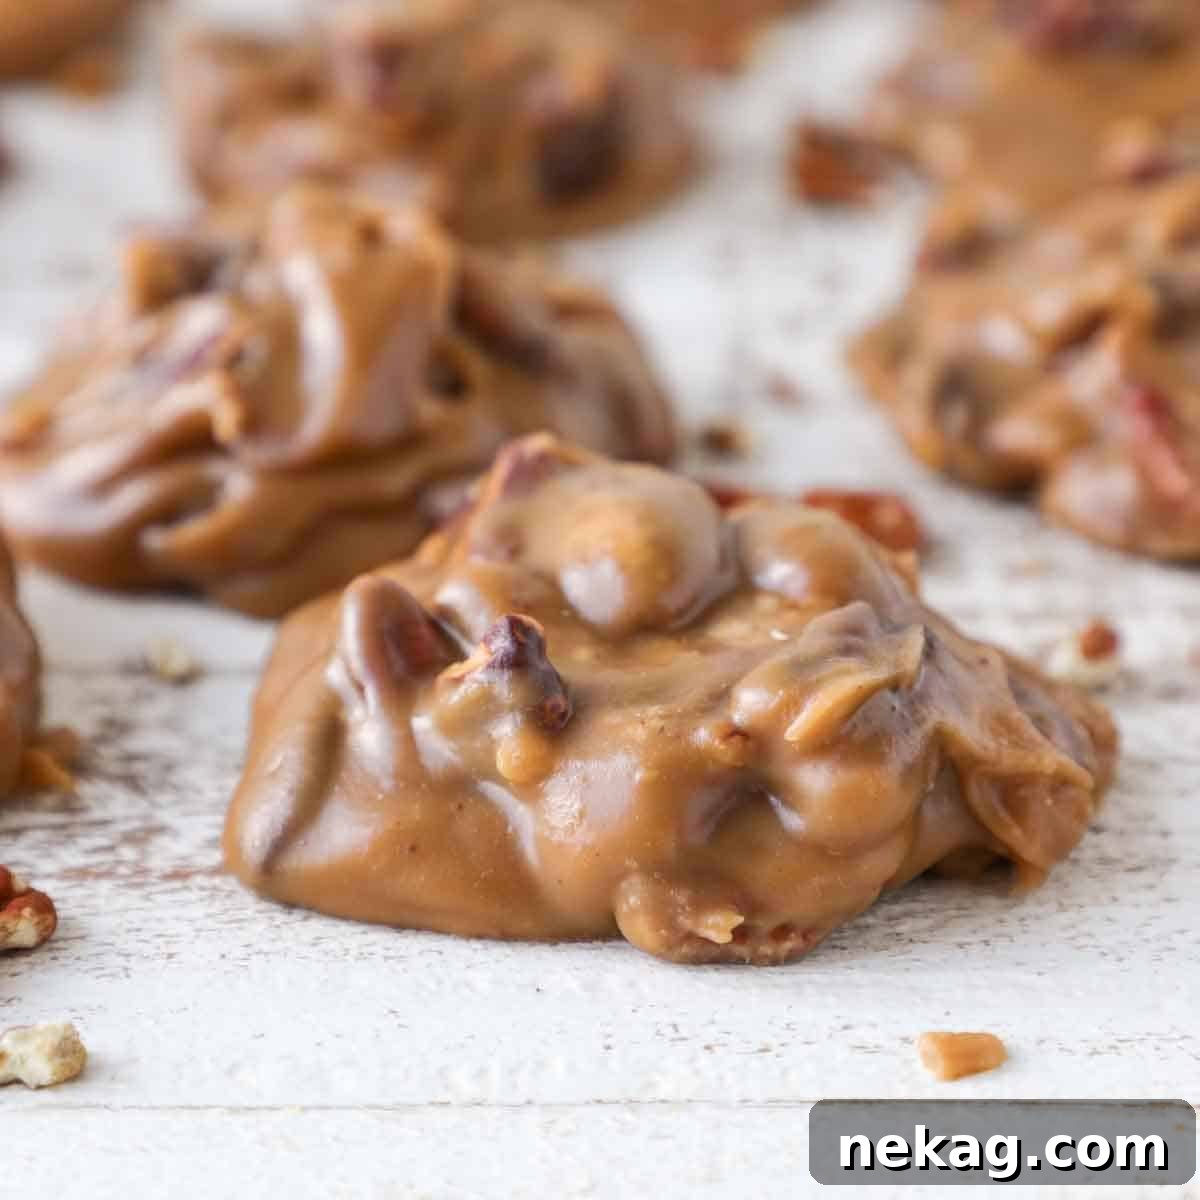
The timing for portioning is everything! Pralines dropped while still too warm will spread excessively, creating thin, flat candies. Conversely, if you wait too long and the mixture cools too much, they will become overly crystallized and difficult to drop smoothly. The sweet spot is right after the candy loses its gloss and achieves a honey-like thickness, just before it hardens. From experience, getting all 16 pralines perfectly portioned in this fleeting window can be a challenge, even for pros! Work swiftly!
Step 8: Allow the dropped pralines to set completely at room temperature. Once firm, they are ready to be enjoyed!
Chef Lindsey’s Expert Recipe Tip
A high-quality candy thermometer is an indispensable tool for praline making. I highly recommend one that clips securely to the side of your pot, allowing for continuous and accurate temperature monitoring. Before you begin, always calibrate your thermometer by placing it in a pot of vigorously boiling water. It should read 212°F (100°C). If it doesn’t, adjust your target temperature accordingly (e.g., if it reads 210°F, aim for 233°F for the softball stage).
Frequently Asked Questions About Pecan Pralines
To maintain their fresh taste and texture, store your pecan pralines at room temperature in an airtight container for up to one month. For best results, place sheets of parchment paper or waxed paper between layers of pralines to prevent them from sticking together. Be mindful that pralines are sensitive to humidity; very humid days can cause them to become sticky, so try to make this recipe during drier months if possible. Avoid storing them near heat sources like a stove or oven.
The final hardness of any sugar-based candy, including pralines, is directly determined by the cooking temperature of the sugar syrup. For pecan pralines to set properly and achieve the desired texture, the mixture absolutely must reach 235°F (113°C), which is the soft-ball stage. Removing the pot from the heat at the lower end of the desired temperature range (e.g., exactly 235°F) is important to account for carry-over cooking, which can raise the temperature slightly after removal. If your pralines aren’t hardening, double-check your candy thermometer’s accuracy by testing it in boiling water; it should read 212°F (100°C). An inaccurate thermometer is a common culprit.
While a tiny bit of crystallization can occur, several professional techniques minimize it significantly. Adding a small amount of corn syrup acts as an invert sugar, helping to prevent large sugar crystals from forming. In this recipe, I also recommend buttering the sides of your pot and strictly limiting stirring to only before the sugar mixture comes to a boil. Most importantly, after the candy reaches the soft-ball stage, it is crucial to let it cool undisturbed for 10 minutes without any agitation. These steps collectively help maintain a smooth, non-grainy texture by inhibiting the formation of large sugar crystal structures.
Yes, it is possible to make pecan pralines without a candy thermometer, but it requires diligent attention and the traditional “ice bath method.” To do this, fill a small bowl with ice water. Every few minutes during cooking, drop a tiny spoonful of the hot sugar syrup into the ice water. If it dissolves immediately, it’s not ready. When the syrup forms a small, soft, pliable ball that you can easily squish between your fingers in the ice water, it has reached the soft-ball stage (235°F). This method requires practice and precision, so a thermometer is highly recommended for consistent results.
Seizing typically occurs if the praline mixture is over-beaten or cools too rapidly during the final stirring stage, causing it to harden prematurely. If your mixture begins to seize or becomes too stiff to portion, you can attempt to rescue it. Add a teaspoon of hot water at a time to the mixture in the pot, stirring vigorously. This can help to loosen it up enough to allow you to drop the remaining candy onto your baking sheets. While the texture might be slightly more granulated than ideal, it will still be delicious.
Absolutely! Pecan pralines made using this recipe are robust enough to make excellent gifts and ship surprisingly well. To ensure they arrive in perfect condition, pack them securely in an airtight tin or sturdy box. Pad any empty spaces with tissue paper or crinkled parchment to prevent them from shifting and getting damaged during transit. Ensure they are completely cool and firm before packing.
If you tried this recipe and absolutely loved it, please take a moment to leave a 🌟 star rating and share your thoughts in the comments below. Your feedback makes my day!
Pecan Pralines
Chef Lindsey
10
20
30
16 pralines
Comment
Print Recipe
Ingredients
- 1 tablespoon unsalted butter
- 1 ½ cups light brown sugar
- 1 ½ cups granulated sugar
- ¼ teaspoon kosher salt
- 3 tablespoons dark corn syrup
- 1 cup whole milk
- 1 teaspoon vanilla extract
- 1 ½ cups pecan halves toasted
Instructions
-
Line 2 baking sheets with waxed paper. You can also use aluminum foil that has been lightly sprayed with cooking spray.
-
Butter the sides of a 3-quart heavy-bottomed sauce pot. A heavy-bottomed pot will produce the best pralines.
-
In the pot, combine sugars, salt, corn syrup, and milk. Stir in order to wet the sugars. Stir carefully to keep as little sugar from getting on the sides of the pot as possible.
-
Cook over medium heat and stir frequently until sugar dissolves. Ideally, you want the sugar to dissolve before the mixture comes to a boil. This will help ensure the sugar doesn’t crystallize.
-
Bring mixture to a boil. Affix a candy thermometer to the side of the pot and cook until the softball stage is reached (235°F), stirring occasionally.
-
Remove from heat and cool for 10 minutes.
-
Add vanilla extract and beat by hand with a wooden spoon for 2 minutes. Add the pecans and continue beating by hand with a wooden spoon until the mixture loses its gloss.
-
Drop by the spoonful onto waxed paper-lined baking sheets. Work quickly because the mixture stiffens as it cools. Do not scrape the sides of the pot. Like fudge, that outermost layer of candy will be crystallized.
-
Pralines dropped while too warm will spread, but those dropped when cooler will be more crystallized. The ideal moment is right after the candy mixture loses its gloss but before it starts to harden. It is difficult to get all 16 pralines from the pot onto the baking sheet in that window – work quickly!
Video Tutorial
Recipe Notes
Presentation Tip: The moment the mixture loses its gloss and reaches a thick, honey-like consistency, start dropping it by the spoonful onto your prepared baking sheets. Working quickly at this stage is the key to achieving the shiniest and most appealing pralines.
Crucial Technique: Do NOT skip the 10-minute cooling step after removing the pot from heat! This undisturbed cooling is absolutely essential to prevent your pralines from crystallizing due to over-stirring at high temperatures.
Storage: Store your homemade pralines at room temperature in an airtight container for up to one month. For best results, place sheets of waxed paper or parchment paper between layers to prevent sticking.
Recipe adapted from Better Homes & Gardens Cookies and Candies, 1971 Edition.
Nutrition Information (per praline)
Carbohydrates: 44g |
Protein: 1g |
Fat: 9g |
Saturated Fat: 1g |
Polyunsaturated Fat: 2g |
Monounsaturated Fat: 4g |
Trans Fat: 0.03g |
Cholesterol: 4mg |
Sodium: 60mg |
Potassium: 95mg |
Fiber: 1g |
Sugar: 43g |
Vitamin A: 52IU |
Vitamin C: 0.1mg |
Calcium: 44mg |
Iron: 0.4mg
Candy & Chocolate
American, Southern
249
Enjoyed this recipe? Leave a comment below!
Explore More Delicious Recipes
I sincerely hope you enjoyed making and tasting this professional chef-tested recipe for Southern Pecan Pralines. These delightful candies are perfect for sharing or savoring yourself. Don’t stop here! Be sure to explore our other delicious homemade candy recipes, perfect for any occasion. Or, if you’re looking for more thoughtful homemade gift ideas, consider trying our decadent bourbon chocolate truffles. Happy baking and candy making!