
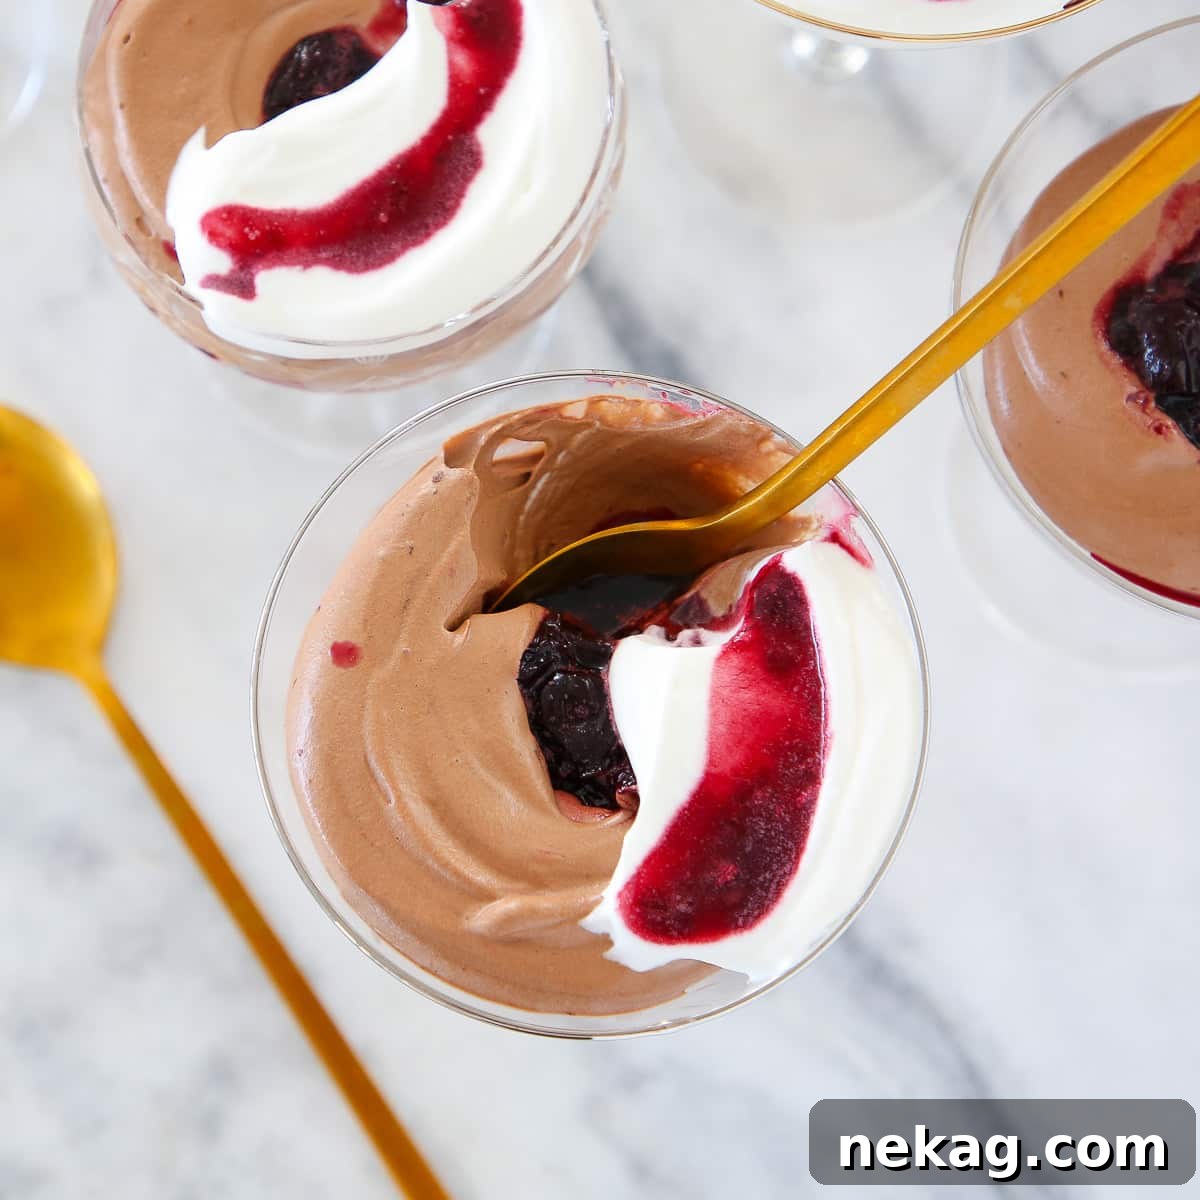
Decadent Dark Chocolate Mousse with a Luscious Cherry Swirl
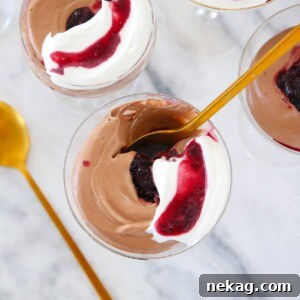
This exquisite chocolate mousse recipe promises a truly rich and deeply chocolate experience, beautifully complemented by an easy-to-make, vibrant cherry sauce. Designed to be incredibly smooth and light, each spoonful melts delicately in your mouth. What makes this recipe truly remarkable is its simplicity: you can create this show-stopping dessert in just 30 minutes using only 4 core ingredients! Crowned with a delicate unsweetened whipped cream, it offers the perfect balance of flavors and textures, making it an ideal treat for any occasion.
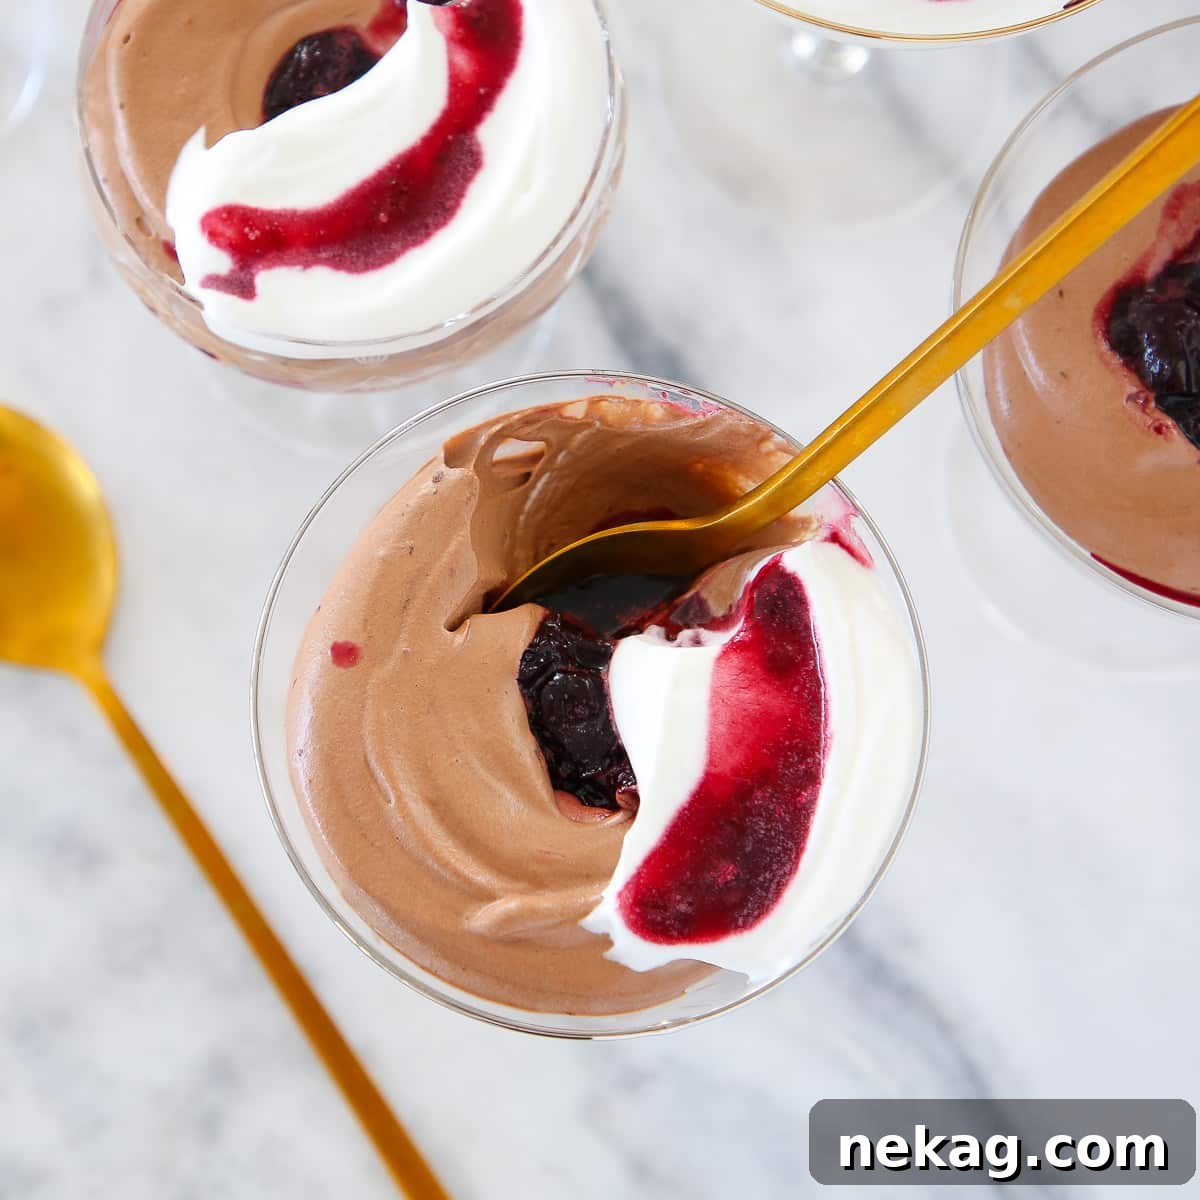
Prepare to elevate your dessert game with this full-bodied dark chocolate mousse. It features a luxurious, kirsch-infused cherry sauce that adds a touch of sophistication, perfectly balanced by a delicate unsweetened whipped cream. This recipe delivers all the intense chocolate flavor you crave without sacrificing an ounce of that coveted airy, smooth texture. It stands out as one of our most popular and easy chocolate desserts. If you’re a true chocolate aficionado and want to indulge further, explore our best chocolate ice cream recipe, our easy chocolate pie, or a classic chocolate pudding recipe for more delightful treats.
Table of Contents
- Why You Will Love This Easy Chocolate Mousse Recipe
- Essential Equipment You’ll Need
- Professional Tips for the Best Chocolate Mousses
- Key Ingredients Explained
- Substitutions for Raw Eggs & Other Variations
- How to Make Chocolate Mousse: Step-by-Step Guide
- Chef Lindsey’s Recipe Tip
- Popular Questions About This Dish (FAQ)
- Printable Chocolate Mousse Recipe Card
- Before You Go
Why You Will Love This Easy Chocolate Mousse Recipe: Unlocking Decadence in Minutes
- A Symphony of Complex Chocolate Flavor: This mousse isn’t just sweet; it offers a luxurious depth of silky chocolate flavor that is both intense and perfectly balanced. The dark chocolate provides a subtle hint of bitterness, beautifully complemented by the rich notes of kirsch in the cherry swirl. Each bite is a sophisticated interplay of sweet, tart, and deeply chocolatey nuances that will tantalize your taste buds and leave a lasting impression.
- Simplicity Beyond Expectation: Don’t let the elegant appearance of mousse intimidate you. This recipe proves that making a truly decadent dessert doesn’t have to be complicated. We’ll guide you through each step, debunking common myths and avoiding typical pitfalls. Before you know it, you’ll be confidently whipping up this ethereal dessert, whether for a special holiday gathering or simply to elevate a casual Tuesday night dinner into an extraordinary culinary experience.
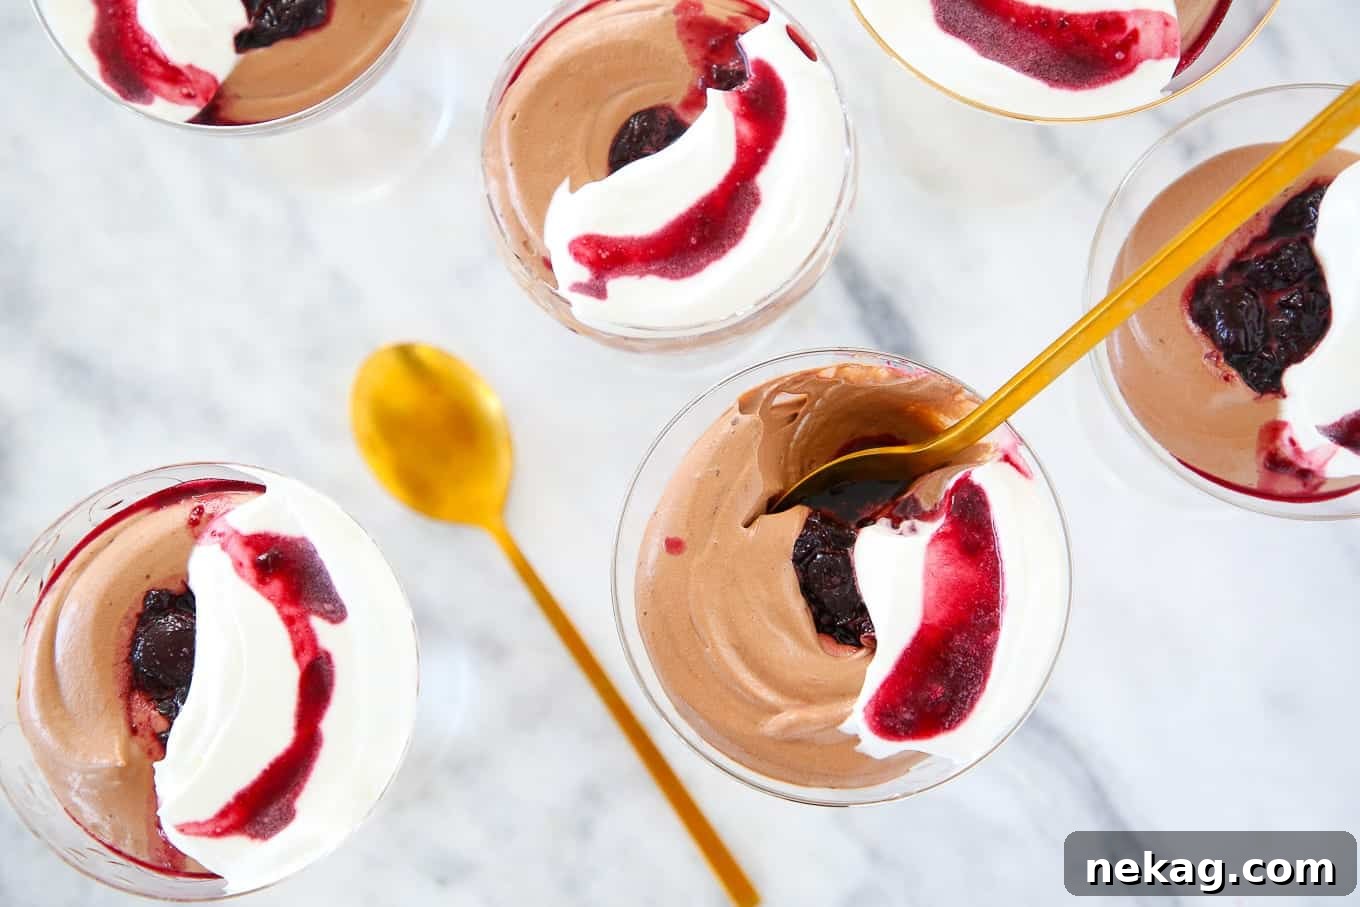
- Perfect for Any Special Occasion: This dessert is the epitome of versatility and elegance. It’s an ideal choice for romantic Valentine’s Day celebrations, sophisticated dinner parties, or an intimate date night. For larger gatherings or buffet-style service, you can easily pipe this light-as-air mousse into elegant shot glasses or miniature coupes, creating a stunning passed dessert that’s both charming and effortlessly manageable. Remember to have those mini spoons ready for a delightful presentation!
Essential Equipment You’ll Need for Perfect Mousse
Having the right tools can make all the difference in achieving that flawless chocolate mousse. Here’s a list of essential equipment that will simplify your preparation:
- Small Saucepan: For preparing the cherry sauce. A non-stick pan is ideal to prevent burning.
- Stand Mixer or Hand Mixer: Crucial for whipping the heavy cream to perfect medium peaks and beating the egg yolks and sugar. A stand mixer offers hands-free convenience.
- Heatproof Bowl (for Bain-Marie): If you prefer the double boiler method for melting chocolate, ensure the bowl fits snugly over a saucepan without touching the simmering water.
- Rubber Spatula: Essential for scraping down bowls, folding ingredients gently, and ensuring uniform blending without deflating the mousse.
- Whisk Attachment: For your stand or hand mixer, to achieve airy whipped cream and foamy egg yolks.
- Serving Glasses or Coupes: Elegant vessels to showcase your beautiful mousse.
- Measuring Cups and Spoons: Accurate measurements are key in baking and pastry.
- Kitchen Scale (Optional but Recommended): For precise ingredient measurement, especially for chocolate and cream.
- Fine-Mesh Sieve (Optional): To strain the cherry sauce for an even smoother consistency, if desired.
Professional Tips for the Best Chocolate Mousse: Mastering the Art of Airiness
Achieving a perfectly light and airy chocolate mousse requires attention to detail. Follow these professional insights to ensure your dessert turns out flawless every time:
- Timing is Everything: Prepare Your Components in Advance. Precision in pastry often comes down to timing. Before you even think about combining ingredients for your mousse, ensure your heavy cream is perfectly whipped to medium peaks and chilled in the refrigerator. This critical step ensures it’s ready to be incorporated as soon as your chocolate mixture is at the ideal temperature, preventing any unwanted delays that could compromise the mousse’s delicate structure.
- Temperature Control: The Golden Rule for Silky Smooth Mousse. The most crucial aspect of making mousse is managing temperatures. You’ll be introducing warm, melted chocolate into cold whipped cream. The challenge lies in finding that precise sweet spot: the chocolate needs to be warm enough to be liquid and incorporate smoothly, but not so hot that it will “melt” or “soupify” your beautifully whipped cream. Conversely, if the chocolate cools too much, it will seize and become difficult, if not impossible, to blend uniformly into the cream. Aim for the chocolate to be just above body temperature – it should feel comfortably warm to the touch, not hot. This allows for seamless integration without compromising the airy texture.
- Embrace the “Sacrifice” Technique for Effortless Folding. In the culinary world, particularly in pastry, “sacrificing” refers to taking a small portion of your aerated ingredient (like meringue or whipped cream) and folding it vigorously into a denser base (like your chocolate-egg yolk mixture). This initial aggressive fold thins out the thicker base, making it much easier to incorporate the remaining, larger portion of delicate whipped cream. By sacrificing a small amount of aeration upfront, you allow for gentler, fewer folds later on, thus preserving the maximum airiness and light texture of your final mousse. It’s a small step that yields significant results in texture.
Key Ingredients Explained: Building Your Mousse Flavor Profile
Understanding the role of each ingredient is essential for perfecting this chocolate mousse. Here’s a detailed look at what goes into this decadent dessert:
- Frozen Black Cherries (Thawed): For the vibrant cherry sauce, I specifically recommend using thawed frozen black cherries. Their lightly floral and sweet-tart profile is unparalleled, providing a classic Black Forest flavor. While black cherries are preferred, tart cherries can also be used for a more pronounced tangy contrast.
- Citric Acid: A secret weapon for balancing sweetness and brightening flavors. Citric acid adds a neutral acidity that tempers the sweetness of the cherries and chocolate, preventing the dessert from becoming cloyingly rich. If you don’t have it on hand, you can omit it, or substitute with a tiny squeeze of lemon or lime juice for a similar effect.
- Almond Extract: This extract enhances the fruity notes of the cherries and complements the dark chocolate beautifully, adding a subtle, sophisticated marzipan-like aroma that is characteristic of traditional Black Forest desserts.
- Kirsch (Cherry Brandy): This cherry-flavored liqueur is a cornerstone of Black Forest desserts. It deepens the cherry flavor, adds a subtle alcoholic warmth, and contributes to the overall complexity. For non-alcoholic alternatives, cherry extract or even rum can be considered, though kirsch offers an authentic touch.
- Egg Yolks: Much like in my favorite French Hot Chocolate, the fat in egg yolks is crucial. They contribute to the mousse’s luxurious thickness and incredibly rich, creamy texture without adding excess moisture, which egg whites might. They also help to emulsify the chocolate, creating a stable and smooth base.
- Granulated Sugar: Beyond its role in sweetness, sugar plays a structural role when beaten with egg yolks, creating a light, aerated sabayon-like mixture. Remember to adjust the sugar content in your cherry sauce based on the natural tartness of your chosen cherries to maintain perfect balance.
- Semi-Sweet Chocolate: The heart of our mousse. Use a high-quality semi-sweet chocolate with a cocoa content of 60-70% for the best flavor and texture. This balance provides deep chocolate notes without being overly bitter. Chopping the chocolate finely ensures even melting.
- Heavy Cream: This is the primary aerating agent for the mousse. Always use full-fat heavy cream, sometimes labeled as heavy whipping cream, with at least 36% milk fat. Lighter whipping creams will not whip to the same stable consistency, are prone to over-whipping, and will result in a less smooth and less stable mousse. Ensure it’s very cold for optimal whipping.
For precise quantities and a comprehensive overview, please refer to the complete recipe card below.
Substitutions for Raw Eggs & Other Delicious Variations
This recipe is incredibly versatile, allowing for several adjustments to suit dietary preferences or simply to experiment with different flavor profiles. Here are some ideas:
- Addressing Raw Eggs: While the egg yolks in this mousse are technically not cooked to a high temperature, they are emulsified and play a vital role in texture. If concerns about raw eggs persist, you have a few safe options:
- Pasteurized Egg Yolks: Many grocery stores offer pasteurized egg yolks in cartons, which are safe for consumption without cooking.
- Pasteurized Eggs: You can also buy whole pasteurized eggs and separate the yolks.
- Tempered Egg Yolks: For a more involved but safer approach, you can gently temper the egg yolks with a small amount of the warm melted chocolate, continuously whisking them over a double boiler until they reach 160°F (71°C) before proceeding with the recipe.
- Flavorful Extract Alternatives:
- Vanilla Instead of Almond: While almond extract pairs wonderfully with cherries, you can easily replace it with ⅛ teaspoon of high-quality vanilla extract for a more classic profile.
- Liquor Swaps: The kirsch adds a distinct cherry note, but feel free to experiment with other liqueurs. A touch of rum can add warmth, while cherry extract provides a non-alcoholic boost of cherry flavor. Personally, I find that brandy contributes a beautiful depth to this flavor combination, similar to how it enhances my Cherry Almond Pound Cake.
- Exploring Different Chocolates: The type of chocolate greatly influences the final flavor:
- Bittersweet Chocolate: For a more intense, less sweet mousse, consider using a mix of semi-sweet and bittersweet chocolate, as I do in my cream cheese chocolate chip cookies. Just be sure to adjust the overall sugar content to keep the elements balanced.
- Milk Chocolate: For a milder, sweeter mousse, milk chocolate can be used, though it might result in a slightly less stable texture due to its lower cocoa butter content.
- White Chocolate: For a complete departure, embrace the delicate sweetness of white chocolate! You can adapt this recipe to create a stunning white chocolate mousse, much like my popular White Chocolate Raspberry Mousse, by adjusting sweetness and potentially using a different fruit pairing.
How to Make Chocolate Mousse: A Step-by-Step Guide to Perfection
Creating this elegant chocolate mousse is simpler than you might imagine. Follow these detailed steps to achieve a perfectly airy and flavorful dessert.
Further details and exact measurements can be found in the recipe card below.
Make the Black Cherry Sauce, if desired:
This sauce adds a wonderful tart-sweet contrast and a beautiful visual swirl. If you prefer a plain chocolate mousse, you can skip this section.
Step 1: Prepare the Cherry Sauce. In a small saucepan, combine the thawed frozen black cherries (including any juices released during thawing), the specified amount of sugar, a pinch of citric acid (if using), and almond extract. Place the saucepan over medium heat. Bring the mixture to a gentle simmer, stirring occasionally, and cook until the sauce thickens enough to coat the back of a spoon or hold a clear line when you run your finger across a spatula dipped in it. This usually takes about 5-8 minutes.
Step 2: Cool the Cherry Sauce Completely. Once the sauce has reached the desired consistency, immediately pour it into a clean bowl. It is absolutely crucial that the cherry sauce cools down completely before you even think about adding it to your mousse. If the sauce is still warm, even slightly, it will melt and deflate the delicate whipped cream and mousse structure, resulting in a soupy rather than airy dessert.
Pro Tip for Quicker Chilling: To expedite the cooling process for your cherry sauce, place the bowl of hot sauce into a larger bowl filled with ice water (an “ice bath”). Stir the sauce occasionally until it is thoroughly chilled. This can significantly reduce cooling time.
Make the Mousse & Assemble:
Now, let’s bring together the core components for your magnificent chocolate mousse.
Step 3: Whip the Heavy Cream. Using either a stand mixer fitted with the whisk attachment or a hand mixer, whip the cold heavy cream until it reaches medium peaks. Medium peaks hold their shape but still have a slight curl at the tip when the whisk is lifted. Be careful not to over-whip, as this can result in a grainy texture. Once whipped, immediately transfer the cream to the refrigerator to keep it cold and stable while you prepare the chocolate mixture.
Chef’s Scale Tip: If you’re proficient with a kitchen scale, you can whip the total amount of heavy cream needed for both the mousse and the topping all at once. Then, simply divide it by weight according to the recipe’s requirements. This saves a washing step!
Step 4: Melt and Cool the Chocolate. Place your finely chopped semi-sweet chocolate in a heatproof bowl. Melt the chocolate either over a bain-marie (a bowl set over a saucepan of gently simmering water, ensuring the bowl does not touch the water) or in the microwave in 30-second intervals, stirring well after each interval, until completely smooth. Once melted, remove the chocolate from the heat (or microwave) and allow it to cool down to just above body temperature. The chocolate should feel comfortably warm to the touch, but not hot. This temperature is crucial for smooth incorporation into the egg yolk mixture without seizing or melting the cream.
Step 5: Prepare the Egg Yolk and Sugar Base. In the clean bowl of a stand mixer (or using a hand mixer), beat the egg yolks and granulated sugar together on medium-high speed. Continue beating until the mixture has tripled in volume, becoming pale yellow and thick enough to form a “ribbon” when the whisk is lifted (this means it leaves a trail that slowly dissolves back into the mixture). Now, with the mixer still running on low, gradually pour the slightly cooled, melted chocolate into the egg yolk mixture. Beat well until fully combined. This mixture will thicken considerably and quickly. Work swiftly during this step to ensure it remains pliable. Use a rubber spatula to scrape down the sides of the bowl frequently, ensuring all ingredients are uniformly blended.
Step 6: Fold in the Whipped Cream (The “Sacrifice” Method). This is where the magic happens for an airy mousse. Take a small amount (about ⅓ to ½ cup) of your chilled whipped cream and add it to the thickened chocolate-egg yolk mixture. Fold this portion aggressively to lighten and thin out the chocolate base. Don’t worry about deflating it too much at this stage; this “sacrifice” step is intentional. Once the initial portion is incorporated, gently add the remaining whipped cream to the chocolate mixture. Using a rubber spatula, fold gently and quickly with a light hand until just combined. Over-mixing will deflate the mousse. Spoon or pipe the mousse immediately into your chosen serving containers.
Piping Mousse: You can use a piping bag with a large round tip to elegantly pipe the mousse into coupes or serving dishes. Keep in mind that piping can sometimes compress the mousse slightly, making the final texture a bit denser than simply spooning it.
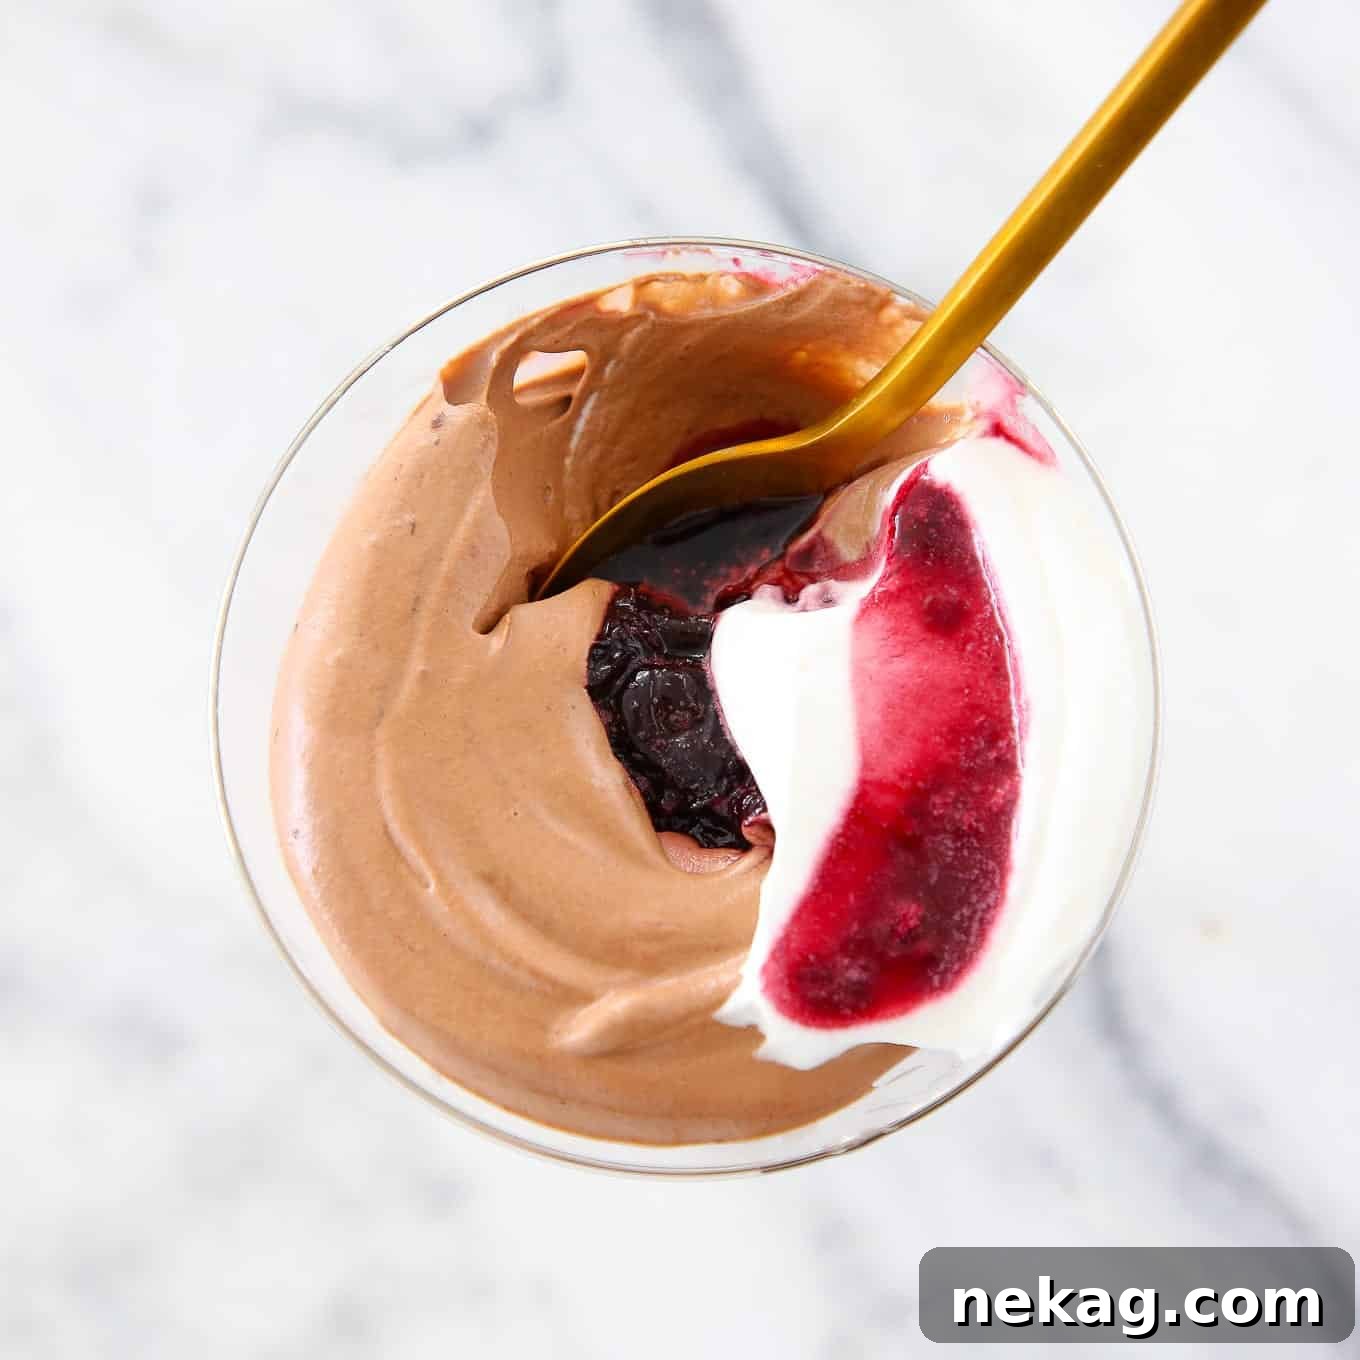
Step 7: Assemble and Chill. If using, dollop a small amount of the cooled black cherry sauce directly into the center of each mousse-filled container. You can gently swirl it with a toothpick for a marbling effect, or for a more integrated flavor, you can gently stir the cold cherry sauce into the mousse before spooning it into containers. Finally, spread a dollop of unsweetened whipped cream on top of each mousse. For best results, cover the serving dishes with plastic wrap and refrigerate for at least two hours, or ideally overnight, before serving. This chilling time allows the mousse to set properly and flavors to meld.
Chilling for Texture: The longer the mousse is allowed to chill and set in the refrigerator, the more stable and cloud-like its texture will become. Avoid leaving it at room temperature for extended periods.
Chef Lindsey’s Recipe Tip: The Importance of Patient Chilling
For an unparalleled melt-in-your-mouth experience and perfectly developed flavor, I always recommend allowing my mousse to chill in the refrigerator for a minimum of two hours, or even better, overnight. This extended setting time not only improves the overall depth of its chocolate and cherry flavors but also ensures it maintains that delicate, cloud-like, ethereal texture that defines a truly exceptional mousse. Don’t rush this final, crucial step!
Popular Questions About This Dish (FAQ)
Proper storage is key to enjoying your chocolate mousse over time. Store it in the refrigerator, covered tightly with plastic wrap to prevent any absorption of refrigerator odors and to maintain its fresh texture. It will remain delicious for up to a week. For longer preservation, chocolate mousse freezes beautifully for up to 2 months. If you plan to freeze it, I highly recommend adding the fresh whipped cream topping just before serving to ensure the best texture and appearance.
At its core, a mousse is a light and airy dessert (or savory dish) characterized by its foamy, delicate texture. This texture is achieved by folding a flavorful base into a light, aerated component, most commonly whipped cream or whipped egg whites (meringue). The base itself can vary widely; for a simple chocolate mousse, it’s often just melted chocolate, while more traditional versions might use a custard-like vanilla crème anglaise, often stabilized with gelatin. A classic mousse typically includes egg yolks beaten with sugar for additional richness and volume, though many modern recipes simplify this step. Critically, the base must also contain an ingredient that will “set” or firm up the mousse when chilled, such as chocolate (which solidifies as it cools) or gelatin, giving it its characteristic stable yet airy structure.
A soupy or runny mousse is a common issue, and it typically occurs because its delicate structure was either improperly built or destroyed during preparation. Here are the most common reasons:
- Chocolate Temperature: The most frequent culprit is adding the melted chocolate when it’s still too hot. Hot chocolate will instantly melt and deflate your carefully whipped cream, turning the mixture into a liquid. Always ensure your melted chocolate has cooled to just above body temperature (comfortably warm to the touch) before combining.
- Under-whipped Cream: If your heavy cream wasn’t whipped to firm enough medium peaks, it won’t provide sufficient structure to hold the mousse. The cream needs to be stable enough to support the weight of the chocolate mixture.
- Over-mixing: After incorporating the chocolate mixture into the whipped cream, over-folding can deflate the air bubbles, resulting in a dense, soupy texture. Always fold gently and only until just combined.
- Insufficient Setting Agent: Chocolate is the primary setting agent in this recipe. If the chocolate wasn’t properly incorporated or if the mousse wasn’t chilled for long enough, it won’t solidify adequately. Chocolate provides structure as it cools, so proper incorporation and chilling are vital for setting.
Ensure your chocolate is at the correct temperature, your cream is properly whipped, and you fold gently for a perfectly structured mousse.
While this recipe uses egg yolks for richness and texture, it is possible to make an egg-free chocolate mousse. You would typically replace the egg yolks with a combination of additional melted chocolate (to provide setting power) and perhaps a small amount of gelatin or agar-agar for stabilization. The result will still be delicious but may have a slightly different texture than an egg-yolk-enriched version. For a truly egg-free option, look for recipes specifically designed as “vegan chocolate mousse” which often use silken tofu, avocado, or aquafaba for structure.
The quality of your chocolate will directly impact the flavor of your mousse. For this dark chocolate mousse, a high-quality semi-sweet chocolate with a cocoa content of 60-70% is ideal. This range offers a deep, rich chocolate flavor without being overly bitter. Brands like Valrhona, Callebaut, Ghirardelli, or Scharffen Berger are excellent choices. Avoid using chocolate chips, as they often contain stabilizers that prevent smooth melting and can lead to a grainy texture.
If you tried this wonderful recipe and absolutely loved it, please don’t hesitate to leave a 🌟 star rating and share your experience in the comments section below. Your feedback truly brightens my day and helps other home bakers discover fantastic recipes!
Decadent Black Forest Chocolate Mousse
Chef Lindsey
10 minutes
30 minutes
6
people
Pin Recipe
Comment
Print Recipe
Ingredients
For the Cherry Sauce:
- 6 oz frozen black cherries thawed
- 3 ½ tablespoon sugar
- ⅛ teaspoon citric acid
- ⅛ teaspoon almond extract
- ½ tablespoon kirsch or other liquor
For the Chocolate Mousse:
- 4 egg yolks
- 3 tablespoons sugar
- 1 ¼ cups semi-sweet chocolate chopped
- 1 ½ cups heavy cream
For Topping:
- ½ cup heavy Cream for topping (unsweetened)
Instructions
Make the black cherry sauce, if desired:
-
Combine cherries (and their juices), 3½ tablespoon sugar, citric acid, and almond extract in a small saucepan. Cook on medium heat, stirring occasionally, until the sauce thickens and holds a line on a spatula.
-
Pour the sauce into a bowl and cool completely. An ice bath can be used for quicker chilling. Ensure it is very cold before adding to the mousse to prevent deflation.
Make the mousse & assemble:
-
Whip 1½ cups heavy cream to medium peaks using a stand mixer with the whisk attachment or a hand mixer. Immediately place the whipped cream in the refrigerator to keep it cold.
-
Melt the 1¼ cups chopped semi-sweet chocolate either in a bain-marie (over simmering water) or in the microwave in 30-second intervals, stirring until smooth. Allow the melted chocolate to cool to just above body temperature (it should feel warm to the touch, not hot).
-
In the bowl of a stand mixer, beat the 4 egg yolks and 3 tablespoons sugar until the mixture is tripled in volume and pale yellow. Add the cooled melted chocolate and beat well until thoroughly combined. The mixture will thicken considerably, so move quickly. Scrape down the sides of the bowl with a rubber spatula to ensure uniform blending.
-
Sacrifice some whipped cream (about ⅓ cup) by adding it to the chocolate mixture. Fold aggressively to lighten and incorporate it. Then, quickly and gently fold the lightened chocolate mixture into the remaining whipped cream until just combined. Spoon or pipe the mousse immediately into your serving containers.
-
Dollop a bit of the cold cherry sauce into the center of the mousse (or swirl it in). Spread a bit of the ½ cup unsweetened whipped cream on top. Refrigerate the mousse for at least 2 hours, or overnight, before serving to allow it to set and flavors to deepen.
Video
Notes
Variations – You could replace the almond extract with ⅛ teaspoon of quality vanilla extract for a classic touch. Alternatively, you could swap the kirsch with some cherry extract for a non-alcoholic version, or even use brandy for a different aromatic depth.
Storage – Store your chocolate mousse in the refrigerator, covered tightly with plastic wrap, for up to a week. It also freezes well for up to 2 months. If freezing, it’s best to add the fresh whipped cream topping just before serving for optimal texture.
Nutrition
Calories: 587kcal
|
Carbohydrates: 38g
|
Protein: 7g
|
Fat: 46g
|
Saturated Fat: 27g
|
Polyunsaturated Fat: 2g
|
Monounsaturated Fat: 13g
|
Trans Fat: 0.03g
|
Cholesterol: 221mg
|
Sodium: 32mg
|
Potassium: 345mg
|
Fiber: 3g
|
Sugar: 31g
|
Vitamin A: 1721IU
|
Vitamin C: 3mg
|
Calcium: 95mg
|
Iron: 3mg
Dessert
French
587
Like this? Leave a comment below!
Before You Go: Explore More Deliciousness
I genuinely hope you enjoyed crafting and savoring this professional chef-tested chocolate mousse recipe. It’s a true testament to how simple ingredients and smart techniques can create extraordinary desserts.
If your love for chocolate knows no bounds, I invite you to explore our other delicious, chef-developed chocolate dessert recipes. Whether you’re seeking rich cakes, gooey cookies, or more sophisticated treats, you’ll find something to satisfy your cravings. Or, perhaps you’re in the mood for another classic comfort? Head straight to our Brown Butter Brownies next for a delightfully chewy and nutty twist on a beloved favorite!
Happy baking, and enjoy every sweet moment!