
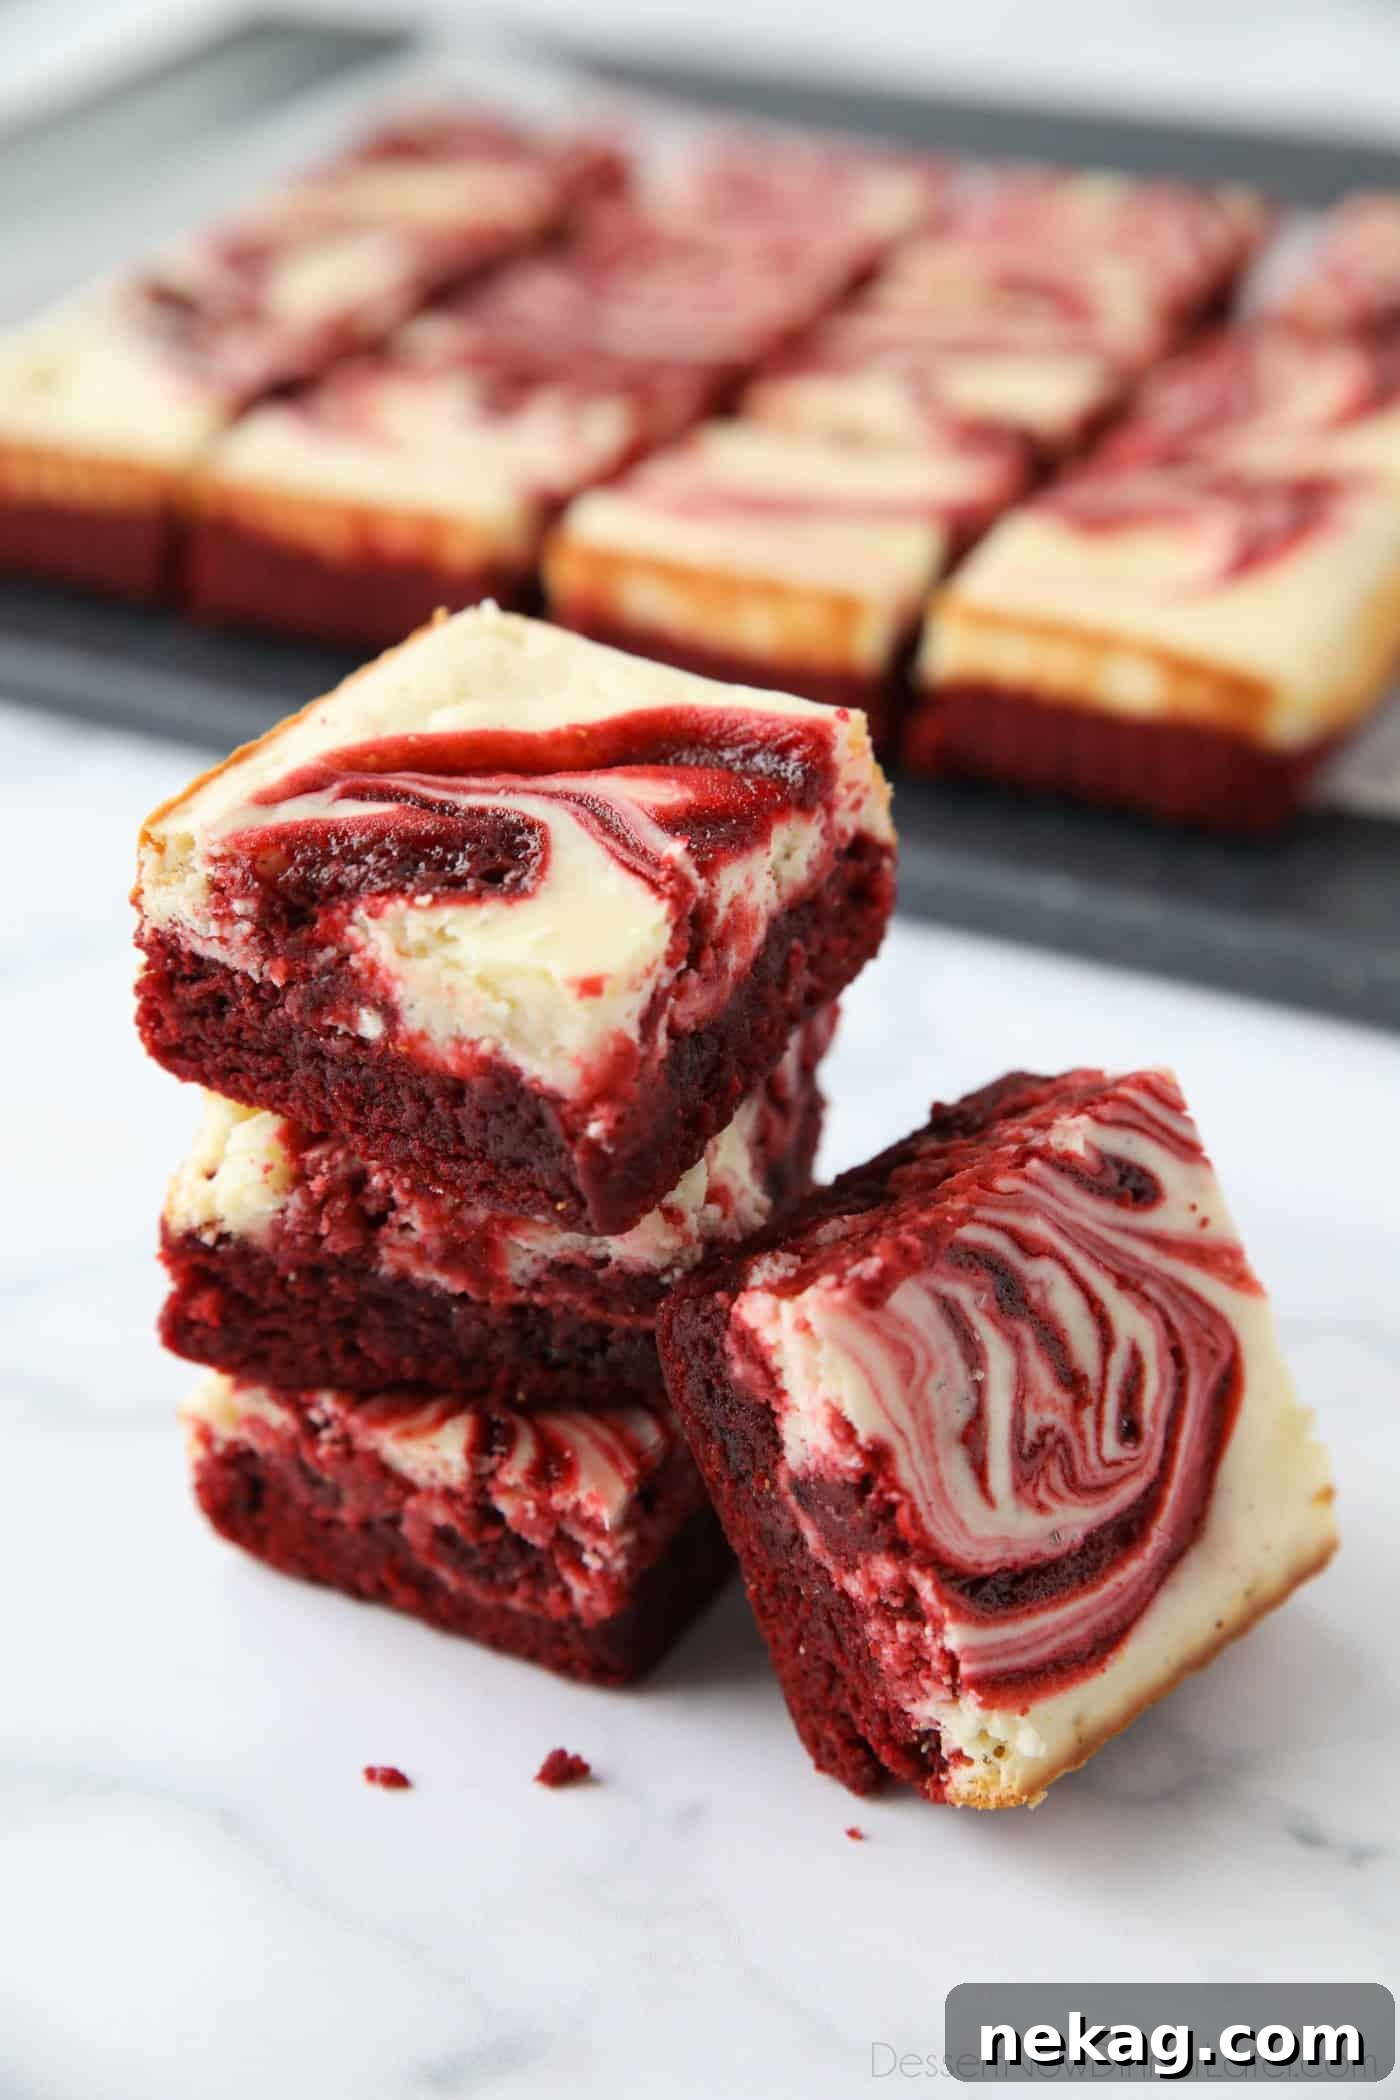
Prepare to be enchanted by the ultimate dessert fusion: Red Velvet Cheesecake Brownies. This incredible recipe seamlessly marries the deep, fudgy richness of classic red velvet brownies with the smooth, tangy decadence of vanilla cheesecake, all swirled into a visually stunning, irresistible bar. Every bite offers a delightful contrast of textures and flavors, making these dessert bars not only a treat for the palate but also a feast for the eyes.
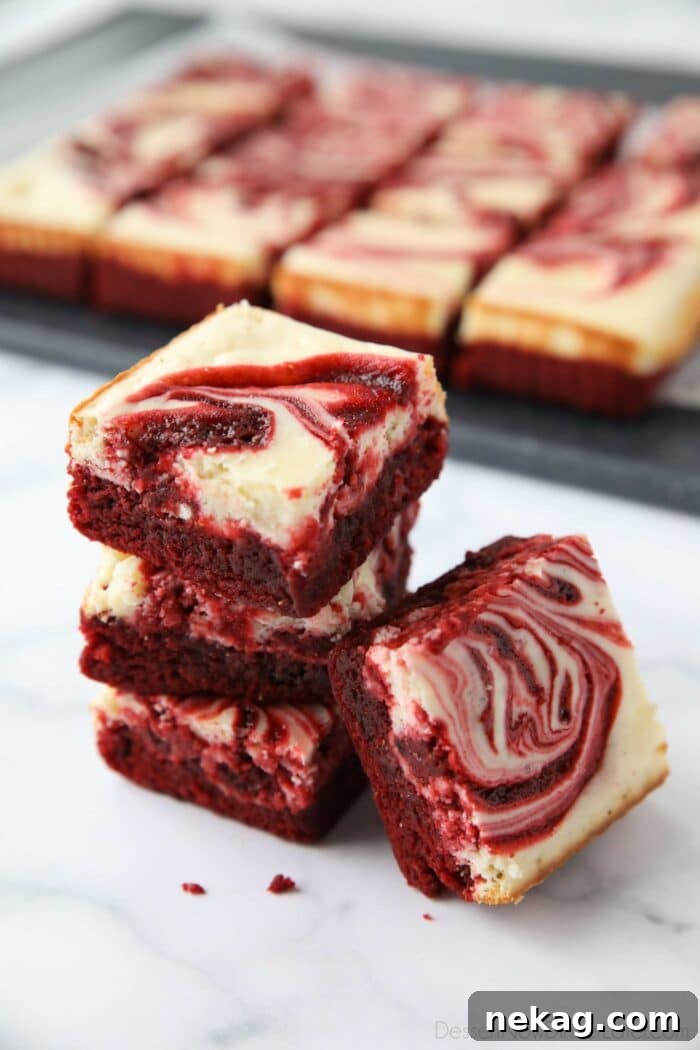
Embracing the Romance: Red Velvet Desserts for Valentine’s Day
As the holiday season fades into memory, our thoughts turn to the next celebration of love and affection: Valentine’s Day. And what better way to express heartfelt sentiments than through the universally adored symbol of romance – red velvet desserts? These treats, with their distinctive crimson hue and luxurious cream cheese frosting, naturally evoke feelings of warmth and indulgence.
Whether you’re planning a fun baking session with the kids, crafting memories with delightful Red Velvet Blossom Cookies, or seeking a more intimate indulgence with your significant other, perhaps sharing a warm, gooey Red Velvet Pizookie, red velvet is a quintessential choice. Its rich chocolate notes, subtle tang, and vibrant color make it a perfect canvas for celebrating love.
The allure of red velvet lies in its sophisticated blend of flavors and textures. It’s more than just chocolate; it’s a delicate balance that hints at cocoa with a slight tang, often beautifully complemented by the creamy embrace of cream cheese. These elements combine to create a dessert that truly “screams romance,” loaded with all the luxurious things we crave. Naturally, I wanted to harness this irresistible charm and combine it with another beloved dessert to create these spectacular red velvet cheesecake brownies.
The Art of the Cheesecake Swirl: Elegance Made Easy
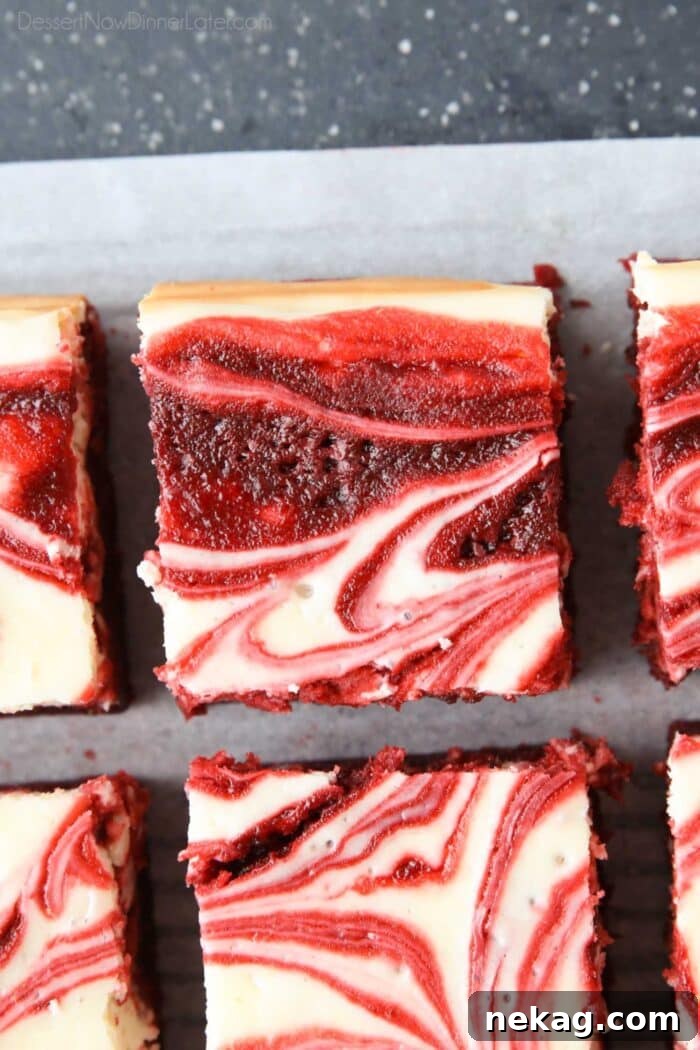
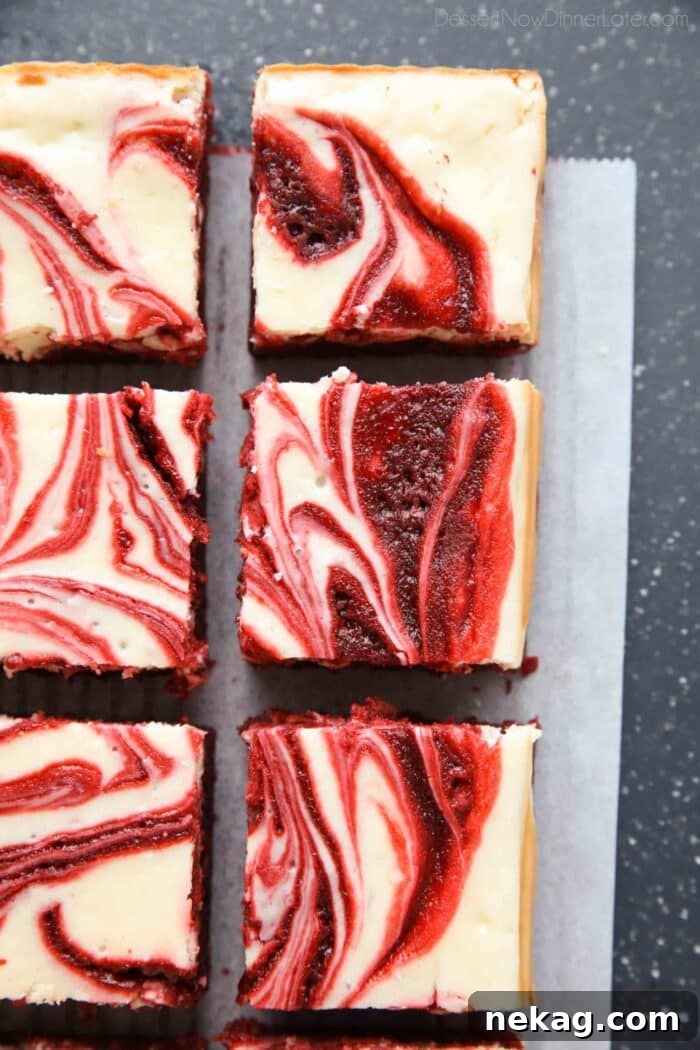
One of the most captivating aspects of these brownies is the stunning cheesecake swirl, which makes each piece look incredibly sophisticated and gourmet. You might imagine that achieving such an elegant design requires intricate baking skills, but in reality, the swirling technique is surprisingly simple. It’s a trick that elevates the visual appeal of any dessert, giving it a fancy touch without the fuss.
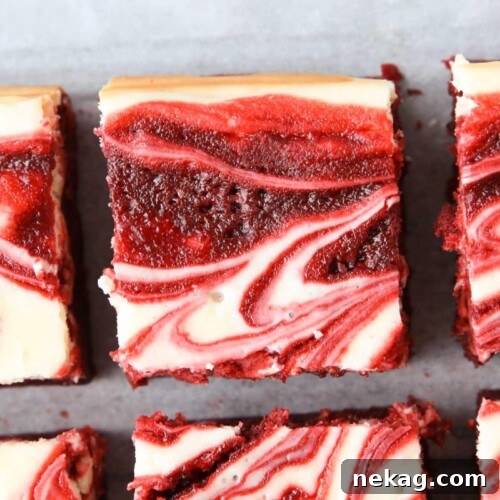
Just like my popular Valentine’s Day Cheesecake, the swirling method adds a layer of artistry that is sure to impress. The striking contrast between the deep red brownie and the creamy white cheesecake creates a beautiful marbling effect that will undoubtedly delight your sweetheart and make these bars a standout on any dessert table. Let’s dive into how you can easily master this impressive technique.
Crafting the Perfect Fudgy Red Velvet Brownie Base
The foundation of these magnificent dessert bars begins with a rich, fudgy red velvet brownie. Unlike traditional chocolate brownies, red velvet has a unique profile. It’s characterized by a lighter cocoa flavor, a touch of acidity, and a distinctive reddish hue that creates a truly special experience. Let’s explore the components and process for creating this essential layer.
What exactly goes into a red velvet brownie? A classic red velvet batter incorporates a modest amount of cocoa powder, providing a subtle chocolate background rather than an overwhelming intensity. A splash of white vinegar is a key ingredient, serving multiple purposes: it brightens the cocoa flavor, reacts with the cocoa powder to enhance its natural reddish tint, and contributes to the signature tender crumb of red velvet desserts. To achieve that iconic vibrant red, additional red food coloring is also incorporated.
Can you skip the vinegar? While white vinegar is a traditional component in red velvet recipes, known for adding a delicate tang and enriching the color and flavor of the cocoa, it can be omitted. In this brownie recipe, the amount is quite small, and we’re already boosting the color significantly with food coloring. If you prefer, or don’t have it on hand, you can certainly leave it out without drastically altering the final product’s flavor or texture, though the classic subtle tang will be less pronounced.
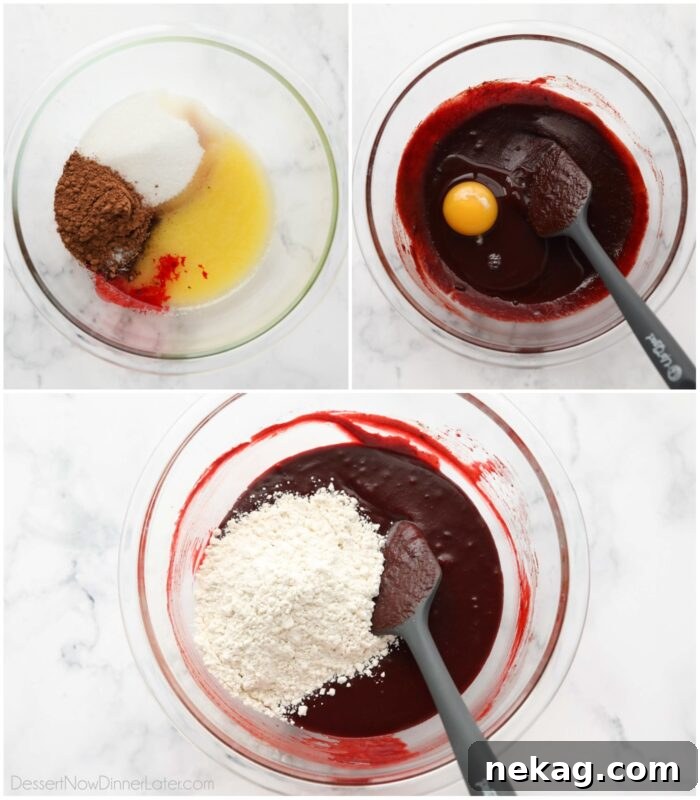
- In a generously sized mixing bowl, combine the melted unsalted butter, granulated sugar, unsweetened cocoa powder, salt, red food coloring, vanilla extract, and distilled white vinegar. Whisk these ingredients vigorously until they are thoroughly combined, creating a smooth, deep red base. Ensure all lumps of cocoa powder are fully dissolved for an even consistency.
- Gradually incorporate the large eggs, adding them one at a time. After each egg addition, mix well until it is fully integrated into the batter. This step is crucial for achieving a moist and cohesive brownie texture.
- Finally, gently fold in the all-purpose flour. Stir the mixture until the flour is just combined and no dry streaks remain. Be careful not to overmix, as this can lead to tough brownies. Once the batter is smooth, set it aside while you prepare the cheesecake layer.
Creating the Silky Smooth Cheesecake Swirl
With the vibrant red velvet brownie batter patiently waiting, it’s time to prepare the creamy counterpart: the velvety smooth cheesecake batter. This layer provides a luxurious, tangy contrast to the fudgy brownies, making each bite an exquisite experience. The key to a perfect cheesecake layer lies in using room temperature ingredients and proper mixing technique.
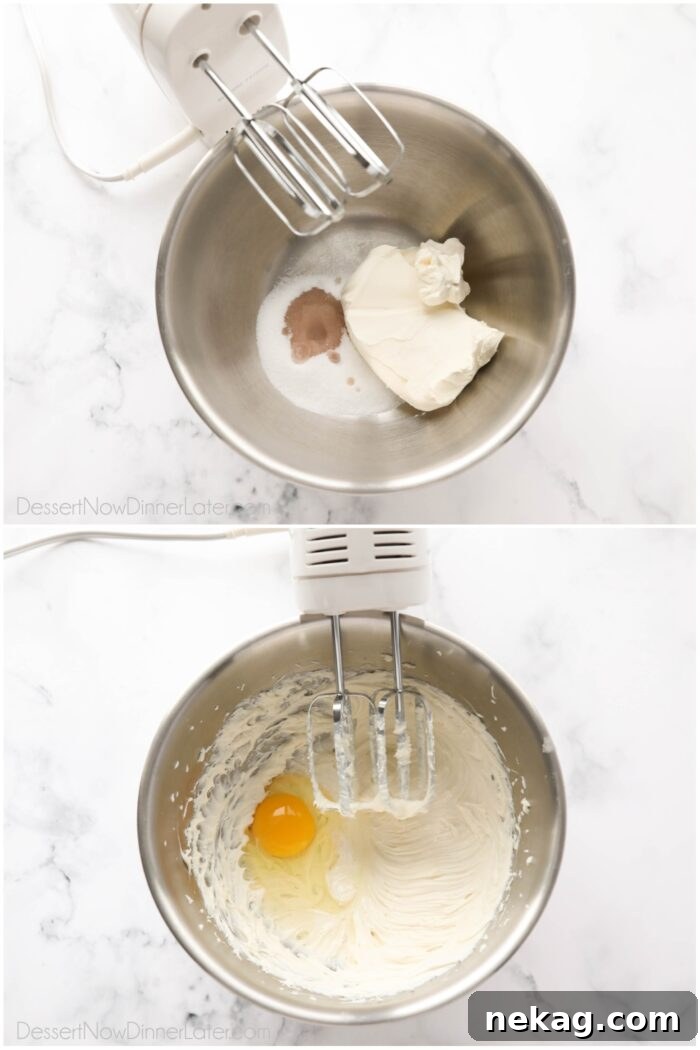
- In a separate large bowl, begin by beating together the room temperature block-style cream cheese, granulated sugar, and vanilla extract. Using an electric hand mixer, beat these ingredients on medium speed until the mixture is light, fluffy, and completely smooth. This ensures there are no lumps of cream cheese, which is essential for that signature creamy cheesecake texture.
- Once the cream cheese mixture is perfectly smooth, add the room temperature large egg. Continue to blend with the electric mixer until the egg is just incorporated and the batter is uniform. Again, avoid overmixing at this stage to prevent incorporating too much air, which can cause cracks in the cheesecake as it bakes. With both batters prepared, you’re now ready for the exciting assembly phase!
Assembling Your Masterpiece: Red Velvet Cheesecake Brownies
With both the decadent red velvet brownie batter and the luscious cheesecake batter ready, it’s time to bring these two delightful components together to create the stunning swirled brownies. This stage is where the magic happens, transforming simple batters into an eye-catching, layered dessert.
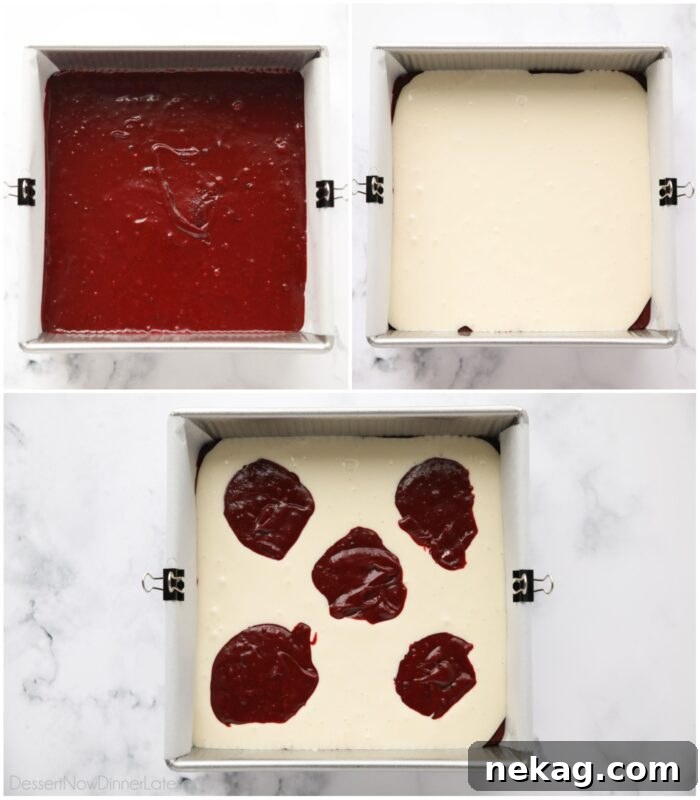
- Prepare your baking pan: Start by lining an 8×8-inch baking pan with parchment paper. Ensure you leave a generous overhang of a couple of inches on two sides, as this will create “handles” for effortlessly lifting the baked brownies out of the pan. For the sides not covered by parchment, lightly grease them with cooking spray to prevent sticking.
- Layer the red velvet base: Before pouring, reserve about 1/2 cup of the red velvet brownie batter. This portion will be used later for the decorative swirls. Pour the remaining red velvet batter evenly into the prepared pan, spreading it to form a uniform base layer.
- Add the creamy cheesecake layer: Carefully and evenly pour the cheesecake batter directly over the red velvet brownie layer. Use a spatula to gently spread it, ensuring it covers the entire surface of the red velvet base.
- Dollop for the swirl: Take the reserved 1/2 cup of red velvet brownie batter and drop small, strategic dollops over the creamy white cheesecake layer. Aim for an even distribution of these dollops across the surface.
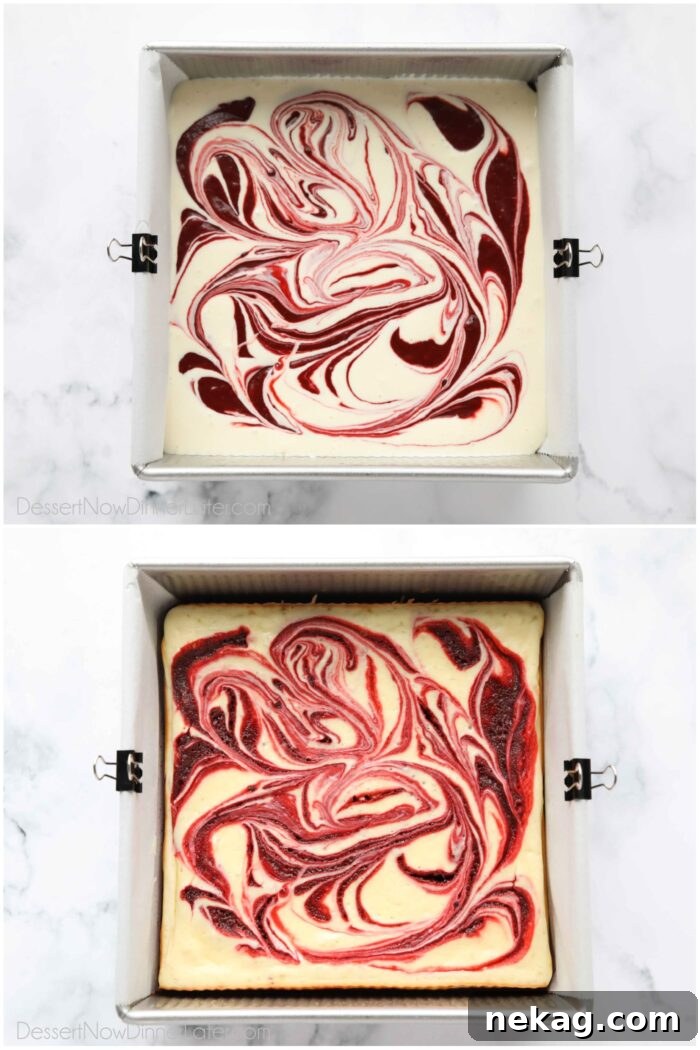
- Create the swirl: Now for the artistic part! Grab a butter knife, a thin spatula, or even a toothpick. Gently drag it through the dollops of red velvet batter and into the cheesecake layer, creating beautiful swirls. Don’t overdo the swirling – a few deliberate strokes are often more effective than excessive mixing. A helpful technique is to make “figure 8” patterns or gentle S-curves. The goal is to marble the two layers together, not fully combine them.
Expert Tip for Swirling: Remember, less is truly more when it comes to swirling. Over-swirling can lead to the colors blending too much, diminishing the distinct marbled effect. Aim for a beautiful contrast where both the vibrant red and creamy white are clearly visible. Think of creating elegant strokes rather than chaotic mixing, and you’ll achieve that picture-perfect finish.
Baking to Perfection and Serving Tips
Once your beautifully swirled red velvet cheesecake brownies are assembled, it’s time to transform them into a decadent dessert. The baking process is straightforward, but knowing how to properly check for doneness and cool them is crucial for that perfect texture and clean cut.
- Baking instructions: Carefully place the pan of swirled red velvet cheesecake brownies into your preheated oven. Bake at 350˚F (175°C) for approximately 30 minutes. To determine if they’re ready, insert a toothpick into the center of the brownies. It should come out with a few moist crumbs of brownie batter or thick, baked cheesecake clinging to it. If the center still appears very wet or jiggly, return them to the oven and bake for a few more minutes, checking frequently. Remember that brownies will continue to set slightly as they cool.
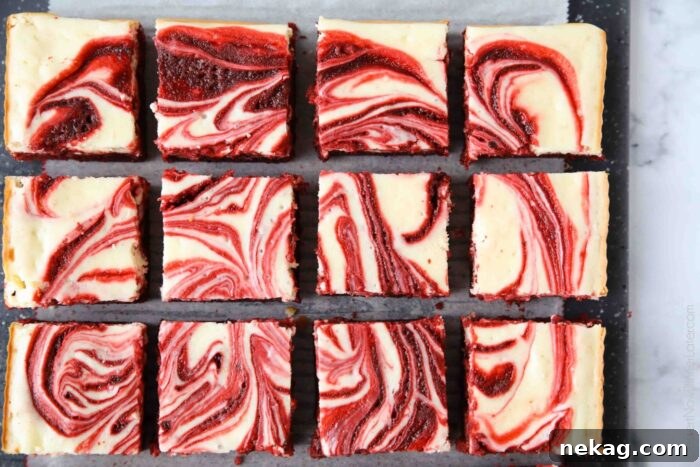
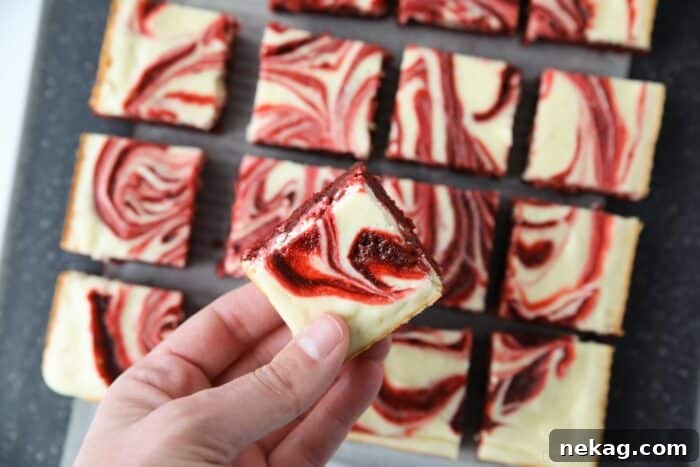
- Cooling for clean cuts: This step is non-negotiable for perfectly sliced brownies! Allow the brownies to cool completely in the pan before attempting to lift them out. Cooling can take a few hours, or you can expedite it by placing them in the refrigerator once they’ve cooled to room temperature. Once fully cooled, use the parchment paper overhang to gently lift the entire slab of brownies from the pan and transfer it to a cutting board. Now, you can confidently cut them into neat squares, showcasing their stunning marbled layers.
- Serving suggestions: These brownies are absolutely divine on their own, but if you want to elevate the experience further, consider dusting them lightly with powdered sugar before serving, or pairing them with a dollop of whipped cream or a scoop of vanilla bean ice cream. The slight warmth from a freshly baked (or gently reheated) brownie with cold ice cream is a sensational combination!
Storage and Make-Ahead Advice
One of the best things about these red velvet cheesecake brownies is how well they store, allowing you to enjoy them for days or even prepare them in advance for a special occasion. To maintain their freshness and delightful texture:
- Refrigeration: Store any leftover brownies in an airtight container in the refrigerator. To prevent them from sticking together and preserve their beautiful tops, it’s a good practice to place a piece of parchment paper between layers if you’re stacking them. They will remain fresh and delicious for up to 1 week.
- Freezing (Optional): For longer storage, these brownies can also be frozen. Cut them into individual squares and wrap each tightly in plastic wrap, then place them in a freezer-safe airtight container or bag. They can be frozen for up to 1-2 months. Thaw them in the refrigerator overnight or at room temperature for a few hours before serving.
Whether you’re making them for a holiday, a party, or just a treat for yourself, these Red Velvet Cheesecake Brownies are sure to be a beloved addition to your baking repertoire.
More Irresistible Red Velvet Desserts to Explore
If you’ve fallen in love with the enchanting flavor and vibrant hue of red velvet, then you’re in for a treat! The world of red velvet desserts extends far beyond brownies, offering a delightful array of cakes, cookies, and unique creations. Here are some more fantastic red velvet recipes that promise to bring a touch of elegance and indulgence to any occasion:
Exquisite Red Velvet CAKES:
- Red Velvet Cake Roll: A stunning dessert featuring a tender red velvet sponge cake rolled with a luscious cream cheese filling. Perfect for impressing guests!
- Red Velvet Cupcake Recipe: Classic individual treats, moist and fluffy, crowned with rich, tangy cream cheese frosting. A timeless favorite.
OTHER Decadent Red Velvet DESSERTS:
- Red Velvet Chocolate Chip Cookies: Soft, chewy, and bursting with white chocolate chips, these cookies are a delightful twist on a classic.
- Red Velvet Brownies: For those times when you crave pure, unadulterated red velvet fudginess, these stand-alone brownies are a perfect choice.
- Mini Red Velvet Cheesecake: Individual portions of creamy red velvet cheesecake, ideal for parties or a personal indulgence.
- Red Velvet Waffles: Start your day with a touch of elegance! These vibrant waffles are fantastic for brunch, especially when drizzled with cream cheese icing.
- Red Velvet Cheese Ball: A surprisingly delicious and festive dessert dip, perfect for gatherings, served with graham crackers or vanilla wafers.
If you embark on this delightful baking adventure and create this recipe, please consider leaving a rating and review in the comments below. Your feedback is greatly appreciated! THANKS!
Red Velvet Cheesecake Brownies
Created by Amber Brady
Prep: 15 mins | Cook: 30 mins | Total: 45 mins
Fudgy red velvet brownies swirled together with creamy vanilla cheesecake. This cheesecake brownies recipe is a great Valentine’s dessert!
Pin Recipe
Rate Recipe
Save Recipe
Ingredients
Red Velvet Brownies:
- ½ cup (113 g) unsalted butter, (1 stick) melted
- 1 cup (200 g) granulated sugar
- ¼ cup (20 g) unsweetened cocoa powder
- ¼ tsp salt
- 1 Tbsp red food coloring
- 1 tsp vanilla extract
- ½ tsp distilled white vinegar
- 2 large eggs
- ¾ cup (90 g) all-purpose flour, stir, spoon & level
Cheesecake:
- 8 oz (226 g) block-style cream cheese, room temperature
- ¼ cup (50 g) granulated sugar
- ½ tsp vanilla extract
- 1 large egg, room temperature
Equipment
- 8-inch Square Pan
- Pyrex Glass Bowl Set of 3
- Silicone Spatula Set
- Electric Hand Mixer
Instructions
- Preheat oven to 350℉ (175°C). Line an 8×8-inch baking pan with parchment paper leaving a couple inches of overhang for easy lifting. Use cooking spray to grease the sides not covered with paper. Set aside.
- RED VELVET BROWNIES: In a large bowl, stir together the melted butter, sugar, cocoa powder, salt, red food coloring, vanilla, and vinegar. Combine well.
- Stir in the eggs one at a time, incorporating well with each addition. Add the flour and stir until just combined. Set batter aside.
- CHEESECAKE: In another large bowl, beat together the cream cheese, sugar, and vanilla with an electric hand mixer. Add the egg and blend until smooth. Set aside.
- ASSEMBLING: Reserve 1/2 cup of red brownie batter for topping. Pour the remaining red velvet batter into the prepared pan.
- Pour the cheesecake batter evenly over the red velvet batter.
- Dollop the reserved 1/2 cup of red velvet brownie batter over the cream cheese layer. Use a butter knife or toothpick to swirl the cheesecake together with the dollops of red velvet batter. TIP: Don’t over-do the swirling. Less is more. It might be helpful to make “figure 8” swirls.
- BAKE at 350℉ (175°C) for 30 minutes, or until a toothpick inserted into the center comes out with a few moist crumbs of brownie batter or thick baked cheesecake stuck to it. If it still looks wet, bake a few minutes more.
- Cool completely before lifting the parchment out of the pan to cut the brownies into squares.
Notes
- Store leftovers in an airtight container, with parchment paper separating any layers, in the refrigerator up to 1 week.
Nutrition
Disclaimer: Nutritional values were calculated using a third-party tool and are provided as an estimation only.
Sharing this recipe with a link is both encouraged and appreciated. Copying/pasting and/or screenshots of full recipes to any social media is strictly prohibited. Content and photographs are copyright protected.
Did you make this?
Don’t forget to leave a rating below and make sure to follow on Pinterest and Instagram for more!