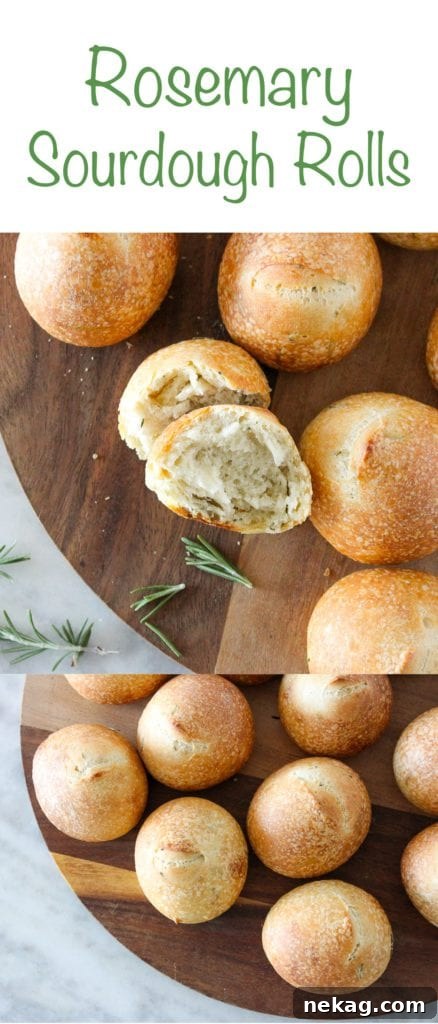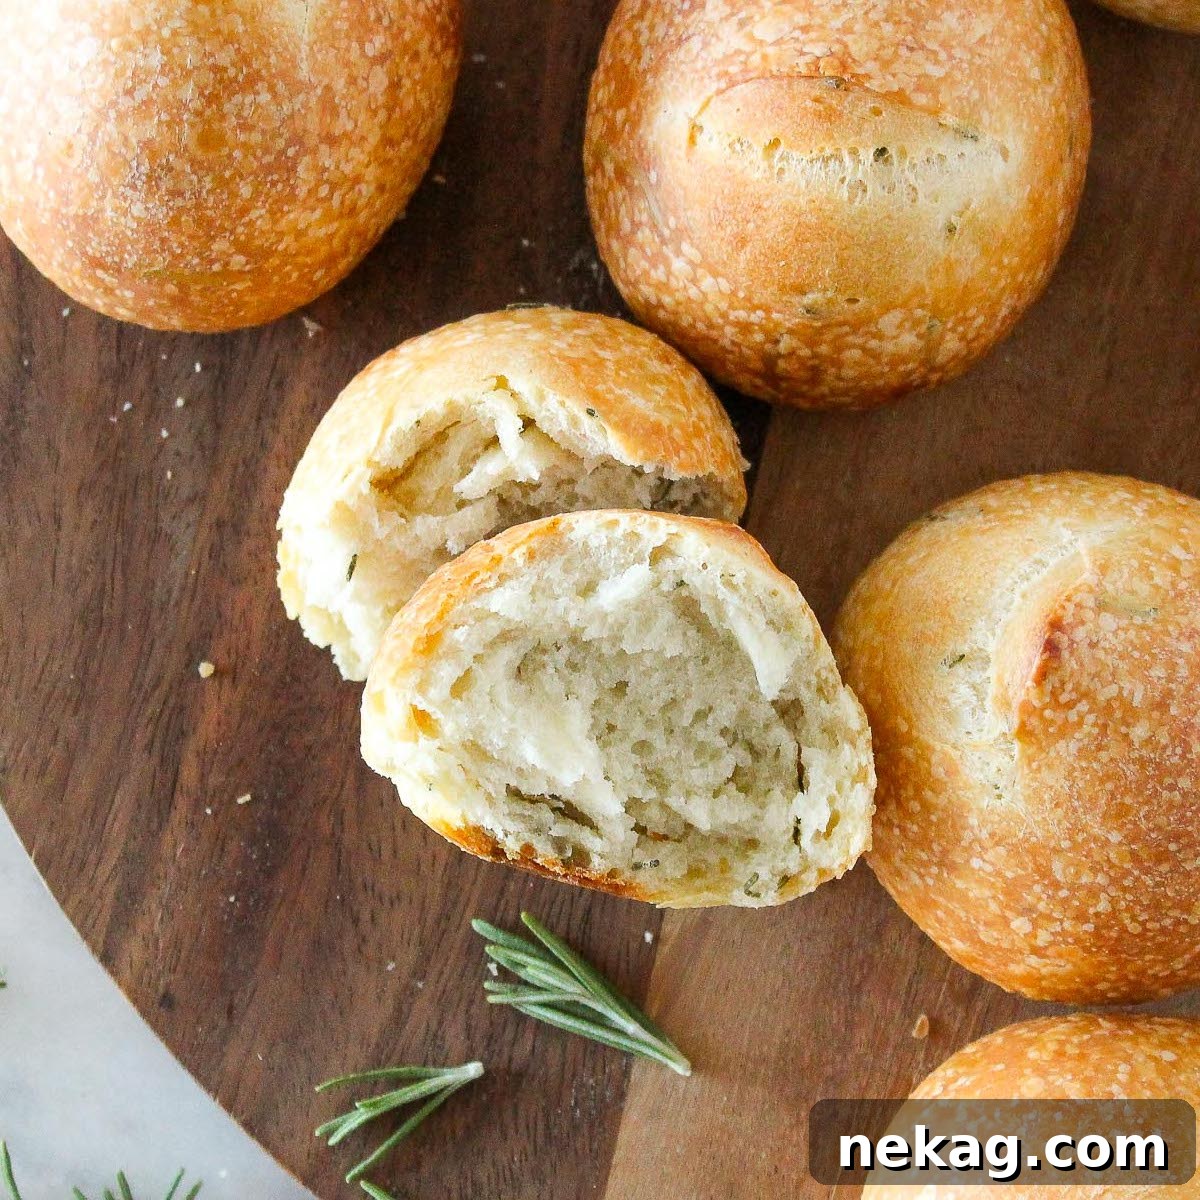
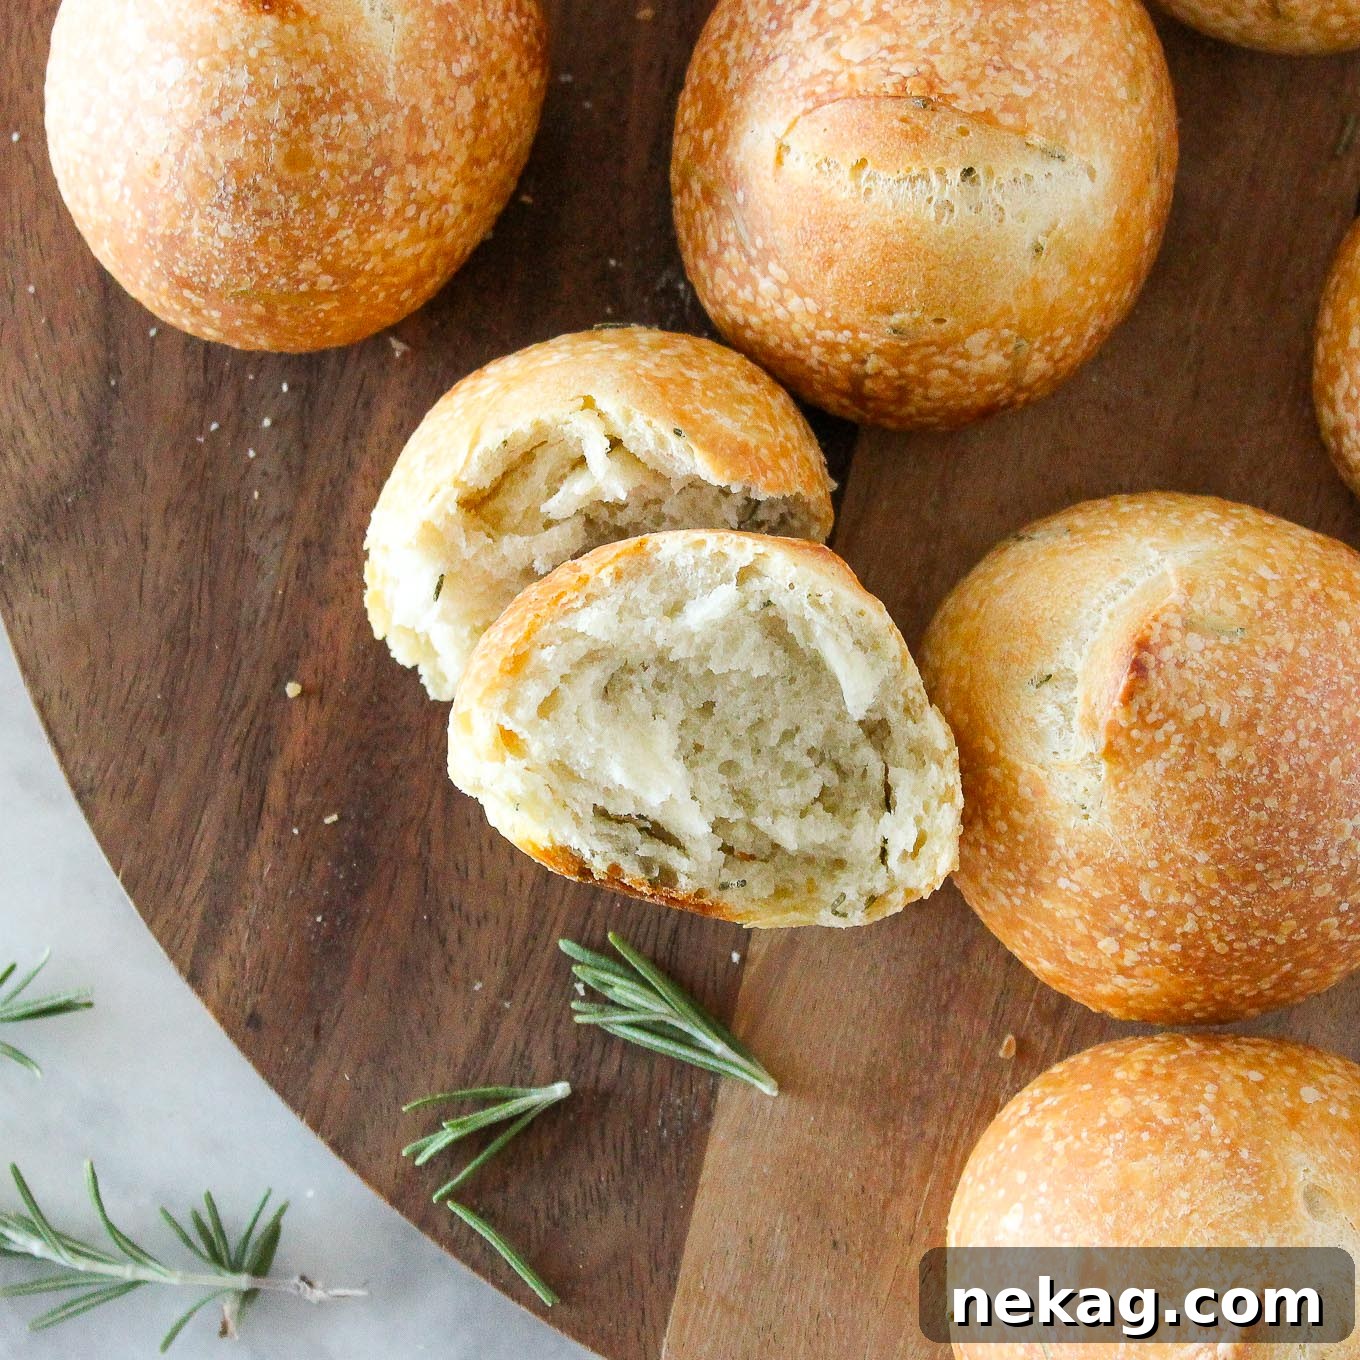
Discover the magic of homemade baking with these utterly irresistible Rosemary Sourdough Rolls! Crafted with care and leavened by an active sourdough starter, each roll promises a delightful contrast: a wonderfully soft, airy interior encased in a golden, satisfyingly crunchy crust. Infused with the bright, aromatic essence of fresh rosemary, these rolls are not just bread; they’re an experience, perfect for elevating any meal from a simple weeknight dinner to a festive holiday spread.

A Quick Look At The Recipe
This brief overview highlights the key aspects of the recipe. For comprehensive instructions and detailed measurements, please jump directly to the full recipe below.
Jump to Recipe
Prep Time
25 minutes
Cook Time
20 minutes
Proof
3 hours
Total Time
3 hours 45 minutes
Servings
16 rolls
Difficulty
Intermediate, designed to be achievable with clear, step-by-step guidance.
Calories *
191 kcal per serving
Technique
Includes building a levain, careful dough mixing, gluten development, folding, precise shaping, and baking to golden perfection.
Flavor Profile
A harmonious blend of a soft, airy crumb with a crunchy crust, elevated by the bright, earthy notes of fresh rosemary.
* Based on nutrition panel, approximate values.
Summarize & Save this content on
google ai
perplexity
grok
I have been making your sourdough recipe several times a week since last spring (always doubling it and often adding cheddar cheese) – I just love it! It is fast, easy and delicious. Thanks so much for sharing!! ⭐⭐⭐⭐⭐
Josephine Havlak
Why You Will Love These Rosemary Sourdough Rolls
- Unmatched Texture and Flavor. Prepare for a truly artisan bread experience. These sourdough rolls boast the dreamiest crust – thin, crackly, and perfectly golden – yielding to a remarkably soft, chewy, and airy interior. Each bite delivers the robust, earthy notes of fresh rosemary, creating a sophisticated flavor profile that complements any meal. It’s the perfect balance of texture and taste that elevates simple dinner rolls into a culinary highlight.
- Versatile for Any Occasion. While elegant enough for your holiday table – think Thanksgiving, Christmas, or Easter dinner – these rosemary-infused rolls are equally suited for enhancing everyday weeknight meals. Their delightful flavor pairs beautifully with hearty stews, roasted meats, or simply a smear of good butter. They’re a simple indulgence that makes any meal feel special.
- A Baker’s Delight: Easy-to-Handle Dough. Don’t let “sourdough” intimidate you! The inclusion of whole milk and olive oil in this recipe creates a remarkably supple and forgiving dough. This extra fat content results in a silky-smooth texture that is a joy to work with, making the shaping process effortless for both novice and experienced bakers alike. It ensures a consistent, beautiful result every time.
- Convenient for Meal Prep. Life gets busy, but delicious homemade bread doesn’t have to be a distant dream. These sourdough rolls are excellent for making ahead! Prepare a double or triple batch and freeze them for later. When you’re ready to serve, a quick reheat brings them back to life, crunchy on the outside and soft on the inside, tasting as fresh as the day they were baked. This makes them an ideal solution for easy, ready-to-eat dinner rolls whenever the craving strikes.
- Health Benefits of Sourdough. Beyond their incredible taste, sourdough rolls offer the added benefit of being naturally fermented. The prolonged fermentation process can help break down gluten and phytic acid, potentially making the bread easier to digest and increasing nutrient absorption compared to conventionally yeasted breads. Enjoy a more wholesome and satisfying roll.
Table of Contents
- Why You Will Love These Rosemary Sourdough Rolls
- The Art of Sourdough Baking: Your Journey to Perfect Rolls
- Essential Ingredients & Smart Substitutions
- Creative Variations for Your Sourdough Rolls
- Chef’s Professional Tips for Sourdough Success
- How to Make Rosemary Sourdough Rolls: Step-by-Step Guide
- Chef Lindsey’s Recipe Tip: Mastering Temperature for Perfect Proofing
- Recipe FAQs: Your Sourdough Questions Answered
- More Recommended Homemade Bread Recipes
- Sourdough Rolls Recipe Card
- Before You Go: Explore More Delicious Bread
The Art of Sourdough Baking: Your Journey to Perfect Rolls
All your dinner roll dreams are about to come true with these incredible Rosemary Sourdough Rolls! Imagine a basket of warm, aromatic bread, each roll boasting a perfectly crunchy crust giving way to a soft, chewy interior, all infused with the vibrant taste of fresh rosemary. This bread is the ideal accompaniment to virtually any meal, whether you’re serving a hearty steak chili or a comforting lamb stew. Its robust flavor and satisfying texture make it a standout on any table.
For those new to the world of sourdough, or simply looking to refresh their knowledge, I highly recommend visiting my comprehensive post on how to create and maintain a healthy sourdough starter. A vibrant, active starter is the heart of this recipe, providing the natural leavening that gives these rolls their unique character and texture. And don’t let any leftover starter go to waste! Your sourdough discard can be transformed into other delicious creations, like these crisp sourdough discard crackers or my versatile sourdough pizza dough recipe.
Baking with sourdough is a rewarding journey, connecting you to ancient traditions and producing bread with unparalleled depth of flavor. While it may seem complex at first, with clear instructions and a little patience, you’ll be creating bakery-quality rolls right in your own kitchen. This recipe is designed to guide you through each step, ensuring a successful and delicious outcome.
Essential Ingredients & Smart Substitutions
Crafting perfect sourdough rolls starts with understanding the role of each ingredient. Here’s a breakdown of what you’ll need and how to approach substitutions:
- All-Purpose Flour: A versatile staple, all-purpose flour works well for the initial levain build and can be used as a substitute for bread flour in the main dough. If using solely all-purpose flour, note that it typically has a lower protein content, which means gluten development might take a little longer.
- Water: The hydration of your dough is crucial. The temperature of your water can significantly impact proofing times – warmer water speeds up yeast activity, while cooler water slows it down, allowing for longer flavor development. Refer to Chef Lindsey’s tip below for more on temperature control.
- Active Sourdough Starter: This is the star of our show! An “active” starter refers to one that has been fed and is bubbly, lively, and at its peak strength, ready to leaven your dough effectively. If your starter isn’t robust, your rolls won’t rise properly. This recipe relies entirely on sourdough for leavening. If you prefer to bake with commercial yeast, my easy dinner roll recipe is a fantastic alternative.
- Bread Flour: For the main dough, bread flour is highly recommended. With a protein content typically ranging from 12-13%, it contributes to a more elastic dough and a chewier crumb, characteristic of classic sourdough bread. While all-purpose flour can be substituted, anticipate a slightly different texture and potentially longer kneading times to achieve adequate gluten development. For those interested in whole wheat variations, remember that whole wheat flour hydrates differently; consider a specialized recipe like this whole wheat sourdough, adding rosemary to it for a similar flavor profile.
- Whole Milk: Incorporating whole milk in yeasted breads offers multiple benefits. Its lower water content and higher fat content contribute to a tender, moist crumb and richer flavor. The fat also helps to keep the rolls soft and delays staling, ensuring your homemade bread stays delicious longer.
- Kosher Salt: More than just a seasoning, salt is vital for controlling fermentation speed and strengthening gluten structure. It also significantly enhances the overall flavor of the bread, balancing the tangy notes of sourdough. Always use a kitchen scale to measure salt accurately for consistent results.
- Liquid Levain: This recipe specifically calls for a liquid levain, indicating a higher percentage of water relative to flour (typically 125% hydration). Building your levain 12-14 hours before mixing your final dough ensures it’s at its most active and potent. This careful preparation contributes significantly to the bread’s flavor, texture, and rise.
- Olive Oil: Beyond adding a subtle, Mediterranean-inspired flavor, olive oil plays a crucial role in the dough’s texture and workability. It enriches the dough, making it incredibly smooth and pliable, an absolute dream to handle. This added fat also contributes to a more tender crumb and a beautifully crisp crust. If olive oil is not available, good quality sunflower oil or avocado oil make suitable substitutes.
- Fresh Rosemary: The signature flavor of these rolls! Fresh rosemary provides an unparalleled aromatic complexity that dried herbs simply can’t match. Its piney, citrusy notes are wonderfully bright and fragrant when baked. If you’re a fan of rosemary like me, you’ll love it in other dishes such as my foolproof grilled rosemary chicken, savory roasted rosemary potatoes, or this refreshing roasted vegetable salad. If substituting with dried rosemary, use approximately half the amount to avoid an overpowering flavor.
For precise quantities and measurements, please refer to the recipe card below.
Creative Variations for Your Sourdough Rolls
While these Rosemary Sourdough Rolls are magnificent as they are, the beauty of baking lies in its endless possibilities for customization. Feel free to get creative and tailor this recipe to your palate and occasion:
- Experiment with Different Herbs and Spices. Rosemary provides a classic, aromatic flavor, but don’t stop there! You can easily swap it out or combine it with other fresh or dried herbs. Consider a blend of Italian herbs for a classic touch, or try fresh thyme for an earthy note, basil for a sweet and peppery aroma, or oregano for a Mediterranean twist. Finely chopped chives or dill would also offer a lovely freshness. When using dried herbs, remember to use about half the amount of fresh herbs, as their flavor is more concentrated.
- Introduce Exciting Mix-Ins. Once your dough has developed its gluten, it’s the perfect canvas for additional flavors and textures. Stir in some grated hard cheese like Parmesan, sharp cheddar, or even creamy mozzarella alongside the olive oil for a savory delight. For a more adventurous profile, chopped olives, sun-dried tomatoes, or roasted garlic cloves can be folded in. If you prefer a slightly sweet and nutty roll, take inspiration from my cherry pecan sourdough bread and incorporate dried fruits such as cranberries or cherries, along with toasted nuts like pecans or walnuts.
- Explore Alternative Baking Formats. This versatile dough isn’t just for individual rolls! For a stunning presentation and easy serving, bake the rolls in a ceramic or glass baking dish to create delicious pull-apart bread that’s perfect for sharing. You can also form the dough into larger, free-form boules or even bake it in a loaf pan, similar to my easy sourdough bread recipe, for a more traditional bread experience. Adjust baking times accordingly for larger shapes.
- Enhance with Delicious Toppings and Finishes. Before baking, for a beautiful golden sheen and a slightly softer crust, consider brushing the tops of your rolls with melted butter or an egg wash (one egg beaten with a tablespoon of water). This adds visual appeal and can contribute to the final texture. For an extra burst of flavor, right as the hot rolls emerge from the oven, brush them generously with homemade garlic butter. The warm bread will readily absorb the butter, infusing every bite with savory goodness. A sprinkle of flaky sea salt or sesame seeds before baking also adds a lovely touch.
Chef’s Professional Tips for Sourdough Success
Baking with sourdough is a blend of art and science. Here are some professional tips to ensure your Rosemary Sourdough Rolls turn out perfectly every time:
- Maximize Convenience with Large Batches and Freezing. Embrace the power of meal prep! Making a larger batch of these rolls allows you to enjoy homemade bread throughout the week with minimal effort. After baking and cooling, store the extra rolls in an airtight freezer bag for up to two months. To reheat, place frozen rolls directly into a preheated 400°F (200°C) oven until they are hot through and the crust has re-crisped – usually 10-15 minutes. This oven reheat is key to restoring that freshly baked crunch and tender interior, making them taste as good as new! They are also fantastic for making mini deviled egg salad sandwiches.
- Precision is Paramount: Use a Kitchen Scale. In baking, especially sourdough, accuracy is everything. I cannot stress enough the importance of using a kitchen scale for all your ingredient measurements. Volume measurements (cups and tablespoons) are notoriously inconsistent and can drastically alter the delicate balance of flour, water, salt, and starter. Even a slight variation of a few grams can impact hydration, gluten development, and ultimately, the final texture and rise of your bread. Invest in a good digital scale – it will transform your baking results.
- Mastering the Art of Proofing. Sourdough baking thrives on a slow, controlled fermentation. This extended proofing time is essential for two reasons: it allows the natural yeast to develop complex flavors and creates the robust gluten structure needed to support the airy, open crumb we desire. Resist the urge to rush the process. If you find your dough rising too slowly, adjust the ambient temperature or the water temperature slightly. While you can add a tiny bit of commercial yeast for a faster rise, as I do in my sourdough raisin bread, be aware that it will compromise some of the unique sourdough flavor development. Sometimes, the trade-off is worth it for a quicker bake!
- Achieving Optimal Gluten Development. Gluten is the network that gives bread its structure and chewiness. This particular dough is on the wetter side, which makes hand-kneading challenging. A stand mixer with a dough hook is highly recommended. If your mixer seems to be struggling to develop the gluten fully, try a longer autolyse – allowing the flour and water (and sometimes levain) to rest together for 20-25 minutes before adding salt and fats. This initial rest helps the flour fully hydrate and starts the gluten development process naturally, making subsequent kneading more effective. You’ll know the gluten is well-developed when the dough becomes elastic, pulls away from the sides of the bowl, and passes the “windowpane test” (stretching a small piece of dough thin enough to see light through it without tearing).
- The Importance of Consistent Shaping. After bulk fermentation, consistent shaping is crucial for even baking and a beautiful presentation. Ensure each roll is similarly sized (around 75g as specified) and shaped into a tight ball. This tension on the surface helps the rolls hold their form and rise upwards in the oven, contributing to a better crumb structure. Watch my sourdough rolls video for a visual guide on shaping techniques.
How to Make Rosemary Sourdough Rolls: Step-by-Step Guide
Follow these detailed instructions to create the most delicious and aromatic sourdough rolls. Further details and precise measurements can be found in the recipe card below.
Part 1: Build the Levain (Your Active Starter)
Step 1: Prepare Your Levain. Approximately 12 to 14 hours before you plan to mix your main dough, it’s time to build your levain. In a clean, appropriately sized container, combine the specified amounts of all-purpose flour, water, and a small portion of your active sourdough starter (yesterday’s starter). Stir these ingredients thoroughly with a small spatula until the flour is completely hydrated and no dry spots remain. The mixture should be smooth and cohesive. Cover the container loosely and let it sit at room temperature. During this time, the levain will become bubbly and active, indicating it’s ready for baking.
Chef’s Note: For this small quantity, I often find it easier and more practical to double the levain build. This ensures you have more than enough active levain for your dough and a sufficient amount leftover to feed your main starter for future bakes, minimizing waste and ensuring continuity.
Part 2: Making the Final Dough
Step 2: Combine Main Dough Ingredients and Autolyse. In the bowl of a stand mixer, fitted with the paddle attachment, combine the bread flour, water, milk, salt, and your prepared liquid levain. Mix on low speed until all the flour is thoroughly incorporated and no dry pockets remain. The mixture will be shaggy but should come together. Once combined, cover the bowl with plastic wrap and let the dough rest for 15 minutes. This crucial resting period, known as “autolyse,” allows the flour to fully hydrate and gluten development to begin naturally, making the dough easier to work with later.
Step 3: Develop the Gluten. After the autolyse, switch your mixer attachment to the dough hook. Increase the mixer speed to medium and knead the dough for approximately 10-15 minutes. During this phase, you’re working to develop the gluten structure. You’ll observe the dough becoming more elastic and beginning to pull away from the sides of the bowl.
Chef’s Note: Given the higher hydration of this dough, it will remain quite wet and soft; it will not form a perfectly tight ball around the dough hook, which is exactly what we want for a tender crumb. Focus on the visual cues: look for strands of gluten forming on the surface and the dough becoming smoother and more elastic.
Step 4: Incorporate Oil and Herbs. Once the gluten has started to develop, reduce the mixer speed to low. Gradually add the olive oil, drizzling it in slowly. Continue mixing until the olive oil has been completely absorbed into the dough, which should no longer appear greasy. At this point, add the fresh, chopped rosemary. Mix on low speed until the rosemary is evenly distributed throughout the dough. The dough should now have a beautiful, smooth, and silky appearance, fragrant with rosemary.
Step 5: Prepare for Bulk Fermentation. Gently scrape the dough from the mixing bowl into a lightly oiled clean bowl. Turn the dough once to coat it in oil, then cover the bowl securely with plastic wrap or a damp tea towel. This prevents the dough from drying out during proofing.
Part 3: Proofing and Shaping
Step 6: Begin the First Proof. Place the covered bowl in a warm spot, ideally around 75-80°F (24-27°C), for 45 minutes. If your kitchen is on the cooler side, you can utilize the proofing setting on your oven, or place the bowl in a slightly warm (but not hot) oven with the light on. This initial warm environment encourages the yeast to become active.
Step 7: Perform a Set of Folds. After 45 minutes, it’s time for the first set of folds. With a damp hand, gently pull one side of the dough up and fold it towards the center, pressing it down slightly. Rotate the bowl 90 degrees and repeat this process with the remaining three sides, pulling the dough upwards and letting it gently “smack” down on the dough in the bowl. This technique helps to strengthen the gluten network and evenly redistribute the yeast and gases, building structure and flavor.
Step 8: Bulk Fermentation. Re-cover the dough with plastic wrap or a damp tea towel and return it to your warm spot to continue bulk fermenting. Check the dough every 45 minutes, performing another set of folds if desired, but typically one set is sufficient for rolls. This bulk fermentation phase will generally take about 2.5 hours in total, depending on your room temperature and starter activity. To gauge readiness, lightly oil or flour your hand and gently poke the dough; it should feel light, airy, and somewhat jiggly, not stiff or dense. It should have visibly increased in volume (by about 30-50%).
Step 9: Pre-Shape the Dough. Once bulk fermentation is complete, lightly dust the top of the dough in the bowl with a small amount of flour. Gently turn the dough out onto a *very lightly* floured work surface. Avoid using too much flour, as this can prevent the dough from sticking to itself during shaping.
Step 10: Divide and Initial Balling. Using a bench scraper, divide the dough into 16 equal pieces, each weighing approximately 75 grams for consistent roll size. Take each individual piece of dough, gently fold its edges towards the center to create tension on the top surface, then flip it seam-side down onto the counter. Using the palm of your hand and a circular motion, gently roll each piece into a tight, smooth ball.
Chef’s Tip: If your work surface has too much flour, the dough won’t be able to grip and tuck into itself properly. Scrape away any excess flour with your bench scraper as needed. For a visual demonstration of this crucial pre-shaping technique, I highly recommend watching my detailed sourdough rolls video.
Step 11: Bench Rest for Relaxation. Once you have formed all 16 dough balls, cover them loosely with plastic wrap or a clean kitchen towel. Allow them to sit and “bench rest” for 15 minutes.
Chef’s Explanation: The pre-shape and subsequent bench rest are vital steps that should not be skipped! The pre-shape helps to organize the gluten strands, building surface tension that will ultimately trap more steam and gas during baking, leading to a beautifully open, airy crumb. It also helps the dough become accustomed to its final round shape. The bench rest then allows the gluten to relax after the tension created during pre-shaping, making the final shaping process much easier and preventing tearing or excessive resistance from the dough.
Step 12: Final Shape and Prepare for Final Proof. After the bench rest, repeat the same shaping process as with the pre-shape, ensuring each roll is a tight, smooth ball with good surface tension. Arrange the shaped rolls on a parchment-lined baking sheet or in a greased rectangular baking dish, leaving a little space between each roll for expansion. Cover them securely with plastic wrap to prevent drying.
Part 4: Baking Options
Option A: Bake the Same Day. If you plan to bake your rolls on the same day, place the covered baking sheet or dish back into your warm spot. Allow the rolls to proof for another 1-2 hours, or until they feel noticeably light and airy and have roughly doubled in volume. When proofing on a flat sheet pan, judging exact volume can be tricky as the dough isn’t contained; instead, focus on the airy feel and visual expansion. Once ready, proceed to the baking steps below.
Option B: Bake the Next Day (Cold Retard). For enhanced flavor development and a more flexible baking schedule, you can retard the dough overnight. Place the covered rolls into the refrigerator immediately after final shaping. The cold temperature will significantly slow down the yeast activity, allowing the dough to proof slowly over 12-18 hours. This extended cold proof develops more complex sourdough flavors. The next day, you can bake them directly from the fridge, or allow them to warm up slightly at room temperature for 30-60 minutes before baking if you desire a bit more rise.
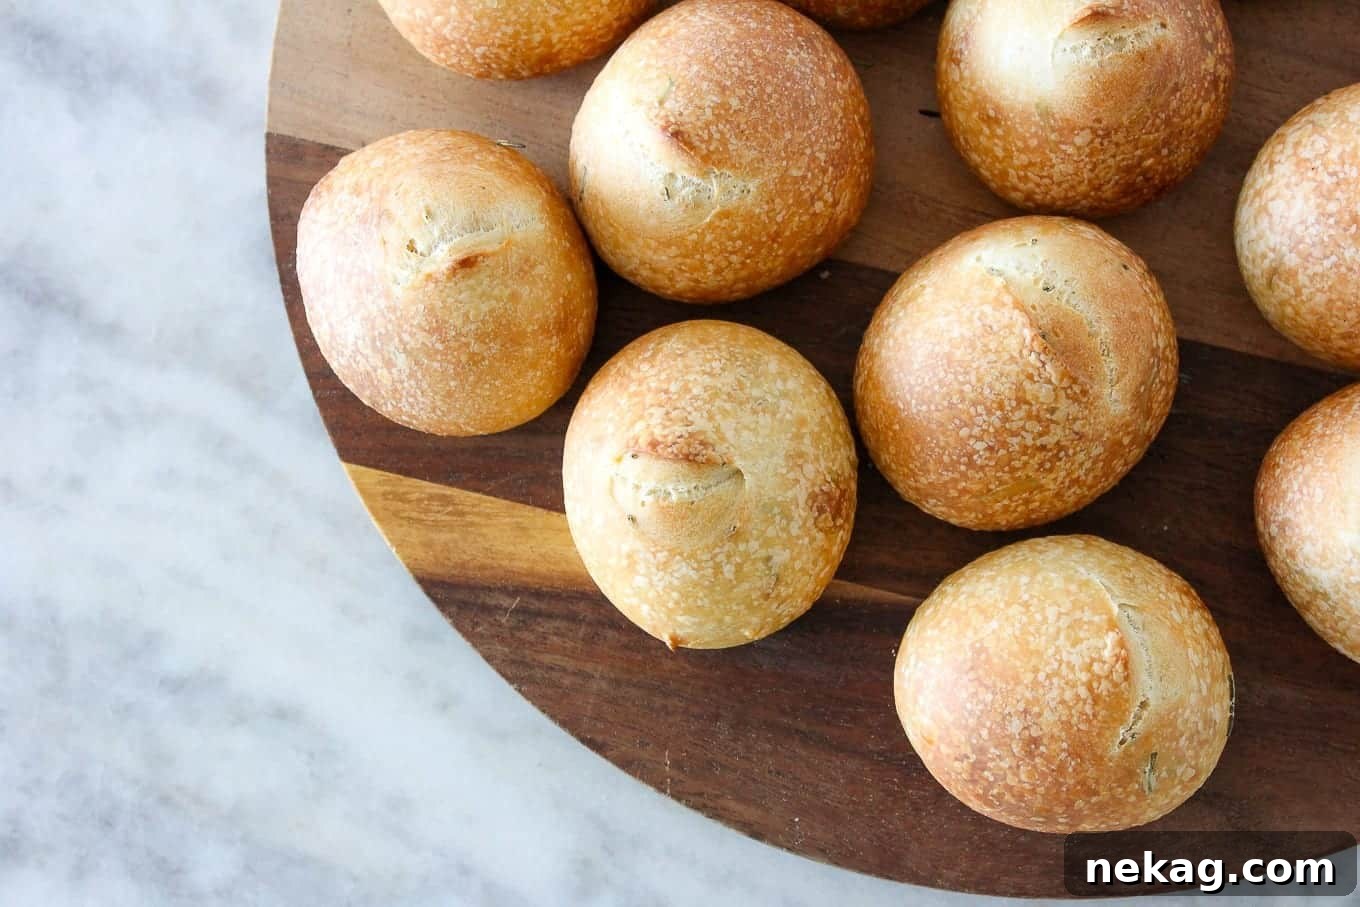
Step 13: Preheat Oven and Score. Preheat your oven to 425°F (220°C) using the convection setting if available, as this helps achieve a crispier crust. While the oven preheats, prepare your rolls for baking. To easily score the tops, I prefer using kitchen scissors to make a small snip or cross-cut on each roll. Alternatively, you can use a sharp knife or a traditional bread lame to create decorative patterns, which also allow the rolls to expand beautifully during baking.
Step 14: Bake to Golden Perfection. Carefully place the baking sheet or dish with the scored rolls into the preheated oven. Bake for approximately 20-25 minutes, or until the rolls are beautifully golden brown on the outside and sound hollow when tapped on the bottom. The rich color indicates a well-developed crust and cooked interior.
Step 15: Cool and Enjoy. Once baked, transfer the rolls to a wire rack to cool completely. This cooling period is crucial; it allows the internal crumb structure to set and any residual alcohol from fermentation to evaporate, resulting in a perfectly textured and flavored roll. While self-control around warm sourdough is often overrated, waiting at least a few minutes will prevent burning your mouth and ensure the best eating experience. Enjoy your magnificent homemade Rosemary Sourdough Rolls!

Chef Lindsey’s Recipe Tip: Mastering Temperature for Perfect Proofing
Temperature is, without a doubt, one of the most critical and often challenging factors to control in bread making. Yet, mastering it unlocks consistent, superior results. The journey to perfect bread begins with controlling the temperature of your water, and understanding its profound impact on your dough’s fermentation.
When I’m aiming for a quicker rise – perhaps my kitchen is cool, or I need the bread ready sooner – I use warmer water, usually between 90-100°F (32-38°C). This stimulates the yeast and accelerates activity. Conversely, if my apartment is particularly warm, or I desire a slower, more controlled rise to develop maximum flavor and complexity in the sourdough, I opt for colder water, around 65-70°F (18-21°C). This allows for a longer fermentation period, which deepens the sourdough’s characteristic tang and improves the crumb structure. Consider your ambient conditions and desired baking timeline when adjusting your water temperature; it’s a simple change that yields powerful results.
Recipe FAQs: Your Sourdough Questions Answered
For optimal freshness, store your baked sourdough rolls at room temperature for up to 1 day. To extend their shelf life, transfer them to a bread box or a resealable plastic bag, where they will remain fresh for an additional 1-2 days. For longer storage, you can freeze the rolls: ensure they are completely cooled, then wrap them tightly in plastic wrap and aluminum foil, or place them in a freezer-safe bag. They will keep well in the freezer for up to 2 months. Reheat from frozen in a 400°F (200°C) oven until warmed through and crusty.
Sourdough bread is not only celebrated for its distinctive tangy flavor and chewy texture but also for its numerous health benefits. The traditional fermentation process can improve digestion by breaking down complex carbohydrates and gluten, making it more digestible for some individuals. It can also lower the bread’s glycemic index, potentially leading to a slower rise in blood sugar, and enhance the bioavailability of nutrients through the reduction of phytic acid. These combined factors make sourdough a more nutritious and satisfying bread choice.
Absolutely! The dough from this recipe is wonderfully versatile and can certainly be adapted for larger loaves. Simply prepare the dough as instructed, then refer to the shaping and baking guidelines provided in my easy sourdough bread recipe for making a rustic boule or a sandwich loaf. You will need to adjust baking times accordingly for the larger format.
An active sourdough starter is crucial for successful leavening. To check for activity, feed your starter as usual. It should double or triple in size within 4-8 hours (depending on ambient temperature), become bubbly on the surface, and pass the float test: drop a small spoonful into a glass of water; if it floats, it’s ready! If it sinks, it may need another feeding or warmer conditions to become more robust.
A sticky dough is common in high-hydration sourdough. Resist the urge to add too much extra flour, as this can dry out your rolls. Instead, lightly dampen your hands or lightly oil them with olive oil before handling the dough. Use a bench scraper to help manage stickiness and gather the dough. Work quickly and confidently. A slightly sticky dough often results in a more tender and open crumb, so embrace it!
More Recommended Homemade Bread Recipes
Dinner Roll Recipes
Potato Rolls
Dinner Roll Recipes
Easy Dinner Roll Recipe
Sourdough Bread Recipes
Cherry Sourdough Bread
Sourdough Bread Recipes
Sourdough Raisin Bread
If you tried this recipe and loved it please leave a 🌟 star rating and let me know how it goes in the comments below. I love hearing from you; your comments make my day!

Rosemary Sourdough Rolls
Pin Recipe
Comment
Print Recipe
Ingredients
Levain Build:
- 9 ¾ tablespoons all-purpose flour
- 6 tablespoons water
- 1 ½ teaspoons yesterday’s starter
Final Dough:
- 5 cups bread flour All-Purpose such as King Arthur’s will work fine
- 6 teaspoons whole milk
- 1 ½ cups water
- 2 ½ teaspoons kosher salt
- 11 ½ tablespoons liquid levain from levain build above
- 4 tablespoons olive oil
- 3 tablespoons fresh rosemary finely picked and chopped
Instructions
Build the Levain:
-
12 to 14 hours before you plan to mix your final dough, combine the all-purpose flour, water, and a small amount of your active starter in a clean container. Stir well until the flour is fully hydrated and the mixture is cohesive. Cover loosely and let it sit at room temperature to become active and bubbly.
Make the Final Dough:
-
In the bowl of a stand mixer fitted with the paddle attachment, combine the bread flour, water, milk, salt, and the prepared liquid levain. Mix on low speed until all ingredients are fully incorporated and no dry flour remains. Cover the bowl with plastic wrap and let the dough rest (autolyse) for 15 minutes to initiate gluten development.
-
Switch to the dough hook attachment. Increase the mixer to medium speed and knead the dough for about 10-15 minutes to develop gluten. The dough will become more elastic and pull away from the sides of the bowl, though it will remain soft and wet.
-
Reduce the mixer speed to low. Gradually add the olive oil, allowing it to fully absorb into the dough. Once the dough is no longer greasy and appears smooth and silky, add the fresh rosemary and mix until evenly distributed.
-
Gently scoop the dough into a lightly oiled bowl. Cover the bowl with plastic wrap or a damp tea towel.
Proofing and Shaping:
-
Place the covered dough in a warm spot (around 75-80°F or 24-27°C) for 45 minutes. You can use your oven’s proof setting if available, or a warm spot with the oven light on.
-
Perform a set of folds: With a damp hand, gently pull one side of the dough up and fold it towards the center. Rotate the bowl 90 degrees and repeat for all four sides. This strengthens the gluten and redistributes yeast.
-
Return the covered dough to the warm spot for bulk fermentation. Check every 45 minutes. This process will take approximately 2.5 hours. The dough should feel light and airy, not dense, and have increased in volume by about 30-50%.
-
Pre-shape: Lightly dust the top of the dough in the bowl with flour. Gently turn the dough out onto a very lightly floured work surface.
-
Divide the dough into 16 equal pieces (75g each). Take each piece, fold its edges towards the center to create a taut surface, then flip it seam-side down. Roll it gently in the palm of your hand into a smooth, tight ball.
-
Once all dough balls are pre-shaped, cover them with plastic wrap and allow them to bench rest for 15 minutes. This relaxes the gluten, making final shaping easier.
-
Final Shape: Repeat the same process as with the pre-shape, ensuring each roll is a tight, smooth ball. Place the shaped rolls on a parchment-lined baking sheet or a greased rectangular baking dish, leaving a small space between each. Cover with plastic wrap.
Baking:
-
To bake the same day: Return the covered rolls to your warm spot for a final proof of 1-2 hours, or until they feel light and airy and have visibly increased in volume. Proceed directly to the baking steps.
-
To bake the next day (cold retard): Place the covered rolls into the refrigerator overnight (12-18 hours). This slows fermentation, developing deeper flavors. Bake directly from the fridge, or let warm for 30-60 minutes at room temperature for a slightly larger rise.
-
Preheat your oven to 425°F (220°C) with convection if available. Using kitchen scissors, snip the top of each roll to score, or use a lame/sharp knife for decorative cuts.
-
Bake the rolls in the preheated oven for 20-25 minutes, or until they are golden brown and sound hollow when tapped on the bottom.
-
Transfer the baked rolls to a wire rack to cool completely. This crucial step allows the crumb to set and flavors to fully develop. Though resisting a warm roll is tough, wait a few minutes to prevent burns! Enjoy your delicious Rosemary Sourdough Rolls!
Video
Notes
Presentation – For a rustic touch, I typically score the rolls with kitchen scissors. However, feel free to use a sharp razor (lame) or a knife to create intricate designs if you desire a more artistic finish.
Flavor Tips – Fresh rosemary is highly recommended for its vibrant aroma and taste. If using dried rosemary as a substitute, reduce the quantity by half as its flavor is more concentrated.
Storage – Store baked rolls at room temperature for up to 1 day. For extended freshness, keep them in a bread box or a sealed plastic bag at room temperature for an additional 1-2 days. For long-term storage, freeze well-wrapped rolls (in plastic wrap then foil) or in a freezer bag for up to 2 months. Reheat in a preheated oven.
Nutrition
Before You Go: Explore More Delicious Bread
I sincerely hope you enjoyed mastering this Rosemary Sourdough Roll recipe and that these aromatic, crusty, and tender rolls bring immense joy to your table. The journey of sourdough baking is incredibly rewarding, and these rolls are a testament to the satisfying results you can achieve.
If you’re eager to expand your repertoire of homemade bread, don’t miss out on our other delicious dinner roll recipes. Be sure to try these incredibly foolproof potato dinner rolls for an exceptionally soft crumb, or explore the seasonal flavors of these delightful pumpkin herb dinner rolls. Happy baking!