
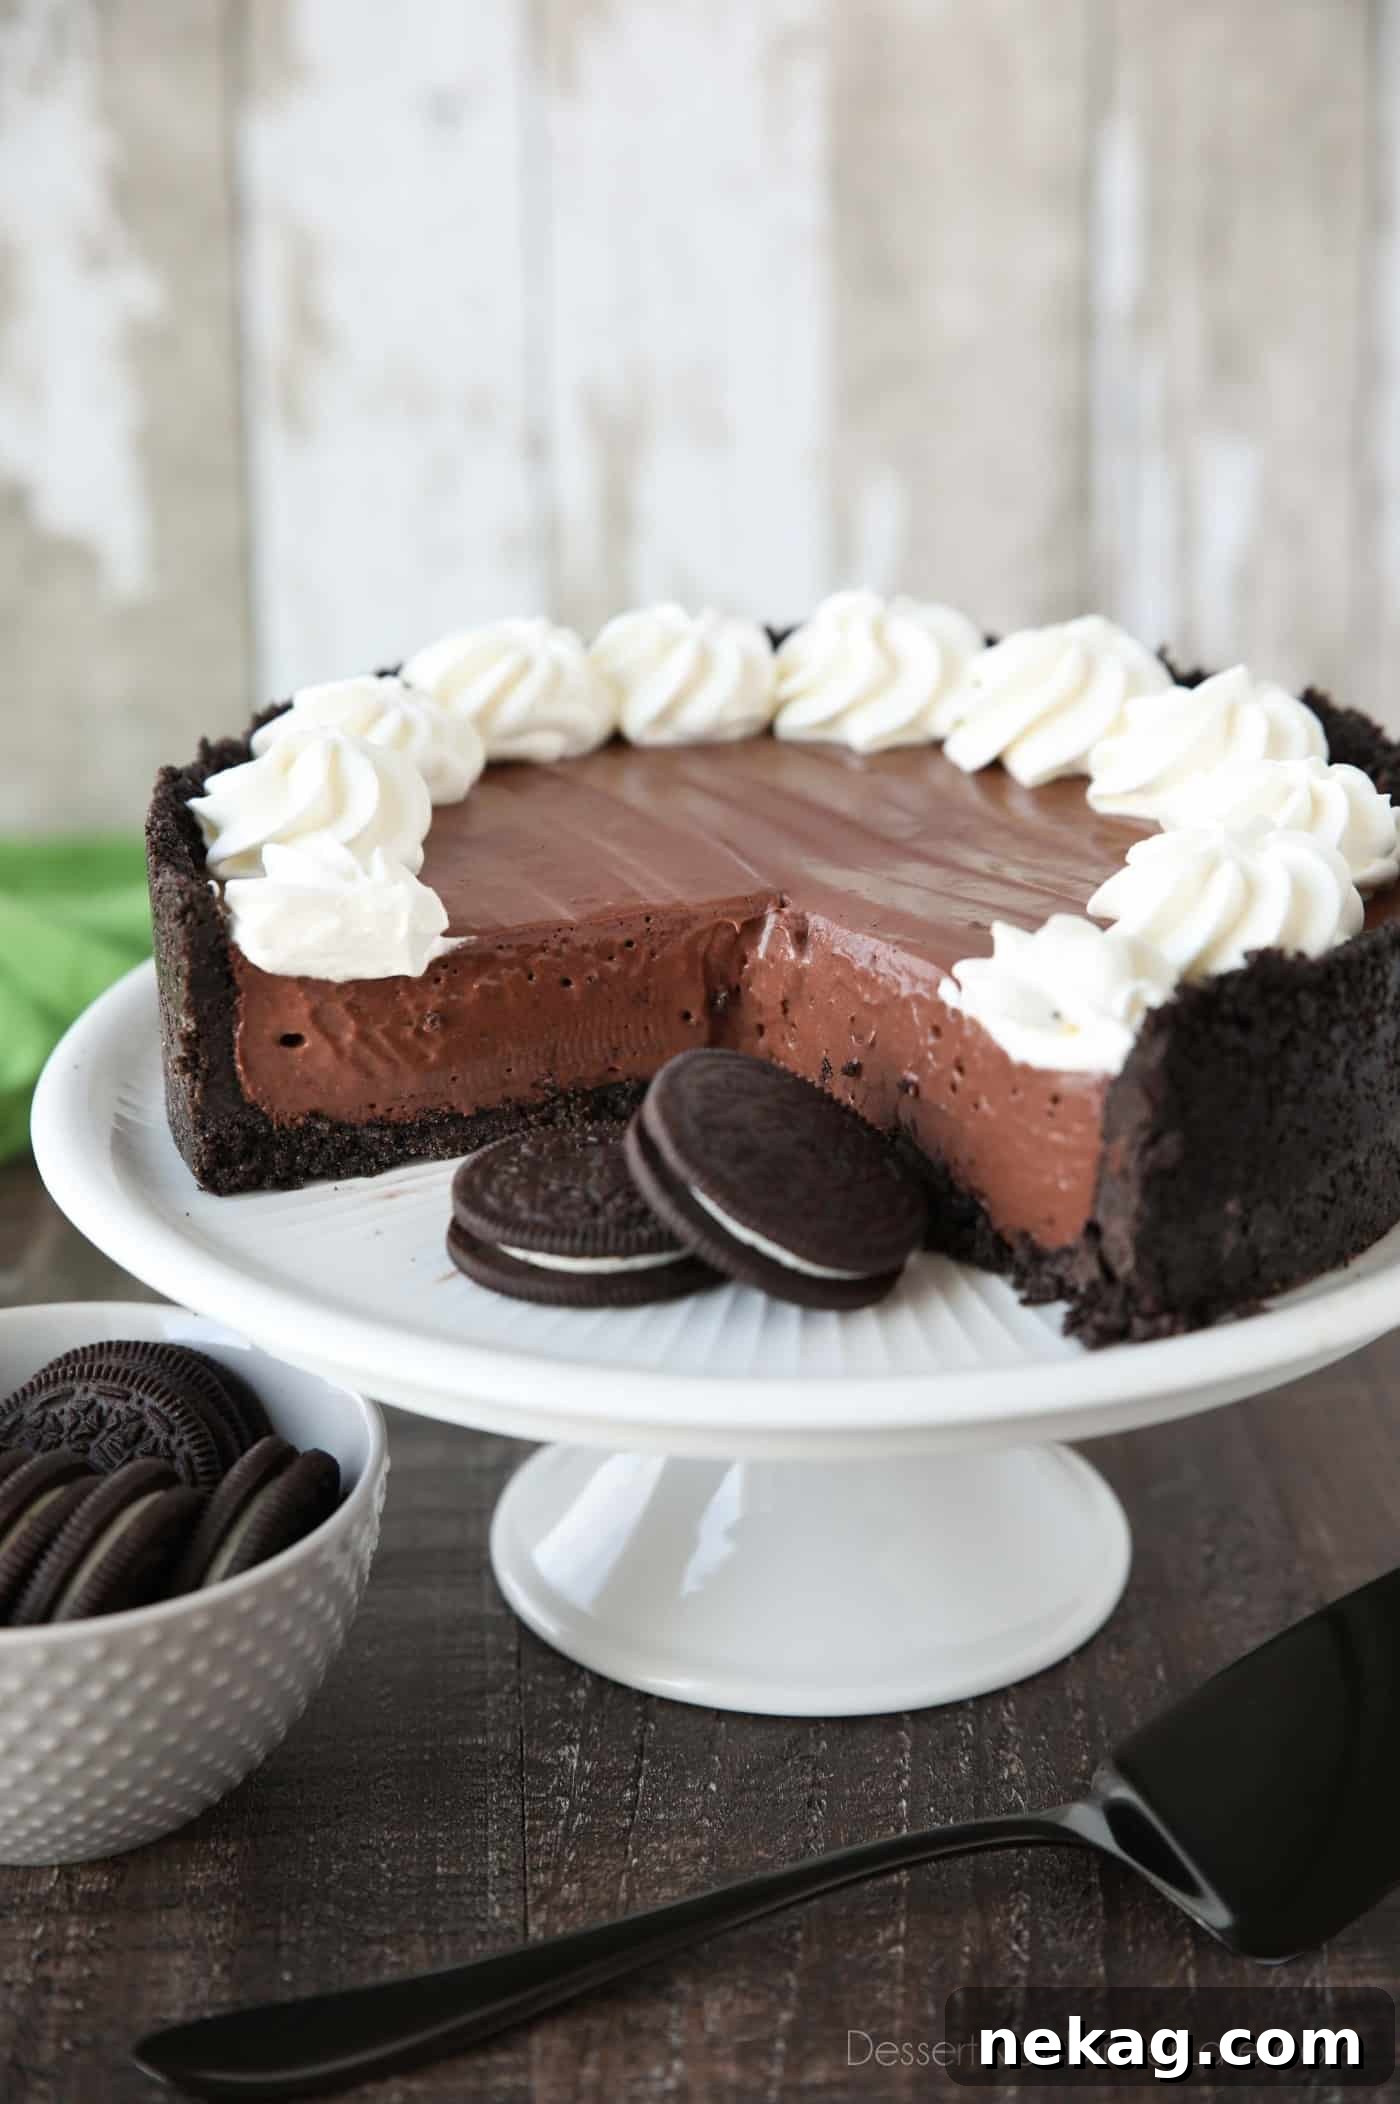
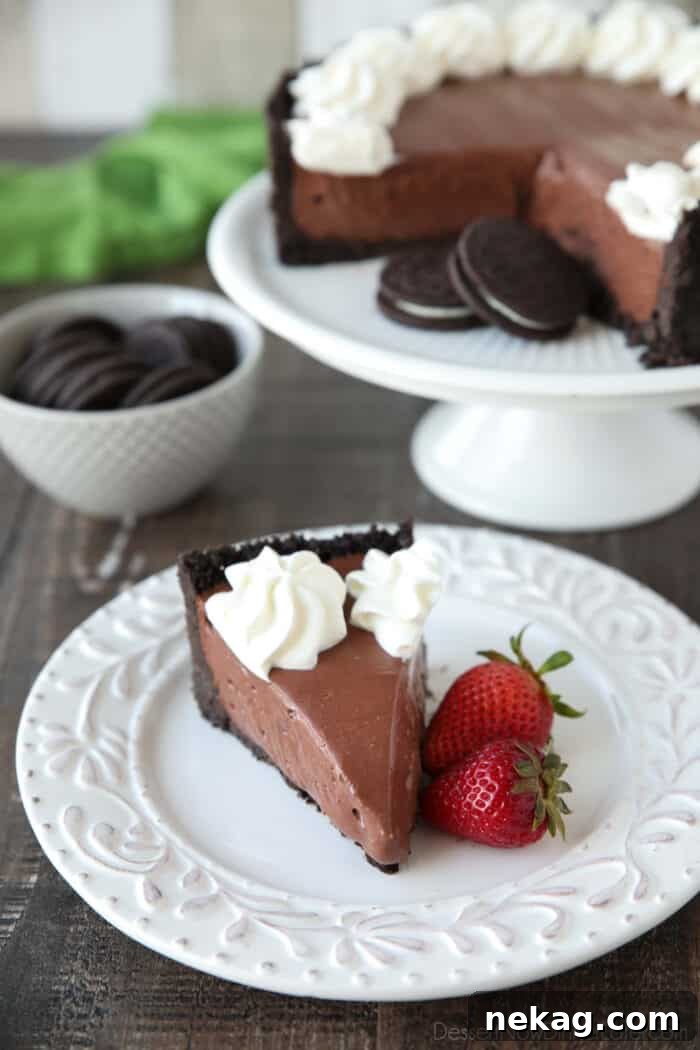
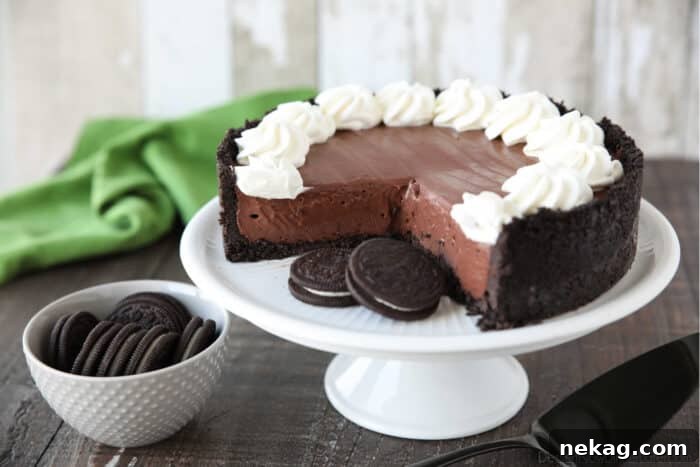
Experience pure bliss with this incredibly decadent and remarkably easy-to-make No Bake Chocolate Cheesecake. Imagine a dessert so rich and creamy, yet so simple to prepare, it requires absolutely no oven time. Perfect for scorching summer days when you want a cool, indulgent treat, or a stress-free holiday dessert that will impress everyone at the table. This recipe shines by using high-quality cocoa powder, delivering a deep, authentic chocolate flavor without the hassle of melting chocolate, ensuring a consistently smooth and luscious filling every single time. Get ready to fall in love with its silky texture and profound chocolatey goodness!
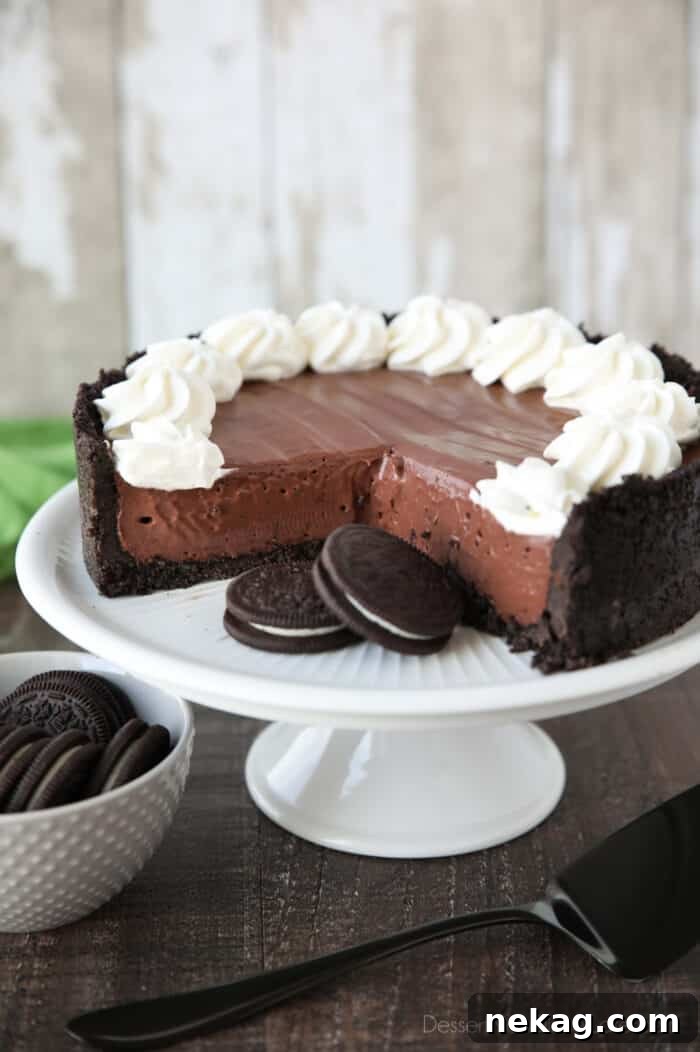
For many, the idea of baking a cheesecake can be daunting, involving water baths, crack prevention, and long oven times. But what if you could achieve that same luxurious cheesecake experience without ever turning on your oven? That’s the magic of no-bake desserts. They are a true lifesaver, especially during the sweltering heat of summer months or when you simply need a quick, impressive treat. This no bake chocolate cheesecake isn’t just easy; it’s a testament to how simplicity can lead to extraordinary flavor. The fact that it requires no baking means less cleanup, less heat in your kitchen, and more time enjoying your delicious creation.
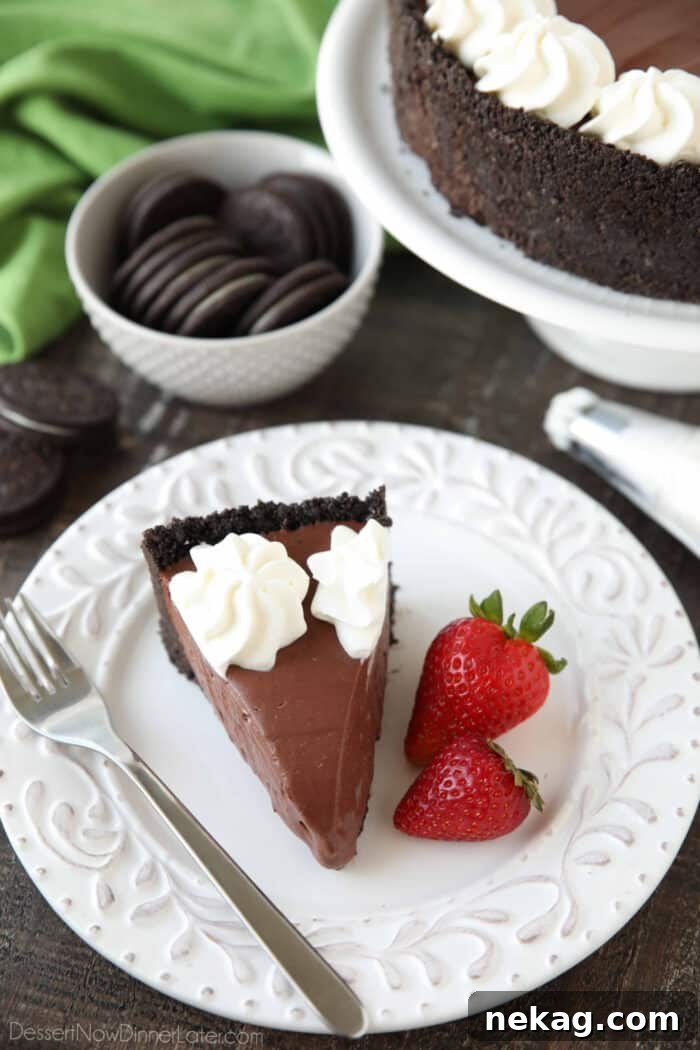
The Irresistible Appeal of No Bake Chocolate Cheesecakes
Everyone adores a classic no bake cheesecake for its light, airy, and wonderfully creamy texture. It’s a dessert that consistently brings smiles, embodying pure indulgence without the fuss. So, why not elevate this beloved classic with the rich, comforting depth of chocolate? A chocolate no-bake cheesecake offers everything you love about its vanilla counterpart, infused with an intense cocoa flavor that chocolate enthusiasts will find utterly captivating.
My inspiration for this particular recipe stems from my popular No Bake Layered Cheesecake, which features delightful layers of both vanilla and chocolate cheesecake, made effortlessly with a pre-made Oreo pie crust and lightened by whipped topping (Cool Whip). While that recipe is fantastic for its convenience, for this ultimate no-bake chocolate cheesecake, I wanted to create something truly exceptional and homemade.
Therefore, I opted for real whipped cream instead of whipped topping in the filling. This seemingly small change makes a monumental difference, transforming the cheesecake into an ultra-decadent, almost pudding-like experience. It achieves an unparalleled richness and silkiness that sets it apart from a simple chocolate pudding pie. The authentic creaminess and subtle sweetness of freshly whipped cream perfectly complement the deep chocolate, creating a symphony of flavors and textures that is truly unforgettable. It’s a sophisticated twist on a beloved classic, ensuring every bite is a luxurious treat.
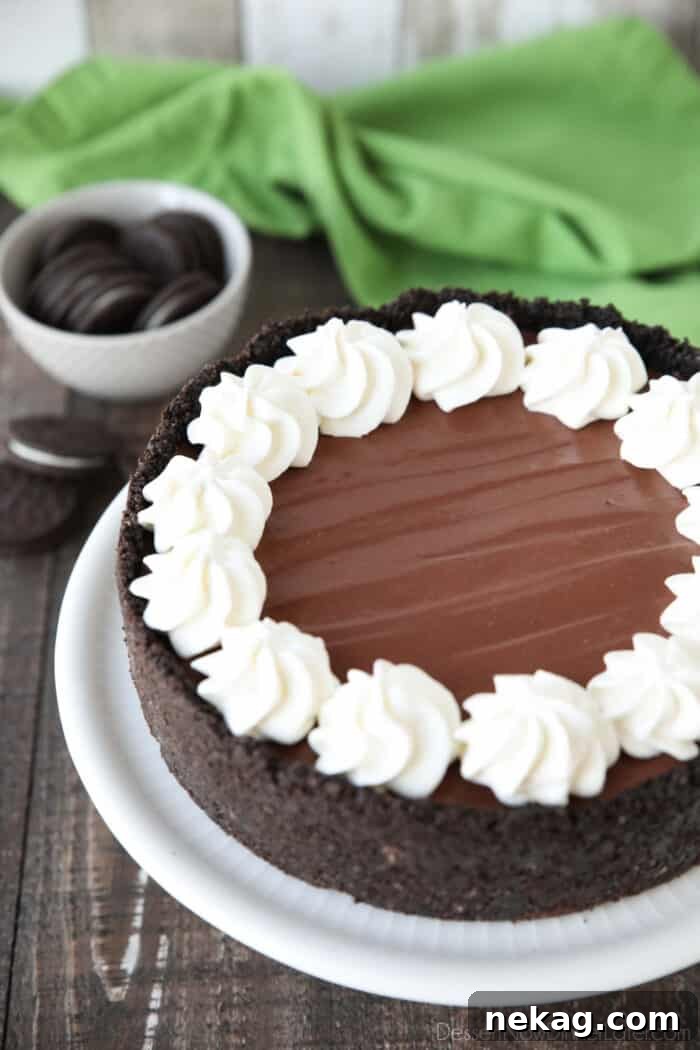
Mastering the No Bake Chocolate Cheesecake Process
Creating this divine dessert is surprisingly straightforward, thanks to its well-defined layers. Each component contributes to the overall harmony of flavor and texture, ensuring a perfect bite every time. The simplicity of these layers is what makes this no-bake chocolate cheesecake a go-to recipe for both novice and experienced bakers alike.
The Three Perfect Layers:
- The Irresistible Oreo Cookie Crust: A sturdy and flavorful foundation made from crushed Oreo cookies and melted butter. This crust is not only easy to make but also provides a delightful contrast to the creamy filling.
- Rich Chocolate Cheesecake Filling: The star of the show! This velvety smooth filling gets its intense chocolate flavor from high-quality cocoa powder, eliminating the need for melting chocolate and ensuring a consistently smooth texture.
- Delicate Sweetened Whipped Cream Topping: An optional but highly recommended addition that adds a cloud-like lightness and balances the richness of the chocolate cheesecake.
Each layer is designed for ease and maximum flavor, building up to a spectacular dessert that tastes incredibly complex despite its simple construction.
Crafting the Perfect Oreo Crust
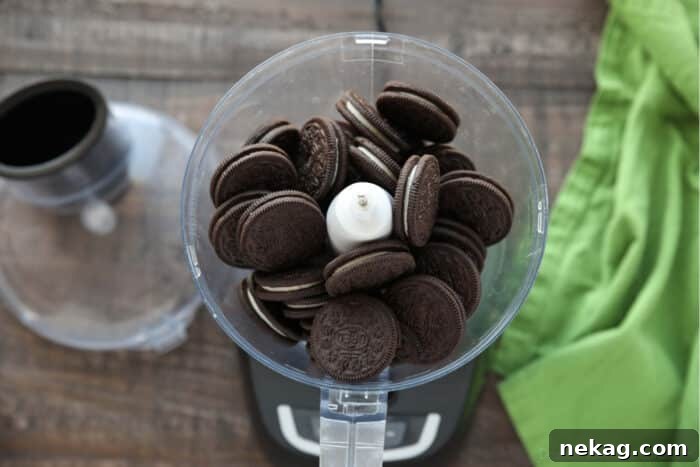
The foundation of any great cheesecake lies in its crust, and for a chocolate no-bake version, nothing quite compares to the classic Oreo. While you could use chocolate graham crackers for a similar effect, I wholeheartedly recommend Oreos. Their unique flavor profile, combined with their ability to form a wonderfully stable crust, makes them the superior choice for a dessert that doesn’t see the inside of an oven. The chocolatey crunch of the Oreo perfectly complements the creamy filling, creating an irresistible textural contrast.
Step-by-Step Oreo Crust Instructions:
- Crush the Cookies: Start by placing whole Oreo chocolate sandwich cookies (yes, the filling too!) into a food processor. Process until you achieve fine, even crumbs. Uniform crumbs are key for a cohesive crust. If you don’t have a food processor, place the cookies in a heavy-duty zip-top bag and crush them with a rolling pin until finely ground.
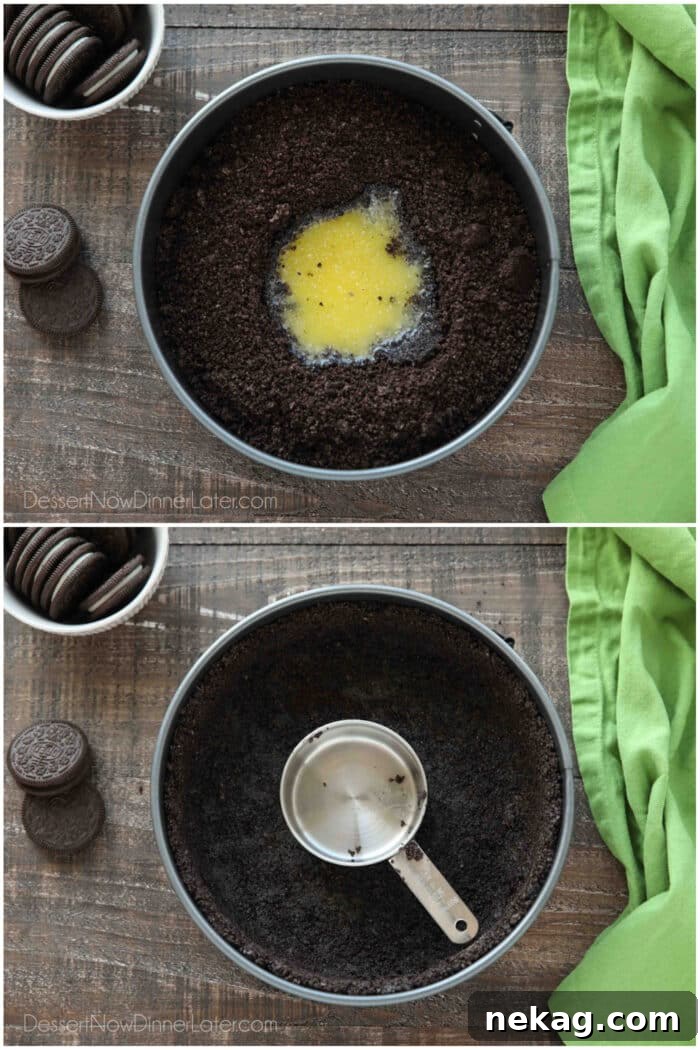
- Prepare the Pan: Transfer the crushed Oreo crumbs into an 8-inch springform pan. A springform pan is ideal for cheesecakes as its removable sides make serving incredibly easy. While an 8-inch pan provides a good height for a rich cheesecake, a 9-inch pan can also be used, though it will result in a slightly shorter, more tart-like dessert.
- Combine with Butter: Pour melted butter over the Oreo crumbs. Mix thoroughly until every crumb is evenly coated. The butter acts as a binder, holding the crust together once it chills.
- Press Firmly: Press the buttered crumbs firmly and evenly onto the bottom and slightly up the sides of the springform pan. For best results, use the bottom of a flat measuring cup or a glass to press the crumbs down, ensuring a compact and stable crust. The firmer you press, the less likely your crust is to crumble when sliced.
- Chill to Set: Place the prepared crust in the freezer while you prepare the filling. This brief freezing period helps the butter solidify quickly, setting the crust and preventing it from becoming soggy when the filling is added.
The Velvety No-Bake Chocolate Cheesecake Filling
This is where the magic truly happens. The heart of our dessert is its rich, velvety chocolate cheesecake filling. Unlike many recipes that call for melted chocolate, this version harnesses the power of cocoa powder. This not only simplifies the process (no tempering or messy melting!) but also allows for a deep, consistent chocolate flavor that’s hard to beat. Because cocoa powder is unsweetened, we incorporate slightly more powdered sugar to achieve the perfect balance of sweetness and rich chocolate intensity, surpassing the sweetness level typically needed with semi-sweet melted chocolate.
Essential Tips for a Flawless Filling:
- Sift for Smoothness: Start by placing the cocoa powder and powdered sugar in a fine mesh sieve. Position this sieve over a piece of parchment paper.
- Ensure Even Distribution: Sift the cocoa powder and powdered sugar onto the parchment paper. This crucial step prevents lumps, ensuring your cheesecake filling is incredibly smooth and uniform. Don’t skip this, as cocoa powder tends to clump easily.
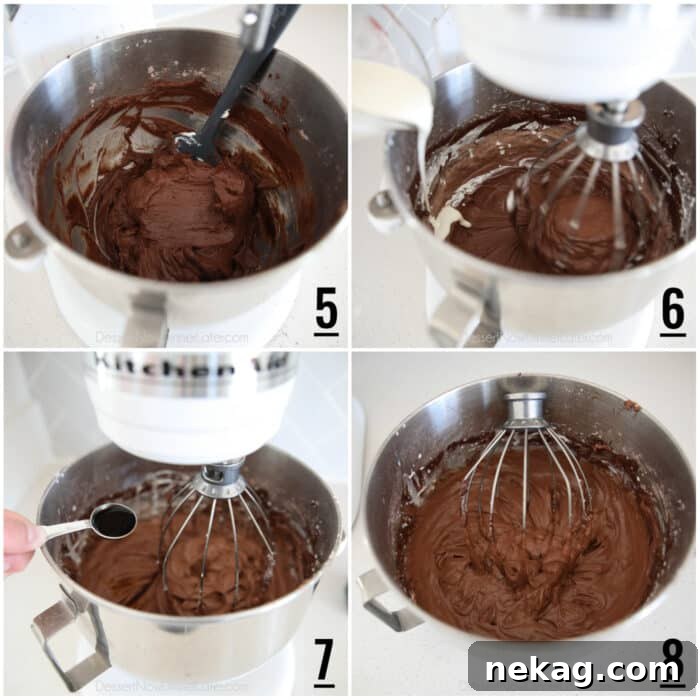
- Room Temperature Cream Cheese is Key: In a stand mixer fitted with the paddle attachment, add your cream cheese. It is absolutely vital that your cream cheese is at room temperature. Cold cream cheese will result in a lumpy filling, no matter how much you mix it.
- Combine Dry and Wet Ingredients: Fold the ends of the parchment paper together to create a funnel. Carefully pour the sifted cocoa and powdered sugar mixture into the bowl with the cream cheese. This method helps to contain the powder and prevent a mess.
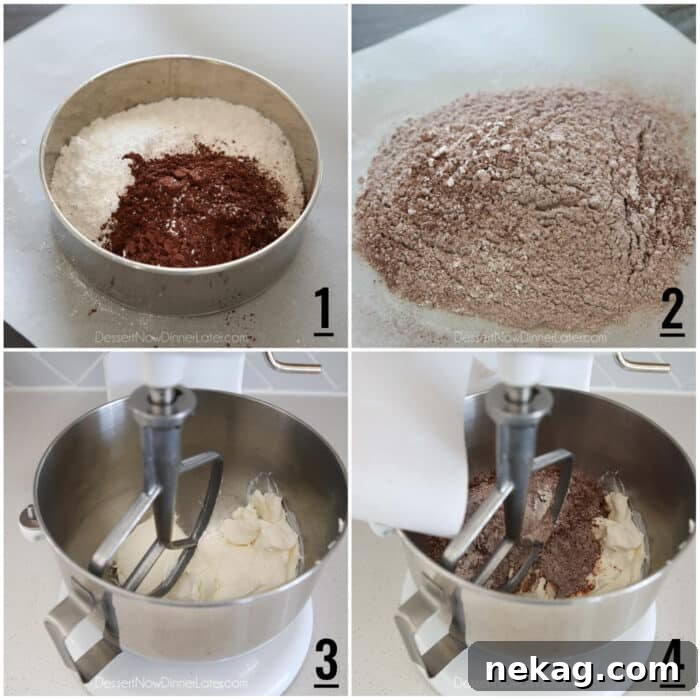
- Initial Mixing: Begin mixing the cream cheese and cocoa/sugar mixture on low speed until just combined. This prevents the powdered ingredients from flying out of the bowl. Once integrated, increase the speed to high and beat until the mixture is truly creamy and smooth, with no lumps visible. Scrape down the sides of the bowl as needed.
- Incorporating Heavy Cream: Switch your mixer to the whisk attachment. With the mixer running on a medium-low speed, begin to slowly pour in the heavy cream. Pouring slowly allows the cream to be fully incorporated without deflating the mixture, helping to create that light, airy texture.
- Flavor Enhancement: Add the vanilla extract and mix until fully combined. Vanilla is essential for enhancing the chocolate flavor, adding a layer of warmth and complexity.
- Whip to Perfection: Continue to whip the no-bake chocolate cheesecake filling until it becomes thick, fluffy, and holds its shape. This process may take a few minutes. You’ll know it’s ready when it leaves distinct ripples in the bowl and significantly increases in volume, much like when you whip heavy cream to stiff peaks. This aeration is key to the cheesecake’s luxurious, light texture.
Assembling and The Crucial Chill Time
With your perfectly prepared Oreo crust and your wonderfully fluffy chocolate cheesecake filling, it’s time for the easy assembly! This step is quick, but the subsequent chilling period is absolutely vital for achieving the perfect cheesecake consistency.
- Fill the Crust: Gently remove your chilled Oreo crust from the freezer. Carefully spoon or pour the entire no-bake chocolate cheesecake filling into the crust.
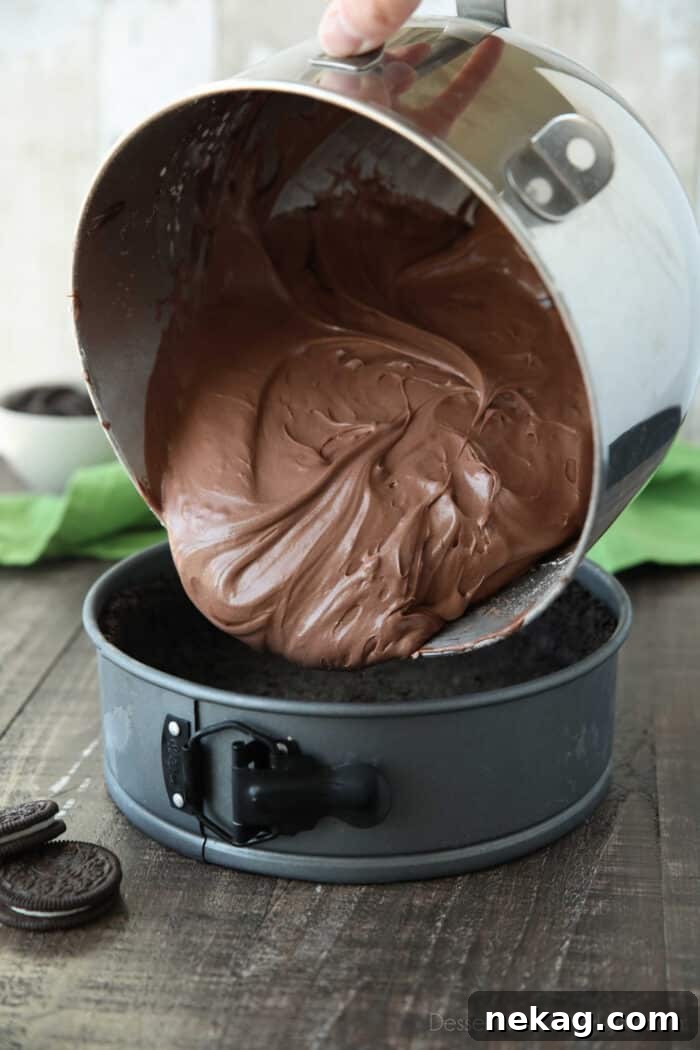
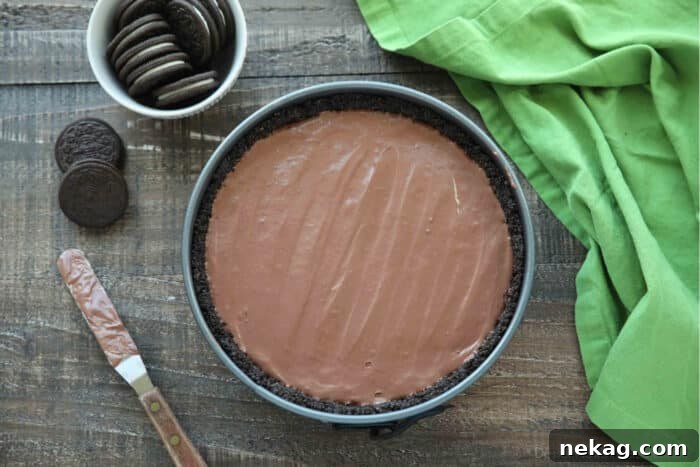
- Smooth and Level: Using an offset spatula or the back of a spoon, gently spread the chocolate filling evenly across the crust, ensuring a smooth, level top. Take your time to get it as even as possible for a beautiful presentation.
- The Essential Chill: This is arguably the most important step for a no-bake cheesecake. Place the assembled cheesecake in the refrigerator and chill for a minimum of 4-6 hours, or ideally, overnight. This extended chill time allows the filling to set completely, becoming firm enough to slice cleanly and develop its full, rich flavor. Rushing this step will result in a soft, messy cheesecake.
- Freezing Option: For an even firmer texture or if you want to prepare it further in advance, you can freeze the cheesecake for 2-3 hours until firm, then transfer it to the refrigerator. It can also be frozen solid for longer storage, just be sure to let it thaw in the refrigerator for a few hours before serving.
The Light and Airy Sweetened Whipped Cream Topping (Optional but Recommended!)
While the no-bake chocolate cheesecake is absolutely divine on its own, adding a layer of fresh, sweetened whipped cream elevates it to another level. This light and airy topping provides a beautiful contrast to the deep richness of the chocolate, offering a refreshing counterpoint that brightens every bite. It’s an optional step, but one that I highly recommend for a truly gourmet experience.
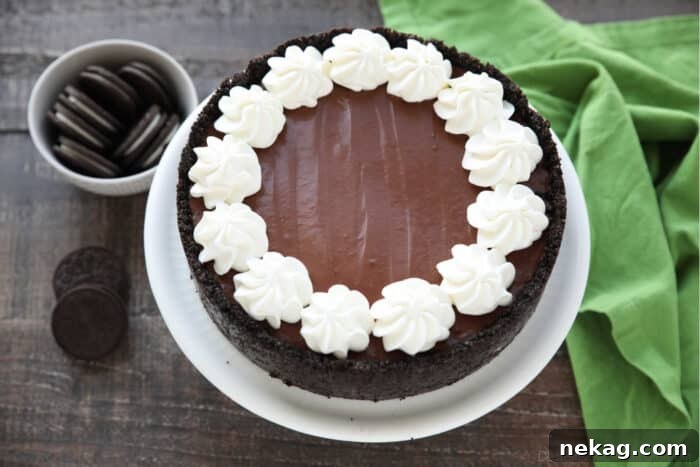
- Whip to Stiff Peaks: To make this delightful topping, simply whip 1 cup of cold heavy cream with 1/4 cup of powdered sugar in a clean, cold bowl (chilling your bowl and whisk attachment beforehand can help immensely!). Continue whipping until stiff peaks form. Be careful not to over-whip, or you’ll end up with butter!
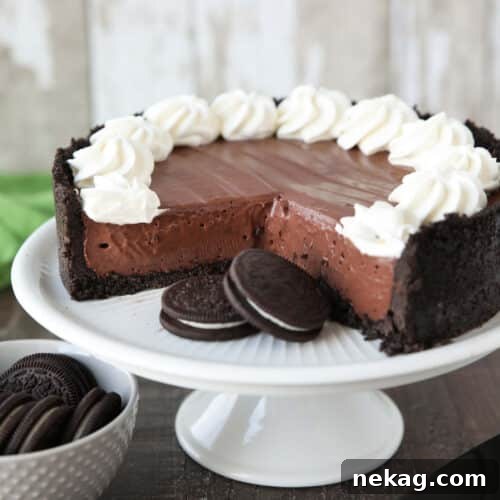
Once your whipped cream is ready, you have several options for presentation. For a fancy touch, I love using a piping bag fitted with a Wilton 2D tip to pipe elegant rosettes on top of the chilled cheesecake. This creates a stunning visual appeal that will surely impress your guests. However, if you prefer a more rustic or straightforward approach, you can simply dollop the whipped cream generously onto the cheesecake and spread it smooth with a spoon or spatula. Either way, the fresh whipped cream will add an exquisite touch.
Expert Tips for Cutting and Serving Your Cheesecake
Achieving clean, beautiful slices of cheesecake can sometimes be a challenge, but with the right technique, you’ll be serving picture-perfect portions every time. Just like a traditional baked cheesecake, a no-bake version benefits greatly from a hot knife.
- The Hot Knife Method: Before each cut, run a sharp chef’s knife under very hot water. Quickly dry the knife with a clean towel to prevent any water from dripping onto your cheesecake. The warm blade will glide effortlessly through the cold, creamy filling and firm crust, ensuring a smooth, clean cut.
- Clean Between Slices: For truly impeccable slices, repeat the process of rinsing the knife under hot water and drying it with a towel before making each subsequent cut. This prevents crumbs and filling from sticking to the knife and creating a messy appearance on your next slice.
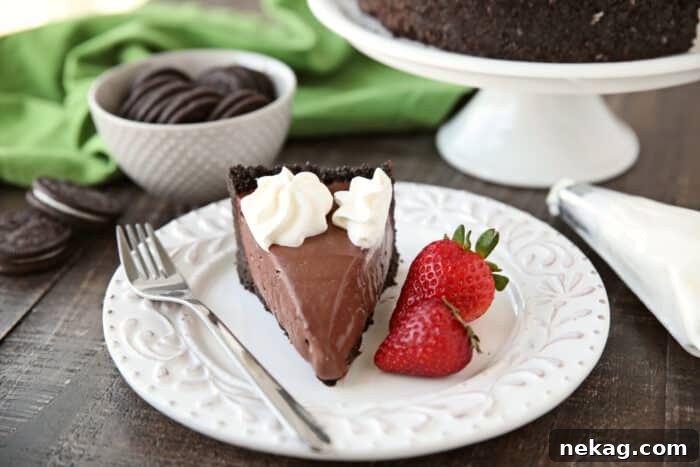
- Garnish and Serve: Once sliced, serve your cheesecake immediately. Consider garnishing each slice with fresh berries (strawberries, raspberries, or blueberries are excellent choices), a sprinkle of cocoa powder, or a few extra Oreo crumbs for added visual appeal and flavor.
How Many Slices and Sizing Your Cheesecake
When serving a rich dessert like cheesecake, portion control is often key, and the size of your springform pan plays a significant role in the yield and presentation.
- For an 8-inch Springform Pan: If you use an 8-inch springform pan, as recommended in this recipe, you can typically get 12 generous slices. Given the decadent richness of this chocolate cheesecake, these slices will be perfectly satisfying, often feeling more substantial than a standard pie slice despite their size.
- For a 9-inch Springform Pan: Should you opt for a 9-inch springform pan, expect to yield between 14-16 slices. However, it’s important to keep in mind that using a larger pan will result in a shorter cheesecake, making it more akin to a chocolate tart in height. While still delicious, the overall presentation and perceived richness will differ. Adjust your expectations accordingly if using a larger pan.
Whether you choose a smaller, taller cheesecake or a wider, shorter one, ensure your slices are consistent for an elegant serving experience.
Why This No-Bake Chocolate Cheesecake is a Must-Try
This recipe isn’t just about making a dessert; it’s about creating an experience. Here’s why this no-bake chocolate cheesecake will become a staple in your recipe collection:
- Effortless Elegance: Achieve a show-stopping dessert without the stress of baking. It’s perfect for busy hosts or those new to cheesecake making.
- Intense Chocolate Flavor: By using cocoa powder, we achieve a deep, authentic chocolate taste that’s rich without being overly sweet, appealing to true chocolate lovers.
- Luxuriously Creamy Texture: The combination of room-temperature cream cheese and freshly whipped heavy cream creates a filling that is incredibly smooth, light, and melts in your mouth.
- Versatile for Any Occasion: Whether it’s a casual summer gathering, a festive holiday meal, or a simple weeknight treat, this cheesecake fits seamlessly into any event.
- Customizable: Easily adapt the toppings and garnishes to suit your taste or the season, from fresh berries to chocolate shavings or a drizzle of caramel.
Frequently Asked Questions (FAQs)
Can I make this cheesecake ahead of time?
Absolutely! This no-bake cheesecake is an excellent make-ahead dessert. You can prepare it up to 2-3 days in advance and keep it stored in the refrigerator. In fact, chilling it overnight often enhances its flavor and ensures a perfectly firm texture. If freezing, it can last for up to 1 month, just make sure to wrap it tightly.
What kind of cocoa powder should I use?
For a deep, rich chocolate flavor, I recommend using a good quality unsweetened cocoa powder. Dutch-processed cocoa powder will give you a darker color and a milder, less bitter chocolate flavor, while natural unsweetened cocoa powder will provide a more intense, slightly fruitier chocolate note. Hershey’s Special Dark is a great option for a deep chocolate hue and flavor.
Can I use a different crust?
Yes, while an Oreo crust is highly recommended for its flavor and stability, you can certainly experiment. Chocolate graham cracker crumbs or even digestive biscuits (mixed with melted butter) would also work well. Ensure the alternative crust also sets firmly when chilled.
How do I store leftover cheesecake?
Leftover cheesecake should be stored in an airtight container in the refrigerator for up to 3-4 days. If you’ve added whipped cream topping, it’s best to add it just before serving, as it can soften over time.
Can I add other mix-ins to the filling?
Definitely! Feel free to get creative. You could fold in mini chocolate chips, chopped nuts, or even a swirl of raspberry sauce for added flavor and texture. Just be mindful not to add too many liquid ingredients, as this could affect the setting of the cheesecake.
Explore More No-Bake Desserts
If you’ve fallen in love with the ease and deliciousness of this No-Bake Chocolate Cheesecake, you’ll be thrilled to discover a world of other simple, refreshing desserts that require no oven! Perfect for hot days, busy schedules, or simply when you crave a fuss-free treat, these no-bake recipes are sure to become new favorites.
- Cheesecake Stuffed Strawberries
- Lemon Fluff
- No Bake Peanut Butter Pie
- Oreo Ice Cream Dessert
- Orange Fluff
- No Bake Peanut Butter Bars with Graham Crackers
- S’mores Krispie Treats
- Strawberry Fluff
- Chocolate Cheesecake Stuffed Strawberries
- Eclair Icebox Cake
- No Bake Nutella Cheesecake
- Raspberry Fluff
No Bake Chocolate Cheesecake
Amber Brady
20 minutes
4 hours
4 hours
20 minutes
Pin Recipe
Rate This Recipe
12
servings
Ingredients
Crust:
-
30
Oreo chocolate sandwich cookies -
6 Tbsp
(85 g)
butter, melted
Filling:
-
16 oz
(452 g)
cream cheese, room temperature -
2 cups
(240 g)
powdered sugar -
½ cup
(40 g)
cocoa powder, (I used Hershey’s Special Dark) -
1 tsp
vanilla extract -
1 cup
(237 ml)
heavy cream
Topping: (optional)
-
1 cup
(237 ml)
heavy cream -
¼ cup
(30 g)
powdered sugar
Equipment
-
6-inch round sifter
-
Silicone Spatula Set
-
KitchenAid 5-Qt. Stand Mixer
-
8-inch Springform Pan
-
Wilton 2D Tip
-
Wilton Disposable Piping Bags
Instructions
FOR THE CRUST:
-
Place Oreo chocolate sandwich cookies (filling and all) into a food processor and blend until fine crumbs.
-
Place crumbs into an 8-inch springform pan. (A 9-inch pan would also work, but will result in a shorter cheesecake.) Add melted butter and combine until all crumbs are coated.
-
Press evenly on the bottom and up the sides of the pan. (Can use the bottom of a measuring cup to help with this.) Freeze crust until filling is ready.
FOR THE FILLING:
-
Place the cocoa powder and powdered sugar in a fine mesh sieve over a piece of parchment paper.
-
Sift the cocoa and powdered sugar onto the parchment paper.
-
Place cream cheese in a stand mixer fitted with the paddle attachment.
-
Fold the ends of the parchment paper together to create a funnel to pour the cocoa and powdered sugar into the bowl of cream cheese.
-
Mix the cream cheese and cocoa/sugar mixture on low until combined, and then on high until creamy and smooth.
-
Switch to the whisk attachment and whip the cream cheese while slowly pouring the heavy cream.
-
Add vanilla and mix to combine.
-
Whip the no bake chocolate cheesecake filling until thick and fluffy. This will take a few minutes. It will leave ripples in the bowl and increase in volume. You want to whip it like you would heavy cream for stiff peaks.
TO ASSEMBLE:
-
Remove the Oreo crust from the freezer and empty the chocolate filling into the crust.
-
Spread smooth with a spatula. Chill the no-bake chocolate cheesecake in the refrigerator for 4-6 hours or overnight. Optional: Freeze the cheesecake instead of refrigerating it.
FOR THE TOPPING:
-
Using a stand mixer with the whisk attachment, whip 1 cup of heavy cream with 1/4 cup powdered sugar until stiff peaks.
-
Use a piping bag and Wilton 2D tip to pipe rosettes on top, or simply dollop the whipped cream on top and spread it smooth.
Notes
- Run a chef’s knife under hot water, dry it with a towel, and cut into the cheesecake.
- Repeat rinsing and drying the knife with each cut. (YIELD: 12 SLICES)
Nutrition
Calories: 575kcal |
Carbohydrates: 51g |
Protein: 6g |
Fat: 40g |
Saturated Fat: 22g |
Polyunsaturated Fat: 10g |
Trans Fat: 1g |
Cholesterol: 98mg |
Sodium: 321mg |
Fiber: 2g |
Sugar: 36g
Disclaimer: Nutritional values were calculated using a third-party tool and are provided as an estimation only.
Sharing this recipe with a link is both encouraged and appreciated. Copying/pasting and/or screenshots of full recipes to any social media is strictly prohibited. Content and photographs are copyright protected.
Did you make this?
Don’t forget to leave a rating below and make sure to follow on Pinterest and Instagram for more!