

The Ultimate Easy Cookie Icing Recipe: Shiny, Soft & Perfect for Beginners
Are you looking for an incredibly simple yet effective way to elevate your cookie decorating game? This **easy cookie icing** recipe is the perfect solution, offering a delightful alternative to traditional royal icing. Crafted with just 5 readily available ingredients, you can whip up this delicious glaze in under 5 minutes. The result? A beautifully shiny icing that sets firm enough for stacking but remains wonderfully soft when bitten into, delivering a truly delightful taste experience every time.

I developed this particular recipe as a fuss-free substitute for royal icing with meringue powder, especially for those occasions when you’re decorating classic cut-out sugar cookies or rich chocolate sugar cookies. The inclusion of light corn syrup is a game-changer; while optional, it’s highly recommended as it imparts a beautiful, glossy finish once the icing is fully set, and it prevents the icing from becoming too brittle, keeping it pleasantly soft. This makes it an **excellent option for cookie decorating beginners** or for anyone who needs a quick and reliable icing when time is short. You’ll achieve professional-looking results without the usual complexity.
One of the many advantages of this versatile recipe is its adaptability. You can easily color this simple cookie icing with food dye to create vibrant designs, decorating just as you would with royal icing. The best part? You likely already have all the necessary ingredients in your pantry. There’s no need for the extra step of whipping up a meringue, and if your icing accidentally turns out too thin, simply add a bit more powdered sugar to achieve the desired consistency. Conversely, you can thin it out further to drizzle over other delicious treats like one-bowl brownies, zesty lemon blondies, or classic chewy blondies, making it a truly multi-purpose glaze.
Table of Contents
- Why This is the Best Easy Cookie Icing
- Expert Tips for Flawless Cookie Icing
- Essential Ingredients for Your Simple Cookie Icing
- Creative Variations & Smart Substitutions
- Step-by-Step Guide: Making Your Easy Cookie Icing
- Decorating Cookies Like a Pro with Simple Icing
- Chef Lindsey’s Recipe Tip
- Frequently Asked Questions About Cookie Icing
- Easy Cookie Icing Recipe Card
- Before You Go: More Delicious Recipes
Why This Easy Cookie Icing is a Game Changer
When it comes to decorating cookies, the right icing can make all the difference. This particular recipe stands out for several compelling reasons, making it superior to many other options, especially for home bakers and beginners:
- Achieves a Beautifully Shiny and Pleasantly Soft Finish: Unlike some icings that dry rock-hard, this recipe yields a surface that is both elegantly glossy and delightfully tender. The secret lies in the addition of just one tablespoon of light corn syrup per batch. This small amount works wonders, creating a lovely sheen that enhances the visual appeal of your cookies, while also ensuring the icing remains soft and enjoyable to eat, rather than crumbly or stiff.
- Quick and Effortless Preparation with 5 Ingredients in 5 Minutes: Time is often a luxury, and this recipe respects that. With only five basic ingredients and a preparation time of under five minutes, you can have a batch of perfect cookie icing ready almost instantly. This rapid turnaround means less stress and more time for the fun part: decorating! Imagine creating stunning Christmas cookies or festive treats without the usual fuss and lengthy waiting times. It’s ideal for busy schedules or spontaneous baking sessions.
- Simplifies Decorating with One Consistency for Both Outlining & Flooding: Many advanced icing techniques require mastering two different consistencies – a thicker one for outlining and a thinner one for flooding the cookie interior. This can be intimidating for novices. However, this recipe eliminates that complexity. By carefully adjusting to a single, medium consistency, you can use the same batch of icing for both outlining your cookie designs and then seamlessly filling them in. This unified approach prevents the icing from becoming too thin too quickly, ensuring perfectly iced sugar cookies with clean lines and smooth surfaces every time. It streamlines the decorating process, making it accessible and enjoyable for everyone.

Expert Tips for Flawless Cookie Icing
Achieving perfectly iced cookies is an art, but with a few professional insights, you can master this easy cookie icing to create stunning results. Here are some key tips to keep in mind:
- Vanilla Extract’s Influence on Icing Color: Traditional vanilla extract, while adding wonderful flavor, has a brownish tint that will noticeably color your icing. For me, the rich vanilla flavor is often worth this slight trade-off, leading to a charming off-white hue. However, if your goal is a pristine, bright white icing without using food coloring, you have two options: either omit the vanilla extract entirely (though this will affect the flavor profile) or opt for a clear vanilla extract, which delivers the flavor without compromising the color.
- Achieving a Perfectly Opaque White Icing: To truly achieve a brilliant, opaque white icing that completely covers the cookie beneath, especially if you’re icing darker cookies like our chocolate sugar cookie recipe, you will need a tiny amount of white gel food coloring. Just a small drop is usually sufficient to transform the icing into a vibrant, solid white, ensuring no hint of the cookie’s original color peeks through. This is a must-have trick for striking, clean designs.
- The Pitfall of Excessive Food Coloring: Be extremely cautious when adding gel food coloring. Even a slightly generous amount can significantly alter the icing’s consistency and prevent it from setting fully. To avoid this common pitfall, I highly recommend using a toothpick or a small skewer. Dip the tip into your gel food coloring and then transfer that small amount to your icing, mixing thoroughly. This method allows for precise control, letting you gradually build up the desired color without compromising the icing’s structural integrity or its ability to set properly.
- Sifting Powdered Sugar is Key: For the smoothest, lump-free icing, always sift your powdered sugar, especially if it’s been sitting in the pantry for a while and has developed clumps. Sifting ensures a silky-smooth base, which is crucial for piping and achieving a flawless finish on your cookies.
- Proper Mixing Prevents Air Bubbles: When whisking your icing, mix until just combined and smooth. Over-whipping can incorporate too much air, leading to tiny air bubbles in your final iced surface. If you notice bubbles, gently tap your piping bag or cookie on the counter after flooding to release them before the icing sets.
Essential Ingredients for Your Simple Cookie Icing
This easy cookie icing recipe shines for its simplicity, relying on just a handful of common pantry staples to create a delicious and versatile glaze. Here’s a closer look at each ingredient and its role:
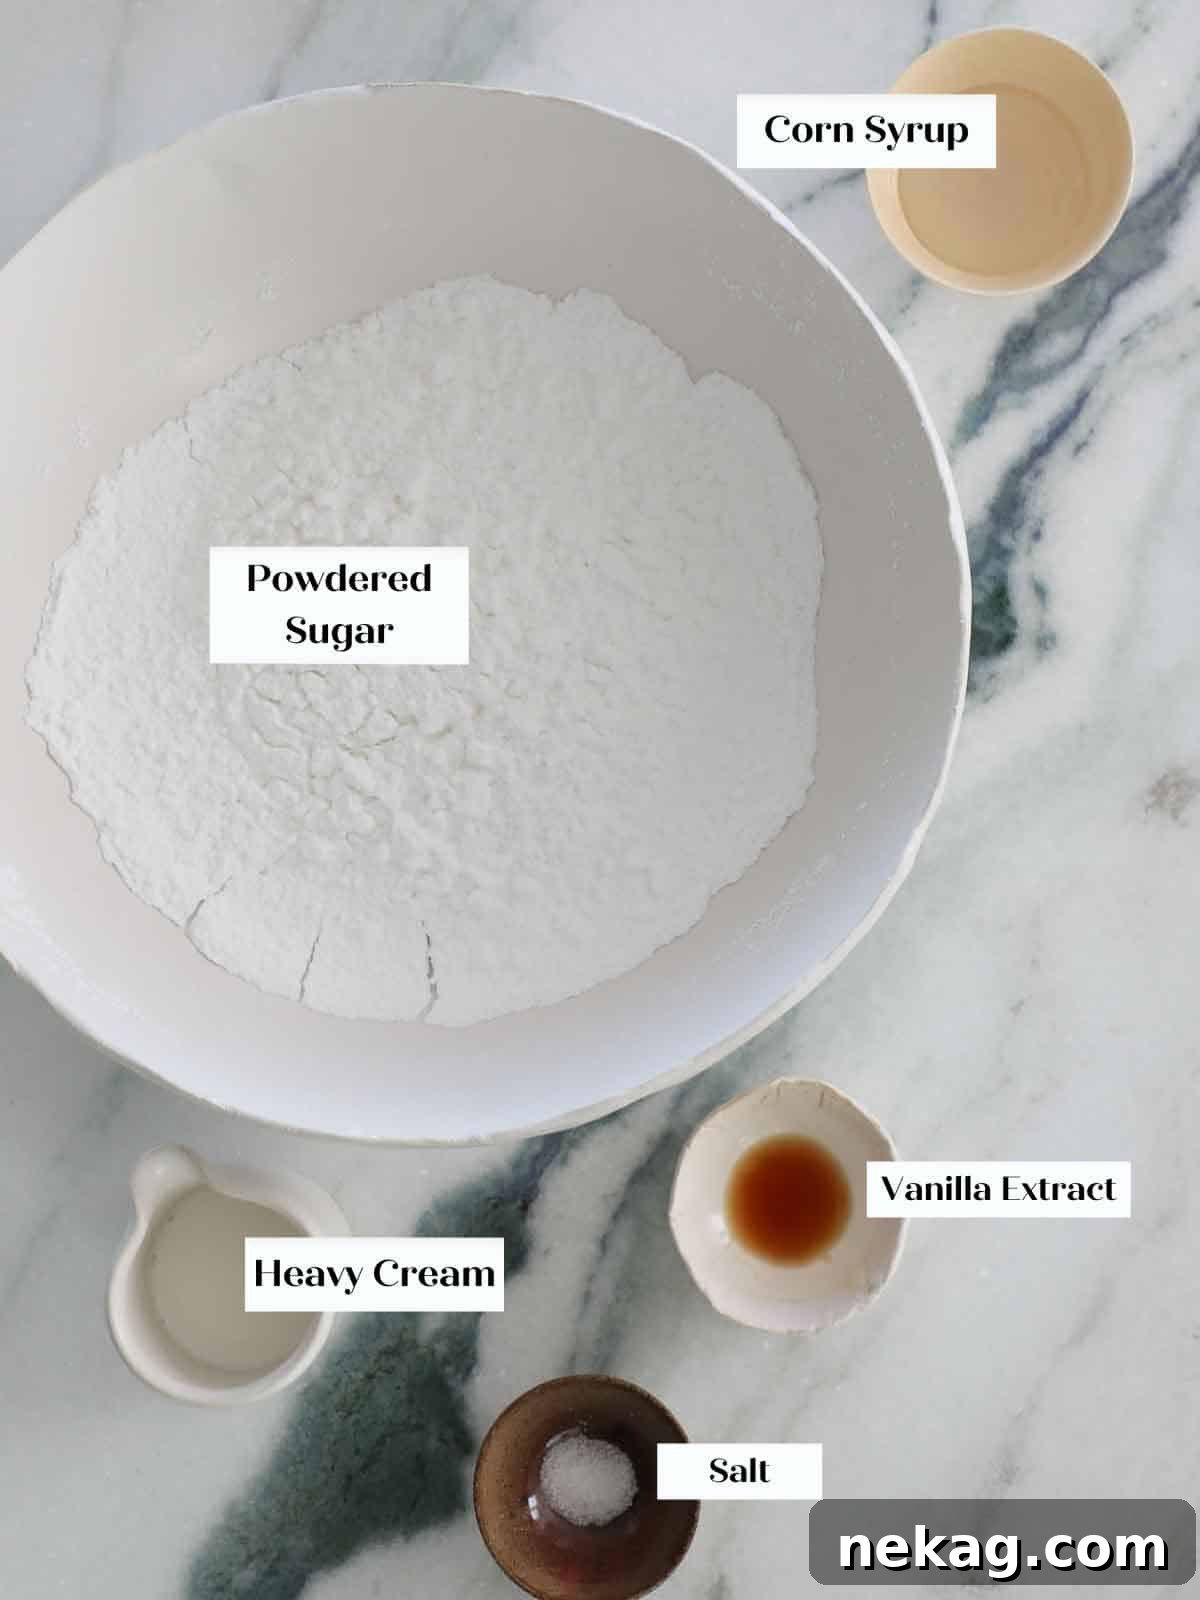
- Powdered Sugar (Confectioner’s Sugar): This forms the base of our icing, much like my popular easy donut glaze. For the smoothest, lump-free result, I highly recommend sifting your powdered sugar, especially if it’s prone to clumping. Sifting ensures a uniform texture, which is essential for elegant cookie decorating.
- Light Corn Syrup (Karo Syrup): This is our secret ingredient for that professional-looking sheen and soft chew. Light corn syrup contributes significantly to the icing’s glossy finish and helps prevent it from drying too hard or cracking. While you can omit it if absolutely necessary, I strongly advise including it if you have it on hand, as it truly enhances the final texture and appearance.
- Kosher Salt (Diamond Crystal): A small pinch of kosher salt might seem unexpected in a sweet recipe, but it plays a crucial role. It beautifully offsets the intense sweetness of the powdered sugar, balancing the flavors and preventing the icing from being overly cloying. I would not recommend omitting it, as it significantly improves the overall taste.
- Vanilla Extract (Pure Vanilla): Vanilla extract adds a classic, warm flavor that complements almost any cookie. As mentioned in the tips, traditional vanilla has a slight tint. To preserve a pure white color, consider using a clear vanilla extract or omitting it. Personally, I find the flavor contribution of vanilla extract to be worth a slight tint, so I either embrace the natural color or add a tiny drop of white gel food coloring to neutralize it.
- Milk (Whole Milk): I prefer using whole milk because its pure white color helps maintain the brightness of the icing. Alternative milks or cream can introduce a different hue, which might subtly alter your desired color. The fat content in whole milk also contributes to a richer mouthfeel.
For precise measurements and full instructions, please refer to the recipe card below.
Creative Variations & Smart Substitutions for Your Easy Cookie Icing
One of the joys of this easy cookie icing recipe is its incredible versatility. With a few simple tweaks, you can customize the flavor, color, and even texture to perfectly match your cookies and your occasion. Don’t be afraid to experiment!
- Unleash Different Flavors: While vanilla is a beloved classic, the possibilities for flavor innovation are endless. For a bright and zesty twist, try Nielson Massey’s lemon extract, almond extract, peppermint extract for holiday cookies, or orange extract for a sunny citrus note. You can also replace the milk with lemon juice or lime juice for a tangy, fruit-infused icing that pairs wonderfully with sugar cookies. A touch of espresso powder can create a coffee-flavored glaze, perfect for chocolate cookies.
- Add a Pop of Color with Food Coloring: This simple white icing is a blank canvas for vibrant designs. You can easily incorporate gel or liquid food coloring to create any hue imaginable.
- Using Liquid Food Coloring: If you opt for liquid food coloring, I recommend adding it *before* the icing reaches its perfect consistency. Liquid dyes contain water, and adding them at the final stage can thin the icing too much. Start with a tiny amount and mix, gradually adding more until you achieve your desired shade.
- Using Gel Food Coloring: Gel colors are highly concentrated and won’t significantly alter the consistency. Use a toothpick to add small amounts, mixing thoroughly after each addition for precise color control.
- Layer Colors and Textures Just Like Royal Icing: Don’t let the simplicity of this recipe fool you; this easy cookie icing is capable of achieving many of the same intricate designs as its more complicated royal icing counterpart. Feel free to color different batches of icing, transfer them to piping bags, and layer on textures, fine lines, and ornate details. You can create wet-on-wet designs, marble effects, or even 3D elements (though for very tall 3D elements, royal icing might still hold an edge due to its meringue stability). Let your creativity soar!
- Vegan-Friendly Options: To make this icing vegan, simply substitute the whole milk with a neutral-flavored plant-based milk like almond milk or soy milk. Ensure your powdered sugar is cane sugar, as some brands process it with bone char.
- Making it Thicker or Thinner: For detailed piping work, you might want a slightly thicker icing. Gradually add more powdered sugar, a tablespoon at a time, until it holds its shape well. For a very thin drizzle, add a few more drops of milk or water until it reaches the desired flow.
Step-by-Step Guide: Making Your Easy Cookie Icing
Creating this simple, yet utterly delicious, icing for decorating cookies is remarkably straightforward. Follow these clear instructions to achieve the perfect consistency and flavor. You’ll find further details and precise measurements in the recipe card provided below.
How to Make the Icing:
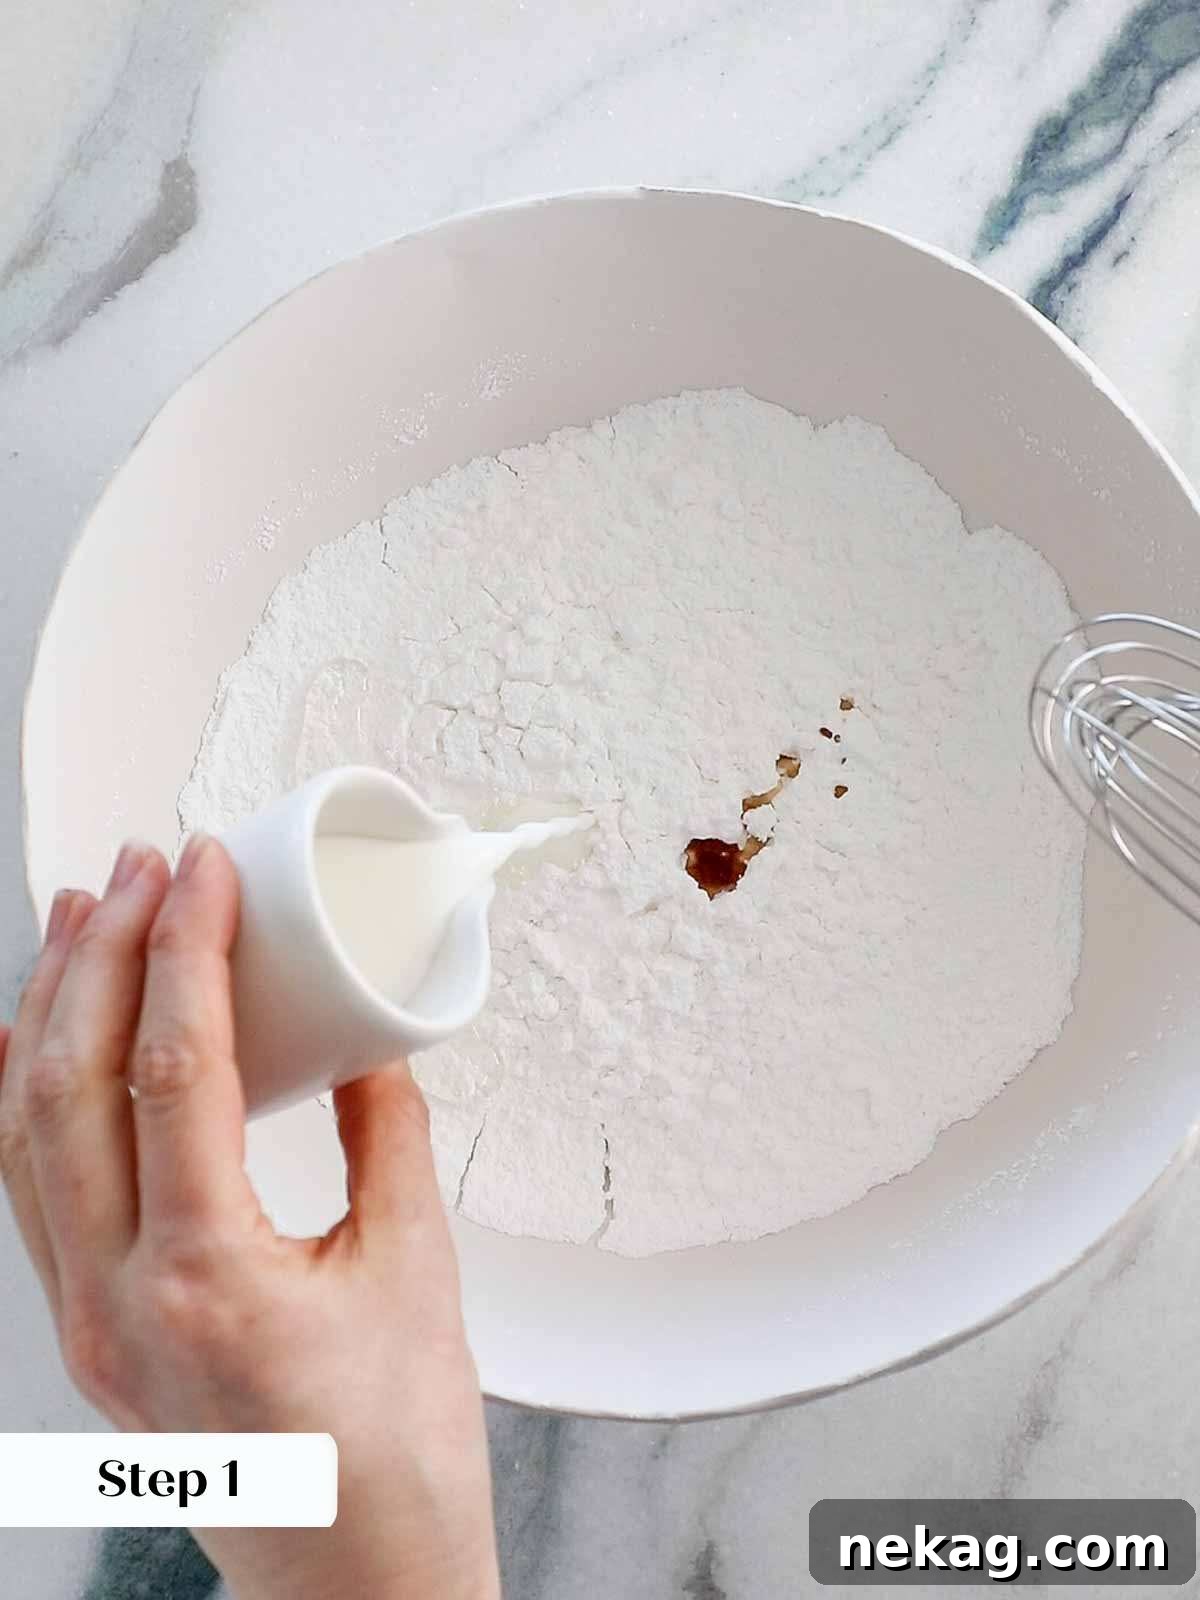
Step 1: Combine Dry and Wet Ingredients (Initial Mix)
Begin by combining your sifted powdered sugar, light corn syrup, kosher salt, and vanilla extract in a medium-sized mixing bowl. Ensure all dry ingredients are thoroughly mixed before adding liquids to prevent lumps.
Step 2: Gradually Add Milk to Achieve Perfect Consistency
Start by adding just 1 tablespoon of milk to the mixture. Whisk vigorously. The icing will appear very thick at first. Continue to slowly add more milk, a few drops at a time, whisking thoroughly after each addition. This gradual approach is crucial for controlling the consistency. If you accidentally add too much milk and your icing becomes too thin, simply add a bit more sifted confectioner’s sugar, a tablespoon at a time, until it thickens back up. The goal is a smooth, flowing consistency that isn’t watery.
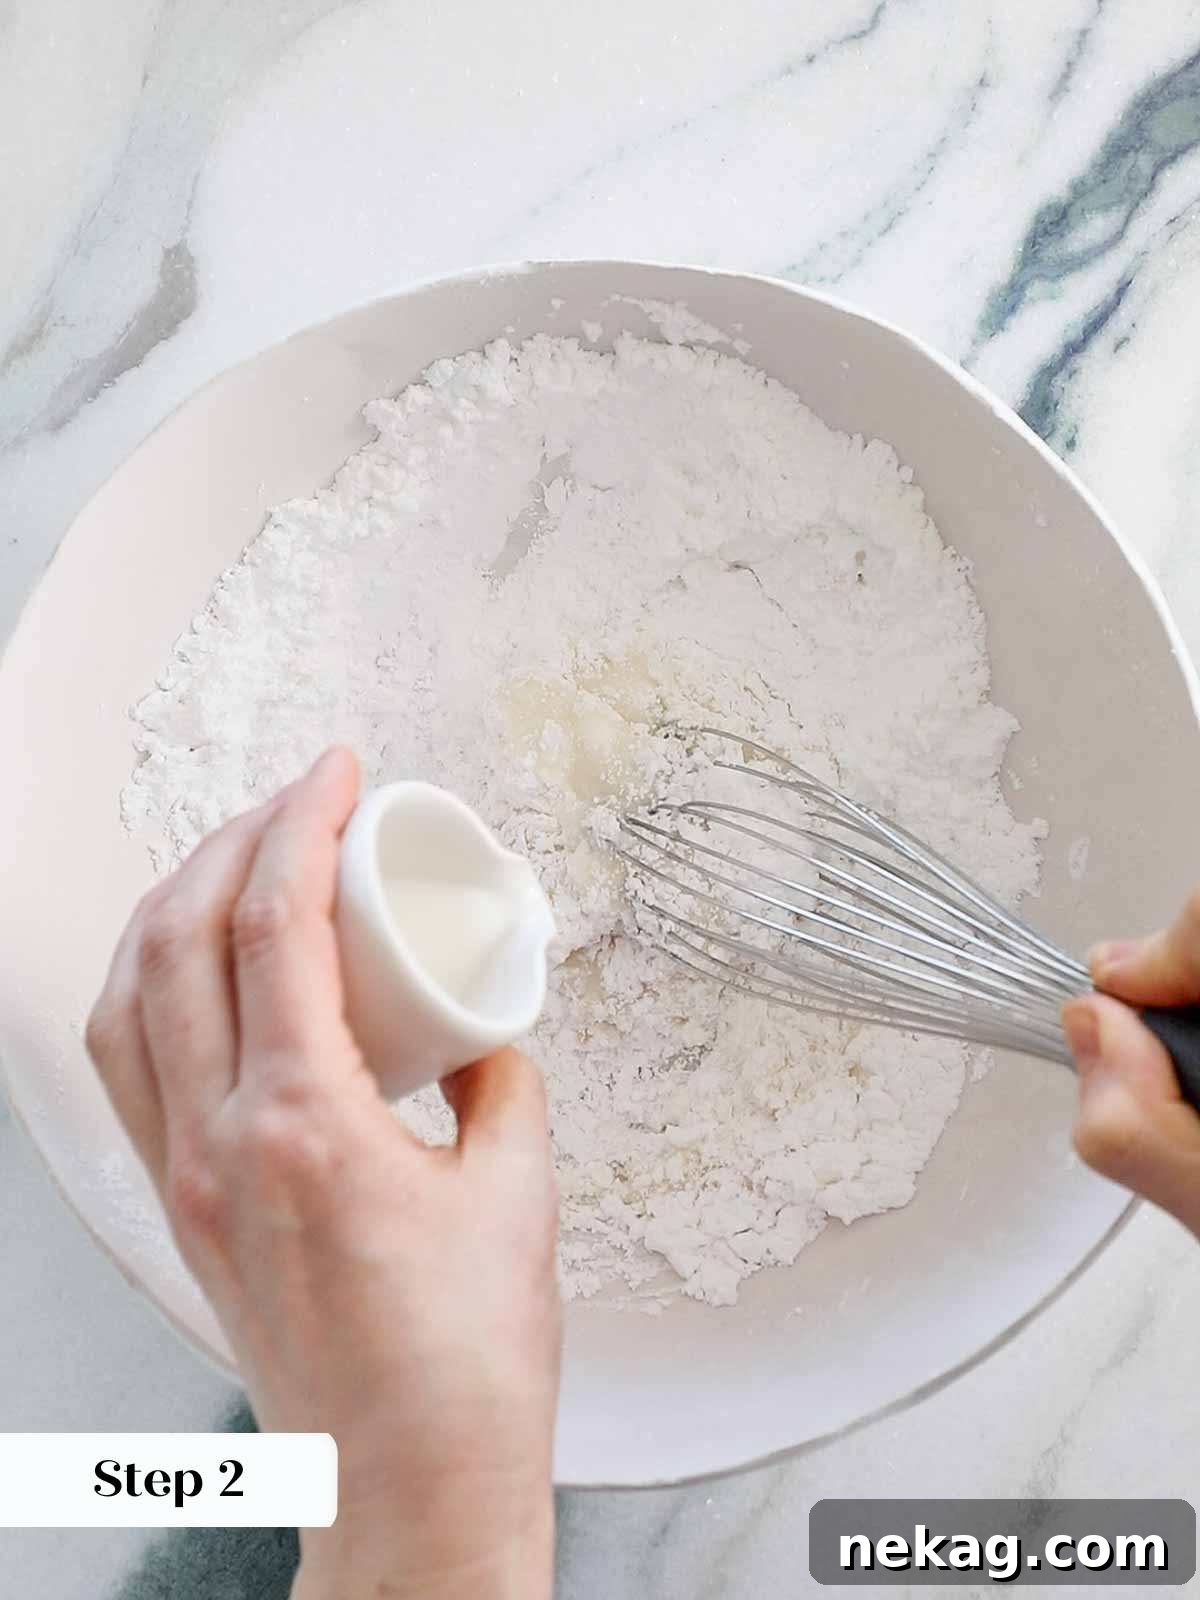
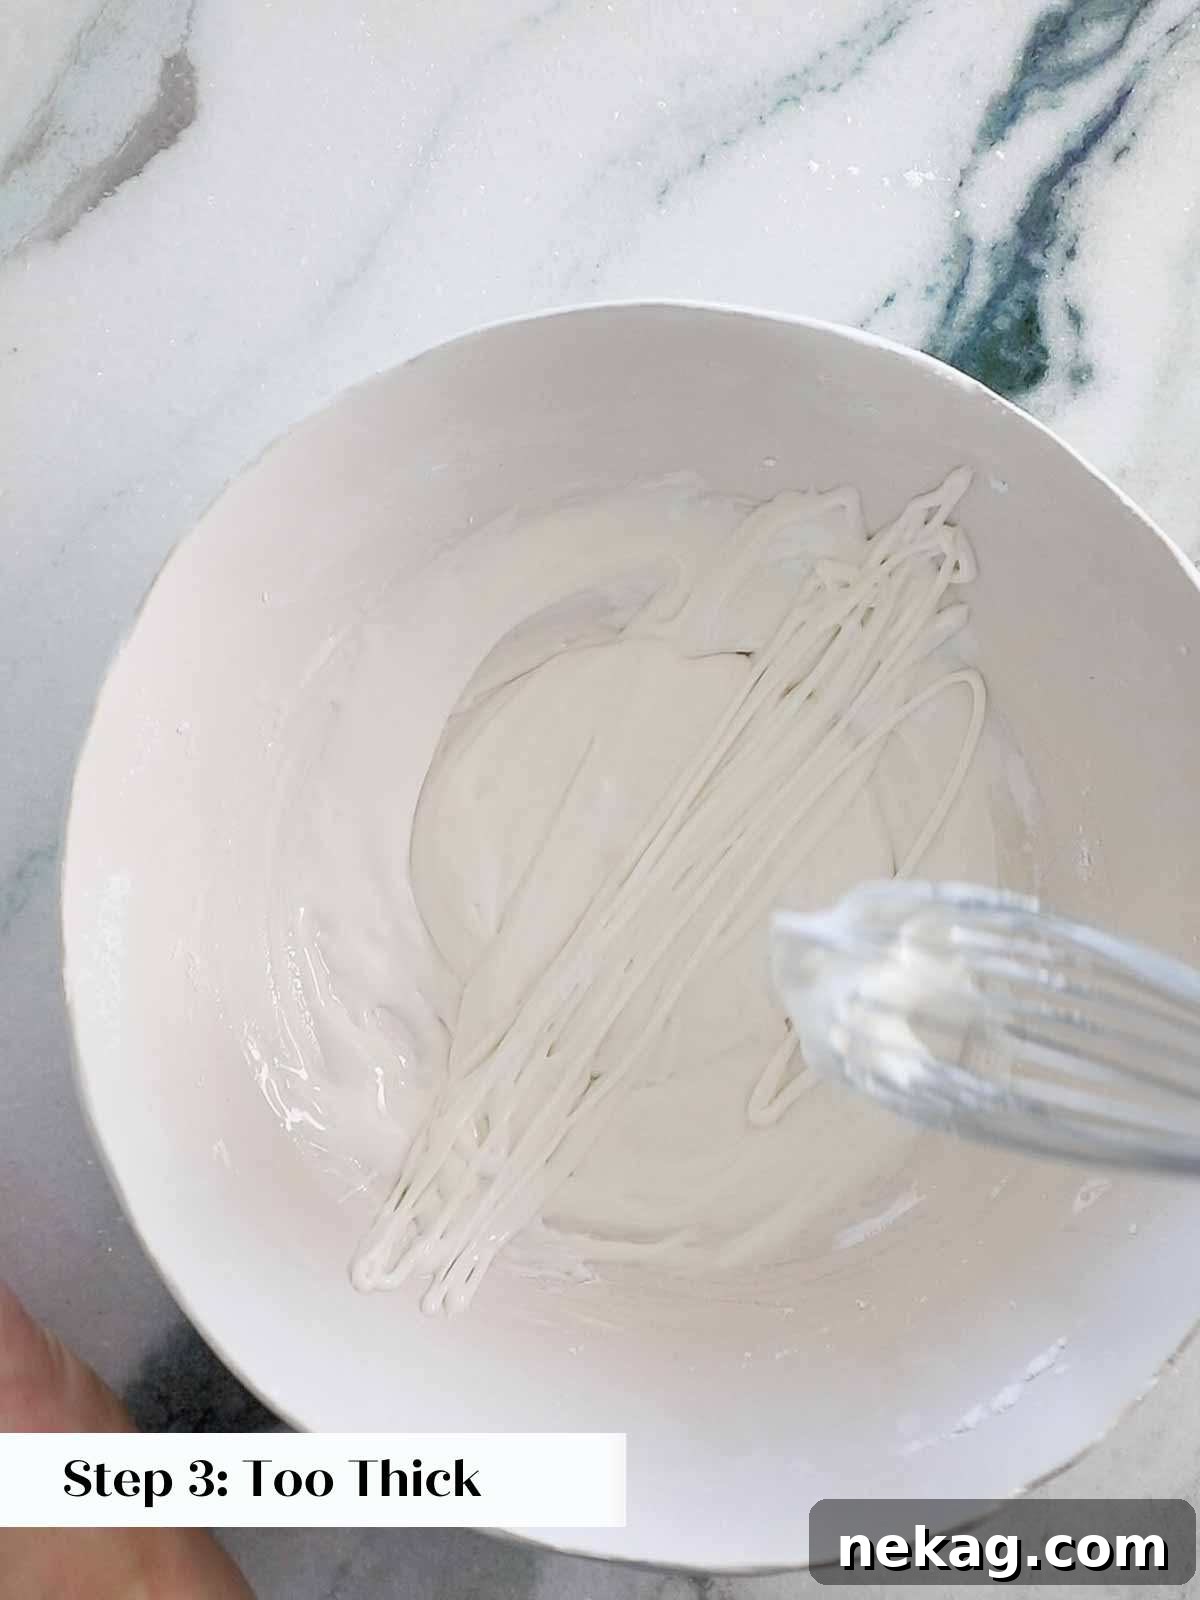
A key advantage of this simple powdered sugar icing is that you can use one consistent texture for both outlining and flooding, unlike royal icing which often requires two different consistencies. When you lift your whisk, the icing should flow off in a thick, cohesive ribbon. This ribbon should then settle and rest on the surface of the icing in the bowl for a brief moment (about 5-10 seconds) before slowly disappearing back into the main batch. This “5-10 second rule” is a great indicator of perfect outlining and flooding consistency. If the ribbon disappears too quickly, your icing is too thin; add more powdered sugar. If it holds its shape indefinitely or breaks off jaggedly, it’s too thick; add a few more drops of milk.
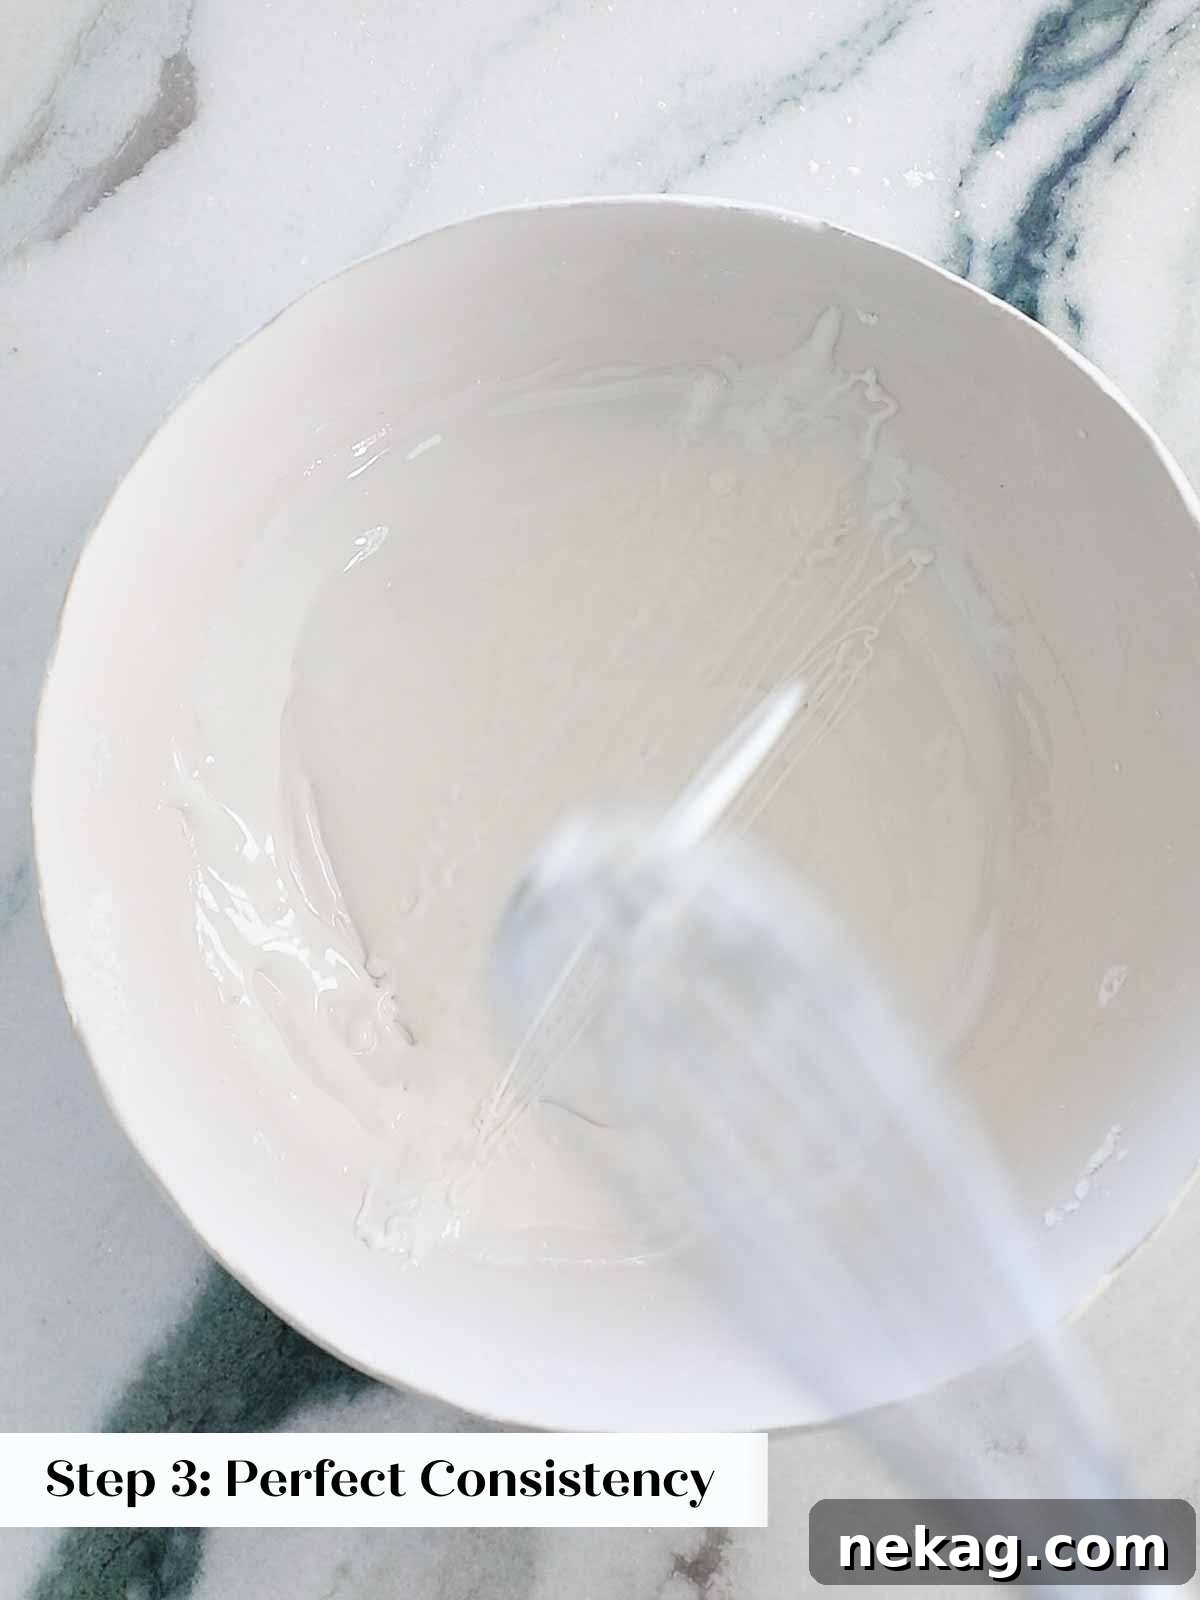
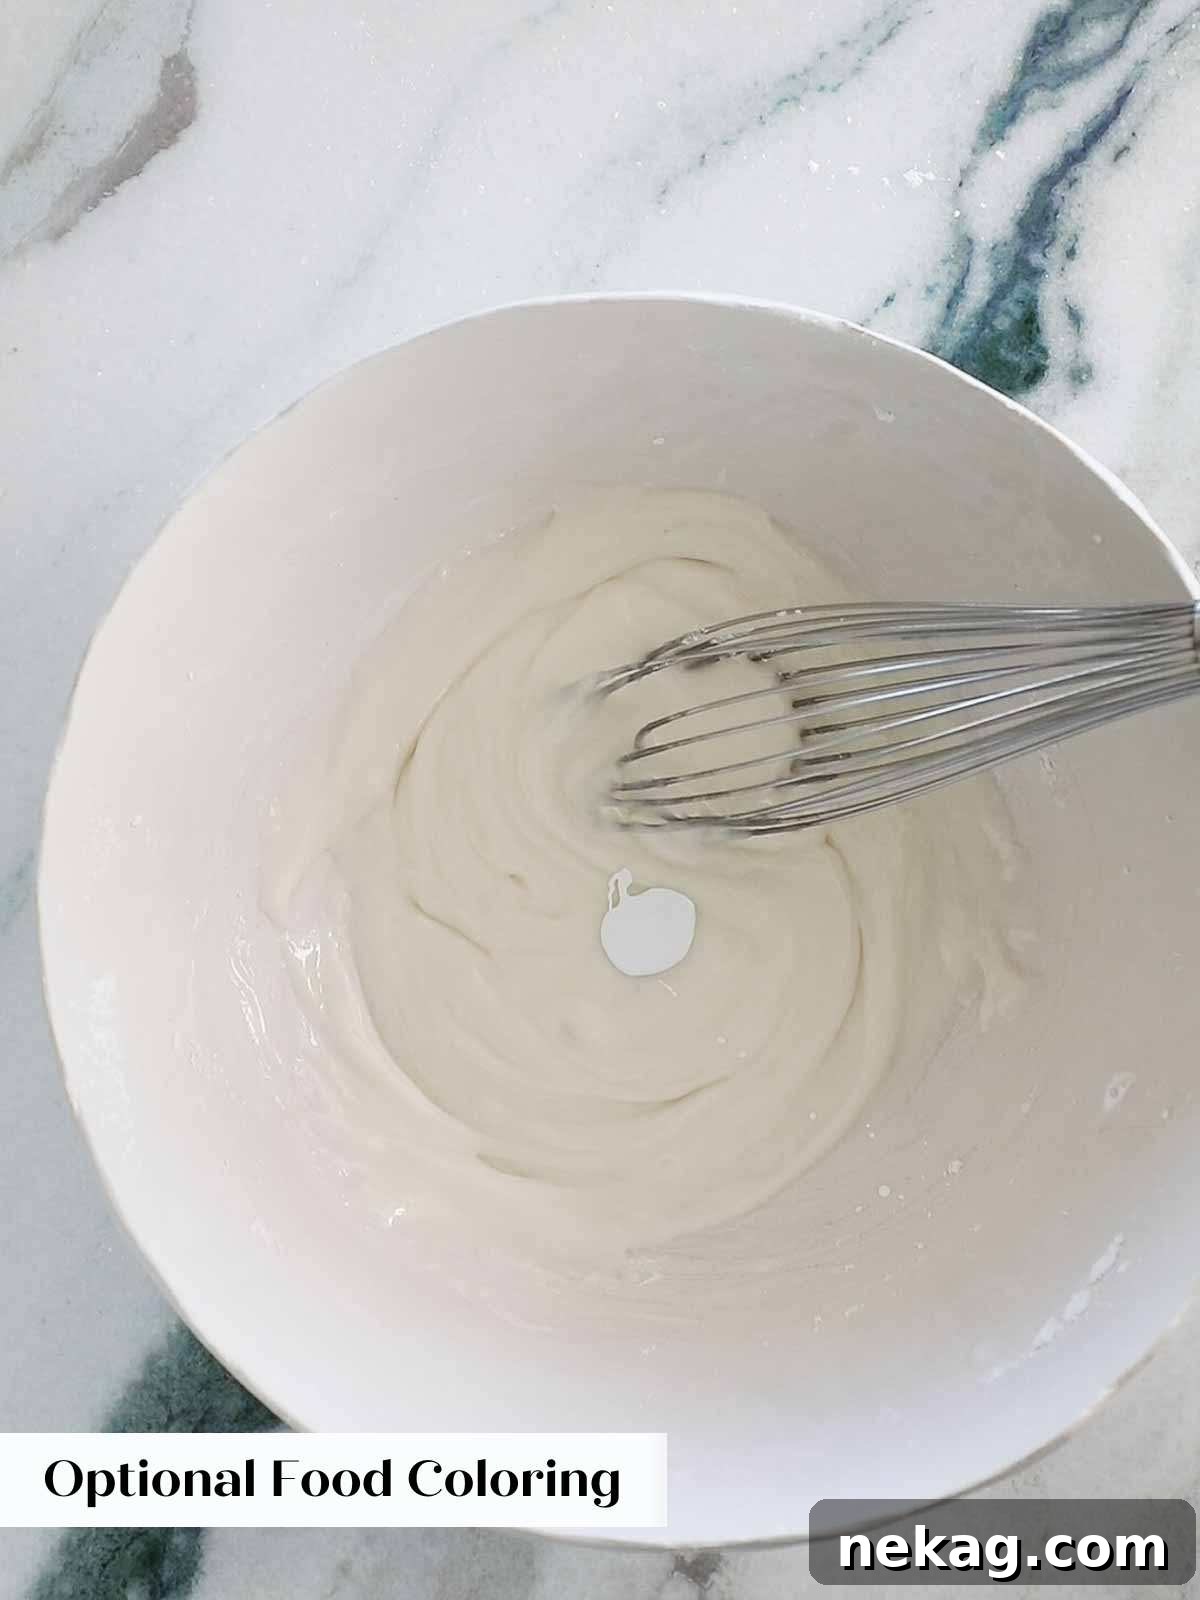
Step 3: Prepare for Decorating
Once you’ve achieved the ideal consistency (using the 5-10 second rule as a guide), it’s time to prepare your icing for application. Carefully transfer the icing into piping bags fitted with a small round tip, or into clean squeeze bottles. If you plan to use multiple colors, divide your icing into separate bowls and mix in your desired gel food coloring before transferring to bags.
For a truly opaque white icing with this recipe, especially crucial when decorating darker cookies like chocolate, you will need to incorporate a small amount of white gel food coloring. A little goes a very long way; just a tiny dab will add enough opacity to ensure that the color of the cookie underneath is completely masked, providing a clean and vibrant white base for your designs.
Decorating Cookies Like a Pro with Simple Icing
Now that your easy cookie icing is ready, it’s time for the fun part: transforming your cookies into edible works of art! With these simple techniques, you’ll be decorating like a seasoned pro in no time.
Step 1: Preparing Your Piping Bag (Or Squeeze Bottle)
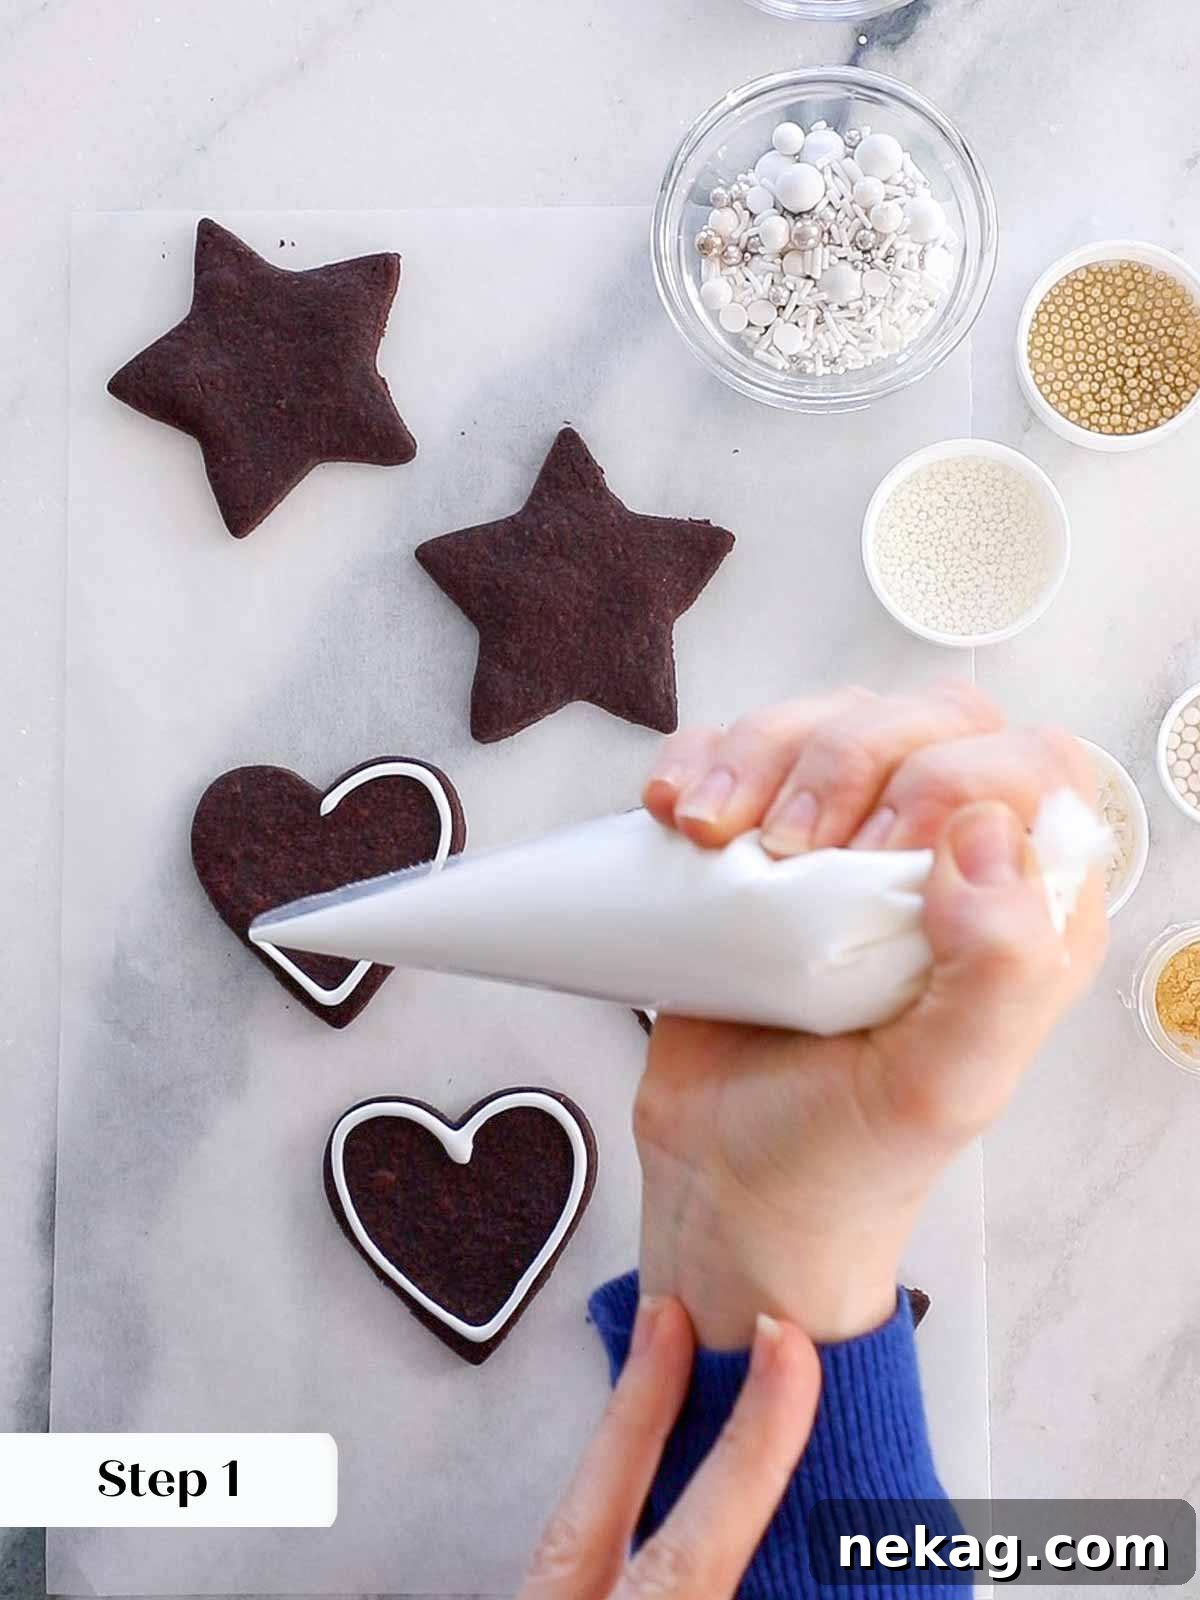
Start with a piping bag filled with your desired icing. When cutting the tip, remember it’s always better to start smaller than you think you need. Make a very tiny snip with sharp scissors. Test a line on a piece of parchment paper or a spare cookie. If the line appears too thin or squiggles unevenly when you squeeze, cut the tip just a little bit bigger. Test and repeat this process until you achieve a medium, consistent straight line that flows smoothly. For easier control and cleaner lines, ensure there are no air bubbles in your piping bag by gently tapping it on your counter.
Step 2: The Art of Outlining Your Cookies
Work with one to three cookies at a time, depending on their size and how quickly you can work. Using your prepared piping bag, gently squeeze to trace the outline of your cookie. Aim to leave a small border, about 1/16th of an inch, around the very edge of the cookie. This small margin is crucial as it creates a subtle dam, preventing your flooding icing from running off the cookie. Keep your hand steady and apply even pressure for a consistent outline.
Even though this recipe allows for a single consistency for both outlining and flooding, it’s still best practice to outline your cookies first and then flood. This two-step process helps to ensure clean, crisp edges and a beautifully smooth, even surface for your flood. While you can technically use the same piping bag for both steps, having two separate bags — one with a slightly smaller opening for outlining and one with a slightly larger opening for flooding — can offer more precision and efficiency, especially for intricate designs.
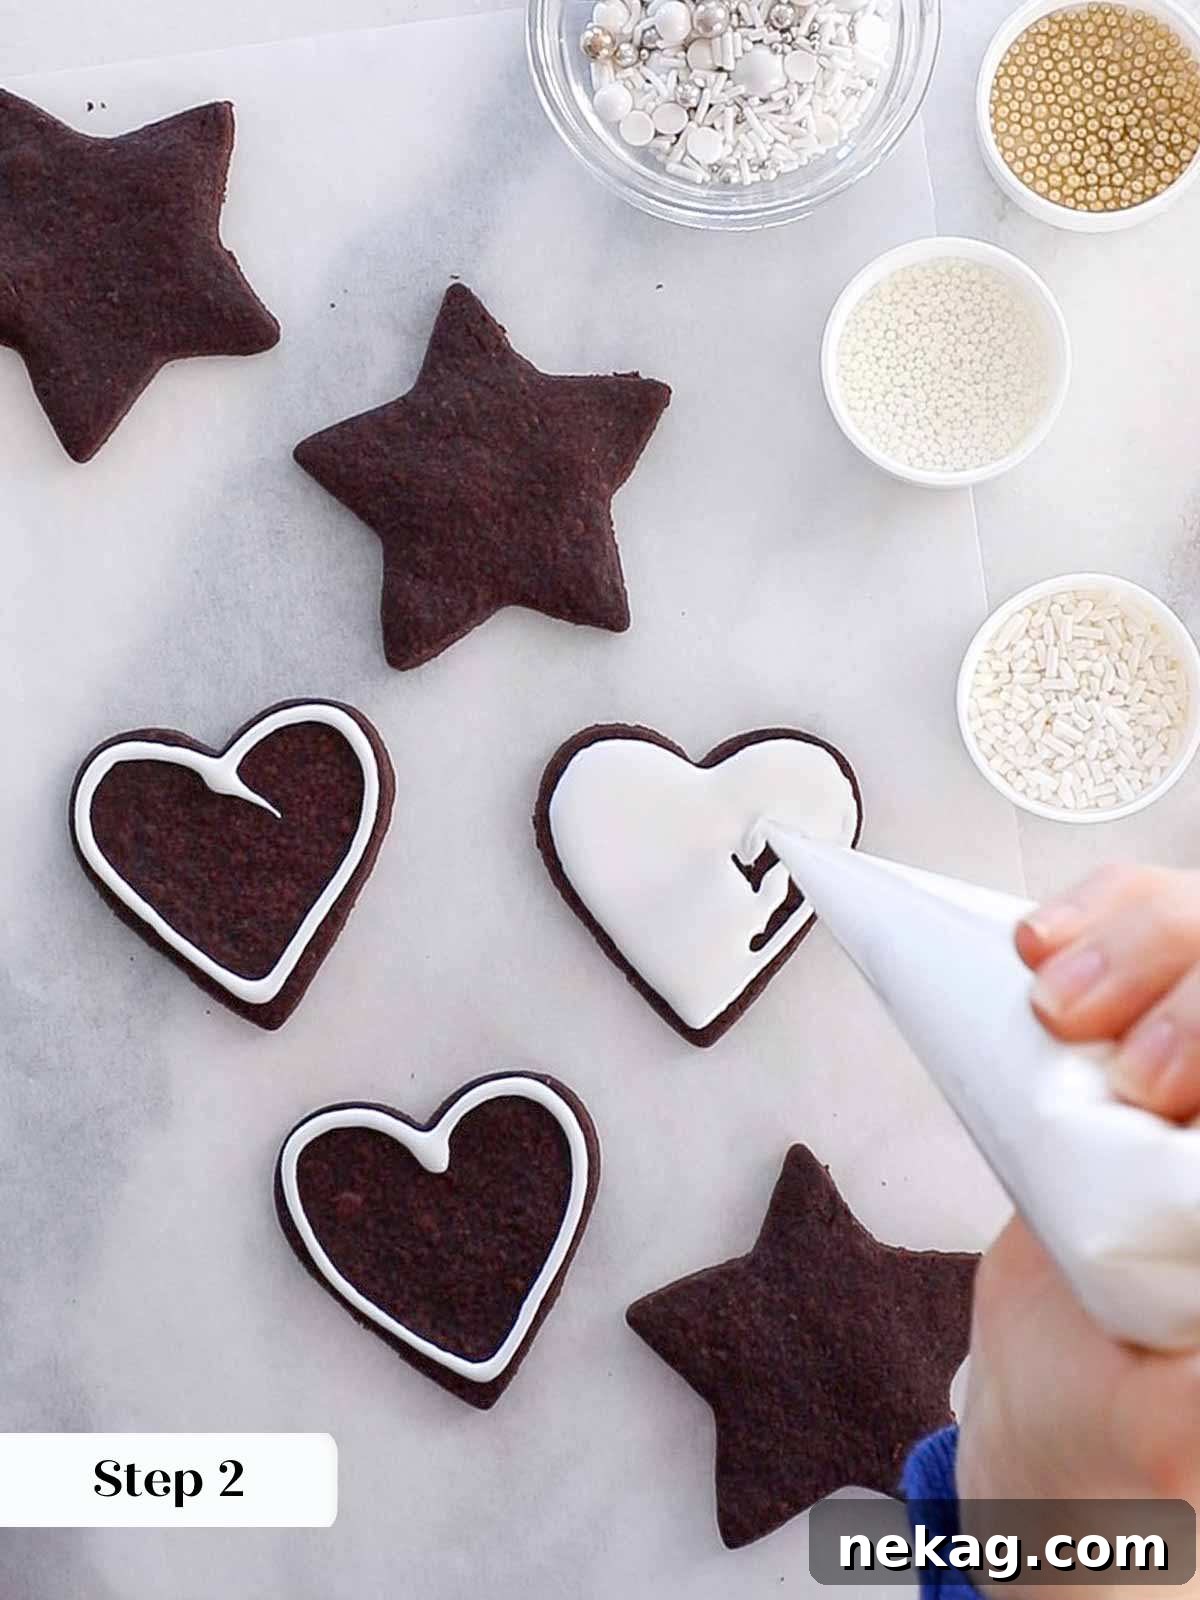
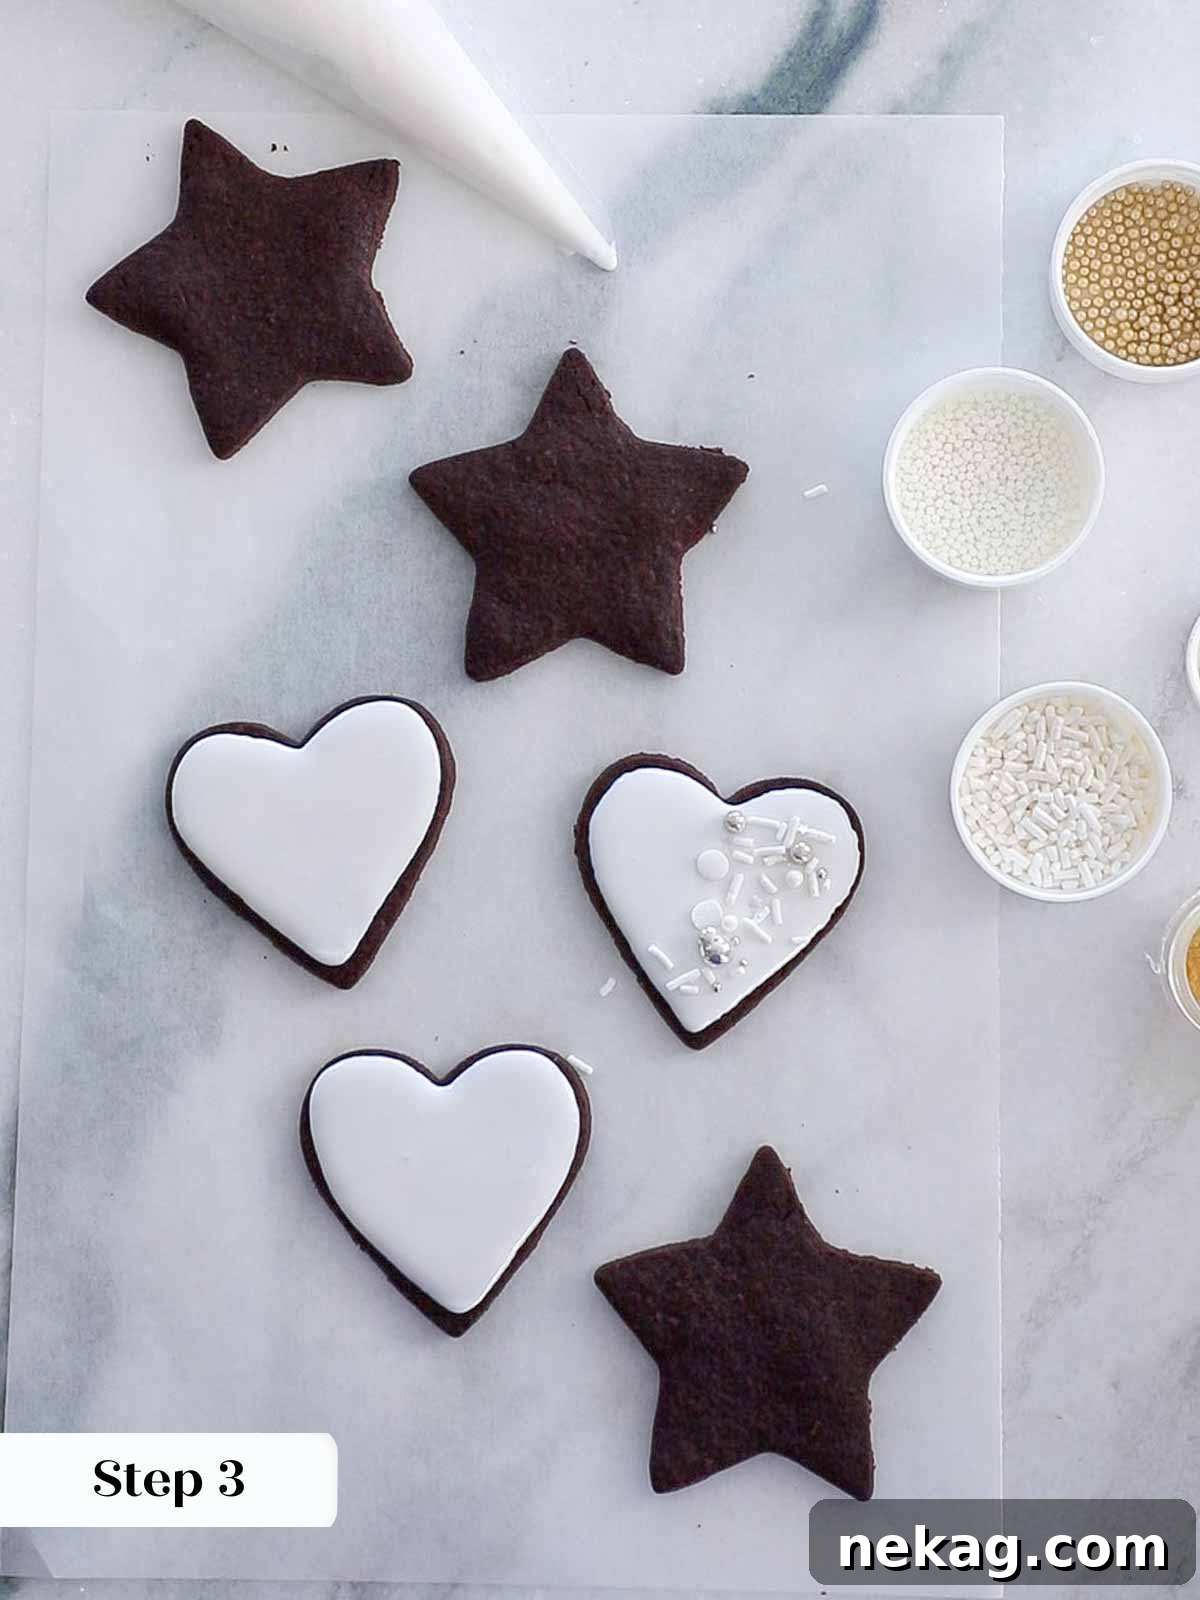
Step 3: Flooding Your Cookies for a Smooth Finish
Once your outlines are complete on a few cookies, switch to your “flooding” bag (which might be the same bag with a slightly larger opening, or a separate bag). Squeeze a squiggle of icing inside the outlined area, covering most of the interior of the cookie you are currently icing. Immediately after, use a cake tester, a wooden skewer, or even the tip of your piping bag (if you’re feeling a bit lazy like me!) to gently spread the icing around. Work quickly to push the icing into all corners and edges, creating one smooth, even layer that meets your outline seamlessly.
When flooding, the goal is to achieve an even layer where you cannot see the cookie beneath the icing. However, it’s equally important that the icing isn’t so thick it overflows your outline. The outline you created in the previous step should ideally blend perfectly with the flood, creating a seamless edge. If you notice a visible line between your outline and flood, you can try to gently blend them with your skewer. For future cookies, consider outlining fewer cookies at a time before flooding, allowing you to work more quickly and achieve that perfect blend.
Step 4: Adding Decorations (While Icing is Wet)
For the simple, elegant style of decorated cookies often pictured, the key is to add your decorative elements while the icing is still wet. After flooding up to three cookies, immediately sprinkle on your chosen decor. This ensures the sprinkles, edible glitter, or other embellishments adhere securely to the soft icing before it begins to set. Try crushed dehydrated strawberries or blueberries for natural color and flavor, your favorite sprinkles, delicate mini hearts, or shimmering gold jimmies for a festive touch. In the examples shown, I focused on a sophisticated palette of white, silver, and gold. The options for personalization are truly limitless, so let your imagination guide you!
Chef Lindsey’s Recipe Tip
While it’s possible to correct icing that is too thin by adding more powdered sugar, it’s important to understand the implications. Adding more sugar will change the original ratio of corn syrup and flavorings, which in turn can subtly alter the final texture and taste of your icing. It’s not a disaster, but it’s something worth considering for optimal results. Always try to get the consistency right with the initial liquid additions to maintain the intended balance.
Frequently Asked Questions About Cookie Icing
To **store any unused icing**, transfer it to an airtight plastic container. Press a piece of plastic wrap directly onto the surface of the icing to prevent a skin from forming. Alternatively, you can keep it in a sealed piping bag with the tip folded over and secured with a piece of tape or a clip. Store at room temperature for up to 3 days, or in the refrigerator for up to a week. If refrigerated, allow it to come to room temperature and give it a quick whisk before use to restore consistency.
For **iced cookies**, allow them to set completely at room temperature in a single layer for at least 2 hours (or overnight for extra security, especially if the icing is very thick). Once fully set and firm, you can stack them gently. Store the stacked cookies in an airtight container at room temperature for up to 5-7 days. The airtight environment will help maintain their freshness and prevent the icing from drying out too much.
I **do not recommend storing iced cookies in the freezer** with this type of icing. Freezing can cause the icing to “bloom” (develop white, dull spots), colors might bleed, and the overall surface texture will become less appealing and more dull upon thawing. It’s best enjoyed fresh or stored at room temperature.
This easy cookie icing is designed to offer the best of both worlds! It will set completely firm, typically within 2 hours, making your cookies stackable without smudging or damage. This firm exterior provides a protective layer and a neat finish. However, unlike some royal icings that dry brittle and hard, this recipe retains a lovely soft texture when you bite into the cookie. This makes for a much more pleasant eating experience, avoiding that crunchy, hard-shell sensation. For extra peace of mind or for cookies with a very thick layer of icing, I recommend allowing them to set overnight in a single layer, well-wrapped, at room temperature to ensure maximum firmness before stacking.
Yes, you can substitute water for milk in this easy cookie icing recipe. Using water will result in a very similar consistency and a perfectly white base if you’re not using vanilla extract that tints the icing. However, milk (especially whole milk) adds a slight richness and creaminess to the flavor and texture that water might not provide. If you’re aiming for a dairy-free option, a neutral-flavored plant-based milk (like almond or oat milk) would be a good choice to retain some richness.
This versatile icing is perfect for almost any sturdy cookie that holds its shape, especially those that are typically decorated. It’s an excellent choice for cut-out sugar cookies, chocolate sugar cookies, gingerbread cookies, and shortbread cookies. Its smooth consistency and soft bite complement the texture of these cookies beautifully. You can also use it to drizzle over brownies, blondies, or even plain butter cookies for an extra touch of sweetness and shine.
If you tried this recipe and loved it, please leave a 🌟 star rating and let me know how it goes in the comments below. I love hearing from you; your comments make my day!
Easy Cookie Icing Recipe
Chef Lindsey
5 mins
5 mins
40 Cookies
Comment
Print Recipe
Ingredients
- 2 cups powdered sugar (sifted for best results)
- 1 tablespoon light corn syrup (recommended for shine and soft texture)
- 1 pinch kosher salt
- ½ teaspoon vanilla extract (use clear vanilla for pure white icing)
- 2 – 2 ½ tablespoons milk (whole milk recommended, or water/lemon juice for variation)
- gel food coloring (optional, for color or opaque white)
Instructions
-
Combine powdered sugar, corn syrup, salt, and vanilla extract in a large bowl. Whisk briefly to combine dry ingredients.
-
Start by adding 1 tablespoon of milk and whisk thoroughly. Slowly add more milk, a few drops at a time, whisking well after each addition until the icing reaches a smooth, flowing consistency. If it becomes too thin, add a bit more confectioner’s sugar and whisk until desired thickness is achieved. Refer to the “5-10 second rule” for consistency: a ribbon of icing should disappear into the bowl within 5-10 seconds.
-
You are looking for a versatile “outline consistency” which you will successfully use for both outlining and flooding your sugar cookies.
-
To achieve a completely opaque white icing, particularly essential for covering chocolate cookies, consider adding a small amount of white gel food coloring. Use a toothpick to add tiny amounts, as a little goes a long way to provide sufficient opacity without seeing the cookie underneath.
-
Even when using one consistency, always outline your cookies first and then flood the interior. This method helps ensure clean lines, smooth edges, and a polished finish on your decorated cookies.
Notes
Presentation: For a vibrant, perfectly opaque white icing, incorporate a tiny amount of white gel food coloring.
Flavor Variations: Experiment with a clear vanilla extract, lemon extract, almond extract, or use fresh lemon juice as a substitute for the milk for a zesty twist.
Storage of Icing: Store any unused icing in an airtight plastic container with plastic wrap pressed directly onto the surface to prevent a skin from forming. Alternatively, keep it in a sealed piping bag with the tip tightly folded or taped closed. Store at room temperature for up to 3 days, or refrigerate for up to a week. Let it come to room temperature before re-using.
Storage of Iced Cookies: Place iced cookies in a single layer at room temperature until the icing sets fully (this usually takes about 2 hours, but for thicker layers or extra security, allow them to set overnight). Once firm, you can stack and store them in an airtight container at room temperature for up to 5-7 days. Freezing iced cookies with this glaze is not recommended as it may cause blooming or color bleeding.
Nutrition Information (Approximate per serving)
Carbohydrates: 6g |
Protein: 0.03g |
Fat: 0.03g |
Saturated Fat: 0.02g |
Polyunsaturated Fat: 0.001g |
Monounsaturated Fat: 0.01g |
Cholesterol: 0.1mg |
Sodium: 2mg |
Potassium: 2mg |
Sugar: 6g |
Vitamin A: 2IU |
Calcium: 1mg |
Iron: 0.004mg
Dessert
American
Enjoyed this recipe? Leave a comment below!
Before You Go: Explore More Delicious Creations!
I sincerely hope you enjoyed creating and decorating with this professional chef-tested easy cookie icing recipe. It’s truly a game-changer for anyone looking for simplicity without compromising on taste or appearance. The joy of homemade, beautifully decorated cookies is a special one, and I’m thrilled to share this straightforward method with you.
If you’re eager to continue your baking adventures, I invite you to explore more of our delightful, chef-developed recipes. Whether you’re a fan of rich and creamy toppings or searching for your next favorite cookie, we have something for everyone:
- Check out our other delicious buttercream and frosting recipes for more ways to top your cakes and cupcakes.
- Find your new favorite among our diverse collection of cookie recipes, perfect for any occasion or craving.
Happy baking and decorating!