
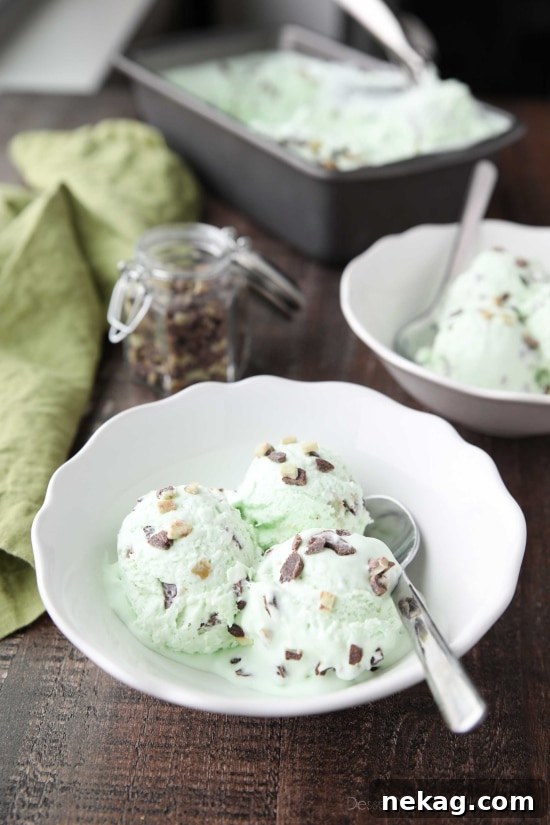
Indulge in Homemade Bliss: The Ultimate No-Churn Mint Chocolate Chip Ice Cream
Forget the fuss and special equipment! This guide unlocks the secret to exceptionally creamy, perfectly balanced No-Churn Mint Chocolate Chip Ice Cream. Revel in the refreshing burst of mint perfectly complemented by rich chocolate, all without the need for an ice cream maker. Whether you prefer the classic crunch of mini chocolate chips or the decadent melt of Andes mint chips for an amplified minty flavor, this recipe promises a delightful, effortless dessert experience that will become a family favorite.
Why Mint Chocolate Chip Ice Cream Reigns Supreme
It’s no secret that mint chocolate chip ice cream holds a special place in the hearts of dessert enthusiasts worldwide. According to the International Dairy Foods Association, this iconic flavor consistently ranks among the top five most popular ice cream choices in America, often landing in a respectable fourth place. Its enduring popularity stems from a perfect synergy of flavors and textures: the smooth, sweet creaminess, the delightful crunch of chocolate, and the invigorating, cooling sensation of mint. Mint, traditionally celebrated as a palate cleanser, makes this ice cream an ideal concluding treat after any meal, leaving you feeling refreshed and satisfied. Beyond ice cream, its beloved combination is also a fantastic flavor profile for other treats, such as cookies, milkshakes, and even cakes.
The Magic of No-Churn: Ice Cream Without an Appliance
For many, the idea of making homemade ice cream conjures images of bulky ice cream makers, pre-freezing bowls, and a lengthy churning process. This often deters even the most enthusiastic home cooks. However, the no-churn method completely revolutionizes the homemade ice cream experience. It’s a simple, elegant technique that yields incredibly rich, smooth, and delicious ice cream using just a few basic ingredients and no specialized equipment. The secret lies in whipping heavy cream to stiff peaks, then gently folding it into sweetened condensed milk along with your chosen flavorings and mix-ins. The whipped cream incorporates air, which, when frozen, prevents large ice crystals from forming, resulting in a delightfully creamy texture remarkably similar to traditionally churned ice cream. This makes gourmet ice cream accessible to everyone, regardless of kitchen space or equipment availability.
Crafting Your Perfect No-Churn Mint Chocolate Chip Ice Cream
This recipe is designed for maximum ease and minimal effort, making it ideal for busy individuals or a fun project with kids. The process is straightforward: begin by whipping heavy cream until it transforms into light, airy, stiff peaks. This aerates the base, which is crucial for a smooth, no-churn result. Next, gently fold in the sweetened condensed milk, which provides both sweetness and a creamy texture that helps prevent the formation of ice crystals. Introduce your chosen mint extract and, if desired, a few drops of green food coloring to achieve that signature mint chocolate chip hue. Finally, stir in your favorite chocolate components.
For an intensified mint experience, we highly recommend using Andes mint baking chips. These chips melt delightfully and infuse an extra layer of refreshing mint flavor throughout the ice cream. However, if you prefer a more classic approach, mini chocolate chips work beautifully, providing delightful texture and cocoa notes. You can also get creative by chopping up your favorite chocolate bar into small pieces for custom chocolate chunks.
Once your mixture is perfectly combined, carefully pour it into a freezer-safe container. A loaf pan or a shallow, airtight container works wonderfully. Cover it tightly with a lid or plastic wrap to prevent freezer burn, which can compromise the texture and flavor. Place it in the freezer for at least 4-5 hours, though for the best, most solid consistency, freezing overnight is highly recommended. While we often enjoy our ice cream a little softer, as you might observe in the accompanying photographs, rest assured that it will freeze completely solid for that classic scoopable texture.
Mint or Peppermint: Choosing Your Perfect Mint Flavor
When it comes to mint-flavored desserts, the distinction between mint and peppermint can sometimes be a point of confusion. For many, the iconic “green” mint chocolate chip ice cream flavor evokes the taste of spearmint or crème de menthe. Spearmint offers a sweeter, milder, and slightly herbal mint flavor, often associated with chewing gum or fresh garden mint. Peppermint, on the other hand, provides a sharper, more intense, and cooling sensation, characteristic of candy canes or breath mints. The beauty of making your own no-churn ice cream at home is the complete control you have over the flavor profile.
You are free to use either peppermint or spearmint extract to flavor this recipe, depending on your personal preference. If you enjoy a bold, crisp, and slightly cooling mint flavor, opt for peppermint extract. If you prefer a subtler, sweeter, and more “traditional” green mint taste, spearmint extract is the way to go. You can even experiment with a blend of both, or adjust the quantity of extract to achieve your desired intensity. Start with half a teaspoon and add more to taste, remembering that a little goes a long way with extracts!
This particular no-churn recipe is not only incredibly delicious but also remarkably simple to prepare, making it a fantastic activity for all ages. My own children absolutely adore mint chocolate chip ice cream, and this easy, no-fuss version means they can even help with the preparation, fostering a love for baking and cooking from an early age. It’s a rewarding experience to create such a beloved treat from scratch, knowing exactly what ingredients go into it.
Tips for Achieving Creamy Perfection
- Chill Your Equipment: For best results when whipping cream, place your mixing bowl and whisk attachment in the freezer for 10-15 minutes before starting. Cold equipment helps the cream whip up faster and achieve stiffer peaks.
- Don’t Overmix: While you want stiff peaks for your heavy cream, be careful not to overmix it past that point, as it can quickly turn into butter. Stop mixing as soon as firm peaks form.
- Gentle Folding is Key: When combining the whipped cream with the sweetened condensed milk and other ingredients, use a gentle folding motion with a spatula. This preserves the air pockets in the whipped cream, which are essential for the light, airy texture of no-churn ice cream.
- Airtight Container for Freezing: Ensure your freezer-safe container has a tight-fitting lid or that you use plastic wrap pressed directly against the surface of the ice cream before covering the container. This prevents ice crystals from forming on top (freezer burn), which can affect the smooth texture.
- Patience is a Virtue: Allow ample freezing time. While 4-5 hours will set the ice cream, an overnight freeze ensures a perfectly firm and scoopable consistency.
- Soften Before Serving: For the ideal scoop and texture, remove the ice cream from the freezer about 5-10 minutes before serving, allowing it to soften slightly.
Creative Variations & Serving Suggestions
While the classic mint chocolate chip is undeniably delicious, this no-churn base offers endless possibilities for customization. Feel free to experiment with different types of chocolate – dark chocolate chunks for a more intense cocoa bite, white chocolate for a sweeter contrast, or even chocolate syrup swirled in for an extra decadent touch. Consider adding other mix-ins like crushed Oreo cookies, brownie bits, or chopped nuts for added texture and flavor dimensions. A dash of vanilla extract can also round out the flavors beautifully. For an adult-friendly treat, a splash of crème de menthe liqueur or a hint of Irish cream can transform this dessert into a sophisticated indulgence.
Serve your homemade mint chocolate chip ice cream in classic cones or elegant bowls. It makes a fantastic base for a sundae, topped with whipped cream, hot fudge, and an extra sprinkle of chocolate chips. It also pairs wonderfully with warm brownies, apple pie, or even a simple cup of coffee. The bright, refreshing mint makes it a versatile dessert suitable for any occasion, from casual family dinners to festive gatherings.
Explore More No-Churn Ice Cream Delights:
If you loved the simplicity and deliciousness of this mint chocolate chip recipe, you’re in for a treat! The world of no-churn ice cream is vast and exciting. Expand your homemade ice cream repertoire with these equally simple and satisfying recipes:
- – Chocolate Chip Cookie Dough Ice Cream: A chewy, sweet classic.
- – Coconut Ice Cream: An unbelievably easy two-ingredient tropical escape!
- – Chocolate Peanut Butter Cup Ice Cream: A rich and nutty dream.
- – Oreo Fudge Ice Cream: Layers of cookies and decadent fudge.
- – Cake Batter Ice Cream: Celebrate any day with this fun, festive flavor.
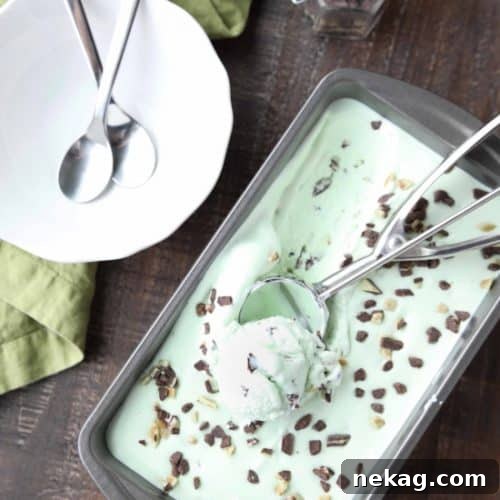
Mint Chocolate Chip Ice Cream
Amber Brady
5 mins
5 hrs
5 hrs 5 mins
Pin Recipe
12
(1/2 cup) servings
Ingredients
-
2
cups
(473
ml)
heavy whipping cream -
14
oz
(396
g)
can sweetened condensed milk -
½
tsp
mint or peppermint extract -
6
drops green food coloring,
(optional) -
1
cup
(170
g)
Andes mint chocolate baking chips,
(or mini chocolate chips, or chopped up chocolate bar)
Instructions
-
In a large mixing bowl (or the bowl of a stand mixer with the whisk attachment), whip the heavy cream until stiff peaks form.
-
Gently pour in the sweetened condensed milk, mint extract, green food coloring (if using), and your chosen mint chocolate chips.
-
Carefully fold all ingredients together using a spatula until just combined. Be gentle to maintain the air in the whipped cream. Empty the mixture into an 8-cup (2-quart) freezer-safe container or a large loaf pan. Cover tightly with a lid or plastic wrap, pressing it directly onto the surface to prevent freezer burn.
-
Freeze for 4-5 hours or until firm. For best results, freezing overnight is recommended. Keep frozen until ready to serve.
Disclaimer: Nutritional values were calculated using a third-party tool and are provided as an estimation only.
Sharing this recipe with a link is both encouraged and appreciated. Copying/pasting and/or screenshots of full recipes to any social media is strictly prohibited. Content and photographs are copyright protected.
Did you make this?
Don’t forget to leave a rating below and make sure to follow on Pinterest and Instagram for more delicious inspiration!