
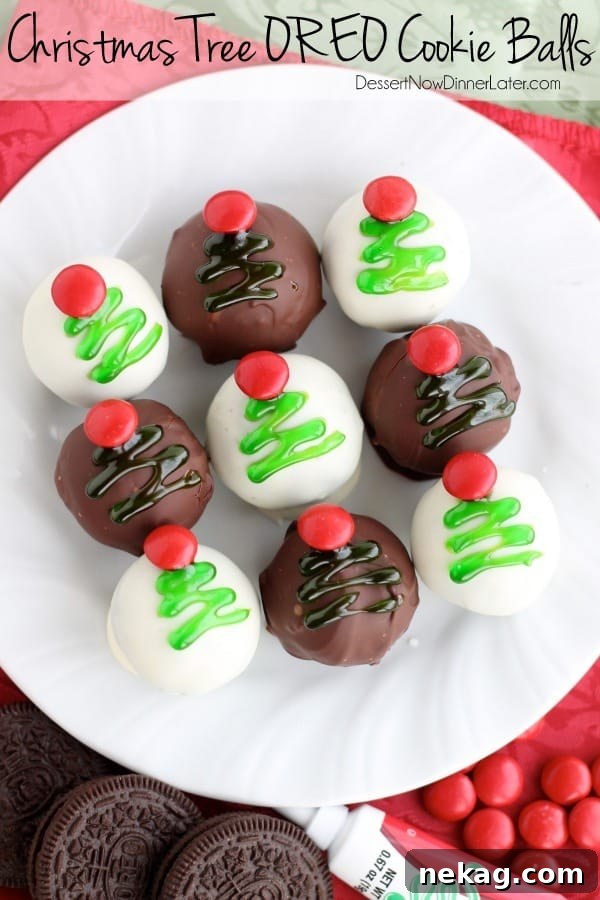
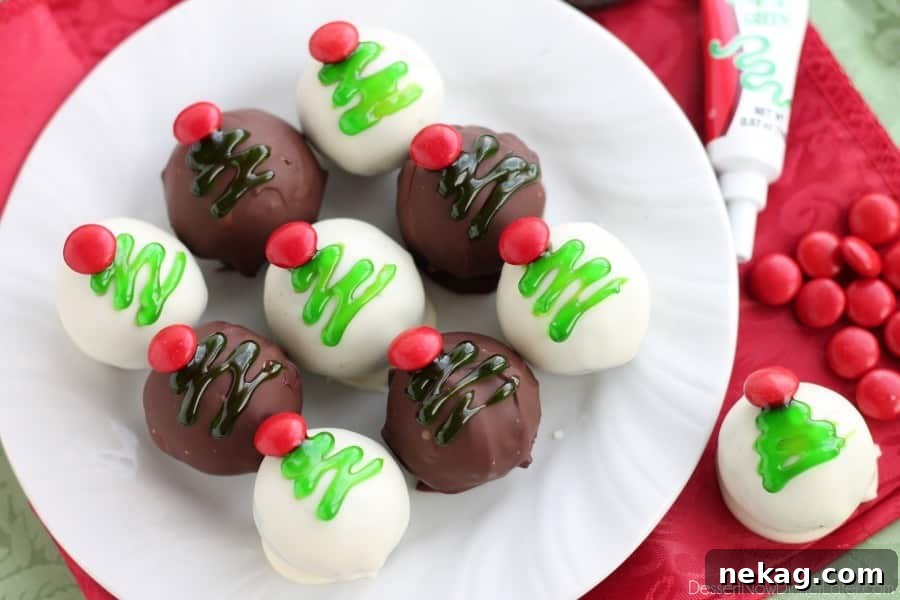
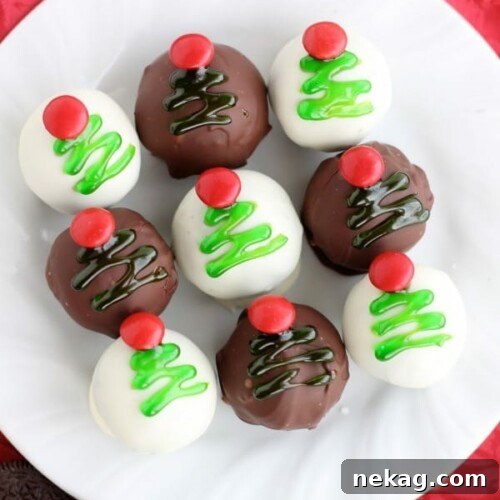
These traditionally made OREO Cookie Balls are decorated with green gel and a red candy-coated chocolate piece for a festive Christmas Tree treat!
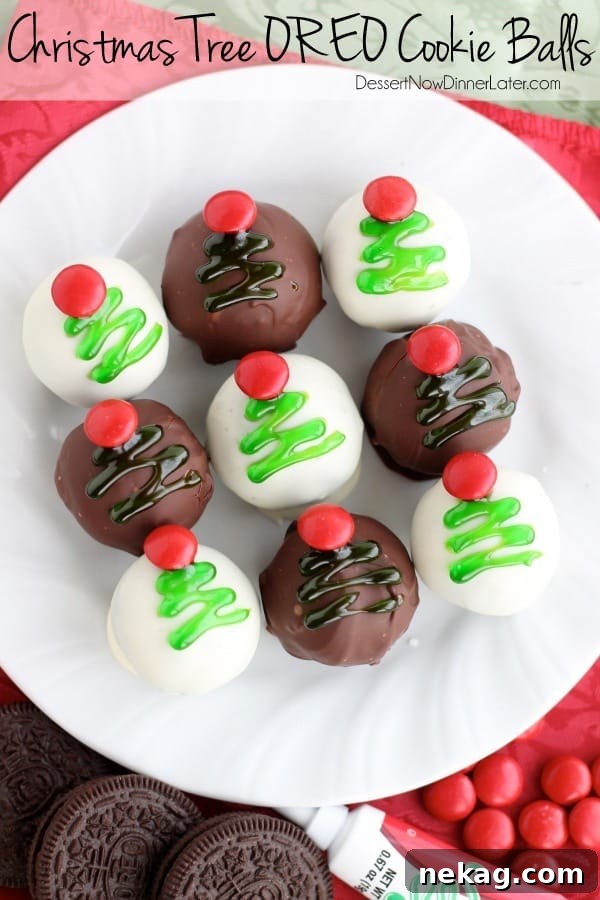
Festive Christmas Tree OREO Cookie Balls: The Ultimate No-Bake Holiday Treat
Welcome to the enchanting world of holiday baking, where tradition meets delightful simplicity! If your heart, like mine, beats for OREO cookies, you know their timeless appeal makes them a versatile foundation for countless desserts. Today, we’re taking the beloved classic OREO Cookie Balls recipe and infusing it with holiday cheer, transforming these irresistible bites into charming Christmas Tree OREO Cookie Balls. This no-bake recipe is not only incredibly easy to prepare but also guarantees a festive treat that will be the star of any holiday gathering. Get ready to create edible works of art that are as delicious as they are delightful!
Why OREO Cookie Balls Are a Holiday Essential
OREO Cookie Balls have earned their place as a cherished dessert for good reason. Their minimal ingredient list and no-bake nature make them a lifesaver during the busy holiday season when oven space and time are precious commodities. The rich, creamy center, formed from crushed OREOs and cream cheese, provides a satisfying contrast to the crisp chocolate coating. This harmonious blend of textures and flavors creates a treat that is universally loved by both children and adults. Beyond their deliciousness, OREO Cookie Balls are a blank canvas for creativity. Their simple, round shape makes them perfect for various decorations, allowing you to customize them for any theme or celebration. For Christmas, we’re embracing a whimsical approach, turning them into miniature, edible Christmas trees that add a playful and festive touch to your dessert spread.
Gathering Your Simple Ingredients for Holiday Magic
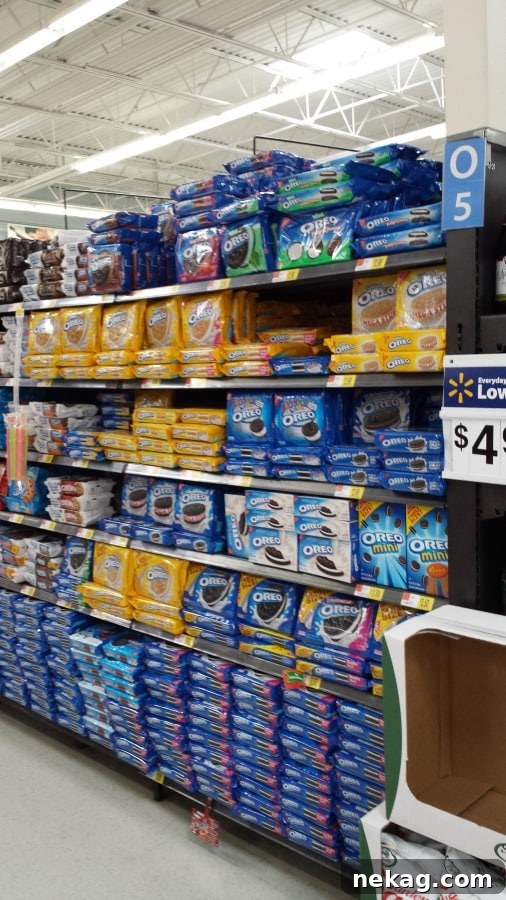
The magic of OREO Cookie Balls truly lies in their straightforward ingredient list. You’ll only need three core components, plus a few festive additions to bring your Christmas tree vision to life. A quick trip to your local grocery store, like Walmart, will get you everything you need:
- OREO Cookies: The foundational hero of our recipe! While the original OREO cookies are perfect for their classic chocolate and cream flavor, feel free to explore other varieties. Mint OREOs can add a refreshing, holiday-appropriate twist, or Golden OREOs could create a unique flavor profile. You’ll need approximately 36 cookies, which is typically one standard package. For the best consistency, finely crush these cookies in a food processor until they resemble fine crumbs, about 3 cups worth. If a food processor isn’t available, placing them in a sturdy zip-top bag and crushing them with a rolling pin works just as well.
- Cream Cheese: A block of full-fat, block-style cream cheese is essential for binding the OREO crumbs into a rich, pliable dough. It’s crucial that your cream cheese is softened to room temperature before mixing. This ensures a smooth, lump-free mixture that’s easy to work with and blends beautifully with the cookie crumbs.
- Melting Chocolate: To achieve that irresistible outer shell, you’ll need about 16 ounces of melting chocolate. Semi-sweet baking chocolate is a popular choice for its balanced sweetness, but dark chocolate offers a richer flavor, and milk chocolate provides a creamier profile. If you opt for white chocolate, a common choice for vibrant decorations, consider adding 1 to 2 teaspoons of coconut oil or shortening while melting. This helps thin the chocolate, making it smoother and easier to dip your cookie balls without it becoming too thick or seizing.
For the enchanting Christmas tree decoration, you’ll also need:
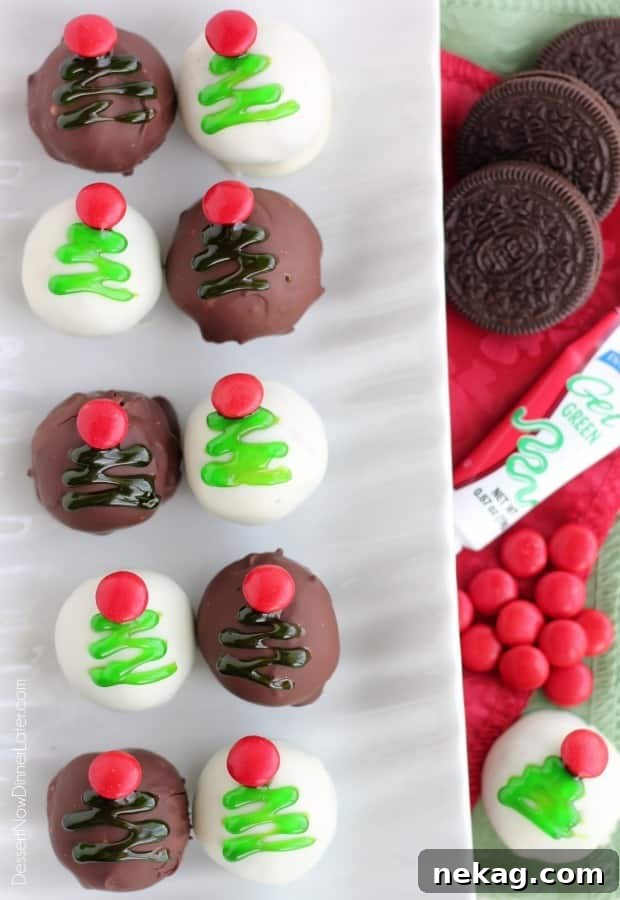
- Green Decorating Gel: Available in small, convenient tubes at most supermarkets or craft stores, this gel is perfect for piping your miniature Christmas tree designs. Depending on the number of cookie balls you plan to decorate, you might need two or more 0.67-ounce tubes.
- Red Candy-Coated Chocolate Pieces or Cinnamon Candies: These tiny, brightly colored candies are the ideal finishing touch, serving as the “star” or charming “ornaments” atop your edible Christmas trees, adding a delightful pop of color and festive flair.
Step-by-Step Guide to Crafting Perfect OREO Cookie Balls
Creating OREO Cookie Balls is an enjoyable and incredibly straightforward process, perfect even for those new to the kitchen. Follow these detailed steps to ensure perfectly formed and delicious treats every time:
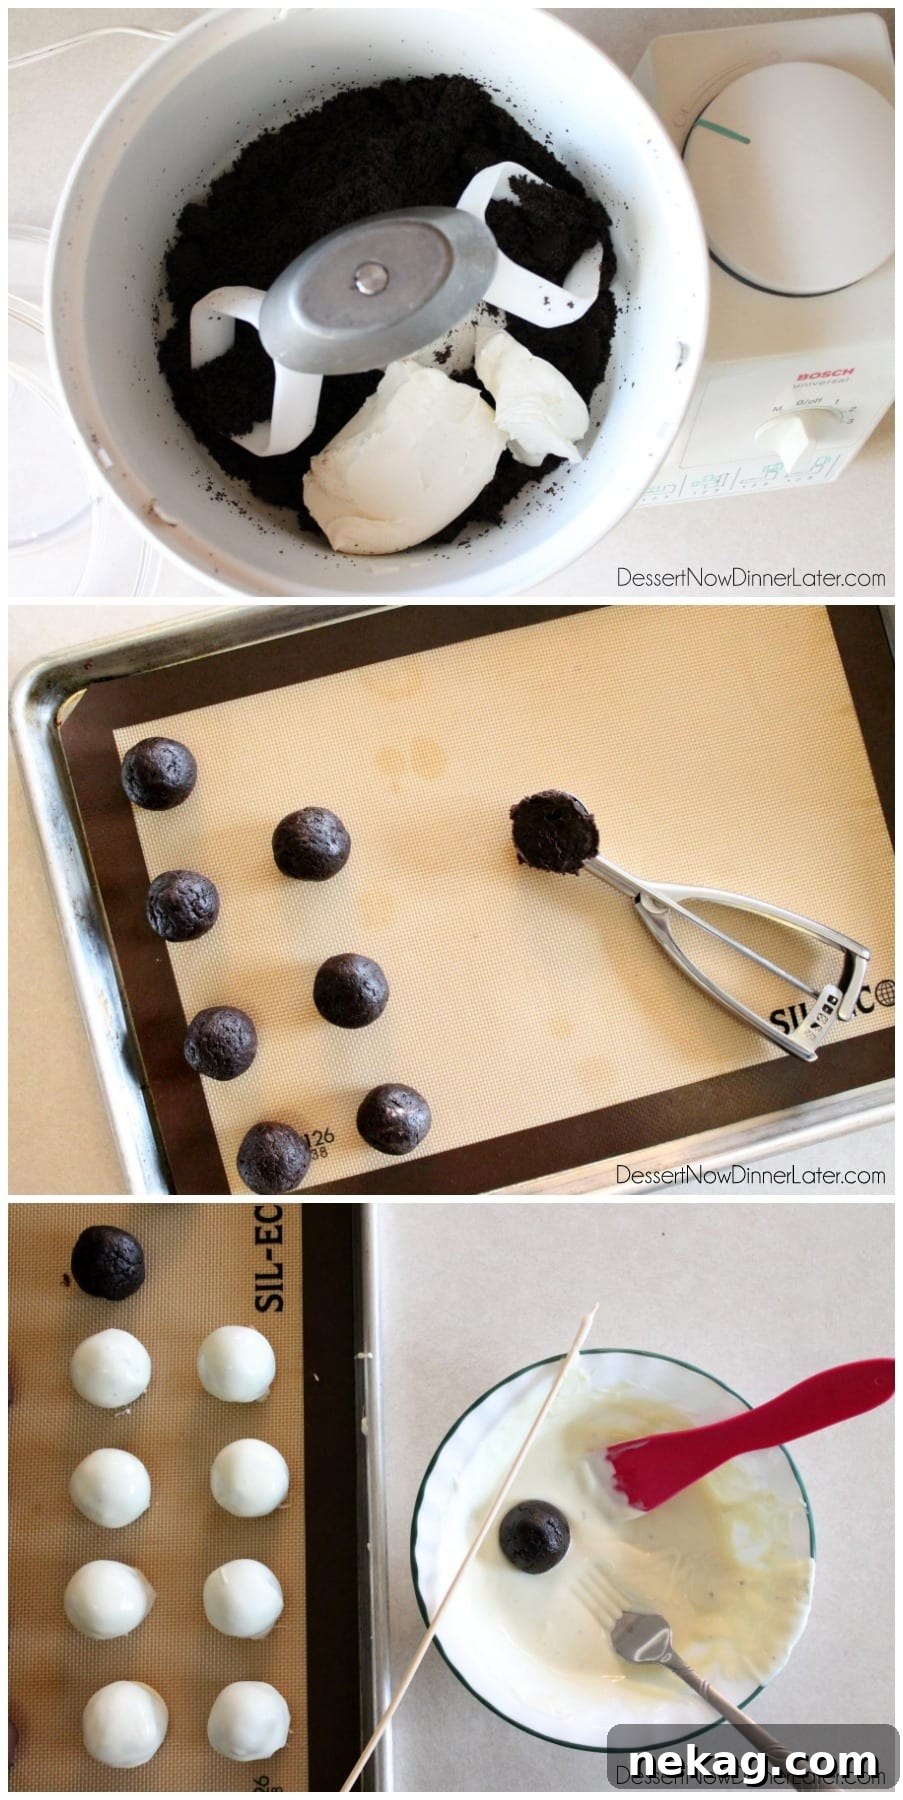
- Crushing the OREOs to Perfection: Begin by finely crushing your OREO cookies. The easiest and most efficient way to achieve consistently fine crumbs is by using a food processor. Simply pulse the cookies until no large chunks remain and you have a texture resembling fine sand. If you don’t have a food processor, a good alternative is to place the cookies in a sturdy zip-top bag, remove as much air as possible, and then roll over them with a rolling pin until thoroughly crushed.
- Combining the Ingredients: In a large mixing bowl, add the finely crushed OREO crumbs and the softened block-style cream cheese. Using an electric mixer on low speed, or a robust spatula, blend these two ingredients together until they are thoroughly combined. It’s important to scrape down the sides of the bowl periodically to ensure all ingredients are incorporated. The resulting mixture should form a thick, uniform dough that is pliable and easy to handle, not overly sticky.
- Shaping Uniform Balls: Once your mixture is ready, take small portions and roll them between your palms to form smooth, uniform balls. For delightful bite-sized treats, aim for approximately 1-inch diameter balls, which typically yields around 48 pieces. If you prefer a more substantial dessert, you can create 2-inch balls, resulting in about 24. A small cookie scoop can be incredibly helpful for achieving consistent sizing. Arrange the shaped balls on a baking sheet lined with parchment paper or wax paper.
- The Essential Freeze for Firmness: This step is critical for successful dipping. Place the baking sheet with your OREO balls into the freezer for at least 10 to 15 minutes. The goal is for the balls to become firm, preventing them from crumbling or softening excessively when introduced to warm melted chocolate.
- Melting the Chocolate with Care: While your OREO balls are chilling in the freezer, prepare your melting chocolate. This can be done using a double boiler on the stovetop for gentle, even melting, or carefully in the microwave. If using a microwave, heat the chocolate in a microwave-safe bowl in 30-second intervals, stirring thoroughly after each interval, until the chocolate is smooth and fully melted. Be cautious not to overheat, as chocolate can scorch quickly. If using white chocolate, remember the tip about adding 1 to 2 teaspoons of coconut oil or shortening to achieve a desirable thin and smooth dipping consistency.
- Dipping for a Smooth Coating: Once the OREO balls are firm and the chocolate is perfectly melted, it’s time for dipping! Using a fork or a specialized chocolate dipping tool, carefully submerge each OREO ball into the melted chocolate, ensuring it is completely coated. Lift the ball, gently tap the fork against the side of the bowl to allow any excess chocolate to drip off, ensuring a neat finish. Then, carefully transfer the coated ball back onto your wax paper-lined baking sheet. Repeat this process until all your OREO balls are beautifully coated.
Transforming Them into Festive Christmas Trees
Now comes the most exciting part – bringing your OREO Cookie Balls to life as festive Christmas trees! This simple yet charming decoration will undoubtedly add a special touch to your holiday spread.
- Ensure Chocolate is Set: Before you begin decorating, make sure your chocolate-dipped OREO balls are completely set and firm. This usually requires about an hour in the refrigerator.
- Prepare Your Green Decorating Gel: Take your green decorating gel tubes. If the gel feels a bit too stiff, gently warm the tube in your hands for a few moments; this will make it more fluid and easier to pipe.
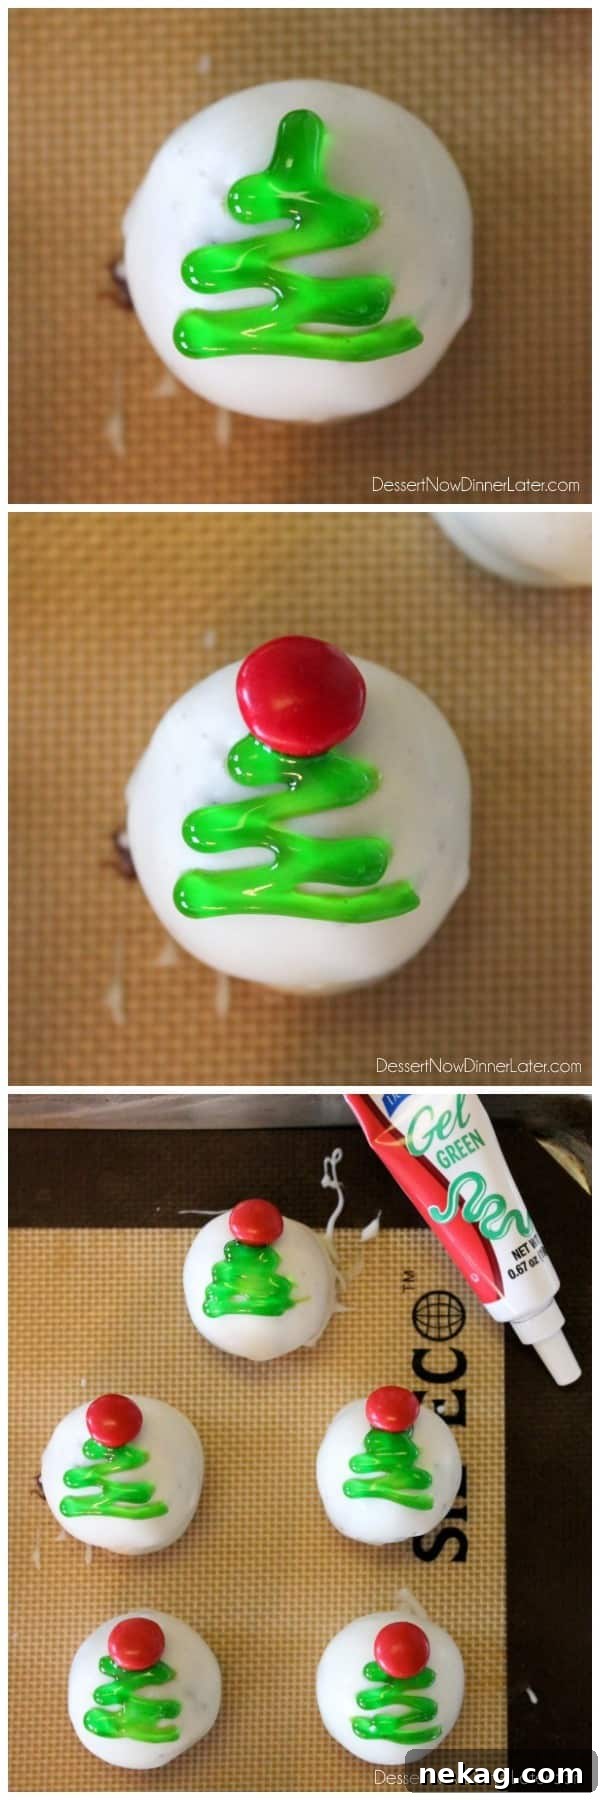
- Pipe the Christmas Trees: Hold the green decorating gel tube as you would a pen. With a steady hand, gently squeeze the tube and draw a small triangle shape on the top of each OREO ball, mimicking a Christmas tree. You can make your trees as simple or as detailed as you like. For a fuller tree, try piping a series of small zigzags from the top to the bottom of the ball. If you’re new to piping, a quick practice run on a piece of wax paper can help build confidence.
- Add the “Star”: Immediately after piping the green gel tree, carefully press a red candy-coated chocolate piece or a small cinnamon candy onto the very top of the green gel. This creates the perfect “star” or ornament, adding a vibrant pop of color. The wet gel will act as an adhesive, securing the candy in place.
- Allow Gel to Slightly Set: Once decorated, let the OREO Cookie Balls sit undisturbed for a short while, allowing the green gel to slightly firm up. While it won’t harden completely like chocolate, giving it a few minutes will help prevent immediate smudging.
Creative Alternative Decoration Ideas:
If you’re seeking alternatives to decorating gel or simply want to explore different looks for your Christmas Tree OREO Cookie Balls, here are a few suggestions:
- Green Candy Melts for Durability: For a decoration that sets firm like chocolate, melt green candy melts according to their package directions. Transfer the melted candy to a zip-top bag, snip off a tiny corner, and pipe your Christmas tree designs. These will harden, offering a more durable and less smudge-prone decoration. You can also use other colored candy melts to pipe small “ornaments” or create a white “snow” effect.
- Mint Chocolate Chips for Flavor: For a delightful flavor combination, melt mint chocolate chips and use them in the same manner as green candy melts. This adds a fantastic cool, minty flavor that pairs wonderfully with the chocolate OREO base, perfect for the winter holidays.
- Sprinkles for Instant Festive Flair: For an even quicker and simpler festive touch, consider adding green and red holiday sprinkles immediately after dipping the OREO balls in chocolate, while the chocolate coating is still wet. This way, the sprinkles will adhere securely as the chocolate sets.
Storage and Serving Tips for Lasting Freshness
To ensure your beautiful Christmas Tree OREO Cookie Balls remain fresh, firm, and visually appealing, proper storage is essential:
- Mandatory Refrigeration: Due to the cream cheese filling, OREO Cookie Balls must always be kept refrigerated. The cold temperature helps maintain their firm texture and prevents spoilage.
- Use an Air-Tight Container: Store your cookie balls in an air-tight container. This prevents them from drying out, keeps them fresh, and protects them from absorbing any unwanted odors from other foods in your refrigerator.
- Avoid Stacking Decorated Balls: This tip is particularly important for decorated cookie balls. If your OREO balls have gel or candy melt decorations, do not stack them directly on top of each other. The decorations can easily smudge, stick together, or even come off. If you need to stack them, place a layer of parchment or wax paper between each layer to provide a protective barrier.
- No Direct Plastic Wrap on Gel: As noted previously, placing plastic wrap directly onto gel decorations is highly likely to rub them off or cause them to stick. Always use an air-tight container with a lid, or if plastic wrap is your only option, tent it loosely over the balls without allowing it to touch the decorations.
- Shelf Life and Freezing: When stored correctly in the refrigerator, OREO Cookie Balls can last for up to 1 to 2 weeks, making them an excellent make-ahead holiday treat. For longer preservation, they can be frozen for up to a month in a freezer-safe, air-tight container. Thaw them in the refrigerator for a few hours or overnight before serving.
Recipe: Christmas Tree OREO Cookie Balls
Christmas Tree OREO Cookie Balls
Pin
Rate
Ingredients
- 8 oz (226 g) block-style cream cheese, softened
- 36 OREO Cookies, finely crushed (about 3 cups)
- 16 oz (452 g) semi-sweet baking chocolate, melted*
- Green decorating gel, (You will need 2 or more (0.67oz) tubes depending on how many balls you make; I only decorated 24 balls.)
- Red candy coated chocolate pieces or cinnamon candy
Instructions
-
PREPARE THE MIXTURE: In a large mixing bowl, beat the softened cream cheese until smooth. Add the finely crushed OREO cookies and mix until well blended and a uniform dough forms.
-
SHAPE AND FREEZE: Roll the mixture into 48 (1-inch) balls or 24 (2-inch) balls. Place them on a parchment or wax paper-lined baking sheet and freeze for at least 10 minutes, or until firm.
-
DIP IN CHOCOLATE: Melt the semi-sweet baking chocolate according to package directions. Dip each frozen OREO ball into the melted chocolate, allowing excess to drip off, then place back on the lined baking sheet.
-
REFRIGERATE TO SET: Refrigerate the chocolate-coated OREO balls for at least 1 hour, or until the chocolate is completely firm.
-
DECORATE AS CHRISTMAS TREES: Once firm, pipe a Christmas tree shape onto each OREO ball using the green decorating gel. Immediately press a red candy-coated chocolate piece or a cinnamon candy onto the top of the gel tree as a “star.”
-
FINAL CHILL & STORAGE: Keep the decorated OREO Cookie Balls refrigerated in an air-tight container, unstacked, to prevent smudging of the gel. Avoid covering directly with plastic wrap.
Notes
Disclaimer: Nutritional values were calculated using a third-party tool and are provided as an estimation only.
Sharing this recipe with a link is both encouraged and appreciated. Copying/pasting and/or screenshots of full recipes to any social media is strictly prohibited. Content and photographs are copyright protected.
Did you make this?
Don’t forget to leave a rating below and make sure to follow on Pinterest and Instagram for more!
Share Your Holiday Creations!
We hope you’ve been inspired to create these festive Christmas Tree OREO Cookie Balls! These delightful, easy-to-make treats are guaranteed to be a hit at any holiday gathering, bringing a touch of whimsy and irresistible flavor. Whether you stick to our classic green gel tree design or venture into other creative decorations, these OREO Cookie Balls stand as a testament to how simple ingredients can conjure extraordinary holiday magic.
We’d love to see your beautiful creations and hear about any unique twists you added! Share your photos and tips with us. Happy no-baking and warm holiday wishes to you and yours!