
The Ultimate No-Bake Oreo Ice Cream Dessert: Your Easy Summer Treat
Indulge in layers of creamy, dreamy goodness with this effortless Oreo Ice Cream Dessert! It’s the perfect no-bake treat to keep you cool and satisfied all summer long.
Discover Your New Favorite No-Bake Dessert
It feels like an eternity since we last celebrated the magic of Oreo desserts together. For many, the Oreo is not just a cookie; it’s a culinary icon, a source of pure joy, and an obsession when combined with cream. This particular Oreo Ice Cream Dessert is a testament to that enduring love affair, overflowing with irresistible cookies and cream flavor in every single bite. The best part? It’s incredibly fast to assemble and requires absolutely no baking, making it an ideal candidate for your next warm-weather gathering or a simple weeknight treat. Think of it as an ice cream cake, but elevated in simplicity and ease!
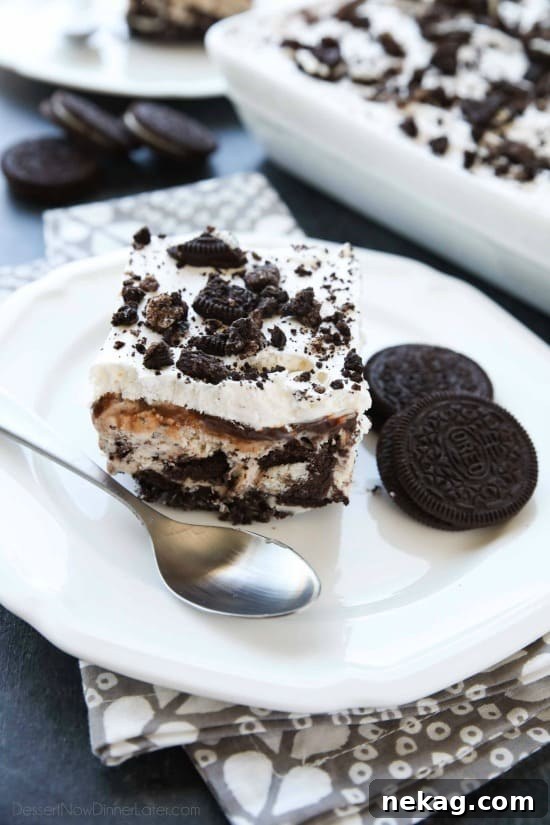
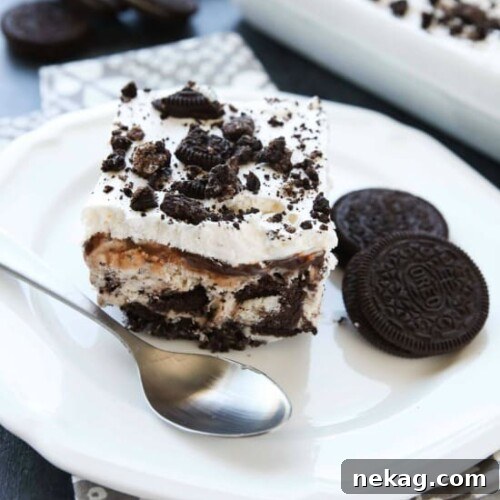
The beauty of this Oreo ice cream dessert lies in its delightfully rustic yet utterly delicious layers: a sturdy base of crushed Oreo cookies, a generous spread of softened cookies and cream ice cream, a decadent drizzle of melted hot fudge, a fluffy topping of whipped cream, and a final flourish of more crushed Oreos. Each component plays a vital role, contributing to a symphony of textures and flavors that is surprisingly easy to achieve. You genuinely cannot find a simpler, more satisfying dessert that delivers such impressive results.
For many, cookies and cream ice cream holds a special place, often topping the list of favorite frozen treats. This dessert takes that beloved flavor profile and transforms it into an even more spectacular experience. It’s so universally loved that it’s often considered for special occasions, like a birthday celebration. Rest assured, your family and friends will undoubtedly request this delightful dessert again and again!
When the temperatures rise, there’s truly nothing more appealing than an easy, no-bake dessert that requires minimal effort but delivers maximum flavor. This Oreo ice cream dessert not only tastes incredible but also boasts an elegant presentation that makes it suitable for any gathering. Whether you’re hosting a summer barbecue, contributing to a potluck, or simply enjoying a family dinner, this dessert is sure to be a showstopper. Prepare to receive endless compliments – you definitely won’t regret bringing this delicious creation to your next event!
Why This Oreo Ice Cream Dessert Is a Must-Try
This dessert isn’t just easy; it’s a game-changer for anyone who loves quick, impressive treats. Here’s why you need to add this recipe to your repertoire:
- Effortlessly Delicious: With no oven required, this recipe simplifies dessert making, perfect for hot days or when you’re short on time.
- Crowd-Pleaser: The classic combination of Oreos and ice cream appeals to almost everyone, making it ideal for parties, picnics, and family dinners.
- Customizable Fun: While the base recipe is fantastic, it’s also incredibly versatile. You can easily switch up ice cream flavors or add extra toppings to suit any preference.
- Visually Stunning: Despite its simplicity, the layered appearance of this dessert is beautiful and enticing, sure to impress your guests.
- Perfect for Summer: Chilled, creamy, and refreshing, it’s the ultimate antidote to a scorching summer day.
Oreo Ice Cream Dessert Recipe
Created by: Amber Brady
Rating: 4.70 from 10 ratings
Prep time: 15 mins
Total time: 15 mins (plus freezing time)
Yields: 12 servings
Ingredients
- 19.1 oz (544 g) family size package Oreos (approximately 48 cookies)
- ⅓ cup (75 g) butter, melted
- ½ gallon (0.7 liters) cookies and cream ice cream, softened
- 11.75 oz (333 g) jar hot fudge
- 8 oz (226 g) tub whipped topping, thawed
Instructions
-
Prepare the Oreo Crust: Take the Oreo cookies and place them in a gallon-sized zip-top bag. Using a rolling pin or a meat tenderizer, gently crush the Oreos into medium-sized chunks. Avoid making them into fine crumbs; you want some texture! Reserve about 1 cup of these crushed Oreos for the topping and set aside. To the remaining crushed Oreos in the bag, add the melted butter. Mix well until all the cookie pieces are coated. Press this mixture firmly onto the bottom of a 9×13-inch baking dish to form an even crust. This will be your delicious foundation.
-
Add the Ice Cream Layer: Next, spread the softened cookies and cream ice cream evenly over the crushed cookie crust. A good tip is to cut the softened ice cream into rectangular pieces with a knife and then arrange them on the crust, smoothing them together with the back of a spoon or an offset spatula. Ensure an even layer from edge to edge. Place the dish in the freezer until the ice cream is firmly set. The exact time will vary depending on how soft your ice cream was to begin with, but generally, 30-60 minutes should be sufficient.
-
Apply the Hot Fudge: Remove the lid from the jar of hot fudge. Warm the fudge in the microwave until it reaches a smooth, spreadable consistency. This usually takes about 45-55 seconds, but microwave wattages vary, so heat in short bursts and stir. Carefully drizzle the warm hot fudge over the set ice cream layer, then gently spread it evenly across the surface with a spatula. Return the dish to the freezer to allow the fudge layer to set, which typically takes around 30 minutes.
-
Final Toppings and Chill: Once the fudge is set, retrieve the dish from the freezer. Generously top the dessert with the thawed whipped topping, spreading it smoothly. Finally, sprinkle the reserved crushed Oreos over the whipped topping for that signature cookies and cream finish. Place the entire dessert back into the freezer for at least 2 hours, or until it is completely firm throughout. This ensures it holds its shape beautifully when sliced.
-
Serve and Enjoy: Before serving, remove the dessert from the freezer and let it sit at room temperature for about 10 minutes. This slight softening will make slicing much easier. For clean, sharp slices, dip your knife into hot water before each cut and wipe the blade clean periodically with a paper towel. Slice, serve, and savor every glorious bite of this incredible no-bake Oreo Ice Cream Dessert!
Tips for a Perfect No-Bake Oreo Ice Cream Dessert
- Softening Ice Cream: For the ideal texture, take your ice cream out of the freezer about 15-20 minutes before you plan to spread it. It should be soft enough to spread easily but not completely melted.
- Even Layers: Take your time to spread each layer (Oreo crust, ice cream, fudge, whipped topping) as evenly as possible. This not only looks better but also ensures a balanced taste in every serving.
- Crushing Oreos: If you don’t have a rolling pin, a food processor can quickly crush the cookies. Just be careful not to over-process them into a fine powder unless that’s your preference for the crust.
- Chilling is Key: Don’t rush the freezing steps between layers. Adequate chilling ensures each layer sets properly, preventing them from mixing and making for cleaner cuts.
- Slicing Technique: The hot water and wiping method for your knife blade is crucial for neat slices. It helps the blade glide through the frozen layers without tearing.
- Pan Preparation: For easy removal, you can line your 9×13-inch baking dish with parchment paper or foil, leaving an overhang on the sides. This allows you to lift the entire dessert out before slicing.
Delicious Variations to Try
This recipe is a fantastic starting point, but feel free to get creative with these delightful variations:
- Different Oreo Flavors: Experiment with mint Oreos, golden Oreos, peanut butter Oreos, or any seasonal flavor for a unique twist.
- Alternative Ice Cream: While cookies and cream is classic, vanilla, chocolate, mint chip, or even coffee ice cream would be incredible.
- Caramel Drizzle: Swap the hot fudge for a layer of warm caramel sauce, or use both for an extra decadent treat.
- Nutty Crunch: Add a layer of chopped pecans, walnuts, or peanuts over the hot fudge for added texture and flavor.
- Fruity Fun: For a refreshing touch, consider adding a thin layer of fresh berries (strawberries, raspberries) over the ice cream before the fudge, or as a garnish.
- Brownie Base: Instead of an Oreo crust, you could use a layer of crumbled brownies for an even more chocolatey base.
- Homemade Whipped Cream: For an extra special touch, make your own whipped cream with heavy cream, powdered sugar, and a hint of vanilla extract.
Storage and Make-Ahead Tips
This Oreo Ice Cream Dessert is an excellent make-ahead option, perfect for entertaining:
- Make Ahead: You can prepare this dessert up to 2-3 days in advance. Simply keep it tightly covered in the freezer until about 10 minutes before you plan to serve.
- Storing Leftovers: Any leftover dessert should be stored in an airtight container or covered tightly with plastic wrap and aluminum foil in the freezer. It will stay fresh for up to 1-2 weeks.
- Serving Temperature: For the best texture and flavor, allow the dessert to sit at room temperature for 5-10 minutes before serving. This makes it easier to slice and ensures a creamier bite.
Frequently Asked Questions (FAQs)
Here are some common questions you might have about making this delightful dessert:
- Can I use a different size dish?
Yes, you can, but be aware that using a smaller dish will result in thicker layers and might require slightly longer freezing times. A larger dish will yield thinner layers and quicker freezing.
- What if my ice cream is too hard to spread?
Allow it to soften at room temperature for a few more minutes. If you’re in a rush, you can microwave it for a few seconds at a time (5-10 seconds) until it’s pliable, stirring in between.
- Can I use homemade hot fudge or whipped cream?
Absolutely! Homemade versions will elevate the dessert even further. Just ensure the hot fudge is cooled to a warm, spreadable temperature before adding it.
- Is this dessert suitable for freezing longer than 2 hours?
Yes, it needs a minimum of 2 hours to firm up properly, but it can be stored in the freezer for much longer, as noted in the storage tips.
- Can I make individual servings?
For individual portions, you could press the Oreo crust into the bottom of cupcake liners or small ramekins, then layer the ice cream, fudge, and whipped topping. Freeze and serve directly!
Final Thoughts on This Delightful Treat
This No-Bake Oreo Ice Cream Dessert truly embodies the essence of an easy, satisfying, and utterly delicious treat. Its straightforward preparation combined with layers of beloved flavors makes it an instant hit for any occasion. Whether you’re a seasoned baker or a kitchen novice, you’ll find this recipe a joy to make and an even greater joy to devour. So go ahead, whip up this frozen masterpiece, and let the smiles begin!