
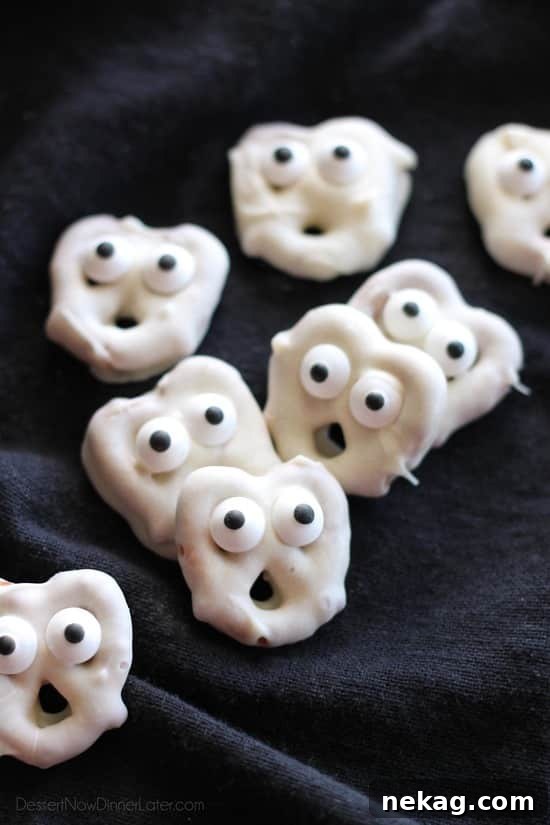
Delightful Ghost Pretzels: Your Ultimate Guide to Easy Halloween Treats
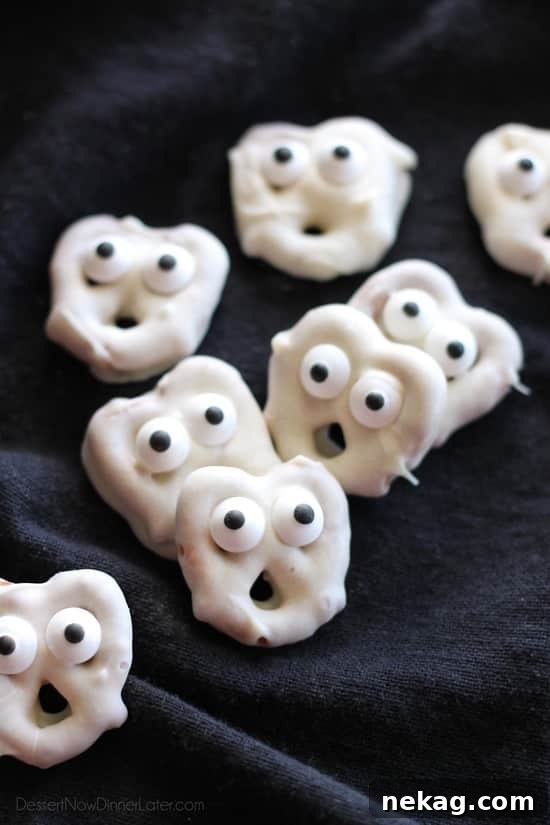
Halloween is a season of spooky fun, creative costumes, and, of course, delicious treats! As the leaves change color and a chill fills the air, there’s nothing quite like gathering with loved ones to celebrate this festive time. And what better way to add a touch of playful fright to your celebrations than with these adorable and incredibly easy Ghost Pretzels?
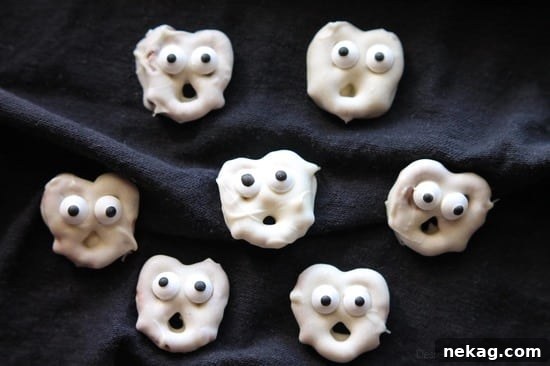
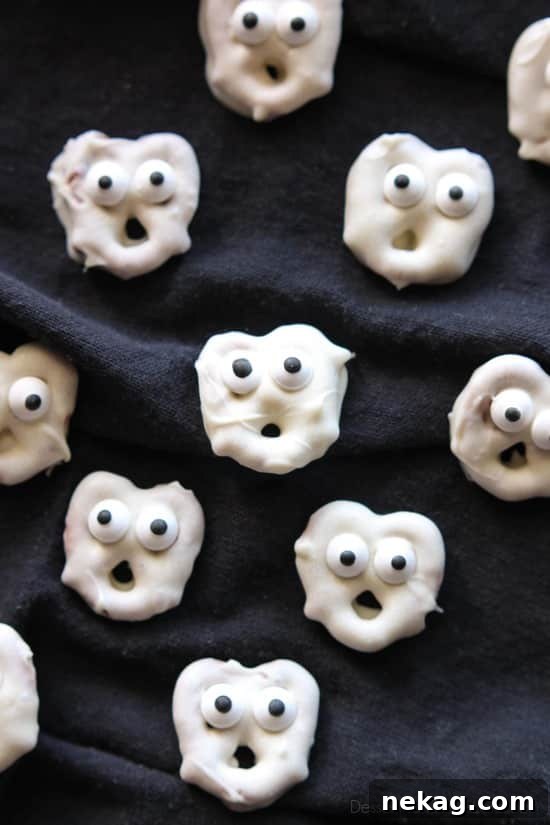
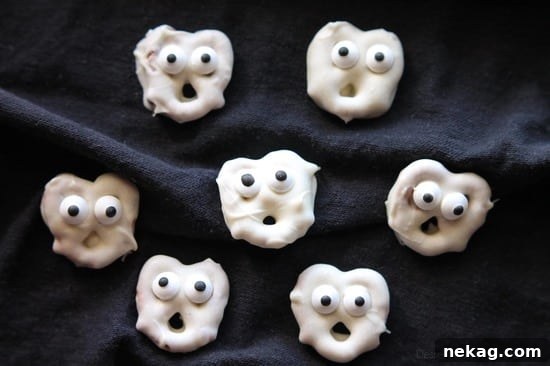
These aren’t just any ordinary snacks; they are charming, white chocolate-dipped pretzels transformed into friendly (or screaming!) ghosts with the simple addition of candy eyes. They are guaranteed to bring smiles to faces of all ages, making them a perfect activity for kids and a beloved addition to any Halloween party spread. Get ready to impress your family and friends with minimal effort and maximum delight!
Why You’ll Love Making These Ghost Pretzels
There’s something truly magical about seeing the pure joy on children’s faces when you create something special, even if it’s incredibly simple. These Ghost Pretzels consistently earn me “cool mom” points because they hit all the right notes:
- Effortlessly Easy: This recipe requires no baking and minimal ingredients, making it ideal for busy parents or anyone looking for a quick Halloween craft.
- Kid-Friendly Fun: From dipping the pretzels to placing the candy eyes, kids can actively participate in making these spooky snacks, fostering creativity and making cherished memories.
- Irresistibly Delicious: The combination of salty, crunchy pretzels and sweet, smooth white chocolate is a classic pairing that everyone loves.
- Perfect for Parties: Whether it’s a school party, a neighborhood gathering, or a family movie night, these ghost pretzels are a crowd-pleasing treat that fits perfectly with the Halloween theme.
- Customizable: While the classic ghost is white, you can easily experiment with different colored candy melts for even more festive variations.
Prepare to become the Halloween treat hero! These pretzels aren’t just fun to look at; they’re even more fun to devour. And if you’re as excited about Halloween as I am, you’re in for a treat! These Ghost Pretzels are just the first of several easy and fun Halloween recipes I’ll be sharing. So, keep an eye out for more spooky delights coming your way soon!
The Key Ingredients for Spooky Success
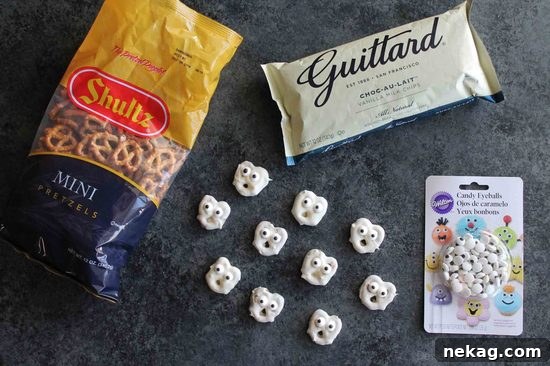
The beauty of these ghost pretzels lies in their simplicity, requiring just a handful of readily available ingredients. Choosing the right components will ensure your spooky snacks are both delicious and visually appealing.
Choosing Your Pretzels
For these ghost pretzels, mini twist pretzels are the star. Their classic shape naturally forms the perfect body for our friendly ghosts, with the two top holes serving as ideal spots for the candy eyes and the bottom hole creating that iconic “screaming” mouth. Brands like Snyder’s or Shultz offer great mini pretzels that are consistent in size and crunch. While you could use pretzel rods, the mini twists lend themselves much better to the ghost shape.
The White Coating: Chocolate, Melts, or Bark?
You have a few excellent options for coating your pretzels, each with its own advantages:
- White Chocolate Chips: This is my personal preference, as I believe it offers the best flavor. High-quality white chocolate, like Guittard Vanilla Milk Chips, melts beautifully and provides a rich, creamy taste that complements the salty pretzels perfectly. I always keep a bag of my favorite chips on hand for impromptu treat-making!
- White Candy Melts: These are specifically designed for melting and coating, offering a very smooth, consistent finish. They are often easier to work with than white chocolate, as they are less prone to seizing. They come in various colors, but white is perfect for ghosts.
- White Almond Bark: Similar to candy melts, almond bark (also known as vanilla candy coating) is a cost-effective and easy-to-use option. It melts smoothly and sets quickly, making it a reliable choice for dipping.
Regardless of your choice, ensure it’s a good quality product for the best taste and texture.
Thinning the Chocolate: The Secret to Smooth Dipping
To achieve a perfectly smooth and easy-to-work-with consistency for your white coating, a little thinning agent goes a long way. I recommend adding about ½ teaspoon of coconut oil or shortening to your melted chocolate. This helps the chocolate coat the pretzels evenly without being too thick or clumpy. A crucial note: the FDA considers coconut oil a tree nut. If you are making these for a school event or for anyone with allergies, it’s best to use shortening instead to avoid any potential issues.
The Eyes Have It: Candy Eyeballs
No ghost is complete without its expressive eyes! Candy eyeballs are readily available in most grocery stores, craft stores like Walmart or Michaels, especially around Halloween, or you can conveniently order them online from Amazon. A small bag usually costs around $2.50 and will provide plenty of eyes for a large batch of ghost pretzels. They come in various sizes; standard size works best for mini pretzels, creating a whimsical and slightly spooky look.
How to Make Spooktacular Ghost Pretzels: A Step-by-Step Guide
Creating these ghost pretzels is a straightforward and enjoyable process. Follow these simple steps for perfectly ghastly treats:
Preparation is Key
- Prepare Your Workspace: Lay out a sheet of wax paper, parchment paper, or a silicone baking mat on a baking sheet. This non-stick surface is essential for easy removal of your finished pretzels once the chocolate has set.
Melting the White Chocolate
- Melt the Chocolate: In a microwave-safe glass bowl, combine your white chocolate chips (or candy melts/almond bark) and the coconut oil (or shortening). Microwave in short bursts of 10-20 seconds, stirring well after each interval. White chocolate can seize easily if overheated, so be patient and stir frequently until it’s completely smooth and free of lumps. Alternatively, you can use a double boiler method for a more controlled melt.
The Dipping Process
- Dip the Pretzels: Working quickly, immerse one mini pretzel at a time into the melted white chocolate. Use a fork to gently turn the pretzel, ensuring it’s fully coated. Carefully lift the pretzel out with the fork, allowing any excess chocolate to drip off. This is a crucial step for achieving that signature “screaming mouth” effect: gently tap the fork against the side of the bowl to encourage chocolate to fall out of the bottom hole of the pretzel. This creates the open-mouthed look of a screaming ghost.
- Place on Baking Sheet: Transfer the chocolate-dipped pretzel to your prepared baking sheet.
Adding the Eyes
- Attach the Eyeballs: Immediately after placing the dipped pretzel on the baking sheet, press two candy eyeballs into the top two holes of the pretzel. The melted chocolate will act as an adhesive. If the chocolate has started to set, you can dab a tiny bit of extra melted chocolate on the back of the candy eyes before pressing them into place.
Finishing Up
- Repeat and Work Quickly: Continue this process with the remaining pretzels. Speed is your friend here, as the chocolate will start to cool and thicken. If your chocolate becomes too thick to work with, reheat it in the microwave for a very short burst (5-10 seconds) and stir well. Try to avoid reheating it more than once if possible, to maintain its smooth consistency.
- Allow to Harden: Let the ghost pretzels rest on the baking sheet until the chocolate has fully hardened. To speed up this process, you can place the baking sheet in the freezer for about 10 minutes. Once firm, gently peel the pretzels off the wax paper or silicone mat, and they’re ready to enjoy!
Tips for Perfect Ghost Pretzels Every Time
Ghost Pretzels
Created by Amber Brady
Prep: 30 mins | Total: 30 mins
White chocolate dipped pretzels are made into ghosts with candy eyes and a little bit of imagination.
Pin Recipe
Rate This Recipe
Save Recipe
Yields 30 pretzels
Ingredients
- 30 mini pretzels (like Shultz or Snyder’s)
- 6 oz (170 g) Guittard Vanilla Milk Chips (equal to 1 cup; half of a 12oz bag)
- ½ tsp coconut oil or shortening, for thinning the chocolate
- 0.88 oz (25 g) pkg Wilton Candy Eyeballs
Equipment
- Wilton Candy Eyeballs, Standard Size
Instructions
- Line a baking sheet with wax paper, parchment paper, or a silicone baking mat. Set aside.
- Melt the white chocolate and coconut oil (or shortening) in a glass bowl in the microwave, for short 10-20 second bursts, until melted. Stir well after each burst until smooth.
- Immediately dip pretzels, one at a time, in the bowl, using a fork to turn the pretzel over. Shake off excess chocolate from the pretzel with the fork. Be sure to shake the chocolate out of the bottom hole, so it looks like an open mouth — screaming. Place chocolate dipped pretzels on the prepared baking sheet.
- Immediately press two eyeballs into the top two holes for eyes — add a little extra chocolate if needed to secure.
- Repeat with remaining pretzels. Work quickly. Heating the chocolate again only once, if needed, for a few seconds.
- Allow pretzels to rest and harden. Place in freezer for 10 minutes to speed up the process. Peel pretzels off the baking sheet and enjoy!
Video
A video showing the making of Ghost Pretzels can be found here.
Notes
Nutrition
Disclaimer: Nutritional values were calculated using a third-party tool and are provided as an estimation only.
Sharing this recipe with a link is both encouraged and appreciated. Copying/pasting and/or screenshots of full recipes to any social media is strictly prohibited. Content and photographs are copyright protected.
Don’t Overheat Your Chocolate!
This is arguably the most important tip. White chocolate is delicate and can easily seize (become clumpy and unworkable) if it gets too hot. Microwave in short bursts and stir thoroughly between each. If using a double boiler, ensure the bowl doesn’t touch the simmering water, and stir continuously.
Work Smart, Work Fast
Melted chocolate starts to set quickly, especially if your kitchen is cool. Prepare all your ingredients and your lined baking sheet before you start melting the chocolate. This minimizes downtime and keeps the process smooth.
The “Screaming Mouth” Effect
After dipping, gently tap the fork holding the pretzel against the edge of your bowl. This helps excess chocolate drip off and, crucially, clears out the bottom hole of the pretzel, creating that perfect open-mouthed look for your ghosts. It’s a small detail that makes a big difference!
Securing the Eyes
Place the candy eyes on the pretzels immediately after dipping. The warmth of the chocolate will help them adhere. If the chocolate starts to harden before you get the eyes on, a tiny dab of fresh melted chocolate on the back of each eye will act as “glue.”
Storage for Freshness
Store your finished Ghost Pretzels in an airtight container at room temperature for up to a week. If you live in a warm climate, you might store them in the refrigerator, but allow them to come to room temperature before serving for the best texture.
Fun Variations & Customizations
While the classic white ghost pretzel is charming, don’t hesitate to get creative! Here are a few ideas to inspire you:
- Colorful Ghosts: Use different colored candy melts (orange, green, purple) for a vibrant array of Halloween characters. You could even create different “ghost” expressions with various eye placements.
- Mummy Pretzels: Dip your pretzels in white chocolate, then, instead of eyes, use a piping bag with a very fine tip (or a fork) to drizzle thin lines of white chocolate horizontally across the pretzel, leaving a small gap for eyes. Add candy eyes to the gap for a spooky mummy effect.
- Sprinkle Magic: Before the chocolate fully sets, sprinkle your ghost pretzels with Halloween-themed sprinkles, edible glitter, or even a fine dusting of cocoa powder for a “shadow” effect.
- Pretzel Rod Ghosts: For a different look, use pretzel rods instead of twists. Dip half the rod in white chocolate, add eyes, and you’ll have long, skinny ghosts.
Serving Suggestions & Occasions
These Ghost Pretzels are incredibly versatile and perfect for a variety of Halloween events:
- Halloween Parties: Arrange them on a platter with other themed treats like spider cookies or pumpkin brownies for an impressive display.
- School Treats: Individually bag them for classroom parties (remember to use shortening if there are nut allergies!).
- Trick-or-Treat Favors: Hand them out as non-candy treats, or add them to treat bags for an extra special touch.
- Movie Night Snack: A bowl of ghost pretzels makes the perfect accompaniment to a spooky movie marathon.
- After-School Snack: Surprise your kids with a fun, homemade treat on a crisp autumn afternoon.
Frequently Asked Questions About Ghost Pretzels
Can I use regular chocolate instead of white chocolate?
While you certainly can, the “ghost” effect relies on white chocolate. You could make “monster” pretzels with milk or dark chocolate and add colored candy eyes, but for true ghosts, white is best!
How long do ghost pretzels last?
Stored in an airtight container at room temperature, they will last for about 5-7 days, maintaining their crunch and flavor. If refrigerated, they might last a bit longer, but the texture of the pretzel might soften slightly.
Can I make these gluten-free?
Absolutely! Many brands now offer gluten-free mini pretzels that work perfectly for this recipe. Just ensure all your other ingredients (chocolate, candy eyes) are also certified gluten-free.
My chocolate is too thick/clumpy. What went wrong?
This usually happens if the chocolate was overheated, or if even a tiny drop of water got into the chocolate. If it’s just thick, you can try adding a bit more coconut oil or shortening, stirring well. If it’s seized and clumpy, it might be difficult to rescue and may be best to start over.
Can I use a piping bag for dipping?
While you could try, dipping with a fork provides better coverage and allows you to easily create the “screaming mouth” effect by shaking off excess chocolate. A piping bag is better for drizzling or decorating after the main dip.
Conclusion: A Spooky Delight Made Simple
These Ghost Pretzels are more than just a recipe; they’re an experience. They’re a testament to how a few simple ingredients and a dash of creativity can transform ordinary snacks into extraordinary memories. Whether you’re a seasoned baker or a beginner in the kitchen, this easy Halloween treat is guaranteed to be a hit.
So, this Halloween, embrace the fun, gather your ingredients, and whip up a batch of these delightful ghost pretzels. Watch as little faces light up and enjoy the smiles (and screams!) these adorable snacks bring. Don’t forget to leave a rating below if you make them, and connect with us on Pinterest and Instagram for more inspiring recipes and festive ideas!
Did you make this?
Don’t forget to leave a rating below and make sure to follow on Pinterest and Instagram for more!