
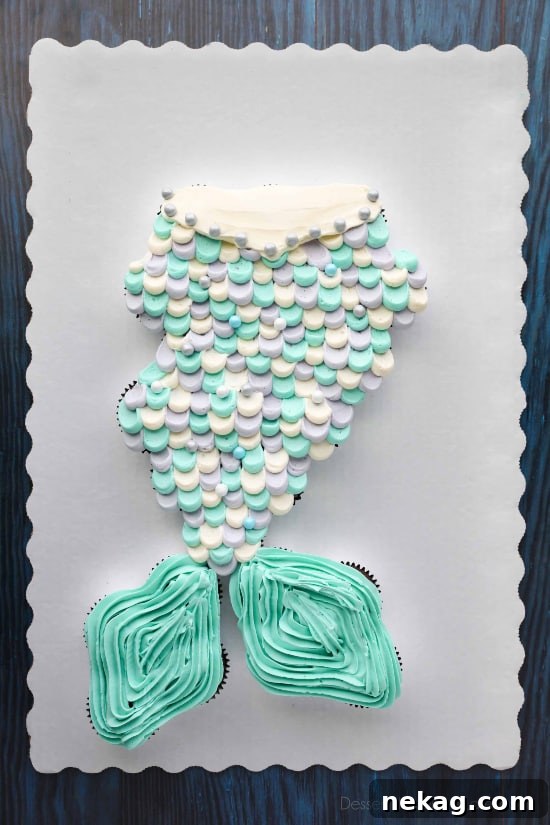
Prepare to dive into an ocean of enchantment with this delightful Mermaid Tail Cupcake Cake! This imaginative dessert isn’t just a feast for the eyes; it’s also incredibly practical, making it the perfect centerpiece for any girl’s birthday celebration or a whimsical baby shower. Forget the fuss of cutting a traditional cake; this innovative design allows guests to simply pull apart individual cupcakes, ensuring easy serving and less mess. Beyond the cake, this comprehensive guide will also share a treasure trove of additional mermaid birthday party ideas, from captivating decorations and fun games to themed food and favors, ensuring your celebration is truly unforgettable.
Mermaid-themed birthday parties hold a special kind of magic for little girls, transforming their celebrations into an underwater adventure. The shimmering scales, vibrant colors, and mystical allure of mermaids create an atmosphere of wonder and joy that captivates young imaginations. It’s no surprise that this theme also makes for an adorably cute and highly popular baby shower theme, promising a splash of sweetness for expectant parents. When my daughter celebrated her eighth birthday recently, a mermaid party was the obvious choice, and as a former cake decorator, I was determined to create a mermaid cake that was both visually stunning and remarkably easy to handle. This mermaid tail pull-apart cupcake cake perfectly fit the bill.
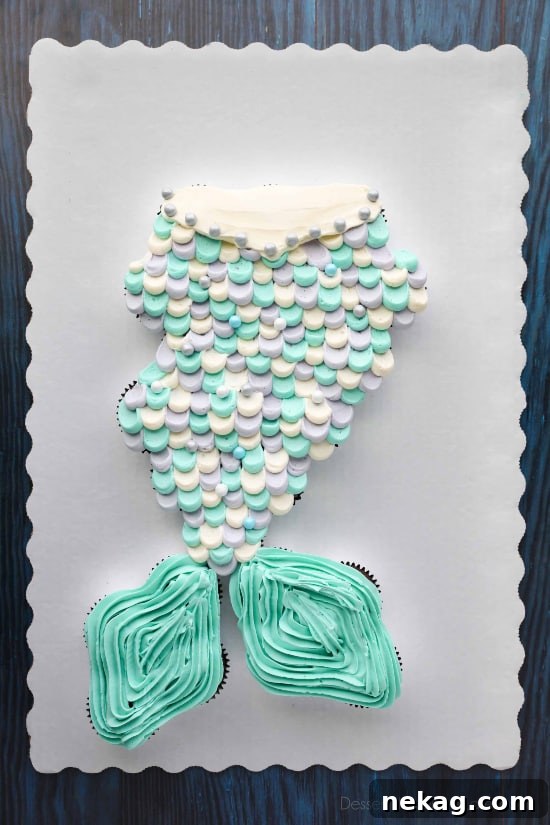
While the intricate details of the scales might suggest a complex undertaking, you’ll be pleasantly surprised by how straightforward this mermaid tail cupcake cake truly is to assemble. It’s a project that offers a fantastic sense of accomplishment, yielding an impressive result with techniques that are simpler than they appear. Alongside the detailed cupcake tutorial, I’m excited to share all the mermaid party ideas that made our celebration a huge success, including charming party bags and favors, enchanting decorations, engaging games, and, of course, a spread of delightful mermaid-themed food. Scroll past the step-by-step cupcake instructions to discover these fantastic party enhancements.
Why Choose a Pull-Apart Mermaid Tail Cupcake Cake?
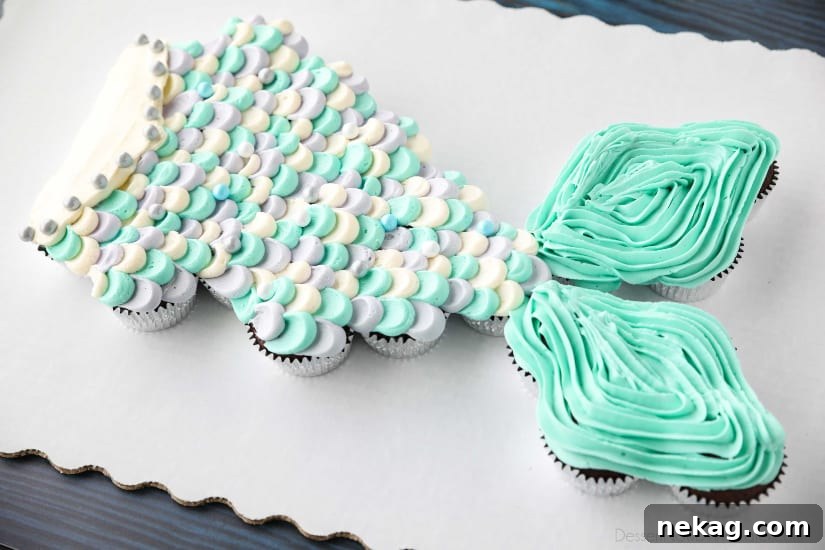
The beauty of a pull-apart cupcake cake lies in its inherent simplicity and convenience. Unlike a traditional cake that requires careful slicing and plating, this innovative design eliminates the need for any cutting tools, making serving a breeze. Each guest can effortlessly “pull apart” their own individual cupcake, minimizing mess and maximizing enjoyment. This format is particularly ideal for children’s parties, where quick and easy serving is a huge advantage. Furthermore, the cupcake cake offers a fantastic canvas for creative decoration, allowing you to achieve an intricate design like a mermaid tail without the complex carving or extensive frosting skills often required for sculpted cakes. It’s a guaranteed crowd-pleaser that combines visual appeal with effortless practicality.
Your Essential Guide to Crafting the Mermaid Tail Cupcake Cake
Creating this magical mermaid tail cupcake cake is a rewarding process, and with these detailed instructions, you’ll be well on your way to making a stunning centerpiece for your party. We’ll cover everything from preparing your cupcakes and setting up your workspace to mastering the art of piping the fins and scales. Gather your ingredients and tools, and let’s dive into the steps to create this enchanting dessert.
Planning Your Mermaid Cake: Template & Cupcake Choices
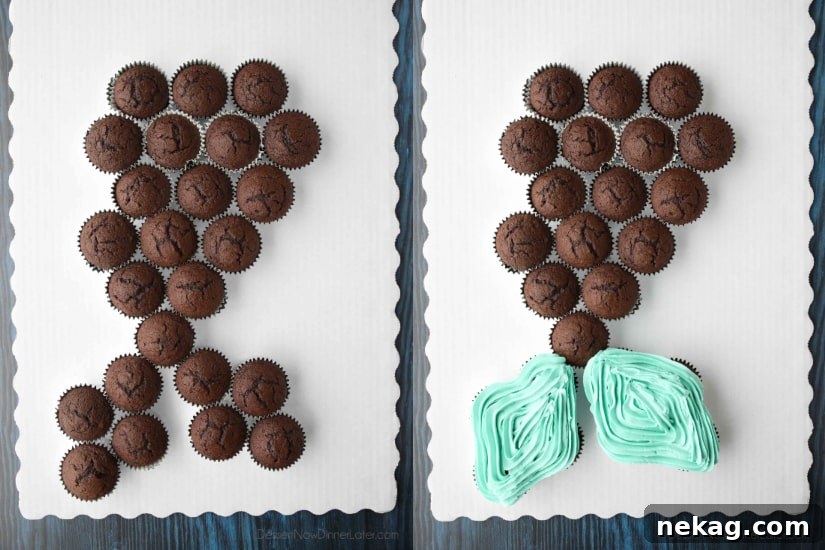
The foundation of our mermaid tail cupcake cake requires 24 standard-sized cupcakes. A single box of cake mix is typically designed to yield exactly 24 cupcakes, making it a convenient choice for this project. However, don’t hesitate to opt for homemade cupcakes if you prefer, whether it’s a vibrant funfetti recipe for a playful touch or a rich chocolate flavor for a decadent treat. The choice of flavor and type of cupcake is entirely up to you and your party’s theme. For the cupcake wrappers, I opted for double-lined silver ones. This choice was strategic, as the double lining effectively concealed the darker brown color of the chocolate cupcakes, ensuring the vibrant mermaid frosting would truly pop without any underlying color interference. If you’re using a lighter-colored cupcake base, almost any color wrapper will work beautifully, so feel free to experiment with shimmery blues, purples, or greens to complement your mermaid theme. To assemble and display your cupcake cake, you’ll need a full-size sheet cake board and a corresponding box, which can often be purchased affordably from the bakery section of most grocery stores.
PRO TIP: To ensure your cupcakes remain perfectly aligned and tightly nestled together while you’re frosting them, apply a small piece of double-sided tape to the bottom of each cupcake wrapper before placing them on the cake board. This simple trick prevents any unwanted shifting and maintains the cohesive mermaid tail shape.
Mastering the Mermaid Tail Fins
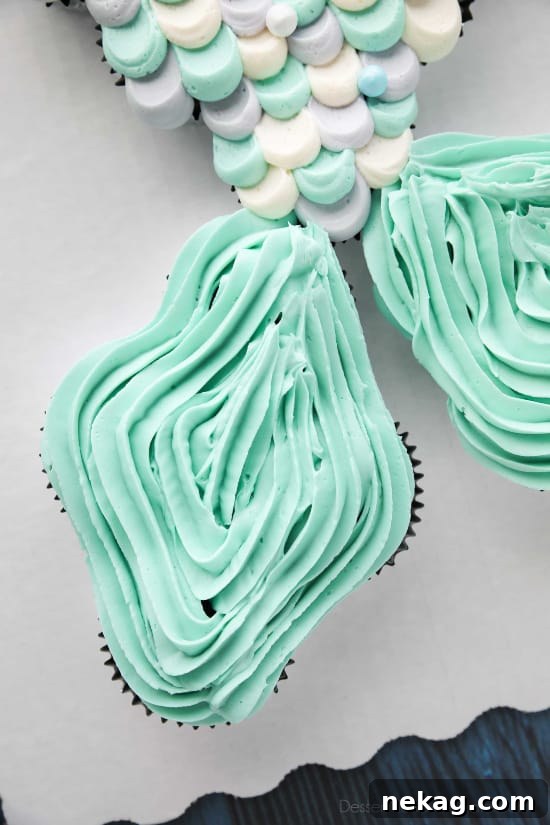
When it comes to decorating your mermaid tail cupcake cake, you’ll want to begin at the very bottom, working your way up from the elegant fins to the top of the tail. Before you start piping, ensure you have a generous batch of our delicious buttercream frosting ready (the recipe is included below!). The key to creating beautiful, flowing fins lies in using the right piping tip and technique. For this step, a Wilton 2D tip, known for its slightly open star/flower shape, is ideal. This tip allows you to create textured, ruffled edges that mimic the graceful movement of a mermaid’s tail. Begin by continuously outlining the very edges of the fin area, building up the shape, then gradually work your way towards the center, filling in the space with smooth, consistent pressure. The goal is to create a seamless, cohesive fin structure that looks naturally flowing and vibrant.
PRO TIP: To avoid frustrating air bubbles and interruptions while piping, always make sure your frosting bag is amply filled before you begin decorating each fin section. A full bag helps maintain even pressure, preventing you from having to lift the tip and restart, which can create unsightly breaks in your design.
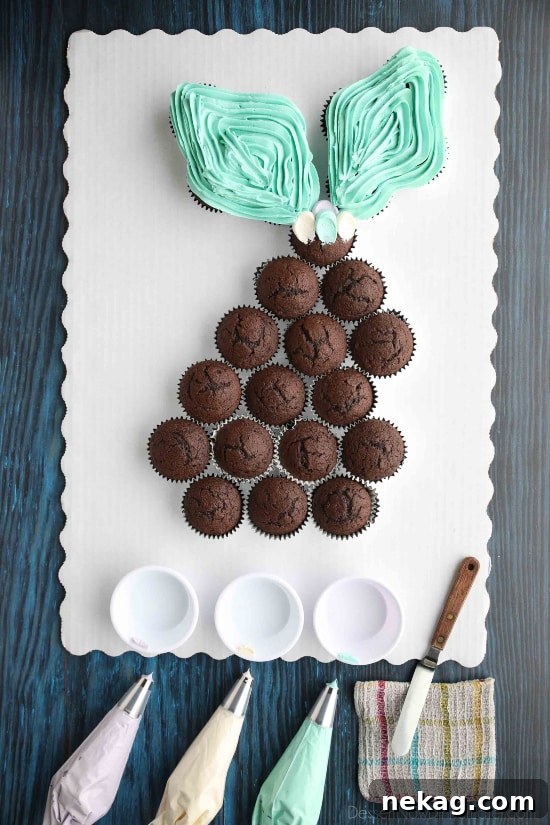
Creating Enchanting Mermaid Tail Scales
Now for the most visually striking part of your mermaid tail: the scales! This step allows for immense creativity in color and pattern. Select three distinct frosting colors that complement your mermaid theme—perhaps a deep ocean blue, a shimmering teal, and a delicate lavender. Once your colors are chosen, prepare your piping bags by fitting each with a Wilton 1A or a similarly sized large round tip. This round tip is crucial for creating the perfect circular dots that will transform into scales. For the technique, you’ll also need a small offset spatula, which will be your primary tool for shaping the scales, and a clean, damp washcloth. The washcloth is essential for wiping your spatula meticulously clean between each color application, preventing color transfer and maintaining crisp, vibrant hues throughout your design.
Before you begin the scales, rotate your cake board so the fins are at the top, positioning the tail in an upright orientation. This makes it easier to work on the scales from bottom to top in overlapping rows. Start by alternating piping colored dots directly onto the cupcakes. Squeeze the frosting bag to create a dot, then lift the bag straight up. As you pipe, consciously try to avoid having the same two colors touch side-by-side; this helps create a natural, varied look. Don’t worry if there are small gaps between cupcakes; you can pipe the frosting a little thicker in these areas to ensure full coverage.
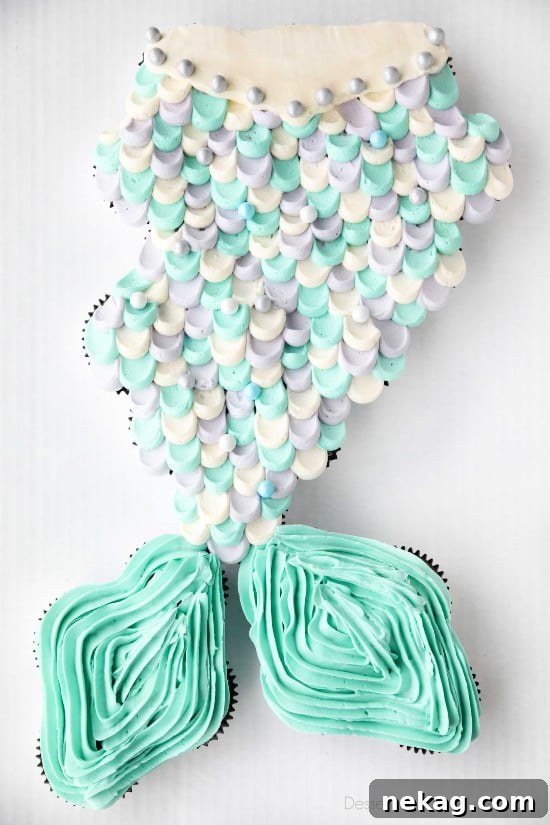
With your dots piped, it’s time to create the scale effect. Using your small offset spatula, gently press down on the very tip of a piped dot. Apply a slight downward pressure, then smoothly pull the spatula towards the unfrosted cupcakes in the row below (or towards the base of the tail if working upwards). This motion will gently flatten and drag the frosting, creating a beautiful, organic scale shape. After each scale, carefully scrape any excess frosting from your spatula into one of your three small bowls (keeping colors separate is key for potential reuse or color correction). Most importantly, wipe your spatula perfectly clean with the damp cloth *between each color* to prevent any muddying of your vibrant scale colors. This part is indeed the most time-intensive, but the stunning, dimensional result is absolutely worth the effort and patience.
PRO TIP: To make the scale creation process more efficient and reduce spatula cleaning, work with one color at a time across a row. Pull all the scales for one color, then wipe your spatula thoroughly clean. Switch to the next color, repeat the pulling process for all those scales, clean your spatula again, and then move to your final color. This systematic approach streamlines the process and ensures consistently clean color separation.
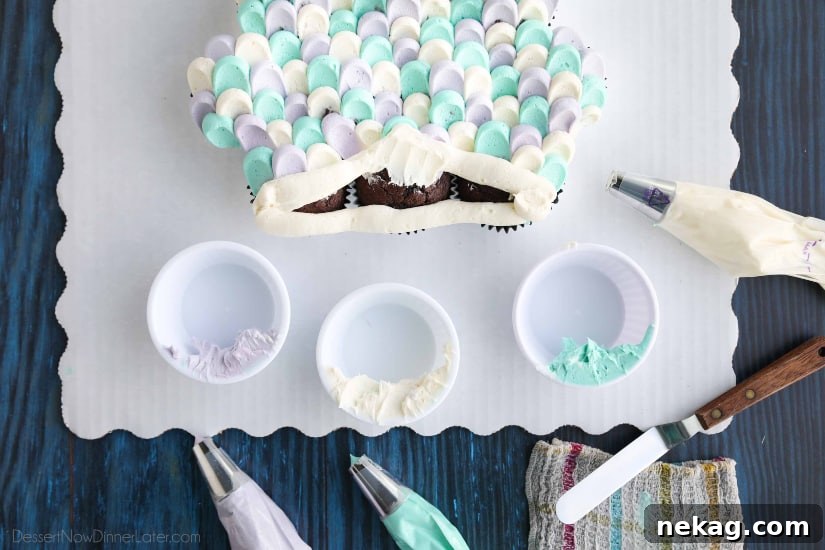
The Finishing Touches: Waistband & Decorations
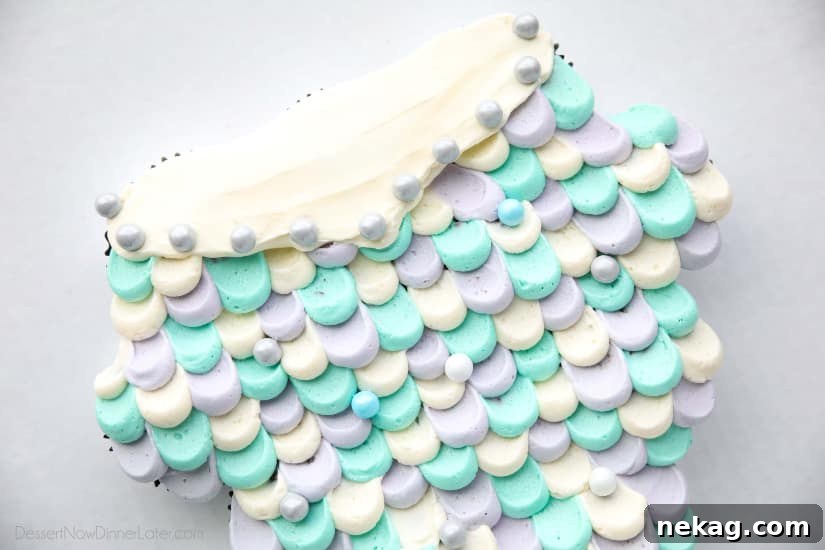
To elegantly complete your mermaid tail cupcake cake, create a distinct waistband at the top, drawing inspiration from designs like this stunning example found on Pinterest. Once your scales have reached the upper section of the mermaid tail, define the outline of a V-shaped waistband using any of your three chosen frosting colors. I personally found white to be an excellent choice for the waistband, especially since it was the color I had the most of remaining, creating a beautiful contrast. After outlining, generously pipe more frosting into the center of the V-shape to fill it completely. Then, using your offset spatula, carefully smooth out the frosting to create a clean, uniform surface. The goal is a polished finish that clearly separates the scaled body of the tail from the imagined waist of the mermaid.
PRO TIP: For an exceptionally smooth waistband, lightly dampen your offset spatula with water before smoothing the frosting. A slightly wet spatula helps to eliminate most bumps, lines, and imperfections, giving your waistband a professional, flawless look. To add a final touch of oceanic sparkle and charm, adorn the waistband with delicate chocolate pearls. You can also scatter a few additional pearls randomly across the mermaid tail scales, mimicking tiny bubbles or hidden treasures among the scales, adding an extra layer of magic and realism to your edible masterpiece.
Storing Your Masterpiece
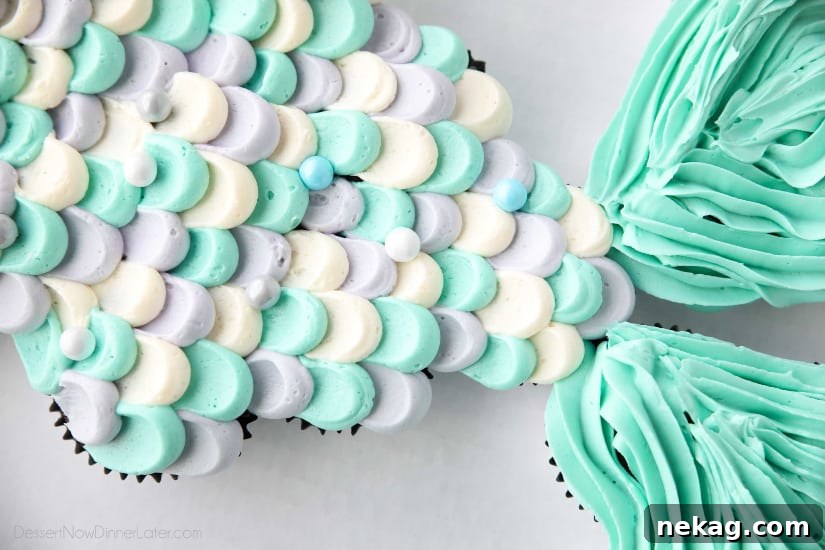
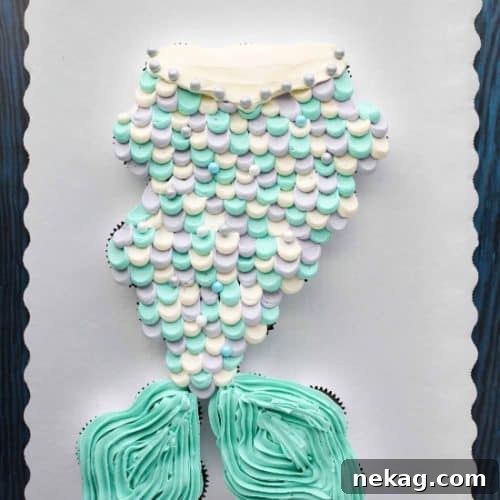
Voila! Your enchanting mermaid tail cupcake cake is now picture-perfect and ready to make a grand splash at your party! To ensure your beautiful creation stays fresh and perfectly preserved until serving time, proper storage is key. Carefully scoot the entire cake board, with the assembled cupcake cake, onto the bottom of a disassembled cardboard cake box. Once the board is in place, reassemble the sides and lid of the box around the cake. This method provides ample protection from dust and air, keeping your frosting fresh and preventing any accidental smudges. Store your Mermaid Tail Cupcake Cake in this secure box at room temperature or in the refrigerator, depending on your frosting ingredients, until it’s time for the big reveal and enjoyment!
Average rating: 4.42 from 24 ratings
Mermaid Tail Cupcake Cake
Created by Amber Brady
Prep: 1 hr | Cook: 20 mins | Total: 1 hr 20 mins
Yields: 24 cupcakes
Ingredients
- 15.25 oz (432 g) box cake mix + ingredients to make cake (oil, water, eggs)
- 4 disposable piping bags (12-inches or larger)
- 1 Wilton 2D tip
- 3 Wilton 1A tips
- Small offset spatula
- Clean damp washcloth
- 3 small bowls to scrape excess frosting
- Chocolate pearls for decorating
Vanilla Buttercream Frosting
- 2 cups (452 g) unsalted butter, room temperature
- 1/2 tsp salt
- 6 cups (720 g) powdered sugar
- 6 Tbsp heavy cream
- 2 tsp vanilla extract
- Food Coloring Paste (2-3 colors of choice – I did turquoise [blue/green mixed together] and purple)
Instructions
- For the cupcakes: Mix and bake cupcakes in paper baking cups. I used double-lined silver baking cups to hide the brown of the chocolate cake. Bake according to package directions. (Cupcakes typically bake at 350˚F for 19-23 minutes.) Ensure you divide the batter evenly for 24 cupcakes.
- For the frosting: With an electric mixer, beat the butter with the salt until creamy. Add the powdered sugar 1/2 cup at a time, mixing completely before adding more. Repeat until all powdered sugar is added. Add heavy cream one Tablespoon at a time, then increase speed to high and beat for about 30 seconds. Add vanilla and mix until incorporated.
- Separate and color 1/2 of the frosting turquoise (or whichever color you choose for the fins and some scales).
- Color 1/4 of the frosting purple (or the color of your choice) and keep the other 1/4 of the frosting white (or the color of your choice).
- Prepare four disposable piping bags. Place half of the turquoise frosting in one bag fitted with a Wilton 2D tip. Place the remaining turquoise, purple, and white frosting into separate bags, each fitted with a Wilton 1A or larger round tip. Also, have ready a small offset spatula, three small bowls, and a clean, damp washcloth for wiping the spatula between colors.
- Use double-sided tape to adhere cupcakes to a full-size sheet cake board, arranging them in the shape of a mermaid tail (refer to the post for a template).
- For the fins: Pipe the fins with the slightly opened Wilton 2D tip. Pipe continuously, outlining the edge first, and then working your way towards the center. TIP: Make sure the frosting bag is full before piping each fin to help prevent air bubbles and interruptions.
- For the scales: Flip the board upside down so the fins are at the top. Alternate piping colored dots by squeezing the frosting directly on top of each cupcake and lifting the bag straight up. Try to avoid having the same two colors touching. You may need to pipe frosting extra thick between any cupcake gaps.
- Using the small offset spatula, gently press the tips of the dots down slightly and then pull the spatula towards the unfrosted cupcakes. This action creates the scales. Scrape excess frosting into three small bowls—one for each color. Wipe the spatula clean with the damp cloth between colors. (This is the most time-intensive part.) TIP: Pull all of the same colors in a row, then wipe the spatula clean and do a different color, then wipe the spatula and do the last color.
- For the waistband: Once the scales get close to the top of the mermaid tail, use any of the three colors to pipe an outline for a V-shaped waistband. I used white as it was the color I had the most left over. Squeeze more frosting into the center to fill it in, then smooth it out with the offset spatula. TIP: Using a slightly wet spatula will help smooth out most bumps and lines.
- Use chocolate pearls to decorate the waistband and randomly scattered scales along the mermaid tail. Scoot the cake board onto the bottom of a cardboard box, and then assemble the box around the cake. Store the Mermaid Tail Cupcake Cake in the cake box until ready to eat.
Notes
*You can purchase a full-size sheet cake board and box from most grocery store bakeries. (I got mine from Walmart.)
*For this frosting, I highly recommend using heavy cream instead of milk. It lightens the frosting and gives it a slightly whipped texture that makes it incredibly easy to smooth. Recipe originally from Sugar Spun Run.
Disclaimer: Nutritional values were calculated using a third-party tool and are provided as an estimation only.
Sharing this recipe with a link is both encouraged and appreciated. Copying/pasting and/or screenshots of full recipes to any social media is strictly prohibited. Content and photographs are copyright protected.
Did you make this?
Don’t forget to leave a rating below and make sure to follow on Pinterest and Instagram for more!
Dive Deeper: Epic Mermaid Birthday Party Ideas
Creating a spectacular mermaid birthday party goes far beyond just the cake. It’s about immersing your guests in an enchanting underwater world, filled with delightful details and memorable activities. From the moment they receive their invitations to the final farewells with party favors, every element can contribute to a magical “under the sea” experience. Here are some of our favorite ideas to help you plan a truly epic mermaid celebration, ensuring every aspect is as shimmering and captivating as the mermaids themselves!
Whimsical Mermaid Invitations
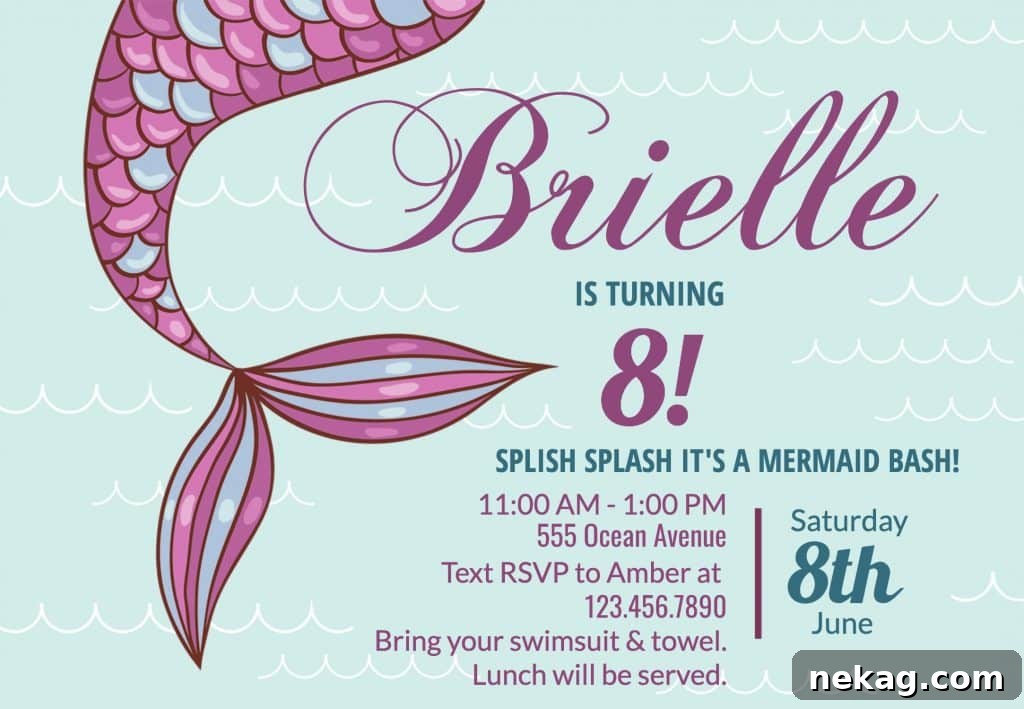
Setting the tone for an enchanting mermaid party begins with the invitations! For our celebration, we discovered and utilized a fantastic FREE customizable Fantasy Fin mermaid invitation. This online tool allowed us to easily personalize all the crucial details: changing the party information, selecting fun fonts, and adjusting colors to perfectly match our theme. The beauty of a customizable digital invitation is its flexibility; once designed, you can simply save the image file and have it printed at your local photo lab or a print shop, just like you would with regular photographs. This not only makes the process incredibly simple but also ensures high-quality, professional-looking invitations that hint at the magic awaiting your guests.
Transform Your Space: Under the Sea Decorations
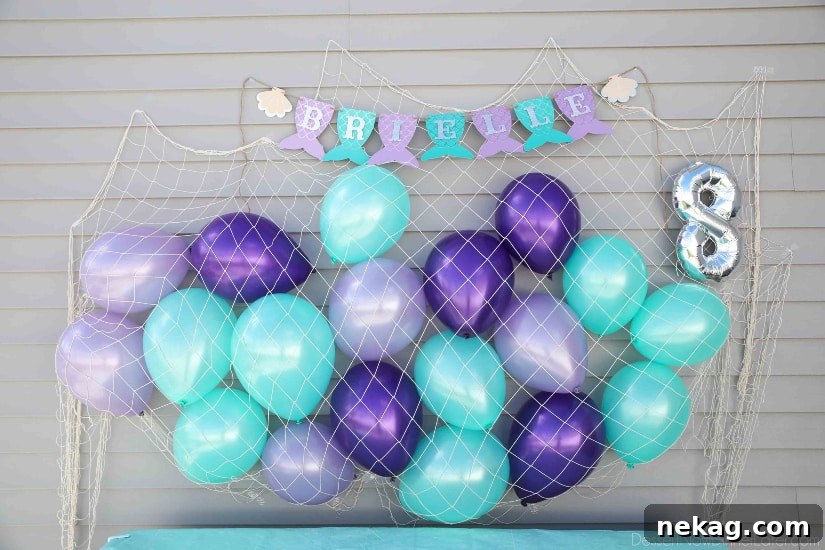
Transforming your party venue into an alluring underwater realm is key to a truly immersive mermaid experience. Our mermaid decorations were thoughtfully inspired by this captivating image on Pinterest. To recreate that aquatic ambiance, we started with a decorative fish net, easily purchased from a party supply store. Hung strategically, it instantly created the illusion of being under the sea. We then added a variety of balloons in shades of blue, green, and purple, tucking them within the netting to resemble floating bubbles or delicate marine flora. Hanging the net can be a bit of a challenge, especially if you’re battling a breeze outdoors, but sturdy tape or small command hooks usually do the trick. Beyond nets and balloons, consider shimmering streamers, iridescent tablecloths, and even cutout fish or starfish to dot around the room. For an extra special touch, we ordered a super cute Mermaid Tail Banner on Etsy, which added a personalized and professional flair to our decor, making the birthday girl feel even more celebrated.
Charming Mermaid Party Favors & Goodie Bags
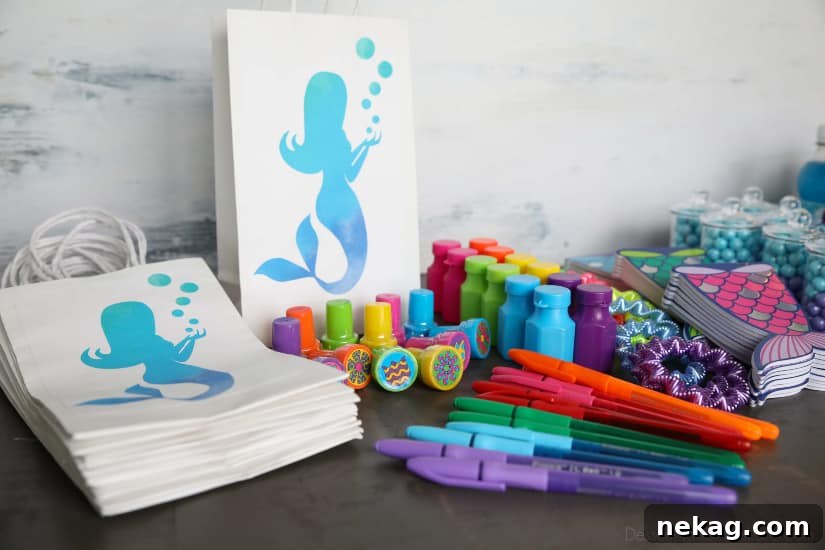
Sending guests home with a piece of the mermaid magic is a wonderful way to conclude the party. For our mermaid party favor bags, we opted for a charming and budget-friendly DIY approach. We purchased plain white gift bags from a dollar store, which served as a blank canvas for customization. To adorn them, we printed a FREE Mermaid Silhouette printable. By arranging two figures horizontally on one page, we efficiently created multiple cutouts, which were then simply glued to the front of each bag. This small personal touch made a big difference, transforming simple bags into themed treasures.
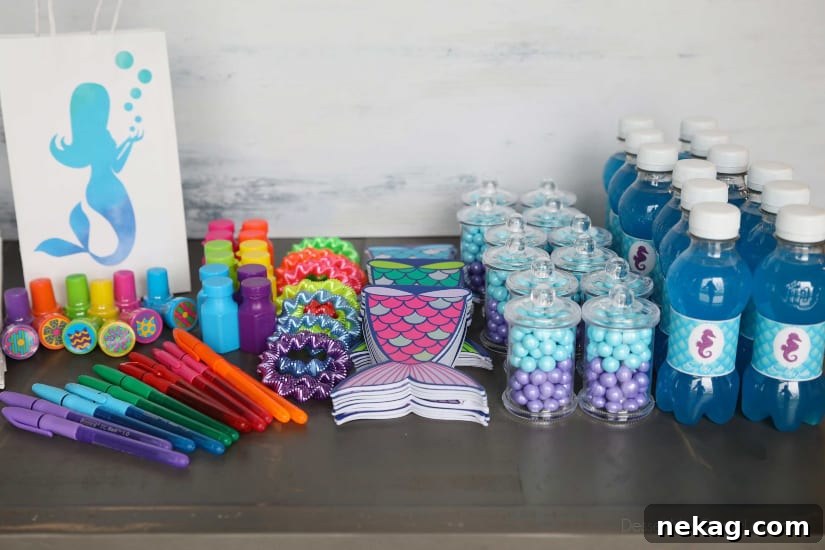
Inside the goodie bags, we packed an array of fun, mermaid-inspired trinkets and treats. We sourced rainbow-colored pens, playful flower stampers, delightful mini bubbles, colorful bracelets, and adorable mermaid tail notebooks. These items were conveniently found at either the dollar store or a local party supply store, proving that you don’t need to break the bank to assemble engaging party favors. Consider also including small packets of glitter, seashell-shaped candies, or even tiny plastic fish to further enhance the underwater theme.
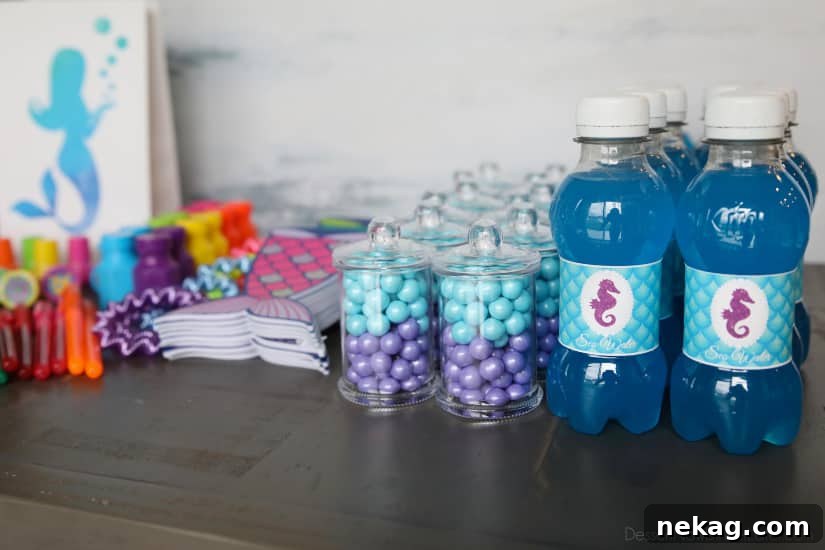
To add a sweet and refreshing touch, we filled mini candy jars with a shimmering mix of blue and purple Sixlets candy pearls, resembling precious underwater jewels. For a themed beverage, we found charming mini blue soda bottles at Winco Foods and creatively labeled them “sea water,” making even the drinks part of the magical theme. The coordinated printables for these bottles and all the food tags were generously provided by Mommy of a Princess, accessible through her VIP Facebook Group. I then used my own selection of fonts to personalize and edit them, ensuring a cohesive and professional look for all our party signage.
A Feast from the Ocean: Mermaid-Themed Food & Drinks
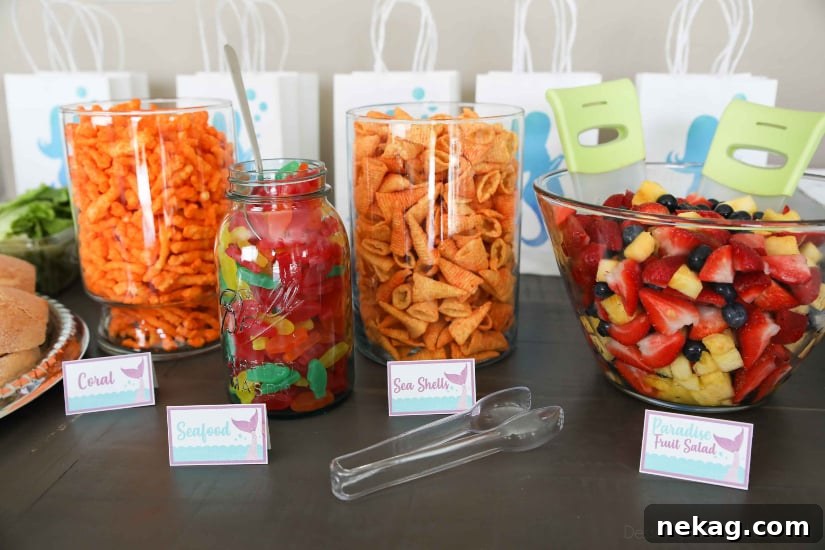
No party is complete without a delicious spread, and for a mermaid celebration, themed food adds another layer of fun! For the main course of our lunch, we served hearty sub “sand-wiches,” playfully named to fit the beachy vibe. Alongside these, we offered a variety of creatively named side dishes: “Coral” (crunchy Cheetos, whose texture and color perfectly mimicked coral reefs), “Seafood” (colorful Swedish Fish candies, an obvious and delightful choice), “Seashells” (Bugles corn snacks, which naturally resemble little shells), and a vibrant “Paradise Fruit Salad” (a refreshing mix of juicy strawberries, plump blueberries, and sweet pineapple). These simple transformations make ordinary snacks feel extraordinary and completely on theme.
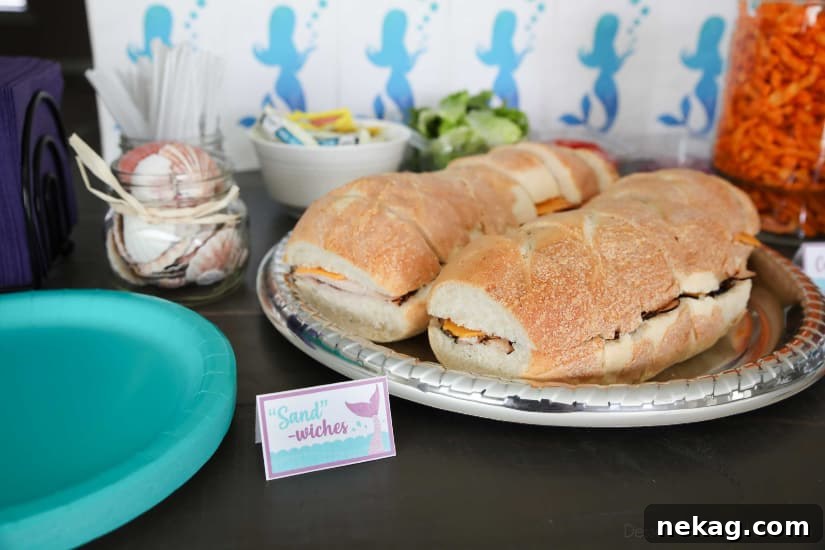
The printables used for all our food tags and bottle labels were generously shared by Mommy of a Princess, available in the files of her exclusive VIP Facebook Group. I then customized them with my preferred fonts to maintain a consistent and charming aesthetic across all our party elements.
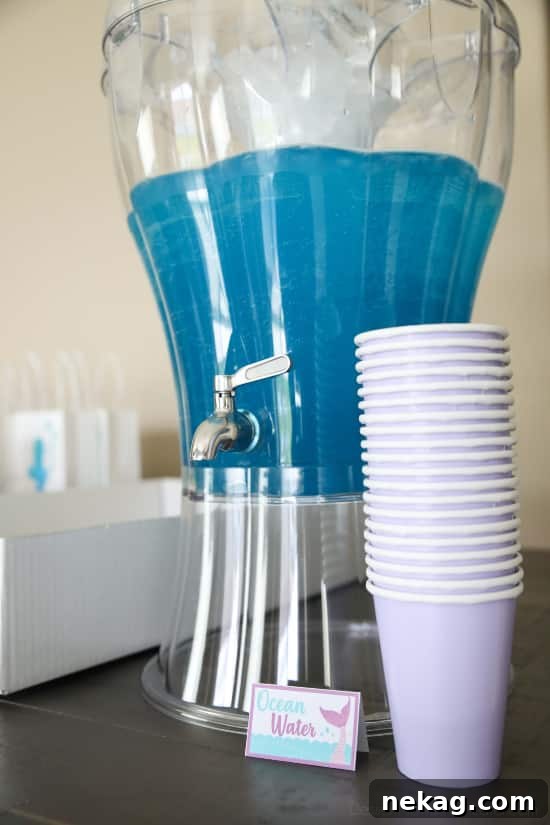
Our featured beverage, “Ocean Water” punch, was a huge hit and incredibly simple to make. It was a delightful concoction of blue Hawaiian Punch mixed with Sprite, creating a fizzy, turquoise drink that perfectly captured the essence of the ocean. For extra flair, you could add gummy fish, sliced lemons, or even a few drops of blue food coloring to plain lemonade. Other food ideas could include “seaweed” (green veggie sticks with dip), “pearls” (white grapes or yogurt-covered pretzels), or “crab croissants” (mini croissant sandwiches with edible googly eyes). The possibilities are as vast as the ocean itself!
Splashing Fun: Mermaid Party Water Games
For a summer mermaid party, incorporating water games is an absolute must! While our chosen games weren’t explicitly mermaid-themed, they provided endless opportunities for splashing, laughter, and a refreshing escape from the heat. The joy of getting wet on a hot day perfectly complements the “under the sea” vibe, even if the games themselves are classic outdoor fun. To kick off the festivities, we set out Mermaid Coloring Pages with crayons and colored pencils on a table. This offered a calm, engaging activity for the girls as everyone arrived, allowing for a smooth transition into the more energetic water games that followed. Here’s a breakdown of the exciting water activities we enjoyed:
Sponge Relay
This teamwork-focused game is a fantastic way to get everyone soaked and laughing. Divide players into two teams. Each team needs two large car wash sponges and four small dollar store buckets. At the front of each line, place one bucket full of water. At the back of each line, place an empty bucket. Team members stand in a line facing the full bucket. The first person in line from each team soaks up as much water with their sponge as possible, then passes it over their head to the next person. The next person passes it underneath, between their legs. The pattern continues: over, under, over, under, down the line. The last person squeezes as much water as they can from the sponge into their team’s empty bucket, then races to the front of the line to re-soak the sponge and continue the relay. The game concludes when either team’s front bucket is completely empty. The team that manages to collect the most water in their back bucket wins! This equipment can also be adapted for a lively Sponge Toss Game, adding more variety to your water-filled fun.
Pass the Water
Similar in spirit to the sponge relay, “Pass the Water” introduces a new challenge and even more opportunities to get delightfully wet! Again, form two teams, each with four buckets and a plastic cup for every team member. One bucket at the front of each line is full of water, while the bucket at the end remains empty. Team members can either stand or sit, creating different levels of difficulty. The first person in line scoops water into their cup, then, lifting it above their head, attempts to pour it into the cup of the person directly behind them. The person receiving the water tries to catch as much as they can, which inevitably leads to some refreshing splashes! This process repeats down the line until the last person pours the remaining water over their head and into the empty bucket. That last person then races to the front of the line, and the relay begins anew. The game ends when either team’s front bucket is empty, with the winning team being the one with the most water collected in their final bucket. This engaging idea comes courtesy of Girl and a Glue Gun, promising a cascade of fun.
Water Balloon Spoon Race
For a test of balance and speed, the “Water Balloon Spoon Race” is a fantastic choice. You’ll need two teams, two large wooden or plastic cooking spoons (the longer the handle, the more challenging the race!), plenty of filled water balloons, and two orange plastic cones or similar markers for start and end points. One member from each team carefully balances a water balloon on their cooking spoon, holding only the very end of the handle with one hand. They then race from the start point, around their designated cone, and back to the start, where they carefully transfer the spoon to the next team member. An officiator, or one designated team member, should be ready to replace any balloons that are dropped or popped. Before the race begins, establish the rules for dropped balloons: does the player restart from the beginning, or from the point where the balloon fell? The team with the most intact balloons remaining, or the fewest dropped balloons after all members have crossed the finish line, is declared the winner.
Water Ball Catch
This quick and energetic game guarantees plenty of splashing and excitement. Set up two teams, with a supply of water sponge balls (we used six packs, totaling 24 mini water balls purchased from the dollar store). Each team will have one bucket and designates one player as the “catcher.” A child’s pool filled with water serves as the central “ocean” where the water balls are submerged. On the count of three, members from each team rush to their side of the pool, grab as many balls as they can, and throw them at their team’s catcher, who stands a few feet away on the opposite side. The team that manages to get the most balls into their bucket wins! This is a fast-paced game, perfect for repeating multiple times to allow different children the chance to be the catcher and experience the thrill of both throwing and catching. For even more exciting options, consider exploring other fun Water Activities that could add to your party’s aquatic theme.
With these creative ideas for a mermaid tail cupcake cake and a host of enchanting party elements, you’re all set to host a truly magical and memorable mermaid birthday celebration. From the shimmering centerpiece to the splashing games, every detail will transport your guests to an imaginative underwater world, leaving them with cherished memories of a day filled with wonder and joy!