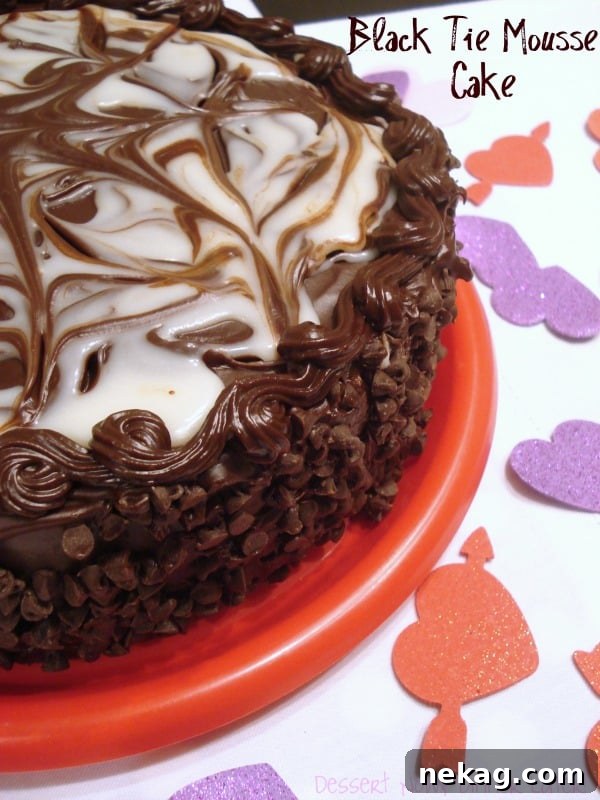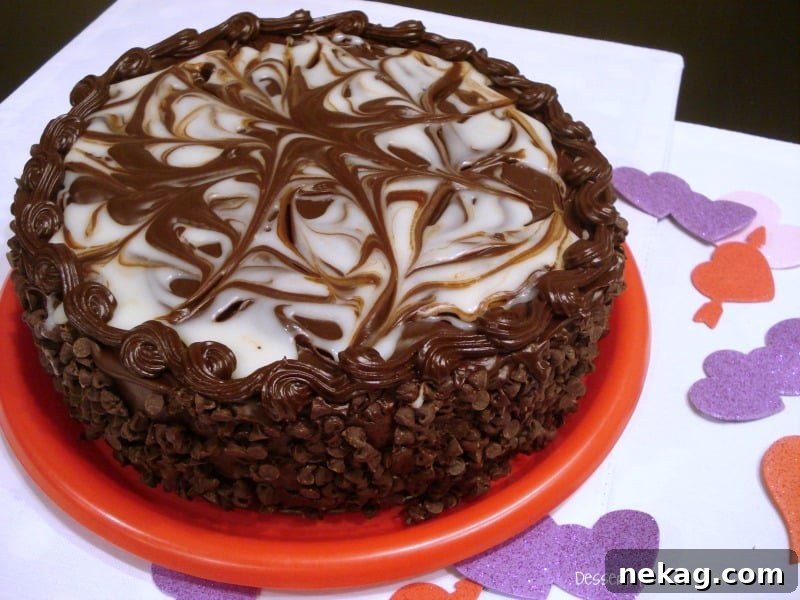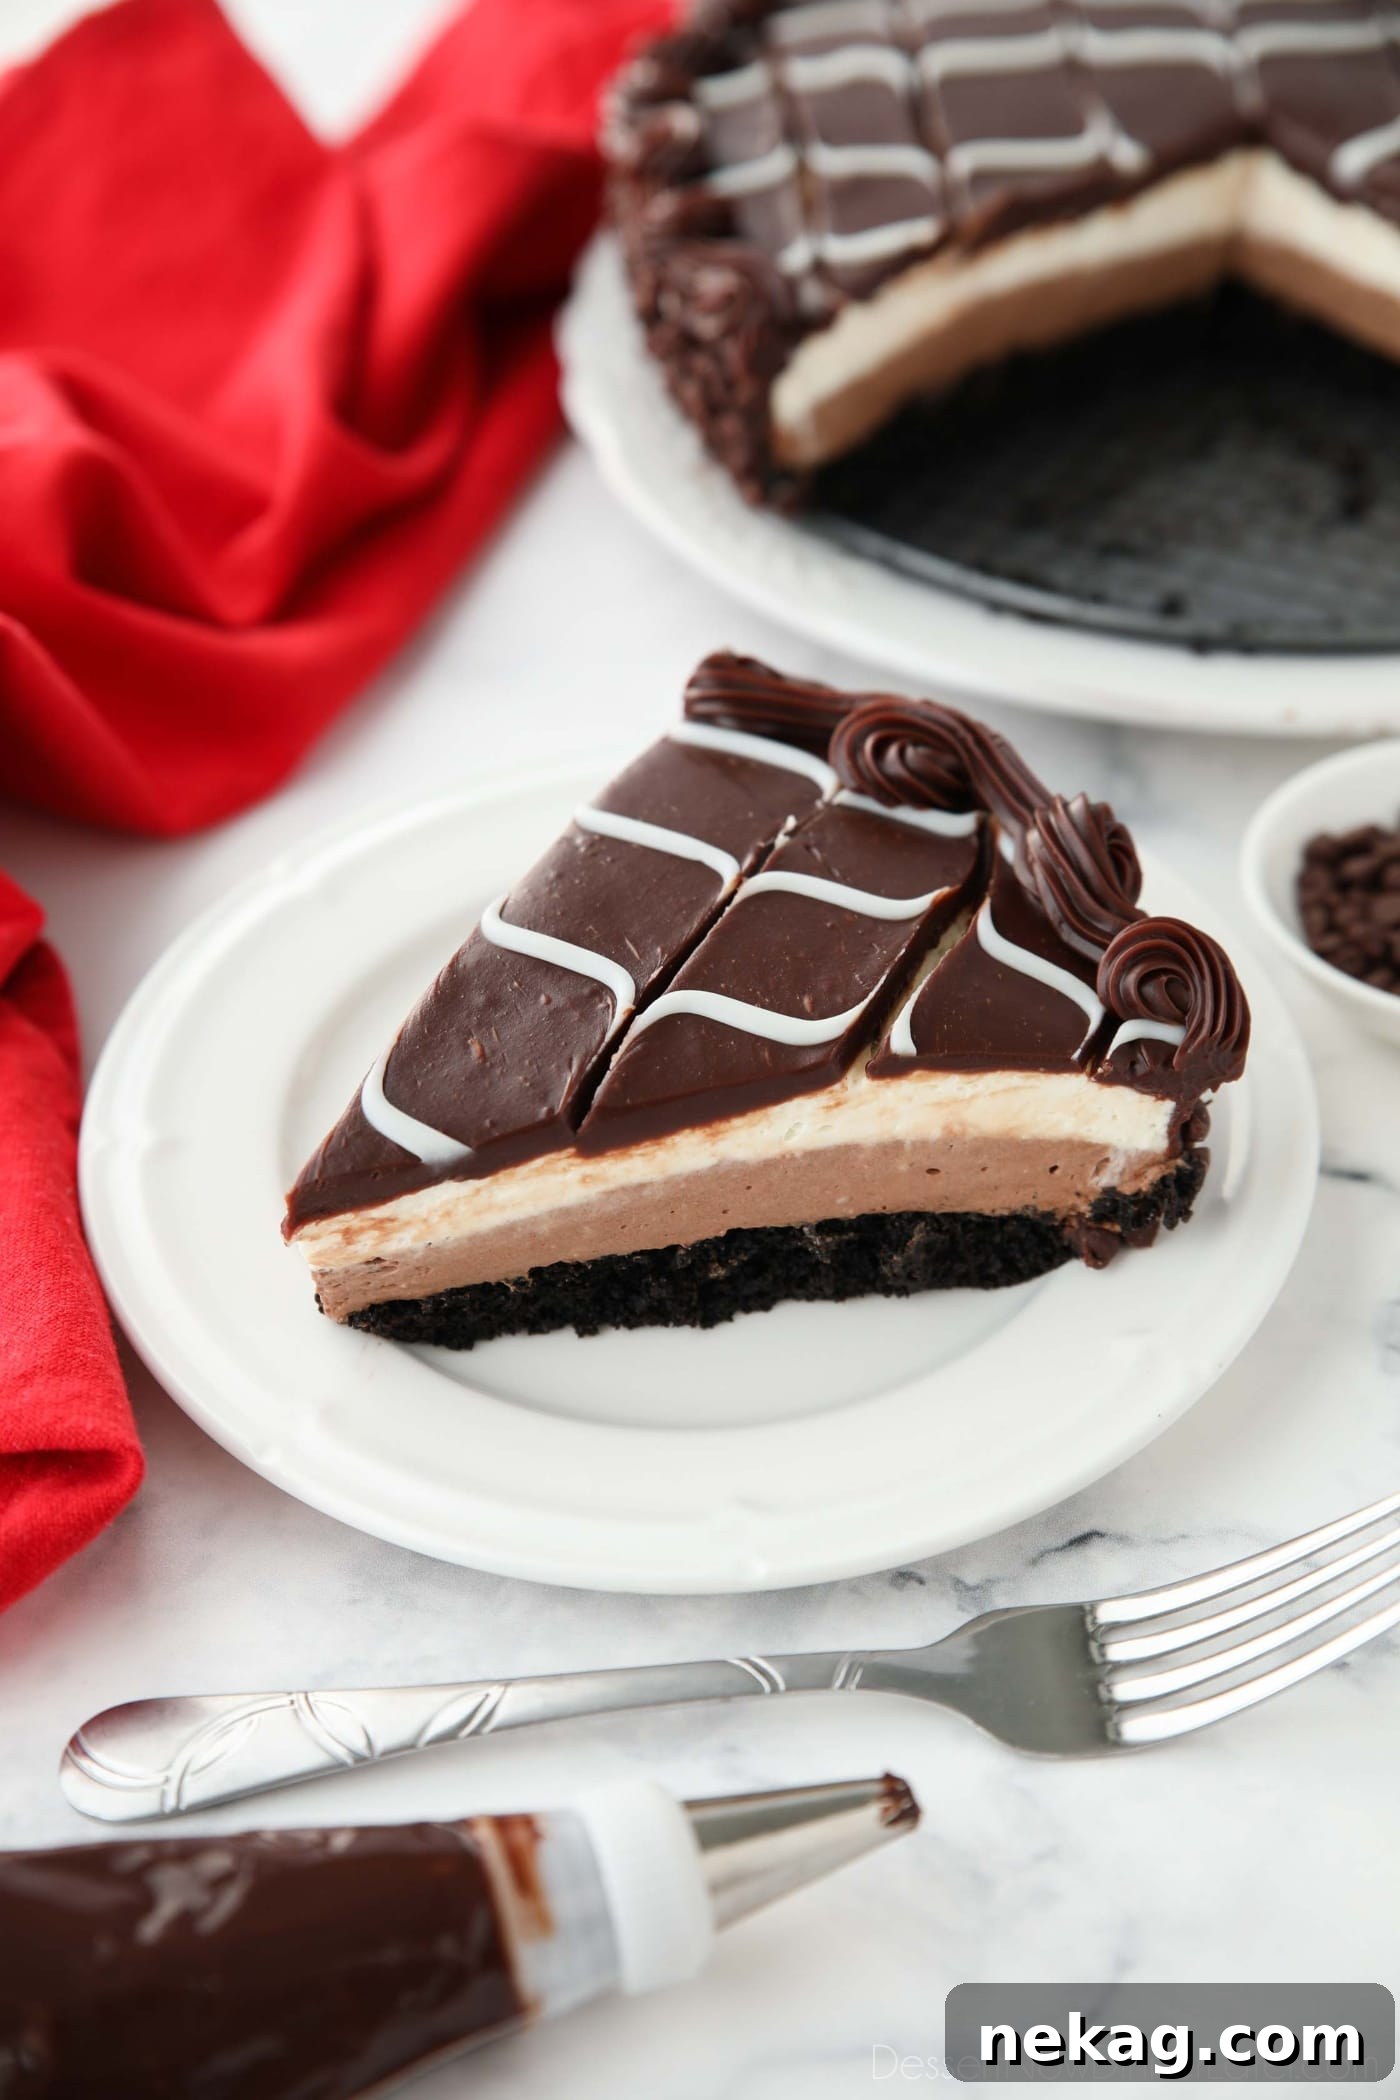
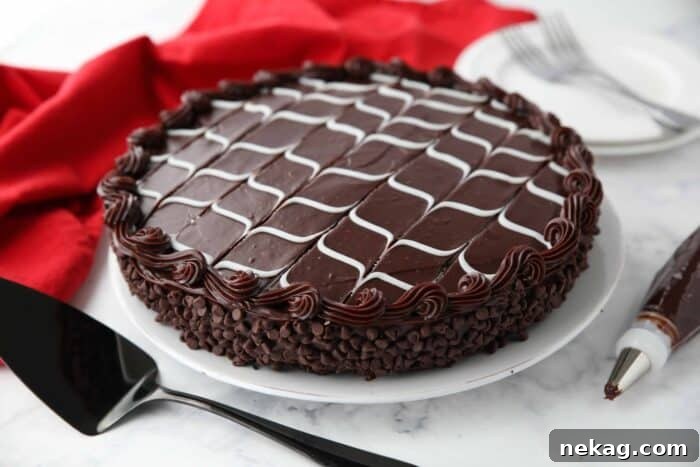
Indulge in a truly decadent dessert experience with this exquisite copycat Olive Garden Black Tie Mousse Cake. This recipe meticulously recreates the elegance and rich flavors of the restaurant favorite, featuring sumptuous layers of moist chocolate cake, a dreamy no-bake chocolate cheesecake, and light, airy vanilla mousse, all enveloped in a silky-smooth ganache and adorned with delicate mini chocolate chips. It’s a show-stopping dessert that’s as beautiful to behold as it is delightful to eat, perfect for any special occasion or simply to treat yourself to a luxurious chocolate fantasy at home.
Elevate your entire meal! Begin your Olive Garden-inspired feast with a refreshing salad dressed in homemade Olive Garden Salad Dressing, or choose from a comforting bowl of Zuppa Toscana or the beloved Chicken and Gnocchi Soup. No Olive Garden experience is complete without their famous Olive Garden Breadsticks, perhaps paired with a hearty pasta dish like this inventive take on Steak Gorgonzola Alfredo. And for the grand finale, our Black Tie Mousse Cake promises an unforgettable sweet ending.
Unveiling the Olive Garden Black Tie Mousse Cake
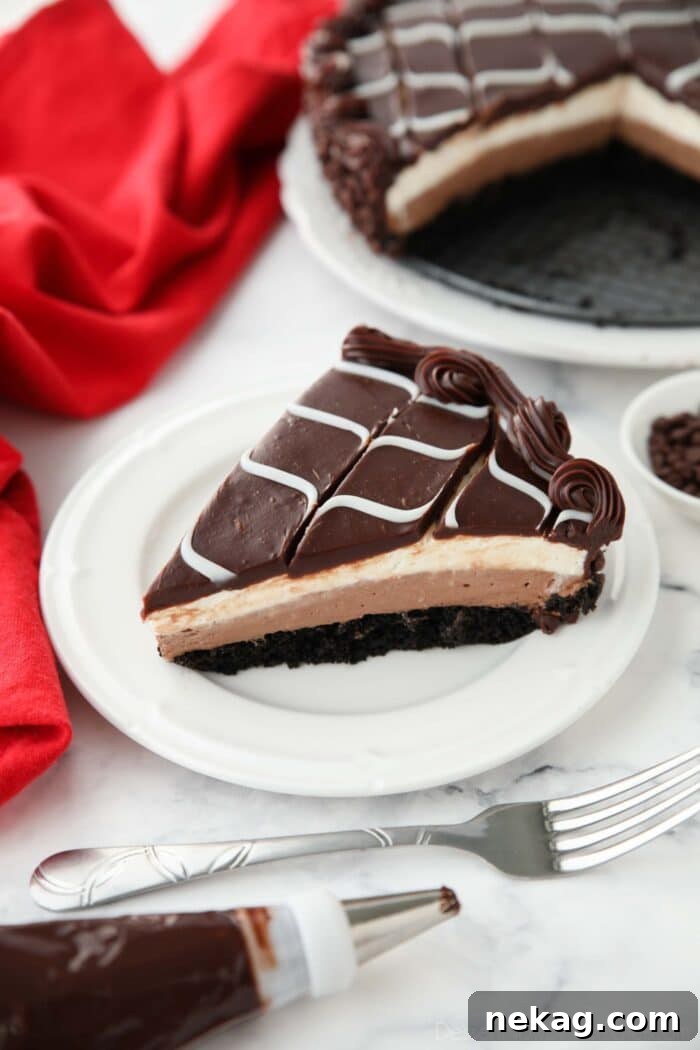
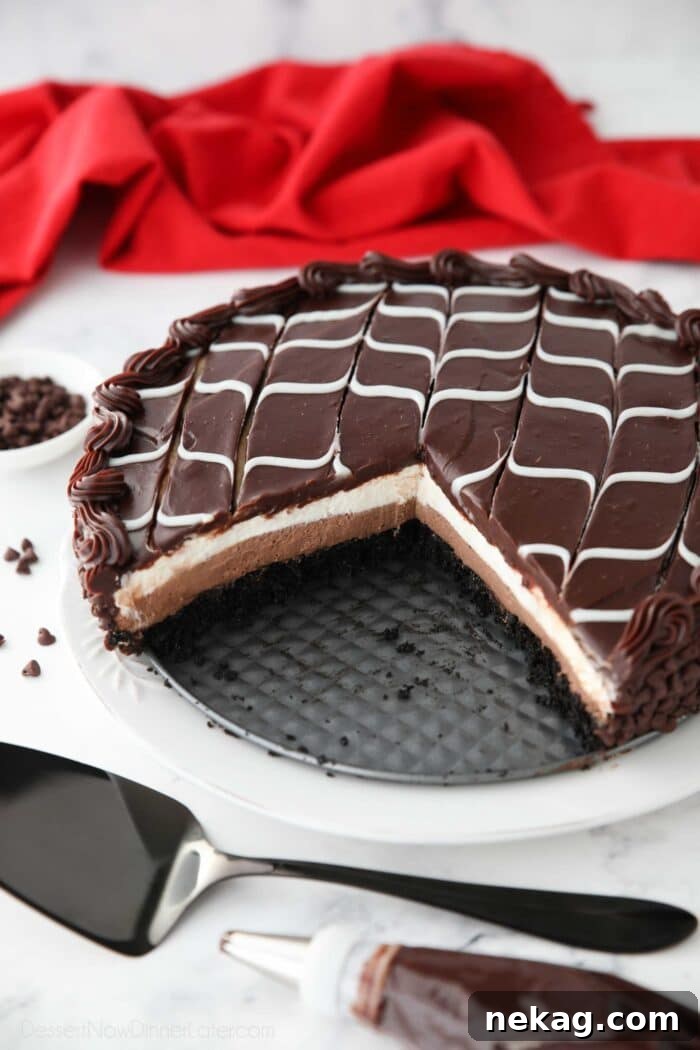
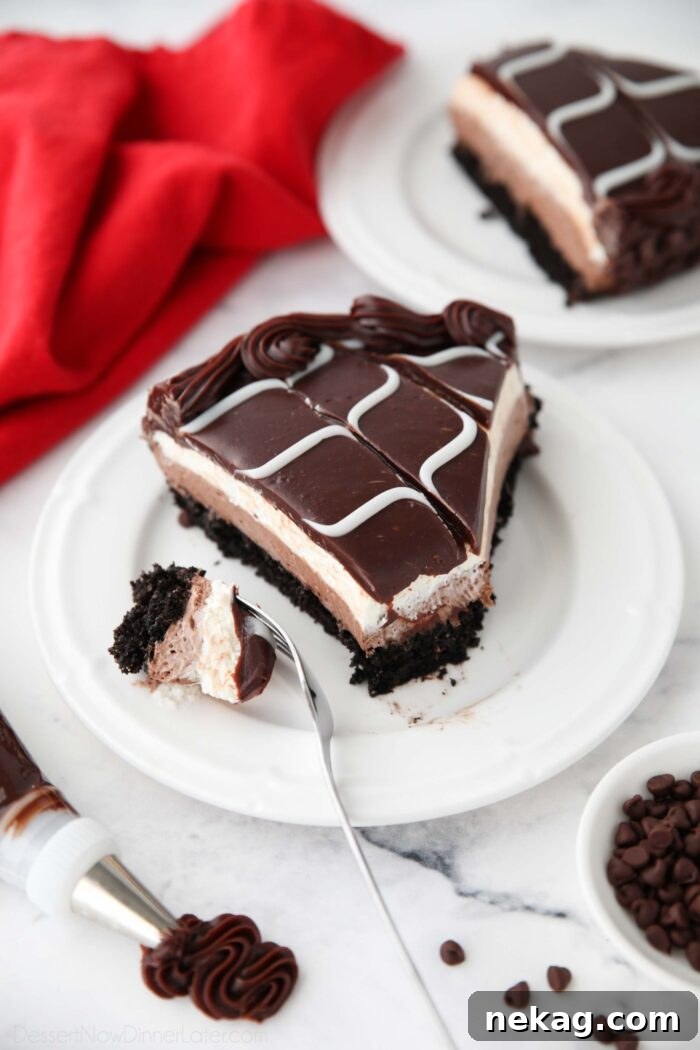
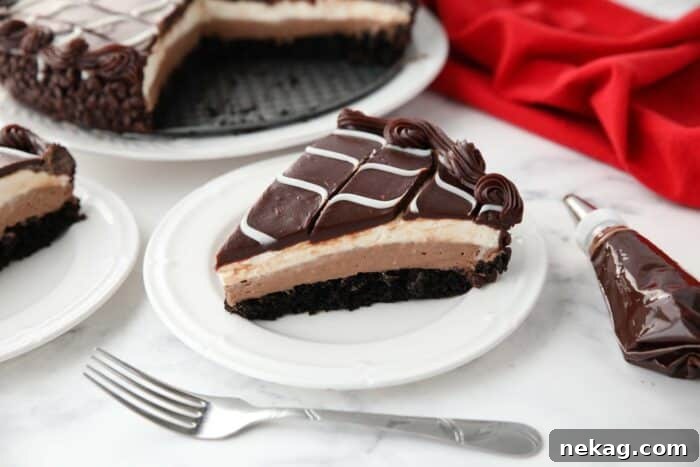
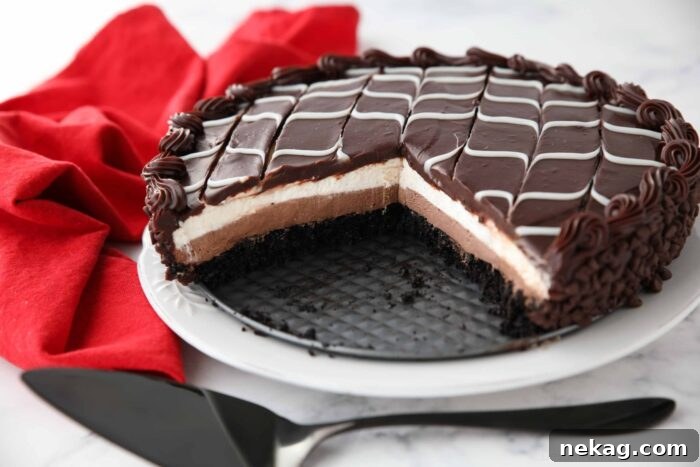
For many, including myself and my husband, a visit to Olive Garden is incomplete without sharing a slice of their iconic Black Tie Mousse Cake. This dessert has become a legendary item on their menu, synonymous with rich indulgence and sophisticated flavor. It’s an original creation from Olive Garden, a true chocolate lover’s dream thoughtfully constructed with four distinct, harmonious layers:
- A foundation of incredibly Moist Chocolate Cake, providing a deep cocoa base.
- A luscious layer of Dark Chocolate Cheesecake, offering a rich and creamy counterpoint.
- A delicate and airy Creamy Vanilla Mousse, adding a light, sweet contrast.
- And finally, a generous coating of glossy Chocolate Ganache Frosting, tying all the flavors together in elegant perfection.
This magnificent dessert shares similarities with other classic creations like a Tuxedo Cake or a Black and White Mousse Cake, both renowned for their elegant presentation and contrasting flavors. While my recipe aims to replicate the essence of the Olive Garden dessert, it offers a distinct advantage: it tastes remarkably similar, delivering that familiar satisfaction, AND it’s considerably easier to prepare in your home kitchen, making it an achievable luxury for any baker.
One notable difference in my rendition is the thoughtful substitution of the traditional custard layer found in the original. Instead, I’ve chosen to use a vanilla cheesecake mousse, mirroring the no-bake chocolate cheesecake layer. This deliberate alteration yields a lighter texture and a more balanced flavor profile, elegantly offsetting the intense richness of the chocolate ganache and dense chocolate cake, resulting in a dessert that feels both indulgent and surprisingly refined.
The Evolution of Perfection: An Updated Recipe
My journey to perfect this copycat Olive Garden Black Tie Mousse Cake began back in February 2012. While the initial recipe was good, I knew it had the potential to be truly great. Over the years, through countless tests and refinements, I’ve made several significant changes to elevate this recipe, ensuring it not only captures the spirit of the original but also offers a superior homemade experience.
The first major improvement involved selecting a different homemade chocolate cake recipe. The goal was to achieve a cake layer that was shorter, allowing for more proportionally equal layers throughout the cake, much like the meticulously crafted Olive Garden version. This new cake base is also inherently more moist than the recipe I previously used, ensuring every bite is tender and flavorful, a critical component for a truly exceptional dessert.
Furthermore, I thoughtfully incorporated gelatin into the no-bake cheesecake layers. This addition serves a dual purpose: it creates that desirable whipped mousse texture, making the fillings incredibly light and airy, and it crucially helps to stabilize the cake without requiring extensive freezing. The result is a cake that holds its shape beautifully at room temperature, making serving and presentation effortless. The impact of these updates exceeded all expectations, transforming a good recipe into an outstanding one.
Why This Black Tie Mousse Cake Recipe Stands Out
When you decide to embark on the delightful journey of baking this Black Tie Mousse Cake, you’re choosing a recipe designed for success and satisfaction. Here are a few compelling reasons why this particular recipe should be your go-to for recreating this Olive Garden classic:
- Comprehensive Step-by-Step Photo Instructions: Baking a layered mousse cake might seem intimidating, but I’ve meticulously crafted a full photo tutorial to guide you. Every single stage, from preparing the cake to the final decorative touches, is accompanied by clear, descriptive photographs, ensuring you feel confident and supported through every step of the process.
- Simplified and Accessible Fillings: We’ve streamlined the most complex aspects of traditional mousse cake fillings. This recipe eliminates the need for making a traditional custard base and the intricate process of tempering eggs. Instead, we use readily available cocoa powder as an alternative to melting chocolate, significantly reducing technicalities, cutting down on preparation time, and minimizing the mess in your kitchen without compromising on flavor or texture.
- A Feast for the Eyes and the Palate: While this dessert might lean towards an intermediate-to-advanced skill level and requires a bit of dedicated time, the effort is undeniably rewarded. The finished Black Tie Mousse Cake is absolutely stunning, boasting an elegant appearance that makes it a perfect centerpiece for any celebration. More importantly, every rich, layered bite is a testament to its deliciousness, making it unequivocally worth every moment spent in its creation!
Crafting the Perfect Chocolate Cake Base
The foundation of our remarkable Black Tie Mousse Cake is a rich, moist chocolate cake base. This recipe is a carefully reduced and expertly altered version of a classic from Hershey’s, renowned for its deep chocolate flavor and tender crumb. To achieve a more intense color and profound chocolate taste, I often opt for a blend of half regular cocoa powder and half dark cocoa. However, using all-natural unsweetened cocoa powder will still yield fantastic results.
*NOTE: For precise ingredient quantities and detailed, step-by-step instructions, please refer to the comprehensive printable recipe card located at the very end of this post.
- Begin by preheating your oven to 350˚F (175˚C). Lightly grease a 9-inch springform pan with a non-stick cooking spray, ensuring every surface is covered to prevent sticking. Set the prepared pan aside.
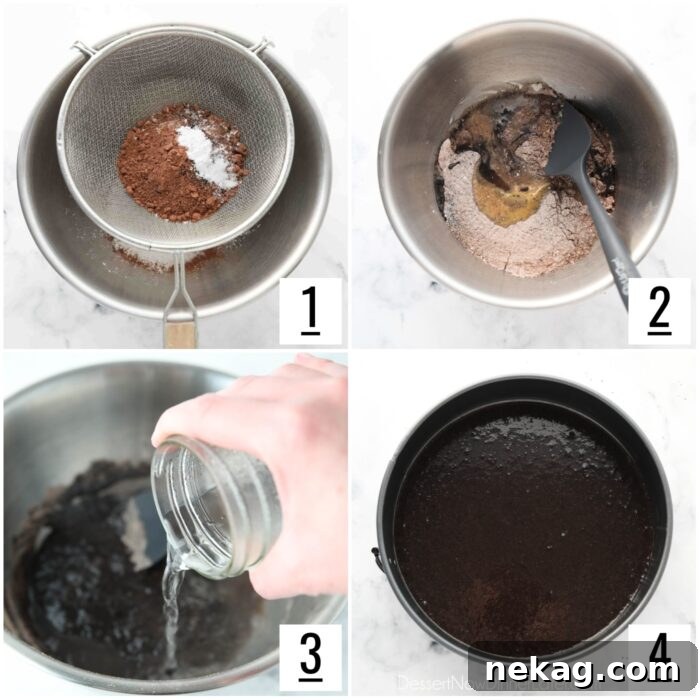
- In a large mixing bowl, meticulously sift together the granulated sugar, all-purpose flour, cocoa powder, baking powder, baking soda, and salt. Sifting is a crucial step that ensures your dry ingredients are evenly distributed and free of lumps, leading to a perfectly textured cake.
- Next, add the wet ingredients: the whisked egg, milk, vegetable oil (or canola oil), and vanilla extract. Stir these ingredients together gently until they are just incorporated. Be careful not to overmix at this stage.
- Now, for a secret to an extra moist cake: heat 1/4 cup of water in a glass measuring cup in the microwave until it reaches a rolling boil (typically 30-60 seconds). Carefully pour this boiling water into your batter and continue to mix until it is fully incorporated. The batter will be thin, but it should be consistent throughout, without any watery spots, indicating a smooth, uniform texture.
- Pour the prepared, thin batter evenly into your greased 9-inch springform pan. Bake the chocolate cake in the preheated oven at 350˚F (175˚C) for approximately 15-18 minutes. The cake is done when a toothpick inserted into the center emerges clean or with only a few moist crumbs attached. Immediately remove the cake from the oven and, for quick cooling, place the entire pan directly into the freezer. This rapid chilling helps set the cake and prepares it for the subsequent layers.
Crafting the Creamy Vanilla and Chocolate Cheesecake Fillings
Creating the luscious vanilla and chocolate cheesecake fillings for our Black Tie Mousse Cake is a straightforward process when approached systematically. We’ll simplify the task by first preparing the two distinct cream cheese mixtures, and then integrating the stabilized whipped cream to transform them into airy, delightful mousses. This method reduces the number of steps and minimizes cleanup, making the entire process efficient and enjoyable – a true win-win!
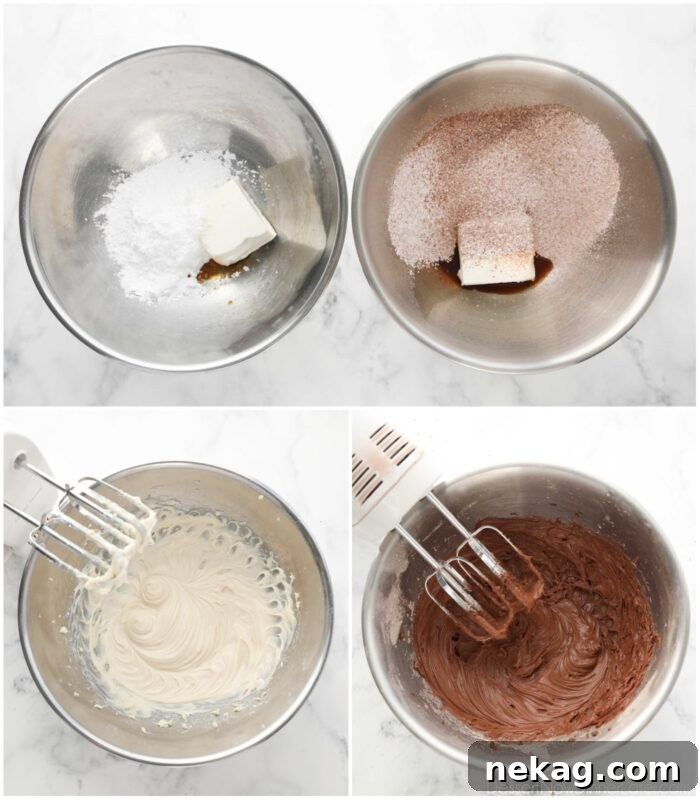
- FOR THE VANILLA CREAM CHEESE LAYER: In a large mixing bowl, combine the softened cream cheese (ensure it’s at room temperature for a smooth consistency), powdered sugar, a pinch of salt, and vanilla extract. Using an electric hand mixer, beat these ingredients together until the mixture is completely smooth and free of any lumps. Once achieved, set this vanilla cream cheese mixture aside. There’s no need to clean your beaters just yet; they’ll be perfect for the next step.
- FOR THE CHOCOLATE CREAM CHEESE LAYER: In a separate large bowl, place the room temperature cream cheese. Over the cream cheese, sift the powdered sugar and cocoa powder. This sifting helps prevent lumps and ensures a silky-smooth chocolate flavor. Add a pinch of salt and vanilla extract. With your electric hand mixer (which you didn’t need to clean!), beat until the chocolate cream cheese mixture is perfectly smooth and well combined. Now, you can wash and clean the beaters, as they’ll be needed for whipping cream later on.
Preparing the Perfectly Stabilized Whipped Cream
The secret to the ethereal, melt-in-your-mouth texture of our mousse layers lies in perfectly stabilized whipped cream. This technique, essentially a version of stabilized whipped cream frosting, omits the powdered sugar because sweetness has already been incorporated into our cream cheese mixtures. The addition of gelatin is key here; it acts as a magical stabilizer, preventing the whipped cream from deflating and boosting that desired airy, whipped texture essential for a light and fluffy mousse.
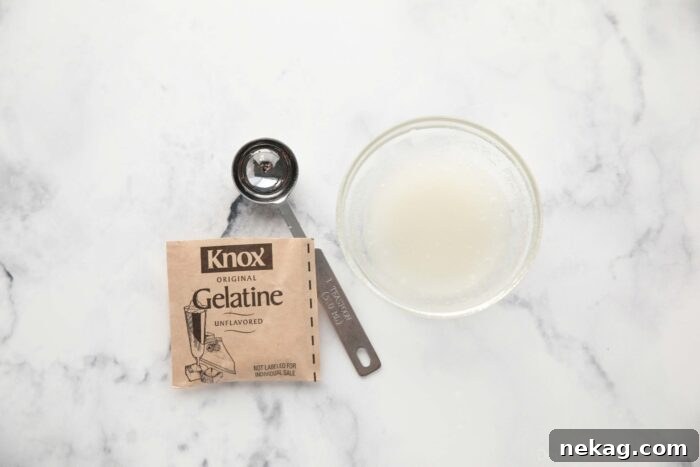
- In a small, microwave-safe bowl, sprinkle the unflavored gelatin evenly over the cold water. Stir gently to combine, then set this mixture aside for precisely 5 minutes. During this time, the gelatin will “bloom,” absorbing the water and solidifying, creating a thick, translucent paste. This blooming process is crucial for the gelatin to dissolve properly later.
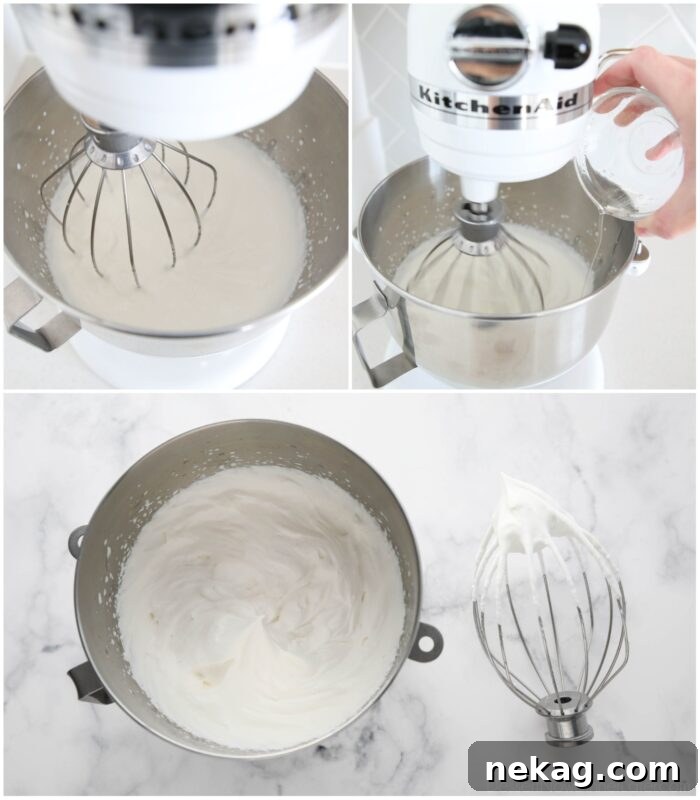
- Pour the very cold heavy cream into the bowl of a stand mixer fitted with the whisk attachment. Begin beating the cream on medium-high speed. Continue to whisk until the mixture visibly thickens, but stops just short of forming soft peaks. You want it to be fluffy but still slightly fluid.
- Next, take your bloomed gelatin and microwave it for exactly 10 seconds. This brief heating will melt the gelatin into a clear liquid. Stir the melted gelatin until it is completely smooth and transparent, with no foggy or grainy appearance. While your mixer is running on low speed, slowly and steadily drizzle the warm, liquid gelatin into the thickening cream. This slow addition is vital to prevent lumps and ensure the gelatin is fully incorporated without seizing.
- Once the gelatin is added, gradually increase the mixer speed to medium-high. Continue to whip the cream until it forms stiff peaks. You’ll know it’s ready when the cream looks thick and holds distinct trails from the whisk. Be extremely vigilant during this final stage: do not over-mix! Over-mixing can quickly cause the cream to curdle and separate into butter, ruining the light texture we’re aiming for. Keep a close eye on it and stop as soon as stiff peaks are achieved.
Transforming into Mousse: Adding Whipped Cream for Vanilla and Chocolate Perfection
The magic of transforming our rich cream cheese mixtures into light, airy mousses happens in this step, with the careful incorporation of the stabilized whipped cream. The key distinction between this and a traditional no-bake cheesecake lies in that very stabilization – the gelatin in the whipped cream gives it that desirable, delicate mousse-like consistency.
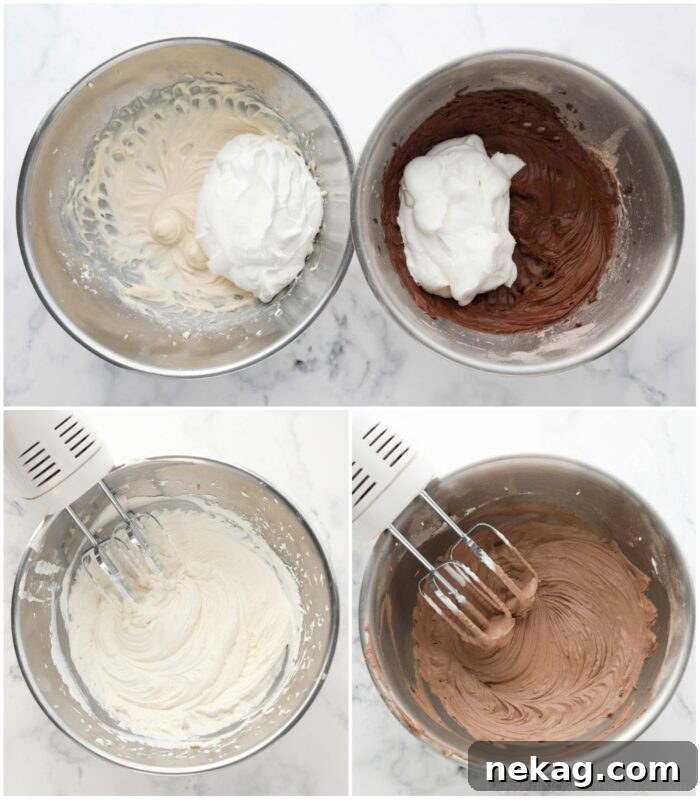
- Carefully divide the perfectly stabilized whipped cream into two equal halves. Gently fold one half into the vanilla cream cheese mixture and the other half into the chocolate cream cheese mixture. Folding, rather than beating, is essential here to maintain the airiness of the whipped cream, ensuring your mousses are light and fluffy.
- Using your electric hand mixer (again, no need to clean the beaters between mixtures, as they are both dairy-based), beat the vanilla mixture first until it is smooth and uniform. Then proceed to beat the chocolate mixture until it reaches the same smooth consistency. This quick mixing ensures the whipped cream is fully incorporated into the cream cheese, creating two distinct and incredibly delicious mousse layers.
Mastering the Art of Layer Assembly
Now comes the exciting part: assembling the layers of your Black Tie Mousse Cake. This stage is where all your careful preparation comes together, building the iconic structure of this magnificent dessert. Precision and patience are your best friends here to ensure clean, distinct layers.
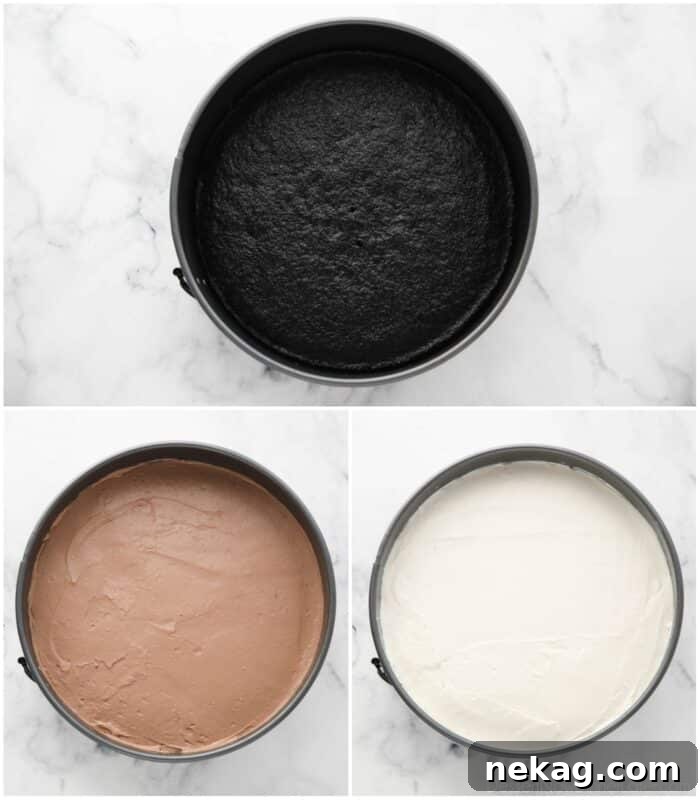
- Retrieve your chilled chocolate cake base from the freezer. A cold cake is easier to work with, providing a firm foundation for the mousse layers.
- Evenly spread the entire chocolate mousse mixture over the surface of the frozen chocolate cake. Use an offset spatula or the back of a spoon to create a smooth, consistent layer that extends to the edges of the cake. This layer will set quickly against the cold cake.
- Next, gently dollop the vanilla mousse over the top of the chocolate mousse layer. Carefully spread it out evenly, again using an offset spatula, ensuring it forms a smooth and level surface. Once both mousse layers are applied, cover the springform pan with plastic wrap, trying your best to avoid the plastic wrap touching the top of the vanilla mousse layer. Place the entire cake in the refrigerator for a minimum of 1 hour to allow the mousse layers to fully set and firm up. This chilling time is crucial for the cake’s structural integrity.
Creating the Luxurious Ganaches
The crowning glory of our Black Tie Mousse Cake is the elegant dual ganache topping. We’ll be preparing both a rich semi-sweet chocolate ganache and a delicate white chocolate ganache to achieve that signature Olive Garden swirl. The key to perfect ganache is gentle heat and quality chocolate.
- Once your mousse layers have sufficiently set in the refrigerator (after at least an hour), carefully remove the outer edge of the springform pan. Keep the cake on its base and gently return it to the fridge to keep it cold while you prepare the ganaches.
- Divide your semi-sweet chocolate chips and white chocolate chips into two separate, heat-proof bowls. These will be ready for the hot cream mixture.
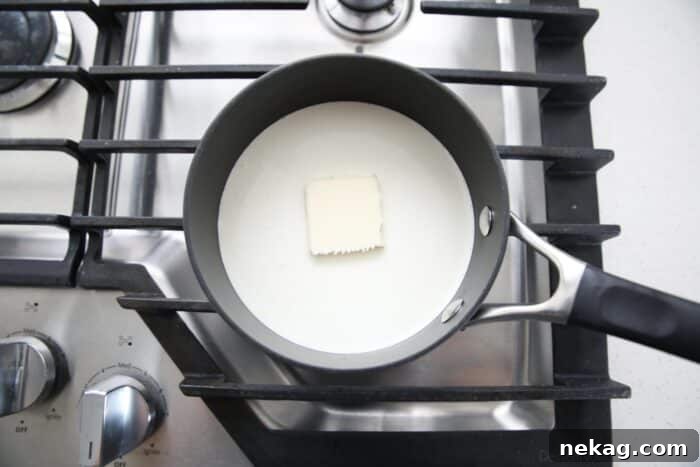
- In a small saucepan, combine the heavy cream and unsalted butter. Heat this mixture over LOW heat, stirring continuously, until it just barely comes to a boil. Watch closely for small bubbles around the edges. Stir thoroughly to ensure the butter is completely melted and fully integrated with the cream. This hot cream mixture is what will melt your chocolate into a smooth ganache.
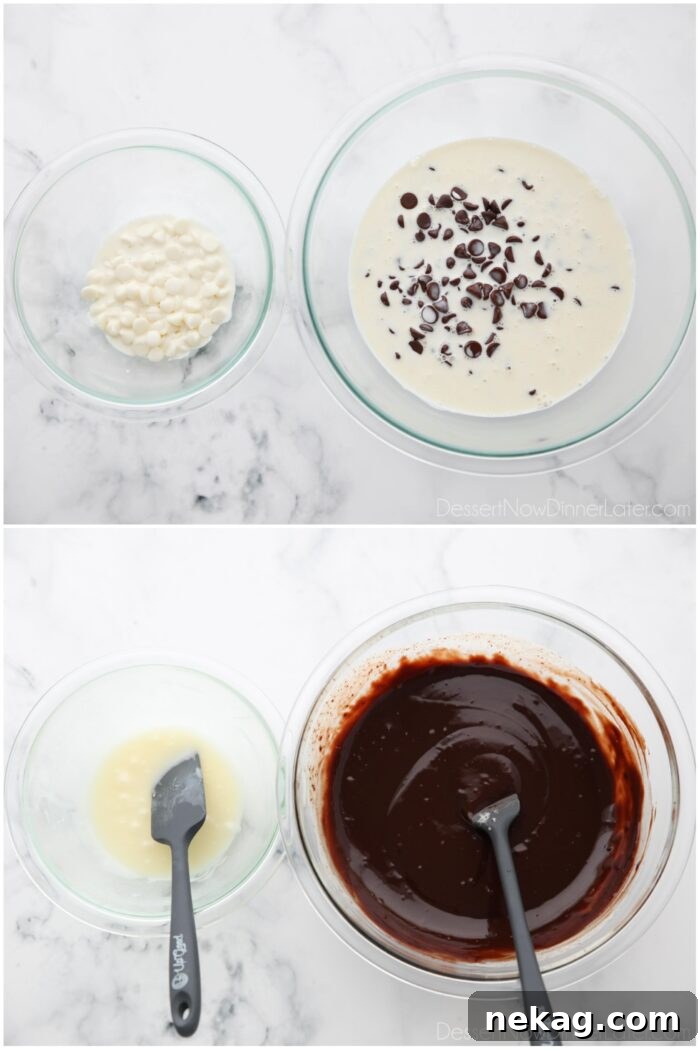
- Measure out 2 tablespoons of the hot cream/butter mixture and pour it directly over the white chocolate chips in their bowl. Pour the remaining larger quantity of the butter/cream mixture over the semi-sweet chocolate chips.
- Allow the hot cream to sit undisturbed over the chocolate chips for a few minutes. This resting time allows the heat to gently melt the chocolate. After a few minutes, stir each bowl separately until the chocolate chips are completely melted and the ganache in each bowl is smooth, glossy, and uniform. Let both ganaches cool slightly at room temperature until they reach a spreadable consistency – you want them thick enough to coat the cake but still pourable. Once cooled, set aside about 1/2 cup of the semi-sweet chocolate ganache; this will be used for piping later. Transfer the white chocolate ganache into a piping bag, but do not cut the tip yet.
A Flawless Finish: Frosting with Chocolate Ganache
Applying the main chocolate ganache coating is a key step in achieving the Black Tie Mousse Cake’s elegant appearance. This smooth, glossy layer not only adds rich flavor but also serves as the perfect canvas for the decorative white chocolate swirls. Follow these steps for a beautifully coated cake:
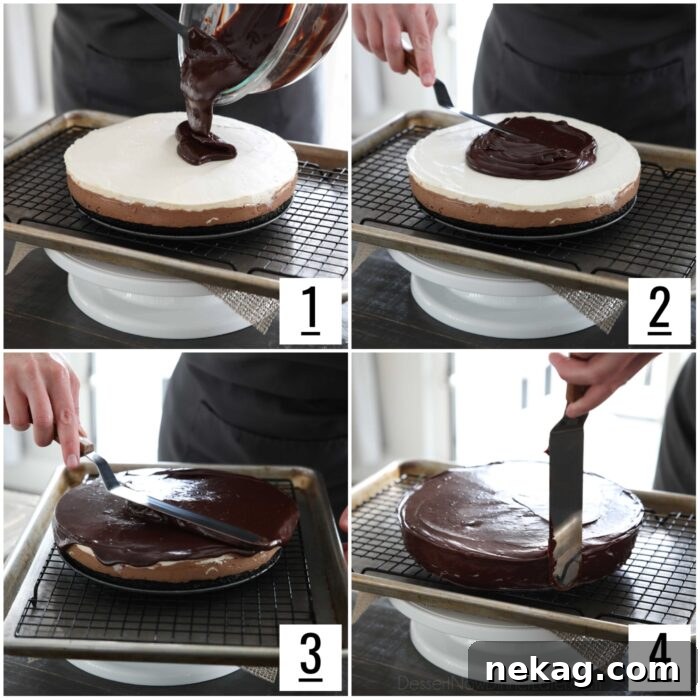
- To ensure a neat ganache application and easy cleanup, place a wire cooling rack inside a baking sheet. Carefully transfer your chilled cake, still on its springform base, onto the center of the cooling rack. The baking sheet below will conveniently catch any excess ganache that drips off, minimizing waste and mess. With the cake properly positioned, pour the warm, semi-sweet chocolate ganache evenly over the top center of the cake.
- Using an offset spatula, gently and smoothly spread the ganache across the entire top surface of the cake. Work quickly but precisely to achieve an even layer.
- Allow the remaining chocolate ganache to naturally drip over the edges of the cake. The gravity will create beautiful, smooth curtains of chocolate down the sides.
- Once the drips have settled, use your offset spatula to gently smooth the ganache around the sides of the cake. This helps to create a uniform and polished finish, ensuring the entire cake is beautifully enrobed in chocolate.
The Grand Finale: Decorating Your Black Tie Mousse Cake
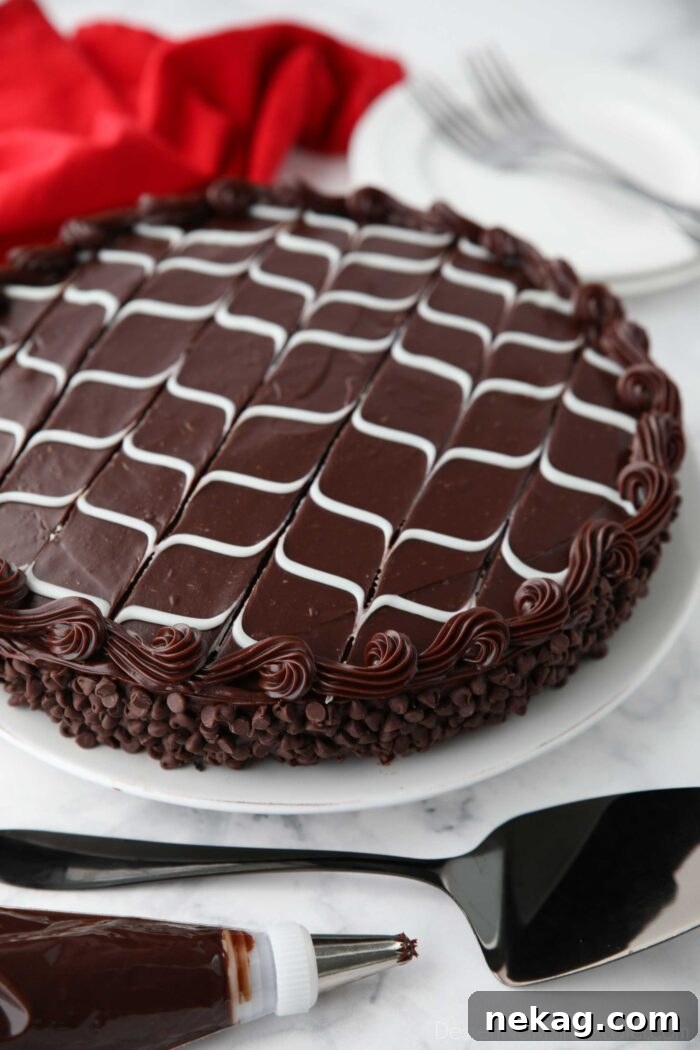
The distinctive charm and added appeal of Olive Garden’s Black Tie Mousse Cake come from its artistic decorative elements, particularly the captivating pattern of dark and white ganaches woven together on top, combined with mini chocolate chips and a piped border. Here’s how you can replicate this elegant finish:
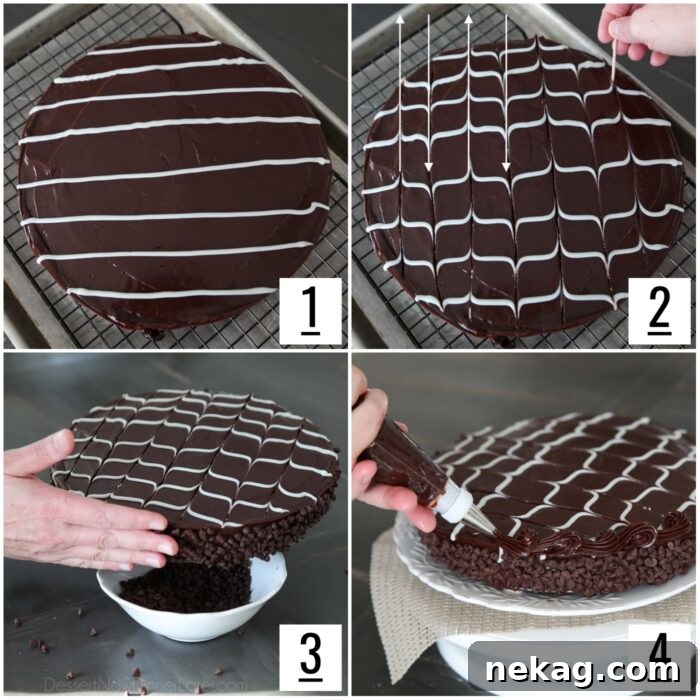
- Once the cake is fully coated with the dark chocolate ganache, it’s time for the white chocolate embellishment. Snip a small tip off the piping bag containing the white chocolate ganache. Pipe horizontal stripes across the top of the cake, spacing them approximately 1-inch apart. Work swiftly while the dark ganache is still somewhat wet to allow for easy marbling.
- Immediately after piping the white stripes, grab a clean toothpick. Gently drag the toothpick through the ganache, creating vertical lines across the entire cake. Alternate the direction of your drags, moving upwards then downwards across the cake. This technique creates the iconic swirled, feathered pattern characteristic of the Black Tie Mousse Cake. Refer to the photo tutorial in the main post for visual guidance on this step.
- With the ganache still slightly pliable, quickly and carefully press the mini chocolate chips onto the sides of the cake. The wet ganache will act as an adhesive, securing the chips in place and adding another delightful textural element and visual appeal.
- Now, retrieve the 1/2 cup of semi-sweet ganache that you set aside earlier. Transfer this ganache into a piping bag fitted with a coupler and a Wilton 21 open star piping tip. This tip is ideal for creating a decorative border. Pipe an elegant border around the top edge of the cake. I particularly enjoy piping a reverse shell pattern for this cake, as it adds a touch of sophistication. If you’re new to this technique, a helpful YouTube tutorial can guide you.
The Final Chill: Ensuring Perfect Set and Presentation
After all your meticulous work in assembling and decorating, the final chilling period is essential to allow all the layers and the ganache to firm up beautifully. This ensures a clean cut and a stable, picture-perfect slice every time.
Once your Black Tie Mousse Cake is fully decorated with its elegant swirls and chocolate chip border, transfer it back into the refrigerator. Allow it to chill until the ganache has completely set, which typically takes a minimum of 15-20 minutes, or even longer if you prefer a firmer consistency. This final chill is crucial for the cake’s integrity and aesthetic.
Preserving Your Masterpiece: Storing and Freezing
To enjoy your homemade Black Tie Mousse Cake for as long as possible, proper storage is key. Once the ganache has fully set and hardened, you can gently cover the entire cake with plastic wrap. Ensure the plastic wrap doesn’t press down on the ganache, which could mar its perfect finish. Stored this way, your exquisite mousse cake will remain fresh and delicious in the refrigerator for up to 5-7 days, allowing you to savor its layers of flavor over time.
To Freeze Your Cake for Extended Enjoyment: Should you wish to prepare this decadent dessert in advance or save some for a later indulgence, it freezes wonderfully. Begin by freezing the cake unwrapped for approximately 1 hour. This initial chill helps to firm up all the layers and prevents the wrapping from sticking. After 1 hour, remove the semi-frozen cake and carefully wrap it with two layers of plastic wrap, followed by one layer of aluminum foil. This triple layer of protection will guard against freezer burn and preserve its quality. The cake can be stored in the freezer for up to 3 months. When you’re ready to enjoy it, simply remove the foil and one layer of plastic wrap, then transfer the cake to the refrigerator to thaw overnight. This slow thawing process ensures the cake retains its moistness and delicate texture.
The Art of the Perfect Slice: How to Slice Mousse Cake
After investing so much effort into creating this beautiful, layered Black Tie Mousse Cake, the last thing you want is to diminish its appeal with messy or smushed slices. Achieving clean, crisp slices that showcase each distinct layer is an art, and it’s simpler than you might think with the right technique.
- Firstly, always ensure your cake is thoroughly cold when you are preparing to cut it. A well-chilled cake holds its structure better, making it much easier to achieve clean lines.
- The secret lies in heat. Rinse a sharp chef’s knife under very HOT running water, ensuring both sides of the blade are heated until the knife is warm to the touch.
- Immediately and thoroughly dry the hot knife with a clean towel. Any lingering water can cause the ganache to stick or streak.
- Carefully line up the pointed edge of the hot knife with the very center of the cake. With a firm, decisive motion, press straight down into the cake until the blade reaches the bottom. Avoid any wiggling or sawing motions; a single, firm press is key. Once at the bottom, gently pull the knife straight towards you, dragging the blade along the serving plate to release the slice.
- This step is crucial for perfection: rinse, dry, and repeat this hot knife process after EVERY single cut. It might seem a bit tedious, but if you desire to beautifully display all those distinct, stunning layers you worked so hard to create, this meticulous approach is absolutely worth the extra few moments. It ensures every slice is as clean and crisp as the first, truly honoring the beauty of your creation.
A CRITICAL WARNING: Resist the urge to use a cold knife. A cold blade will inevitably press down on the denser ganache, tragically smashing the delicate, airy layers of mousse beneath it and squeezing them outwards. This can ruin the beautiful presentation and texture you’ve worked so hard to achieve. I speak from experience: even just scooping a slice with a cold fork can cause the mousses to visibly squeeze outwards due to the heavier density of the ganache compared to the light mousse layers below. THE MORAL OF THE STORY: A consistently hot knife is your essential tool for gracefully slicing through the ganache and each tender layer of mousse without any distortion or damage, ensuring every piece is perfect.
You are truly going to adore this rich, intricately layered cake. Its delightful medley of flavors and textures, from the moist chocolate cake to the creamy mousses and glossy ganache, creates an unforgettable dessert experience. It’s an impeccable choice for celebrating special occasions and holidays, adding a touch of elegance and indulgence, especially for romantic events like Valentine’s Day.
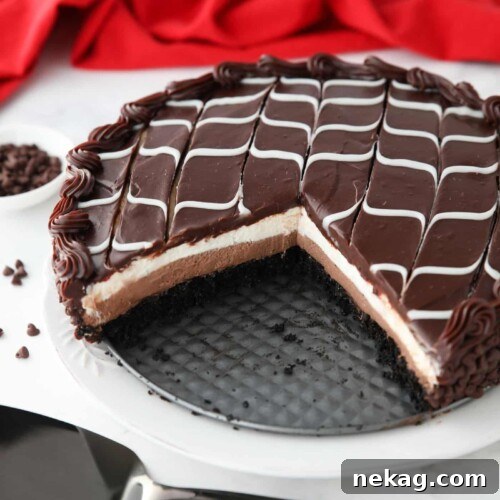
Black Tie Mousse Cake
Pin
Rate
SaveSaved!
Ingredients
Chocolate Cake
- ½ cup (100 g) granulated sugar
- ½ cup (60 g) all-purpose flour, stir, spoon, and level when measuring
- ¼ cup (20 g) unsweetened cocoa powder
- ½ teaspoon baking powder
- ¼ teaspoon baking soda
- ¼ teaspoon salt
- ½ large egg, about 2 Tbsp, whisked
- ¼ cup (59 ml) milk
- 3 Tablespoons oil, (canola/vegetable)
- ½ teaspoon vanilla extract
- ¼ cup (59 ml) boiling water
Vanilla Cream Cheese
- 4 ounces (113 g) cream cheese, room temperature
- ¾ cup (90 g) powdered sugar
- 1 pinch salt
- ½ teaspoon vanilla extract
Chocolate Cream Cheese
- 4 ounces (113 g) cream cheese, room temperature
- ¾ cup (90 g) powdered sugar
- 1/4 cup (20 g) unsweetened cocoa powder
- 1 pinch salt
- ½ teaspoon vanilla extract
Stabilized Whipped Cream (to make mousses)
- 1 teaspoon unflavored gelatin
- 4 teaspoons cold water
- 1 ½ cups (355 ml) heavy whipping cream, cold
Ganaches and Decorations:
- 1 cup (237 ml) heavy whipping cream
- 2 Tbsp unsalted butter
- 12 ounces (340 g) semi-sweet chocolate chips, about 2 cups
- ¼ cup (43 g) white chocolate chips
- ½ cup (85 g) mini chocolate chips
Equipment
-
9 Inch Springform Pan with parchment paper
-
Mixing Bowls with Airtight Lids
-
Electric Hand Mixer
-
Wilton 3-Piece Icing Spatula Set
-
Wilton Disposable Piping Bags
-
Wilton Cake Decorating Tip Open Star #21
Instructions
-
Preheat oven to 350˚F. Lightly grease a 9-inch springform pan with cooking spray. Set aside.
-
CHOCOLATE CAKE: Sift together the sugar, flour, cocoa, baking powder, baking soda, and salt into a large bowl.
-
Add the egg, milk, oil, and vanilla. Stir until incorporated. Heat 1/4 cup of water in a glass measuring cup in the microwave until boiling (30-60 seconds). Pour boiling water into batter and mix until fully incorporated. The texture of the batter should be consistent throughout. Batter will be thin, but shouldn’t have watery spots. Pour batter into the prepared pan.
-
Bake chocolate cake at 350˚F for 15-18 minutes, or until a toothpick comes out clean or with a few moist crumbs when inserted in the center of the cake. Remove from oven and place the pan in the freezer to chill the cake.
-
VANILLA CREAM CHEESE: Place the cream cheese, powdered sugar, salt, and vanilla in a large bowl. Beat together with an electric hand mixer until smooth. Set aside. (No need to clean the beaters. Use them for the next step.)
-
CHOCOLATE CREAM CHEESE: Place the cream cheese in a large bowl. Sift the powdered sugar and cocoa powder over the top of the cream cheese. Add the salt and vanilla. Beat together with an electric hand mixer until smooth. Set aside. (Now clean the beaters for a future step.)
-
STABILIZED WHIPPED CREAM: In a small microwaveable bowl, stir together the unflavored gelatin and cold water. Set aside for 5 minutes to absorb and solidify.
-
Place cold heavy cream in the bowl of a stand mixer. Using the whisk attachment, beat until mixture is thickened, but not quite soft peaks.
-
Nuke gelatin in microwave for 10 seconds to melt it. Stir until smooth and no longer foggy/grainy; mixture will start to look more transparent/clear. Slowly drizzle the liquid gelatin into the cream while the mixer is running on low speed. (It’s important to do this slowly to avoid lumps.)
-
Slowly increase speed to medium-high and whip until stiff peaks form. (Just until it starts to look thick and leaves trails from the whisk. Do not over-mix or it will curdle and turn into butter. Keep a close eye on it.)
-
MAKE MOUSSES: Divide the stabilized whipped cream, placing half in the vanilla cream cheese mixture and half in the chocolate cream cheese mixture. Use the electric hand mixer to beat the vanilla mixture first. Then the chocolate. No need to clean the beaters in-between.
-
ASSEMBLE LAYERS: Spread the chocolate mousse mixture evenly over the frozen chocolate cake. Then dollop the vanilla mousse over the top of the chocolate mousse and carefully spread even. Cover the pan with plastic wrap (try not to let it touch the top) and chill in the fridge for a minimum of 1 hour.
-
After the mousse has set, carefully remove the edge of the springform pan, but keep the cake on the base and place it back in the fridge.
-
MAKE GANACHES: Place the semi-sweet and white chocolate chips into two separate bowls. In a small saucepan on LOW, heat heavy cream and butter until it just comes to a boil. Stir the mixture to make sure the butter is completely melted.
-
Measure 2 Tbsp of the cream/butter mixture and put it on top of the white chocolate chips. Pour the remaining butter/cream mixture over the semi-sweet chocolate chips. Let the cream melt the chocolate chips and then stir them up in their separate bowls. Let the ganaches cool slightly until spreading consistency. Set aside 1/2 cup of the semi-sweet chocolate ganache, and place the white chocolate ganache in a piping bag, but wait to cut the tip.
-
DECORATE CAKE: Place a cooling rack inside of a cookie sheet and set the cake on top of the cooling rack. (The ganache that falls off the cake will be caught in the cookie sheet underneath the cooling rack.) Pour the semi-sweet chocolate ganache over the top of the cake; spread evenly with an offset spatula. When the chocolate drips over the edges, smooth the ganache with your spatula.
-
Once the cake is coated, cut the tip of the bag of white chocolate ganache and pipe horizontal stripes on top of the cake about 1-inch or so apart. Immediately use a toothpick to gently drag lines through the ganache across the full cake in vertical motions, alternating going up and down across the cake.
-
Quickly press the mini chocolate chips onto the side of the cake while the ganache is still wet. Place the semi-sweet ganache that was set aside into a piping bag fitted with a coupler and Wilton 21 open star piping tip. Pipe a border around the edge. I piped a reverse shell pattern.
-
Once fully decorated, store the cake in the fridge until the ganache has set completely, at least 15-20 minutes or more, as desired.
-
When ready to serve, cut cake with a hot, dry knife. Rinsing the knife in hot water and drying the knife between cuts for crisp slices.
Notes
- Once the ganache has set, you can lightly cover the black tie mousse cake with plastic wrap and store it in the fridge for up to 5-7 days.
- To Freeze: Freeze the cake unwrapped for 1 hour. Then wrap the cake with 2 layers of plastic wrap and 1 layer of foil. Freeze for up to 3 months. Remove the foil and one layer of plastic wrap, then thaw in the refrigerator overnight.
Nutrition
Disclaimer: Nutritional values were calculated using a third-party tool and are provided as an estimation only.
Sharing this recipe with a link is both encouraged and appreciated. Copying/pasting and/or screenshots of full recipes to any social media is strictly prohibited. Content and photographs are copyright protected.
Did you make this?
Don’t forget to leave a rating below and make sure to follow on Pinterest and Instagram for more!
*Originally published 2/1/2012. Post updated January 2024.