
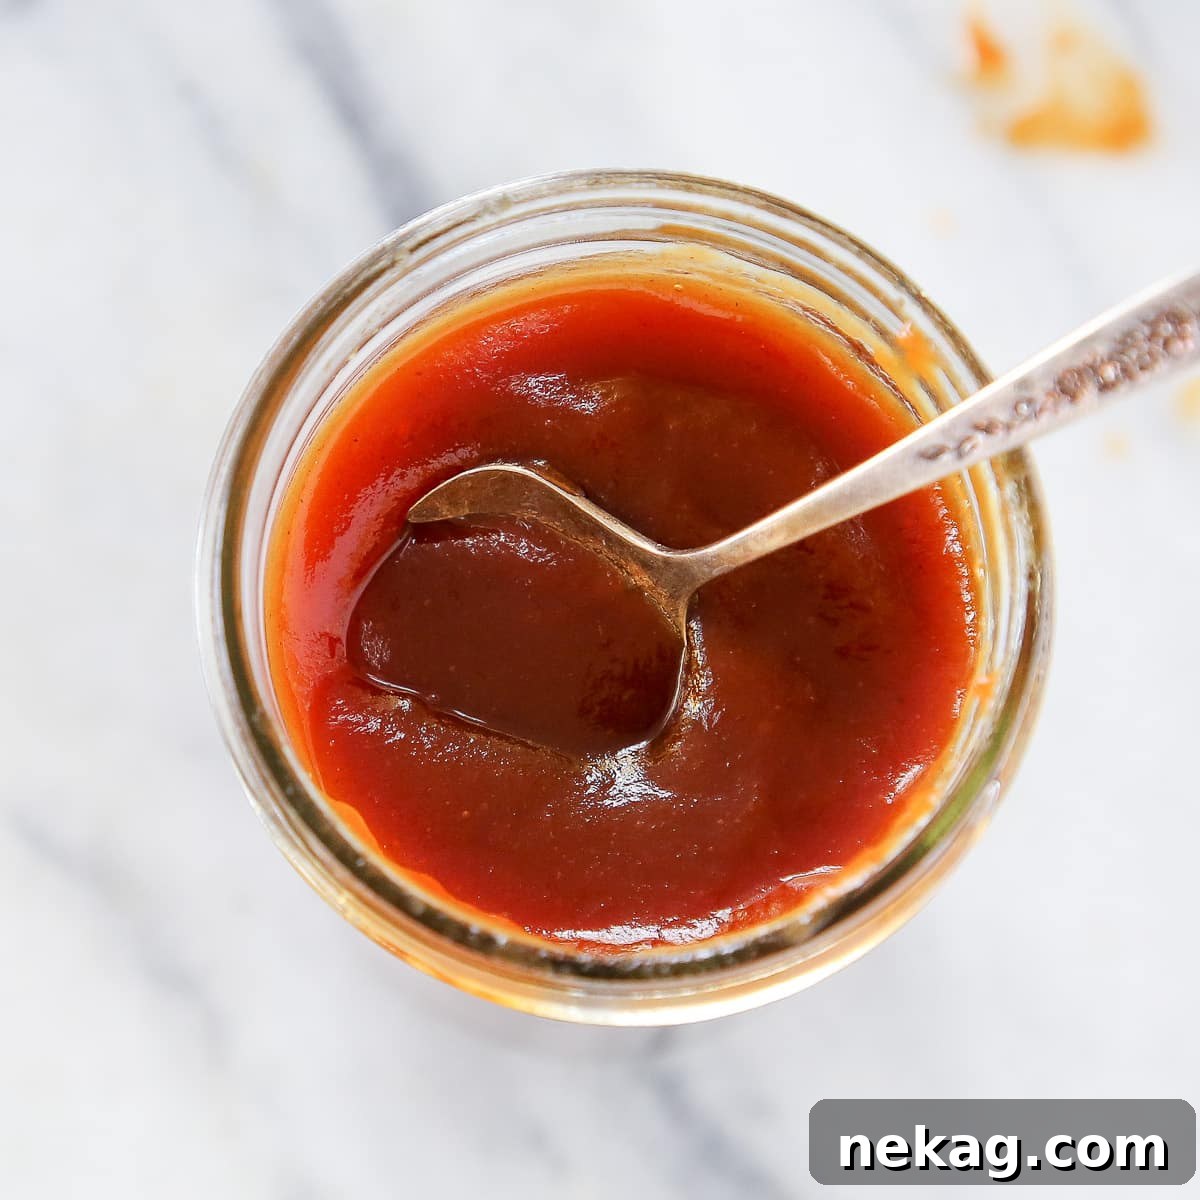
Embark on a culinary journey to create the most exquisite homemade apple butter you’ve ever tasted. This professional chef’s recipe unveils the secret to achieving a remarkably silky-smooth texture and a rich, deeply caramelized apple flavor that sets it apart. Forget the overly sweet, one-dimensional versions; our unique method leverages the power of a dry caramel base, transforming simple apples and spices into a gourmet spread. With only three core ingredients and a little patience, you’ll produce a batch of apple butter so divine, it tastes like spiced caramel apples in a jar. Prepare to be amazed by the depth and complexity this recipe brings to a classic fall favorite.
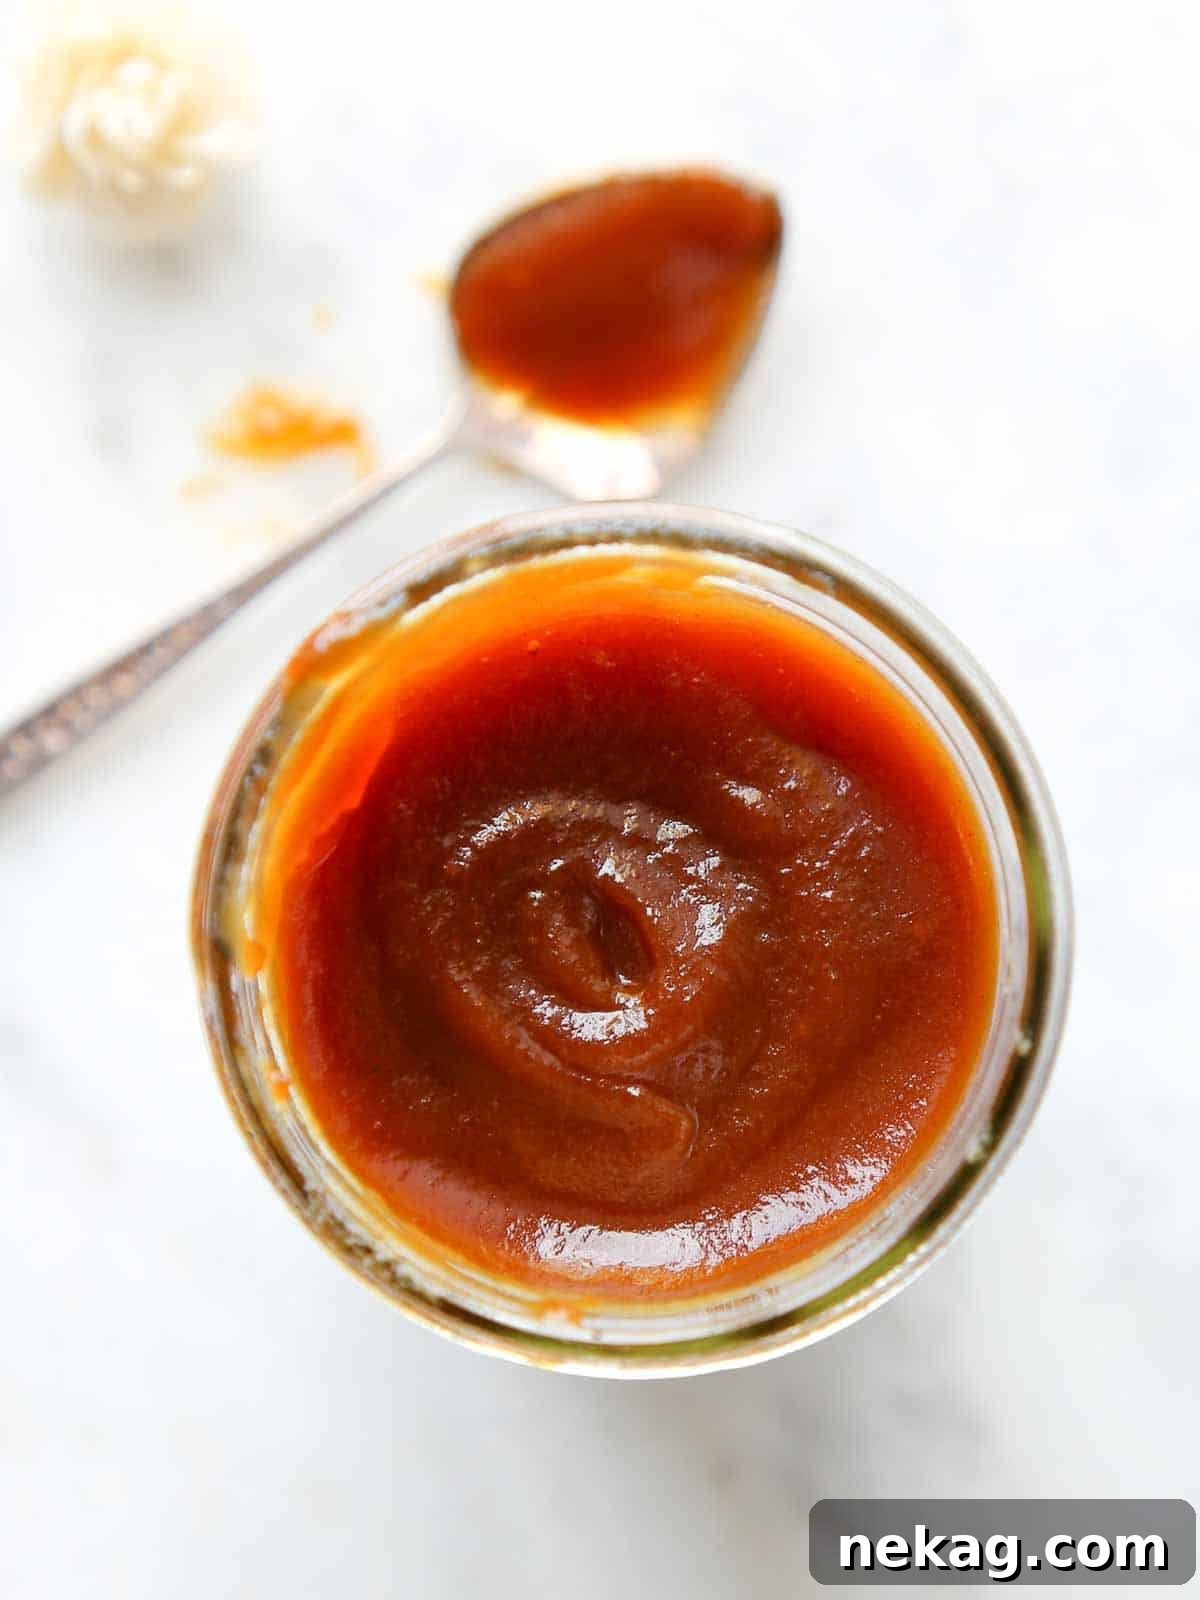
What is Apple Butter? More Than Just Applesauce!
Unlike conventional applesauce, which is typically a simpler puree of cooked apples, apple butter is a sophisticated reduction. It’s a concentrated, intensely flavored fruit spread where apples are slowly cooked down with sugar and spices until they reach a thick, jam-like consistency. The “butter” in its name refers not to dairy, but to its incredibly smooth, almost spreadable texture that glides like butter. Our exclusive recipe elevates this concept further by starting with a rich, dry caramel. This crucial step infuses every spoonful with the warmth and complexity of spiced caramel apples, perfectly tempering the sweetness and adding an unparalleled depth that distinguishes it from any other apple butter you’ve encountered.
The beauty of homemade apple butter lies in its incredible versatility. It’s a fantastic addition to almost any meal, from breakfast to dinner, or even as a thoughtful gift. Spread it generously on warm slices of banana bread with crumb topping, slather it over savory rosemary sourdough rolls, or dollop it onto flaky buttermilk biscuits. Beyond traditional spreads, stir it into your morning oatmeal, swirl it into yogurt, or use it as a flavorful substitute for applesauce in any baking recipe, adding a layer of rich, caramelized goodness. The possibilities are truly endless, making this apple butter a staple in any gourmet kitchen.
Why Our Apple Butter Recipe Stands Out
- Unrivaled Depth of Flavor from a Caramel Base: The cornerstone of this recipe’s superiority lies in its foundation: a meticulously crafted dry caramel. By caramelizing all the sugar right at the beginning, we develop complex flavor compounds that simply can’t be achieved by just adding sugar to cooked apples. This process not only prevents the apple butter from becoming cloyingly sweet but also infuses it with a profound, almost toasted, and genuinely unique caramelized apple essence that differentiates it unmistakably from basic applesauce.
- Strategic Deglazing with Premium Apple Cider: Once the caramel reaches its peak, dark amber perfection, we deglaze the pot with high-quality apple cider (not apple juice, which lacks the essential tartness and complexity). This crucial step not only dissolves the caramel into a luscious liquid but also introduces a tangy, fruity layer that beautifully complements the deep caramel notes. For an even more authentic and robust flavor profile, sourcing unfiltered apple cider from a local farmer can truly elevate the final product.
- The Power of Apple Variety for a Balanced Taste: One of the most significant secrets to the best apple butter is using a diverse array of apples. There are no “wrong” apples, but the magic happens when you combine sweet, tart, firm, and soft varieties. Each apple brings its unique sugar content, acidity, and pectin levels, contributing to a more nuanced, well-rounded, and complex flavor profile. When preparing large quantities, I make a point to gather as many different types as possible (often 5-15 varieties), avoiding overly mealy apples like Macintosh to ensure a rich and harmonious blend. This diversity prevents any single apple flavor from dominating, resulting in a perfectly balanced and unforgettable apple butter.
Table of Contents
- Why This is the Best
- Essential Ingredients for Perfect Apple Butter
- Creative Variations & Smart Substitutions
- Professional Tips for Masterful Apple Butter
- How to Make Homemade Apple Butter: Step-by-Step
- How to Tell When Apple Butter is Perfectly Done
- Chef Lindsey’s Expert Recipe Tip
- Inspiring Ways to Enjoy Your Apple Butter
- Apple Butter Recipe FAQs
- More Recommended Apple Recipes
- The Ultimate Apple Butter Recipe Card
Essential Ingredients for Perfect Apple Butter
Crafting the perfect apple butter begins with selecting the right, high-quality ingredients. While the list might seem simple, each component plays a vital role in developing the deep, rich flavors we aim for in this recipe. Here’s a closer look at what you’ll need and why:
- Apples (4 lbs, cored, cubed, use at least 5 varieties): This is where the magic truly begins! The key to a complex, well-rounded apple butter is a blend of different apple varieties. Aim for at least five, but don’t hesitate to go up to 15 in larger batches. A mix of sweet apples (like Fuji, Gala, Golden Delicious, Honeycrisp, Braeburn) and tart apples (such as Granny Smith, Cortland, Jonagold) will provide a beautiful balance of flavor and acidity. Using various textures also contributes to the final consistency. Avoid overly mealy varieties if you’re aiming for a super smooth finish, but truly, almost any apple will contribute something wonderful.
- Granulated Sugar (1 ½ cups): While apple butter is sweetened, our unique method of caramelizing the sugar first profoundly transforms its role. Instead of just adding sweetness, the granulated sugar becomes the foundation for a rich, complex caramel flavor that forms the backbone of this recipe. It helps balance the tartness of the apples and allows for a deeper, more sophisticated taste that’s far from just sugary.
- Apple Cider (2 cups): Crucial for deglazing the caramel and infusing the apples with additional autumnal flavor. Always opt for unfiltered apple cider, which retains more of the apple’s natural flavor and aroma compared to clear, pasteurized apple juice. Seek out a local farm’s cider if possible for the best results. Be extremely careful not to use apple cider vinegar, as its high acidity would ruin the balance of the apple butter. You can use any leftover cider to make delicious hot apple cider, creamy pumpkin butter, or a batch of delightful apple cider donuts.
- Cinnamon Sticks (1 stick): Whole cinnamon sticks impart a subtle, warm, and nuanced cinnamon flavor that is distinct from ground cinnamon. They slowly release their aromatics during the long cooking process, creating a deeper, more mellow spice note. We’ll remove it before blending to ensure a smooth texture.
- Ground Cinnamon (½ teaspoon): While cinnamon sticks provide depth, a touch of ground cinnamon ensures an immediate and noticeable burst of warm spice throughout the apple butter.
- Ground Ginger (½ teaspoon): Ground ginger adds a lovely warmth and a hint of zesty brightness that beautifully complements the apples and cinnamon without overpowering them.
- Ground Cloves (¼ teaspoon): A small amount of ground cloves contributes a rich, intensely aromatic, and slightly sweet-spicy note, typical of classic apple butter profiles. Use sparingly, as cloves can be potent.
These carefully selected ingredients, especially the blend of apples and the dry caramel technique, are what truly elevate this homemade apple butter from good to absolutely phenomenal.
Creative Variations & Smart Substitutions
While our signature apple butter recipe yields truly exceptional results, the beauty of home cooking lies in its adaptability. Don’t be afraid to experiment with these delicious variations and substitutions to tailor the recipe to your taste or convenience.
- Slow Cooker or Instant Pot Method (without caramel): If you’re short on time or prefer a hands-off approach, you can adapt this recipe for a slow cooker or Instant Pot. This variation means skipping the dry caramel step, which, while it won’t yield the same deep caramelized flavor, still produces a delicious apple butter. For this method, you can halve the sugar, as the caramelization process typically mellows sweetness. Simply combine all ingredients (minus the caramelization process) in your slow cooker and cook on low for 6-8 hours or high for 3-4 hours, or in an Instant Pot following appropriate pressure cooking guidelines for apples. You can even start the apple cooking on the stovetop and transfer it to a slow cooker for the final reduction phase.
- Experiment with Different Spices: The spice blend in this recipe is a classic, but your palate is the ultimate guide. Feel free to adjust the quantities of cinnamon, ginger, and cloves, or introduce other warm spices to create your unique flavor profile. Consider adding a pinch of nutmeg, cardamom, or even a touch of allspice. For an effortless switch, you could use a pre-made apple pie spice mix or a seasonal pumpkin spice mix to infuse your apple butter with a different autumn essence.
- Transform it into Pear or Quince Butter: Why stop at apples? This exact technique can be gloriously applied to other fall fruits. Imagine the rich, smooth texture of homemade pear butter, or the slightly more tart and aromatic quince butter. The caramelization process works beautifully with these fruits, bringing out their natural sweetness and creating another stunning fruit spread. Simply substitute the apples with an equal amount of peeled, cored, and cubed pears or quince, and follow the recipe instructions. You might adjust the sugar slightly depending on the sweetness of your chosen fruit.
Professional Tips for Masterful Apple Butter
Achieving truly exceptional apple butter goes beyond simply following steps; it involves understanding the nuances of the cooking process. These professional insights will help you create a perfectly smooth, deeply flavorful, and beautifully textured spread every time.
- Take the Caramel to a Dark Amber: This is perhaps the most critical step for developing profound flavor. Don’t be afraid to let your dry caramel deepen in color. A pale caramel will result in an apple butter that tastes simply sweet, lacking the complexity and rich, toasted notes we’re after. Watch for it to turn a deep, rich amber-brown, almost reaching the point where it begins to smoke profusely and emits a strong caramel aroma. This dark stage ensures maximum flavor development. Have your apple cider ready to deglaze immediately, as caramel can burn quickly once it hits this peak. If the caramel seizes when the cold cider is added, don’t panic! It will slowly melt and incorporate as the apples cook.
- Puree and Pass Through a Fine Sieve for Ultimate Smoothness: To achieve that signature silky-smooth, “butter-like” texture, pureeing is essential, but it’s often not enough on its own. After blending, passing the apple puree through a fine-mesh sieve (or a chinoise strainer, as often used in professional kitchens) is a game-changer. This step removes any tiny bits of apple skin, un-melted sugar crystals, or spice remnants, guaranteeing a luxurious, velvety consistency that truly earns the “butter” moniker. It’s an extra step, but one that makes all the difference.
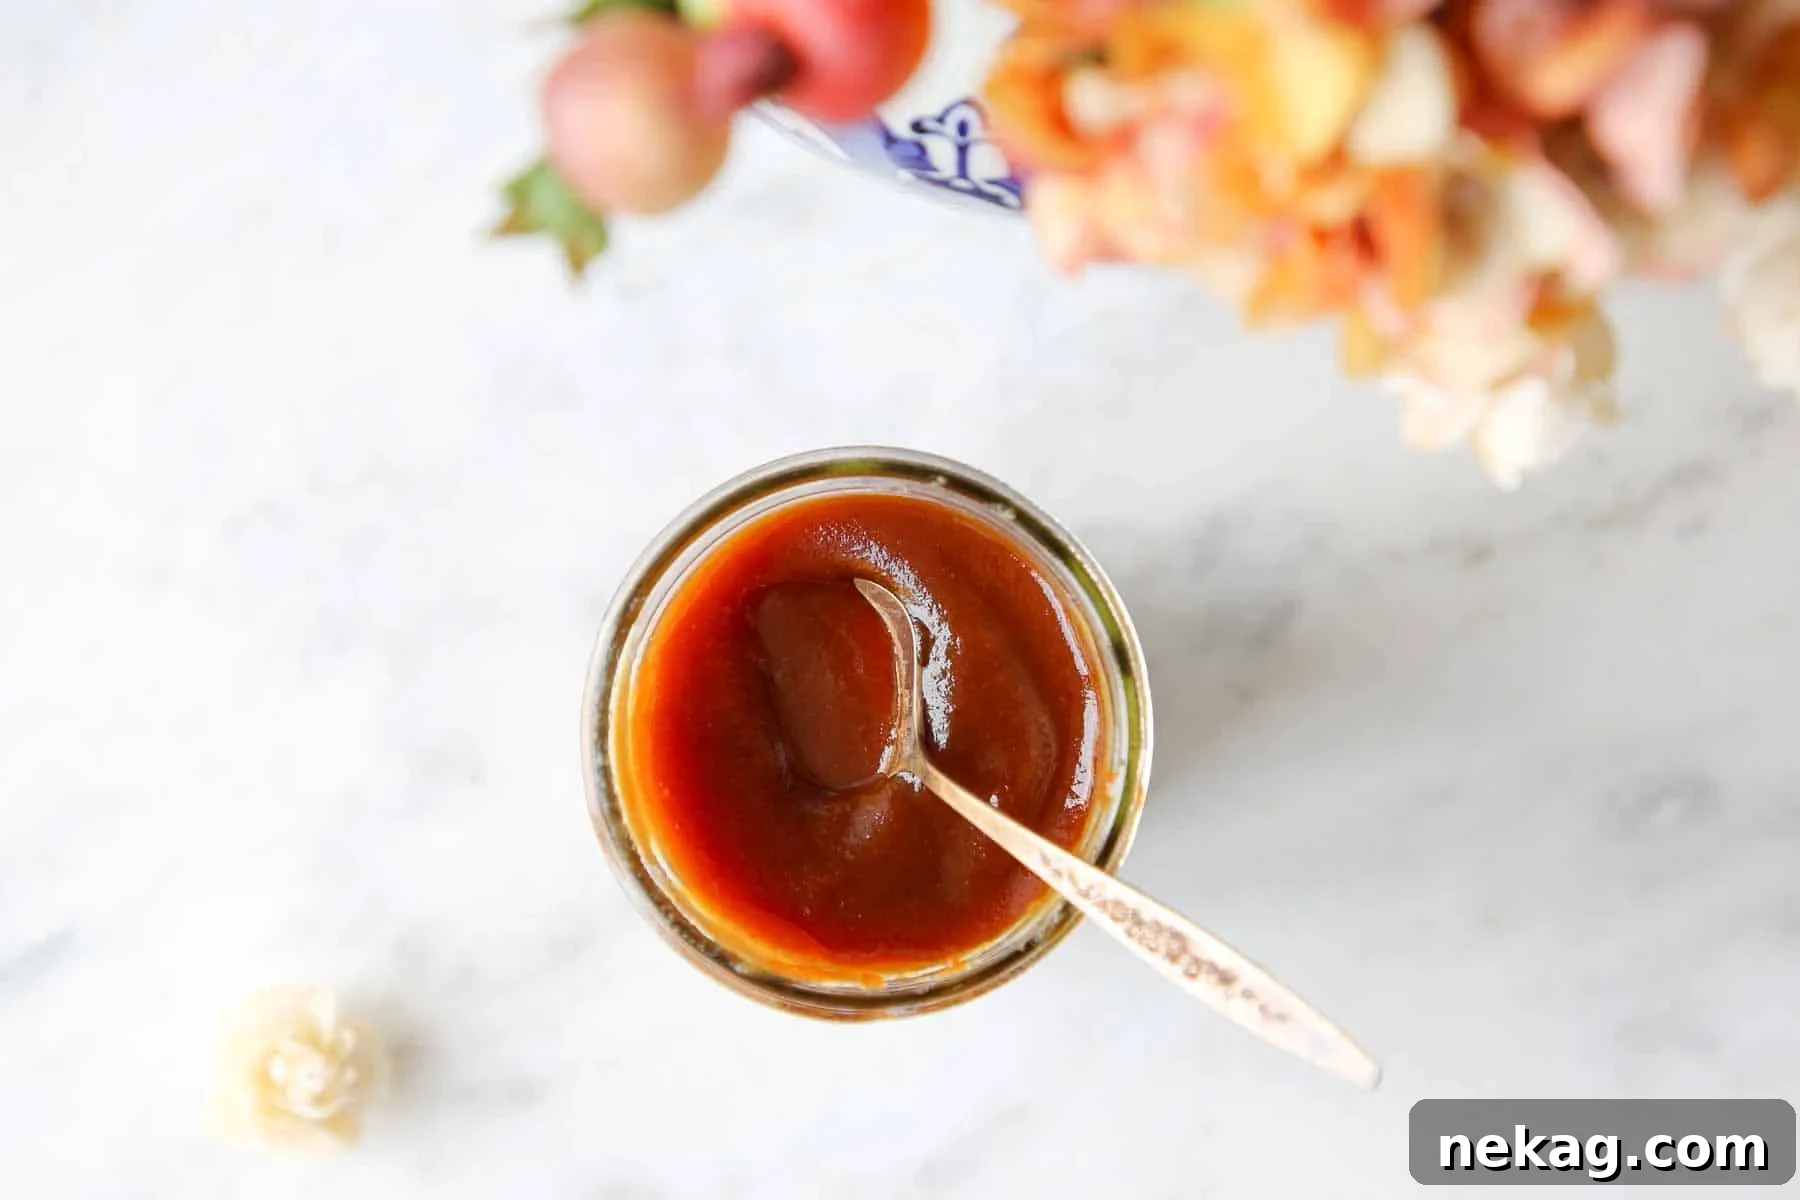
- Continue Cooking After Pureeing for Ideal Thickness: Unlike many recipes that suggest you’re done after blending, our professional method emphasizes further reduction. After you’ve pureed and strained the apple mixture, return it to the pot and continue cooking it over low heat, stirring frequently. This secondary reduction phase allows the excess water to evaporate, concentrating the flavors even further and thickening the apple butter to its ideal, spreadable consistency. Look for it to run off a spoon in thick globs, similar to cold honey, or to hold a distinct line when you drag a spoon through it on a chilled plate. This final reduction ensures a rich, concentrated product that isn’t watery or thin.
How to Make Homemade Apple Butter: Step-by-Step
Creating this gourmet apple butter is a rewarding process that combines a few precise techniques with patient cooking. Follow these detailed instructions to achieve perfect results every time.
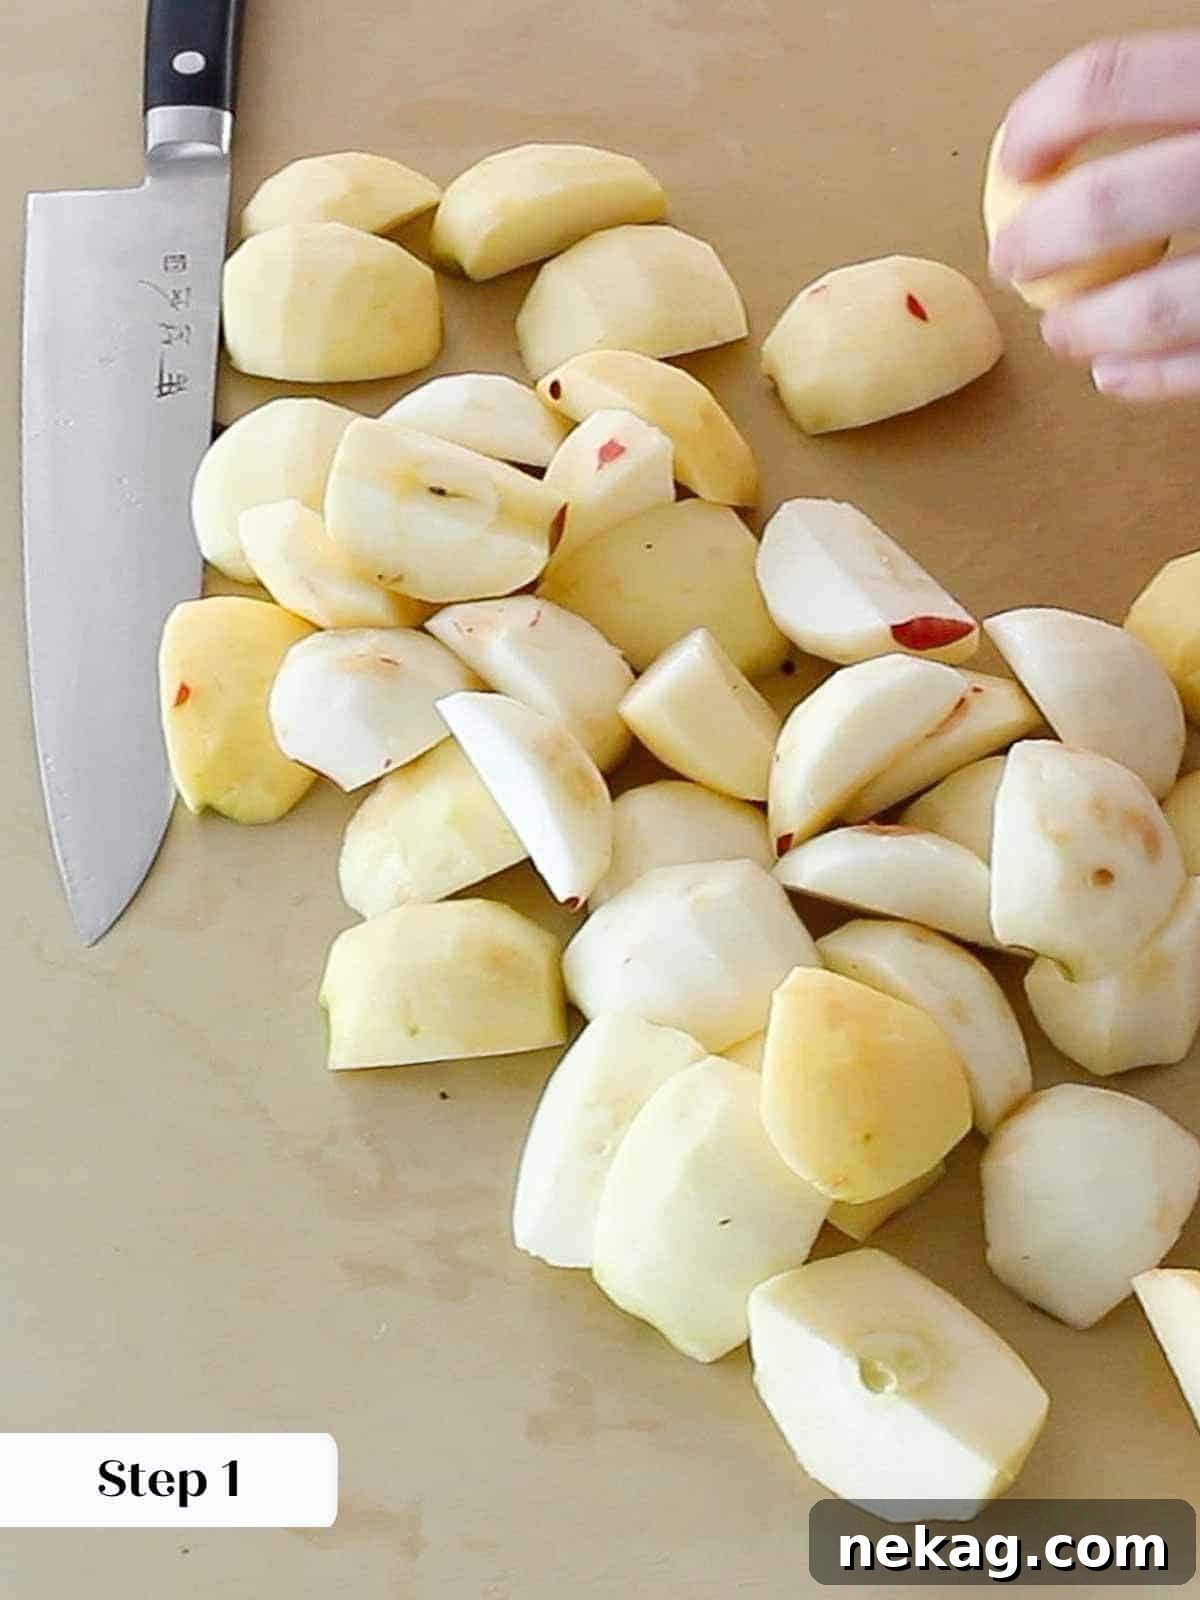
Step 1: Prepare the Apples. Begin by peeling, coring, and quartering all your apples. While you don’t need to slice them into smaller pieces at this stage, peeling is highly recommended for easier straining later, especially if you desire the silkiest texture. If you decide not to strain, peeling is absolutely essential to avoid chunky apple butter.
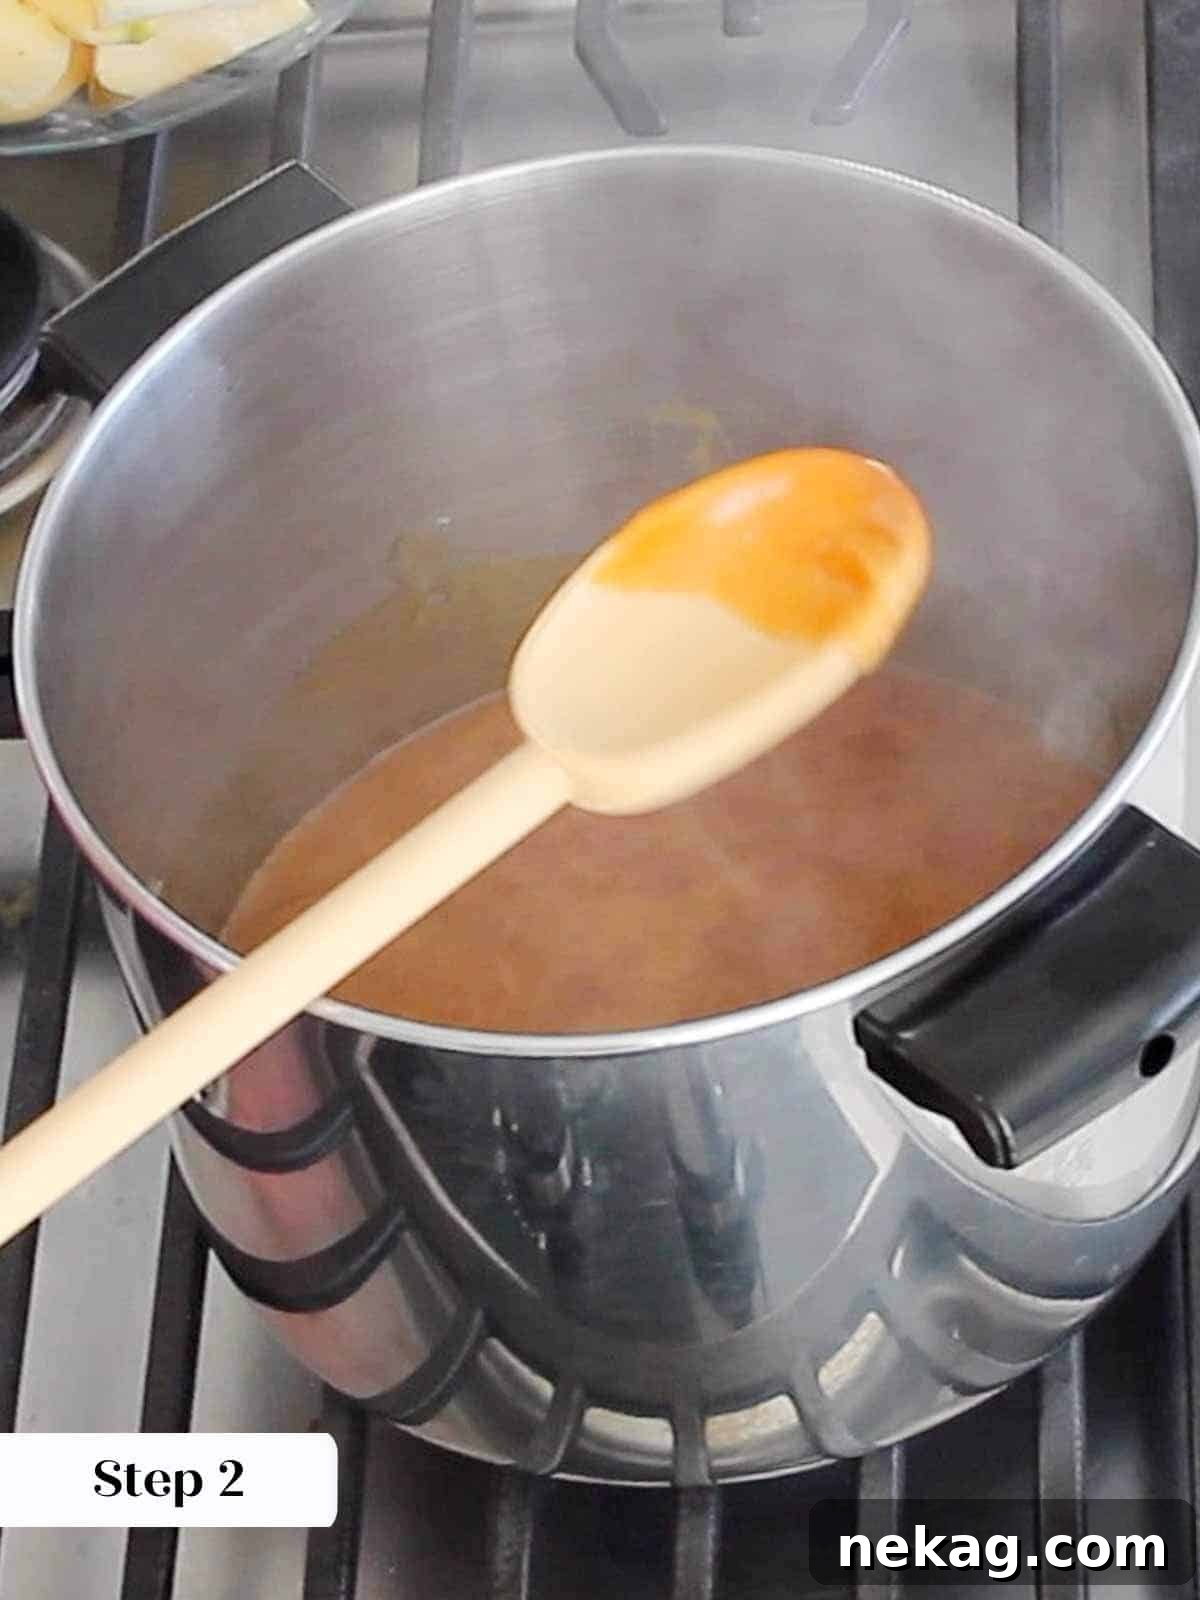
Step 2: Create the Dry Caramel. In a large, high-sided, heavy-bottomed pot, add all the granulated sugar in an even layer. Cook over medium-high heat. Allow the sugar to melt and caramelize, stirring occasionally with a spoon to break up any clumps and ensure even melting. While you can stir a dry caramel, I typically stop stirring once all the sugar has visibly melted and the caramel begins to develop color. A few small lumps of sugar are nothing to worry about; they will dissolve during the cooking process or be strained out later.
For an alternative method to making a dry caramel, you can sprinkle the sugar in layers, adding a new layer only after the previous one has fully melted, as demonstrated in my salted caramel sauce recipe. However, for this apple butter, a single addition and occasional stirring usually suffice, as any minor imperfections will be resolved during subsequent cooking and straining.
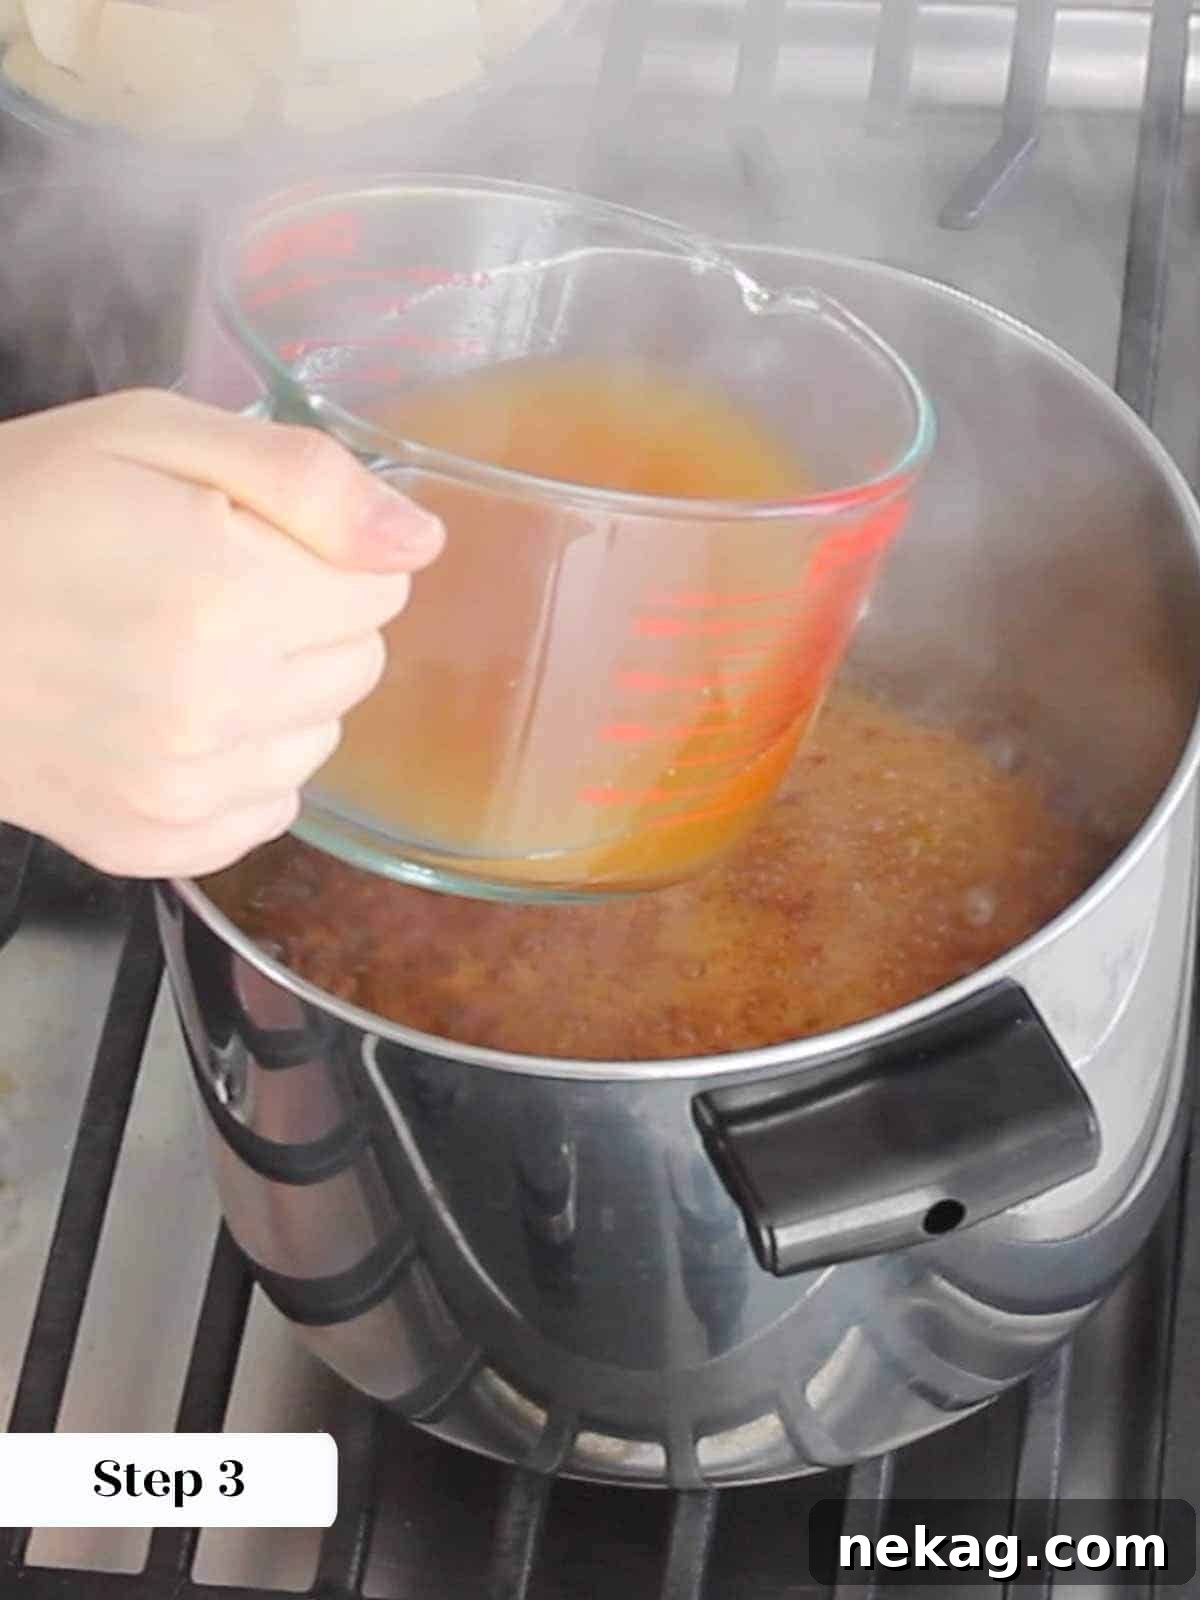
Step 3: Deglaze the Caramel. Once the caramel transforms into a beautiful, dark amber color, immediately turn off the heat. This “dark amber” stage occurs just after the caramel starts to smoke noticeably and emits a strong, rich caramel aroma. Precision is key here; have your apple cider measured and ready to go. Carefully and slowly add the apple cider, a little at a time, to deglaze the hot caramel. It will bubble up vigorously and may seize into a hard mass; this is perfectly normal and expected. Don’t worry, the heat from the residual caramel and subsequent cooking will melt it completely.
If the caramel hardens and seizes when the cooler apple cider is added, don’t fret. It will have ample time to melt and re-dissolve as the mixture simmers with the apples.
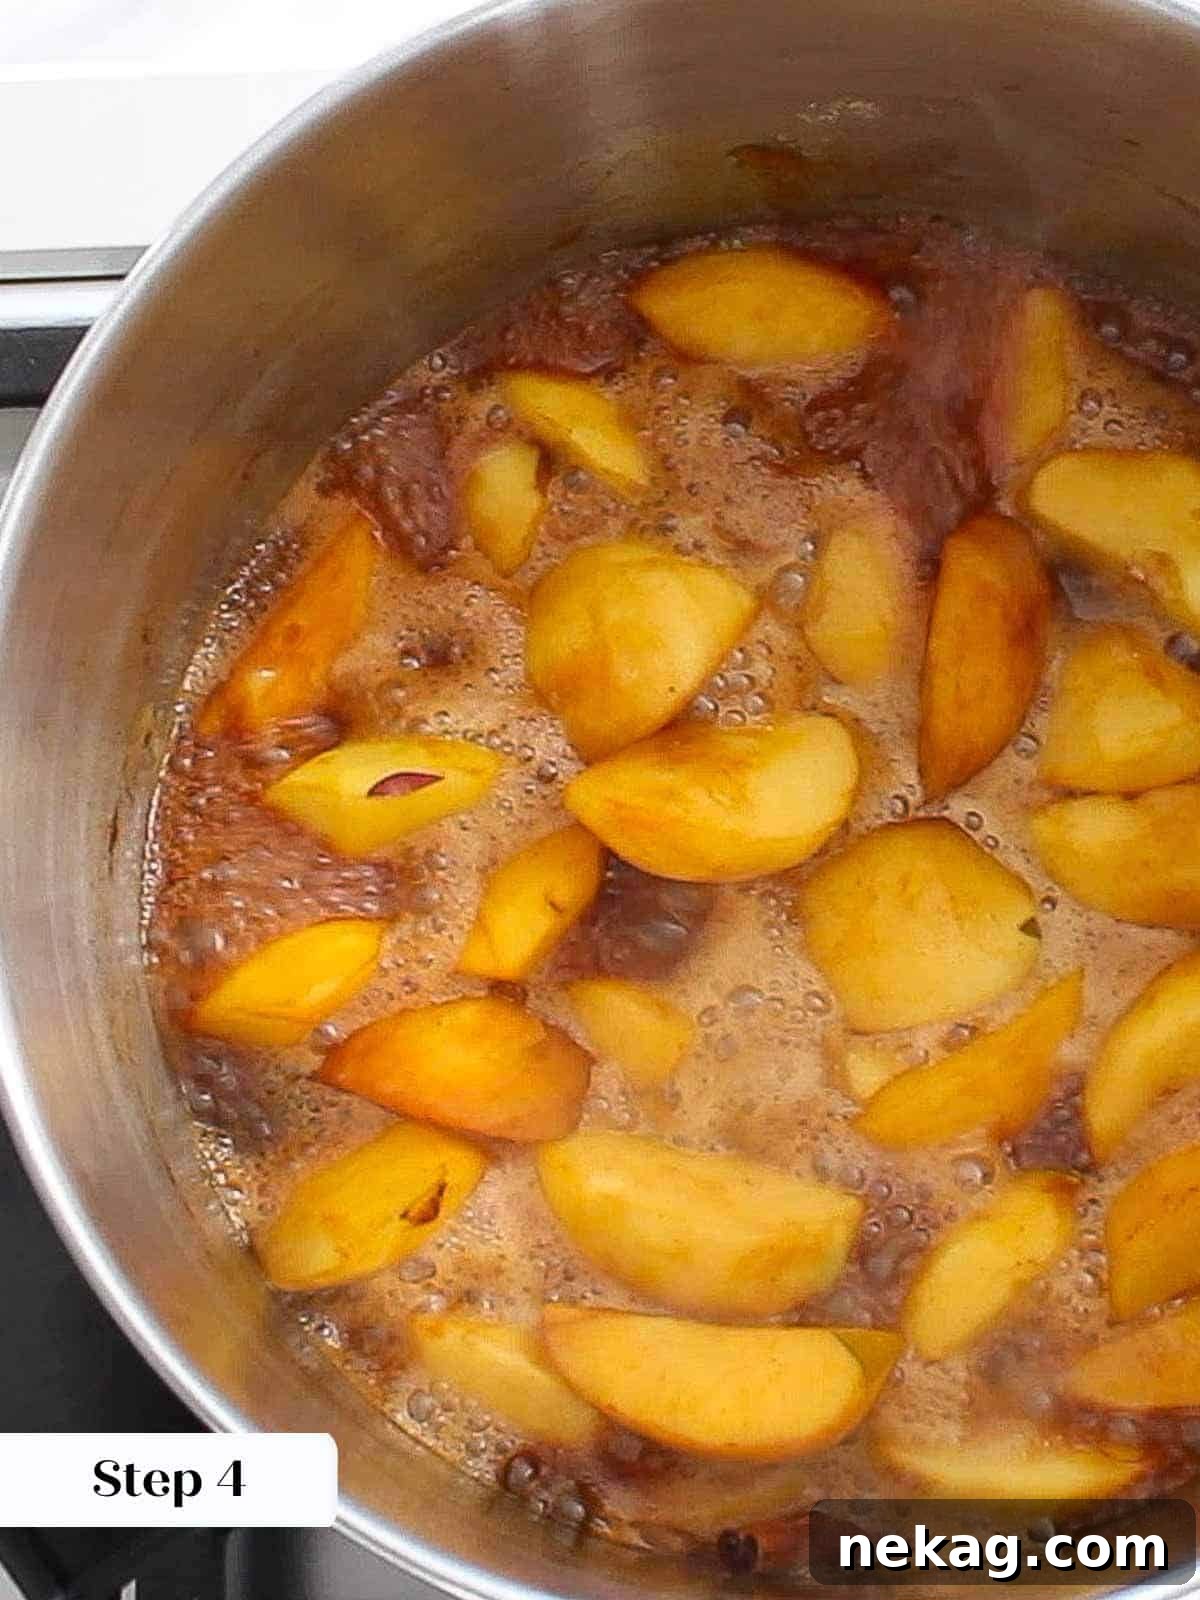
Step 4: Add Apples and Spices. Once the caramel has been deglazed and most of it has dissolved, add the prepared apples, the cinnamon stick, and all the ground spices (ground cinnamon, ginger, and cloves) to the pot. Stir everything thoroughly to ensure the apples are well coated and the spices are evenly distributed within the caramelized apple cider base. The apples will begin to release their juices as they cook down.
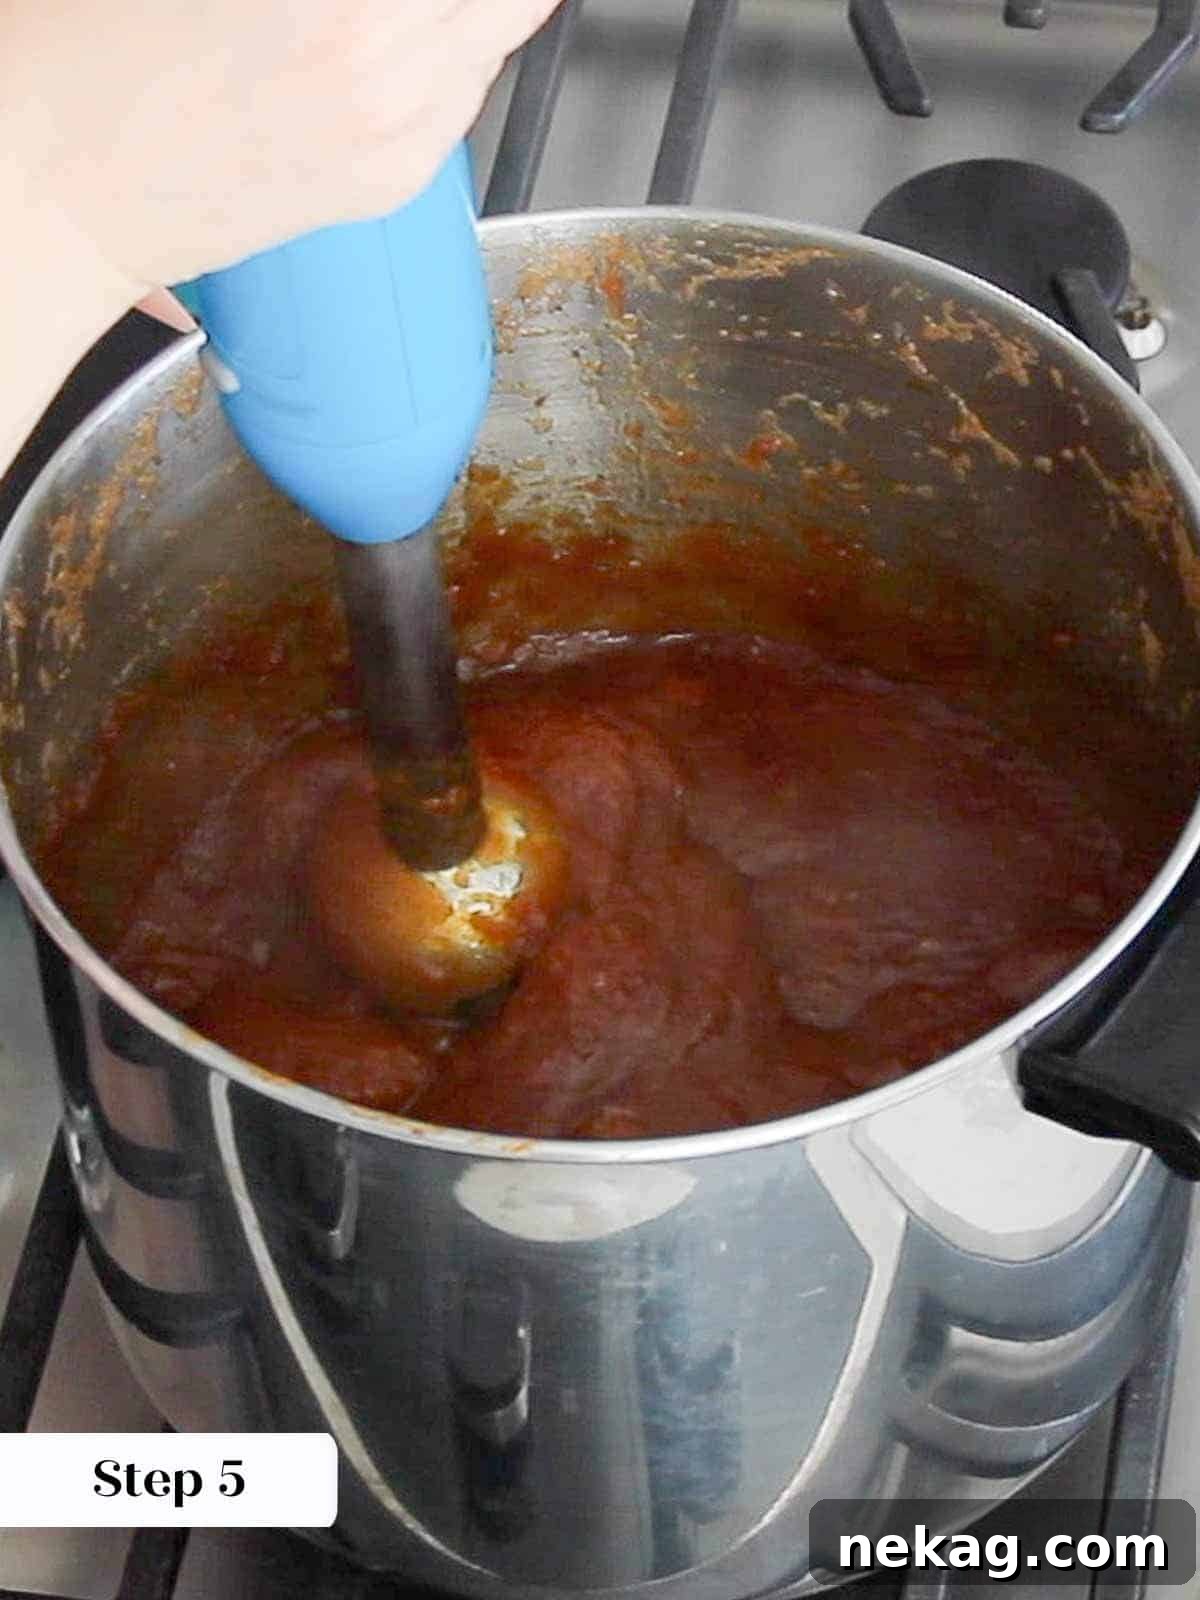
Step 5: Cook and Puree the Apples. Bring the mixture to a simmer and cook for approximately 1 hour, or until the apples are very tender and easily mashed. During this time, the apples will break down, and the flavors will meld beautifully. After cooking, carefully remove the cinnamon stick from the pot. Using an immersion blender directly in the pot, blend the apple mixture until it is as smooth as possible. Alternatively, you can carefully transfer the cooked apples in batches to a standard blender, pureeing until velvety smooth. Exercise caution when blending hot liquids.
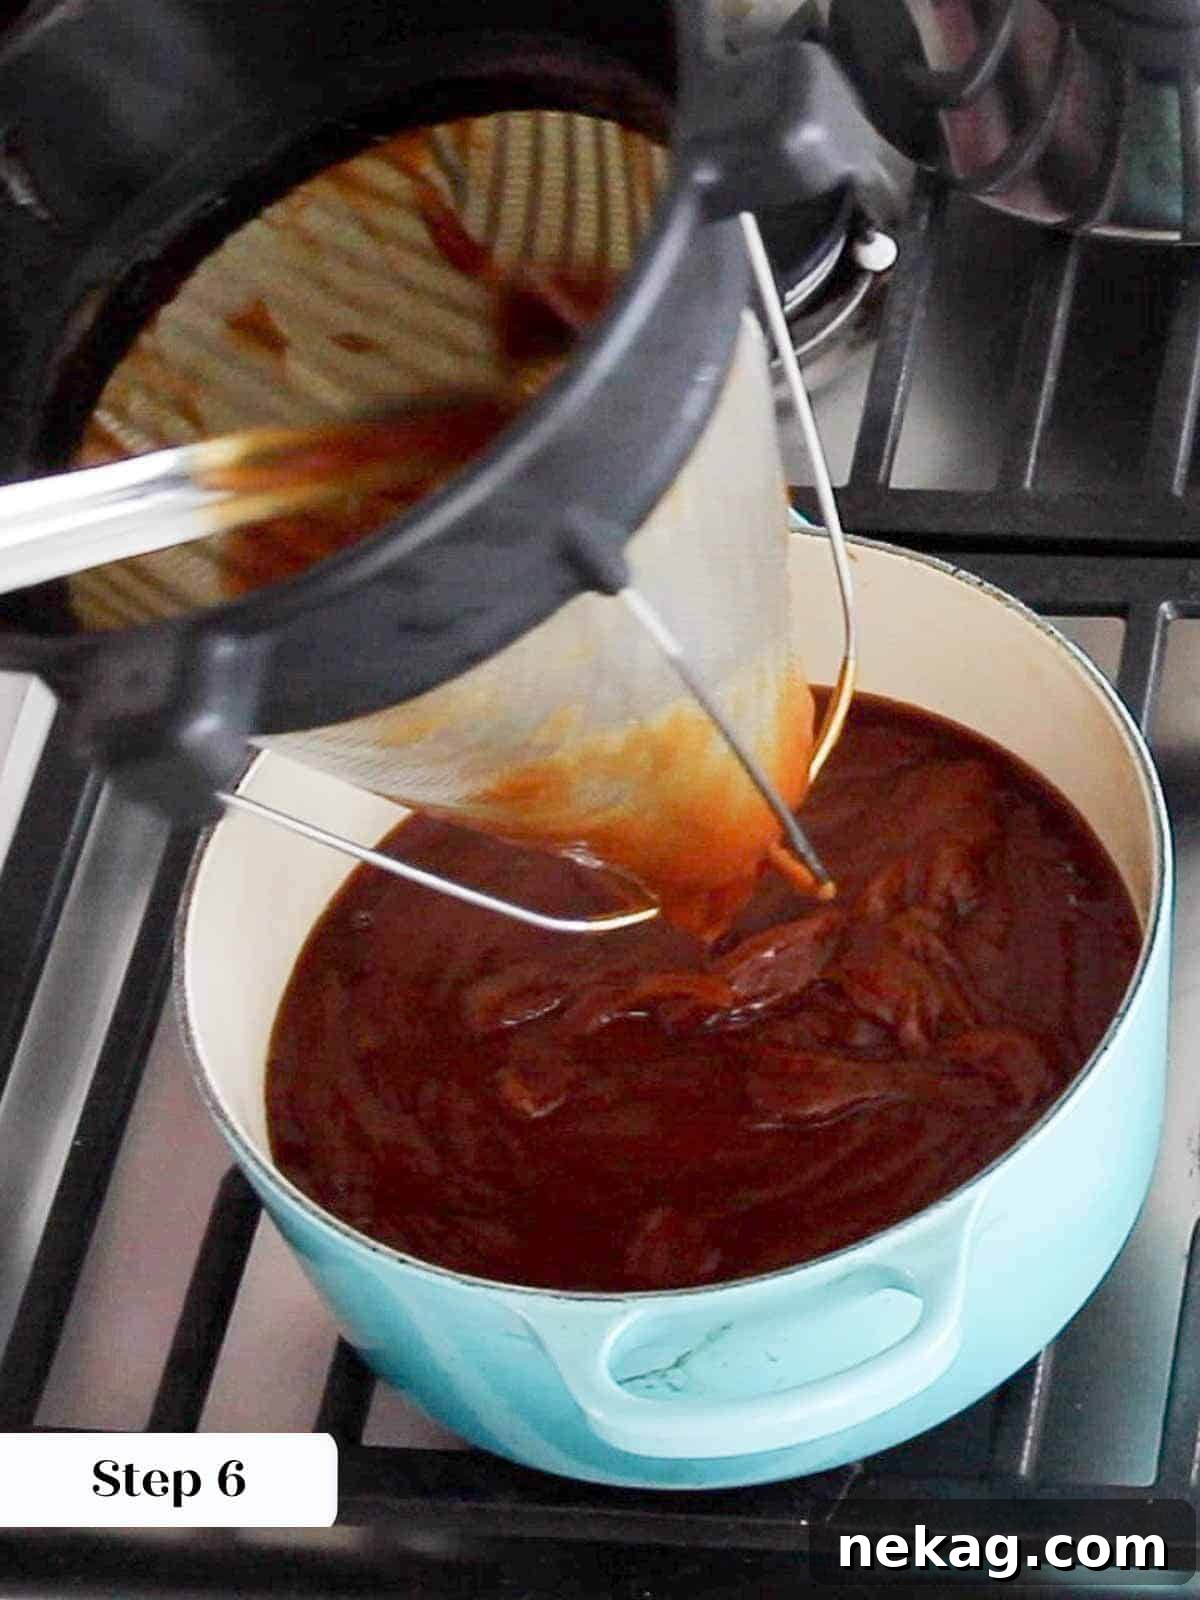
Step 6: Strain for Silky Smoothness. For the ultimate silky-smooth texture, pass the pureed apple mixture through a fine-mesh sieve or a chinoise strainer. Use a sturdy spoon or a 2 oz ladle to help force the puree through the mesh, leaving behind any fibrous bits, tiny skins, or stubborn lumps. This step is crucial for achieving that signature “butter-like” consistency.
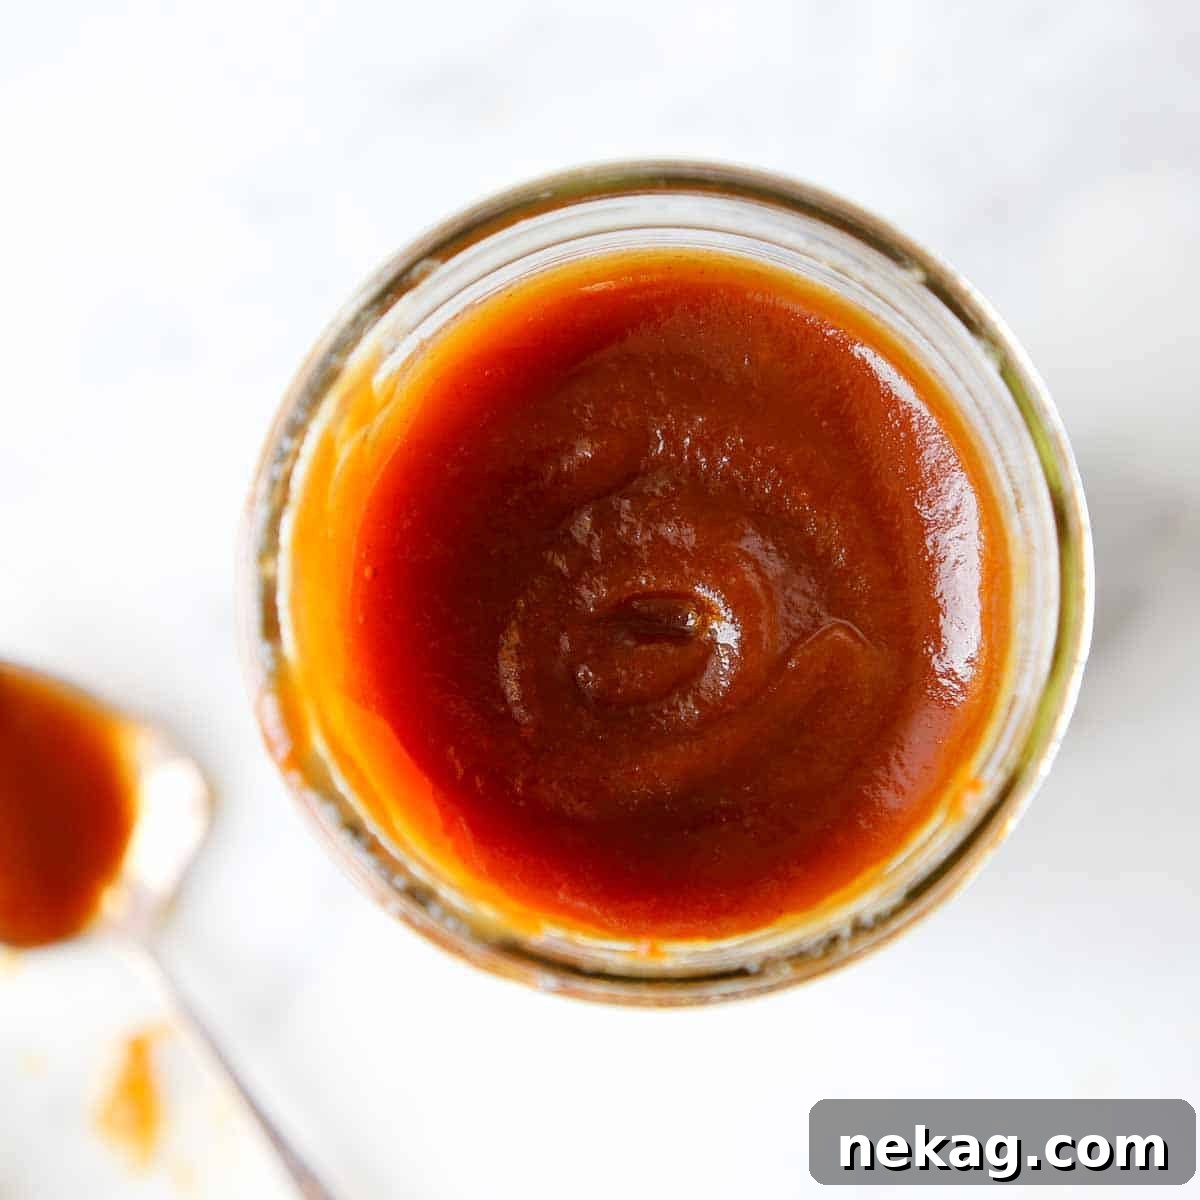
Step 7: Reduce to Perfection. Transfer the strained apple puree back into a clean, high-sided pot (or rinse and reuse the original pot). Cook over low heat, stirring frequently with a heat-resistant silicone spatula, until the apple butter thickens considerably. This reduction process concentrates the flavors and achieves the desired consistency. The apple butter is done when it runs off a spoon in thick, slow globs, much like cold honey, or when it holds a distinct line on the back of a spoon when you draw your finger through it.
As the apple butter thickens during the final reduction, frequent stirring with a silicone spatula is key to prevent scorching and ensure an even consistency.
Step 8: Cool and Store. Once your apple butter has reached its perfect thickness, remove it from the heat and allow it to cool completely to room temperature. Once cool, transfer the apple butter into clean, sterilized jars. If you plan to can it for long-term pantry storage, follow appropriate canning safety precautions (such as a water bath canning method). Otherwise, store it in the refrigerator. Enjoy your homemade masterpiece!
How to Tell When Apple Butter is Perfectly Done
Knowing exactly when your apple butter has achieved its ideal consistency is key to a perfect batch. Here’s how professional chefs determine doneness:
- The “Cold Honey” Test: Dip a clean spoon into the hot apple butter. As you lift it, the apple butter should run off the spoon in thick, slow-moving globs, rather than flowing like a thin liquid. It should resemble the way cold honey drips.
- The “Line Test”: Scoop a small amount of apple butter onto a chilled plate. Let it cool for a minute. Then, draw a line through the center of the dollop with your finger or a spoon. If the line holds and the apple butter doesn’t immediately flow back together, it’s ready. If it merges, continue cooking and re-test.
- Visual Clues: Towards the end of the cooking process, the apple butter will visibly thicken, often bubbling more slowly and creating larger, thicker bubbles. It will also darken in color and become more translucent.
When in doubt, always remove a spoonful, cool it quickly, and test its consistency. It’s better to undercook slightly and continue reducing than to overcook and risk scorching.
Chef Lindsey’s Expert Recipe Tip
Making the best apple butter is indeed a labor of love that requires patience and might dirty a few dishes, but the unparalleled flavor and silky texture are absolutely worth every effort. This recipe is wonderfully scalable, meaning you can easily double or triple the ingredients to create a large batch. Consider making an extra-large quantity to enjoy throughout the year or to share as thoughtful gifts. When scaling up, especially with the caramelization step, always choose a pot large enough to accommodate the increased volume safely, or work in smaller batches for the initial caramel and then combine them before adding the apples. Safety first when dealing with hot caramel!
Inspiring Ways to Enjoy Your Apple Butter
Your freshly made, caramelized apple butter is a versatile culinary gem, ready to elevate countless dishes. Beyond the obvious, here are some inspiring ideas to savor its rich flavor:
- As a Luxurious Spread: The most classic way to enjoy apple butter! Spread it generously on your favorite breakfast items. It’s phenomenal on quick breads like moist pumpkin bread, comforting old-fashioned banana bread, or light healthy pumpkin muffins. Elevate yeasted breads such as fluffy pumpkin spice rolls or tender easy dinner rolls. It also pairs beautifully with scones, like these fragrant spiced apple scones or sweet cinnamon scones. For a truly decadent breakfast, mix a spoonful with maple syrup and drizzle over your sourdough waffles or pancakes!
- Bake with Apple Butter: Substitute apple butter for applesauce in any recipe at a 1:1 ratio to add a deeper, richer, and more spiced flavor. It’s perfect for baking unique treats like a distinct apple butter pie, filling cupcakes for a surprise burst of flavor, or creating a moist and aromatic apple spice cake. It also works wonderfully in cookies, bars, and muffins.
- An Unexpected Addition to Party Platters: Surprise your guests by including apple butter on your next gathering. Serve it alongside sharp cheeses on a cheese board, incorporate it into an autumn butter board, or offer it as a sweet counterpoint on a charcuterie tray. Its rich flavor and smooth texture make it an intriguing and sophisticated condiment.
- Easy Topping for Savory Dishes: Don’t limit apple butter to sweet applications! Its sweet-savory profile makes it an excellent accompaniment to various savory meals. Spoon it over perfectly seared pork chops or serve it alongside this flavorful rosemary chicken recipe for a balanced and delicious dinner. It also adds a fantastic dimension to gourmet sandwiches, especially those with roasted turkey or ham.
- Swirled into Desserts: Elevate your favorite desserts with a swirl of homemade apple butter. Try swirling it into a creamy cheesecake before baking for ribbons of caramelized apple flavor, or incorporate it into a rich Swiss meringue buttercream for an autumnal frosting that will truly impress.
- A Heartfelt Homemade Gift: Much like homemade cranberry chutney, luscious peach preserves, or your custom pumpkin pie spice blend, a jar of homemade apple butter makes an incredibly thoughtful and cherished gift for home cooks. Package it beautifully in a decorative jar with a handmade label, and it transforms into the perfect hostess gift, Christmas present, or a delightful gesture for any occasion.
Apple Butter Recipe FAQs
Once your apple butter has cooled completely to room temperature, transfer it into clean, airtight jars. Store these jars in the refrigerator, where the apple butter will maintain its quality for up to a year, provided it remains uncontaminated. For even longer storage, apple butter freezes beautifully. Simply portion it into freezer-safe containers or bags, leaving a little headspace, and it will keep for several months. While freezing is an option, its excellent refrigerator shelf life often makes it unnecessary.
No, apple butter and applesauce are distinct, though both are made from cooked apples. Applesauce is generally a simpler preparation, often chunky, and can be unsweetened or lightly sweetened, serving primarily as a side dish or baking ingredient. Apple butter, however, is a much more concentrated product. It’s always sweetened and generously spiced, cooked down to a thick, jam-like consistency, and meticulously pureed until it achieves an incredibly silky-smooth texture – hence the “butter” in its name. Professionally, true apple butter should never be chunky and is always made from peeled apples to ensure that signature velvety mouthfeel.
Absolutely! This homemade apple butter recipe is perfectly suited for canning, allowing you to preserve its deliciousness for extended periods. Once your apple butter is cooked to the desired thickness, fill hot, sterilized canning jars, leaving appropriate headspace. Top with new, warm lids and screw on the bands finger-tight. Process the jars in a boiling water bath canner according to established canning guidelines for your altitude and jar size (typically 10-15 minutes for half-pint or pint jars). When properly sealed and cooled, canned apple butter can last for well over a year in a cool, dark pantry.
Scaling up this recipe is entirely possible, and highly recommended if you wish to enjoy apple butter all year or share it widely. In professional kitchens, batches yielding 8 quarts (2 gallons) from 32 pounds of apples are common. However, when increasing the quantity, it’s crucial to be mindful of the caramelization step, which involves very hot sugar. Always choose a very large, high-sided pot to prevent boil-overs and allow for safe handling. If your pot isn’t large enough for the total sugar, consider making several smaller batches of caramel, deglazing each with a portion of the cider, and then combining them before adding the apples to continue cooking in a single large vessel. Safety and careful attention are paramount with larger quantities of hot caramel.
The short answer is: use a variety! While you can technically use any type of apple, the most flavorful and complex apple butter comes from a blend of several different varieties. Aim for a minimum of 5 varieties in any batch, combining both tart and sweet apples. Tart apples (like Granny Smith, Cortland, Braeburn) provide acidity and brightness, while sweet apples (such as Gala, Fuji, Golden Delicious, Honeycrisp, Jonagold, Ginger Gold, Cripps Pink) contribute natural sugars and depth. This diverse mix creates a beautifully balanced flavor profile that single-variety apple butter simply can’t achieve.
More Delicious Apple Recipes You’ll Love
If you’re an apple enthusiast, you’re in for a treat! After mastering this exquisite apple butter, explore these other chef-tested apple recipes that celebrate the versatility of this beloved fruit. From comforting compotes to classic desserts, there’s something here for every craving.
Homemade Gift Ideas
Easy Apple Compote
Apple Recipes
Applesauce Recipe – Just 2 Ingredients!
Crisps & Crumble Recipes
Easy Apple Cobbler Recipe
Apple Recipes
Apple Cinnamon Rolls
If you’ve tried this incredible homemade apple butter recipe and loved it, please consider leaving a 🌟 star rating and sharing your experience in the comments below. Your feedback truly brightens my day and helps other home cooks discover this delicious recipe!
The Ultimate Apple Butter Recipe
Comment
Print Recipe
Ingredients
- 4 lbs apples cored, cubed, peeled (use at least 5 varieties for best flavor)
- 2 cups unfiltered apple cider
- 1 ½ cups granulated sugar
- 1 cinnamon stick
- ½ teaspoon ground cinnamon
- ½ teaspoon ground ginger
- ¼ teaspoon ground cloves
Instructions
-
In a large, high-sided pot, add all the sugar and cook over medium-high heat to make a dry caramel. You may stir the dry caramel to prevent clumping. As soon as all the sugar melts and begins to color, stop stirring.
-
When the caramel turns a dark amber color and just begins to smoke, turn off the heat and carefully add the apple cider, apples, and all the spices. Don’t worry if the caramel seizes; it will melt as the mixture cooks.
-
Return the pot to medium heat and simmer for approximately 1 hour, or until the apples are very tender. Remove the cinnamon stick.
-
Using an immersion blender, blend the apple mixture directly in the pot until completely smooth. Alternatively, carefully transfer the hot mixture in batches to a standard blender and puree until velvety. Then, pass the apple puree through a fine-mesh sieve for ultimate smoothness.
-
Return the strained puree to a clean, high-sided pot. Reduce over low heat, stirring frequently with a silicone spatula, until the apple butter thickens to a consistency resembling cold honey (it will run off a spoon in thick globs).
-
Allow the apple butter to cool completely to room temperature before transferring it into clean jars. Store in the refrigerator or can using appropriate safety precautions for long-term storage.
Video
Notes
You will typically need about 5 pounds of whole apples to yield the 4 pounds of cored and cubed apples required for this recipe, accounting for waste and a little snacking!
Flavor Tip: For the most complex and robust flavor, use as many different varieties of apples as you can find – a minimum of 5 is recommended!
Technique for Best Results: For the ultimate smooth and thick apple butter, it is crucial to puree and strain the mixture while it’s hot, and then continue cooking until it reaches the desired thick consistency.
Storage: Properly cooled apple butter can be stored in an airtight container in the refrigerator for up to a year. For longer preservation, it can be safely canned using a water bath method or frozen.
Nutrition Information (per serving)
Carbohydrates: 9g |
Protein: 1g |
Fat: 1g |
Saturated Fat: 1g |
Polyunsaturated Fat: 1g |
Monounsaturated Fat: 1g |
Sodium: 1mg |
Potassium: 38mg |
Fiber: 1g |
Sugar: 8g |
Vitamin A: 16IU |
Vitamin C: 1mg |
Calcium: 3mg |
Iron: 1mg
Before You Go!
We hope you’ve thoroughly enjoyed this professional chef-tested recipe for homemade apple butter. It’s a true celebration of fall flavors and a testament to how simple ingredients, combined with expert techniques, can yield extraordinary results. Be sure to explore our other delightful, chef-developed fall recipes, including our incredibly easy two-ingredient applesauce recipe. Happy cooking!