
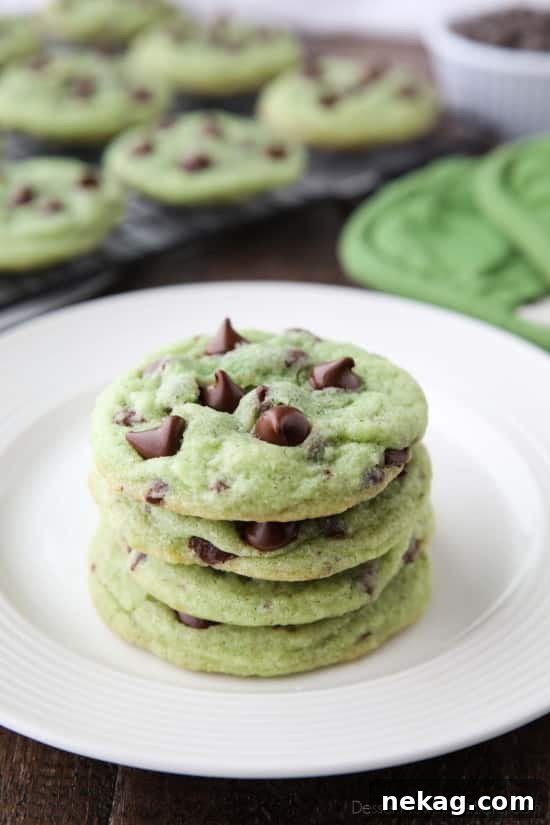
Mint Chocolate Chip Cookies are a delightful treat, renowned for their irresistibly soft and chewy texture, rich chocolate flavor, and the perfect refreshing hint of mint. These vibrant green cookies are not only a fantastic addition to your Christmas baking repertoire but also an ideal, festive snack for St. Patrick’s Day celebrations, bringing a touch of color and cheer to any occasion.
The combination of mint and chocolate is a timeless classic, especially cherished during the holiday seasons. As festive times approach, there’s no better way to spread joy than with a batch of these flavorful cookies. Their unique green hue makes them an absolute showstopper, effortlessly fitting into both the vibrant spirit of Christmas and the playful charm of St. Patrick’s Day. Beyond their striking appearance, these cookies promise a comforting balance of sweetness and cool mint, making every bite a memorable experience.
Understanding Mint: Spearmint vs. Peppermint and Beyond
When diving into the world of mint-flavored desserts, it’s crucial to understand the two primary types of mint extracts commonly used: spearmint and peppermint. While both offer that signature cool, refreshing taste, they differ significantly in intensity and flavor profile, which can greatly impact your final cookie experience.
The Nuances of Mint Extracts
Spearmint is generally characterized by its milder, sweeter, and slightly herbaceous flavor. It’s often described as being gentler on the palate, making it a favorite for those who prefer a more subtle minty note in their baked goods. Spearmint extract is sometimes labeled as “Crème de Menthe extract” in stores, which can be a useful identifier.
Peppermint, on the other hand, boasts a much higher menthol content. This translates to a stronger, more pungent, and intensely cooling sensation. It’s the flavor most associated with candy canes, mints, and certain breath fresheners. While beloved by many, its potent flavor can sometimes be overwhelming in desserts if not used sparingly.
Often, “mint extract” sold in stores is a blend of spearmint and peppermint, offering a balanced flavor that is typically less intense than pure peppermint extract. This blended extract is a safe bet for many recipes, providing a pleasant mint flavor without overpowering other ingredients.
Choosing Your Mint Flavor
Personal preference plays a significant role in selecting the right mint for your cookies. I typically lean towards a lighter mint flavor, utilizing a standard mint extract rather than pure peppermint. This ensures that the cookies have a refreshing zest without resembling the taste of toothpaste, a common concern with overly strong mint flavors. However, if you are a true peppermint enthusiast, feel free to adjust the amount or type of extract in the recipe to suit your taste. A good starting point is to use the recommended amount and then add more incrementally if you desire a bolder mint kick. Always remember that a little goes a long way with strong extracts!
Crafting the Perfect Mint Chocolate Chip Cookies
These Mint Chocolate Chip Cookies are designed to be an unforgettable indulgence. The recipe infuses the cookie dough with a delightful mint extract, creating a wonderfully aromatic base. We then enhance their festive appeal with a touch of green food coloring, making them visually appealing and fun for any celebration. Finally, generous amounts of semi-sweet chocolate chips are folded in, adding bursts of rich, decadent chocolate that perfectly complements the cool mint. The result is a cookie that is not just delicious but also exceptionally soft, wonderfully chewy, and truly irresistible!
The Secret to Super Soft and Chewy Cookies
Achieving that coveted soft and chewy texture is all about the right balance of ingredients and precise baking. Here are some key elements in this recipe that contribute to their amazing texture:
- Room Temperature Butter: Creaming softened butter with sugar creates tiny air pockets, which contributes to a lighter, softer cookie.
- Cornstarch: A secret weapon in many cookie recipes, cornstarch helps to tenderize the dough, leading to a much softer, chewier final product that resists drying out.
- Proper Flour Measurement: Using the “stir, spoon, and level” method for flour ensures you don’t add too much, which can result in dense, dry cookies.
- Careful Baking: Baking just until the edges are lightly golden and the centers are still slightly soft will prevent over-baking, keeping the cookies moist and chewy. They will continue to set as they cool on the baking sheet.
If you’re a devoted fan of the mint chocolate pairing, you’ll be thrilled to explore other fantastic recipes like my Homemade Mint Oreos, rich Mint Brownies, the classic Grasshopper Pie Recipe, or my other beloved Chocolate Mint Chip Cookies. Each offers a unique way to enjoy this delectable flavor combination!

Mint Chocolate Chip Cookies
Amber Brady
10 minutes
8 minutes
18 minutes
Pin
Rate
3
dozen cookies
Ingredients
-
1 cup
(226 g)
unsalted butter, room temperature -
1 ¼ cups
(250 g)
granulated sugar -
2
large/XL eggs -
1 tsp
mint extract, (or more to taste) -
8-10
drops green food coloring, optional -
2 ¾ cups
(330 g)
all-purpose flour, (stir, spoon, and level) -
1 tsp
baking soda -
1 tsp
salt -
1 Tbsp
cornstarch -
12 oz
(340 g)
bag semi-sweet chocolate chips, (about 2 cups) -
¼-½ cup
(56-112 g)
mini chocolate chips, optional
Instructions
-
Prepare for Baking: Preheat your oven to 350 degrees Fahrenheit (175°C). Line several baking sheets with parchment paper or silicone baking mats. This step is crucial for preventing sticking and ensuring even baking, though a light coating of cooking spray can also be used as an alternative.
-
Cream Wet Ingredients: In the bowl of a stand mixer fitted with the paddle attachment, cream together the softened unsalted butter and granulated sugar on medium speed until the mixture is light and fluffy (about 2-3 minutes). This incorporates air for a tender cookie. Next, beat in the eggs one at a time, ensuring each is fully incorporated before adding the next. Stir in the mint extract and green food coloring until uniformly mixed. Remember to scrape down the sides of the bowl as needed to ensure all ingredients are well combined.
-
Combine Dry Ingredients: In a separate medium bowl, whisk together the all-purpose flour, baking soda, salt, and cornstarch. The cornstarch is key to giving these cookies their signature soft and chewy texture. Ensure these dry ingredients are thoroughly combined to distribute the leavening evenly.
-
Mix and Fold in Chips: Gradually add the dry ingredients to the wet ingredients in the stand mixer, mixing on low speed until just combined. Be careful not to overmix, as this can lead to tough cookies. Once the dough comes together, gently fold in the semi-sweet chocolate chips. For an extra touch, I recommend reserving about 1/2 cup of chocolate chips to press into the tops of the cookie dough balls before baking, enhancing their visual appeal. Using a cookie scoop (a #40 scoop works perfectly for consistent sizing), drop rounded balls of dough onto the prepared baking sheets. If desired, lightly press additional chocolate chips onto the top of each cookie.
-
Bake and Cool: Bake the cookies in the preheated oven for 8-10 minutes. The cookies are ready when the edges are set and just barely starting to brown, but the centers still look slightly soft. This ensures a chewy interior. Do not overbake! Remove the baking sheets from the oven and allow the cookies to rest on the tray for 1-2 minutes before carefully transferring them to a wire cooling rack to cool completely. This resting period allows the cookies to firm up without becoming brittle.
Notes
Storage: Store baked cookies in an airtight container at room temperature for up to 3-4 days to maintain freshness. For longer storage, cookies can be frozen for up to 3 months.
Make-Ahead Dough: The cookie dough can be prepared ahead of time and refrigerated for up to 2 days. If refrigerating, let the dough sit at room temperature for about 15-20 minutes before scooping and baking.
Freezing Dough: You can also scoop balls of dough and freeze them on a baking sheet until solid, then transfer them to a freezer-safe bag for up to 3 months. Bake from frozen, adding an extra 1-2 minutes to the baking time.
Food Coloring Alternatives: If you prefer to avoid artificial food coloring, these cookies are still absolutely delicious without the green hue. The flavor will remain just as fantastic!
Disclaimer: Nutritional values were calculated using a third-party tool and are provided as an estimation only.
While precise nutritional information can vary based on exact ingredients and brands, these cookies are a delightful treat to enjoy in moderation. A typical serving (e.g., one cookie) would contain carbohydrates, fats, and sugars. For specific dietary needs, it’s recommended to calculate based on the ingredients you use.
Sharing this recipe with a link is both encouraged and appreciated. Copying/pasting and/or screenshots of full recipes to any social media is strictly prohibited. Content and photographs are copyright protected.
Did you make this?
Don’t forget to leave a rating below and make sure to follow on Pinterest and Instagram for more delicious recipes!