
The Ultimate Guide to Baking a Perfect Peach Pie (Fresh, Frozen, or Canned!)
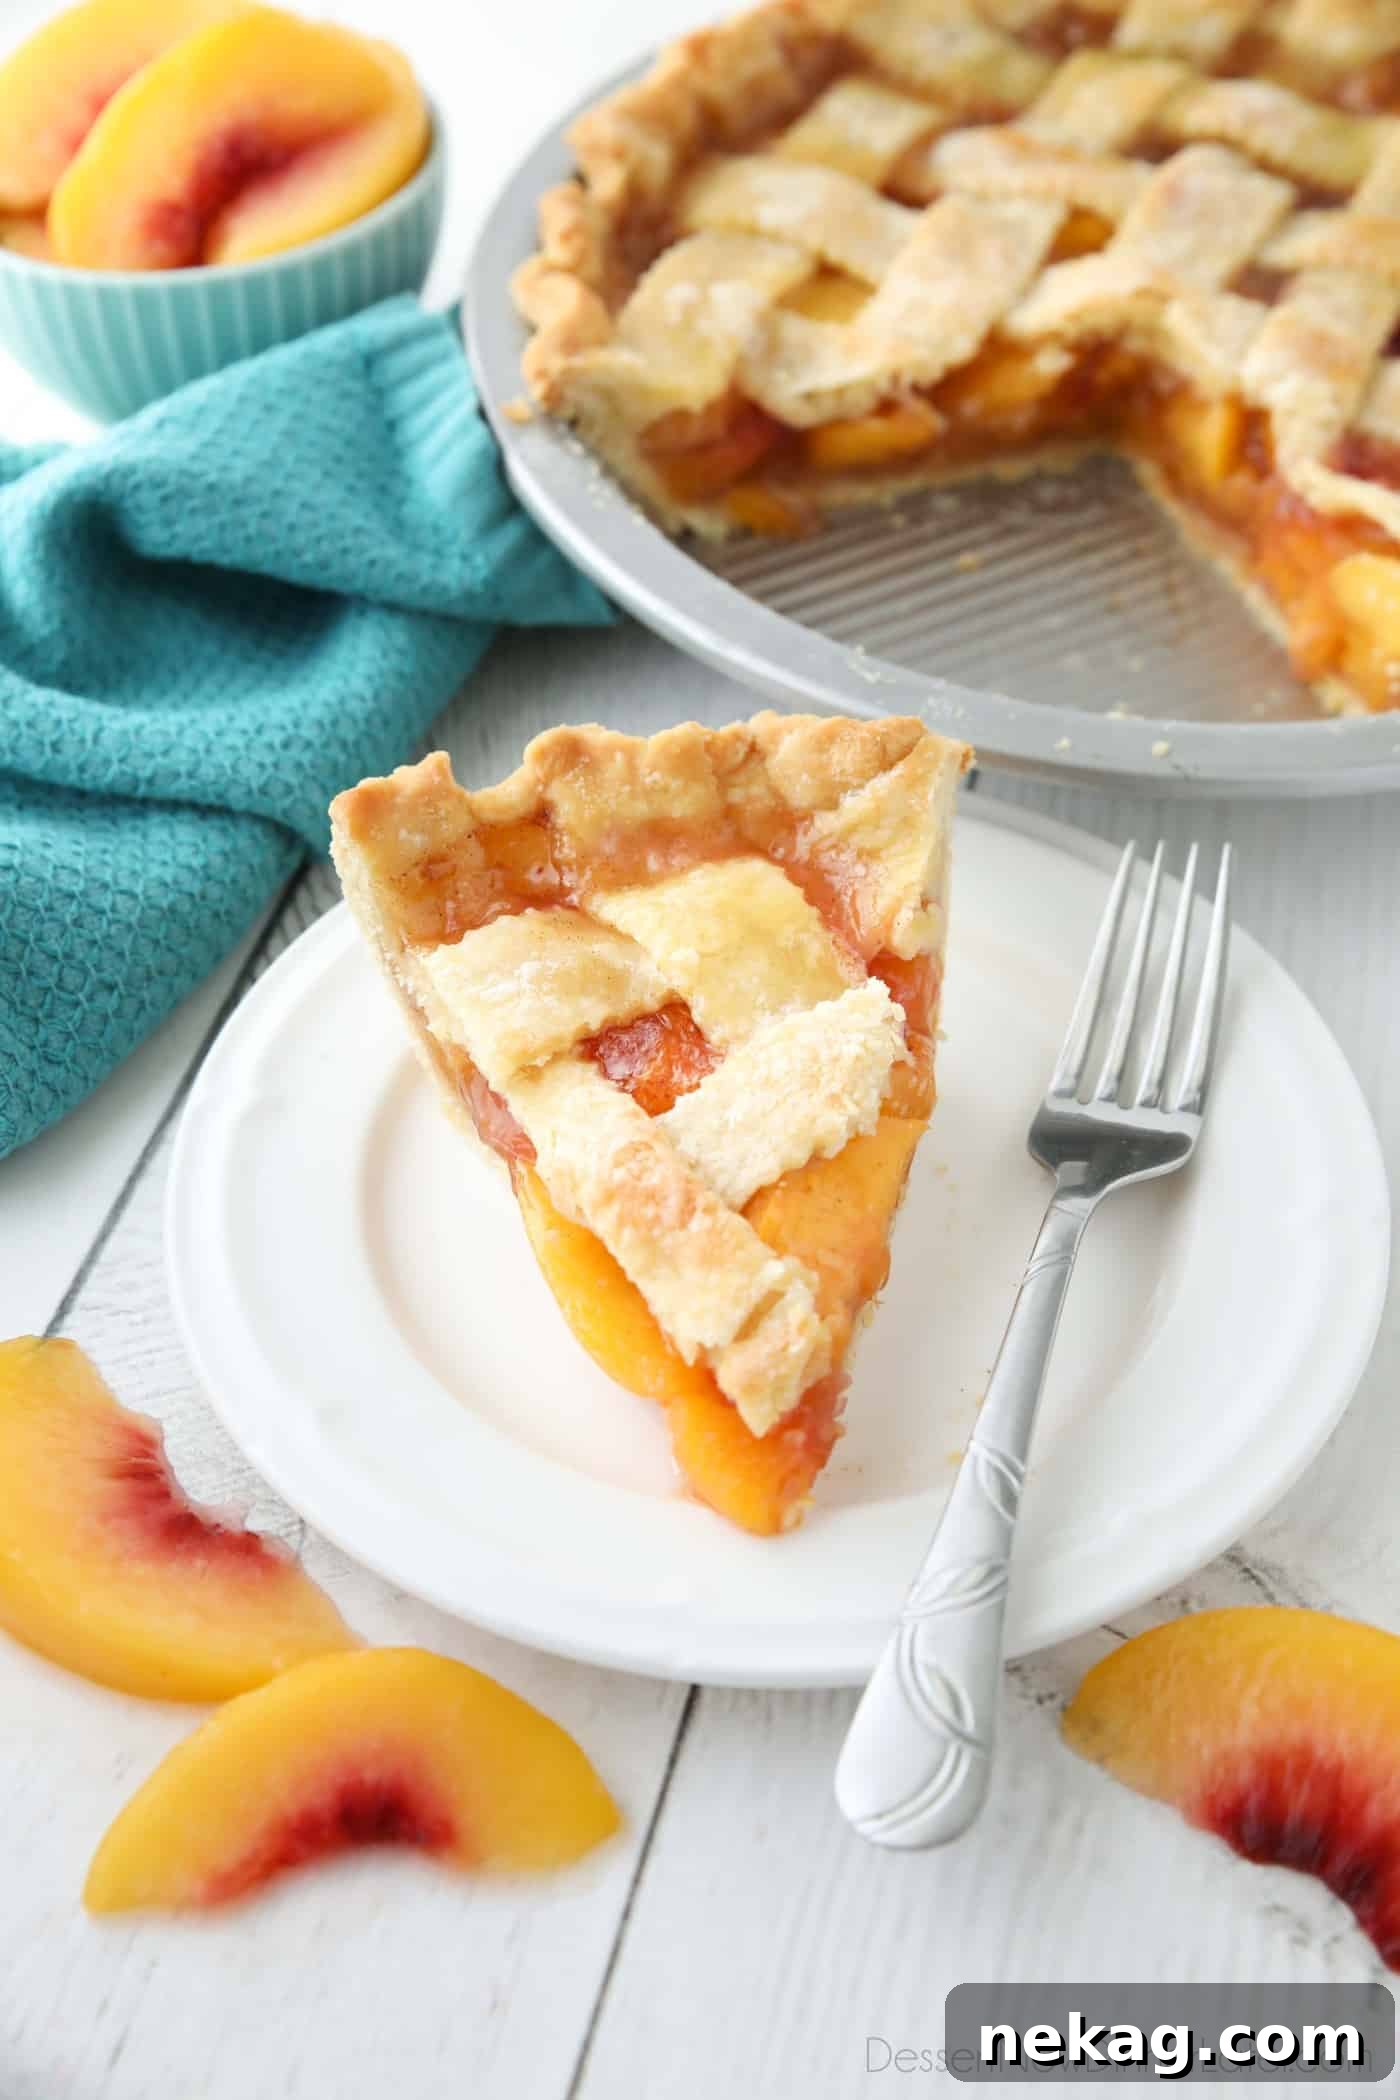
Few desserts evoke the warmth and comfort of home quite like a classic peach pie. Bursting with the sweet, juicy flavor of peaches nestled in a flaky, golden crust, it’s a timeless treat perfect for any occasion. Whether you’re celebrating summer’s bounty with fresh fruit or craving a taste of sunshine in the colder months, this comprehensive guide will equip you with everything you need to bake the ultimate peach pie. Our versatile recipe works beautifully with fresh, frozen, or even canned peaches, ensuring you can enjoy this delightful dessert year-round. Plus, we’ll cover various crust options, from a traditional double crust and elegant lattice top to a delightful crumb topping, catering to every baker’s preference. Get ready to impress with a pie that’s consistently delicious and never runny!
Baking Peach Pie Year-Round: Fresh, Frozen, and Canned Options
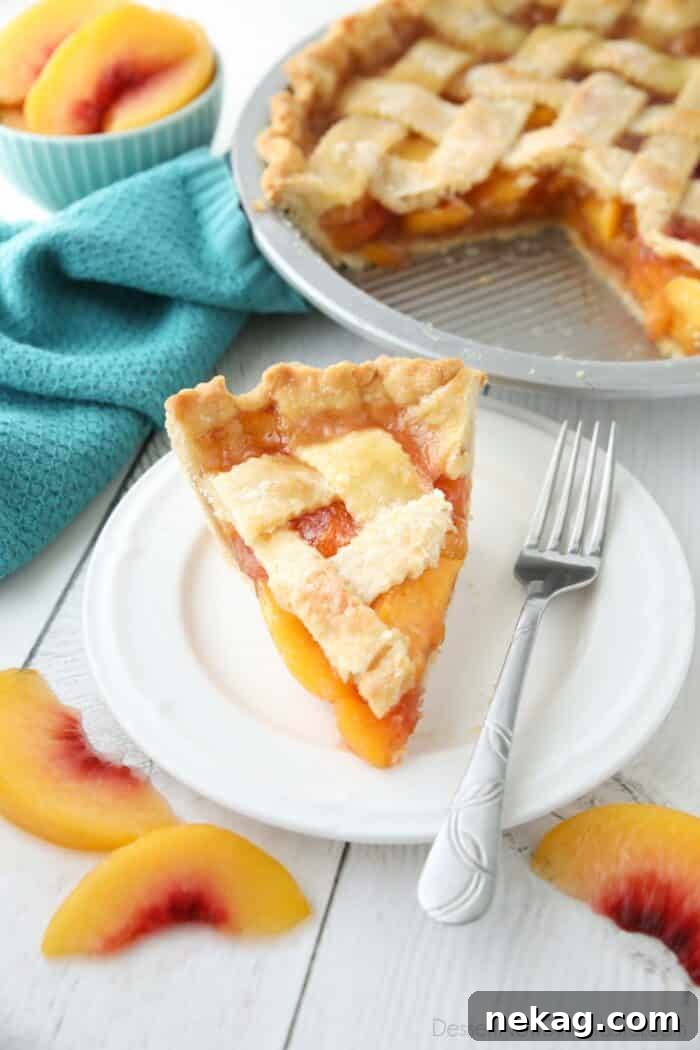
While summer’s peak peach season is undeniably magical for pie making, you don’t have to limit your peach pie cravings to just a few months of the year. This adaptable recipe makes it incredibly easy to enjoy a homemade peach pie no matter the season, leveraging the convenience of frozen or even canned peaches. This flexibility makes peach pie a fantastic option for holiday gatherings, potlucks, or simply a comforting weeknight dessert.
One of the greatest advantages of using frozen peaches is the significant time savings in prep work. There’s no need for peeling, pitting, or slicing – the hard work is already done for you! When using frozen peaches for this recipe, it’s crucial to thaw them completely before baking. Unlike smaller berries, larger peach slices require proper thawing to ensure the filling cooks thoroughly and thickens correctly. Attempting to bake with unthawed frozen peaches can lead to a watery, undercooked filling and a longer, uneven baking time, so plan ahead for this important step.
Of course, if you have access to luscious, ripe fresh peaches, they are an absolutely divine choice. The natural sweetness and vibrant aroma of fresh peaches elevate the pie to another level. We’ll cover how to prepare fresh peaches later in this guide, including a simple method for easy peeling. Regardless of your choice of fruit, this recipe is designed to deliver a perfectly set, flavorful peach pie every time.
The Foundation of Flavor: Mastering the Pie Crust
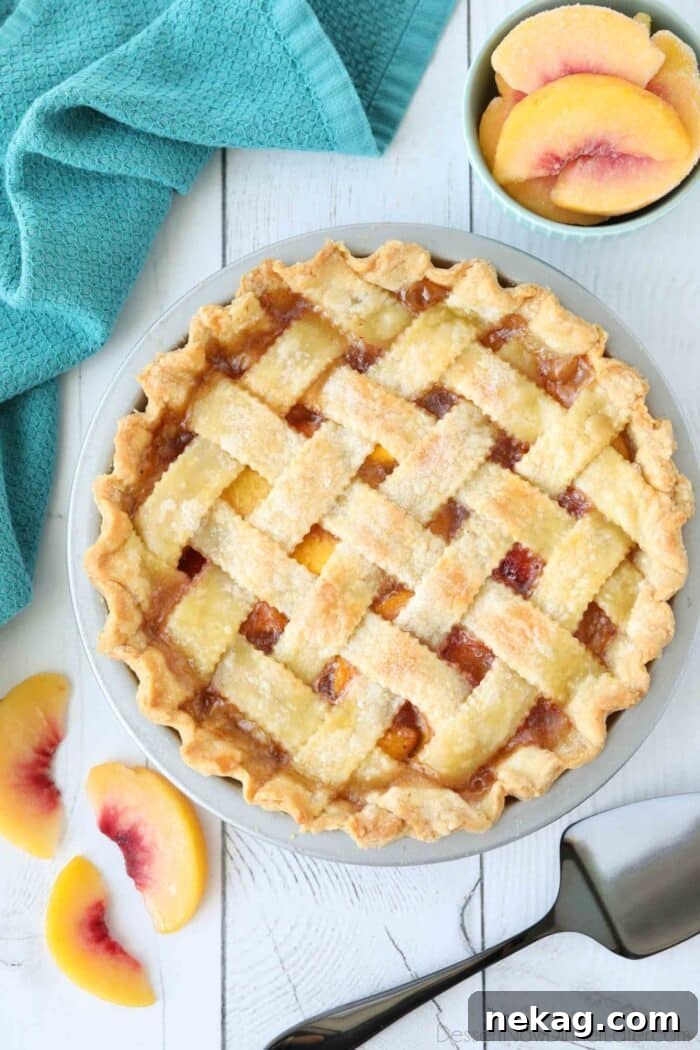
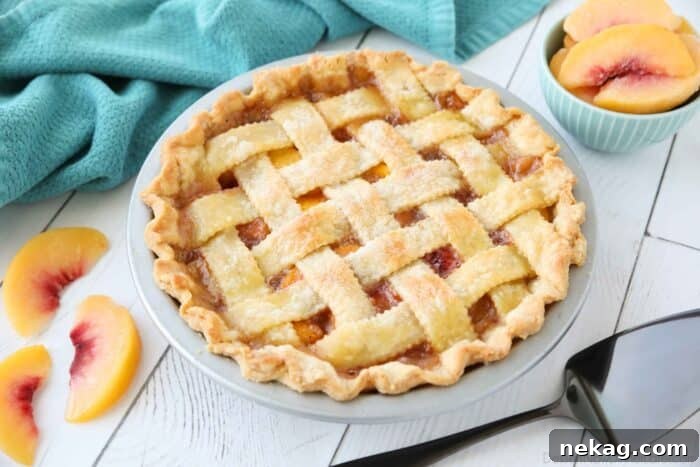
Every truly exceptional pie begins with an equally exceptional crust. It’s the golden embrace that holds the luscious filling, providing a crucial textural contrast and contributing immensely to the overall flavor profile. In the images throughout this article, you’ll see examples of a stunning lattice pie crust, crafted using our favorite recipe for a perfectly flaky and resilient pie crust. This particular homemade crust is formulated to maintain its structure and flakiness even at room temperature, which is especially beneficial when creating intricate designs like a lattice top. Its robust nature also allows it to withstand longer baking times, a common requirement when working with fruits that release a lot of moisture, such as frozen peaches.
Homemade vs. Store-Bought Pie Crusts
While store-bought pie crusts offer undeniable convenience, opting for a homemade crust provides several distinct advantages. Homemade crusts often have a superior flavor and texture, boasting a rich, buttery depth and an irresistible flakiness that pre-made versions struggle to replicate. Furthermore, homemade crusts are generally more forgiving during longer baking periods. They tend to brown more evenly and slowly, reducing the risk of a prematurely darkened crust before the filling has had adequate time to thicken and set. This is a critical factor, especially when baking fruit pies where the filling needs to reach a boiling point to activate the thickeners.
Conversely, store-bought pie crusts can sometimes brown very quickly in the oven. This can be misleading, causing bakers to pull the pie out too early, thinking it’s done when in reality, the fruit filling is still runny. If you choose to use a store-bought crust, be extra vigilant and consider covering the edges with foil earlier in the baking process to prevent over-browning while the filling catches up. Investing a little extra time in a homemade crust truly pays off in the final result, delivering a pie that’s a cut above the rest.
Troubleshooting Runny Pie Filling: Secrets to a Perfectly Set Pie
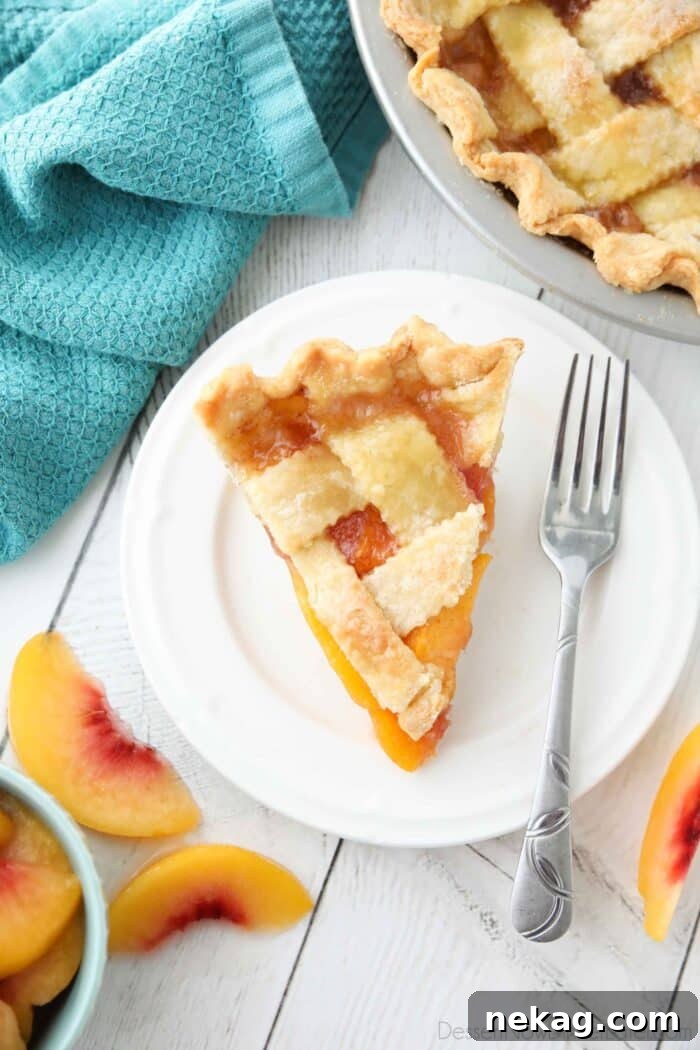
One of the most common frustrations in pie baking is cutting into a slice only to find a watery, runny filling. The good news is that preventing a runny fruit pie is simpler than you might think, and it primarily comes down to understanding two key factors: adequate thickening agent and proper baking time.
The initial browning of the top crust is often seen as a sign of a finished pie, but for a fruit pie, this is rarely the case. The true indicator of a perfectly set filling is when it reaches a full, rolling boil in the center of the pie. This high temperature is essential to properly activate the chosen thickening agent, whether it’s cornstarch, flour, or tapioca. For this peach pie recipe, we prefer cornstarch due to its neutral flavor and clear finish, which allows the vibrant color of the peaches to shine through. As the filling bubbles, the starch molecules absorb moisture and swell, creating that luscious, thick consistency we all desire.
Practical Solutions for a Perfect Set
If you notice your pie crust browning rapidly before the filling shows any signs of bubbling in the center, don’t panic! The solution is straightforward: simply cover the entire top of the pie with aluminum foil, or create a foil ring to shield just the edges, and continue baking. This technique allows the filling to continue cooking and thickening without the crust becoming over-baked or burnt. It’s also important to ensure the bubbling occurs in the *center* of the pie, not just around the edges. The edges heat up and cook faster, so bubbling there doesn’t guarantee the middle is done.
Creating slits in the top pie crust (if you’re not using a lattice design) serves a dual purpose: it allows steam to escape, preventing a soggy crust, and it provides a window to visually confirm the bubbling of the filling. Think of pie filling much like making jam or a thick sauce – it needs to reach a sustained boil and reduce slightly to achieve the desired consistency. Once you observe that hearty bubbling in the pie’s core, and the crust is beautifully golden, your pie is finally done.
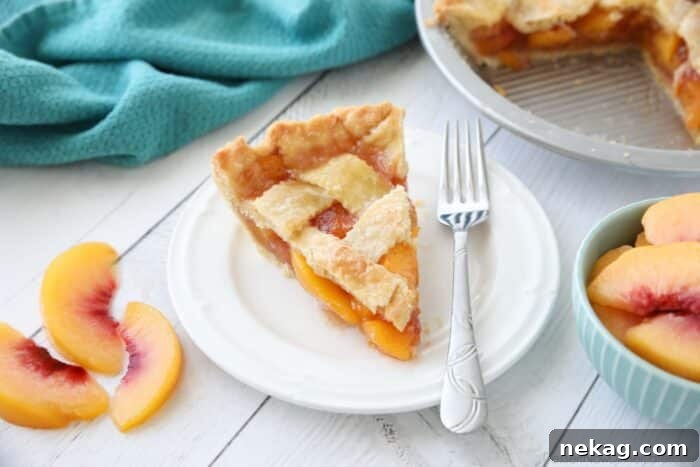
Another crucial tip for a perfectly set pie is patience during the cooling process. The filling will continue to thicken significantly as the pie cools. Resist the urge to slice into your masterpiece too soon! Allowing the pie to cool completely, ideally for several hours at room temperature, ensures the filling has ample time to firm up, resulting in clean slices and a delightful texture.
Beyond the Double Crust: Delightful Crumb Topping Alternatives
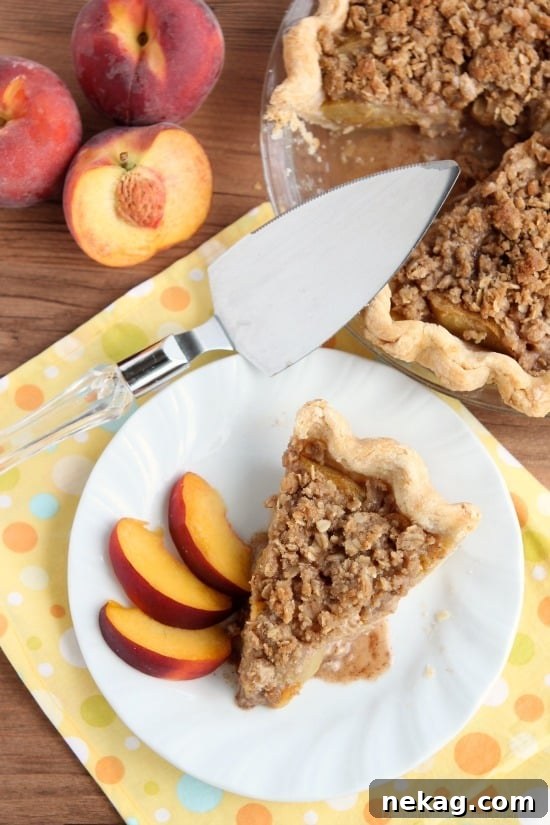
While a classic double crust or an intricate lattice top offers timeless elegance, sometimes a change of texture is in order. For those who adore a contrasting crunch and an extra layer of flavor, a streusel or crumb topping is an absolutely fantastic alternative for fruit pies. Don’t misunderstand – the flakiness of a traditional pie crust is undeniably wonderful, but the satisfying chewiness and sweet, buttery crumbles of a streusel topping are equally, if not more, delicious to many!
This recipe is incredibly versatile, allowing you to choose your preferred topping. While the updated photos proudly display a beautiful lattice crust, this peach pie originally featured a luscious brown sugar and oat crumb topping. This delightful streusel adds a rustic charm and a delightful texture that complements the tender peach filling perfectly. The recipe for this specific oat-based crumb topping is provided in the notes section of the recipe card below.
If oats aren’t your preference, or you’re looking for a different kind of crumbly texture, we also have a fantastic crumble topping recipe without oats that works wonderfully on various fruit pies, including this peach pie. The beauty of baking is in its flexibility and ability to customize to your taste. So, whether you opt for the visual appeal of a double or lattice crust, or the irresistible crunch of a crumb topping, this peach pie filling is designed to be the star, allowing you to personalize your perfect pie experience. The choice is entirely yours!
Essential Peach Pie Ingredients for Success
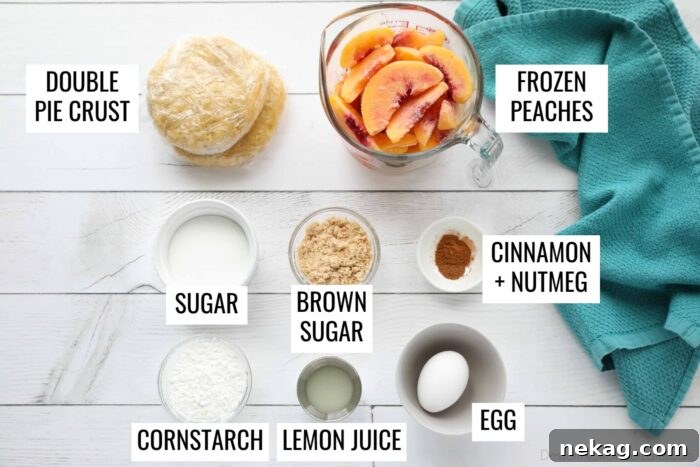
Crafting a truly memorable peach pie requires a careful balance of fresh ingredients that work in harmony to create a symphony of flavors and textures. Here’s a detailed look at what you’ll need and why each component is essential:
- Double Pie Crust: This forms the essential structure and a significant portion of the pie’s flavor and texture. You’ll need enough for both a bottom and a top crust. As discussed, you can substitute the top crust with crumb topping ingredients if preferred. For best results, consider making your own with our recommended recipe, or choose a high-quality store-bought option.
- Frozen Peaches (or Fresh/Canned): The star of the show! We recommend 5 cups (approximately 24-30 oz) of frozen peaches, thawed and drained. If using fresh peaches, ensure they are peeled, cored, and sliced. For canned peaches, drain them thoroughly and pat them dry.
- Granulated Sugar: This provides foundational sweetness and helps maintain the vibrant, natural color of the peaches in the filling. While brown sugar adds depth, a higher proportion of white sugar keeps the filling looking bright and appealing.
- Brown Sugar: Adds a beautiful caramel-like richness and a deeper layer of sweetness that perfectly complements the peaches. Its molasses notes enhance the overall warm flavor profile.
- Ground Cinnamon: A quintessential spice for peach desserts. Cinnamon provides a warm, aromatic note that enhances the natural sweetness of the peaches without overpowering them.
- Ground Nutmeg: Just a hint of nutmeg introduces a subtle earthiness and a delicate, warm spice that rounds out the flavor of the filling. Use sparingly, as a little goes a long way.
- Cornstarch: This is our preferred thickening agent for the pie filling. Cornstarch creates a clear, glossy finish that allows the fruit’s natural beauty to shine through, and it provides a stable, sliceable consistency once baked and cooled.
- Lemon Juice: A splash of fresh lemon juice is crucial. It brightens the fruit flavor, preventing the pie from tasting overly sweet and adding a subtle tang that balances the richness. It also helps preserve the peaches’ color.
- Egg (for Egg Wash): A single large egg, whisked with a tablespoon of water, creates an “egg wash.” This mixture serves two purposes: it helps bind the two crusts together, ensuring a sealed pie, and when brushed over the top crust, it promotes even browning and adds a beautiful golden sheen, enhancing flavor.
Step-by-Step: Crafting Your Perfect Peach Pie with Frozen Peaches
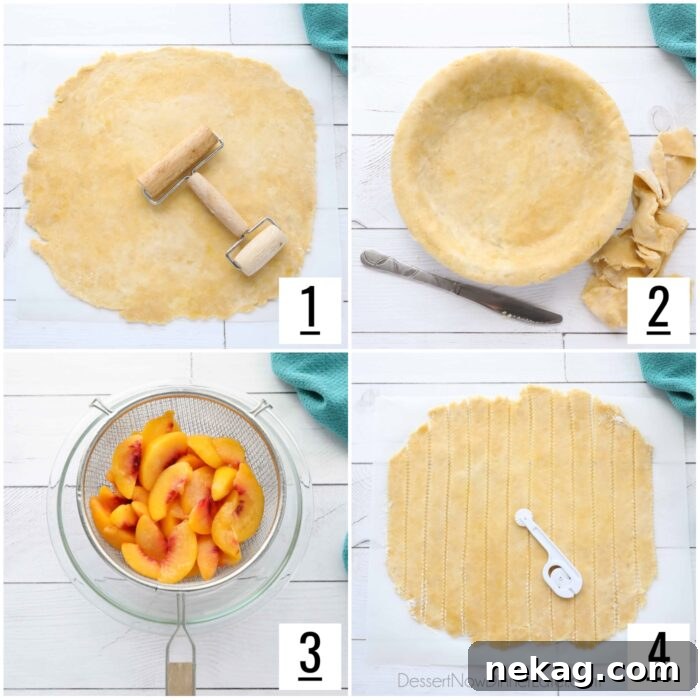
Follow these detailed steps to assemble your peach pie, ensuring a delicious result every time. Remember, careful preparation is the key to a beautiful and perfectly baked pie.
- Prepare Your Pie Crust: Begin by making your pie dough from scratch if you’re going the homemade route, and chill it thoroughly in the refrigerator. This chilling step is vital for a flaky crust. If using store-bought, ensure it’s at the correct temperature for rolling. Preheat your oven to 350 degrees Fahrenheit (175 degrees Celsius).
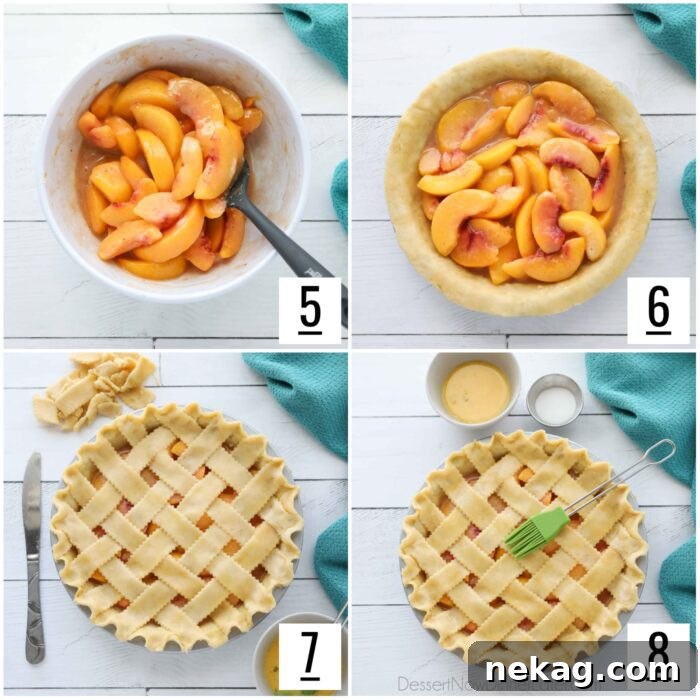
- Roll Out the Bottom Crust: On a lightly floured surface, roll one disc of your chilled pie dough into a large circle, approximately 1/8-inch thick. Carefully transfer the rolled crust into a 9-inch pie dish, gently pressing it into the contours without stretching. Trim any excess crust around the edges, leaving about a 1/2-inch overhang. Flute or crimp the edges as desired, or simply trim neatly if planning to add a top crust. Place the pie dish with the bottom crust back into the fridge to keep it cold while you prepare the filling. This prevents the butter in the crust from melting prematurely.
- Thaw and Drain Peaches: If using frozen peaches, place them in a microwave-safe bowl and thaw them using short 30-second bursts until fully defrosted. Alternatively, thaw them in the refrigerator overnight. Once thawed, transfer the peaches to a colander set over a bowl and allow them to drain thoroughly. This step is crucial to remove excess liquid, which helps prevent a runny pie filling. Discard the drained liquid. If using fresh or canned peaches, prepare them as instructed in their respective sections below.
- Prepare the Top Crust (Optional Lattice): Roll out the second disc of pie dough (for the top crust) to 1/8-inch thick, similar to the bottom crust. If you desire a stunning lattice top, use a pastry wheel or a sharp knife to cut the dough into even strips, typically 1/2-inch to 1-inch wide. Set these strips aside on a parchment-lined baking sheet and chill them slightly for easier handling.
- Mix the Filling: In a large, clean bowl, combine the drained peaches with the granulated sugar, light brown sugar, ground cinnamon, ground nutmeg, cornstarch, and fresh lemon juice. Stir gently but thoroughly until all the peaches are evenly coated with the sugar and spice mixture. It’s important to mix the filling just before assembly to minimize the amount of juice the sugar draws out from the fruit.
- Fill the Pie Crust: Retrieve your chilled pie dish with the bottom crust from the refrigerator. Carefully spoon the peach filling into the prepared pie crust, mounding it slightly in the center. Ensure the filling is evenly distributed.
- Attach the Top Crust: Whisk together one large egg with one tablespoon of water to create an egg wash. Brush a thin layer of this egg wash around the entire rim of the bottom pie crust. If using a solid top crust, carefully place it over the filling, then trim any excess and crimp the edges to seal the pie. If making a lattice crust, carefully weave the chilled strips over the filling, securing them to the bottom crust’s edge with a gentle press. Trim any overhang and crimp the edges for a neat finish.
- Final Touches: Brush the entire top surface of the pie crust (or the lattice strips) with the remaining egg wash. This will give your crust a beautiful golden sheen. For an added touch of sweetness and a hint of sparkle, sprinkle about 1 teaspoon of granulated sugar evenly over the egg-washed crust. This not only enhances the flavor but also aids in achieving that perfect golden-brown color.
Baking and Storage: Ensuring Longevity and Perfect Texture
The baking process is where all your careful preparation comes to fruition. Achieving a perfectly baked peach pie requires attention to detail, especially regarding crust browning and filling thickness.
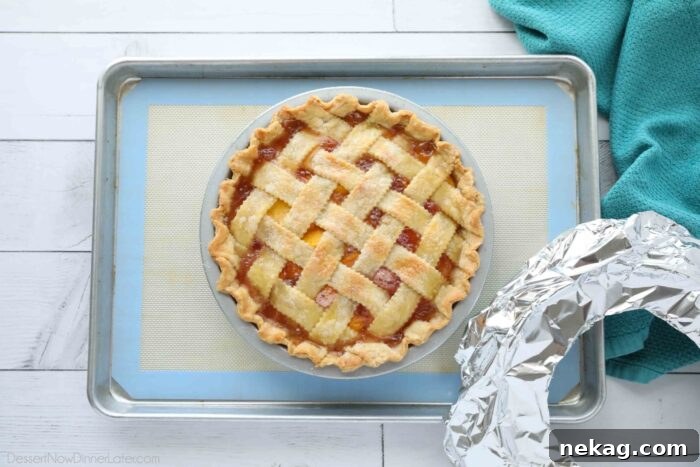
Bake your peach pie in the preheated oven at 350˚F (175˚C) for 60-75 minutes. The true indicator of readiness is not just a golden-brown crust, but a filling that is actively bubbling in the center – not just along the edges. This vigorous bubbling confirms that the cornstarch has been fully activated and the filling is properly thickened. About halfway through the baking time, check on your pie. If you notice the crust, particularly the edges, browning too quickly, loosely cover the entire pie or just the browning sections with aluminum foil. This prevents over-browning while allowing the filling to continue cooking through.
NOTE: If you are using a store-bought pie crust, it will generally brown much faster than a homemade crust. In this case, you might want to bake the pie covered with foil for the entire duration, only removing it for the last 10-15 minutes to allow for final browning. For homemade crusts, which often brown faster on the edges than in the middle, a useful trick is to cut a hole in the center of your foil and cover only the edges, leaving the middle exposed. This ensures even browning across the entire top surface.
Once your pie is out of the oven, the most challenging part (besides waiting!) begins: cooling. It is absolutely essential to allow the pie to cool completely on a wire rack at room temperature. This typically takes several hours. During this cooling period, the hot filling will continue to set and thicken, transforming from a liquidy state to a beautifully firm and sliceable consistency. Cutting into a warm pie too soon will almost always result in a runny mess.
For storage, once the pie has cooled completely, you can store it at room temperature, loosely covered with foil or plastic wrap, for up to 3-4 days. If you need to keep it longer, or if your kitchen is particularly warm, store it in the refrigerator for up to 1 week. Bring refrigerated pie back to room temperature or gently warm slices before serving for the best flavor and texture.
Essential Baking Tips for Peach Pie Perfection
Achieving a flawless peach pie involves a few key techniques and considerations. Heed these expert tips to ensure your pie turns out beautifully golden, wonderfully flaky, and perfectly set every single time:
- Utilize a Clear Pie Dish: Baking in a glass or ceramic pie dish allows you to visually inspect the bottom crust. This is incredibly helpful for confirming that the crust has fully browned and cooked through, preventing a soggy bottom – a common pie pitfall.
- Bake on a Lined Baking Sheet: Always place your pie on a baking sheet lined with a silicone baking mat or parchment paper before putting it in the oven. Fruit pies, especially when generously filled, have a tendency to bubble over. A lined baking sheet will catch any drips, preventing a messy oven and making cleanup much easier. Alternatively, you can place the lined baking sheet on the rack directly below your pie.
- Thaw and Drain Frozen Peaches Thoroughly: This step cannot be overstated. Frozen peaches contain a significant amount of water that will release during thawing. Draining them well significantly reduces the liquid content in your filling, which is critical for preventing a runny pie. Gently squeezing excess moisture from the thawed peaches can also be beneficial.
- Mix Filling Ingredients Just Before Assembly: Sugar acts as a natural osmetic agent, drawing moisture out of fruit. If you mix your peach filling too far in advance, the sugars will extract a lot of juice, resulting in an excessively watery filling. To prevent this, have your pie crusts rolled out and the pie dish ready before you combine the peaches with the sugars, spices, and thickener. This minimizes the time the fruit sits with the sugar, preserving the ideal moisture level.
- Bake Until the Filling Bubbles Vigorously in the Center: This is arguably the most crucial tip for a perfectly set fruit pie. Do not rely solely on the browning of the crust as an indicator of doneness. The pie must bake long enough for the filling to reach a full, rolling boil in the very center. This high heat activates the cornstarch (or other thickener), ensuring the filling sets properly upon cooling. If the crust begins to brown too quickly, tent the pie with aluminum foil to protect it while the filling continues to cook and thicken. Patience is key here – a little extra baking time is far better than a runny pie.
Adapting the Recipe for Fresh Peaches
If you’re lucky enough to have an abundance of fresh, ripe peaches, adapting this recipe is wonderfully straightforward. The basic steps for the filling remain the same, but you’ll need to prepare the fresh fruit appropriately.
To use fresh peaches, you will first need to peel, pit, and slice the fruit. Unlike frozen peaches, there’s no need to thaw or drain them beforehand; simply proceed directly to mixing the filling once prepared.
TIP for Easy Peeling: Peeling fresh peaches can sometimes be a challenge, but there’s a quick and efficient method that makes it a breeze. Bring a large pot of water to a rolling boil. Carefully drop the peaches into the boiling water and blanch them for exactly 60 seconds. Immediately remove the peaches with a slotted spoon and plunge them into an ice bath (a large bowl or sink filled with ice water) to stop the cooking process. Once cooled, you’ll find that the skin easily slips off. You can run a small knife around the core of the peach (as if you’re going to cut it in half) to help get a purchase on the skin and simply slide it right off. For a visual demonstration, search for videos on “how to easily peel peaches with blanching.”
Using Canned Peaches for Your Pie
Yes, you can absolutely make this delicious peach pie using canned peaches, making it an even more convenient option when fresh or frozen are unavailable. The key to success with canned peaches is proper drainage.
To use canned peaches, simply drain the peaches very well from their syrup. After draining, gently pat them dry with paper towels to remove any residual moisture. This extra step helps prevent the pie filling from becoming overly watery. Once drained and patted dry, proceed with the recipe instructions as usual for mixing the filling. The sweetness of canned peaches can vary, so taste a peach and adjust the sugar slightly if you feel it’s too sweet or not sweet enough, though the given sugar amounts should work well.
More Delectable Peach Desserts to Explore
If you find yourself with an abundance of peaches beyond what your pie cravings can handle, or simply want to explore other delightful ways to enjoy this beloved fruit, here are some fantastic peach dessert ideas:
- Peach Crumble Recipe: A rustic and comforting dessert featuring tender peaches topped with a buttery, crisp oat crumble.
- Peach Donut Recipe: Indulge in warm, fluffy donuts infused with sweet peach flavor – a perfect breakfast or dessert treat.
- Peaches and Cream Pie with Shortbread Cookie Crust: A luscious, no-bake pie combining fresh peaches and creamy filling over a delicate shortbread base.
- Cream Cheese Peach Cobbler: A rich and decadent cobbler with a creamy, tangy twist, perfectly complementing the sweet peaches.
- Fresh Peach Pie: A celebration of summer with thinly sliced fresh peaches in a classic double crust.
- Peach Bars: Portable and delightful, these bars feature a sweet peach filling sandwiched between a shortbread crust and crumb topping.

Peach Pie
Amber Brady
20
1
1 20
Pin
Rate
Save
8
servings
Ingredients
-
Double Pie Crust
-
5 cups
(851 g)
frozen peaches, thawed (about 24-30 oz frozen peaches; may substitute with fresh peaches) -
½ cup
(100 g)
granulated sugar -
¼ cup
(50 g)
light brown sugar, packed -
½ tsp
ground cinnamon -
⅛ tsp
ground nutmeg -
4 Tbsp
cornstarch -
1 Tbsp
lemon juice
Additional Ingredients:
-
1
large egg -
1 Tbsp
water -
1 tsp
granulated sugar
Equipment
-
Mini Rolling Pin
-
9-Inch Pie Pan USA Pan Bakeware
-
9-inch Standard Glass Pie Dish
-
6-Quart Steel Mixing Bowl
-
Silicone Spatula Set
-
Silicone Pastry Brush
Instructions
-
Make pie dough and chill in fridge. (Find my favorite pie crust recipe and tutorial HERE.) Preheat oven to 350 degrees Fahrenheit.
-
Roll the bottom pie crust into a large circle 1/8-inch thick. Fit pie crust into a 9-inch pie dish and cut off excess crust. Place crust in fridge to keep cold.
-
Thaw the frozen peaches (in the microwave in short 30-second bursts) and drain the liquid over a bowl (to discard). Set aside.
-
Roll the top pie crust 1/8-inch thick. Cut into strips for a lattice crust, if desired.
-
Mix the filling. Place the drained peaches into a clean bowl and add the sugar, brown sugar, cinnamon, nutmeg, cornstarch, and lemon juice. Stir until combined. Empty the peaches into the prepared pie crust.
-
Brush the edges of the bottom pie crust with egg wash (1 egg + 1 Tbsp water whisked together) and attach the top crust. (Weave strips together if making a lattice crust.) Cut off excess crust, seal the edges, and crimp.
-
Brush the top of the pie crust with the egg wash and sprinkle with sugar to flavor the crust.
-
Bake at 350˚F for 60-75 minutes, or until the crust browns and the filling bubbles in the center (not just the edges). Cover the top or edges with foil if the crust browns faster than the filling bubbles. Check pie about halfway through baking.
-
Allow the pie to cool completely on a wire rack at room temperature. Store the pie covered with foil or plastic wrap at room temperature up to 3-4 days or in the fridge up to 1 week.
Video
Notes
- Do not mix filling until ready to assemble pie. The sugars will draw out the liquid in the fruit the longer it sits.
- Store-bought pie crust will brown quicker than homemade. You may want to bake the pie with foil the entire time if using a store-bought crust. My homemade pie crust browns faster on the edges than the middle, so I like to cut a hole in the center of my foil and cover the edges while keeping the middle exposed.
- Streusel Topping
1/4 cup butter, cold
1/2 cup oats
1/2 cup brown sugar
1/4 cup flour
1/2 tsp cinnamon - Crumb Topping Recipe without oats
ALTERNATE TOPPING OPTIONS
Mix with a fork, pastry blender, or your hands until it comes together and is crumbly, not dry. Sprinkle over pie filling before baking.
Nutrition
Serving:
1
slice
|
Calories:
367
kcal
|
Carbohydrates:
59
g
|
Protein:
5
g
|
Fat:
14
g
|
Saturated Fat:
4
g
|
Polyunsaturated Fat:
8
g
|
Cholesterol:
23
mg
|
Sodium:
223
mg
|
Fiber:
3
g
|
Sugar:
31
g
Disclaimer: Nutritional values were calculated using a third-party tool and are provided as an estimation only.
Sharing this recipe with a link is both encouraged and appreciated. Copying/pasting and/or screenshots of full recipes to any social media is strictly prohibited. Content and photographs are copyright protected.
Did you make this?
Don’t forget to leave a rating below and make sure to follow on Pinterest and Instagram for more!
*Originally published 9/3/14. Photos updated May 2022.