

Bake the Best Easy Dinner Rolls: Soft, Fluffy, and Buttery Perfection
Discover the ultimate recipe for easy dinner rolls that are guaranteed to be soft, incredibly fluffy, and rich with buttery flavor. This foolproof guide provides step-by-step instructions, making it simple for even beginner bakers to achieve bakery-quality results right in their own kitchen. Say goodbye to store-bought rolls and hello to the comforting aroma and taste of homemade goodness!
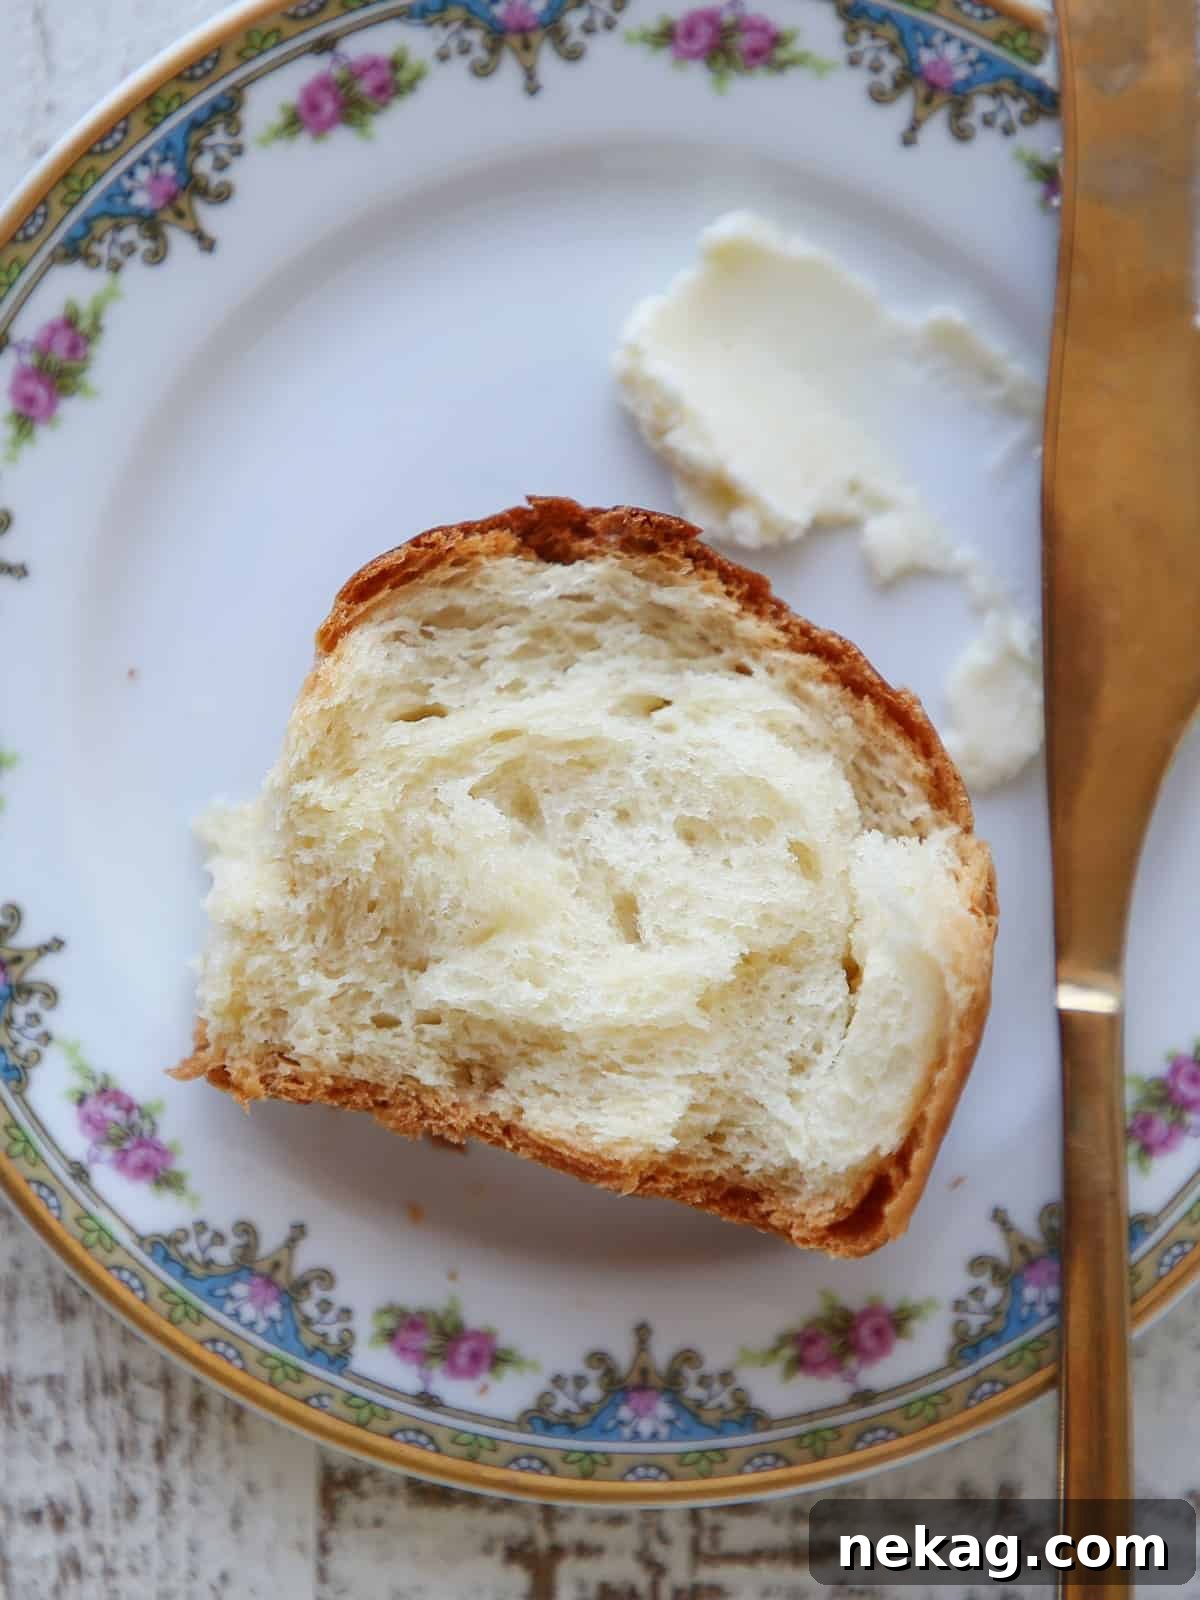
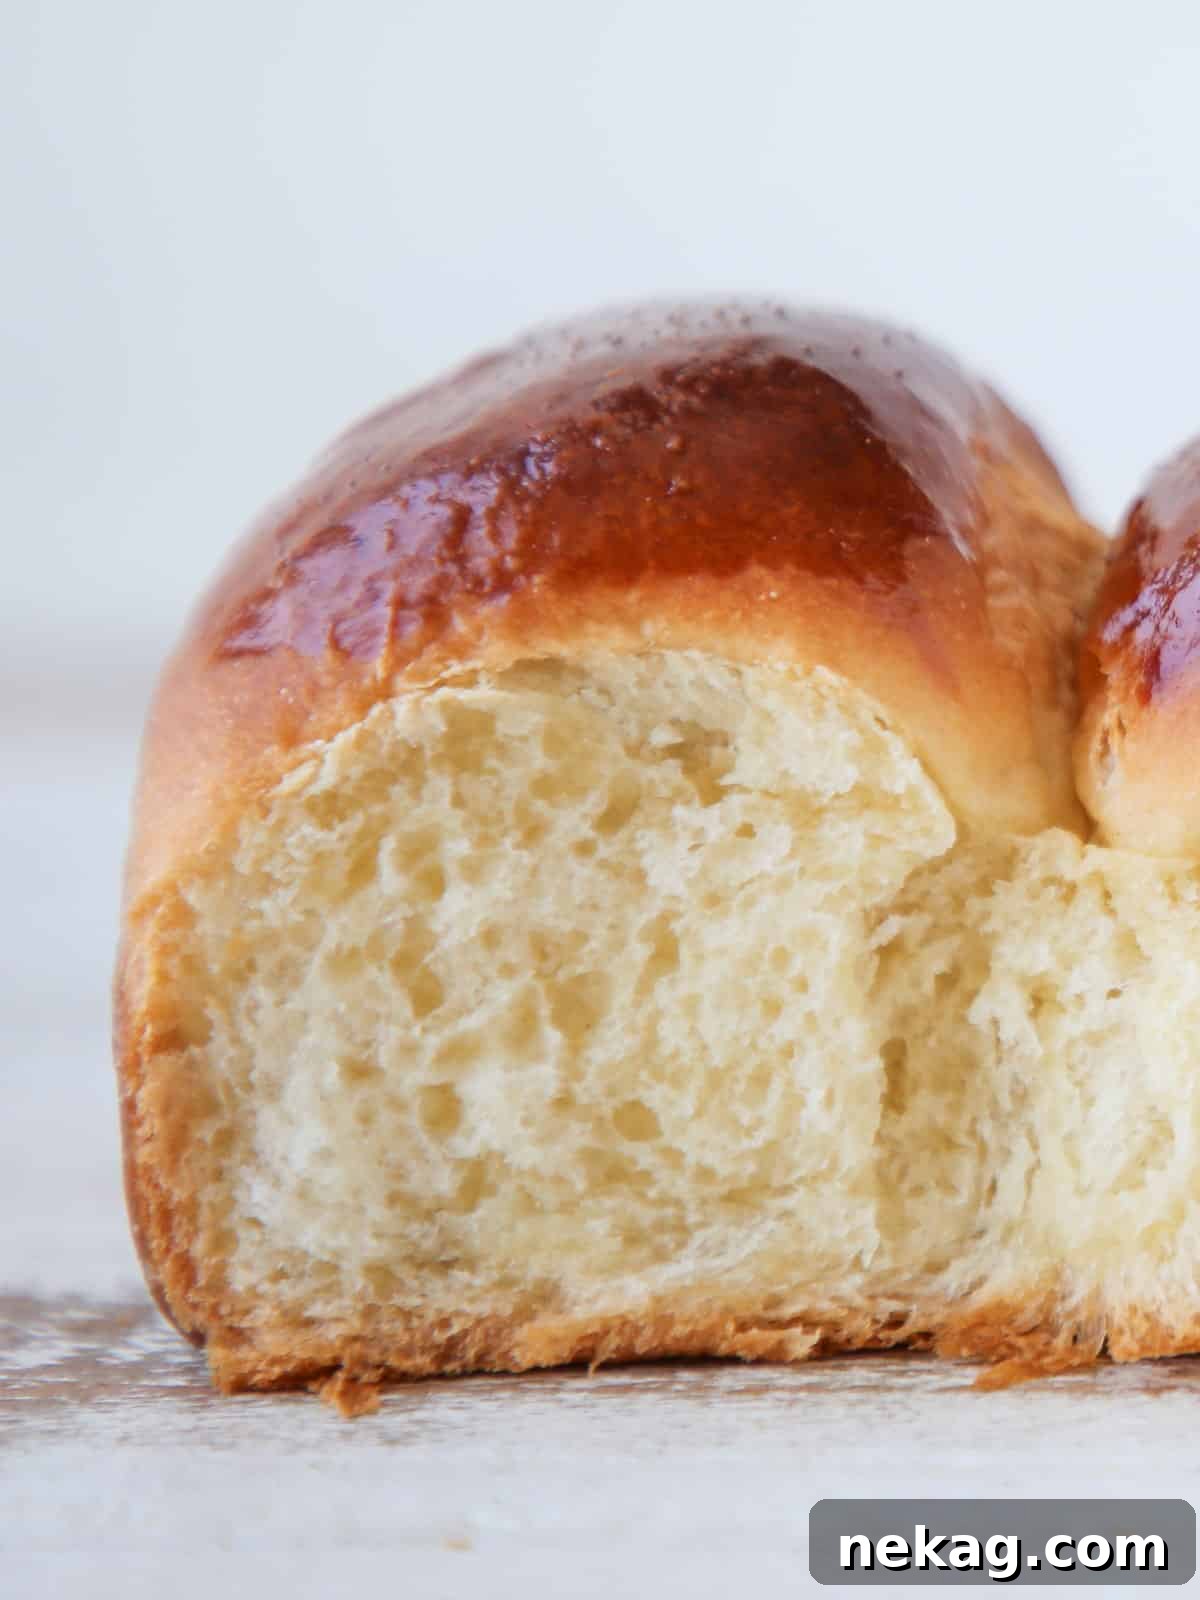
There’s nothing quite like the warmth and tender chew of a freshly baked dinner roll. It’s a simple pleasure that elevates any meal, from a casual family dinner to a festive holiday feast. Our recipe simplifies the process, utilizing a clever sponge technique to ensure an exceptionally light texture and deep flavor development with minimal effort. Prepare to impress your family and friends with these irresistible, cloud-like rolls that will have everyone asking for more!
A Quick Look at This Dinner Roll Recipe
- Prep Time: 30 minutes
- Cook Time: 22 minutes
- Proof Time: 1 hour 20 minutes
- Total Time: 2 hours 12 minutes
- Yields: 12 rolls
- Calories: Approximately 525 kcal per roll (based on the nutrition panel)
- Technique: Features a “sponge” method for enhanced flavor and texture, followed by kneading until the dough passes the windowpane test, two proofing stages, meticulous shaping, and baking to a perfect golden brown.
- Flavor Profile: A delightful balance of buttery richness and subtle sweetness, yielding a perfectly fluffy texture with an unbelievably soft, cloud-like crumb.
- Difficulty: Moderate – approachable for home bakers looking to refine their bread-making skills.
Featured Comment: What Our Bakers Are Saying
⭐⭐⭐⭐⭐
“I made these dinner rolls last night, and they were everything I hoped for: incredibly soft, wonderfully fluffy, and just the right hint of sweetness. The sponge step truly made a difference in the depth of flavor. These will definitely be a repeat in my kitchen!” – Lauren
Why You Will Love These Homemade Dinner Rolls
This isn’t just another dinner roll recipe; it’s a journey to creating bakery-quality bread right in your own kitchen. Here’s why these rolls will become your new go-to:
- Unmatched Light, Buttery Texture: These dinner rolls are the epitome of softness and lightness, infused with a rich, buttery flavor. The secret lies in using a “sponge” – a pre-ferment that kickstarts yeast activity and gluten development, resulting in an exceptionally airy texture. And as a final flourish, more melted butter is brushed on after baking, ensuring every bite is moist and decadent.
- Surprisingly Easy Homemade Bread: Don’t let the professional results fool you; these homemade rolls are surprisingly simple to make. The enriched dough is incredibly forgiving and easy to handle, allowing you to have warm, freshly baked rolls on your table in just over two hours. It’s a truly foolproof method for achieving impressive homemade bread.
- Perfect for Make-Ahead Preparations: Planning for a big meal or just want fresh rolls without the morning rush? This recipe is incredibly versatile! You can prepare the dough, shape the rolls, and then refrigerate them overnight. Simply bring them to room temperature and bake fresh the next day. This makes them ideal for holiday meal prepping, whether it’s Thanksgiving, Christmas, or even Easter. While these are fantastic year-round, for a festive Easter treat, you might also enjoy our sourdough hot cross buns!
Table of Contents
- A Quick Look at This Dinner Roll Recipe
- Why You Will Love These Homemade Dinner Rolls
- Essential Ingredients & Clever Substitutions
- Delicious Variations for Your Dinner Rolls
- Professional Baking Tips for Perfect Rolls
- How to Make Homemade Easy Dinner Rolls Step-by-Step
- Chef Lindsey’s Pro Tip for Bread Baking
- Dinner Roll Recipe FAQs
- Recommended Soft and Buttery Bread Recipes
- Easy Dinner Rolls Full Recipe
- Before You Go
This recipe builds on the success of my popular potato rolls, sharing a similarly forgiving dough that consistently bakes into light, fluffy, and undeniably buttery rolls. Don’t let the “dinner” in the name limit you – these versatile, restaurant-quality rolls are fantastic any time of day! Serve them with breakfast, alongside lunch, as a delightful snack, or as the perfect accompaniment to your evening meal. You’ll soon find yourself craving them nightly.
A baker’s reward is always the first taste, so be sure to enjoy a few rolls fresh out of the oven! Then, serve the remaining alongside hearty dishes like a warming bowl of vegan chili, tender ricotta meatballs, a savory brown sugar glazed meatloaf, or even a robust mustard-crusted pork. Their tender crumb and rich flavor make them the ideal companion to almost any meal.
Essential Ingredients & Clever Substitutions
Crafting the perfect easy dinner rolls starts with understanding each ingredient’s role. Here’s a detailed look at what you’ll need and how you can adapt if necessary:
- All-Purpose Flour: This is the backbone of our rolls. All-purpose flour strikes the ideal balance, providing enough gluten for a strong, elastic network while keeping the final product tender and soft. If bread flour is all you have, it can be used, but be mindful that the gluten will develop faster, potentially leading to a slightly chewier rather than super tender roll. Adjust kneading time accordingly.
- Water & Milk: Our recipe uses a strategic combination of water and whole milk for hydration. The milk contributes a touch of fat and a subtle creamy flavor, enriching the dough without overwhelming the star ingredient: butter! While whole milk is preferred for its richness, skim milk, alternative milks (like almond or oat milk), or even all water can be used. For a tangier twist, consider using buttermilk, much like in my delicious honey whole wheat buttermilk rolls!
- Kosher Salt: More than just flavor, salt is crucial for controlling yeast activity and strengthening gluten structure. Always use kosher salt for baking as its larger crystals dissolve more slowly, preventing over-salting and ensuring even distribution.
- Active Dry Yeast: This recipe calls for active dry yeast, which requires an initial activation step (the “sponge”). This pre-hydration not only confirms the yeast is alive but also kickstarts fermentation and gluten development, making the overall process more efficient and predictable. If using fresh yeast, double the weight; for instant yeast, use half the weight. While instant yeast can be added directly to dry ingredients, incorporating it into the sponge still offers benefits in flavor and texture development.
- Granulated Sugar: A modest amount of granulated sugar serves multiple purposes. It provides a readily available food source for the yeast, accelerating fermentation. Additionally, it contributes to the rolls’ lovely golden-brown crust through caramelization and adds a delicate sweetness that perfectly complements the butter. For variations, you can substitute dark brown sugar, honey, or maple syrup. Be aware that liquid sweeteners like honey or maple syrup might make the dough slightly stickier, so you may need a tiny bit more flour.
- Unsalted Butter: Butter is key to the luxurious richness and tender crumb of these rolls. Using unsalted butter allows you to control the overall salt content of the recipe. Ensure it’s softened to room temperature for easier incorporation into the dough, leading to a more homogenous mixture and better gluten development.
Refer to the full recipe card below for precise measurements and quantities of all ingredients.
Delicious Variations for Your Dinner Rolls
While these easy dinner rolls are perfect on their own, they also serve as a fantastic canvas for creative culinary experimentation. Here are some exciting variations to try:
- Transform into a Loaf: This versatile dough isn’t just for rolls! Divide and shape the entire recipe into two beautiful loaves of bread. For detailed instructions on shaping and baking a loaf, follow the guide in my popular brioche bread recipe. The result will be an incredibly soft and rich sandwich bread or an impressive centerpiece for your table.
- Infuse with Nuts and Dried Fruit: Add a delightful burst of flavor and texture by incorporating your favorite nuts and dried fruits. You can follow the inspiration of my sourdough raisin bread or take cues from the vibrant flavors of cherry pecan sourdough bread. Feel free to mix and match any combination of dried fruits (like cranberries, apricots, or figs) and nuts (pecans, walnuts, almonds), up to a total of one pound, for a truly customized bread.
- Cheesy Indulgence: For a savory treat, introduce cheese into your rolls! After the dough has passed the windowpane test, mix in up to one cup of shredded hard cheeses like sharp cheddar, nutty Parmesan, or creamy Gruyere. For an extra layer of flavor and a beautiful golden crust, sprinkle a bit more cheese on top of the rolls before baking. Imagine serving these warm, cheesy rolls with a comforting bowl of tomato soup – pure bliss!
- Spice Up Your Bread: Give your dinner rolls a fragrant twist by adding warm spices. My homemade pumpkin spice recipe is perfect for this, as demonstrated in these delightful pumpkin dinner rolls. You can add up to one tablespoon of your preferred spice blend (like cinnamon, cardamom, or a mix) without altering the dough’s hydration or structure. Adjust to your taste for a comforting, aromatic experience.
Professional Baking Tips for Perfect Rolls
Achieving consistently perfect dinner rolls is easier with a few insights from the pros. Here are key tips to ensure your baking success:
- Verify Yeast Activity: The very first step to successful bread baking is ensuring your yeast is alive and active. The “sponge” method is excellent for this. After mixing the sponge and letting it rest for a few minutes, if you don’t see visible bubbles forming on the surface, it’s a clear sign that your yeast is likely dead. In this scenario, it’s crucial to discard the mixture, get fresh yeast, and start over. Continuing with inactive yeast will only result in dense, unrisen “hockey pucks” rather than light, airy rolls.
- Use Room Temperature Ingredients: For optimal dough consistency and faster proofing, always use room temperature butter and milk. Softened butter incorporates smoothly and evenly into the dough, preventing lumps and ensuring uniform fat distribution. Likewise, room temperature milk (around 100°F or 38°C) won’t shock the yeast or cool down the dough, allowing the yeast to activate and thrive more quickly, leading to a more efficient and consistent proofing process.
- Never Skimp on Proofing Time: It can be tempting to rush the proofing stages, especially the bulk proof (the first rise). However, this is one of the most critical steps for developing the light, fluffy texture and rich flavor that defines excellent bread. During proofing, the yeast ferments, producing gases that expand the dough and create its characteristic airy structure. It also allows complex flavors to develop. If you under-proof, your rolls will be dense; if you over-proof, they may collapse in the oven. Patience here is truly a virtue!
- Master the Windowpane Test: This professional technique helps you determine if your dough has been adequately kneaded and its gluten developed sufficiently. To perform the test, pinch off a small piece of dough (about a quarter-sized amount). Gently stretch it with your fingers, rotating it as you pull. If you can stretch the dough thin enough to see light through it without tearing (like a windowpane), your gluten is well-developed. If it tears easily, the dough needs more kneading time.
- Measure by Weight for Accuracy: While cup measurements are common, baking by weight (especially for flour) offers far greater accuracy and consistency. Different flours can have varying densities, and scooping techniques can drastically alter the actual amount. Using a kitchen scale ensures you’re adding the exact amount of each ingredient, leading to more predictable and successful baking outcomes every time.
How to Make Homemade Easy Dinner Rolls Step-by-Step
Follow these detailed instructions to create irresistibly pillowy dinner rolls. Full ingredient measurements can be found in the recipe card below.
Make the Sponge:
- Mix the sponge: In a medium-sized bowl, combine all the ingredients specified for the sponge. Use your hands to thoroughly mix everything together. While a spoon can be used, the wet consistency of the mixture makes hands the most efficient tool for ensuring all ingredients are fully incorporated.
- Allow to rest: Cover the bowl tightly with plastic wrap or a clean kitchen towel. Place it in a warm spot in your kitchen. Let the mixture rest for approximately 20 minutes, or until you see a visible layer of bubbles forming on the surface, indicating the yeast is active and fermenting.
Mix the Dough:
Chef’s Note: I typically use the sponge resting time to precisely weigh out (or “scale,” as chefs say) all the remaining ingredients for the final dough. This makes the next steps quick and seamless.
- Combine the dough ingredients: Transfer the prepared sponge into the bowl of a stand mixer. Add the remaining all-purpose flour, granulated sugar, kosher salt, softened unsalted butter, and the egg. Attach the paddle attachment to your stand mixer.
- Mix until combined: Begin mixing on low speed until all ingredients are just combined and a shaggy dough forms.
- Switch to dough hook and knead: Replace the paddle attachment with the dough hook. Increase the mixer speed to medium and continue kneading. This process can take anywhere from 10 to 15 minutes. Because this is an enriched dough (meaning it contains fats like butter and egg), gluten development will occur at a slower pace compared to lean doughs. Knead until the dough passes the “rough windowpane” test (see explanation below).
Understanding the ‘Windowpane’ Test: This crucial test helps determine if your dough has been sufficiently kneaded. The dough should have come together as one cohesive mass, pulling cleanly away from the sides of the bowl and clinging mostly to the dough hook. To test, pinch off a small piece of dough and gently stretch it from the sides. Rotate the dough 90 degrees and stretch again. You should be able to stretch it thin enough to see light through it, like a translucent windowpane. It might have some rougher edges, which is perfectly normal for a “rough windowpane.” If it tears easily, continue kneading for a few more minutes and retest.
Proofing and Shaping:
- First proof (bulk fermentation): Carefully scrape the kneaded dough into a clean bowl that has been lightly oiled. Cover the bowl securely with plastic wrap or a clean kitchen towel. Allow the dough to proof in a warm place for 30 minutes. This is a critical step for flavor and texture development.
- Fold the dough: After the first 30-minute proof, gently “fold” the dough. To do this, grab one side of the dough, pull it upwards and outwards from the bowl, then fold it over approximately one-third of the dough. Rotate the bowl 180 degrees and repeat this folding motion with the opposite side. Next, rotate the bowl a quarter turn (90 degrees) and repeat the same folding technique. Finally, rotate the bowl 180 degrees again for the last fold. This series of folds helps to strengthen the gluten structure and redistribute the yeast. You should now have a neat, tight square packet of dough.
- Second proof: Cover the bowl with plastic wrap again and return it to a warm place. Allow the dough to double in size. For my dough, this typically takes an additional 30 minutes.
- Prepare the baking pan: While the dough is completing its bulk proofing, thoroughly grease a 9 x 13-inch baking dish with cooking spray or butter. Ensure the entire surface is coated to prevent sticking.
- Turn out the dough: Once the dough has visibly doubled in size and feels light and airy to the touch, gently turn it out onto a clean, unfloured countertop or work surface. The dough at this stage should be soft, supple, and noticeably not sticky.
- Divide the dough: Divide the dough into 12 equal portions. For perfectly consistent, evenly baking rolls, it’s highly recommended to use a kitchen scale. Each portion should weigh approximately 87 grams.
- Shape the rolls: Take one portion of dough and fold it in half, then place the seam side down on your countertop. Using the palm of your hand and your thumb as a guide, roll the dough portion into a smooth, round ball (a boule). Repeat this shaping process for all 12 portions. Arrange the shaped rolls equidistant from each other in the prepared baking pan.
- Final proof: Cover the baking pan with plastic wrap or a kitchen towel and place it back in your warm spot to proof until the rolls have doubled in size. This usually takes about 30 minutes. During this final proofing stage, preheat your oven to 350°F (175°C).
Time to Bake:
- Egg wash: Once the rolls have doubled and appear light and airy, gently brush the tops with a beaten egg. This egg wash will give them a beautiful, golden-brown, and shiny crust.
- Bake to perfection: Place the baking pan in the preheated oven. Bake for 20-22 minutes, or until the rolls are a rich golden brown. For absolute certainty, an instant-read thermometer inserted into the center of one of the middle rolls should read 185°F (85°C). If you don’t have a thermometer, insert a cake tester or toothpick into the center; it should come out with clinging crumbs but no wet streaks of raw dough.
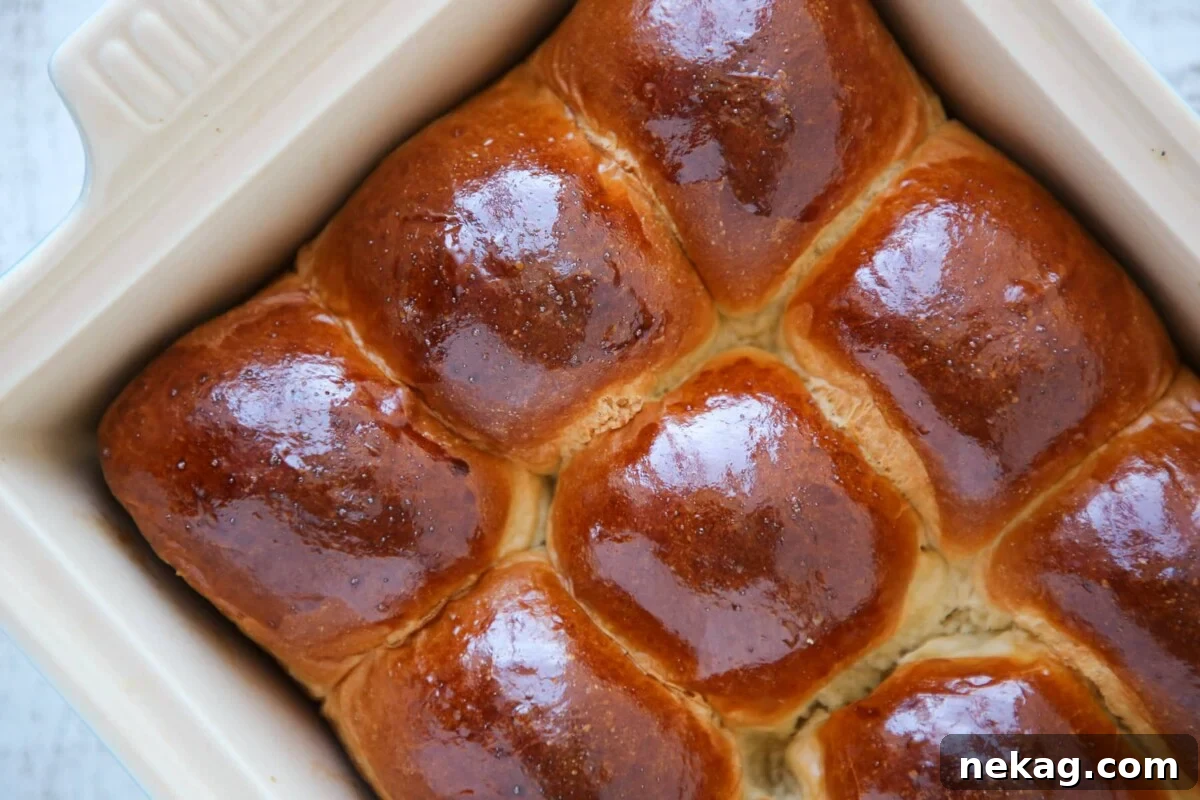
- Buttery finish: Immediately after removing the hot buns from the oven, brush their tops generously with melted butter. This not only enhances their flavor but also contributes to that irresistible shiny, enticing top. While technically they should cool slightly, who has the patience? I recommend digging right in and enjoying them warm!
Chef Lindsey’s Pro Tip for Bread Baking
When it comes to baking, especially bread, I’m a stickler for weighing my ingredients – it truly makes all the difference in achieving consistent, perfect results. This kitchen scale is my absolute favorite. Conveniently, since this bread is made with a sponge, I usually scale the remaining ingredients for the final dough while the sponge is sitting and activating. It’s an efficient use of time that streamlines the entire baking process!
Dinner Roll Recipe FAQs
For the best quality and flavor, dinner rolls are ideally consumed within two days of baking. Store them in an airtight container at room temperature. If you have leftovers beyond this timeframe, they freeze beautifully when wrapped tightly or placed in a freezer bag. Additionally, stale rolls are phenomenal in various bread pudding recipes! Consider making this easy bread pudding with hard sauce, or for a seasonal twist, try the pumpkin bread pudding with maple bourbon sauce in the fall, or a refreshing lemon raspberry bread pudding in the summer.
A “sponge” is a classic bread-making technique (also known as a pre-ferment or poolish) where a portion of the flour, all of the yeast, and all of the liquids (in this recipe, milk and water) are combined and allowed to ferment before the rest of the ingredients are added. The sponge offers several key advantages: it vigorously activates the yeast, giving it a head start on fermentation; it allows the gluten network to begin developing early, which ultimately reduces the total mixing or kneading time needed for the final dough; and most importantly, it significantly enhances the flavor and aroma of the finished rolls, contributing to a more complex and nuanced taste profile.
Dense dinner rolls are typically the result of one of three common issues: under-proofing, over-proofing, or inactive yeast. If you under-proof the dough, the yeast hasn’t had enough time to fully activate and produce sufficient carbon dioxide gases, preventing the rolls from rising properly in the oven and resulting in a heavy texture. Conversely, if you over-proof the bread, it rises too quickly and then collapses due to weakened gluten structure, leading to a dense, fallen crumb once baked. Finally, if your yeast is dead or inactive from the start, the dough won’t rise at all, resulting in rock-hard “hockey pucks.” Using the sponge method, as in this recipe, is an excellent way to pre-test your yeast and ensure it’s active before you commit to the entire baking process, helping you avoid this common pitfall.
Recommended Soft and Buttery Bread Recipes
Dinner Roll Recipes
Potato Rolls
Dinner Roll Recipes
Pumpkin Spice Dinner Rolls
Dinner Roll Recipes
Sourdough Rolls
Dinner Roll Recipes
Brioche Bun Recipe
If you tried this easy dinner roll recipe and loved it, please leave a 🌟 star rating and let me know how it went in the comments below. Your feedback makes my day!

Average Rating: 4.80 from 5 ratings
Easy Dinner Rolls
Chef Lindsey
This easy dinner roll recipe makes soft, fluffy, buttery rolls with minimal effort. Step-by-step instructions ensure perfect results, even for beginners!
30 mins
22 mins
1 hr 20 mins
2 hrs 12 mins
12 rolls
Comment
Print Recipe
Ingredients
Sponge:
- 2 ¼ teaspoons active dry yeast
- 14 tablespoons whole milk, 100°F
- ⅓ cup water, 100°F
- 1 tablespoon granulated sugar
- 1 ¼ cups all-purpose flour
Final Dough:
- 3 cups all-purpose flour
- 4 ½ tablespoons granulated sugar
- 1 teaspoon kosher salt
- 6 ½ tablespoons unsalted butter, softened
- 1 large egg
Total Dough (for reference):
- 2 ¼ teaspoons active dry yeast
- 14 tablespoons whole milk, 100°F
- ⅓ cup water, 100°F
- 5 ½ tablespoons granulated sugar
- 4 ⅓ cups all-purpose flour
- 1 teaspoon kosher salt
- 6 ½ tablespoons unsalted butter, softened
- 1 large egg
Instructions
Make the Sponge:
- Combine all the ingredients for the sponge (yeast, milk, water, 1 tbsp sugar, 1 ¼ cups flour) in a medium bowl and mix thoroughly with your hands until well combined.
- Cover the bowl with plastic wrap and set it in a warm spot. Allow it to rest until visibly bubbly, which typically takes about 20 minutes, indicating active yeast.
Mix the Dough:
- Add the remaining flour (3 cups), sugar (4 ½ tbsp), salt, softened butter, egg, and the prepared sponge to the bowl of a stand mixer fitted with a paddle attachment. Mix on low speed until all ingredients are just combined and a shaggy dough forms.
- Switch to the dough hook attachment. Mix on medium speed for 10-15 minutes, or until the dough develops enough gluten to pass the rough windowpane test (the dough should be cohesive, pulling away from the sides of the bowl, and a small piece can be stretched thin without tearing).
Proofing and Shaping:
- Scrape the dough into a well-oiled bowl. Cover with plastic wrap or a kitchen towel and let it proof in a warm place for 30 minutes.
- After 30 minutes, perform a series of folds: grab one side of the dough, pull it up, and fold it over ⅓ of the dough. Rotate the bowl 180 degrees and repeat. Then, rotate a quarter turn (90 degrees) and repeat the folding. Rotate 180 degrees for the final fold. This creates a tight packet of dough.
- Cover the bowl again with plastic wrap and allow the dough to double in a warm place, which will take approximately an additional 30 minutes.
- While the dough is completing its bulk proofing, grease a 9 x 13-inch baking dish with cooking spray or butter.
- Once the dough has doubled and feels light and airy, turn it out onto an unfloured surface. The dough should be soft, supple, and not sticky.
- Divide the dough into 12 equal portions. For precision, use a kitchen scale; each roll should weigh about 87 grams.
- Shape each portion into a smooth boule (round ball). Fold the portion in half, place the seam side down on the counter, and roll it in the palm of your hand, using your thumb as a guide, until smooth. Place each shaped roll equidistant apart in the prepared baking pan.
- Cover the pan and place it back in the warm spot for a final proof until the rolls have doubled, about 30 minutes. During this time, preheat your oven to 350°F (175°C).
Time to Bake:
- When the rolls are ready to bake (doubled, light, and airy), gently brush their tops with a beaten egg.
- Bake in the preheated oven for 20-22 minutes, or until they are golden brown and an instant-read thermometer inserted into the center of a middle roll reads 185°F (85°C). If no thermometer, a cake tester should come out with clinging crumbs, not wet dough.
- Immediately upon removing from the oven, brush the hot rolls generously with melted butter for a shiny, enticing finish and added flavor. Serve warm and enjoy!
Video Tutorial
Notes
Yield: 12 rolls
Presentation: To achieve a beautiful, shiny finish, brush the rolls with a beaten egg before baking and then brush with melted butter immediately after baking!
Technique: The “windowpane” test involves gently stretching a small piece of dough until it becomes translucent enough to see light through it without tearing. This indicates well-developed gluten. If it tears easily, continue kneading. Ensure your dough piece isn’t too small and you’re not pulling too aggressively, as this can also cause tearing prematurely.
Variations: Feel free to chop and mix in some of your favorite fresh herbs like thyme, sage, or basil into the dough. For a unique twist, try adding rosemary, similar to these sourdough rolls, or a fragrant mixture of herbs, inspired by my pumpkin herb dinner rolls.
Storage: These rolls are truly best enjoyed the day they are made, while still warm and fresh. However, leftovers can be delightfully reheated in a warm oven the next day. For optimal freshness beyond two days, wrap them tightly or store them in a freezer-safe bag and freeze. Thaw and reheat as needed.
Nutrition
Serving: 1 roll | Calories: 525kcal | Carbohydrates: 84g | Protein: 12g | Fat: 16g | Saturated Fat: 9g | Polyunsaturated Fat: 1g | Monounsaturated Fat: 4g | Trans Fat: 1g | Cholesterol: 65mg | Sodium: 516mg | Potassium: 178mg | Fiber: 3g | Sugar: 15g | Vitamin A: 492IU | Vitamin C: 0.003mg | Calcium: 69mg | Iron: 4mg
Bread, Side Dish
American
525
Like this recipe? Leave a comment below!
Before You Go
We hope you thoroughly enjoyed baking and, more importantly, tasting these incredibly buttery and soft easy dinner rolls! This recipe is a testament to how simple ingredients and a thoughtful technique can yield truly exceptional homemade bread. Whether served warm with a slather of butter or as an accompaniment to a hearty meal, these rolls are sure to become a cherished addition to your recipe collection.
If you’re eager to explore more delightful bread-making adventures, be sure to check out our other delicious yeasted bread recipes. You might fall in love with these savory parmesan garlic knots, discover the comforting goodness of potato bread, or perhaps take on the rewarding challenge of my easy sourdough bread recipe. Happy baking!