
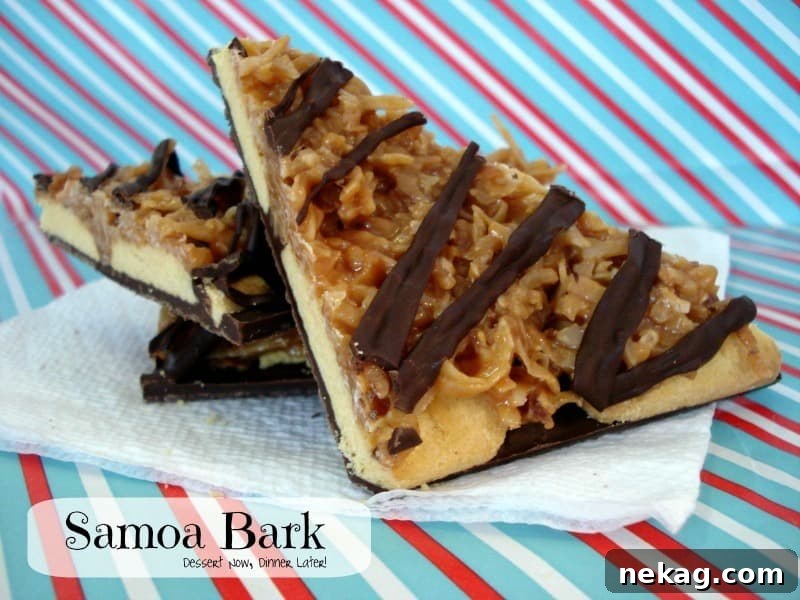
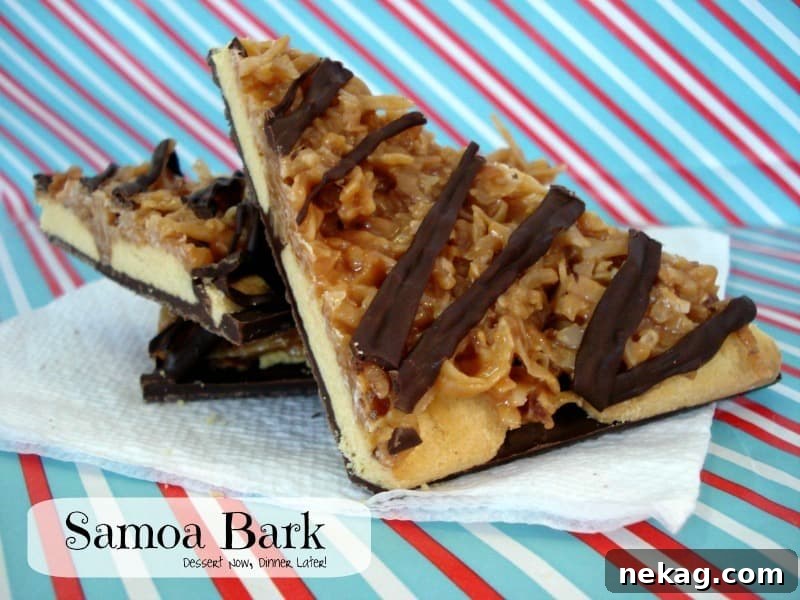
Easy Homemade Samoa Bark: A Girl Scout Cookie Inspired Delight
There’s an undeniable magic that comes with the arrival of Girl Scout cookie season. For many, it’s a nostalgic time filled with anticipation for those iconic boxes of Thin Mints, Tagalongs, and, of course, the beloved Samoas. That irresistible combination of crisp shortbread, chewy caramel, toasted coconut, and a decadent chocolate drizzle is truly a culinary masterpiece. But what do you do when the cookie season is over, and your cravings hit? You make your own, of course! And this Samoa Bark recipe is the perfect, easy solution to bridge that gap and bring the joy of Samoas into your home any time of year.
This isn’t just a simple treat; it’s a celebration of flavors and textures, meticulously crafted into a no-bake wonder. Imagine sinking your teeth into layers of buttery shortbread, blanketed in gooey caramel and aromatic toasted coconut, all encased in luscious chocolate. It’s everything you adore about the classic cookie, transformed into an incredibly shareable and beautiful bark that’s ideal for gifting, holiday gatherings, or simply satisfying that sweet tooth craving.
Why You’ll Fall in Love with This Samoa Bark Recipe
If you’re a fan of those iconic striped, coconutty, caramel-covered cookies, then this homemade Samoa Bark is about to become your new favorite obsession. Here’s why this recipe stands out and why you need to try it:
- A Taste of Pure Nostalgia: This bark captures the quintessential flavor profile of the classic Girl Scout Samoa cookie. Every bite transports you back to those delightful memories, offering the perfect blend of sweet, salty, and wonderfully textural elements.
- Effortlessly Delicious & No-Bake: Forget turning on the oven! This recipe is incredibly simple to assemble, requiring no baking whatsoever. It’s perfect for busy schedules, warm weather, or when you just want a quick and impressive dessert without the fuss. The straightforward steps make it accessible for even novice bakers.
- Perfect for Sharing & Gifting: Yielding a generous amount, Samoa Bark is an excellent candidate for holiday treat platters, neighbor gifts, or party desserts. Its beautiful layers and appealing presentation make it a thoughtful and delicious present that everyone will adore.
- Customizable & Versatile: While the classic combination is hard to beat, this bark offers room for customization. Experiment with different types of chocolate, add a sprinkle of sea salt for a gourmet touch, or even try different shortbread cookie varieties to make it uniquely yours.
- Impressive Results with Minimal Effort: Despite its gourmet appearance and rich flavor, this bark requires surprisingly little effort. The layers come together beautifully, creating a visually stunning treat that looks like it took hours, but actually comes together in a flash.
The Allure of Samoa Cookies: A Sweet History
The Samoa cookie, also known as Caramel deLites in some regions, has been a beloved staple of the Girl Scout cookie lineup for decades. Introduced in the 1970s, it quickly became a fan favorite, celebrated for its unique and intricate flavor profile. The genius lies in its combination: a tender shortbread ring, drenched in creamy caramel, generously coated in toasted coconut flakes, and elegantly striped with dark fudge. This complex blend of textures and tastes sets it apart from other cookies and has cemented its place in dessert history.
Our Samoa Bark recipe pays homage to this legendary treat, distilling its essential elements into an even easier-to-make format. By breaking it down into simple layers, we get to enjoy all the beloved characteristics of the Samoa cookie without the intricate baking and assembly process of individual cookies. It’s a shortcut to happiness, bringing those coveted flavors to your kitchen whenever the craving strikes.
Gathering Your Essential Ingredients
Creating this irresistible Samoa Bark begins with selecting the right components. Each ingredient plays a crucial role in replicating that authentic Girl Scout Samoa experience. Here’s a closer look at what you’ll need and some tips for selection:
- Semi-Sweet Chocolate Chips (12 oz / 340g, divided): Chocolate forms both the base and the decorative drizzle of our bark. Semi-sweet chocolate provides a balanced sweetness that complements the caramel and coconut without being overly rich. You can use chocolate chips, baking bars, or even good quality melting wafers. Dividing the chocolate allows you to create a solid base and a final delicate drizzle. For best results, choose a brand you enjoy eating on its own.
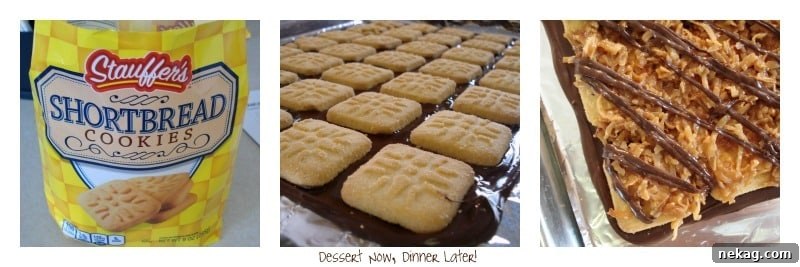
- Shortbread Cookies (35-40 cookies): The classic Samoa has a shortbread base, and our bark uses whole shortbread cookies to create a delightful, buttery crunch. I found that Stauffer’s shortbread cookies work perfectly, providing a sturdy yet tender foundation. Look for plain, rectangular, or round shortbread cookies that are relatively flat to ensure an even layer.
- Kraft Caramel Bits (11 oz / 311g) or Caramel Squares (14oz bag): These provide the iconic chewy caramel layer. Caramel bits are incredibly convenient as they melt smoothly and quickly. If you can only find caramel squares, simply unwrap them and follow the recipe notes for the slightly adjusted water quantity. The key is to use a good, soft-chewing caramel that will melt into a luscious, pourable consistency.
- Sweetened Flaked Coconut (2 ½ cups / 300g): This is arguably the star of the Samoa show! Sweetened flaked coconut adds both sweetness and that characteristic chewy texture. Toasting the coconut is a non-negotiable step; it amplifies its flavor, giving it a deeper, nutty aroma and a beautiful golden-brown color that makes all the difference. Don’t skip this step!
- Water (2 Tbsp, 3 Tbsp if using 14oz caramel squares): Just a small amount of water helps the caramel bits melt into a smooth, pourable sauce, preventing it from becoming too stiff or grainy.
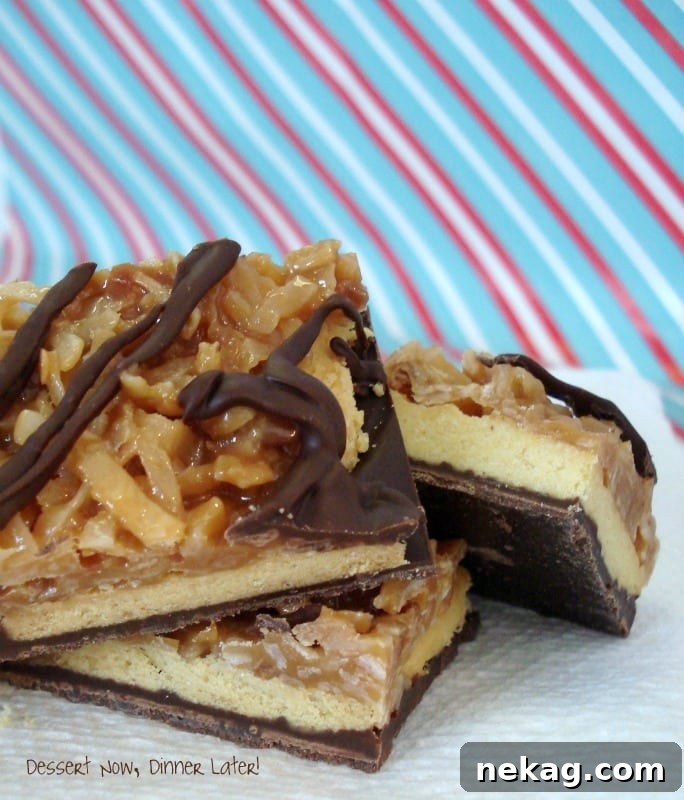
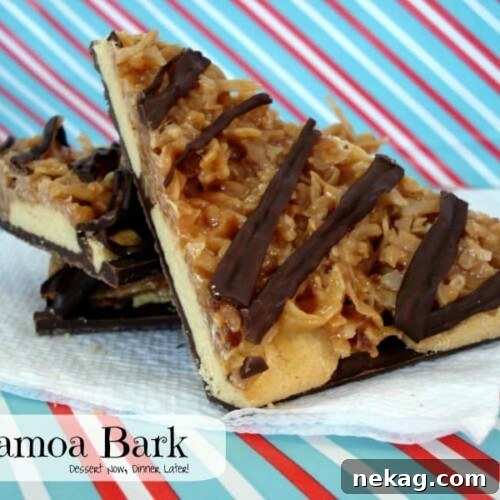
Samoa Bark
Created by: Amber Brady
This irresistible no-bake Samoa Bark brings all the delicious flavors of your favorite Girl Scout cookie right to your kitchen, any time of year. Layers of buttery shortbread, gooey caramel, toasted coconut, and rich chocolate make this an easy and impressive treat perfect for gifting or indulging!
Print Recipe |
Pin Recipe
Yields: 16 Servings
Ingredients
- 12 oz (340 g) semi-sweet chocolate chips (1 bag), divided
- 35-40 shortbread cookies (I used Stauffer’s and it had 35 exactly)
- 11 oz (311 g) Kraft Caramel Bits (or 14oz bag caramel squares)
- 2 ½ cups (300 g) sweetened flaked coconut
- 2 Tbsp water (3 Tbsp if using 14oz of caramel squares)
Instructions
- Line a baking sheet with foil, ensuring enough overhang to easily lift the bark once set. Set aside.
- Save 2 oz of chocolate chips for the final drizzle and set them aside. Melt the remaining 10 oz of semi-sweet chocolate. You can do this over a double boiler for a smooth melt, or carefully in the microwave: heat on half power for 30-second intervals, stirring thoroughly after each interval, until completely melted and smooth. Spread the melted chocolate evenly onto the prepared baking sheet to your desired thickness (about ¼ inch thin).
- While the chocolate is still warm and soft, arrange the shortbread cookies evenly over the entire surface. Press them down gently to ensure they adhere to the chocolate base. The closer together you place them, the easier it will be to top with the caramel-coconut mixture later. Place the baking sheet in the freezer for at least 10-15 minutes to allow the chocolate to set firmly while you proceed with the next steps.
- In a non-stick skillet, toast the sweetened flaked coconut over medium-low heat. Stir frequently and watch it carefully, as coconut can go from perfectly golden to burnt very quickly. This process will take approximately 8-10 minutes, until the coconut is fragrant and beautifully golden brown. Once toasted, immediately remove the coconut from the skillet and set it aside in a bowl to cool slightly.
- Meanwhile, in a separate non-stick saucepan, combine the caramel bits (or unwrapped caramel squares) with 2 tablespoons of water (or 3 tablespoons if using caramel squares). Melt this mixture over medium-low heat, stirring constantly, until the caramel is just melted and smooth. It’s crucial not to overcook the caramel, as it can become hard. As soon as it’s fully melted and pourable, turn off the heat and remove the pan from the burner immediately. Gently fold in the toasted coconut until it is thoroughly coated in the caramel.
- Retrieve your chocolate and cookie base from the freezer. Evenly spread the warm caramel-coconut mixture over the layer of shortbread cookies. Use an offset spatula or the back of a spoon to ensure an even distribution.
- Melt your reserved 2 oz of chocolate chips using the same method as before (microwave on half power in 30-second intervals, stirring). For best results and a professional look, transfer the melted chocolate to a small plastic bag, snip off a tiny corner, and drizzle it artfully over the caramel-coconut layer. This creates those iconic Samoa stripes.
- Place the baking sheet back into the freezer for another 5-10 minutes, or until all the chocolate layers are completely set and firm. Once firm, carefully lift the bark from the baking sheet using the foil overhang. Peel back the foil, place the bark on a cutting board, and use a sharp knife to cut it into desired pieces. Enjoy your homemade Samoa Bark!
Notes
For cleaner cuts, chill your knife briefly before slicing, or run it under hot water and wipe it dry between cuts. Store the bark in an airtight container at room temperature or in the refrigerator for extended freshness.
Disclaimer: Nutritional values were calculated using a third-party tool and are provided as an estimation only.
Sharing this recipe with a link is both encouraged and appreciated. Copying/pasting and/or screenshots of full recipes to any social media is strictly prohibited. Content and photographs are copyright protected.
Did you make this?
Don’t forget to leave a rating below and make sure to follow on Pinterest and Instagram for more!
Pro Tips for the Best Samoa Bark
Achieving bakery-quality Samoa Bark is simpler than you might think, especially with a few expert tips. Follow these guidelines to ensure every batch is perfect:
- Don’t Rush the Coconut Toasting: This step is critical for developing the deep, nutty flavor that makes Samoas so distinctive. Use a non-stick skillet over medium-low heat and stir constantly. It might take 8-10 minutes, but it’s worth the patience. Keep a close eye, as coconut can burn quickly once it starts to brown.
- Quality Chocolate Makes a Difference: While chocolate chips work perfectly, using a good quality semi-sweet chocolate bar, finely chopped, can elevate the flavor and texture of your bark. High-quality chocolate melts smoother and sets with a more satisfying snap.
- Achieve Even Layers: Spreading the melted chocolate base thinly and evenly is key for a balanced bark. Similarly, try to distribute the shortbread cookies and the caramel-coconut mixture as uniformly as possible for consistent flavor in every bite.
- The Freezer is Your Friend: Don’t underestimate the power of chilling. Freezing the chocolate layers helps them set quickly and provides a firm foundation for subsequent layers, preventing melting and mixing. It also makes cutting much easier.
- For Cleaner Cuts: Once the bark is fully set, use a large, sharp knife to cut into pieces. For extra clean cuts, you can warm your knife slightly under hot water (and dry it thoroughly) between cuts. This helps the knife glide through the chocolate and caramel without cracking or dragging.
- Drizzle with Precision: For that signature Samoa look, transfer your melted chocolate for drizzling into a small piping bag or a ziptop bag with a tiny corner snipped off. This gives you more control and helps create even, attractive stripes.
Variations to Explore
While the classic Samoa Bark is undeniably delicious, don’t be afraid to experiment with these fun variations:
- Dark Chocolate Delight: For those who prefer a richer, less sweet profile, swap out some or all of the semi-sweet chocolate for dark chocolate. A 60-70% cocoa content would be magnificent.
- A Pinch of Sea Salt: Elevate the flavors with a sprinkle of flaky sea salt over the caramel-coconut layer before the final chocolate drizzle. The touch of salt perfectly balances the sweetness.
- Nutty Twist: For added crunch and flavor, consider stirring in a handful of chopped toasted pecans or almonds into your caramel-coconut mixture.
- Different Cookie Bases: While shortbread is classic, you could experiment with other crisp, plain cookies like digestive biscuits or even graham crackers for a different base texture.
- White Chocolate Drizzle: Instead of a semi-sweet chocolate drizzle, use melted white chocolate for a striking visual contrast and a creamier taste.
Storage & Make Ahead
Samoa Bark is an excellent make-ahead treat, perfect for holiday preparations or gifting. Properly stored, it maintains its deliciousness for several days.
- At Room Temperature: Store Samoa Bark in an airtight container at cool room temperature for up to 3-4 days. If your kitchen is particularly warm, you might want to consider refrigeration.
- In the Refrigerator: For longer freshness, store the bark in an airtight container in the refrigerator for up to 1-2 weeks. Be aware that the chocolate might bloom slightly (form a whitish film) due to temperature changes, but it’s still safe and delicious to eat. Bring to room temperature for optimal flavor and texture.
- Freezing: Samoa Bark freezes beautifully! Place pieces in an airtight freezer-safe container, separating layers with parchment paper to prevent sticking. It can be frozen for up to 1-2 months. Thaw in the refrigerator or at room temperature before serving.
- Gifting: This bark is an ideal homemade gift. Package it in decorative tins, clear cellophane bags tied with festive ribbons, or small bakery boxes. It’s a thoughtful and delicious present for neighbors, teachers, friends, and family.
Frequently Asked Questions (FAQs)
Here are answers to some common questions you might have when making Samoa Bark:
Q: Can I use pre-toasted coconut?
A: While you can buy pre-toasted coconut, I highly recommend toasting it yourself. Freshly toasted coconut has a much more vibrant flavor and aroma that truly makes a difference in this recipe. It’s a simple step that yields significant flavor rewards.
Q: My caramel mixture seems too thick, what should I do?
A: If your caramel feels too thick to spread, you can gently warm it over very low heat for a few seconds, adding another half teaspoon of water if needed, and stirring until it becomes more pliable. Be careful not to overheat it, as it can seize or burn quickly.
Q: How do I prevent the chocolate from seizing when melting?
A: The key to melting chocolate smoothly is to avoid introducing any water or moisture, and to melt it gently. If using a microwave, use half power and stir thoroughly after each short interval. If using a double boiler, ensure the bottom of your bowl doesn’t touch the simmering water, and no steam escapes into the chocolate. Stirring frequently also helps.
Q: Can I use milk chocolate instead of semi-sweet?
A: Yes, you can! If you prefer a sweeter chocolate, milk chocolate can be used for both the base and the drizzle. Keep in mind it will make the bark considerably sweeter, so adjust to your personal preference. Dark chocolate is also a great option for a richer, less sweet treat.
Q: How long does it take for the bark to set in the freezer?
A: Each layer of chocolate typically takes about 5-10 minutes to set in the freezer. The final setting after all layers and the drizzle are applied might take 10-15 minutes to ensure it’s completely firm and ready to cut without melting.
Q: Is this recipe gluten-free?
A: This recipe can easily be made gluten-free by simply using gluten-free shortbread cookies. All other ingredients are typically gluten-free, but always check labels to be sure.
This Samoa Bark recipe offers a fantastic way to enjoy the iconic flavors of Girl Scout Samoas without the wait. It’s easy, fun to make, and yields a beautifully impressive treat that will surely delight anyone who tries it. Whether you’re making it for a special occasion, as a thoughtful gift, or simply to satisfy your own cravings, this bark is destined to become a cherished addition to your dessert repertoire. So, gather your ingredients, follow these simple steps, and prepare to indulge in a truly magical, no-bake experience. Happy making, and even happier eating!