
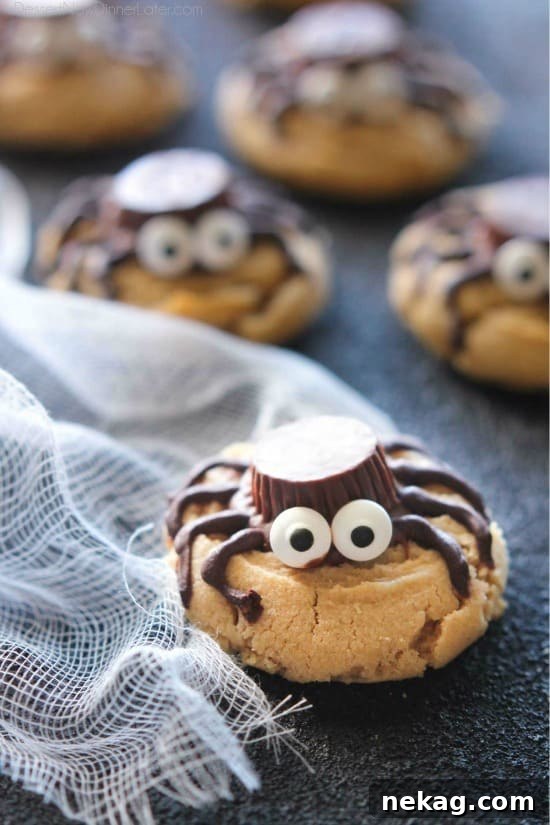
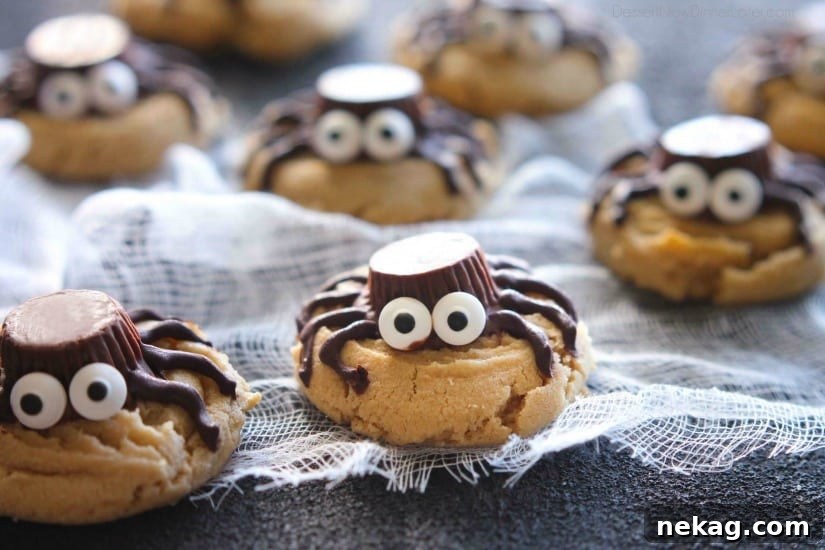
Not all Halloween treats have to be spooky and gory! This Halloween season, delight your family and friends with these irresistibly cute Spider Cookies. Featuring rich peanut butter cups, luscious chocolate, and playful candy eyes, these festive cookies are built upon what we believe is the BEST peanut butter cookie recipe you’ll ever try! They’re the perfect blend of sweet, salty, and just a little bit creepy-crawly fun.
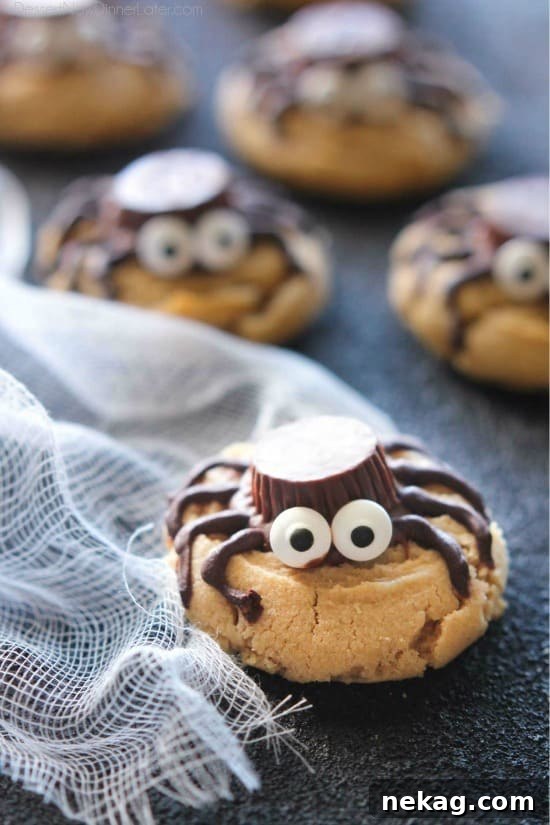
Halloween has always held a special place in my heart, but my adoration leans strongly towards the whimsical and charming side of the holiday. Think princesses, doctors, beloved Disney characters – anything that celebrates creativity and fun, rather than the macabre. This preference extends to my Halloween food choices as well. While some people revel in gruesome brain-shaped jellos or worm-infested desserts, I prefer treats that are festive and playful. That’s precisely why these adorable Spider Cookies are an absolute favorite. They capture the spirit of Halloween with their eight-legged design, yet remain delightfully cute and only “semi-creepy,” making them ideal for all ages.
My Real-Life Spider Saga: A Culinary Irony
It’s quite ironic, really, how much I enjoy making these sweet spider treats, given my real-life aversion to actual spiders. To say I dislike them would be an understatement – I genuinely hate them! If one dares to venture into my home, I’ll usually recruit my children for the unpleasant task of dispatching it. On occasion, I resort to vacuuming them up, but not before letting the vacuum run for a solid five minutes, just to be absolutely certain it’s met its demise. The thought of a spider crawling out and, heaven forbid, having babies in my house is simply unbearable. So, while I celebrate these edible eight-legged creations, rest assured that my sentiments toward their real-world counterparts remain firmly rooted in fear and avoidance!
Crafting Your Cute Spider Cookies: A Simple & Sweet Process
If you’re familiar with making classic “blossom” or “kiss” cookies, then you’ll find crafting these Halloween Spider Cookies incredibly straightforward and enjoyable. The process is strikingly similar, leveraging the warmth of a freshly baked cookie to meld with a beloved candy. We start by baking our incredibly flavorful peanut butter cookies to a golden perfection. As soon as they emerge from the oven, still wonderfully warm and soft, a miniature Reese’s peanut butter cup is gently pressed into the center of each one, forming the spider’s body. The residual heat from the cookie causes the peanut butter cup to soften ever so slightly, creating a seamless bond.
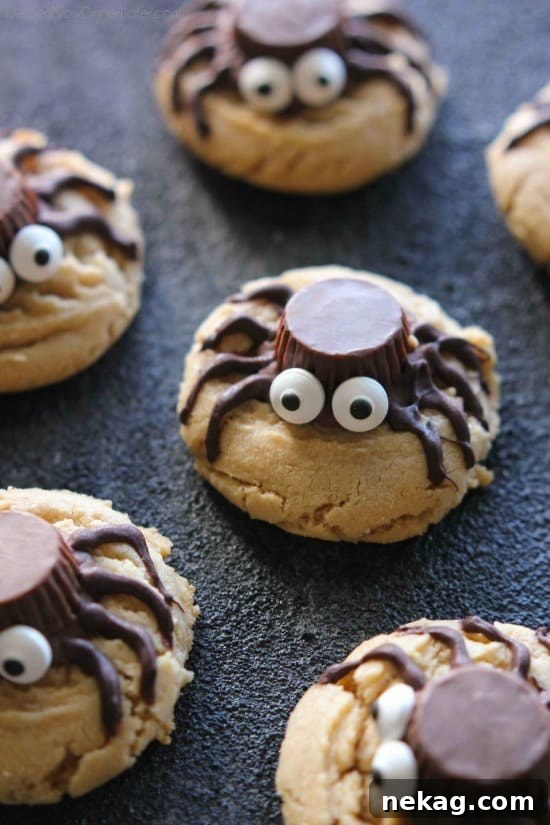
The next step in bringing our spiders to life is adding their adorable eyes. While the Reese’s cup is still warm and pliable, two candy eyeballs are carefully placed on the side of each peanut butter cup. This quick addition transforms a simple cookie into an instantly recognizable, friendly spider. To prevent the peanut butter cups from melting too much and to help the candy eyes set firmly, the cookies are then transferred to the freezer for a brief chilling period. This ensures the bodies are firm before moving on to the final decorative touch.
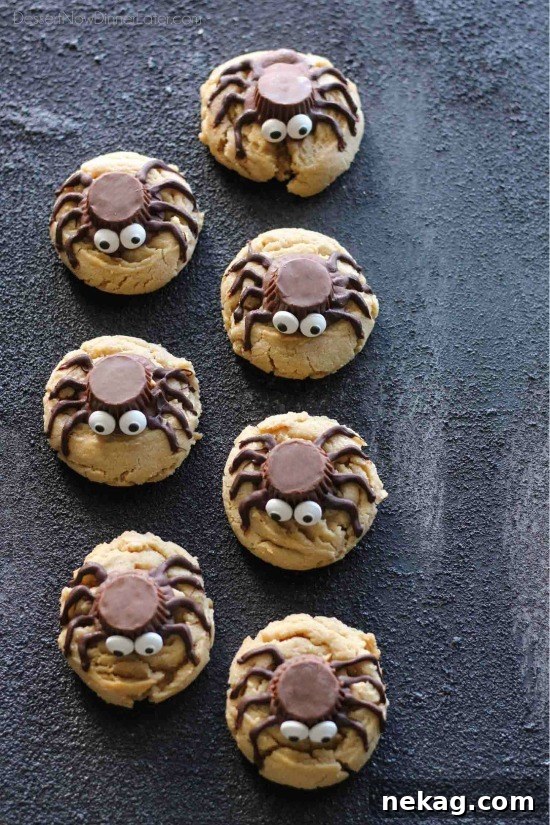
The last, and arguably most fun, part of the process is piping the spider’s legs. Melted chocolate chips, thinned slightly with a touch of coconut oil or shortening for perfect consistency, are key here. This melted chocolate is transferred to a piping bag (or a zip-top bag with a tiny corner snipped off) and used to create eight distinct, bent “L-shaped” legs on each cookie, radiating from the peanut butter cup body. Once all the legs are piped, the cookies make another quick trip back to the freezer to allow the chocolate to set completely. The result? A batch of delicious, visually charming spider cookies ready to steal the show at any Halloween gathering!
The Ultimate Peanut Butter Cookie Base: A Foundation for Flavor
What sets these spider cookies apart isn’t just their charming appearance; it’s the incredibly delicious peanut butter cookie base. We’re not just making a vehicle for candy; we’re crafting a truly exceptional peanut butter cookie that stands on its own. This recipe yields cookies that are perfectly soft, chewy, and packed with that classic, comforting peanut butter flavor. The combination of both granulated and brown sugar ensures a rich depth of flavor and a wonderfully moist texture that melts in your mouth. The addition of a quality creamy peanut butter, a large egg for binding, and a hint of vanilla extract elevate these cookies from good to truly phenomenal.
Getting the flour measurement just right is crucial for the perfect texture, which is why we recommend stirring, spooning, and leveling your all-purpose flour. This method prevents overpacking, which can lead to dry, dense cookies. Baking soda and salt work in harmony to provide the ideal lift and balance the sweetness, bringing out the best in the peanut butter. Each bite of this cookie base is a testament to classic baking, making it a recipe you’ll want to revisit long after Halloween is over. It’s this superior foundation that truly makes these spider cookies a must-try Halloween dessert, appealing to all peanut butter and chocolate lovers alike!
Tips for Spider Cookie Success
- Don’t Overbake: Peanut butter cookies are best when slightly underbaked, resulting in a soft, chewy texture. They might look a little undone when you pull them from the oven, but they will continue to set as they cool.
- Work Quickly: The key to getting the Reese’s cups to melt just enough and the candy eyes to stick is adding them while the cookies are still warm. Have everything prepped and ready to go.
- Chill for Stability: Don’t skip the freezer steps! Chilling the cookies after adding the peanut butter cups and eyes, and again after piping the legs, ensures everything sets properly and prevents your spiders from becoming a melted mess.
- Perfect Chocolate for Piping: When melting your chocolate chips, add a tiny bit of coconut oil or shortening. This makes the chocolate smoother and easier to pipe, giving you beautifully defined spider legs. Melt in short bursts in the microwave, stirring well after each interval, to prevent burning.
- Small Snip for Legs: When preparing your piping bag (or zip-top bag), cut a very small corner. You want thin, delicate legs, not thick, clunky ones. You can always make the opening larger, but you can’t make it smaller!
Creative Variations & Serving Suggestions
While the classic peanut butter cup spider is a winner, feel free to get creative! You could try using white chocolate peanut butter cups for a different look, or even mini caramel cups. For the eyes, if candy eyeballs aren’t available, small dots of white icing with a black dot in the center, or even mini M&Ms, can work. Experiment with different types of chocolate for the legs – dark chocolate for a richer flavor, or even colored candy melts for a vibrant twist.
These spider cookies are perfect for Halloween parties, school events, or simply a fun baking project with kids. Arrange them on a platter with some cobweb decorations or alongside other Halloween treats like ghost brownies or pumpkin-shaped sugar cookies. They also make fantastic edible gifts for neighbors and friends. Stored in an airtight container at room temperature, these delightful cookies will stay fresh for up to 5 days, though it’s doubtful they’ll last that long!
If you love the irresistible combination of peanut butter and chocolate as much as I do, then these charming Halloween Spider Cookies are an absolute must-make. They’re a guaranteed hit, bringing smiles and a touch of sweet, spooky fun to your celebration. Enjoy every delicious bite!

Spider Cookies
Amber Brady
20 minutes
10 minutes
30 minutes
Pin
Rate
30
cookies
Ingredients
-
½
cup
(113
g)
unsalted butter,
softened -
½
cup
(100
g)
granulated sugar -
½
cup
(100
g)
brown sugar,
gently packed -
½
cup
(132
g)
creamy peanut butter -
1
large egg -
1
tsp
vanilla extract -
1 ½
cups
(180
g)
all-purpose flour,
(stir, spoon & level) -
1
tsp
baking soda -
½
tsp
salt -
30
miniature Reese’s peanut butter cups,
unwrapped -
½
cup
(85
g)
chocolate chips,
(milk chocolate or semi-sweet) -
¼
tsp
coconut oil or shortening,
for thinning the chocolate -
0.88
oz
(25
g)
pkg Wilton Candy Eyeballs
Instructions
-
Cream the butter and sugars together in the bowl of a stand mixer using the paddle attachment. Add the peanut butter, egg, and vanilla. Mix well and scrape the bowl.
-
Combine the flour, baking soda, and salt. Add to the butter mixture all at once and mix until just incorporated.
-
Working in batches, scoop dough into balls and place onto silicone lined baking sheets about 2-inches apart — up to 12 cookies per baking sheet (recipe makes 30 cookies in total). Bake at 350 degrees Fahrenheit for 10 minutes or until just set. Allow cookies to cool slightly on the tray for 2 minutes.
-
Lightly press one mini peanut butter cup in the center of each cookie while still warm. Allow to melt slightly. As soon as the peanut butter cups are soft enough, place two eyeballs on the side of each peanut butter cup. Repeat for all cookies on the tray then move the tray to the freezer to allow the chocolate to set.
-
Melt the chocolate chips and coconut oil (or shortening) in the microwave in short 10-20 second bursts until melted. Place melted chocolate inside a zip-top sandwich bag. Cut off a small piece of the corner and pipe 8 legs on each cookie in an “L” shape to create a bent leg look.
-
Return cookies to freezer to set the chocolate. Remove and store cookies covered with plastic wrap or in an airtight container up to 5 days.
Notes
Sharing this recipe with a link is both encouraged and appreciated. Copying/pasting and/or screenshots of full recipes to any social media is strictly prohibited. Content and photographs are copyright protected.
Did you make this?
Don’t forget to leave a rating below and make sure to follow on Pinterest and Instagram for more!