
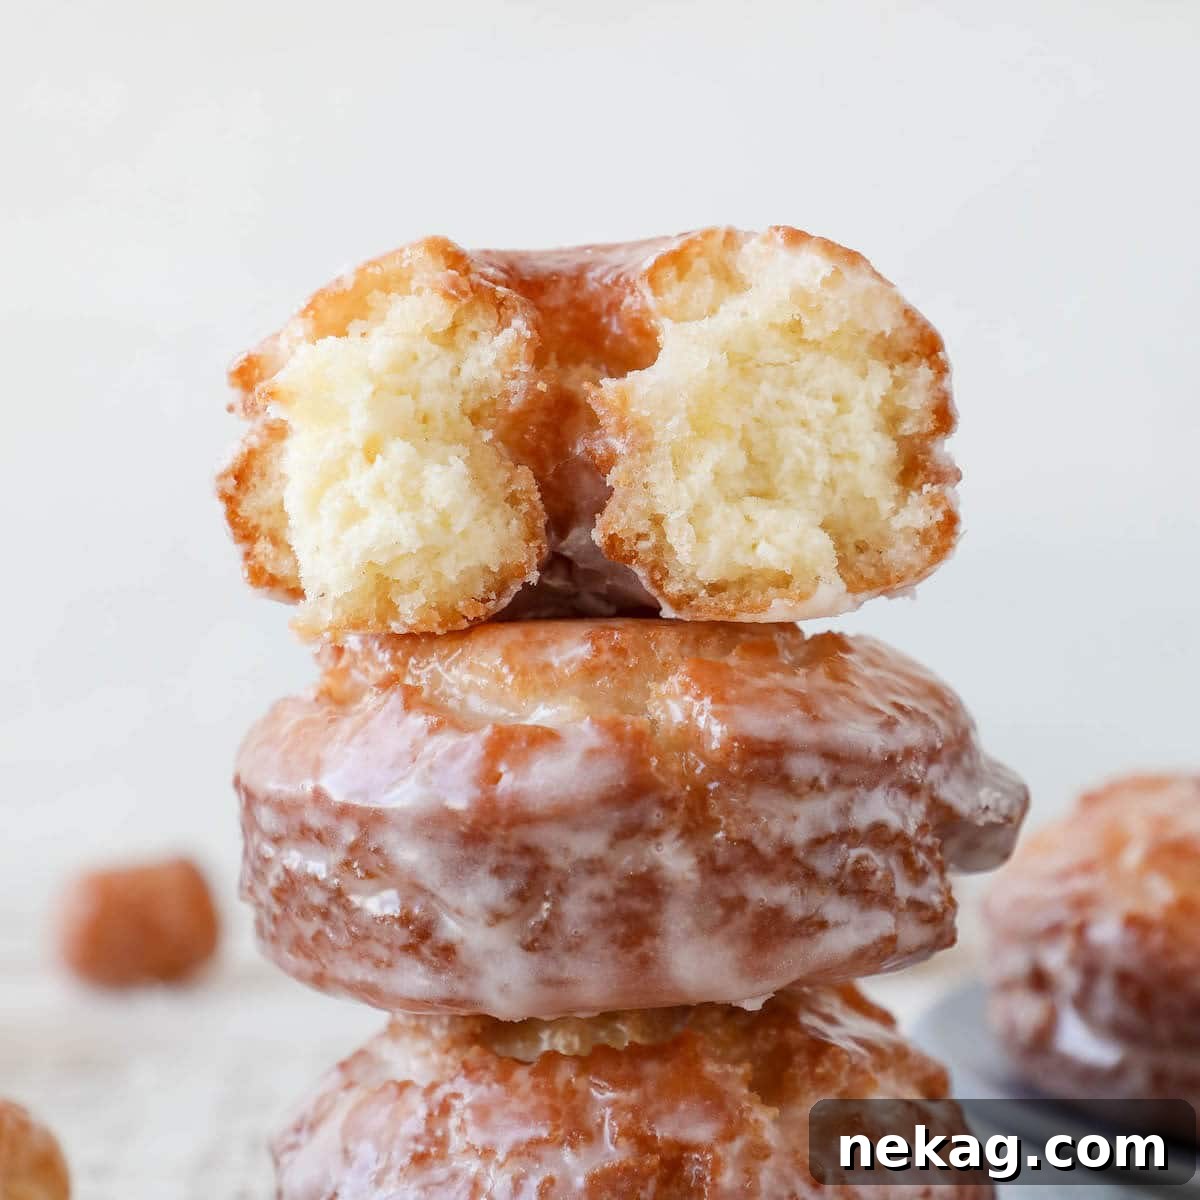
Old Fashioned Sour Cream Donuts: Your Guide to Pillowy Perfection
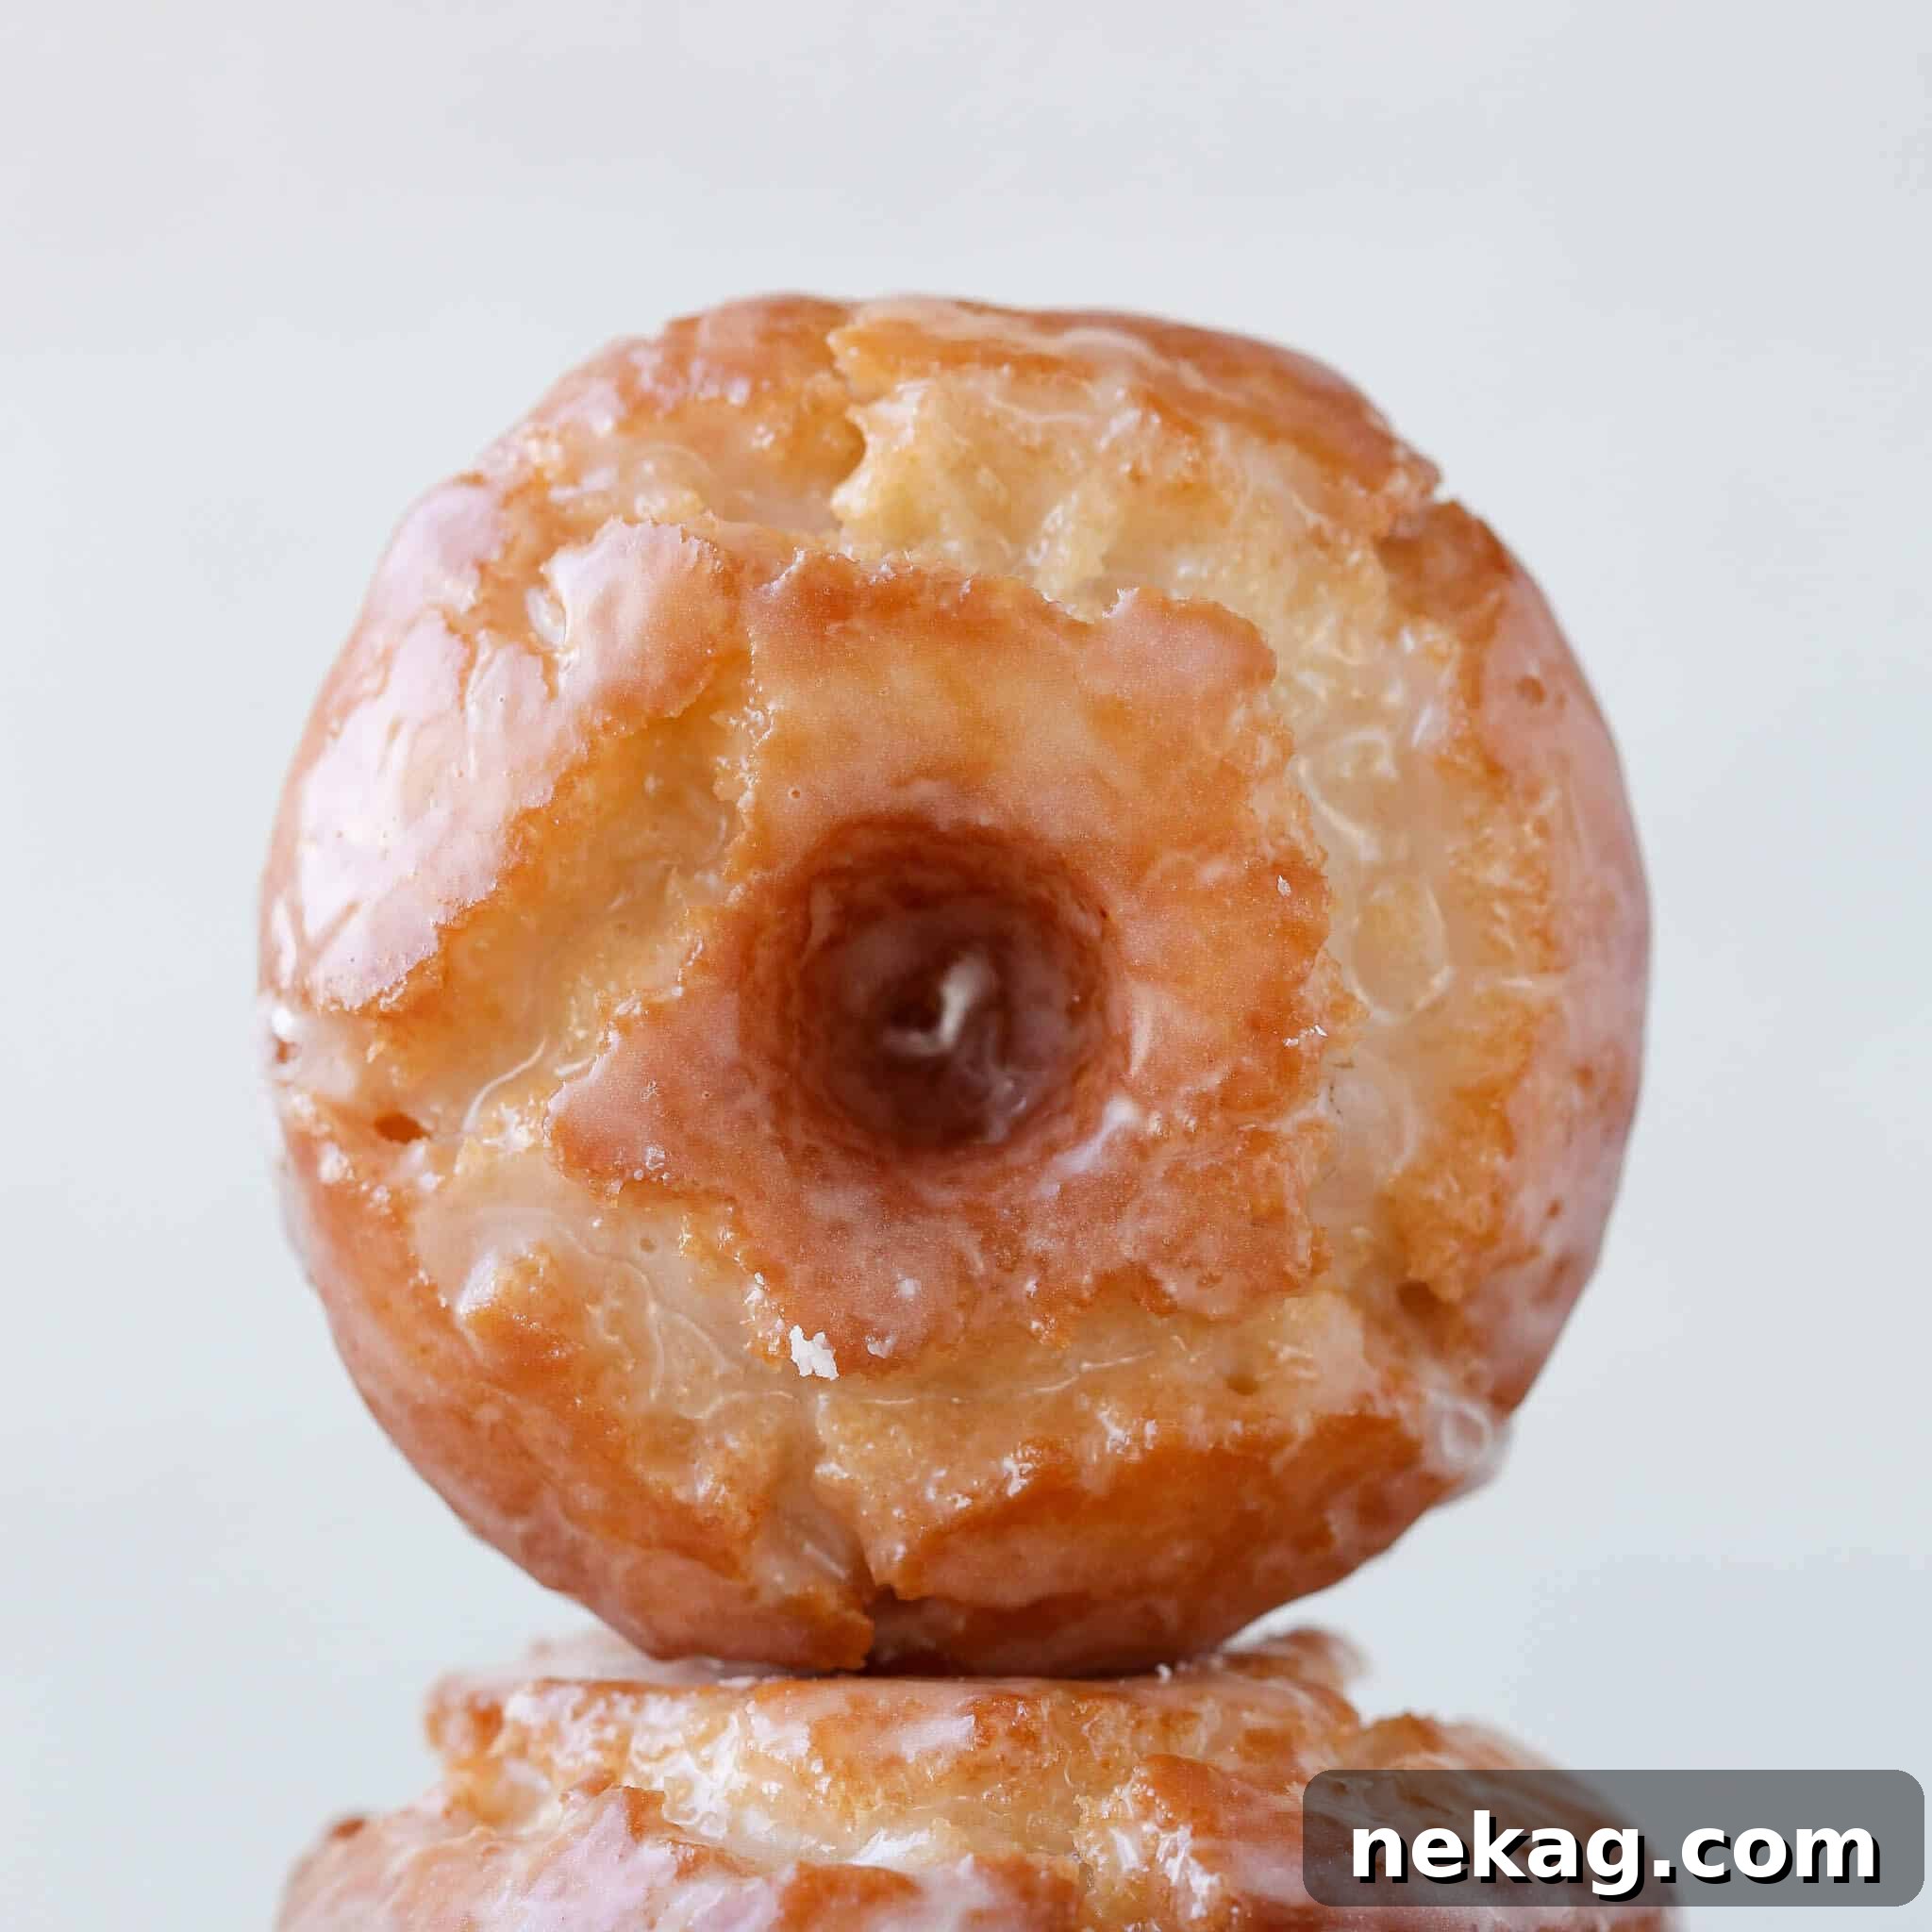
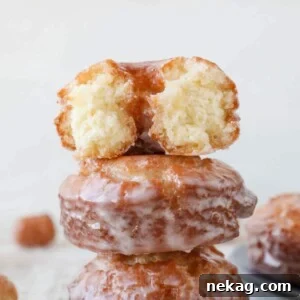
Prepare to create culinary magic in your own kitchen with these incredible Old Fashioned Sour Cream Donuts. This exceptional cake donut recipe yields fried doughnuts with an absolutely divine texture: unbelievably soft, tender, and cakey on the inside, beautifully complemented by a perfectly crispy, golden-brown exterior. Each donut is then lovingly finished with a simple, classic sweet glaze, transforming them into an irresistible treat that rivals any bakery.
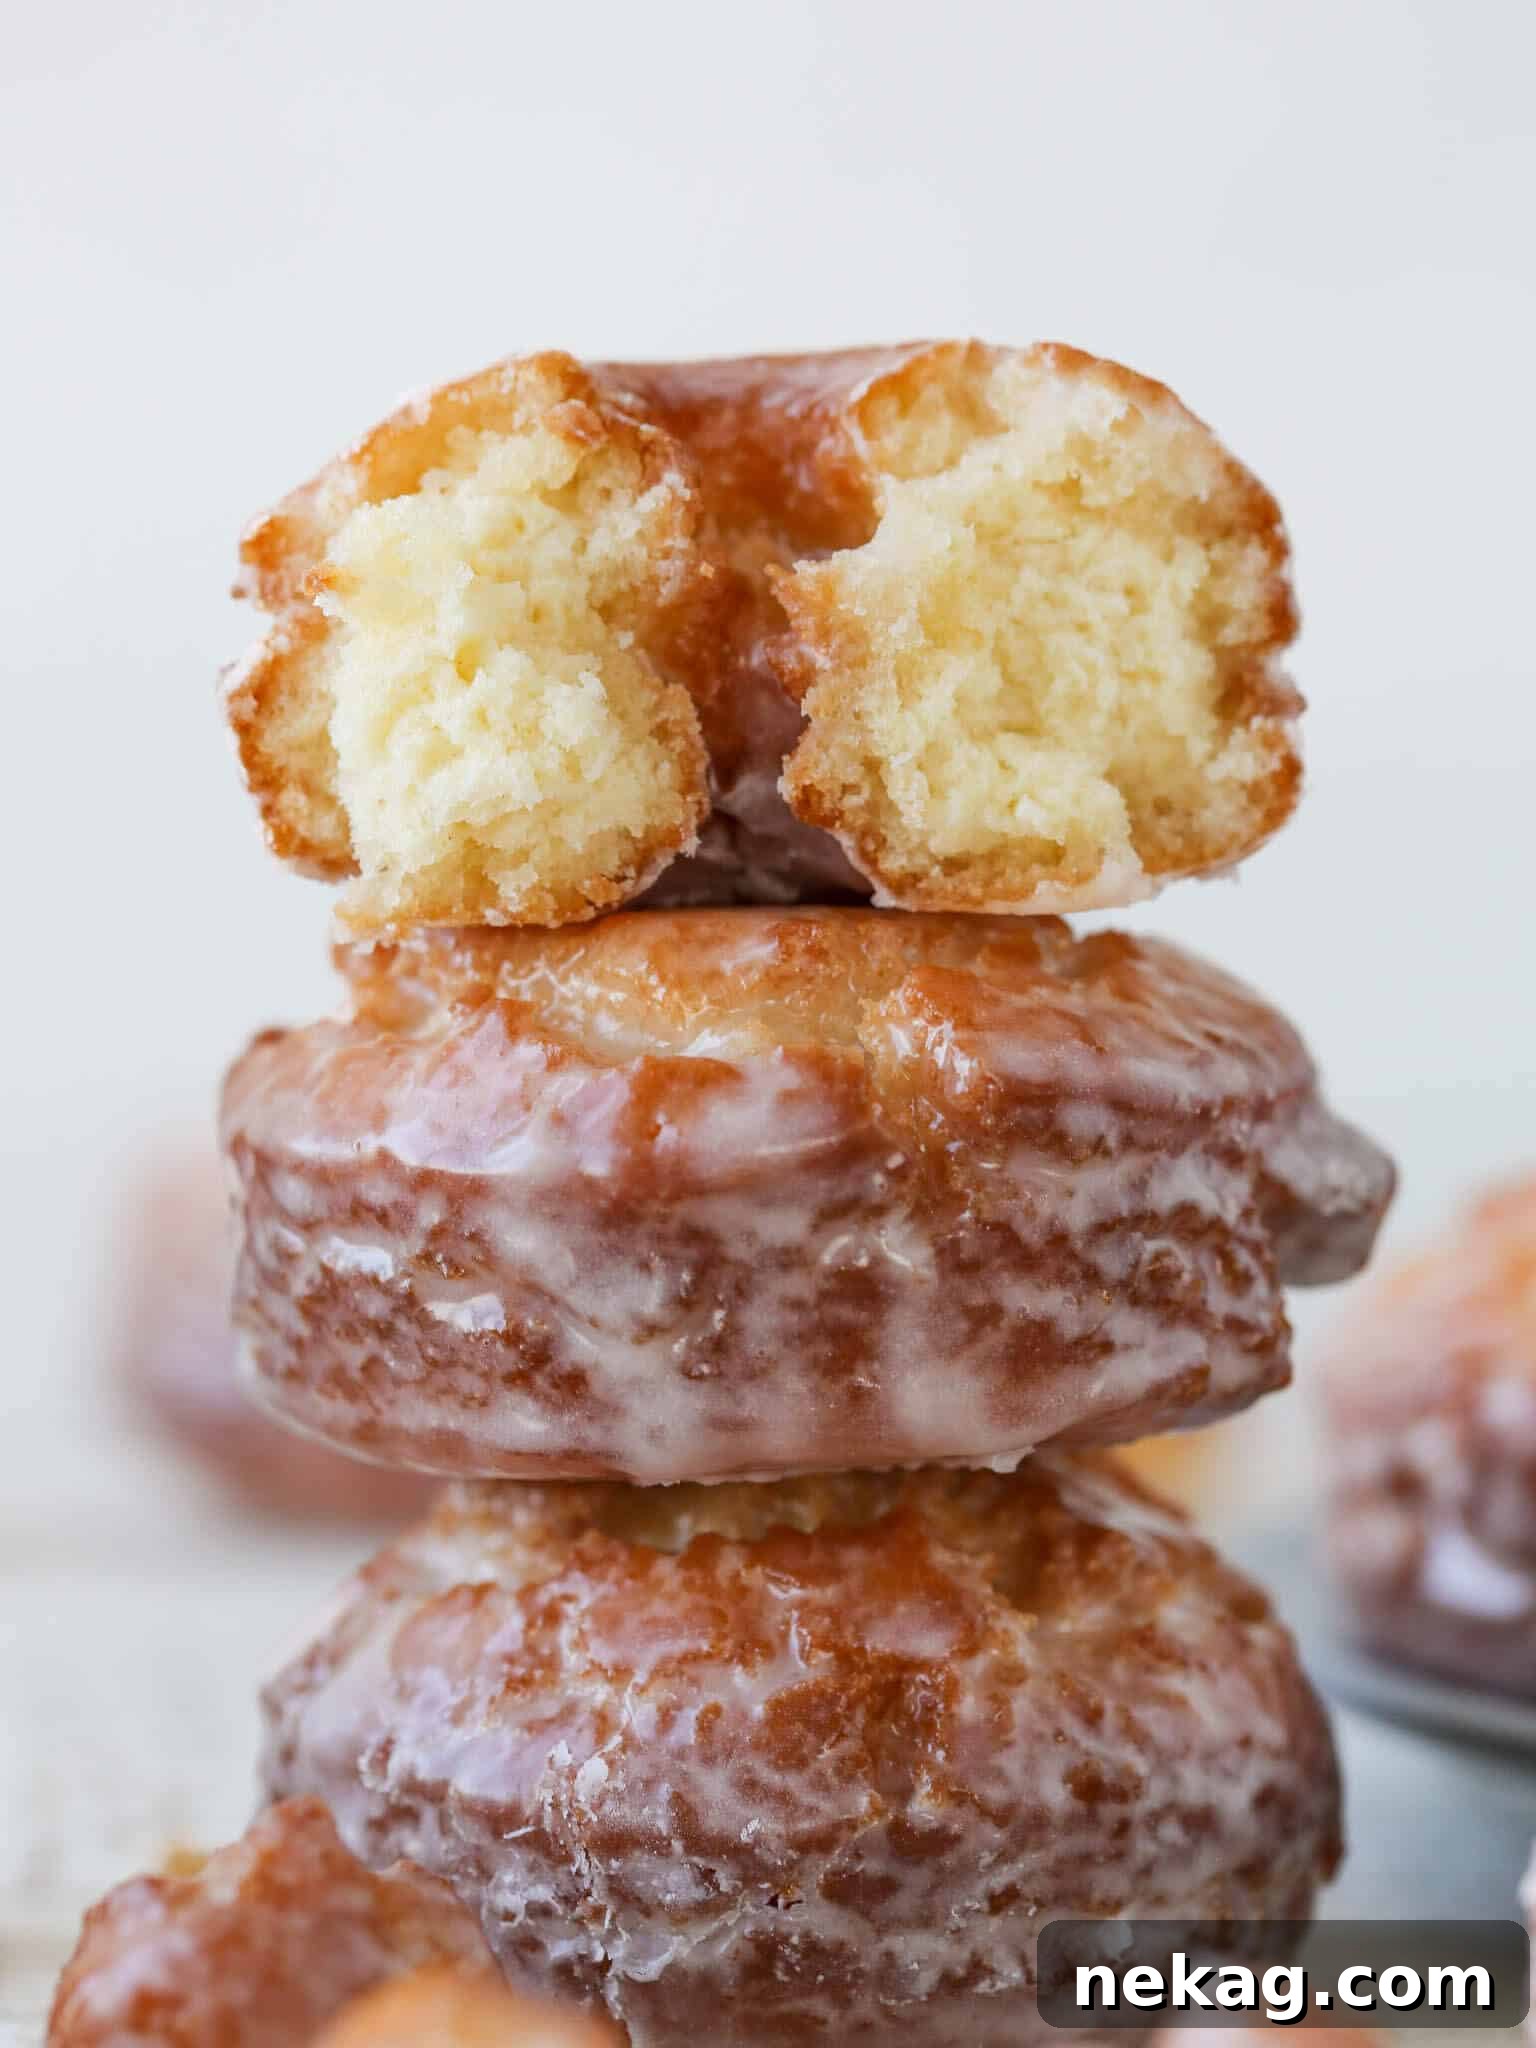
This Sour Cream Cake Donut Recipe is surprisingly straightforward, making it almost dangerously easy to whip up a batch whenever a craving strikes. The donut dough comes together effortlessly, and after a crucial chilling period, you’ll have perfect old-fashioned donuts ready to devour in under two minutes of frying time per batch. Top them off with my simple, yet iconic donut glaze, and you’ll forever question why you ever bought donuts from a store. The aroma of warm fryer oil and sweet dough will fill your kitchen – and trust me, it’s a good kind of trouble!
My journey into the world of frying wasn’t without its initial trepidation. During my time at the esteemed International Culinary Center (ICC), the thought of deep-frying brought a flurry of butterflies to my stomach. Yet, I mustered the courage to tackle challenging recipes like delicate beignets, crispy churros, and classic jelly donuts. Fast forward six years, through demanding line cook positions and the rewarding role of a pastry chef in various Manhattan restaurants, I’ve now gathered a wealth of experience and secrets that I’m thrilled to share with you.
If you’re feeling a bit nervous about frying, please know that I’ve been exactly where you are. We’ll approach these sour cream donuts as a team, building your confidence with each golden-brown bite. Once you’ve mastered these, you’ll be ready to explore other delightful variations, including my popular glazed chocolate donuts, elegant French crullers, seasonal pumpkin donuts, and the ever-popular jelly donut recipe!
Table of Contents
- Why You Will Love These Sour Cream Donuts
- The Magic of Sour Cream in Donuts
- Essential Ingredients for Sour Cream Donuts
- Step-by-Step Guide to Making Sour Cream Donuts
- Frying Sour Cream Donuts Like a Professional Chef
- Professional Tips for Perfect Sour Cream Donuts
- Can You Bake These Sour Cream Donuts?
- Recipe Substitutions and Adjustments
- Creative Variations for Your Donuts
- Storage Best Practices for Donuts
- Frequently Asked Questions About Sour Cream Donuts
- Chef Lindsey’s Expert Recipe Tip
- Old Fashioned Sour Cream Cake Donuts Recipe Card
- Before You Go!
Why You Will Love These Sour Cream Donuts
- A Pillow of Fried Bliss: The texture of these homemade sour cream donuts is truly unparalleled. Each bite offers a delightful combination of light, airy tenderness on the inside, perfectly contrasted with a satisfyingly crispy exterior. They are, quite simply, divine.
- Prepare Ahead for Convenience: This sour cream cake donut recipe is incredibly flexible, allowing you to prepare the dough up to three days in advance. You can refrigerate the dough at various stages before frying, giving you the freedom to fit donut-making into your schedule. Just ensure they are fried or frozen within three days for optimal freshness and texture.
- Impressive Yet Effortless: While homemade donuts might seem daunting, I’ve meticulously broken down each step into clear, manageable details. This comprehensive guide is designed to banish any anxiety and empower you to create perfect, bakery-quality donuts every single time. These irresistible treats are your gateway to a wonderful world of fried desserts, and imagine the delight on your friends’ and family’s faces when you tell them the amazing donuts they’re enjoying came straight from your kitchen!
The Magic of Sour Cream in Donuts
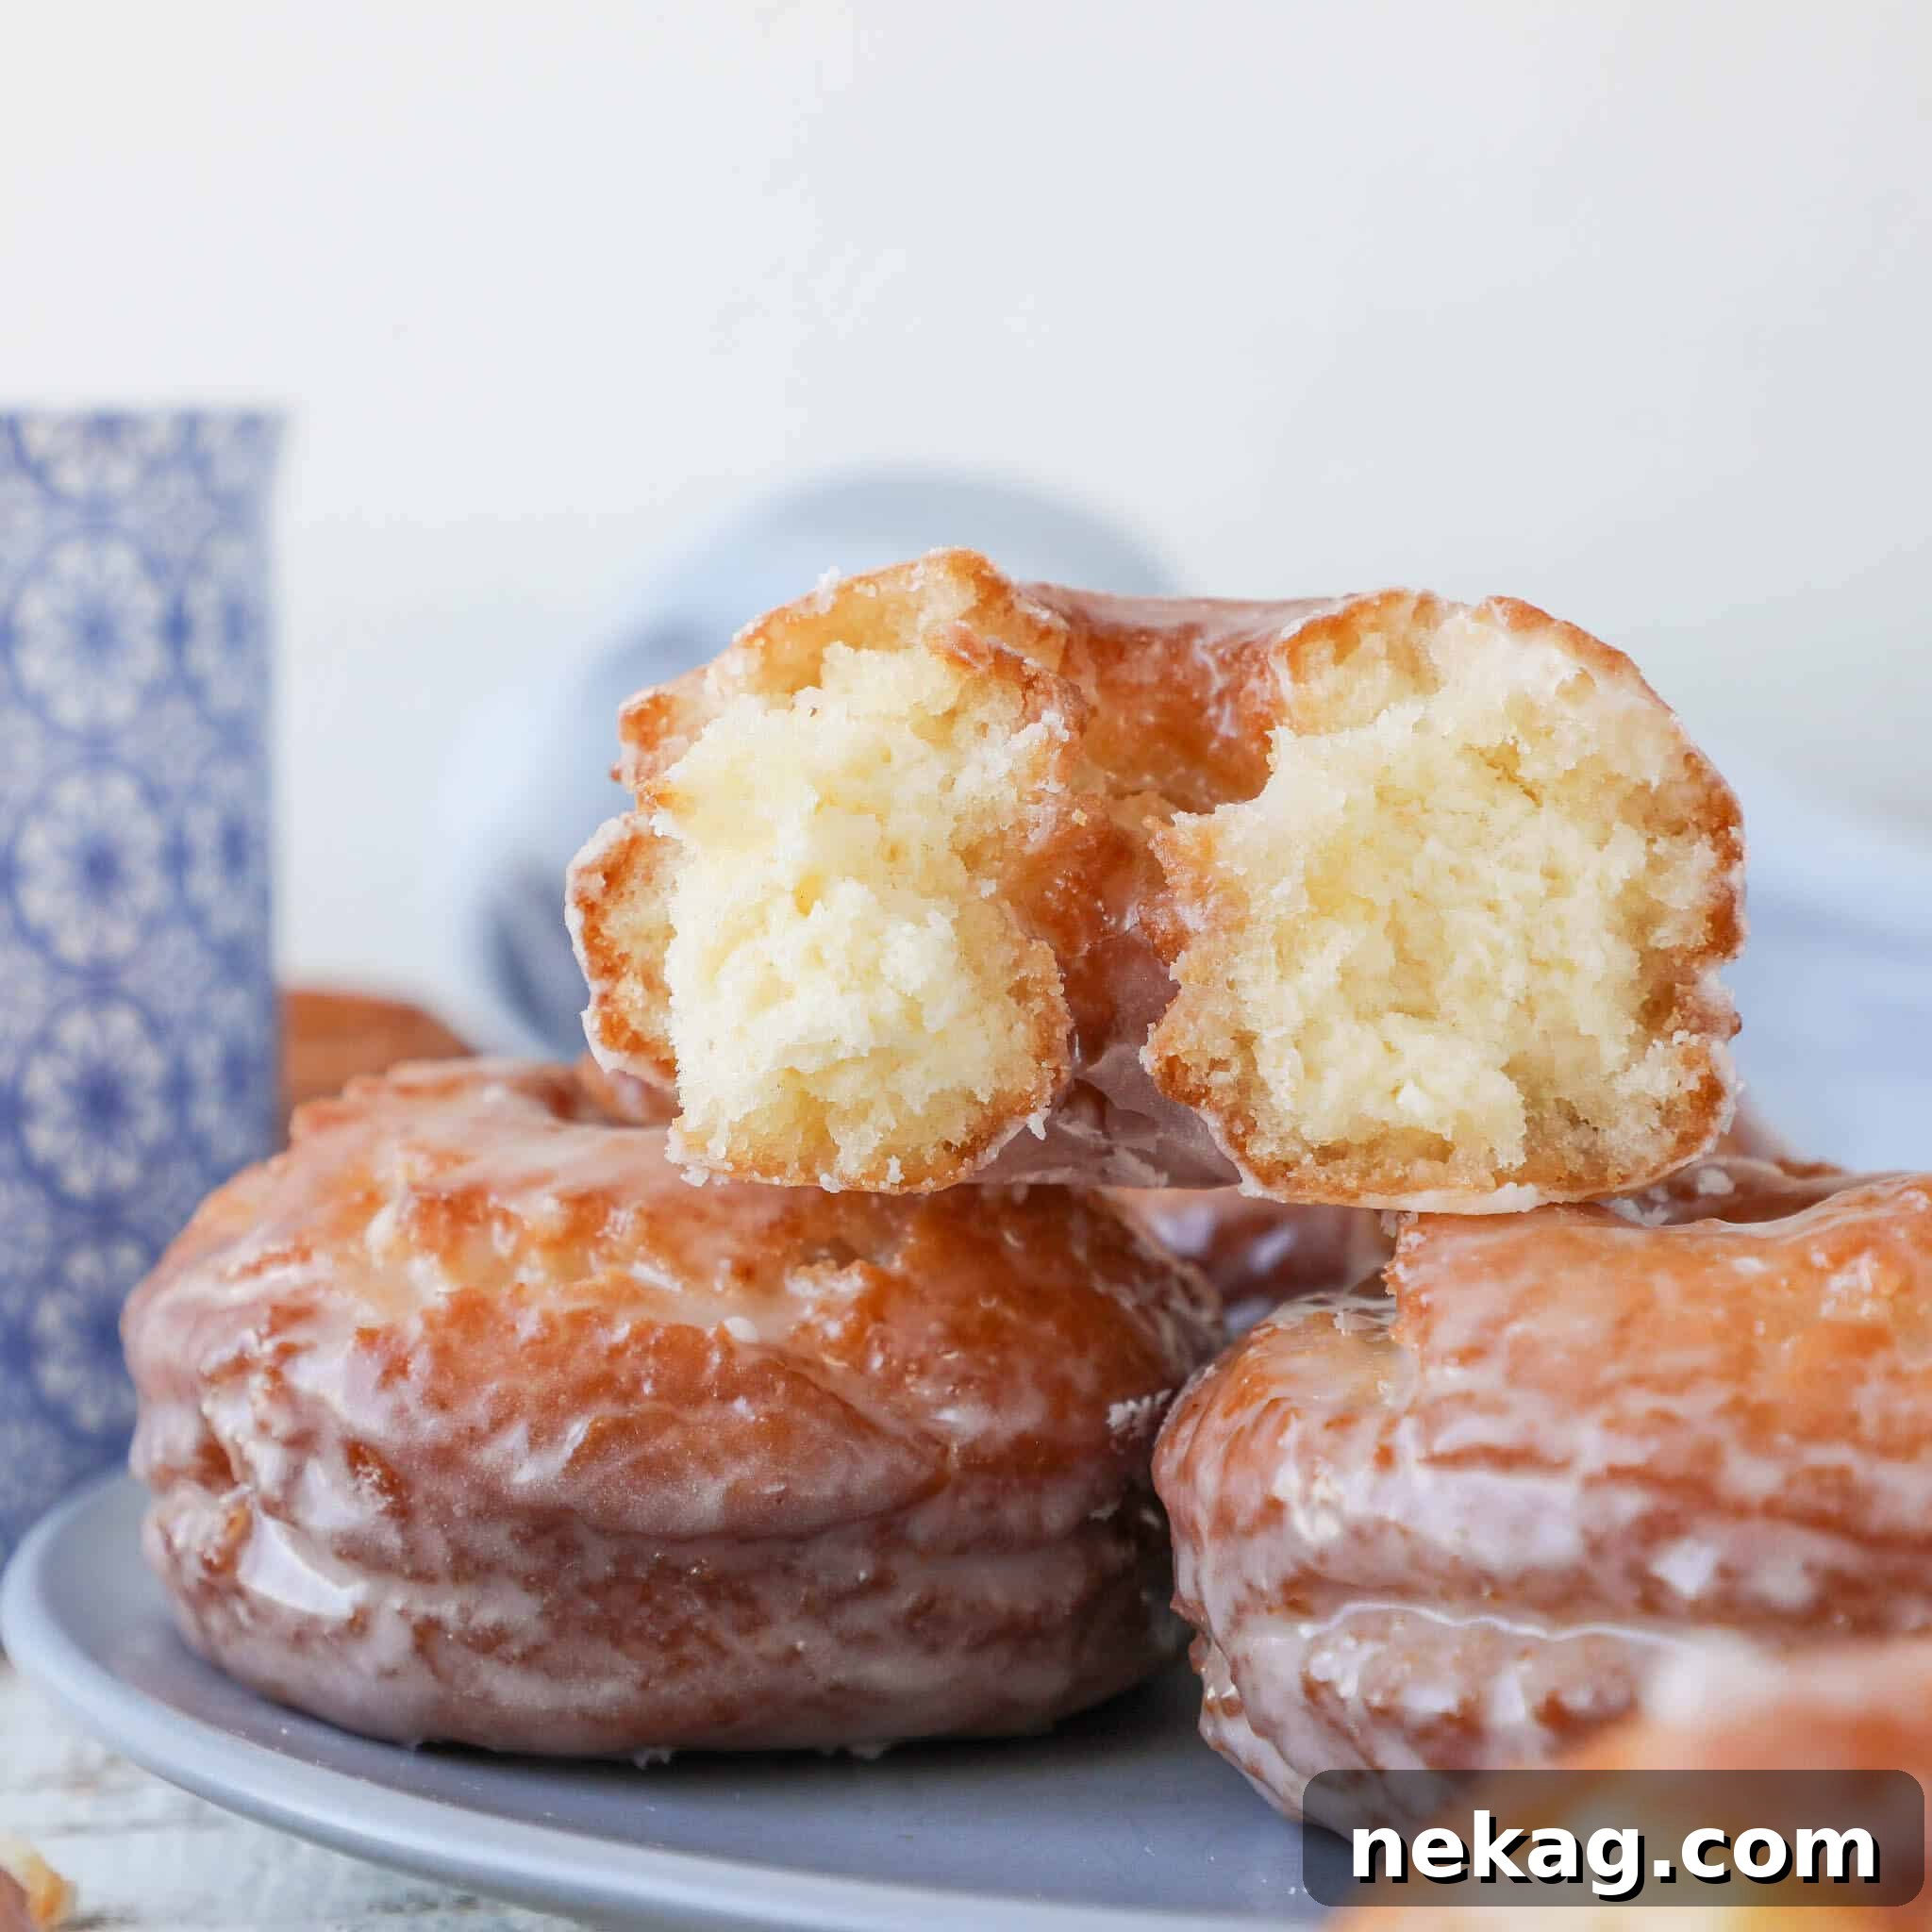
Ever wondered why sour cream is a star ingredient in the best cake donut recipes? It’s all about creating that signature soft and tender crumb. The fat content in sour cream is crucial; it contributes richness and keeps the donuts incredibly moist without making the dough overly wet or sticky. An excessively wet dough, in contrast, often results in a gummy, tough texture after frying. Sour cream acts as the perfect binding agent, holding the dough together beautifully while providing just the right amount of moisture. This balance allows the interior to remain wonderfully soft and cakey, while simultaneously ensuring the exterior achieves that desirable crispiness we all crave in an old-fashioned donut.
Essential Ingredients for Sour Cream Donuts
Crafting the perfect old fashioned sour cream donut starts with understanding the role of each ingredient. Here’s a closer look at what you’ll need and why it matters:
- All-Purpose Flour: For the majority of my donut recipes, I lean on all-purpose flour. It strikes the ideal balance of gluten content, allowing the dough to develop enough structure for a delightful chew while remaining wonderfully tender and soft. While cake flour or pastry flour could also work, I’ve found consistent success with all-purpose flour over the last five years, so it’s my tried-and-true recommendation.
- Granulated Sugar: More than just a sweetener, granulated sugar plays a multifaceted role. When beaten with eggs, it contributes to leavening, helping to create a light and airy texture. It also ensures the donuts puff up beautifully when fried, adding to their delightful structure.
- Kosher Salt: Don’t underestimate the power of salt in sweet recipes! Kosher salt (which is less dense than table salt, so a tablespoon weighs less) is essential for enhancing and balancing the overall flavor profile of the donut dough. While the quantity might seem generous, it’s perfectly calibrated to bring out the best in your donuts.
- Egg Yolks: The inclusion of egg yolks is a key secret to rich, cakey, and tender sour cream donuts. The fat from the yolks adds luxurious richness and helps to shorten gluten strands, preventing the donuts from becoming tough. Properly beating the egg yolks also introduces air, providing additional leavening and contributing to a lighter texture. Furthermore, eggs act as an emulsifier, ensuring a cohesive and texturally perfect batter.
- Unsalted Butter: Using unsalted butter gives you precise control over the overall saltiness of your dough. Beyond that, it infuses the donuts with a classic, rich buttery flavor that elevates their deliciousness.
- Sour Cream: As the star ingredient, sour cream is non-negotiable for these sour cream cake donuts. It provides all the necessary moisture, binding the dough together without making it excessively wet. This prevents the donuts from becoming tough or gummy, ensuring that signature soft interior.
- Baking Powder: We rely on double-acting baking powder for superior leavening. It reacts initially when mixed with an acid (our sour cream!) and then again when exposed to heat during frying. This dual action is crucial, especially if you plan to make the dough a day or two in advance. Unlike baking soda, which has a single, immediate reaction, double-acting baking powder retains its leavening power until it hits the hot oil, guaranteeing a beautiful puff.
Pro Tip: Keep the Dough Cold. Work quickly when rolling and cutting your dough. Maintaining a cold temperature helps prevent the baking powder from reacting prematurely with the sour cream, preserving its full leavening potential for frying.
- Canola Oil: For frying, I recommend canola oil due to its neutral flavor and high smoke point. However, any neutral-flavored oil suitable for deep frying, such as crisco shortening or vegetable oil, will also work wonderfully.
Step-by-Step Guide to Making Sour Cream Donuts
Follow these detailed instructions to achieve perfect sour cream donuts every time. More specific measurements and a printable version can be found in the comprehensive recipe card below!
Make the Donut Dough:
Step 1: In a large mixing bowl, thoroughly whisk together the all-purpose flour, baking powder, and kosher salt. This ensures all dry ingredients are evenly distributed. Set this bowl aside.
Step 2: Line another large mixing bowl with plastic wrap, then lightly spray the surface of the plastic wrap with nonstick spray. This will prevent the dough from sticking. Set this prepared bowl aside.
Step 3: Using a stand mixer fitted with the paddle attachment, combine the granulated sugar and unsalted butter. Beat on high speed until the butter is fully incorporated into the sugar. Due to the higher sugar-to-butter ratio, the mixture won’t appear “light and fluffy” as it would for a traditional cake batter.
Step 4: Add the egg yolks to the mixer. Continue beating on high speed for approximately 2 minutes, or until the mixture visibly lightens in color and increases in volume. Periodically stop the mixer to scrape down the sides of the bowl, ensuring all ingredients are evenly combined.
Step 5: Reduce the stand mixer speed to low. Gradually add the dry ingredients to the bowl, alternating with spoonfuls of sour cream. Add the next spoonful of dry ingredients or sour cream once only a few large streaks of flour remain visible in the bowl. Maintain a consistent alternation between the wet and dry components. Stop the mixer to incorporate any remaining sour cream by scraping the bowl. Mix only until the dry ingredients are fully incorporated – overmixing will lead to excessive gluten development, resulting in tough donuts with undesirable “tunnels.” Speed is key here to maintain tenderness.
Step 6: Transfer the prepared dough to the plastic wrap-lined bowl. Lightly spray the top of the dough with nonstick spray, then fold the edges of the plastic wrap over to fully cover it. Refrigerate the dough for at least 60 minutes. This chilling period is crucial for firming the dough and allowing the flavors to meld. At this stage, the dough can be safely stored in the refrigerator for up to 2 days.
Portion and Cut Dough:
Step 1: Line a half-sheet baking pan with parchment paper, then lightly spray the paper with nonstick spray. This will prepare a non-stick surface for your cut donuts. Set aside.
Crucial Tip: Generously Flour Your Work Surface. This donut dough tends to be quite sticky. A well-floured bench or counter will make a significant difference in your ability to easily manipulate and roll out the dough without it adhering to the surface.
Step 2: Lightly dust your work surface with flour. While the dough is still in its bowl, dust the top of the dough with an additional sprinkle of flour. Carefully turn the dough out onto your floured work surface, placing the floured side down. Lightly dust the new top surface with more flour.
Step 3: To maintain the dough’s cold temperature and prevent premature leavening, work quickly. Roll out the dough evenly to a thickness of approximately ½ inch.
Step 4: Gently brush off any excess flour from the top surface of the rolled dough. Use a 3-inch ring cutter for the donuts and a 1 ¼-inch ring cutter for the donut holes. If you don’t have specialized cutters, a biscuit cutter, cookie cutter, or even the rim of a glass can serve as excellent alternatives! Lightly tap your chosen cutter in flour before each cut to ensure a clean release. Carefully transfer the cut donuts and donut holes to the prepared sheet pan.
Step 5: Cover the sheet pan with plastic wrap, taking care to ensure the plastic does not directly touch the top of the donuts. Chill the cut donuts and holes in the refrigerator for a minimum of 30 minutes, or up to overnight. This second chill is vital for maintaining their shape and achieving the desired texture during frying.
Make the Glaze:
Step 1: In a medium-sized bowl, whisk together the milk, powdered sugar, and a pinch of salt until smooth and lump-free. To prevent a skin from forming on the surface, cover the glaze directly with plastic wrap, pressing it onto the surface. If you prefer a warm glaze for dipping, you can gently heat it over a pot of simmering water on the stove. However, I often find this step unnecessary as I typically dip my donuts while they are still very hot from the fryer, which creates a beautifully even glaze.
Fry the Donuts:
Best Practices for Frying Oil: Always use canola oil or another neutral-tasting oil with a high smoke point for the best results and flavor. This includes vegetable oil or even shortening.
Step 1: Pour your chosen frying oil into a deep fryer or a heavy-bottomed Dutch oven, ensuring the oil depth is at least 2 inches. Heat the oil to precisely 350°F (175°C). It is crucial to use a clip-on fry or candy thermometer to accurately monitor and adjust the temperature, keeping it consistently between 350°-360°F (175°-182°C) throughout the frying process. I recommend heating the oil to about 360°F (182°C) before adding your first batch of donuts, as the cold dough will naturally cause the oil temperature to drop.
Step 2: Gently place 3-5 donuts into the hot oil, being careful not to overcrowd the pot. Keep any remaining uncooked donuts in the refrigerator to maintain their cold temperature. The ideal number of donuts per batch depends on the size of your pot; ensure they have enough room to move freely and puff up without touching each other. Once the donuts float to the surface (which happens quickly!), cook for approximately 30 seconds, then carefully flip them using a slotted spoon. Continue frying until the bottom side achieves a lovely golden brown color, usually around 80 seconds. Flip them once more and fry for another 80 seconds, or until they are an even, beautiful golden brown all over. To test for doneness, I typically insert a cake tester into a donut; if it comes out clean with no streaks of dough or crumbs, it’s perfectly cooked. Transfer the fried donuts to a wire rack set over a sheet pan or paper towels to drain excess oil. Donut holes have a slightly different frying time: fry for 30 seconds, flip, then another 60 seconds, flip, then a final 40-60 seconds until they are puffed and golden brown on all sides.
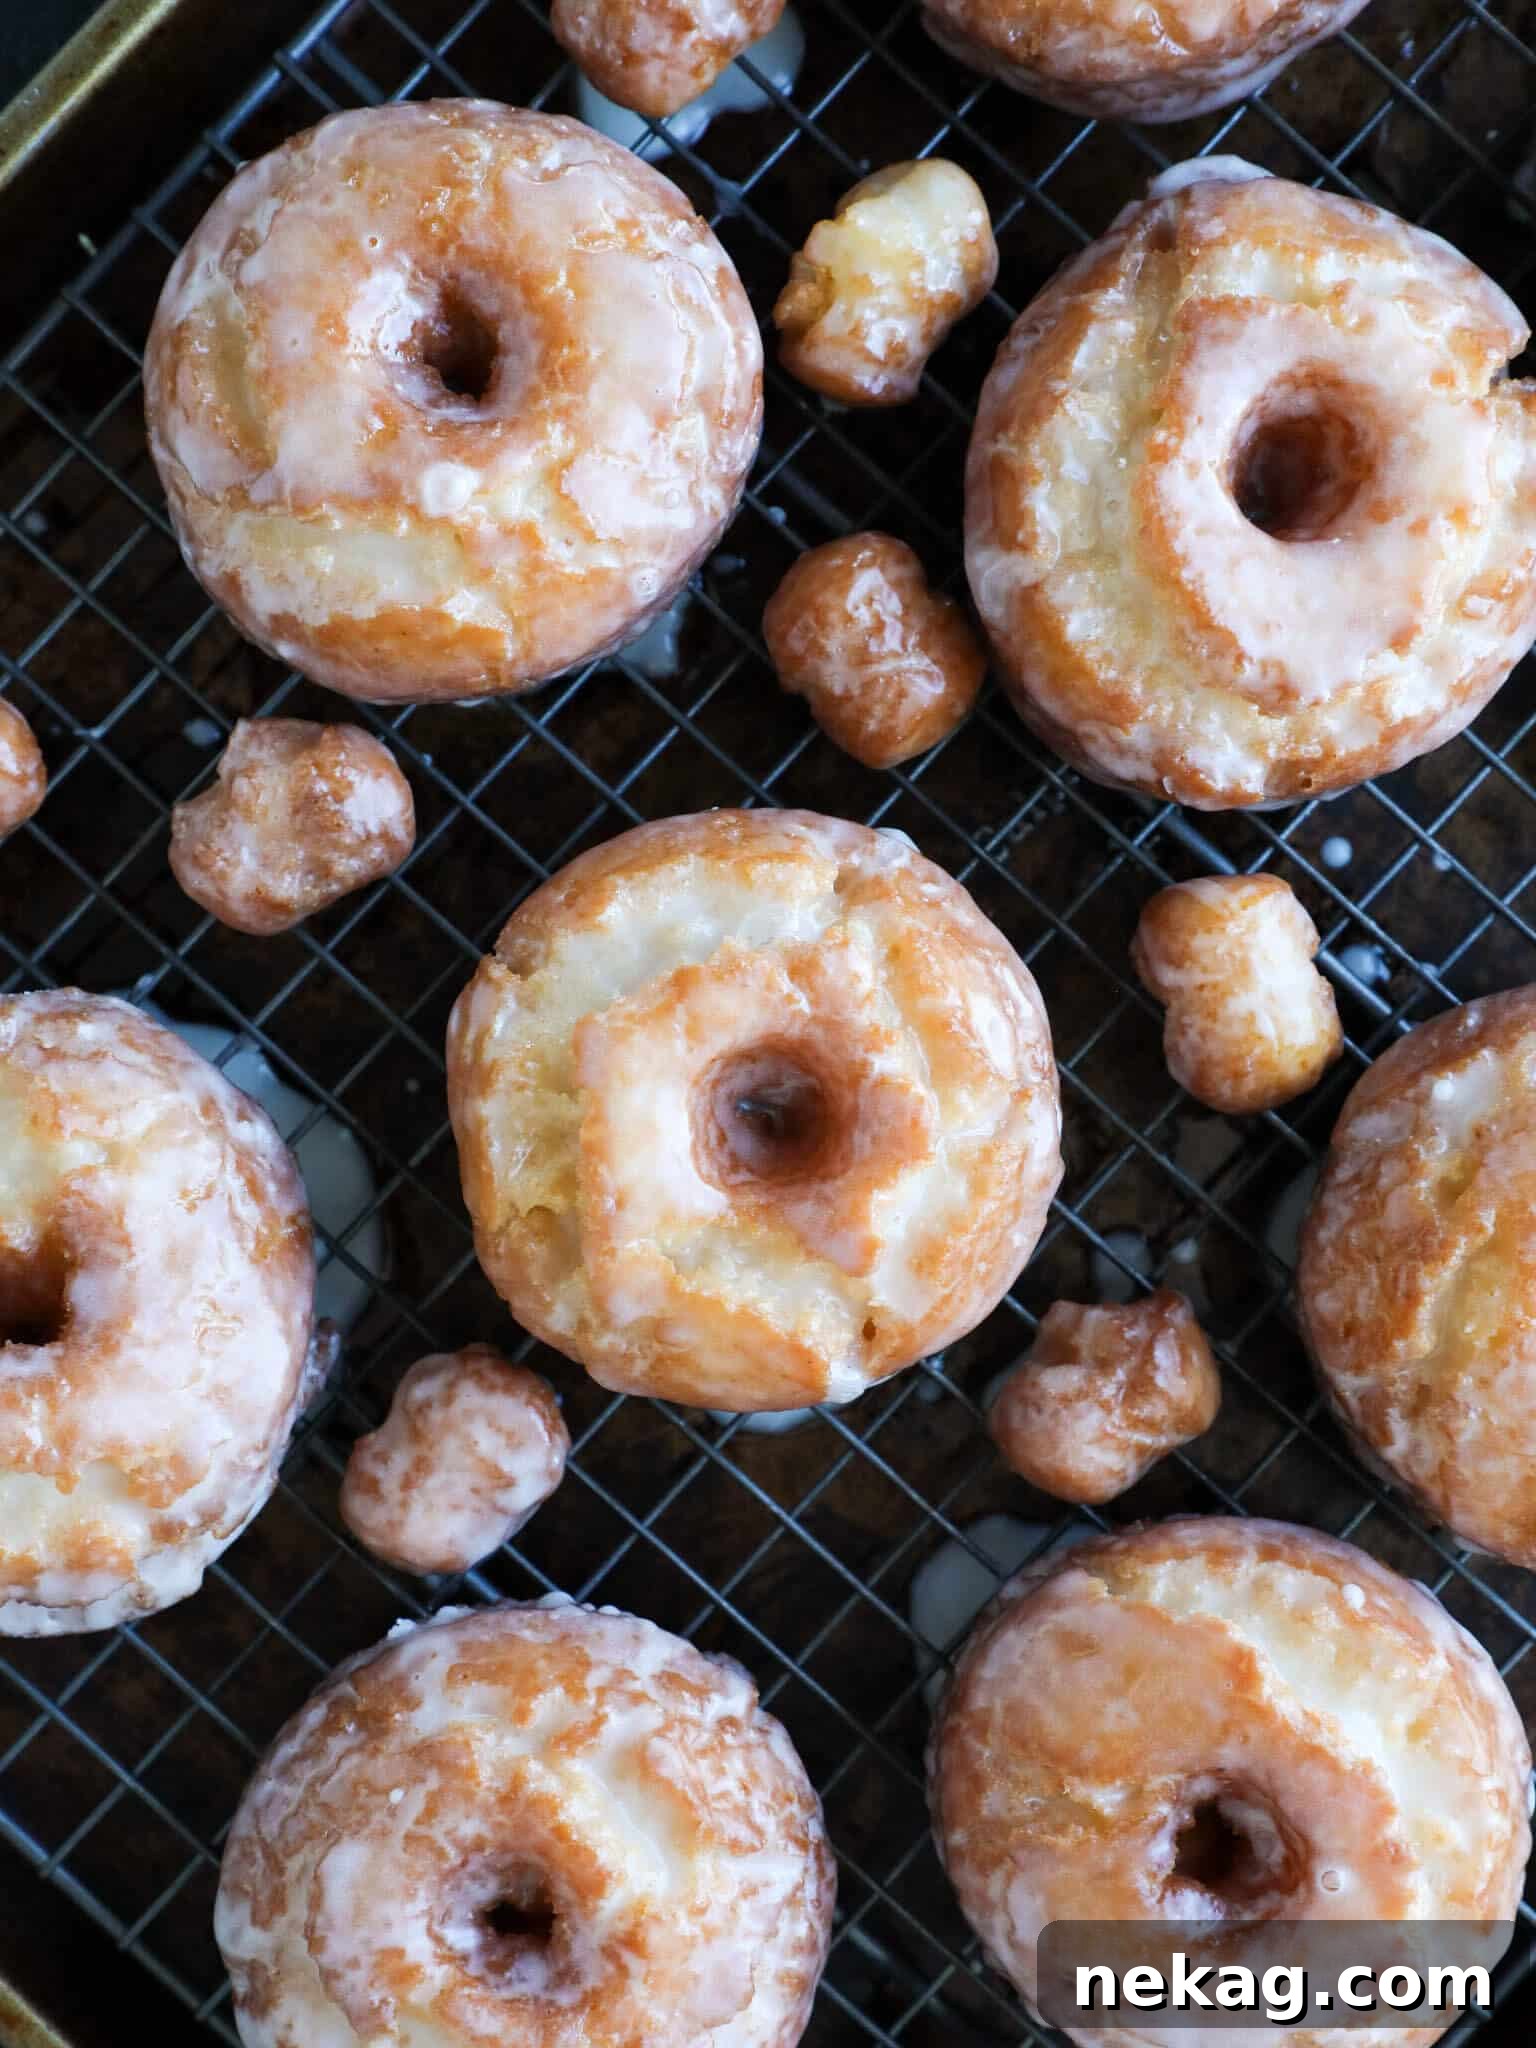
Step 3: Once the donut is just cool enough to handle comfortably, dip it into the prepared glaze. Immediately place the glazed donut back on the wire rack. Dipping a warm donut (not scalding hot) will result in a beautifully thin, even coat of glaze that isn’t too thick or too runny.
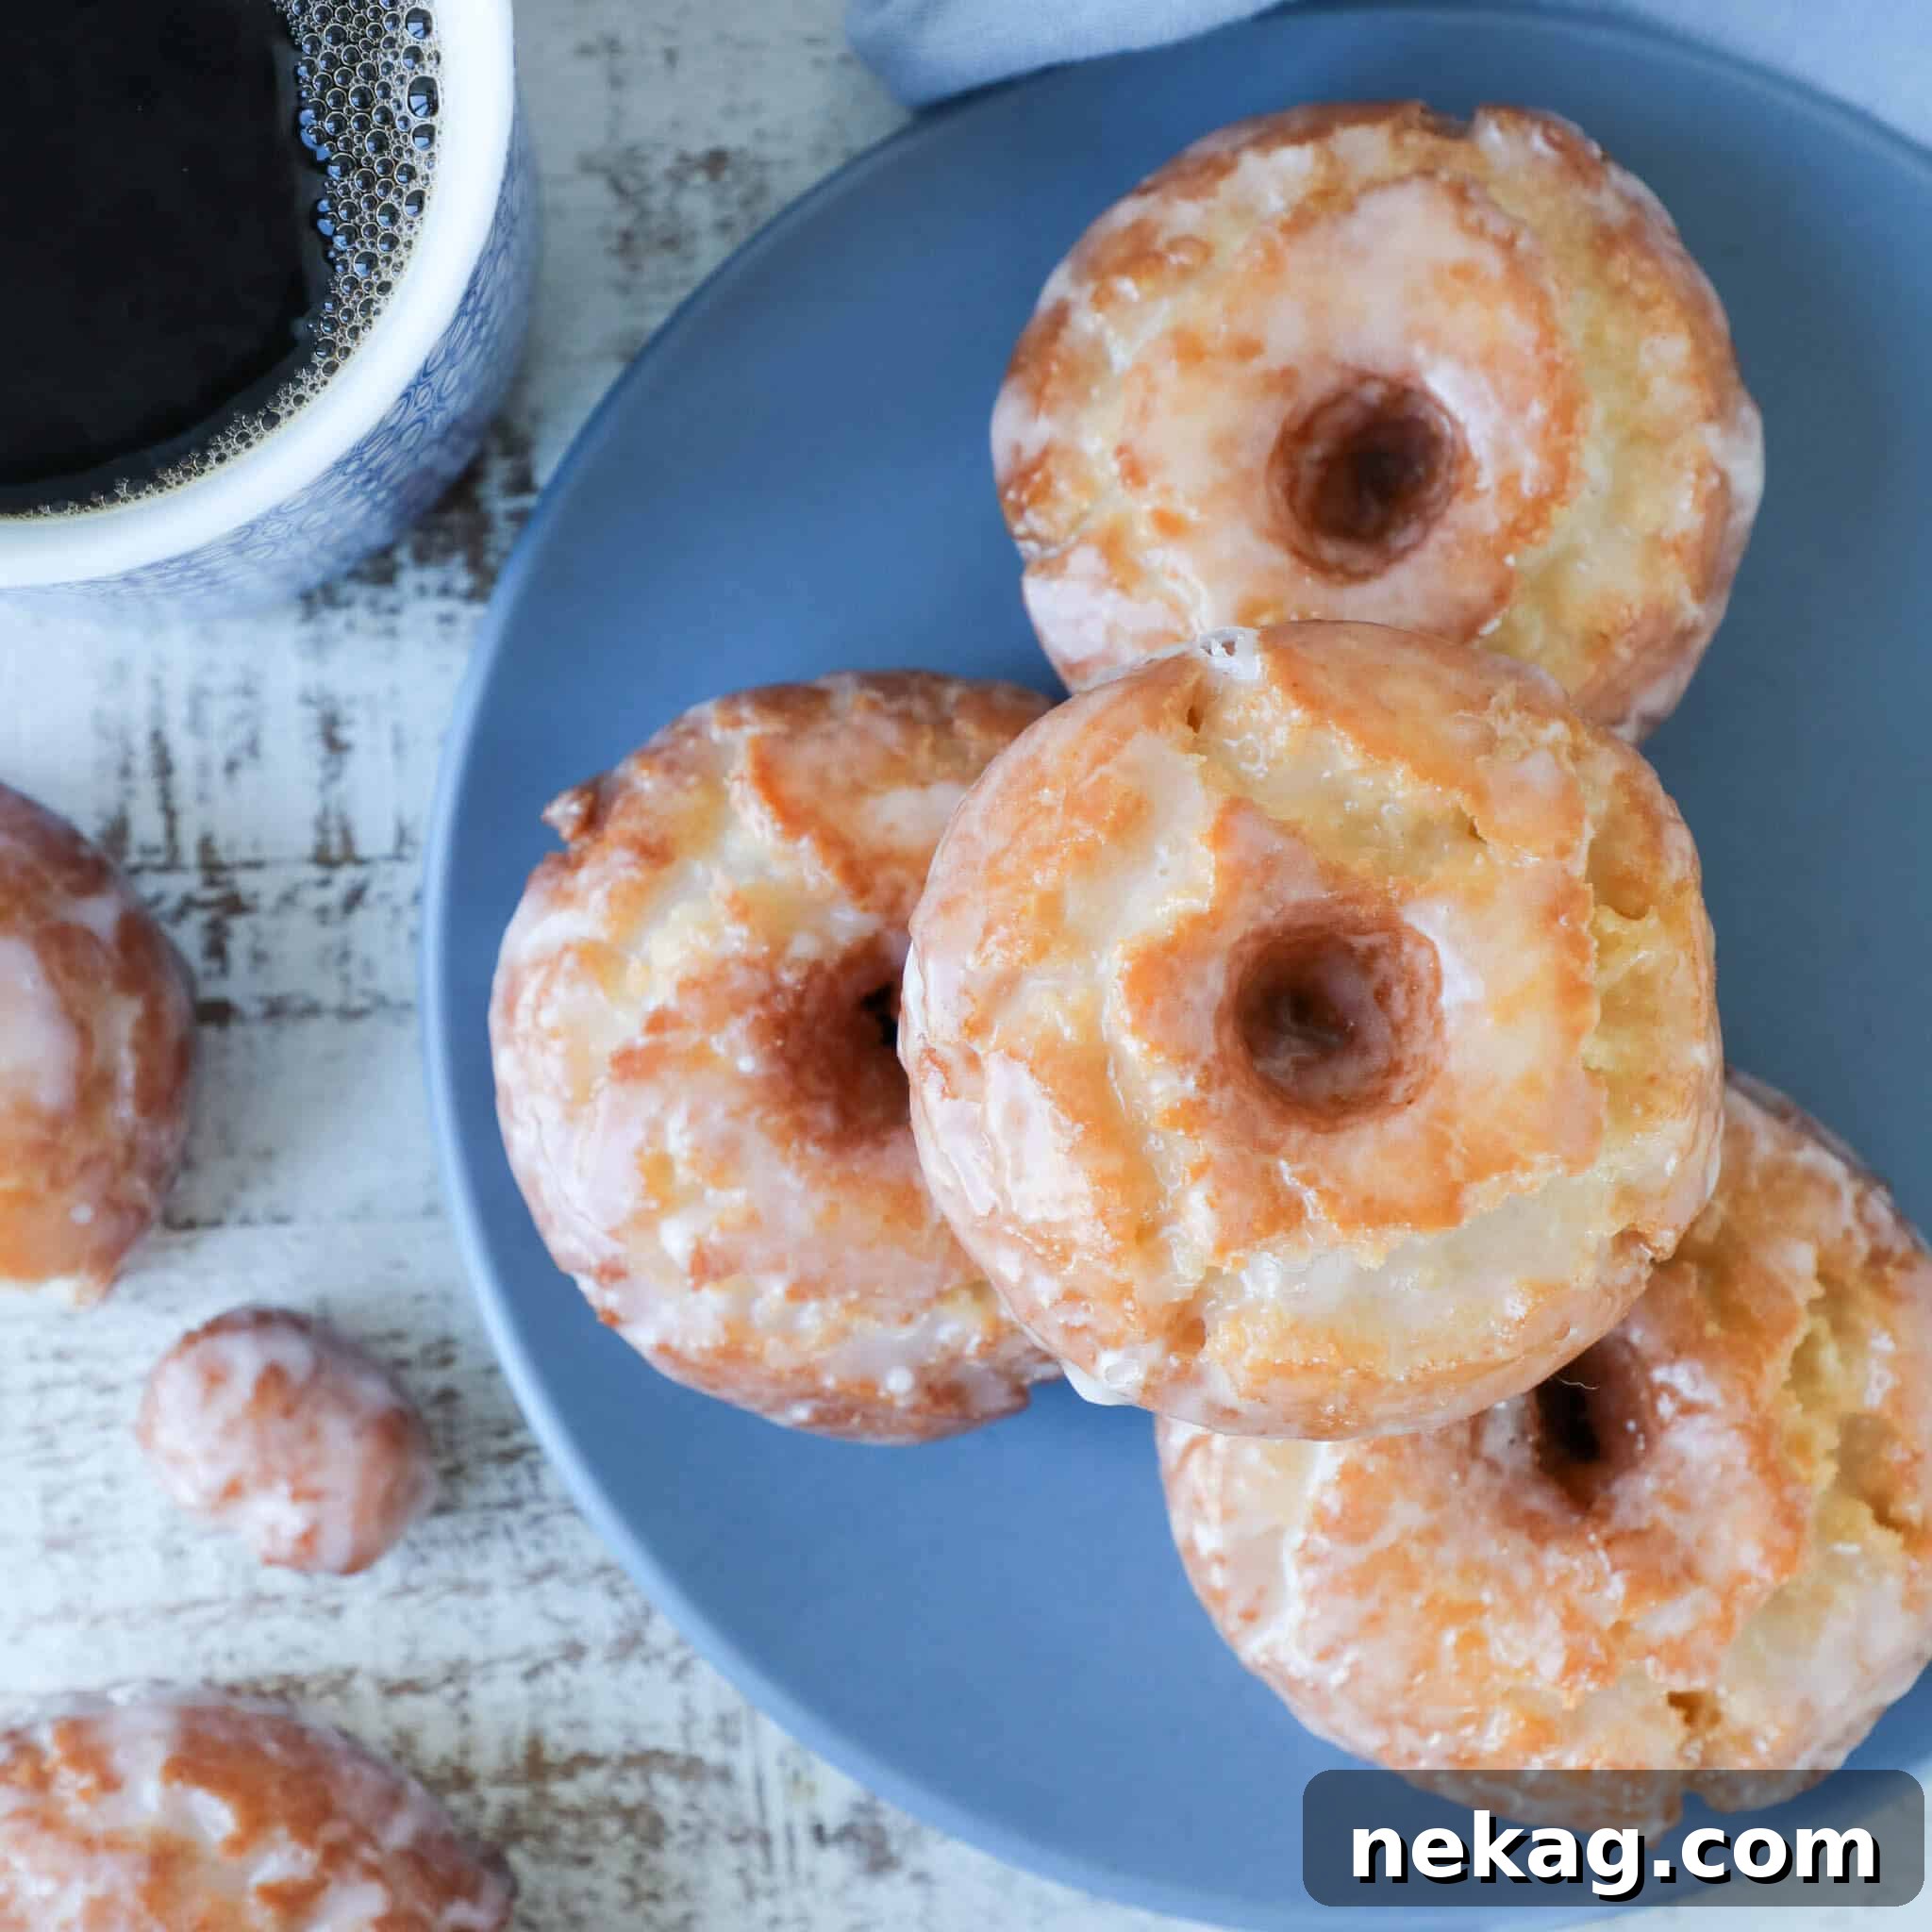
Step 4: For optimal freshness and flavor, these old fashioned sour cream donuts are best enjoyed the day they are fried, perhaps with a freshly brewed cup of coffee! If storing overnight, keep them at room temperature in a container with the corner slightly cracked to allow for some ventilation. This helps prevent the glaze from becoming too soft. While they are delicious for up to three days, they will slowly begin to dry out. I do not recommend refrigerating or freezing fried cake donuts, as it can significantly alter their texture.
Frying Sour Cream Donuts Like a Professional Chef
Mastering the art of frying is crucial for perfect homemade sour cream donuts. Here are some pro tips to guide you:
- Vigilantly Monitor Your Oil Temperature: The golden rule of frying is maintaining the correct oil temperature, which for these donuts is consistently between 350°-360°F (175°-182°C). If your oil drops to 340°F (170°C), it’s too cold, and your donuts will absorb excess oil, becoming greasy. Conversely, if it climbs to 380°F (193°C), it’s far too hot; the outsides will burn and become unpleasantly dark while the insides remain raw and gooey. A reliable clip-on thermometer is your best friend here. Don’t be afraid to adjust your stove’s heat or even turn it off for a moment if the temperature is climbing too high. Patience with oil temperature is incredibly liberating and ensures perfect results.
- Exercise Caution and Prioritize Safety: While hot oil may appear calm, rest assured that oil at 350°F (175°C) is extremely hot and can cause serious burns. I speak from experience and have the scars to prove it! Always handle donuts and utensils with care. Use a slotted spoon or spider to gently lower and remove donuts from the oil. While I’ve developed the confidence to carefully drop them in by hand after years of training, it’s not necessary, and safety should always come first.
- Test for Doneness (The “Tester Pancake” Rule): While cooking time and visual color are good indicators, a cake tester becomes invaluable once you’re confidently managing your oil temperature. Think of your first donut as a “tester pancake.” If it’s a bit undercooked or slightly too dark, don’t worry! Adjust your timing or temperature for the next batch. Use your cake tester to ensure the center of the donut is completely cooked through and no raw dough remains.
After Frying: Always place your freshly fried donuts on a wire cooling rack positioned over a baking sheet or layers of paper towels. This setup allows excess oil to drain away, preventing soggy bottoms and helping to maintain that desirable crispy exterior.
- A Quick Science PSA: Water and Hot Oil Don’t Mix: Please remember that water and hot oil are a dangerous combination. Even a tiny drop of water can cause violent splattering. To prevent this, always ensure all your utensils are completely dry after rinsing. If your chilled dough has collected any condensation, gently blot it dry with a paper towel before introducing it to the hot oil. Your safety is paramount!
Professional Tips for Perfect Sour Cream Donuts
- Maintain a Cold Dough: This is a recurring and critical tip for a reason! When rolling and cutting your dough, work efficiently to keep it as cold as possible. While double-acting baking powder will react again during frying, preventing a premature reaction with the sour cream ensures maximum leavening power. Furthermore, keeping the dough cold inhibits excessive gluten development, which is key to achieving the softest, most tender donuts imaginable.
- Prepare Your Bench Flour: This dough is naturally a bit sticky, so a generously floured work surface (your “bench”) is essential. It will make a world of difference in your ability to handle, roll, and cut the dough with ease and without frustration.
- Choose the Right Frying Oil: Opt for canola oil or another neutral-tasting oil with a high smoke point, such as vegetable oil or shortening. This ensures a clean flavor and prevents scorching during frying.
- Optimal Cooling for Crispy Bottoms: After frying, immediately transfer your donuts to a wire cooling rack placed over a baking sheet or paper towels. This setup allows air circulation around the entire donut and lets excess oil drip away, guaranteeing crispy bottoms and preventing any sogginess.
- Glaze While Still Warm: For the best, most even, and perfectly adherent glaze, dip your donuts while they are still warm to the touch (but not scalding hot). This eliminates the need to heat your glaze separately. Some chefs use chopsticks for dipping, but after years in fast-paced professional kitchens, I often use my (toughened) fingers for efficiency. Choose whichever method you find easiest and safest.
Can You Bake These Sour Cream Donuts?
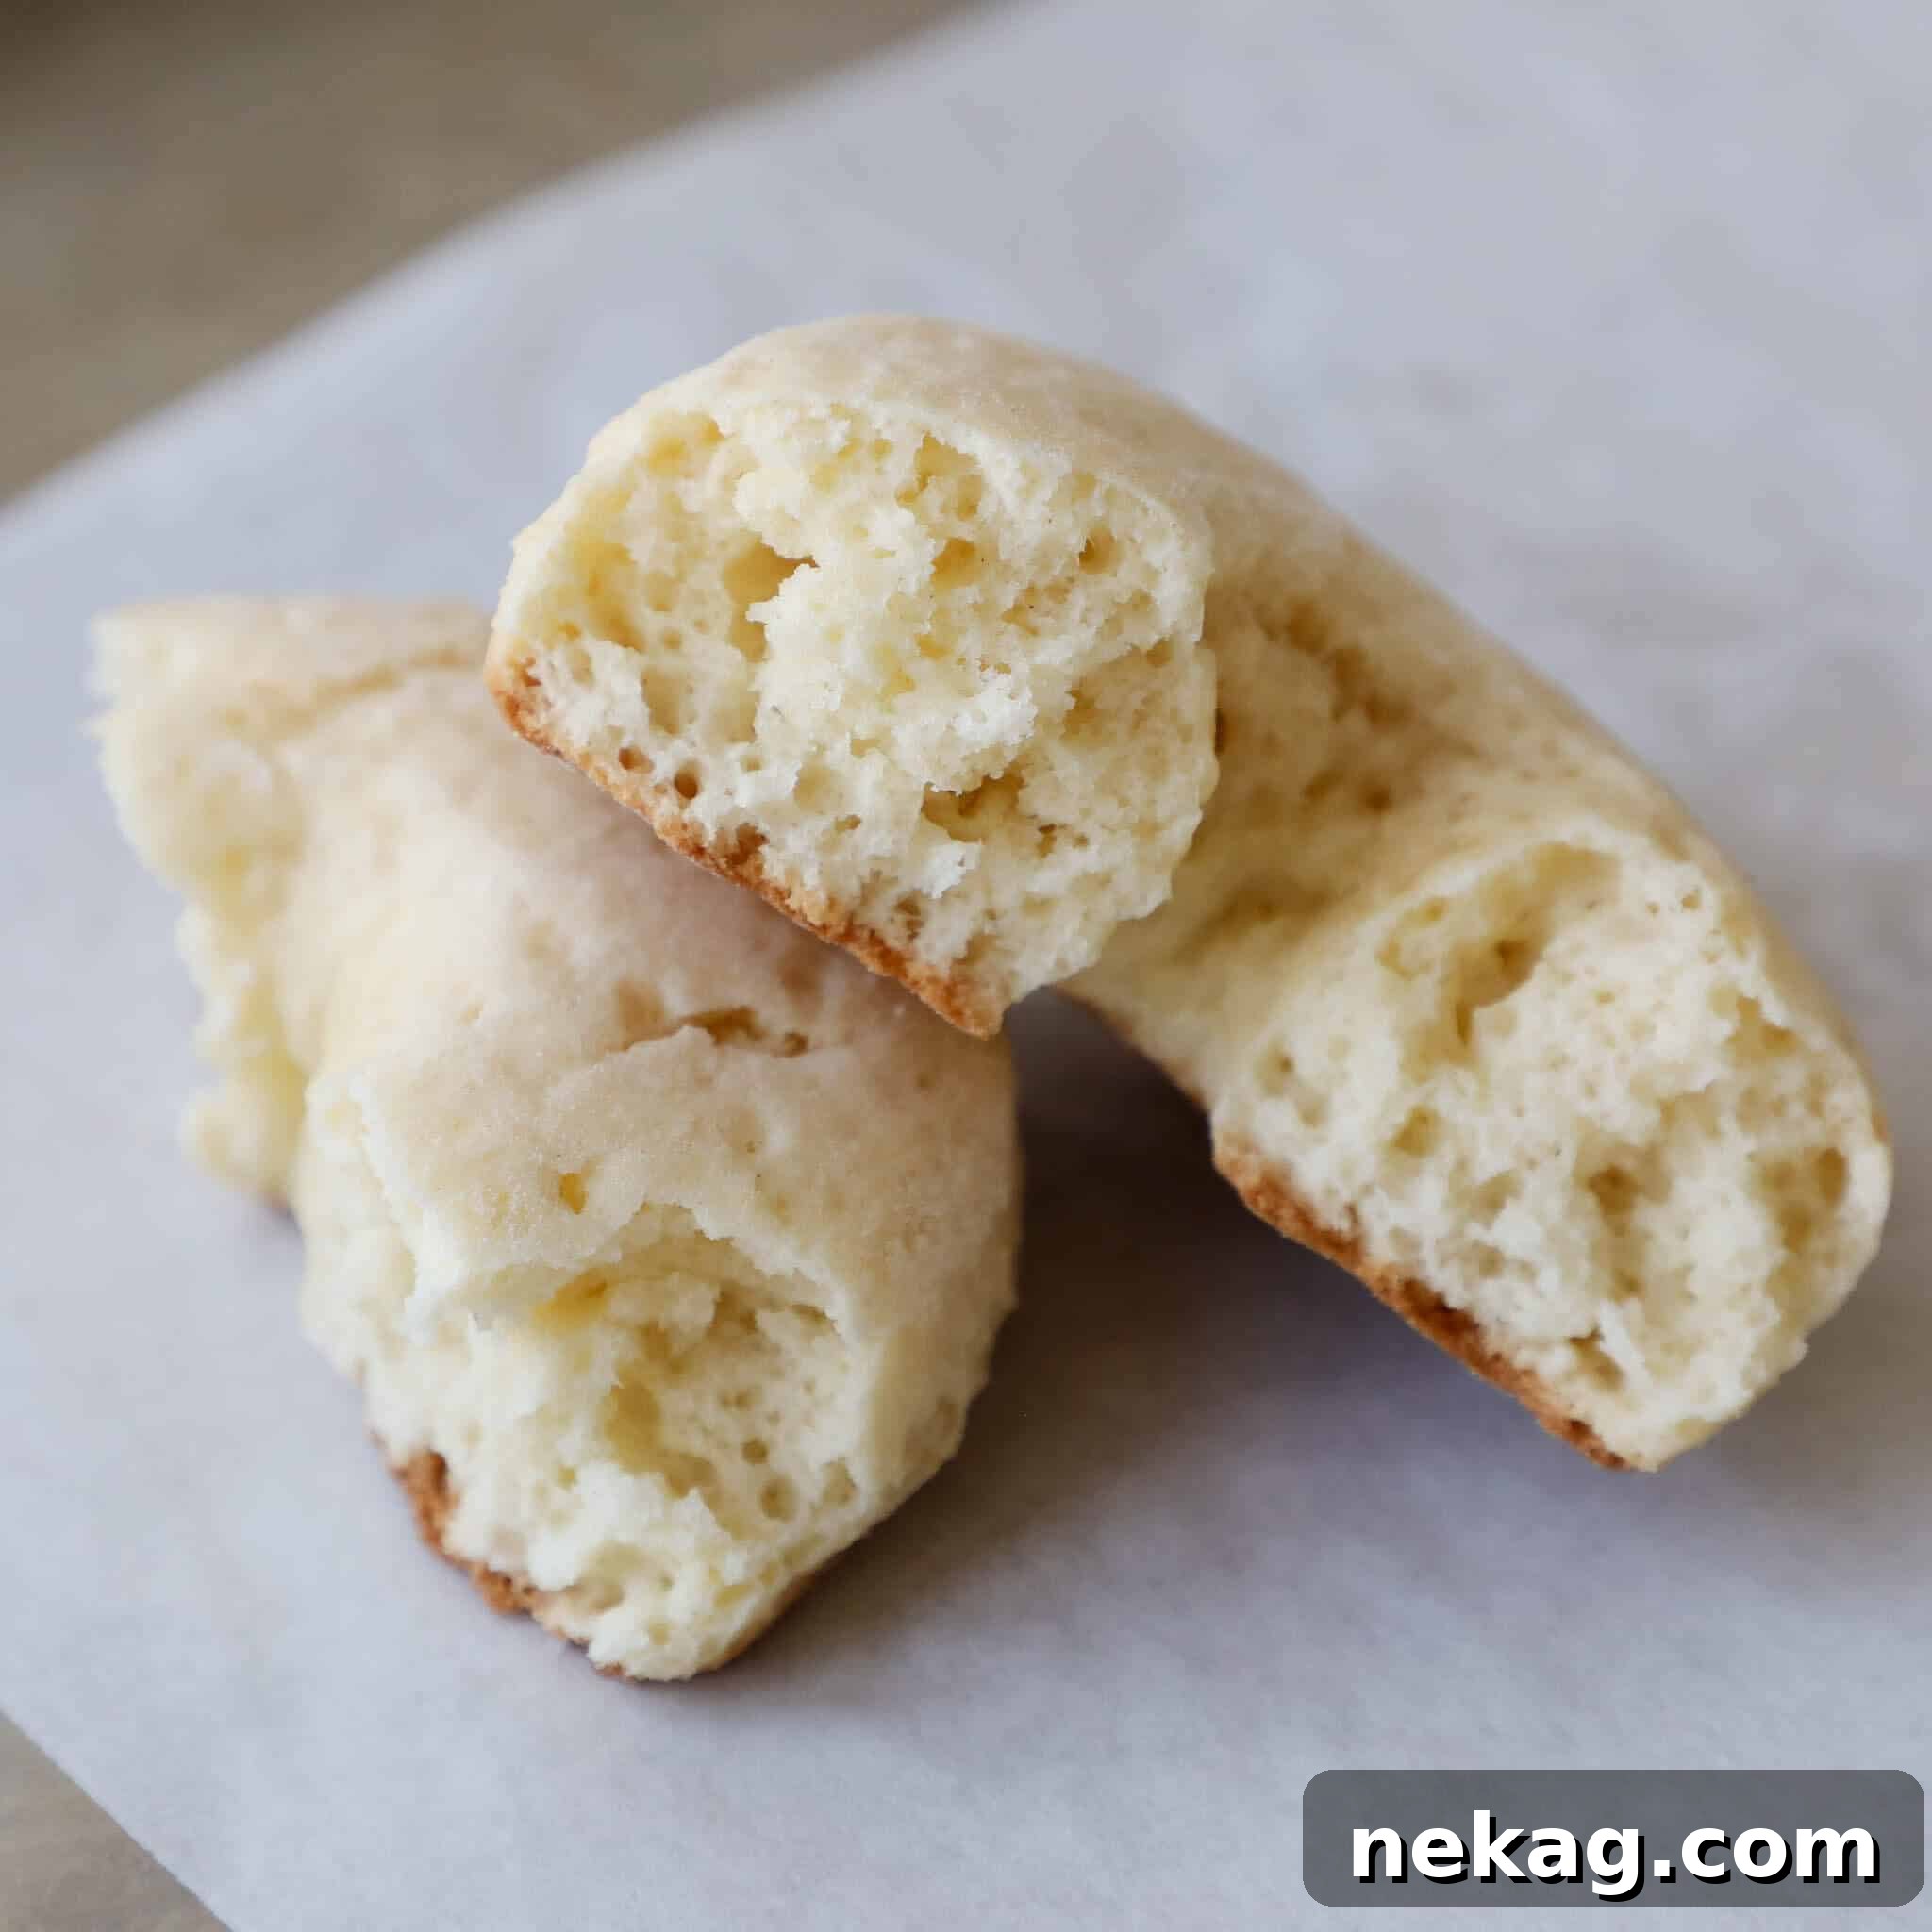
As the compelling photo evidence above clearly illustrates, my recommendation is a resounding no: please do not attempt to bake these donuts. This specific recipe is formulated for deep-frying, and if baked, the resulting donuts will be disappointingly dense, with an undesirable taste and texture. This is because baked donuts are fundamentally a type of cake, requiring a much wetter, pourable batter rather than a rollable dough. Attempting to bake this fried donut dough will yield a product that is significantly less delicious and frankly, won’t capture the essence of what an old fashioned sour cream donut should be. Embrace the fryer for this recipe!
Recipe Substitutions and Adjustments
- Sour Cream: For the absolute best results, I strongly advocate for using a high-quality, full-fat sour cream. Its thicker consistency and tangy flavor are integral to the recipe, and crucially, its fat content ensures these donuts remain wonderfully soft and tender. While technically the recipe *will* work with low-fat sour cream, be aware that you cannot significantly decrease the fat and expect to achieve the same unparalleled richness and tender texture. The fat is key!
- Baking Powder: Double-acting baking powder is specified for its two-stage leavening action: an initial reaction with the sour cream’s acid, followed by a second, powerful rise when heated in the fryer. I highly advise against substituting baking soda, unless it’s a genuine donut emergency and you have no other choice. Baking soda’s leavening effect is primarily a single, immediate reaction. If you’re making the dough ahead of time (a day or two in advance), baking soda will lose much of its potency before the donuts even hit the oil, resulting in a much flatter, denser donut.
- Egg Yolks: While it might be tempting to use whole eggs instead of just the egg yolks in this old fashioned sour cream cake donut recipe, doing so will noticeably impact the final texture of your donuts. Egg whites introduce additional moisture without the fat content of the yolk. This imbalance can lead to a tougher, less tender donut. Taking the extra moment to separate the yolks is well worth the effort for that signature cakey texture. And don’t let those spare egg whites go to waste – they’re perfect for whipping up a delicate Lemon Berry Pavlova Cake for another delicious dessert!
Creative Variations for Your Donuts
Once you’ve mastered the classic old fashioned sour cream donut, the possibilities for customization are endless! Here are some ideas to spark your creativity:
- Glaze Variations: My classic donut glaze is undeniably perfect for these sour cream donuts, but don’t feel limited! The world is your donut shop. Experiment with a vibrant citrus glaze (lemon, orange, or lime zest would be fantastic), or even a rich coffee-infused donut glaze for a morning treat. Feel free to let me know in the comments which glaze pairing becomes your favorite!
Remember: Always dip the donuts in the glaze while they are still warm. This ensures a smooth, even coating and means you won’t need to bother heating up your glaze!
- Spice It Up: For a delightful aromatic twist, incorporate about 1 ½ tablespoons of your favorite spice mixture directly into the donut dough. Just as I do in my popular Pumpkin Cake Donuts, a blend of cinnamon, nutmeg, cloves, and ginger would be absolutely heavenly.
- Get Fruity: If you’re craving a brighter, fruitier flavor, take inspiration from my Strawberry Lemon Cake Donuts! Adding lemon zest to the dough and pairing it with a homemade easy strawberry jam is a beautiful and delicious variation that’s sure to impress.
Storage Best Practices for Donuts
While freshly fried and glazed cake donuts are undeniably at their absolute best the day they are made, they can still be enjoyed for a few days with proper storage. For optimal quality, store them uncovered at room temperature. Placing them in an airtight container can cause the glaze to soften and may impart a slightly “oily” taste over time. If you need to store them longer than a day, place them in a container with one corner slightly cracked open to create a small vent. This method helps maintain their texture for up to three days at room temperature. They will gradually begin to dry out after the first day, but will still be delicious. I strongly advise against refrigerating or freezing *already fried* cake donuts, as these methods significantly compromise their delicate texture and flavor.
Frequently Asked Questions About Sour Cream Donuts
Yes, chilling the dough is absolutely crucial for easier handling and superior frying results. I recommend two distinct chilling periods. First, chill the dough for at least 60 minutes after initial mixing, before cutting. Second, chill the cut donuts for a minimum of 30 minutes before frying. These chilling steps also allow the gluten to relax, which contributes to more tender and beautifully puffed donuts.
Absolutely! This recipe is excellent for advance preparation. You can prepare sour cream cake donuts up to three days ahead of time. The dough can be refrigerated at any stage in the process before frying – whether it’s the bulk dough or the already-cut donuts. This flexibility allows you to manage your time effectively. Just remember to fry or freeze the dough within three days for the best quality.
I have successfully tested this donut recipe in a professional bakery environment for larger batches. Your primary limitation will be the capacity of your stand mixer. When multiplying this recipe, I strongly advise measuring all ingredients by weight rather than volume. Donut doughs are particularly sensitive to even minute adjustments in flour and hydration ratios. While I scale all my recipes, this precision is especially important when preparing a larger batch to ensure consistent, perfect results.
Cake donuts are a beloved type of fried donut that, unlike yeast-risen donuts, use chemical leaveners like baking powder to achieve their rise. They earn their name because their interior texture is delightfully similar to a moist cake. However, it’s important to note they are not simply fried cake batter! They typically utilize sour cream or buttermilk as their primary source of moisture, resulting in a thick, rollable dough rather than a pourable batter.
There is no fundamental difference between the terms “sour cream cake donuts” and “sour cream donuts”; they are often used interchangeably. Both refer to cake-style donuts that incorporate sour cream into their dough. The sour cream plays a vital role by providing the perfect amount of moisture, contributing essential fat for tenderness, and acting as an acidic component that reacts with baking powder to create a light and airy crumb.
I do not recommend freezing *already fried* sour cream donuts, as their texture can suffer. Instead, the best approach is to freeze the *cut dough* before frying. This dough can be stored in the freezer for up to one month. Over time, the baking powder will gradually lose some of its potency, so the donuts might not puff up quite as much as when the dough is freshly made. When you’re ready to fry, simply allow the frozen, cut dough to thaw for a few hours in the refrigerator, then proceed with the frying steps.
No, I strongly advise against frying the donut dough directly from frozen. Frying frozen dough will cause the outsides to cook and brown too quickly while the insides remain raw and uncooked. It’s much better to thaw the cut donuts unwrapped in the refrigerator first, which typically takes only about an hour or so, and then proceed to fry them for the best results.
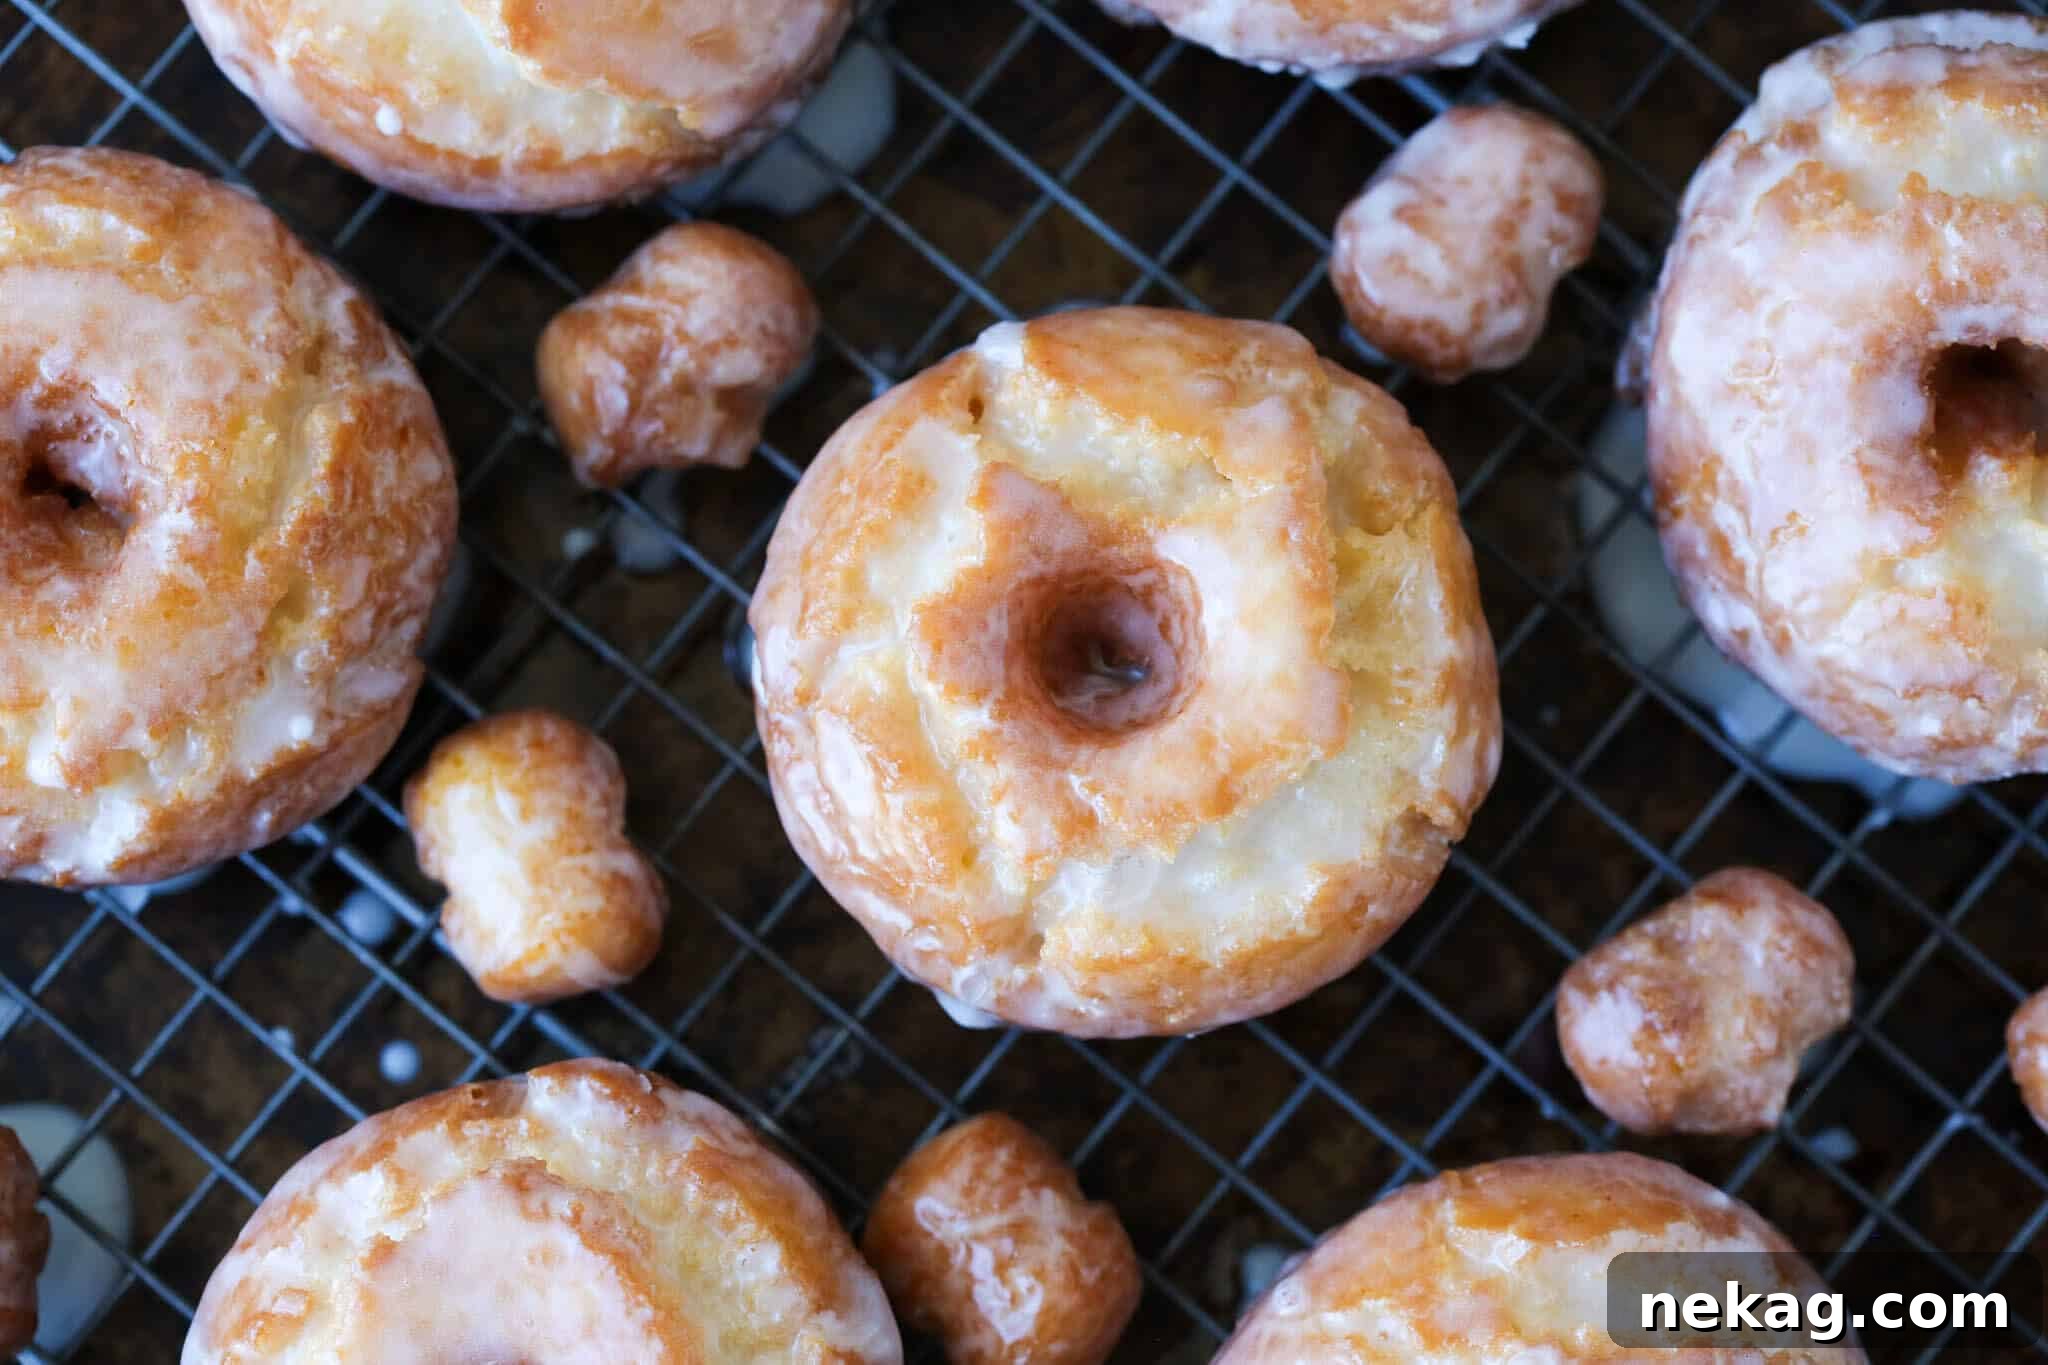
The characteristic cracks on old fashioned donuts typically form naturally during the frying process, often appearing more prominently on the side initially submerged in the hot oil. Several factors can influence this. If the dough was overworked, it might not crack as much due to excessive gluten development. Ensure your oil temperature is correct and consistently around 350°F (175°C); if the oil is too cold, the cracks might not form properly. A combination of cold donut dough and the right oil temperature is key for optimal cracking. Another possibility for a lack of cracks is that your baking powder might be old and no longer reactive, leading to insufficient leavening. Remember, each donut cracks uniquely and to varying degrees.
Chef Lindsey’s Expert Recipe Tip
If there’s one overarching piece of advice I can impart from this entire guide, it’s this: stay calm and keep going. Cooking, especially baking and frying, is a learning process. If your dough feels a bit too sticky, don’t hesitate to add a little more bench flour. If your very first donut comes out slightly doughy on the inside or too dark on the outside, consider it your “tester.” Adjust the oil temperature, use a cake tester to check for doneness, and proceed with confidence for the rest of your batch. Every expert was once a beginner!
If you tried this recipe and loved it, please consider leaving a 🌟 star rating and sharing your experience in the comments below. Your feedback truly makes my day!
Old Fashioned Sour Cream Cake Donuts
Chef Lindsey
30 mins
30 mins
2 hrs
3 hrs
13 Donuts
Comment
Print Recipe
Ingredients
For the Donuts:
-
4 ¾ cups
pastry flour
(all-purpose flour is fine) -
1 tablespoon
baking powder -
1 tablespoon
kosher salt -
1 ¼ cups
granulated sugar -
2 ½ tablespoons
unsalted butter -
5
egg yolks -
1 ½ cups
sour cream -
96 oz
vegetable oil
(for frying, can also use shortening)
For the Glaze:
-
⅓ cups
whole milk
(100 ML) -
1 teaspoon
kosher salt -
3 ¼ cups
powdered sugar
Instructions
Make the donut dough:
-
In a large bowl, whisk together the flour, baking powder and kosher salt to distribute. Set aside.
-
Line a large mixing bowl with plastic wrap and then spray the surface of the plastic wrap with nonstick spray. Set this aside too.
-
In the bowl of a stand mixer fitted with the paddle attachment, beat together the granulated sugar and butter on high speed until the butter has completely incorporated. There is too much sugar in proportion to butter to look “light and fluffy.”
-
Add the egg yolks and continue to beat on high until the mixture lightens and the volume increases. This will take about 2 minutes. Stop and scrape down the mixture a few times to be sure it is all evenly incorporated.
-
With the stand mixer on low, gradually add the dry ingredients to the bowl a large spoonful at a time alternating with spoonfuls of sour cream. Add the next spoonful when you only see a few large streaks of flour left in the bowl. I alternate almost nonstop between the two. Stop the mixer to scrape in the last bit of sour cream. Only mix until the dry ingredients are fully incorporated. You want to do this as quickly as possible so that not too much gluten develops, which will make tunnels in your donuts and also make them tough.
-
Transfer the dough to the plastic wrap lined bowl. Spray the top of the dough with nonstick spray and then fold the edges of the plastic over the top to cover it. Refrigerate for 60 minutes. At this point, the dough can be held in the fridge for up to 2 days.
Portion and cut dough:
-
Line a half-sheet baking pan with parchment paper and spray the paper with nonstick spray. Set this aside.
-
Lightly dust a work surface with flour. While the dough is still in the bowl, dust the top of the dough with flour. Turn the dough out onto your floured work surface, floured side down. Lightly dust the top with more flour.
-
Working quickly to keep the dough cool, roll out the dough to ½ inch thick.
-
Brush any excess flour from the top of the dough. Use 3-inch and 1 ¼ – inch ring cutters to cut the donuts and holes. You can use a donut cutter, biscuit cutter, cookie cutter, or even the rim of a glass! Lightly tap the cutters in flour before cutting each donut. Place the donuts and donut holes on the prepared sheet pan.
-
Cover sheet pan with plastic wrap, but be sure not to let the plastic touch the top of the donuts. Chill in the refrigerator for at least 30 minutes up to overnight at this step.
Make the glaze:
-
In a medium bowl whisk together the milk, powdered sugar and salt. Cover the glaze with plastic wrap directly on the surface to prevent it from getting a skin. You can heat up the glaze over a pot of simmering water on the stove if you want it to be warm. I typically dip my donuts while they are still very hot, so I don’t need to do this.
Fry the donuts:
-
Pour oil into a fryer or a Dutch oven, making sure the oil is at least 2 inches deep. Heat your oil to 350°F. Adjust your heat to keep the temperature between 350°- 360°F while frying. You will need a clip-on fry/candy thermometer for this. I heat my oil up to 360°F before adding a batch of donuts, because the cold dough will lower the temperature of the fryer oil.
-
Gently place 3-5 donuts in the fryer, while keeping the remaining donuts in the fridge. The number you can fry at once depends on the size of your pot. You want the donuts to have room to move around and space to puff. Once they rise to the surface, cook for 30 seconds and then flip them with a slotted spoon. Fry until the bottom develops a nice golden brown color, about 80 seconds. Flip it again and then fry for another 80 seconds or until the color is a nice even golden brown. I usually test mine with a cake tester. Pull it out of the oil, poke it and then pull the cake tester out. It should not have any streaks of dough or crumbs. Transfer to a wire rack set over a sheet pan or paper towels. Donut holes fry for 30 seconds then flip, then another 60 seconds, then flip, then another 40-60 seconds. They will puff up and be golden brown all over.
-
Once the donut is just barely cool enough to handle, dip the donut in the glaze and place it back on the wire rack. Dipping a hot donut will give you a nice, even glaze that isn’t too thick or too thin!
-
Store at room temperature in a container with the corner cracked overnight but they are best consumed the day they are fried…with coffee.
Video
Notes
Flavor Tips – I use a high-quality, full-fat sour cream because it is thicker and has a more tangy flavor. The fat in the sour cream helps keep these donuts soft and tender. It provides the perfect amount of moisture necessary to make the texture of the doughnuts divine.
Technique – Keep the dough cold. Roll and cut it quickly to keep the baking powder from starting to react with the sour cream. It’s true that double-acting baking powder will react again when fried, but if we want the most leavening it’s best to keep it from reacting too early. Additionally keeping the dough cold will inhibit gluten formation, thus making the softest, most tender donuts.
Helpful Tools – Yes, a stand mixer is extremely helpful for these donuts, as it helps you keep incorporating your ingredients while not over-developing your gluten. The real MVP of this recipe is the clip-on fry thermometer, which helps keep your fry oil at the perfect temperature in the pot.
Variations – Once you’ve mastered these donuts, you have an excellent base recipe for a lot of experimentation. If you want to go in a fruity direction, check out my Strawberry Lemon Cake Donuts, and if you’re feeling festive my Pumpkin Spice Cake Donuts will give you the measurements for your favorite spices. You can also always mix up the glaze!
Storage – Old fashioned sour cream cake donuts are best the day they are made but will keep three days at room temperature. I do not recommend refrigerating or freezing fried cake donuts.
Nutrition
Calories:
453
kcal
|
Carbohydrates:
85
g
|
Protein:
8
g
|
Fat:
11
g
|
Saturated Fat:
5
g
|
Polyunsaturated Fat:
1
g
|
Monounsaturated Fat:
3
g
|
Trans Fat:
1
g
|
Cholesterol:
99
mg
|
Sodium:
634
mg
|
Potassium:
225
mg
|
Fiber:
5
g
|
Sugar:
50
g
|
Vitamin A:
368
IU
|
Vitamin C:
1
mg
|
Calcium:
133
mg
|
Iron:
2
mg
Breakfast
American
453
Before You Go!
I truly hope you enjoyed mastering this professional chef-tested recipe for Old Fashioned Sour Cream Donuts. There’s immense satisfaction in creating such delicious treats from scratch. Don’t stop here – I encourage you to explore our other fantastic, chef-developed donut recipes for more culinary adventures!