
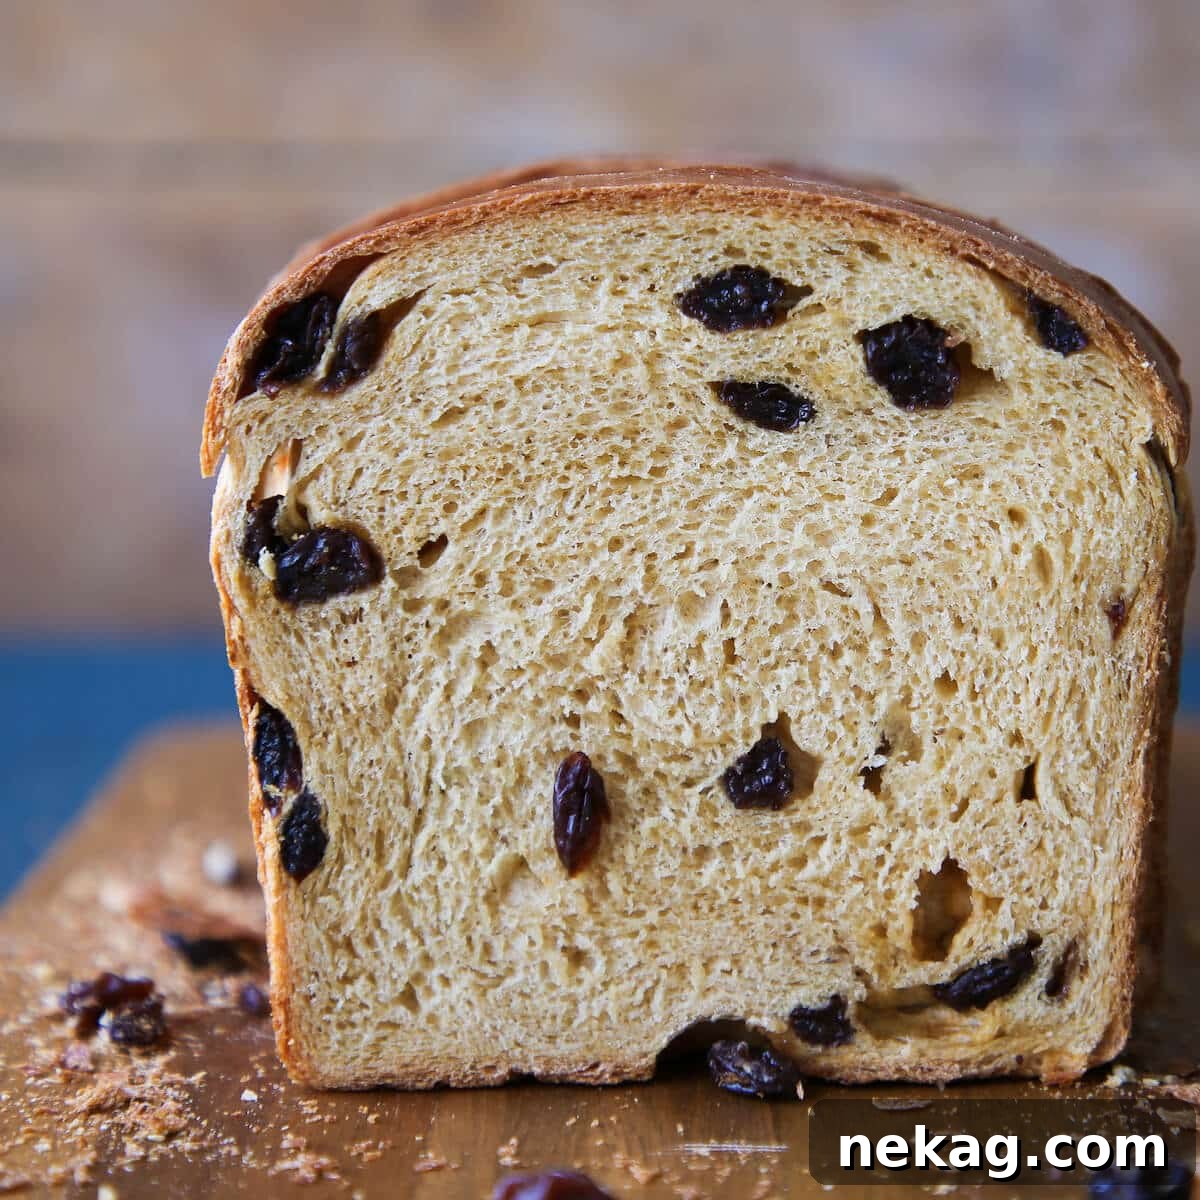
The Ultimate Old-Fashioned Raisin Bread Recipe: Soft, Moist, and Irresistible
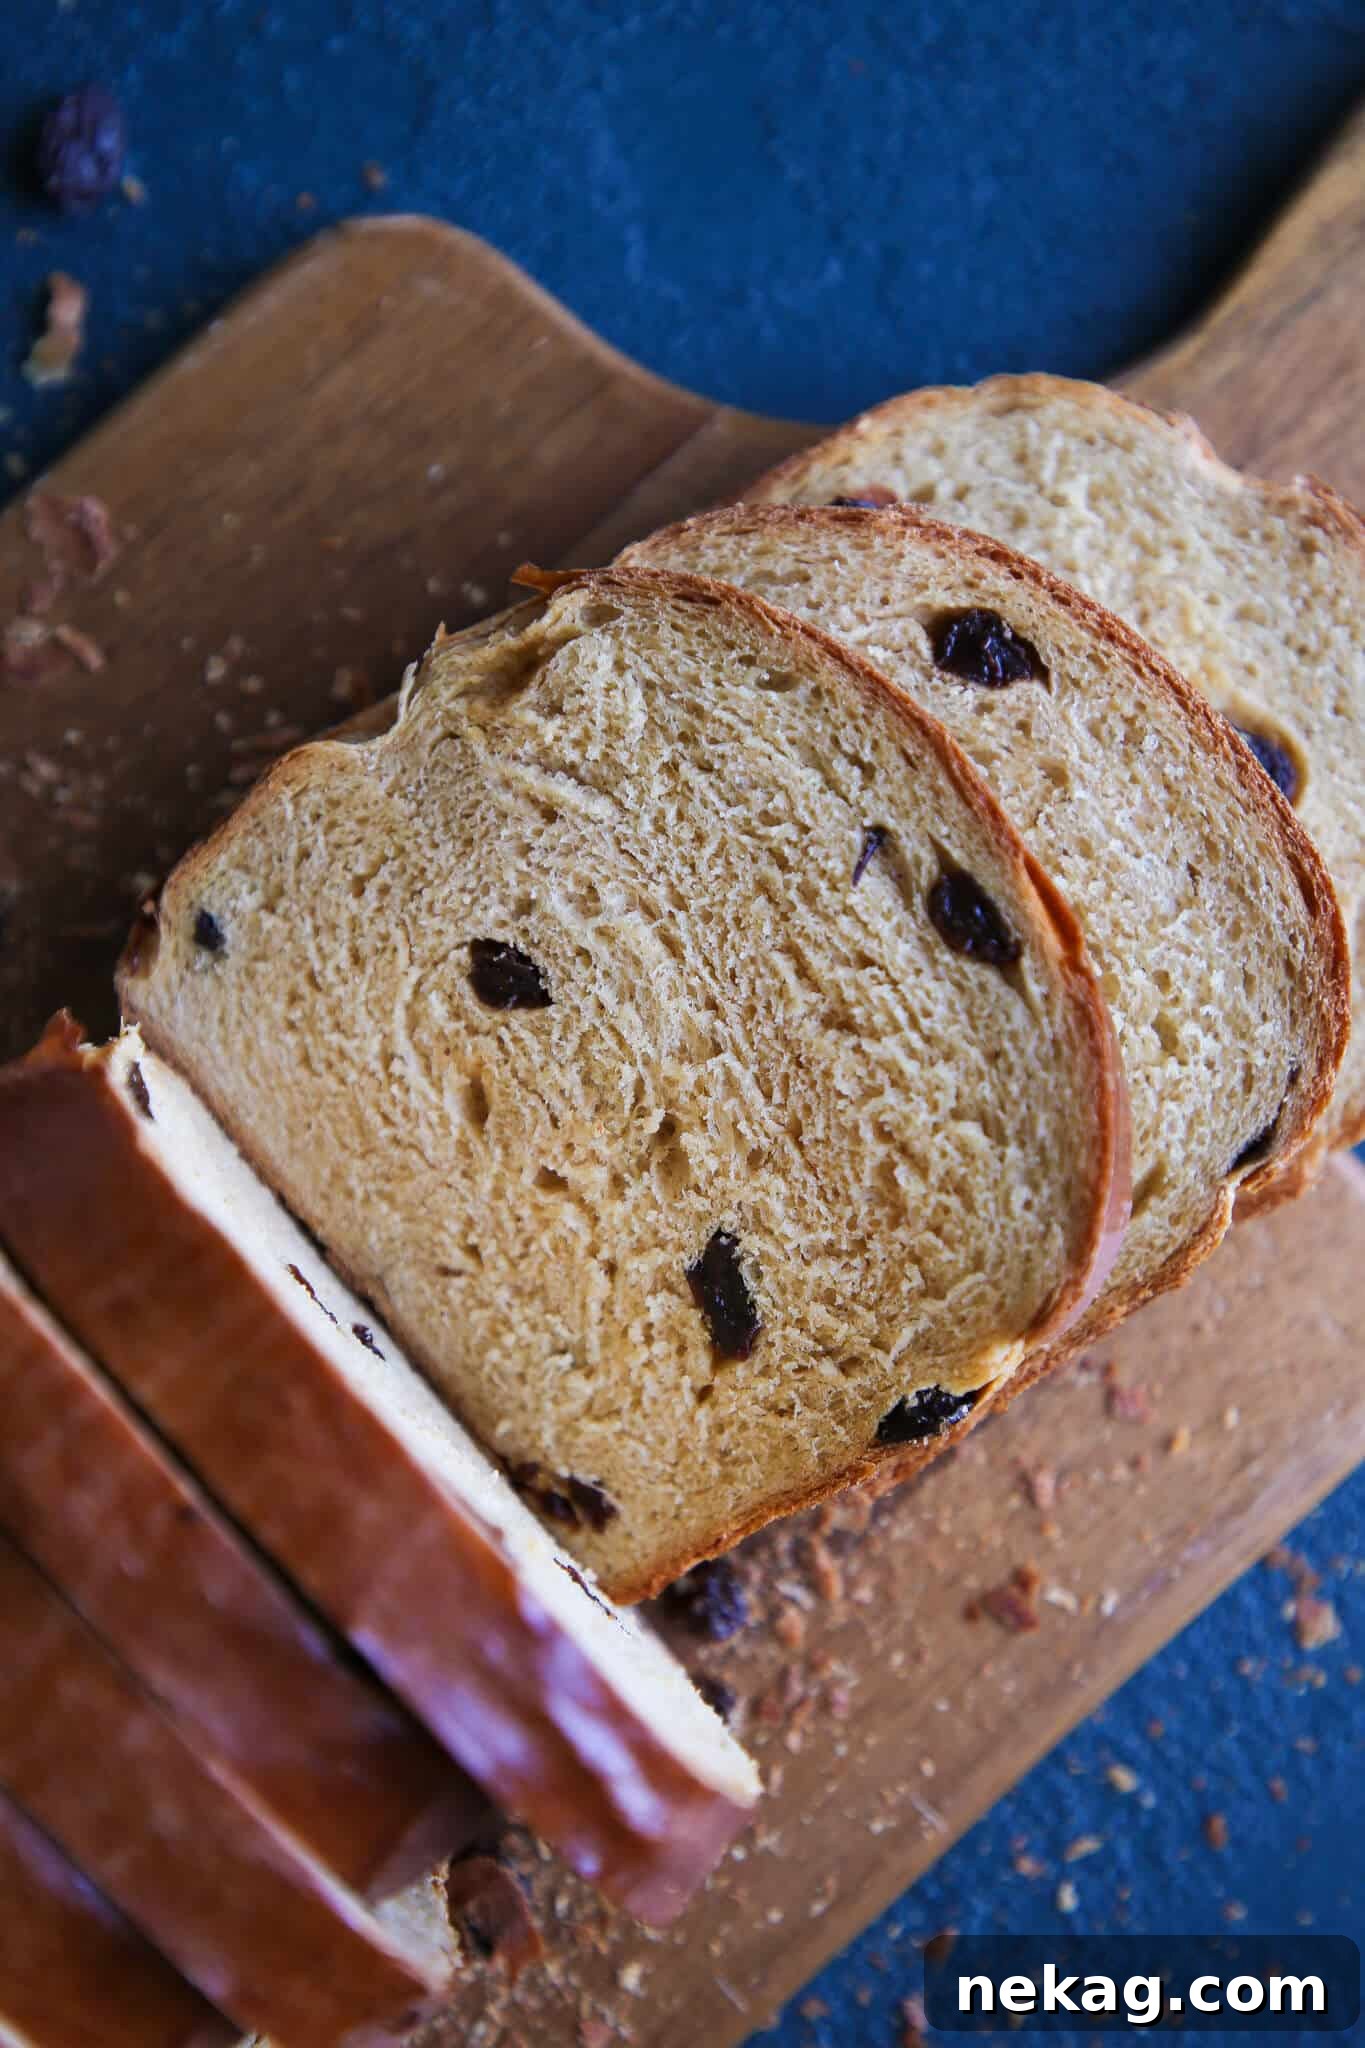
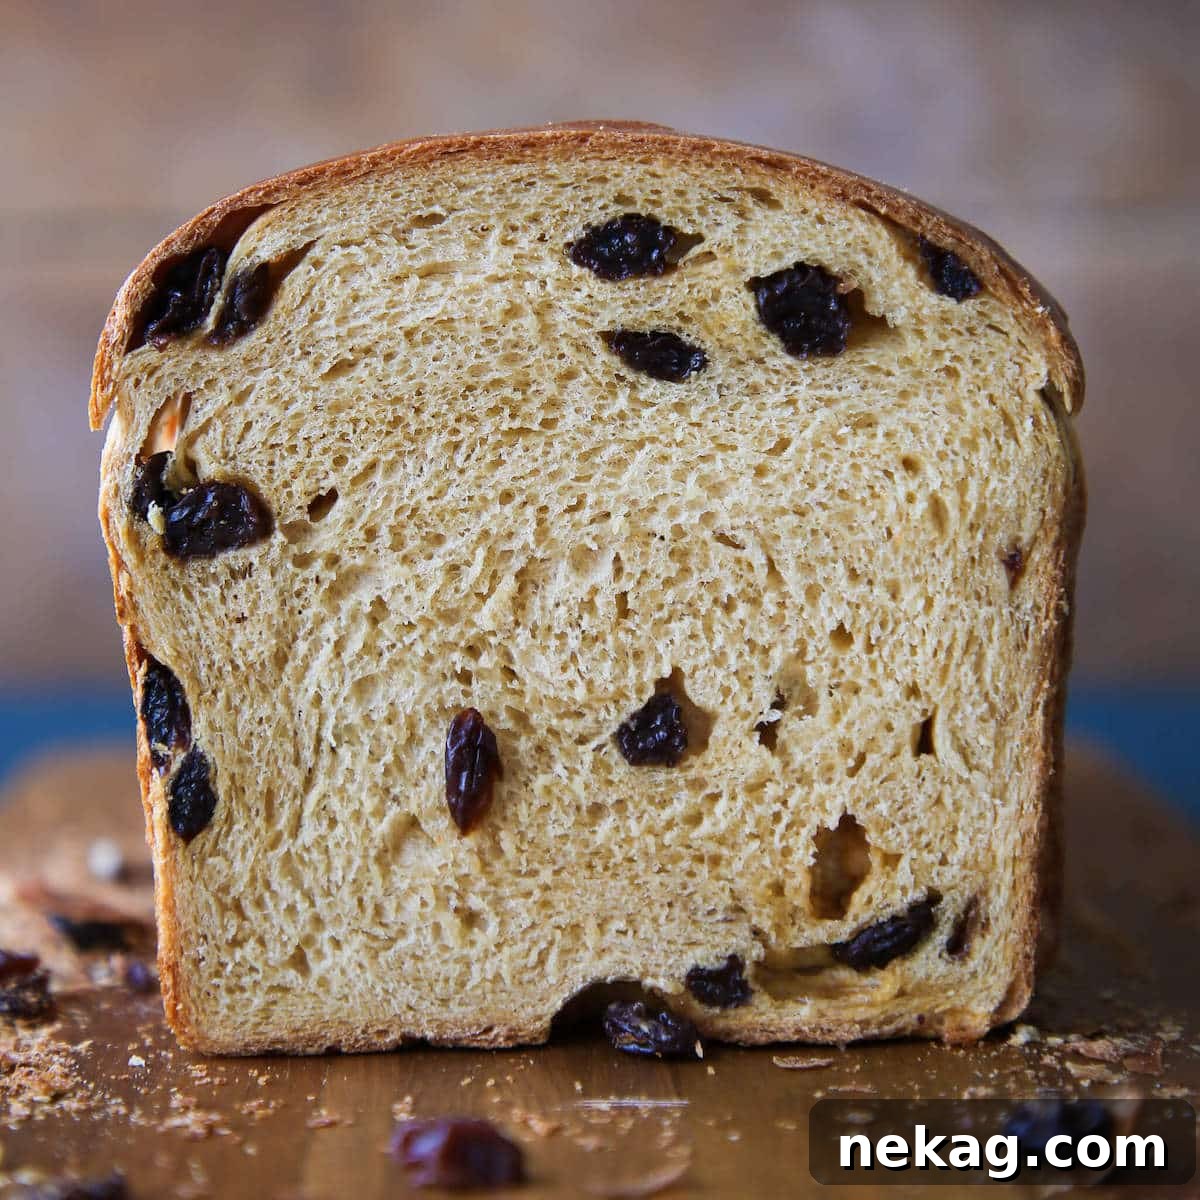
This raisin bread recipe is a true celebration of baking, offering a delightful experience with every bite. You’ll love its incredibly soft, pleasantly chewy, and wonderfully moist texture, subtly infused with the warm, rich notes of molasses. It’s perfect for enjoying by the slice with your morning coffee, transforming into cinnamon sugar toast for a nostalgic treat, or elevating your brunch as a base for the most delicious French toast you’ve ever tasted!
A Quick Look At The Recipe
This is a brief summary of the recipe’s key details and estimated timings. For comprehensive instructions and exact measurements, please jump directly to the full recipe card.
Jump to Recipe
Prep Time
45 minutes
Cook Time
30 minutes
Proof Time
1 hour 30 minutes
Total Time
2 hours 45 minutes
Servings
24 slices
Difficulty
Moderate (easy steps!)
Calories *
163 kcal per serving
Technique
Mix dough, allow for essential proofing, careful shaping, and bake until golden brown and perfectly risen.
Flavor Profile
A remarkably soft, mildly sweet bread boasting the distinct depth of molasses and abundant, juicy raisins woven throughout.
* Based on nutrition panel at 1 serving (1 slice)
Summarize & Save this content on
google ai
perplexity
grok
Why You’ll Adore This Homemade Raisin Bread
There are countless reasons why this particular raisin bread recipe stands out from the rest and is destined to become a beloved staple in your kitchen. Here are just a few of the compelling reasons why you’ll fall in love with baking and enjoying this magnificent loaf:
- Unparalleled Softness, Tenderness, and Moisture: Unlike many dry or crumbly bread recipes, this one is engineered for ultimate comfort. The secret lies in melting the shortening and molasses directly into the milk before mixing. This unique approach ensures that the fats and sweeteners are perfectly emulsified and distributed throughout the dough, resulting in a bread that is exceptionally soft, remarkably tender, and stays moist for days. It’s truly a melt-in-your-mouth experience.
- Rich, Deeply Flavored Profile: Prepare for an aroma that will fill your home with warmth and nostalgia. The combination of dark, juicy raisins and the distinctive, earthy sweetness of molasses creates a flavor profile that is both comforting and sophisticated. It’s perfectly balanced – sweet enough to satisfy, yet complex enough to intrigue. Each slice offers a taste that is both familiar and uniquely rich, making it an instant classic.
- An Old-Fashioned Recipe with a Unique Twist: This isn’t just another raisin bread recipe; it’s a testament to timeless baking wisdom, with clever techniques that set it apart. The unconventional mixing method, along with the specific use of molasses for sweetness and shortening for its tenderizing properties, harks back to traditional methods while delivering superior results. It produces a bread with a distinct character and irresistible charm.
- Generous Yield of Two Loaves: Imagine the joy of having two perfect loaves of homemade raisin bread! This recipe thoughtfully yields a pair, making it ideal for sharing with loved ones, gifting to a friend, or ensuring you have a second loaf ready to enjoy later. You can savor one fresh from the oven and freeze the other for future breakfasts, brunches, or delightful snacks whenever the craving strikes.
Table of Contents
- Why You’ll Adore This Homemade Raisin Bread
- Essential Ingredients for Perfect Raisin Bread & Smart Substitutions
- Exciting Variations to Customize Your Raisin Bread
- Pro Tips for Baking Bakery-Quality Raisin Bread at Home
- Step-by-Step Guide: Crafting Your Delicious Raisin Bread
- Chef Lindsey’s Recipe Tip
- Frequently Asked Questions About Homemade Raisin Bread
- Recommended Raisin Bread Recipes
- Raisin Bread Recipe Card
- Before You Go: Explore More Delicious Bread Recipes
While many of my most cherished breads featuring raisins are often reserved for special holiday occasions, such as the festive stollen or the iconic Italian panettone, this particular raisin bread recipe breaks free from seasonal constraints! It’s designed to be enjoyed year-round, bringing comfort and joy to any day.
The moment I stumbled upon this gem in the pages of the venerable American Woman’s Cookbook – the very same treasure trove where I discovered the secret to my beloved 100% whole wheat bread – I was utterly captivated. The ingredient list and the intriguing methodology immediately piqued my curiosity, compelling me to try it without delay.
And I’m so glad I did! The resulting loaves were every bit as moist, delightfully chewy, and profoundly flavorful as I had dared to hope. Furthermore, the inclusion of shortening and molasses in the dough made the mixing and shaping process an absolute dream – the dough was incredibly pliable and a pleasure to work with. This recipe truly lives up to its promise, delivering a wholesome and utterly delicious homemade raisin bread experience that you’ll want to revisit again and again.
Essential Ingredients for Perfect Raisin Bread & Smart Substitutions
Crafting exceptional raisin bread begins with understanding the role of each ingredient. Here’s a detailed look at what you’ll need and potential substitutions to suit your pantry and preferences:
- Whole Milk: Whole milk is more than just a liquid; it’s a key contributor to the bread’s luscious texture and rich flavor. Its higher fat content and lower water content compared to skim milk help to create a tender, moist crumb that stays fresh longer. The proteins in whole milk also contribute to the dough’s structure. If whole milk isn’t available, you can use other milk substitutes like 2% milk, or even plant-based milks (almond, soy, oat), though these may slightly alter the final texture and richness. For a tangy twist and incredibly soft results, buttermilk is an excellent alternative, much like how I use it in my honey whole wheat buttermilk rolls.
- Shortening: Ingredients like Crisco, are vital for achieving that signature tenderness. Shortening is a solid fat that works by inhibiting excessive gluten development, preventing the bread from becoming tough or overly chewy. This results in a remarkably soft, almost cake-like crumb. If you prefer, unsalted butter can be used for a richer flavor, or coconut oil for a slightly different aroma and similar tenderizing effect. Keep in mind that butter has some water content, so the dough’s hydration might need slight adjustment if you substitute it.
- Molasses: I highly recommend using unsulphured molasses for this recipe. This type has a lighter, milder, and less bitter flavor compared to blackstrap molasses, which can be quite intense. Molasses infuses the bread with those comforting, warm “winter” notes and a beautiful caramel-brown hue without being overpowering. Beyond flavor, molasses is also a fantastic food source for the yeast, giving your proofing process a significant kickstart and ensuring a lively, active dough.
- Dry Active Yeast: This classic leavening agent requires a crucial initial step of hydration and activation, but it’s very reliable and controllable. It’s what gives your bread its beautiful rise and airy texture. If you don’t have dry active yeast on hand, you can substitute it with double the weight of fresh yeast for a similar result, or half the weight of instant yeast if you prefer a faster-acting option. When using fresh or instant yeast, you can typically add them directly to the dry ingredients without prior hydration, but always double-check the specific instructions on your yeast packaging.
- All-purpose Flour: The foundational ingredient for our bread, all-purpose flour provides the necessary structure. Its moderate protein content allows for good gluten development, creating a bread that is both airy and sturdy enough to hold its shape. While all-purpose works wonderfully, you could experiment with a small percentage of bread flour (e.g., swapping 1 cup) for a slightly chewier texture, or whole wheat flour (like my whole wheat bread recipe) for added fiber and a nuttier flavor, though this would change the crumb density.
- Kosher Salt: Far more than just a flavor enhancer, kosher salt plays multiple vital roles in bread making. Its larger crystals mean it’s less salty by volume than finer table salt, which is important for accurate measurement. It not only amplifies the sweet and savory notes in the bread but also strengthens the gluten structure and regulates yeast activity, preventing over-proofing and contributing to a balanced, stable dough.
- Raisins: For this recipe, I typically opt for classic dark raisins, which offer a delightful sweetness and chewiness. However, feel free to get creative! Golden raisins provide a brighter, tangier flavor, or you could use a mix of both for visual appeal and complex taste. If you’re a true raisin enthusiast, you can increase the quantity up to 3 cups, as I often do in my sourdough raisin bread recipe (though you’ll need to master a sourdough starter first!). My personal policy regarding raisins is simple: the more, the merrier!
Refer to the recipe card below for the precise measurements and quantities of each ingredient needed to create these perfect loaves.
Exciting Variations to Customize Your Raisin Bread
While this old-fashioned raisin bread is absolutely perfect as is, it also serves as a fantastic canvas for culinary creativity! Don’t hesitate to experiment with these delicious variations to tailor it to your taste or to discover new family favorites:
- Craft a Delicious Cinnamon Swirl: Elevate your raisin bread into a cinnamon raisin delight by adding a beautiful, fragrant swirl. After the initial bench rest, gently roll each portion of dough into an approximately 8×12-inch rectangle. Lightly brush the surface with a touch of milk or water, then generously sprinkle a mixture of cinnamon and sugar all over, leaving a small, clean margin along one edge. Roll the dough tightly lengthwise, much like you would when preparing sourdough cinnamon rolls, ensuring a snug spiral. Pinch the seam closed securely, then place the rolled dough, seam-side down, into your prepared loaf pan. Proceed with the final proofing as instructed.
- Experiment with Different Mix-ins: Raisins are wonderful, but they’re just the beginning! This versatile dough welcomes a variety of dried fruits, nuts, or even chocolate. Try incorporating dried currants for a more traditional European flavor, reminiscent of sourdough hot cross buns. Dried cherries, like in my cherry sourdough bread, offer a tart contrast, while freeze-dried strawberries or blueberries can add a burst of fruity freshness. For added crunch and depth, mix in some toasted pecans, walnuts, or slivered almonds. Craving a decadent touch? Chocolate chips (dark, milk, or white) are always a welcome addition!
- Switch Up the Sweetener: Molasses provides a unique depth, but you can easily alter the flavor profile by exchanging it for another sweetener. Local honey will lend a lighter, floral sweetness and a slightly different hue. I’ve also successfully made this bread using dark brown sugar, which imparts a rich, almost caramelized flavor, or light brown sugar for a softer, more mellow sweetness – both variations were truly divine and highly recommended!
- Infuse with Aromatic Spices: Beyond cinnamon, a hint of additional spice can transform this bread. Consider adding a teaspoon of my homemade apple pie spice mix for autumnal notes, or a dash of pumpkin spice recipe for a cozy, holiday-inspired loaf. Nutmeg, cardamom, or allspice are also excellent choices, each adding its own layer of warmth and complexity. Start with ½ teaspoon and adjust to your preference.
Pro Tips for Baking Bakery-Quality Raisin Bread at Home
Achieving bakery-quality bread at home often comes down to a few key techniques and careful attention to detail. These professional tips will help ensure your raisin bread turns out perfectly every time:
- Always Let the Milk Cool Properly: The temperature of your liquid when activating yeast is paramount. If your milk is too hot (above 115°F/46°C), it will kill the yeast, preventing your bread from rising. Conversely, if it’s too cold, the yeast will activate too slowly or not at all. Yeast thrives in a “happy place” between 90°F and 110°F (32°C and 43°C), which is where you’ll achieve optimal fermentation and robust dough growth. Using a kitchen thermometer is highly recommended to ensure accuracy.
- Never Rush the Proofing Process: Patience is a virtue in bread making, especially during the bulk proof (the first rise). This phase is absolutely essential for not only developing the beautiful open structure of the dough but, more importantly, for cultivating the complex flavors. Underproofed dough can result in a bland, overly yeasty taste, a dense crumb, and a gummy texture, even after it’s fully baked. Allow your dough ample time to double in size in a warm, draft-free environment; don’t be tempted to shortchange this crucial step.
- Embrace Your Kitchen Scale for Accuracy: Baking, particularly bread making, is a precise science. The ratio of flour to liquid (hydration) is critical for proper gluten development and overall dough consistency. Measuring by volume (cups) can lead to significant inconsistencies because flour can be packed differently each time. The easiest, most consistent, and most accurate way to measure ingredients, especially flour, is by weight using a digital kitchen scale. This ensures repeatable results and a perfectly hydrated dough every time.
- Master the Windowpane Test: Knowing when your dough is adequately kneaded is key. The windowpane test indicates sufficient gluten development. To perform it, pinch off a small piece of dough (about the size of a golf ball) and gently stretch it between your fingers. If you can stretch it thin enough to see light pass through without tearing, like a translucent windowpane, your dough is ready. If it tears easily, continue kneading for a few more minutes and test again. This ensures your bread will have a strong, elastic structure.
- Maintain a Warm, Humid Proofing Environment: Yeast loves warmth and a bit of humidity to do its best work. For optimal proofing, find a warm spot in your kitchen, or create one. You can preheat your oven to its lowest setting (around 100°F/38°C) for a few minutes, then turn it off and let the dough rise inside with the door slightly ajar. Alternatively, place the covered dough in a microwave with a cup of hot water. The steam from the hot water creates a perfect humid environment, preventing the dough surface from drying out and forming a crust, which can inhibit rising.
Step-by-Step Guide: Crafting Your Delicious Raisin Bread
Follow these detailed instructions to create two loaves of this scrumptiously soft and flavorful raisin bread. You’ll find the precise measurements and further critical details within the recipe card located below.
Preparing the Yeast Mixture & Mixing the Dough
This initial phase focuses on activating your yeast and bringing together the core ingredients to form a pliable dough.
Step 1: In a small saucepan or microwave-safe bowl, combine the shortening, molasses, and whole milk. Gently heat this mixture over low heat or in the microwave until all the shortening has completely melted, stirring occasionally to ensure everything is well combined. Crucially, allow this mixture to cool down until it is comfortably lukewarm, ideally between 100°F – 110°F (38°C – 43°C). This temperature range is vital for yeast activation.
Step 2: Once the milk mixture reaches the correct temperature, carefully whisk in the active dry yeast. Let this mixture rest, undisturbed, for 10-15 minutes. During this time, the yeast should become active, manifesting as a bubbly, frothy layer on the surface. This indicates your yeast is alive and ready to work.
Important Yeast Check: If, after waiting the full 15 minutes, you observe no bubbles or frothing, it’s a strong indicator that your yeast is no longer viable. This could be due to old yeast, improper storage, or the milk being too hot and killing it. It’s best to discover this now and restart with fresh yeast, rather than wasting time and ingredients on dough that won’t rise later.
Step 3: In the spacious bowl of a stand mixer, fitted with the paddle attachment, combine your proofed wet ingredients with the kosher salt and all-purpose flour. Begin mixing on a low speed. Continue to mix just until all the ingredients are fully incorporated and a shaggy dough forms, ensuring there are no dry pockets of flour.
Step 4: Switch out the paddle attachment for the dough hook attachment. Increase the mixer speed to medium and continue mixing for approximately 10-12 minutes (this duration may vary depending on your specific mixer and flour). The goal is to develop the gluten sufficiently until a smooth, elastic dough has formed that successfully passes the windowpane test.
Understanding the Windowpane Test: To perform this essential test, gently pinch off a small piece of dough (no larger than a golf ball). With your thumbs and forefingers, carefully stretch the dough outwards from the center. The aim is to stretch it so thin that you can see light passing through it, resembling a translucent windowpane, without it tearing. If the dough tears easily before becoming translucent, it needs more mixing time. Remember to be gentle; pulling too aggressively or using too small a piece can cause false tears. If in doubt, try a slightly larger, fresh piece.
Step 5: Once your dough has achieved the desired level of gluten development and elasticity (passing the windowpane test), gently add the raisins. Continue mixing on a low speed. Allow ample time for the mixer to thoroughly distribute the raisins evenly throughout the entire dough, ensuring every slice will be studded with juicy goodness. Avoid over-mixing at this stage, as it can tear the developed gluten strands.
Bulk Proofing the Dough
This crucial step allows the yeast to work its magic, developing both volume and flavor in your dough.
Step 6: Take a large, clean mixing bowl and lightly oil its interior with cooking spray or a neutral vegetable oil. Transfer the prepared dough into this greased bowl, turning it once to ensure the entire surface is lightly coated with oil. This prevents the dough from sticking during its rise. Cover the bowl securely with a damp towel or plastic wrap to maintain moisture and prevent a crust from forming.
Step 7: Place the covered bowl in a warm, draft-free spot. Allow the dough to proof until it has visibly doubled in size. In my kitchen, this typically took about an hour, but proofing times can vary based on ambient temperature and yeast activity. Look for visual cues of significant expansion.
Step 8: Once the bulk proof is complete, gently turn the dough out onto a clean countertop. Using a kitchen scale, divide the dough into two equal portions, approximately 730g each. This ensures two consistently sized loaves.
Dough Handling Tip: This particular raisin bread dough is moist enough that you generally won’t need to flour your work surface. Adding too much flour at this stage can make the bread drier and harder to shape properly. If you find the dough is excessively sticky, a light misting of nonstick cooking spray on your countertop, similar to how I handle my potato rolls, can be very effective in preventing sticking without altering the dough’s hydration.
Shaping the Loaves
Proper shaping builds tension in the dough, contributing to a beautiful rise and an appealing final loaf.
Step 9: Preheat your oven to 350°F (175°C). While the oven heats, prepare two standard 9×5-inch loaf pans by lightly spraying them with cooking spray or greasing them with butter. This prevents sticking and ensures easy removal after baking.
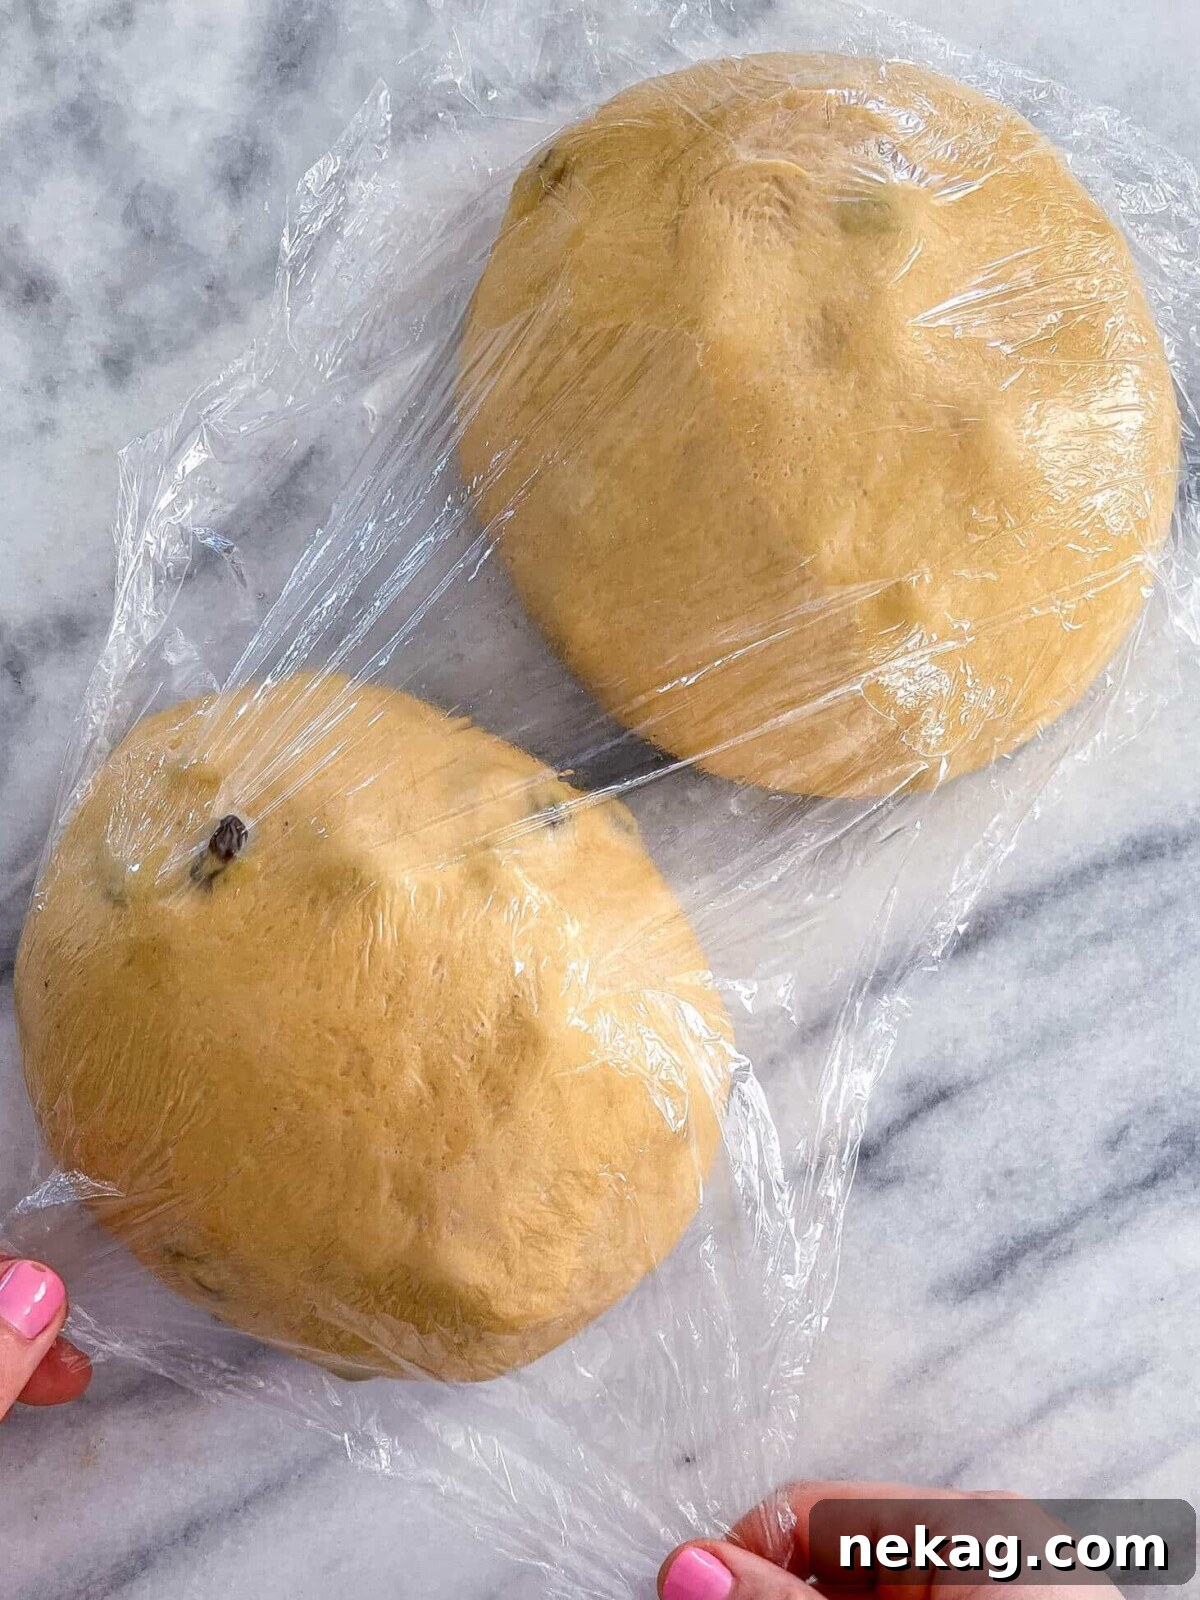
Step 10: Preshape the dough into a boule (round). Take one portion of dough. Gently flatten it slightly, then fold each of the four sides towards the center, creating a somewhat square parcel. Flip the dough over so the seam is facing down. Using two hands, gently cup the dough and pull it towards yourself, allowing the dough to stretch over the top and pull underneath, creating surface tension. Rotate the dough a quarter turn and repeat this motion until you have a smooth, tightly rounded dough ball. Cover the preshaped dough with plastic wrap and allow it to “bench rest” (sit undisturbed) for 10 minutes. This resting period allows the gluten to relax, making the final shaping much easier.
Step 11: Final shape into a log and place in a greased baking dish. After the bench rest, take one preshaped boule. Flip the dough over so that the seam is facing upwards. Gently grab two corners and lift the dough, allowing gravity to naturally stretch it into a rough rectangular shape. Lay it back down on your clean workbench, ensuring the seam is still face up. Fold the top third of the rectangle down towards the center, pressing firmly to seal. Rotate the dough 180 degrees, then repeat the folding process with the other side, folding the top third down towards the center and sealing. Now, beginning from the right side, use the heel of your right hand and the thumb of your left hand to grasp the top edge of the dough. Fold this top edge over your left thumb and seal it down by pressing the heel of your right hand along the seam you’ve just created. Continue this “thumb folding” process, working your way along the entire length of the loaf, creating a tight, uniform log.
Shaping for the Pan: As you shape, always keep the length of your loaf pan in mind. You want your dough log to be roughly the same length as your pan – neither too long nor too short. You might find it helpful to place your loaf pan directly on the bench in front of you for easy visual reference. If your dough log isn’t tight enough or isn’t quite long enough, you can repeat the “thumb folding” process once more to achieve the desired tension and length.
Step 12: Once shaped, carefully place each dough log into its respective prepared loaf pan, ensuring the seam-side is facing down. Cover the loaf pans loosely with plastic wrap to prevent the dough from drying out during the final proof.
Final Proof and Bake
The last rise and baking bring your delicious raisin bread to its golden, aromatic conclusion.
Step 13: Allow the covered loaves to proof in a warm, humid environment until they have doubled significantly in size and feel notably light and airy to the touch. This final proof typically takes longer than the bulk proof, sometimes up to an hour and a half, depending on your kitchen’s conditions. An adequately proofed loaf will spring back slowly when gently poked.
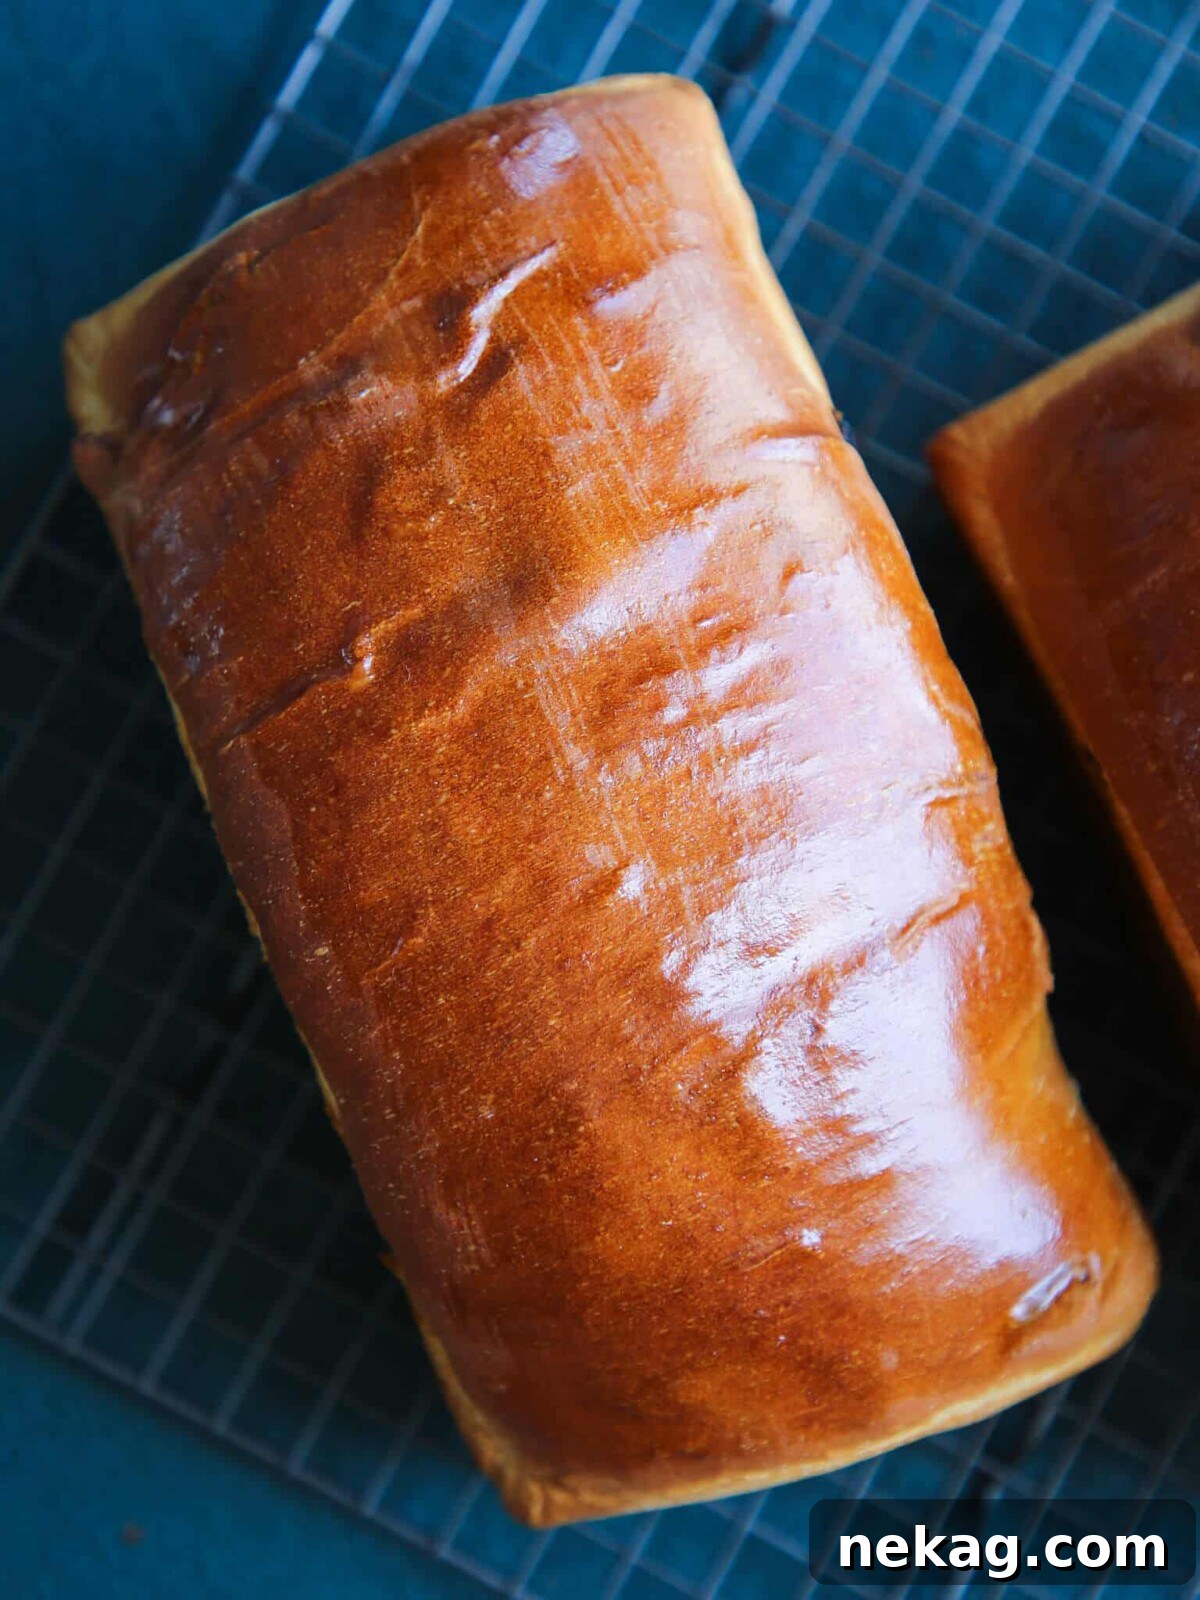
For a Beautiful, Shiny Crust: If you desire the glossy, golden-brown tops seen in professional bakeries, brush the surface of each loaf with a beaten egg (an “egg wash”) just before baking. A light, even coating will do the trick, adding both sheen and a rich color to the crust.
Step 14: Bake the loaves in your preheated oven at 350°F (175°C) for approximately 30-35 minutes, or until an internal thermometer inserted into the center of the loaf reads 186°F (86°C). Another reliable indicator of doneness is inserting a clean toothpick into the center; if it comes out clean, the loaves are fully baked. Immediately turn the baked loaves out onto a wire cooling rack and allow them to cool completely before attempting to slice. Cooling entirely is crucial for the internal structure to set.
Chef Lindsey’s Recipe Tip
Always remove your freshly baked bread from its pan immediately after taking it out of the oven. If you allow the bread to cool within the pan, the trapped steam will collect underneath, causing the bottom crust to become soggy. We definitely want to avoid any soggy bottoms to ensure a perfectly crisp crust all around!
Frequently Asked Questions About Homemade Raisin Bread
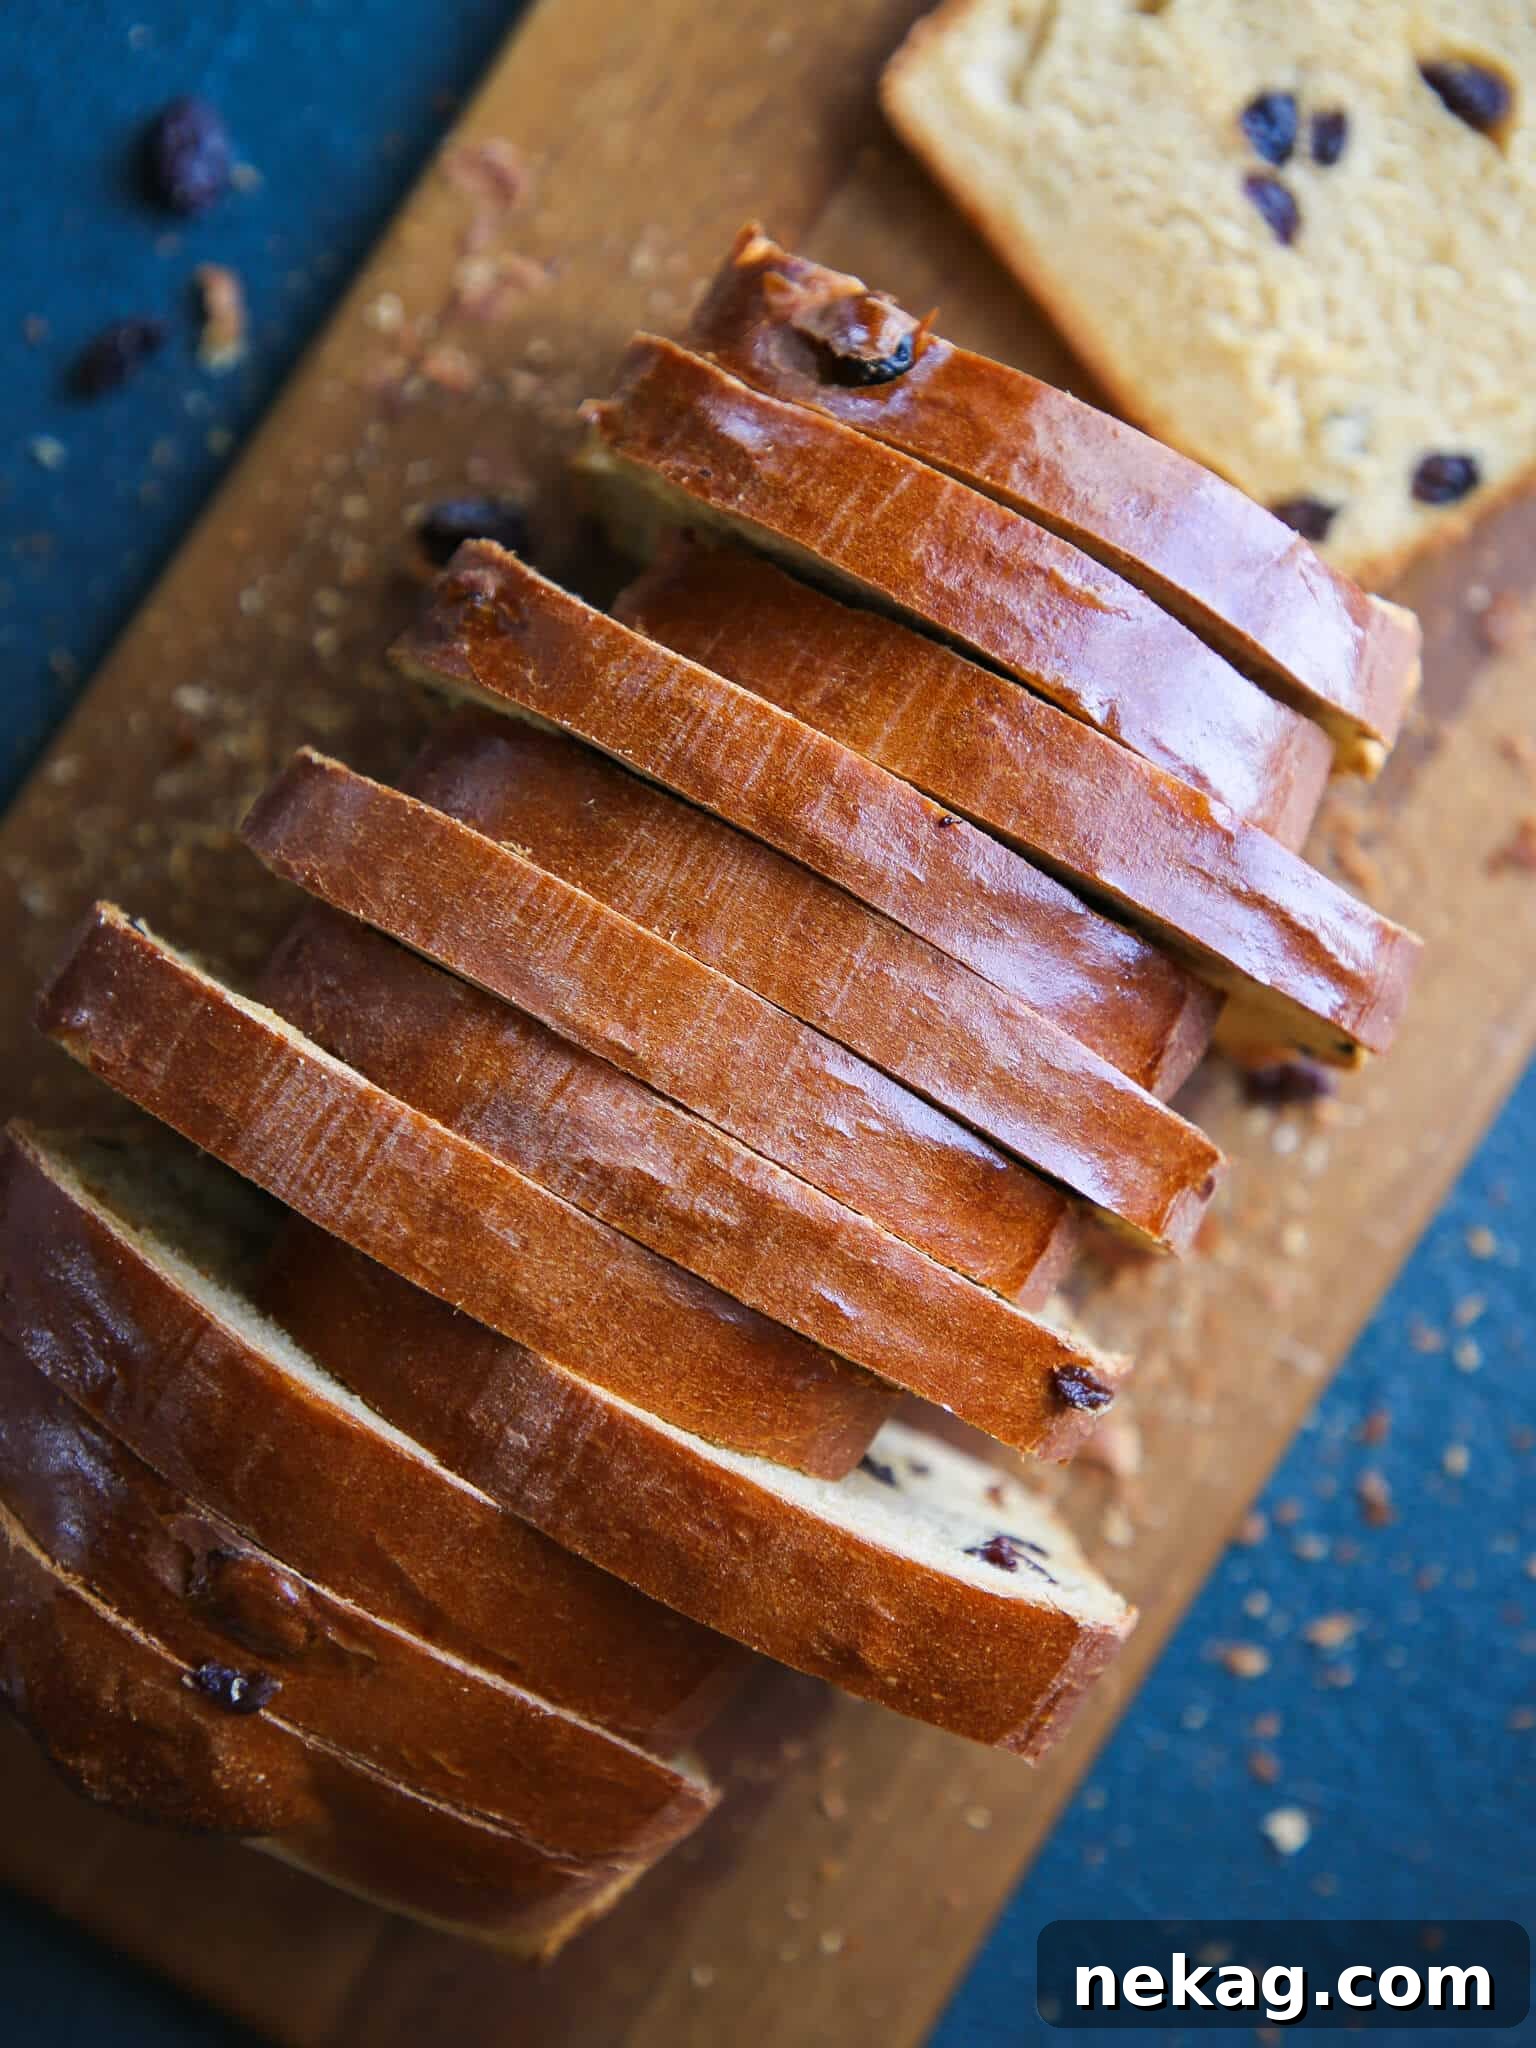
Thanks to the rich additions of molasses, whole milk, and shortening, this homemade raisin bread possesses a natural ability to stay wonderfully soft and moist. You can store a well-wrapped loaf or slices in an airtight container at room temperature for up to 3 days before any noticeable drying out begins. For longer freshness, it can last up to 5 days at room temperature. If you wish to extend its life even further, freeze the bread immediately after it has cooled completely for up to 2 months. Be aware that storing bread in the refrigerator tends to dry it out much faster, so it’s generally not recommended for optimal texture. I highly recommend pre-slicing the loaf before wrapping and freezing; this way, you can easily grab just a few slices as needed, rather than defrosting the entire loaf.
For this particular raisin bread recipe, it is generally not necessary to soak the raisins beforehand, especially if they are fresh and plump. The dough is sufficiently moist to hydrate them during the baking process. However, there are exceptions: if your raisins are exceptionally dry, soaking them in hot water for 10-15 minutes and then draining them thoroughly can help them plump up. For an extra layer of flavor, you could soak them in a spirit like brandy or rum, similar to how I prepare my rum raisin banana bread. If you choose this method, be sure to drain the liquid completely and pat the raisins very dry before incorporating them into the dough to avoid altering the dough’s hydration.
This raisin bread is incredibly versatile and delicious in many forms! My absolute favorite way to enjoy it is toasted until golden, slathered with butter, and generously sprinkled with cinnamon sugar – a truly nostalgic and comforting treat. Beyond that, consider serving it with a dollop of homemade maple butter for an irresistible breakfast, or with a rich cream cheese spread and your favorite fruit jam for a delightful snack. It’s also fantastic simply served fresh, alongside a cup of tea or coffee, allowing its natural flavors to shine.
Leftover raisin bread is a gift that keeps on giving! It’s absolutely perfect for transforming into cinnamon raisin French toast, which makes for an unbelievably decadent breakfast or brunch. It’s also an ideal base for comforting desserts like easy bread pudding, or my seasonal favorite, pumpkin bread pudding with maple bourbon sauce. Don’t stop there! You can create sweet bread crumbs or croutons: simply toss cubes or crumbs of the bread with melted butter, a sprinkle of sugar, and your preferred spices (like cinnamon or nutmeg). Toast them in the oven until they’re golden brown and delightfully crunchy. These sweet croutons are incredible served with salted caramel sauce drizzled over vanilla bean ice cream for an impressive dessert!
Recommended Raisin Bread Recipes
If you’ve loved this recipe, explore more delicious bread creations from my kitchen:
Easy Quick Bread Recipes
Traditional Irish Soda Bread with Raisins
Sourdough Bread Recipes
Sourdough Raisin Bread
Yeasted Bread Recipes
The Best Stollen Recipe
Easy Quick Bread Recipes
Brown Butter Rum Raisin Banana Bread
If you tried this recipe and loved it, please consider leaving a 🌟 star rating and share your experience in the comments section below. I genuinely love hearing from you; your feedback and comments truly brighten my day!
Raisin Bread
Chef Lindsey
45
30
1
30
2
45
24 slices
Comment
Print Recipe
Ingredients (US Customary)
- 2 cups whole milk warmed to 115°F (46°C)
- 2 tbsp shortening
- ¼ cup molasses (unsulphured recommended)
- 2 ¼ teaspoon dry active yeast
- 6 cups all-purpose flour
- 1 ½ teaspoon kosher salt
- ¾ cup raisins (dark or golden)
Instructions
Mix the dough:
-
Combine the shortening, molasses, and milk and heat until all the shortening has melted, stirring occasionally. Let this mixture cool until it is lukewarm (100°F – 110°F / 38°C – 43°C).
-
Whisk the active dry yeast into the mixture and let it sit, undisturbed, for 10-15 minutes, or until the yeast has bubbled and looks frothy.
-
In the bowl of a stand mixer fitted with the paddle attachment, combine wet ingredients with salt and flour. Mix on low until incorporated.
-
Switch to the dough hook attachment and mix on medium until a smooth dough has formed and it passes the windowpane test. This typically takes about 10-12 minutes in a stand mixer.
-
Once the desired amount of gluten development has occurred, add the raisins and mix on low speed. Ensure the raisins are evenly distributed throughout the dough.
Bulk proof:
-
Oil a large bowl with cooking spray or vegetable oil. Place the dough in the greased bowl. Cover with a damp towel or plastic wrap.
-
Allow to proof in a warm spot until doubled in size, which often takes about an hour.
-
Turn dough out onto a countertop and divide into two equal portions (approximately 730g each).
Shape the bread:
-
Preheat the oven to 350°F (175°C) and spray two 9×5-inch loaf pans with cooking spray or butter.
-
Preshape the dough into a boule (round). Fold each of the four sides towards the center, then flip over (seam side down). Gently pull it towards yourself using two hands, allowing the dough to stretch over the top and pull underneath. Turn a quarter turn and repeat until you have a round dough ball with a smooth, tight surface. Cover with plastic wrap and bench rest for 10 minutes.
-
Final shape into a log. Flip the dough over so the seam is facing up. Grab two corners, pick it up, and allow gravity to pull the dough down, stretching it into a rectangle. Place on the bench (seam still face up). Fold the top third towards the center, pressing down. Rotate 180 degrees, then repeat with the other side, folding the top third down towards the center. Using the heel of your right hand and the thumb on your left, grab the top part of the dough starting on the right side and fold it over your thumb. Seal it down by pressing the heel of your right hand on the seam you just created. Repeat until you have gone the full length of the loaf.
-
Place seam-side down in the prepared loaf pans. Cover with plastic wrap.
Final Proof and Bake:
-
Proof in a warm, humid place until they have doubled in size and feel light and airy to touch.
-
Bake in the preheated oven until a thermometer reads 186°F (86°C). You can also insert a toothpick into the center; the loaves are done when it comes out clean. Turn out onto a cooling rack and cool completely before slicing.
Notes
Presentation – For a beautifully shiny, golden crust, lightly brush the top of each loaf with an egg wash (one egg beaten with a tablespoon of water) just before baking.
Flavor Tips – Ensure your raisins are fresh and flavorful. If they’ve been sitting in the pantry for a while, taste a few to make sure they haven’t developed an off-flavor, as this will impact your bread.
Storage – Store loaves wrapped tightly in plastic wrap or in an airtight container at room temperature for up to 5 days. For longer storage, freeze completely cooled, pre-sliced loaves for up to 2 months. Avoid refrigerating, as it can dry out the bread.
Nutrition
Carbohydrates: 31g |
Protein: 4g |
Fat: 2g |
Saturated Fat: 1g |
Polyunsaturated Fat: 1g |
Monounsaturated Fat: 1g |
Trans Fat: 1g |
Cholesterol: 2mg |
Sodium: 157mg |
Potassium: 163mg |
Fiber: 1g |
Sugar: 4g |
Vitamin A: 33IU |
Vitamin C: 1mg |
Calcium: 39mg |
Iron: 2mg
Bread
American
163
Like this? Leave a comment below!
Before You Go: Explore More Delicious Bread Recipes
I sincerely hope you enjoyed baking and savoring this easy, delightful, and truly old-fashioned raisin bread recipe! It’s a classic for a reason, bringing warmth and comfort to any home. The joy of homemade bread is unmatched, and this recipe is a perfect testament to that.
If you’ve found a new favorite in this raisin bread, I encourage you to delve deeper into the wonderful world of baking with my other cherished yeasted bread recipes. Perhaps you’ll find your next baking adventure in my wholesome whole wheat sandwich bread, perfect for everyday meals. Or, for a truly indulgent treat, don’t miss out on my irresistible cinnamon roll recipe crowned with luscious cream cheese icing – a guaranteed crowd-pleaser! Happy baking, and may your kitchen always be filled with the wonderful aroma of fresh bread.