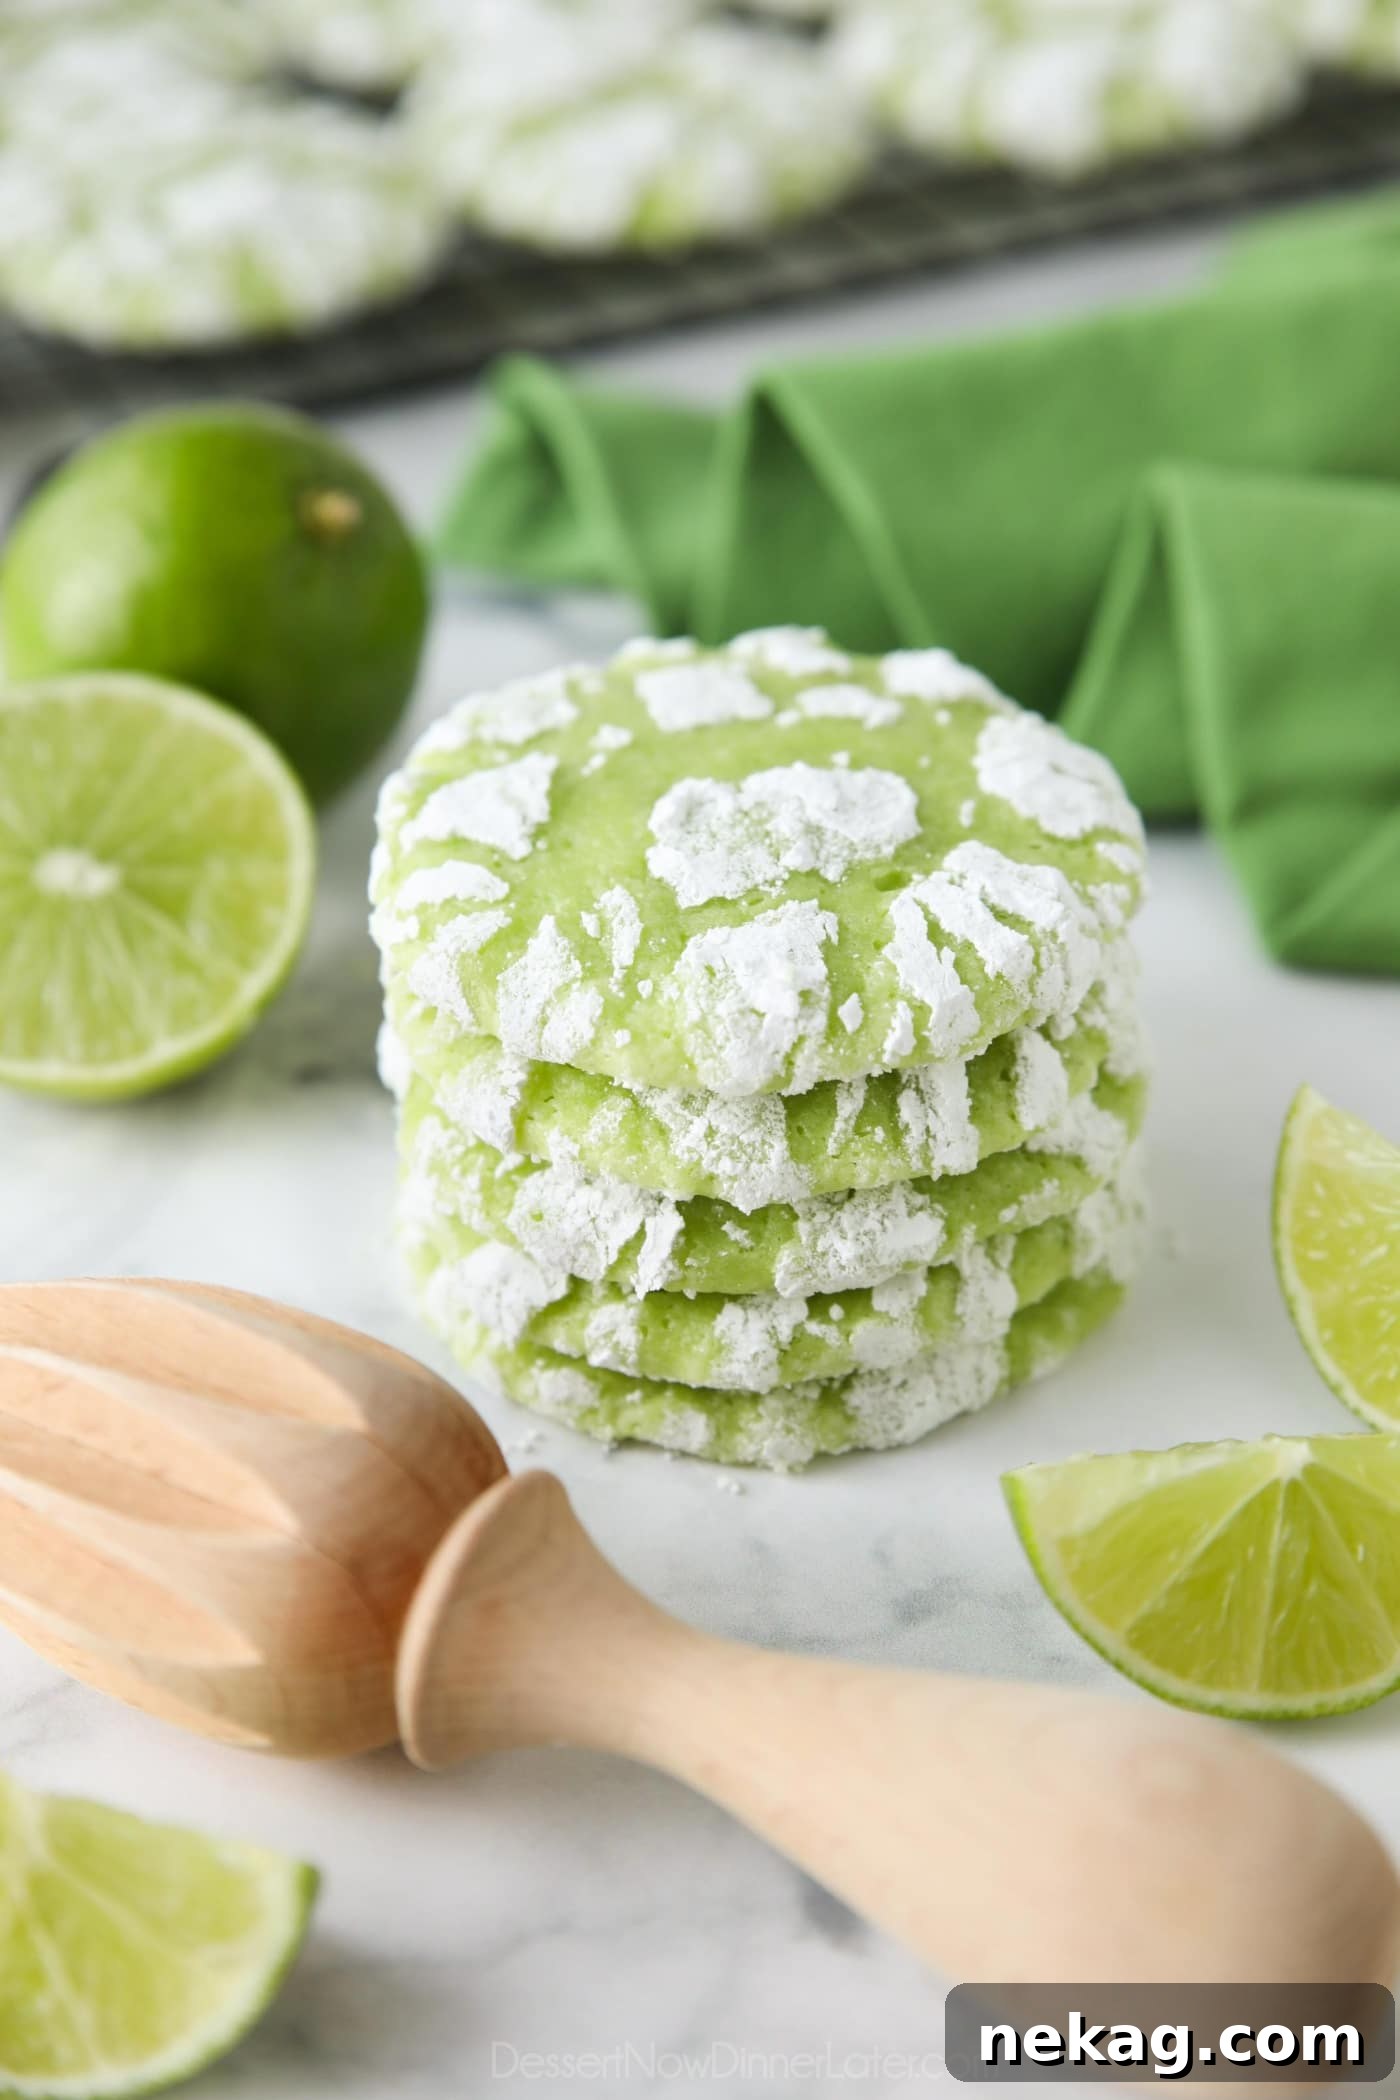
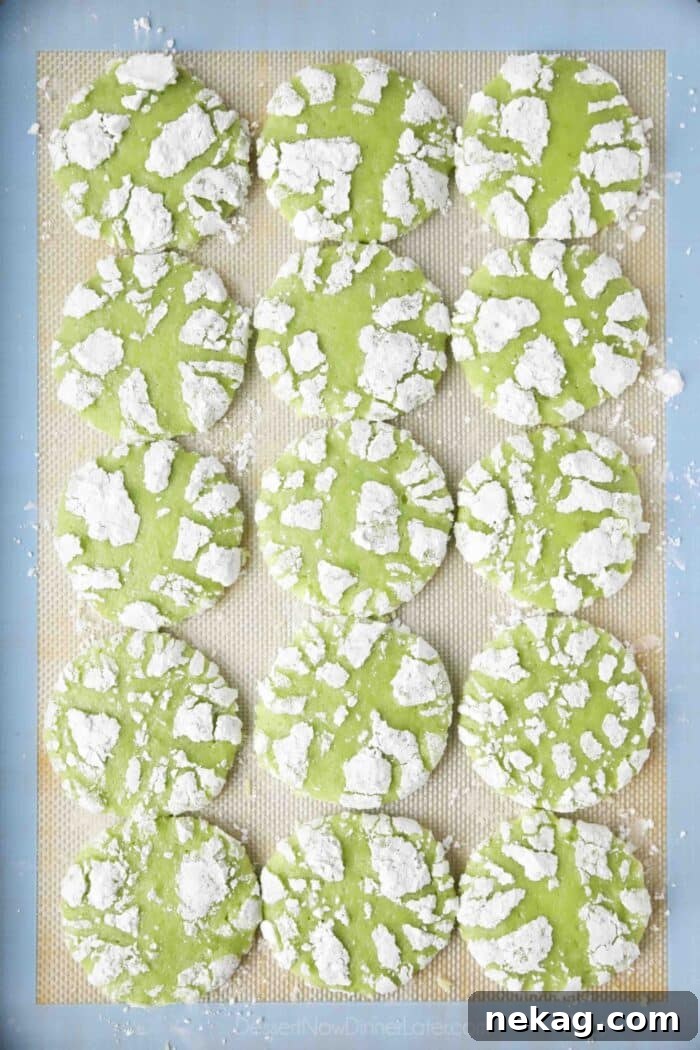
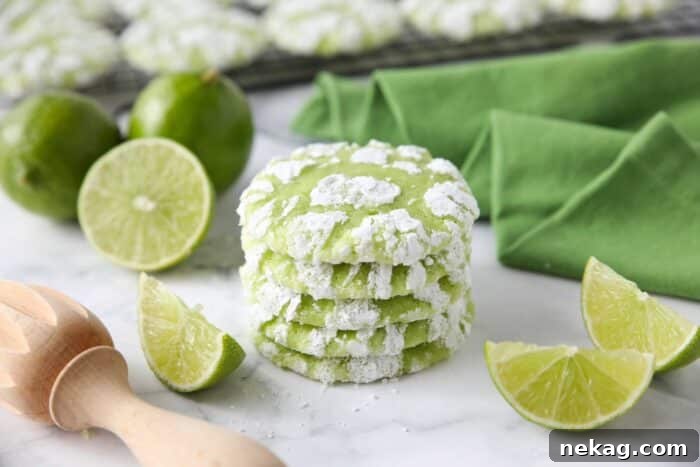
Delight your senses with these wonderfully soft-baked Lime Crinkle Cookies. Bursting with the vibrant flavor of fresh lime zest and tangy lime juice, these cookies offer a truly refreshing experience. As they bake, the generous coating of powdered sugar elegantly cracks, revealing the moist, chewy, and irresistibly zesty cookie beneath. They are a feast for both the eyes and the palate, perfect for any occasion.
For those who adore the whimsical charm of crinkle cookies, you’ve likely encountered the classic chocolate crinkle cookies. However, my passion for these beautiful cracked treats has inspired a delightful array of variations. Explore the comforting spice of pumpkin crinkle cookies, the tropical zest of coconut key lime crinkle cookies, or even the unique apple butter cookies, which swap powdered sugar for a cinnamon-sugar coating but retain those characteristic, gorgeous cracks. Each recipe offers a distinct flavor profile while celebrating the signature crinkle aesthetic that makes these cookies so beloved.
Why These Lime Crinkle Cookies Will Become Your New Favorite
Our Lime Crinkle Cookies aren’t just another cookie recipe; they’re a vibrant celebration of citrus that brings a unique twist to your dessert table. Here’s why you’ll fall in love with them:
- A Zesty Dream for Citrus Lovers – If you find yourself gravitating towards anything lemon or lime, these cookies are tailor-made for you. They deliver an unparalleled burst of refreshing lime flavor, making them a standout from more conventional cookie options. The bright, tangy notes are perfectly balanced with the sweetness, creating an invigorating taste that truly awakens the palate. It’s the ultimate treat for those who adore a zesty and vibrant dessert.
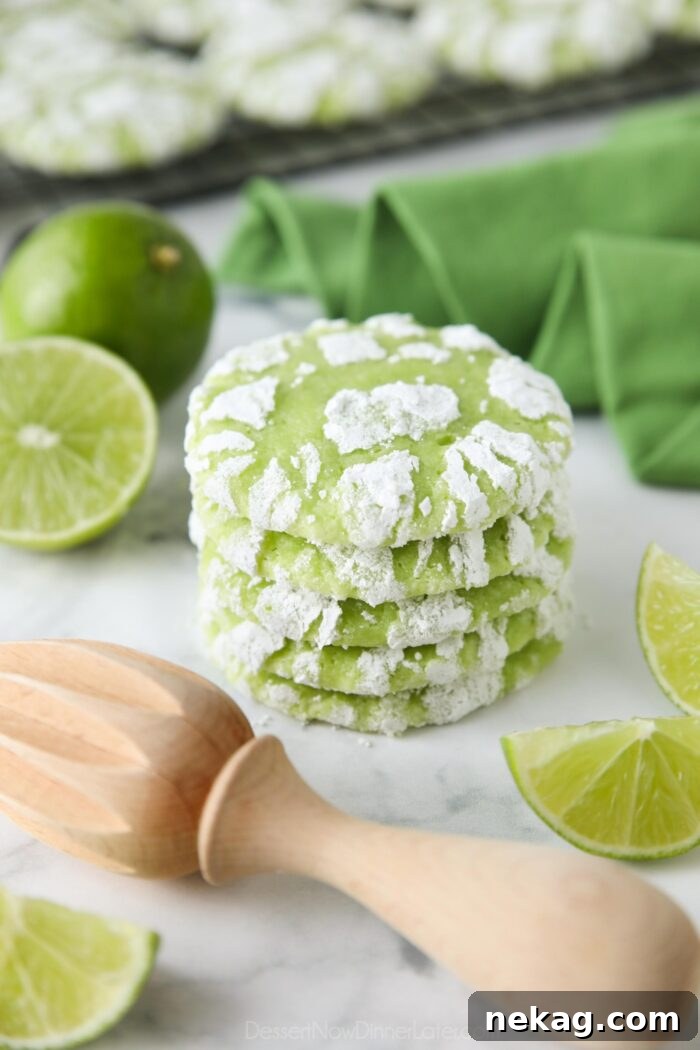
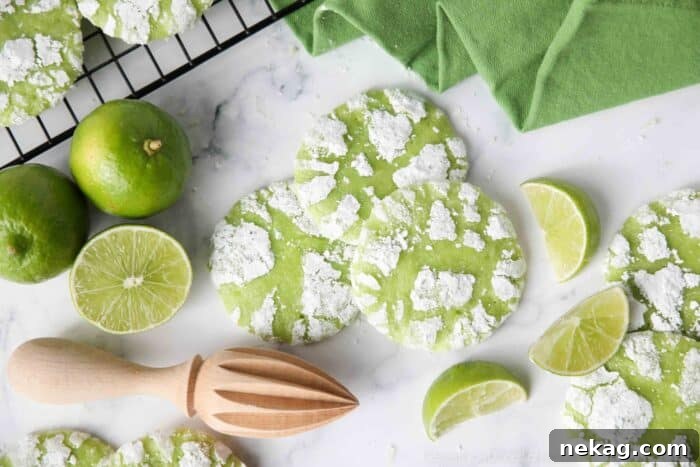
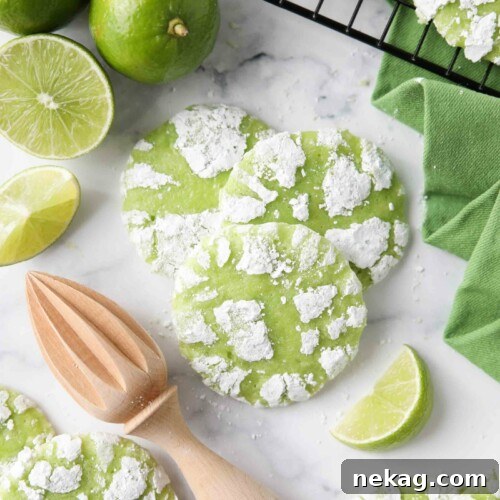
- Visually Stunning and Festive – The hallmark crinkle effect is not just delicious; it’s incredibly eye-catching. The stark contrast between the pristine white powdered sugar and the radiant green interior of the cookie (beautifully enhanced with a touch of food coloring) creates a festive and appealing presentation. These cookies instantly brighten any platter, making them ideal for holiday gatherings, special occasions, or simply to add a splash of color to your everyday baking.
- An Engaging and Rewarding Baking Adventure – The process of preparing these cookies is genuinely fun and satisfying. From rolling the dough in sugar to watching the magical crinkle effect appear in the oven, each step is rewarding. It’s a fantastic project for bakers of all skill levels, offering a delightful hands-on experience that culminates in a batch of exquisite, homemade treats.
- Perfectly Balanced Texture – Beyond their striking appearance and bold flavor, these cookies boast an incredible texture. They are wonderfully soft and chewy, with a slightly crisp exterior thanks to the double sugar coating. This harmonious blend of textures elevates the eating experience, making each bite an absolute pleasure.
Unveiling the Magic of Crinkle-Style Lime Cookies
These exquisite crinkle-style lime cookies are a direct descendant of my beloved lemon crinkle cookies, but with a vibrant, zesty lime twist. While I truly can’t pick a favorite between the two – my love for all citrus desserts runs deep – these lime versions certainly hold a special place. They offer a unique, tangy profile that stands out beautifully.
What sets these lime crinkles apart is their exceptional texture. They are wonderfully soft on the outside, yielding to a delightfully dense and moist interior. This creates a mouthfeel that is almost reminiscent of biting into a luscious lemon bar or, in this case, a rich lime bar. You get that same intensely tangy citrus taste, but with a fascinating textural fusion where the creamy curd and chewy crust seem to have morphed into a single, cohesive, and utterly delicious cookie. It’s a sophisticated yet playful dessert that offers the best of both worlds.
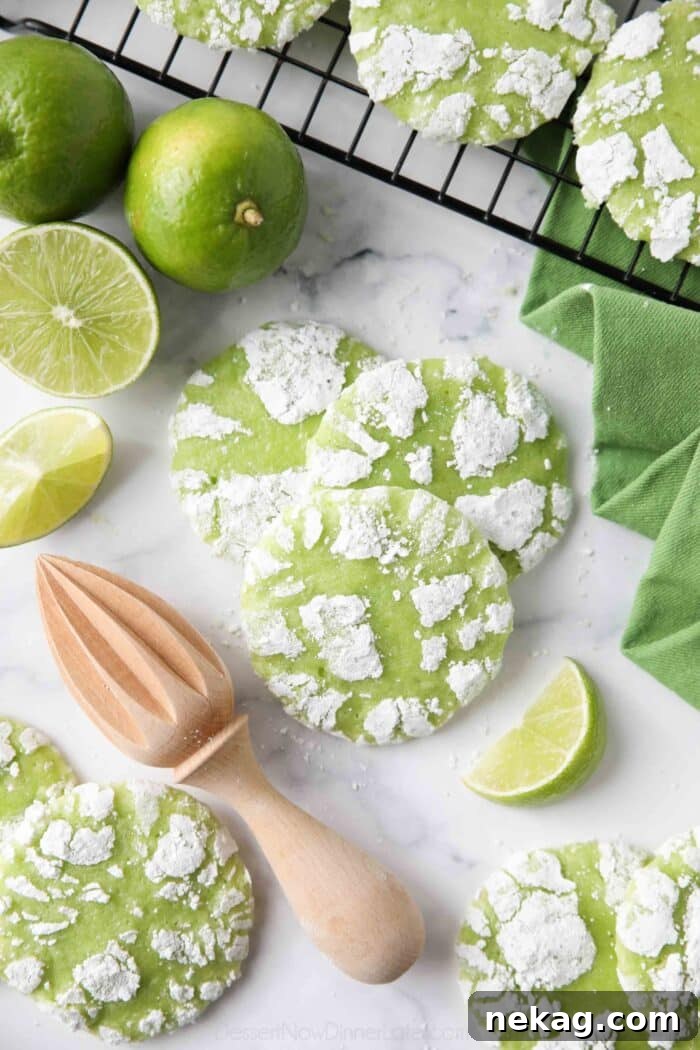
Creating these sensational cookies is surprisingly simple, relying on the authentic flavor of real limes and their aromatic zest. To truly amplify their visual appeal, I incorporate a touch of neon green food coloring. This ensures that when the powdered sugar majestically cracks during baking, it reveals the most stunningly vibrant green cookies beneath – a true showstopper! Allow me to guide you through the straightforward steps to achieve this culinary masterpiece.
The Science Behind the Perfect Crinkle
Have you ever wondered what makes crinkle cookies develop their signature cracked appearance? It’s a delightful little baking trick rooted in simple science. The magic happens because of the generous coating of powdered sugar. When the cookie dough is rolled in a thick layer of powdered sugar before baking, the sugar acts as a barrier. As the cookies bake, the dough spreads and expands, but the powdered sugar coating, being less elastic, can’t expand at the same rate. This difference in expansion causes the sugar coating to crack and separate, revealing the contrasting color of the baked cookie dough underneath.
The granulated sugar layer applied first also plays a crucial role. It creates a slightly rougher surface that helps the powdered sugar adhere better, preventing it from completely melting and being absorbed into the dough. This double coating ensures that the beautiful white cracks remain distinct and vibrant, making your lime crinkle cookies not only delicious but also visually spectacular. Understanding this simple principle helps ensure you get those picture-perfect cracks every time.
How to Make Irresistible Lime Crinkle Cookies
Crafting these delectable lime crinkle cookies is a straightforward process that yields impressive results. Pay close attention to each step, and you’ll be enjoying these zesty treats in no time. NOTE: For a complete list of ingredients with precise measurements and detailed instructions, please refer to the comprehensive recipe card located at the end of this article.
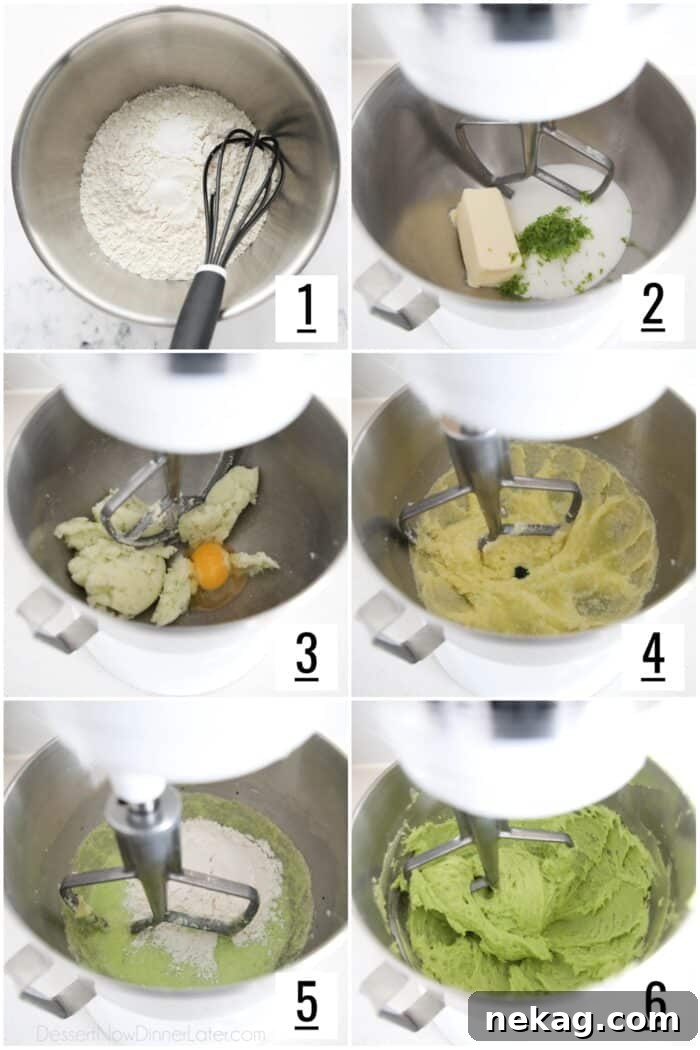
- Prepare Dry Ingredients: In a medium-sized mixing bowl, thoroughly whisk together the all-purpose flour, baking powder, and salt. Whisking ensures these leavening agents and seasonings are evenly distributed throughout the dry mixture, which is crucial for uniform cookie texture. Set this bowl aside for later use.
- Cream Butter, Sugar, and Zest: Using a stand mixer fitted with the paddle attachment (or a hand mixer), combine the softened unsalted butter, granulated sugar, and fresh lime zest. Beat these ingredients together on medium speed until the mixture becomes light, fluffy, and noticeably pale in color. This creaming process incorporates air, contributing to the cookies’ soft texture. The lime zest is vital here, as its oils infuse directly into the fat, maximizing the lime flavor.
- Incorporate Eggs and Wet Ingredients: Add the eggs one at a time, mixing well after each addition until fully incorporated. Scrape down the sides of the bowl as needed to ensure everything is evenly mixed. Next, pour in the fresh lime juice and, if desired for a more vibrant hue, a few drops of neon green food coloring (you can also combine green and yellow food coloring to achieve this bright shade). Mix until these liquid ingredients are just combined.
- Combine Wet and Dry Mixtures: Reduce the mixer speed to low. Gradually add the prepared flour mixture to the wet ingredients, mixing until just combined. Be careful not to overmix the dough, as this can develop the gluten too much, resulting in tougher cookies. The dough will have a thick and slightly sticky consistency.
NOTE: If your dough feels excessively wet and sticky, it’s likely that your butter was too soft when you started creaming. Don’t worry, this is easily fixed! Simply place the cookie dough in the refrigerator to chill for about 30 minutes, or until it becomes firm enough to handle and scoop easily. This chilling process will also help prevent the cookies from spreading too much during baking.
Mastering the Scoop and Double Coating for Perfect Lime Crinkles
The distinctive crinkle effect of these lime cookies relies heavily on the correct scooping and coating technique. This two-step sugar coating is the secret to their beautiful appearance and delightful texture.
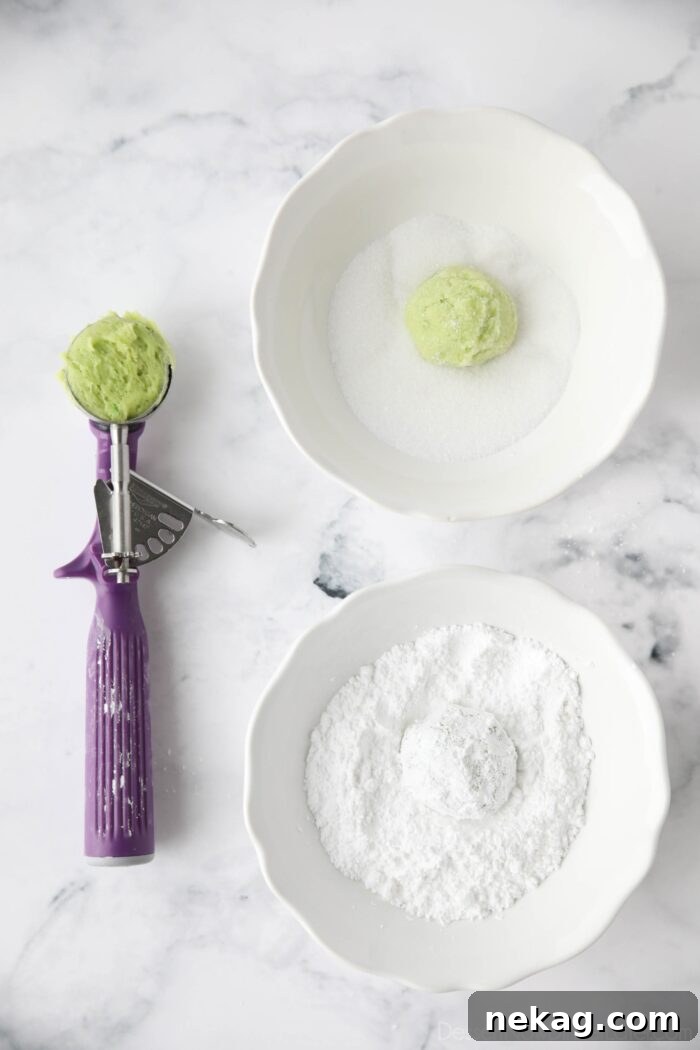
- Prepare Your Coating Stations: Set up two separate small bowls. Fill one with granulated sugar and the other with powdered sugar. This makes the coating process efficient and mess-free.
- Scoop the Dough: Use a medium cookie scoop (a #40 scoop, which holds about 1.5 tablespoons) to form uniform balls of cookie dough. A trigger-style scoop is highly recommended for this recipe, as the dough tends to be slightly sticky, and a trigger mechanism makes releasing the dough much easier and cleaner.
- First Coat – Granulated Sugar: Gently drop each scooped dough ball into the bowl of granulated sugar. Roll it around until it’s fully coated, then lightly shake off any excess sugar. This initial layer of granulated sugar serves a dual purpose: it makes the sticky dough more manageable, preventing it from sticking to your hands, and it provides a foundational layer for the powdered sugar to adhere to without dissolving prematurely.
- Second Coat – Powdered Sugar: Immediately after the granulated sugar coating, transfer the dough ball to the bowl of powdered sugar. Roll it generously in the powdered sugar, ensuring it’s completely and thickly coated. Don’t be shy with this layer; a substantial coating is essential for achieving those deep, pronounced crinkles during baking.
Baking and Storing Your Zesty Treats
Proper baking and storage are key to enjoying your Lime Crinkle Cookies at their absolute best. Follow these guidelines to achieve perfectly baked cookies and keep them fresh for longer.
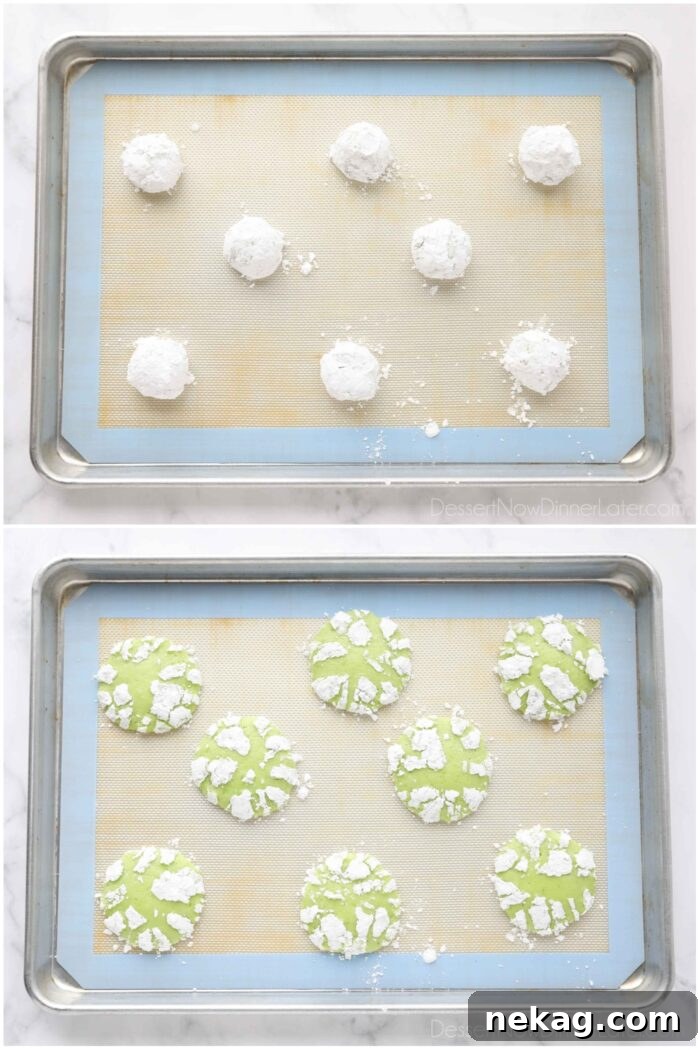
- Baking Preparation: Arrange the coated cookie dough balls several inches apart on a baking sheet lined with parchment paper or a silicone baking mat. This spacing allows the cookies to spread slightly without merging into each other.
- Bake to Perfection: Bake in a preheated oven at 350°F (175°C) for 9-11 minutes. The cookies are done when they appear puffy, and their edges are set and firm to the touch. The center of the beautiful crinkles will still look almost matte, with just a slight hint of wetness or shininess remaining. This indicates a perfectly moist and chewy interior. Avoid overbaking, as this can lead to dry cookies.
- Cooling Process: Allow the cookies to cool on the baking sheet for several minutes immediately after removing them from the oven. This brief period helps them set further and firm up. After a few minutes, carefully transfer the cookies to a wire rack to cool completely. Cooling on a wire rack ensures air circulation around the entire cookie, preventing sogginess and preserving their delicate texture.
- Optimal Storage: Once completely cooled, store your lime crinkle cookies in an airtight container at room temperature. They will retain their freshness and soft texture for up to one week. For best results, place parchment paper between layers of cookies to prevent them from sticking together.
Expert Tips for Unforgettable Lime Crinkle Cookies
Achieving perfectly tender, tangy, and beautifully crinkled lime cookies every time involves a few essential techniques. Heed these expert tips to elevate your baking and ensure stunning results:
- The Crucial Role of Room Temperature Butter: This is perhaps one of the most vital tips for successful cookie baking. “Room temperature” butter is often misunderstood; it’s cooler than many imagine. When you gently press room temperature butter, it should create a small indent, yet still feel semi-firm and not leave your fingers greasy. If your finger easily sinks into the butter and it feels soft like lotion, it’s too warm. Butter that is too soft will cause your cookie dough to spread excessively during baking, leading to thin, flat cookies. If you suspect your butter was too warm, simply place the prepared cookie dough in the refrigerator to chill until it firms up sufficiently for scooping.
- The Secret to the Double Sugar Coating: As a true enthusiast of crinkle cookies, I’ve discovered that the most beautiful and long-lasting crinkles come from a dual coating process. First, roll the dough balls in granulated sugar, then follow with a generous coating of powdered sugar. This innovative method serves a few key purposes: it creates a protective barrier that helps prevent the powdered sugar from dissolving into the cookie during storage, keeping those white cracks distinct. Additionally, this technique imparts a subtle crispness to the exterior while maintaining a wonderfully soft and chewy interior, enhancing the overall textural experience.
- For Thicker, Chewier Cookies – Embrace the Chill: While this recipe is designed to be baked immediately, if your preference leans towards thicker, more substantial cookies, a period of chilling the dough is highly recommended. Chilling the dough solidifies the butter, which slows down the rate at which the cookies spread in the oven. This results in a taller, chewier cookie with a more pronounced dome, while still achieving those beautiful crinkles. Even 30 minutes in the fridge can make a noticeable difference.
- Don’t Overmix the Dough: After adding the flour mixture, mix only until just combined. Overmixing develops the gluten in the flour, which can lead to tough, dense cookies instead of the desired soft and tender texture.
- Fresh Limes are Non-Negotiable: For the best and brightest lime flavor, always use fresh limes for both the zest and juice. Bottled lime juice simply doesn’t compare in terms of vibrant taste and aroma. The zest contains essential oils that provide a powerful punch of flavor.
Can I Freeze These Delicious Lime Crinkle Cookies?
Absolutely! One of the fantastic advantages of these Lime Crinkle Cookies is their freezer-friendliness. You can easily freeze them either before or after baking, making them perfect for meal prep, spontaneous cravings, or future entertaining. Here’s how:
- Freezing Unbaked Cookie Dough Balls: This method is ideal for having fresh-baked cookies on demand.
- Scoop individual cookie dough balls (without coating them in sugar yet) and place them on a baking sheet lined with parchment paper. Ensure they are not touching.
- Freeze the dough balls until they are completely solid, typically 1-2 hours.
- Once frozen, transfer the solid dough balls to a freezer-safe zip-top bag or an airtight container. Label with the date.
- Freeze for up to 3 months.
- When ready to bake, you can either thaw the dough balls in the refrigerator overnight before coating and baking as usual, or bake them directly from frozen. If baking from frozen, coat them with both granulated and powdered sugar as instructed, and add a few extra minutes (typically 2-4 minutes) to the baking time. Keep an eye on them to ensure proper doneness.
- Freezing Baked Cookies: This is a convenient option if you want to have ready-to-eat cookies on hand.
- Allow the baked lime crinkle cookies to cool completely on a wire rack. This is crucial to prevent ice crystals and freezer burn.
- Once fully cooled, arrange them in an airtight freezer-safe container. For best results and to prevent sticking, place a piece of parchment paper between each layer of cookies.
- Freeze for up to 3 months.
- To enjoy, simply thaw the cookies in the refrigerator overnight or at room temperature on your kitchen counter for a few hours. They will be just as soft, chewy, and flavorful as when freshly baked!
Serving Suggestions and Creative Variations
These Lime Crinkle Cookies are delightful on their own, but there are many ways to enjoy them and even customize them to your liking. Here are some ideas:
Serving Suggestions:
- Coffee or Tea Companion: Their bright, zesty flavor makes them a perfect pairing with a warm cup of coffee or a refreshing iced tea.
- Dessert Platter Star: Arrange them on a dessert platter with other treats for a colorful and varied spread at parties or gatherings.
- Light Afternoon Treat: Enjoy one or two as a refreshing pick-me-up during the afternoon.
- Gift Giving: Package them in a decorative box or bag as a thoughtful homemade gift for friends, family, or neighbors.
- With Fresh Fruit: Serve alongside a bowl of mixed berries or sliced melon for a balanced dessert.
Creative Variations:
- Coconut Lime Crinkles: For a tropical twist, add 1/2 cup of shredded unsweetened coconut to the dough. You could also toast the coconut lightly for added flavor.
- White Chocolate Lime Crinkles: Fold in 1/2 cup of white chocolate chips to the dough during the last stage of mixing for a sweet and creamy contrast.
- Citrus Medley: Experiment with adding a touch of lemon or orange zest alongside the lime for a broader citrus flavor profile.
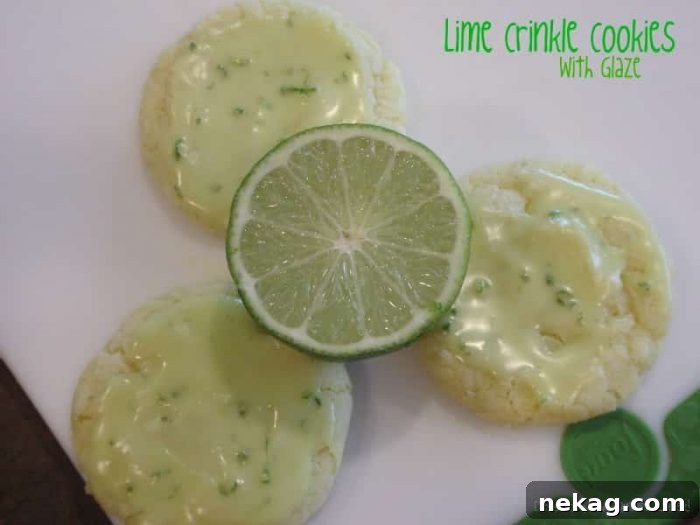
- Lime Glaze: If you desire even more lime punch, drizzle a simple lime glaze (powdered sugar mixed with a little lime juice) over the cooled cookies after the crinkles have set.
- Essential Oil Boost: As noted in the recipe card, for an extra intense lime flavor, you can add 1/8 teaspoon of food-grade lime essential oil or 1 teaspoon of lime extract to the dough. Be careful with essential oils as they are very potent.
Lime Crinkle Cookies
Amber Brady
15
10
25
28 cookies
Ingredients
- 2 ⅓ cups (280 g) all-purpose flour, stir, spoon & level
- 1 teaspoon baking powder
- ½ teaspoon salt
- ½ cup (113 g) unsalted butter, (1 stick) room temperature
- 1 ¼ cups (250 g) granulated sugar
- 1 Tablespoon lime zest, about 2 limes
- 2 large eggs, room temperature
- ¼ cup (59 ml) lime juice, about 2 limes
- neon green food coloring, optional
Coating
- ¼ cup (50 g) granulated sugar
- ½ cup (60 g) powdered sugar
Equipment
-
KitchenAid 5-Qt. Stand Mixer
-
Electric Hand Mixer
-
Zester
-
#40 Cookie Scoop
-
Aluminum Half Sheet Tray (2 Pack)
-
Silicone Baking Mat
Instructions
-
Preheat oven to 350 degrees Fahrenheit. Line baking sheets with silicone mats or parchment paper. Set aside.
-
Whisk together the flour, baking powder, and salt in a bowl. Set aside.
-
Using a stand mixer with the paddle attachment, cream the butter, sugar, and lime zest until light and fluffy.
-
Add the eggs, one at a time, mixing well after each addition. Add the lime juice and some neon green food coloring (optional; may also combine green and yellow to achieve this color). Mix to combine.
-
On low speed, gradually add the flour mixture and mix until just combined. The dough will be thick and slightly sticky. NOTE: If the dough seems especially wet and sticky, your butter may have been too soft. Simply chill the dough until it’s firm enough to scoop; about 30 minutes.
-
Place the granulated sugar and powdered sugar for coating the dough in two separate small bowls. Use a medium cookie scoop (#40 scoop; about 1.5 Tablespoons) to spoon the cookie dough into a ball. (A trigger scoop is recommended due to the stickiness of the dough.)
-
Drop the dough into the granulated sugar. Roll it around and shake off any excess. (This helps make the dough more manageable.) Next, generously coat the dough with powdered sugar. Place the cookies several inches apart on the prepared baking sheets.
-
Bake at 350˚F for 9-11 minutes, until cookies are puffy and the edges are firm to the touch. The center of the cracks will be almost matte (just slightly wet/shiny still). Cool for several minutes on the pan, then transfer cookies to a wire rack to cool completely. Store cookies in an airtight container at room temperature for up to 1 week.
Notes
- Freeze scooped cookie dough balls, un-coated, on a baking sheet. Then transfer frozen dough to a freezer safe bag. Freeze up to 3 months. Coat dough balls with both sugars and add a few extra minutes of bake time, if baking from frozen. You may thaw dough balls in the fridge overnight, if desired.
- Freeze baked cookies, after they have cooled completely, in an airtight container with parchment paper between the layers for up to 3 months. Thaw in the refrigerator or on the counter.
If even more lime flavor is desired, you can add 1/8 tsp of lime essential oils, or 1 tsp of lime extract to the dough.
Nutrition
Disclaimer: Nutritional values were calculated using a third-party tool and are provided as an estimation only.
Sharing this recipe with a link is both encouraged and appreciated. Copying/pasting and/or screenshots of full recipes to any social media is strictly prohibited. Content and photographs are copyright protected.
Did you make this?
Don’t forget to leave a rating below and make sure to follow on Pinterest and Instagram for more!
*Originally published 2/22/2012. Post updated January 2024.