
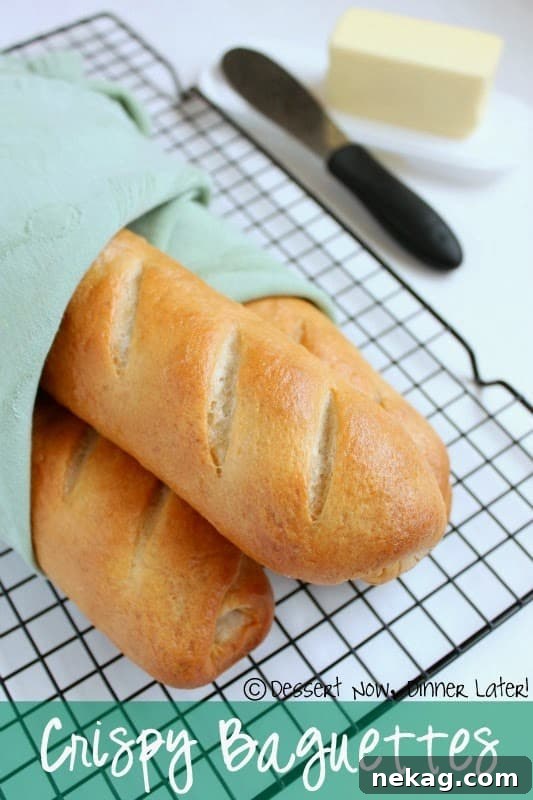
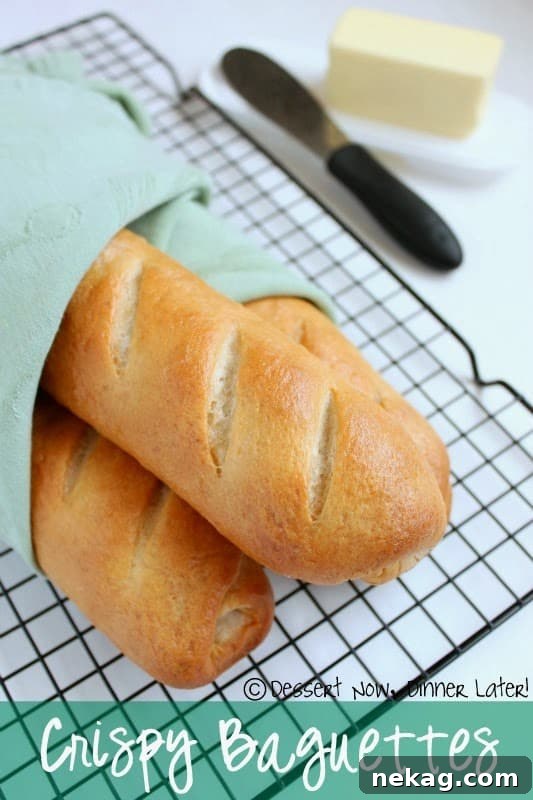
There’s an undeniable magic that happens when you bake bread at home. The aroma that fills your kitchen, the warmth emanating from the oven, and the sheer satisfaction of pulling out a freshly baked loaf are experiences that truly elevate the everyday. Recently, I embarked on a baking adventure that led to these incredible homemade crispy baguettes, a recipe so delightful it’s become an instant family favorite. The initial spark for this project came from a simple soup recipe I was preparing, which called for a side of delicious, cheesy, crispy toast. While the recipe suggested using a store-bought baguette, the thought of spending $3 on a single loaf felt unnecessary, especially when the joy and affordability of making it from scratch beckoned. That decision set me on a path to crafting my very own artisanal French bread, and the results were truly worth every moment.
Mastering the Art of Homemade Baguettes: A Rewarding Culinary Journey
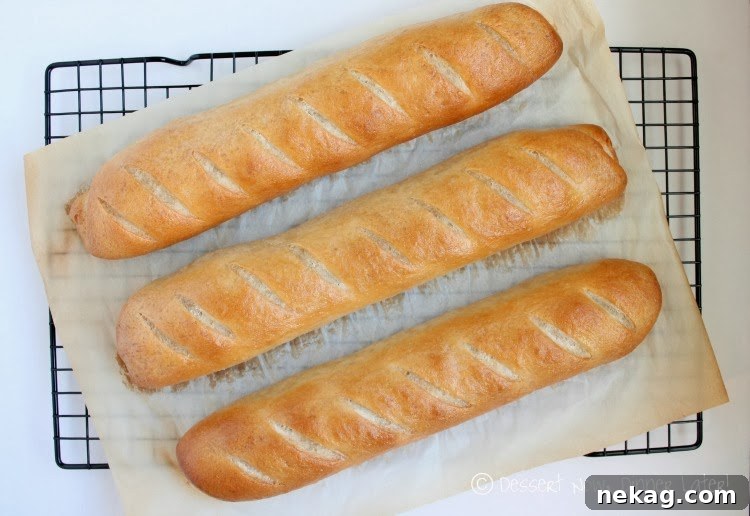
Baking homemade baguettes might seem like a daunting task, and I’ll admit, it’s quite time-consuming. However, the process is incredibly therapeutic, and the end product far surpasses anything you’ll find in a supermarket. My first attempt, while wonderfully crisp and flavorful, didn’t quite achieve the classic rustic look of an artisan baguette. I realized that a proper rectangular baking stone or a specialized baguette pan would have made a significant difference in shaping and crust development. Lacking these tools, I improvised by using a regular baking sheet, preheating it in the oven to mimic the intense heat transfer of a baking stone. This technique certainly helped create a wonderfully crisp crust, but the loaves settled into a more “French bread” shape rather than the distinctively irregular form of true artisan baguettes. Despite the slightly different aesthetic, the taste and texture were phenomenal.
The true measure of success, however, came from my toughest critics: my kids. They were captivated by what they called the “special bread,” constantly asking for more. That enthusiastic endorsement solidified my belief that this recipe was not just delicious but blog-worthy, a true culinary gem worth sharing. If you have a relaxed weekend ahead and are looking for a rewarding baking project, I wholeheartedly encourage you to give these homemade crispy baguettes a try. The satisfaction of slicing into a warm loaf, knowing you made it yourself, is unparalleled.
The Ultimate Crispy Baguettes Recipe
Creating perfect crispy baguettes at home requires a bit of patience and attention to detail, but the incredible flavor and texture you achieve are well worth the effort. This recipe walks you through a two-stage process, starting with a flavorful pre-ferment (starter) that develops depth, followed by the main dough. The long fermentation and specific baking techniques ensure a beautifully crisp crust and a tender, airy interior.
Crispy Baguettes
Amber Brady
Pin Recipe
Rate this Recipe
Save Recipe
Consider enabling “Cook Mode” to prevent your screen from dimming while following the recipe.
Ingredients
Starter:
- ½ cup (118 ml) cool to lightly warm water
- 1 pinch active dry yeast
- 1 cup (120 g) bread or all-purpose flour, (stir, spoon & level)
Dough:
- 1 tsp active dry yeast
- 1 to 1 ¼ cups (237-296 ml) lukewarm water*
- all of the starter
- 3 ½ cups (420 g) bread or all-purpose flour, (stir, spoon & level)
- 1 ½ to 2 tsp salt, depending on personal taste
Instructions
-
Begin by preparing the starter. In a medium bowl, combine the pinch of active dry yeast with the cool to lightly warm water. Stir gently until the yeast dissolves. Then, add the bread or all-purpose flour (ensuring it’s stirred, spooned, and leveled for accuracy). Mix everything until a soft, cohesive dough forms. Cover the bowl loosely with plastic wrap or a damp cloth and allow it to rest at room temperature for a minimum of 14 hours. Overnight works perfectly. By the morning, your starter should have visibly risen and show a good amount of bubbly activity, indicating its readiness.
-
Once your starter has undergone its long fermentation (after 14+ hours), it’s time to prepare the main dough. In the bowl of a stand mixer fitted with a dough hook, dissolve the 1 tsp active dry yeast into the specified amount of lukewarm water. Incorporate all of your prepared starter into this mixture. Next, add the remaining 3 ½ cups of bread or all-purpose flour (again, stirred, spooned, and leveled) and the salt. Mix on low speed, then increase to medium-low (around speed 2 on a stand mixer) and knead for approximately 5 minutes. You’re looking for a soft, somewhat smooth dough that comes together cohesively, though its surface may still appear a bit rough.
-
Lightly grease a clean, medium-sized bowl. Transfer the kneaded dough into this bowl, turning it once to lightly coat all sides with oil. Cover the bowl securely with plastic wrap or a clean kitchen towel. Allow the dough to rise for a total of 3 hours. During this period, gently deflate the dough and turn it over after the first hour, and then repeat this process again after the second hour. This technique helps to develop gluten and redistribute the yeast, leading to a better texture.
-
Once the bulk fermentation is complete, turn the dough out onto a lightly greased work surface. Divide the dough into three equal pieces. Gently shape each piece into a rough, slightly flattened oval. Cover these with lightly greased plastic wrap and let them rest for 15 minutes. This short rest allows the gluten to relax, making the dough easier to shape in the next step.
-
Working with one piece of dough at a time, begin shaping your baguettes. Fold the dough in half lengthwise, bringing one long edge over to meet the other. Firmly seal the seam using the heel of your hand. Gently flatten the dough slightly, then fold and seal it again. This double-folding and sealing method builds tension and creates the classic baguette structure, ensuring a good rise and a crisp crust.
-
With the seam-side down, gently roll the dough back and forth with your hands, working from the center outwards, until you form a log approximately 15 inches long. Place these shaped logs seam-side down into the wells of a baguette pan if you have one, or onto a lightly greased or parchment-lined sheet pan. Ensure there is adequate space between each loaf. Cover the shaped loaves with lightly greased plastic wrap and allow them to undergo their final rise until they appear very puffy, which usually takes about 1½ hours. This is crucial for achieving a light, open crumb.
-
Towards the end of the final rising time, preheat your oven to a high temperature of 450˚F (232˚C). If you are utilizing a baking stone for extra crispiness, make sure to place it on the LOWEST rack in your oven during preheating. This allows the stone to get incredibly hot, which is vital for the initial burst of steam and crust development.
-
Just before baking, use a very sharp knife, a razor blade, or a lame held at about a 45-degree angle to make several vertical slashes (typically 3-5) along the top of each baguette. These slashes, also known as “scoring,” allow the bread to expand beautifully in the oven without tearing unevenly. Immediately after scoring, heavily spritz the baguettes with warm water. This step is critical for generating steam in the oven, which helps to create that desirable crackly-crisp crust and gives the baguettes their signature golden-brown color.
-
Bake the baguettes for 25 to 30 minutes, or until they achieve a very deep golden-brown color. The darker the crust, the crispier and more flavorful it will be. Once baked, remove them from the oven and transfer them to a wire rack to cool completely. For the absolute crispiest baguettes, turn off the oven, crack the door open about 2 inches, and allow the baguettes to cool slowly inside the cooling oven. This gentle cooling helps dry out the crust further, ensuring maximum crispness.
Notes
*When preparing the dough, adjust the amount of lukewarm water according to your environment. Use the lesser amount (1 cup) during summer months or in humid climates, as flour tends to absorb more moisture in these conditions. Opt for the greater amount (1 ¼ cups) in winter or in dry climates, where flour can be thirstier. For the rest of the year, aim for somewhere in between, adjusting as needed based on the dough’s feel – it should be soft but not overly sticky.
Pro Tip for Oven Spring: To enhance the crust and achieve maximum oven spring (the final burst of rising in the oven), consider placing a pan of hot water on the bottom rack of your oven when you start preheating. The steam created will help keep the crust soft for a longer period, allowing the bread to expand more fully before setting into its final form.
Storage: Freshly baked baguettes are best enjoyed on the day they are made. If you have leftovers, store them at room temperature in a paper bag for up to 1 day. For longer storage, you can freeze them for up to a month. Thaw at room temperature and refresh in a hot oven (350°F / 175°C) for 5-10 minutes to bring back their crispness.
Disclaimer: Nutritional values were calculated using a third-party tool and are provided as an estimation only.
Sharing this recipe with a link is both encouraged and appreciated. Copying/pasting and/or screenshots of full recipes to any social media is strictly prohibited. Content and photographs are copyright protected.
Did you make this?
Don’t forget to leave a rating below and make sure to follow on Pinterest and Instagram for more delicious recipes!
Recipe adapted from King Arthur Flour
Why Bake Your Own Baguettes? The Rewards Are Endless!
There’s a special kind of pride that comes with baking your own bread, and baguettes are no exception. Beyond the sheer satisfaction, making baguettes at home offers several compelling advantages. First and foremost is the incredible freshness. A store-bought baguette, even from a good bakery, can’t compare to the warmth and vibrant aroma of a loaf pulled directly from your own oven. The crust is at its crispiest, the interior at its softest, and the flavor at its peak.
Cost-effectiveness is another significant factor. While a single artisanal baguette can cost a few dollars, the ingredients for a batch of three or more homemade loaves are surprisingly inexpensive. Flour, water, yeast, and salt are pantry staples, making this a budget-friendly way to enjoy high-quality bread regularly. Furthermore, you have complete control over the ingredients, allowing you to choose organic flours or adjust salt levels to your preference.
The process itself, though lengthy, is deeply rewarding. Kneading dough, watching it rise, shaping it with your hands, and seeing it transform in the heat of the oven connects you to an ancient culinary tradition. It’s a mindful activity that offers a delightful escape from daily stresses, culminating in a tangible, delicious reward.
Tips for Achieving the Perfect Baguette Crust and Crumb
The hallmark of a great baguette is its crackly, golden crust and an open, airy interior (the “crumb”). Achieving this consistently requires understanding a few key elements:
- The Starter (Pâte Fermentée): This recipe uses a pre-ferment, or “starter,” which is crucial for developing complex flavors and improving the texture of your baguettes. The long fermentation period allows the yeast to work slowly, creating organic acids that contribute to the bread’s characteristic taste and aroma. Don’t rush this step – patience here truly pays off.
- Dough Hydration: Baguette dough is relatively high in hydration, which contributes to its airy crumb. However, humidity levels in your kitchen can affect how much flour the dough absorbs. Pay attention to the dough’s feel rather than strictly sticking to exact measurements for water. It should be sticky but manageable.
- Kneading: Adequate kneading develops the gluten structure, essential for the baguette’s chewiness and ability to hold its shape. While a stand mixer makes it easier, hand-kneading is also very effective and allows you to truly feel the dough’s development.
- Shaping Technique: The folding and rolling method described in the instructions is vital. It builds tension in the dough, which helps create a strong “skin” for the crust and encourages a beautiful oven spring. Practice makes perfect when it comes to shaping!
- Steam in the Oven: The spritzing of warm water before baking is perhaps the most critical step for achieving that signature crispy, glossy crust. The steam prevents the crust from hardening too quickly, allowing the bread to expand fully before the crust sets. Some bakers also place a pan of hot water on the oven floor for the first 10-15 minutes of baking for maximum steam.
- High Heat Baking: Baguettes need a hot oven to cook quickly and develop a crisp crust. A baking stone, if you have one, is excellent for this as it provides intense, even heat from below, promoting a strong oven spring and a very crisp bottom crust. If not, a preheated heavy baking sheet works well.
- Cooling: Allowing the baguettes to cool slowly in a slightly open, turned-off oven (as suggested in the recipe) helps to further dry out the crust, making it exceptionally crisp. Resist the urge to cut into them immediately; cooling allows the interior to set and prevents a gummy texture.
Serving Suggestions for Your Homemade Baguettes
These crispy baguettes are incredibly versatile and can elevate almost any meal:
- With Soup or Stew: As was my initial inspiration, these baguettes are perfect for dipping into hearty soups or stews. Slice them, toast them lightly, and add a sprinkle of cheese or garlic butter for an extra treat.
- Bruschetta and Crostini: Slice thinly, toast until golden, and top with fresh tomatoes, basil, garlic, and olive oil for classic bruschetta, or with any other creative toppings for crostini.
- Sandwiches: Their elongated shape and sturdy crust make them ideal for hearty sandwiches, like a classic bánh mì or a sophisticated French dip.
- Cheese Boards: Serve slices alongside your favorite cheeses, charcuterie, and preserves for an elegant appetizer.
- Simple Pleasure: Sometimes, the best way to enjoy a fresh baguette is simply with a generous smear of good quality butter, or dipped in olive oil with a pinch of sea salt.
No matter how you choose to enjoy them, these homemade crispy baguettes are sure to impress. They are a testament to the joy of baking and the simple pleasure of good, honest bread.