

Indulge in the ultimate cozy comfort with this silky, intensely flavorful roasted squash soup recipe. Crafted from a harmonious blend of sweet butternut and creamy kabocha squash, infused with fragrant fresh herbs, savory onion, and pungent garlic, this soup is a true culinary delight. It’s not just delicious; it’s an easy, healthy, and naturally vegan option, making it my go-to choice for a nourishing lunch or a heartwarming dinner during the cooler months.

A Quick Look at This Comforting Squash Soup
Get ready to create a masterpiece of autumnal flavors with surprising ease. Here’s a brief overview of what makes this squash soup truly special:
- Prep Time: 15 minutes – Minimal effort for maximum flavor payoff.
- Cook Time: 40 minutes – The oven does most of the work, deepening the squash’s natural sweetness.
- Total Time: 55 minutes – From pantry to table in under an hour.
- Servings: 6 generous bowls – Perfect for family meals or meal prepping.
- Calories: Approximately 120 kcal per serving – A light yet satisfying choice.
- Technique: Roasting the squash to perfection, gently sautéing aromatic vegetables, then blending everything with vegetable stock for an effortlessly smooth finish.
- Flavor Profile: Rich, velvety, naturally sweet with earthy undertones from the roasted squash, brightened by fresh herbs. It’s savory, slightly sweet, and utterly comforting.
- Difficulty: Easy, even for beginner cooks – Simple steps yield impressive results.
Why This Will Be Your New Favorite Squash Soup
This isn’t just another squash soup; it’s a carefully crafted recipe designed to deliver an unforgettable experience. Here’s why you’ll find yourself making it again and again:
- Bold, Complex Flavor from Dual Squash Varieties: We don’t settle for one squash when two can create a symphony of taste. Butternut squash brings its characteristic sweetness and vibrant color, while kabocha or Blue Hubbard squash contributes a denser, creamier texture and a deeper, nuttier flavor profile. Together, they transform simple ingredients into a complex and robust soup that’s far from one-dimensional.
- Velvety-Smooth Texture, Every Single Time: Achieving that restaurant-quality silkiness is easier than you think. Our method involves careful roasting to caramelize the squash, followed by gradual blending with vegetable stock. A pro tip: peeling the squash while it’s still warm makes it incredibly easy, ensuring no fibrous bits compromise the luxurious texture. Say goodbye to grainy soups!
- Fresh Herbs Elevate the Flavor Naturally: Many creamy soups rely heavily on dairy, but this recipe shines by letting the natural flavors of the squash and a generous mix of fresh herbs take center stage. Sage, thyme, and rosemary infuse the soup with an aromatic depth that’s truly unparalleled. These herbs, combined with a delightful crunchy garnish, create a rich and satisfying experience without the need for heavy cream. It’s a healthier approach that doesn’t compromise on indulgence.
Featured Comment: A Reader’s Raving Review
⭐⭐⭐⭐⭐ “This soup was incredible! The note about choosing fresh produce and adjusting roasting time for different squash sizes was so helpful, especially since the squashes near me are almost the size of housecats! Knowing how to adapt really made a difference. I couldn’t believe how creamy this turned out for a vegan recipe. It felt so decadent. Definitely adding this one to my fall rotation for years to come!” —Lauren
Table of Contents
- A Quick Look at This Comforting Squash Soup
- Why This Will Be Your New Favorite Squash Soup
- Essential Ingredients & Smart Substitutions
- Selecting the Perfect Butternut Squash for Soup
- Creative Variations for Your Creamy Squash Soup
- Professional Chef Tips for Success
- Mastering Your Roasted Squash Soup: Step-by-Step
- How to Roast Butternut Squash for the Best Flavor
- Roasting Kabocha or Blue Hubbard Squash: A Detailed Guide
- Assembling the Roasted Squash Soup: From Pot to Puree
- Crafting the Perfect Spiced Pepita Garnish
- Chef Lindsey’s Expert Tip for Kabocha Squash
- Frequently Asked Questions About Squash Soup
- More Delicious Squash Recipes to Explore
- Full Creamy Roasted Squash Soup Recipe Card
- Before You Go: Your Culinary Journey Continues
There’s something incredibly soul-satisfying about a bowl of rich, creamy squash soup, especially when the weather turns crisp. This recipe, or a slight variation of it, is a constant in my kitchen all winter long because it consistently delivers on warmth, silkiness, and incredible flavor. The magic truly happens in the roasting process, which coaxes out the squash’s natural sugars, creating a depth of sweetness that perfectly balances the earthy notes of fresh herbs.
While I highly recommend roasting your own squash for the best flavor, this recipe is wonderfully versatile. If you’re pressed for time, a good quality canned butternut squash puree can be a convenient shortcut, though you’ll miss some of the roasted depth. To elevate each bowl, don’t skip the toppings! A sprinkle of spiced pepitas adds a delightful crunch and warmth, a swirl of extra virgin olive oil enhances richness, or some homemade croutons provide a satisfying textural contrast. It’s these small details that transform a simple soup into an extraordinary meal.
If you’re seeking more hearty, comforting dishes to warm you from the inside out, I encourage you to explore other seasonal favorites. You might love my Hearty Rosemary Lamb Stew, my wholesome Quinoa Vegetarian Meatballs (Gluten-Free), or my robust Red Chili with Ground Beef.
Essential Ingredients & Smart Substitutions
Creating an exceptional squash soup starts with selecting the right components. Here’s a detailed look at the ingredients that make this recipe shine, along with smart substitutions to fit your pantry and preferences:
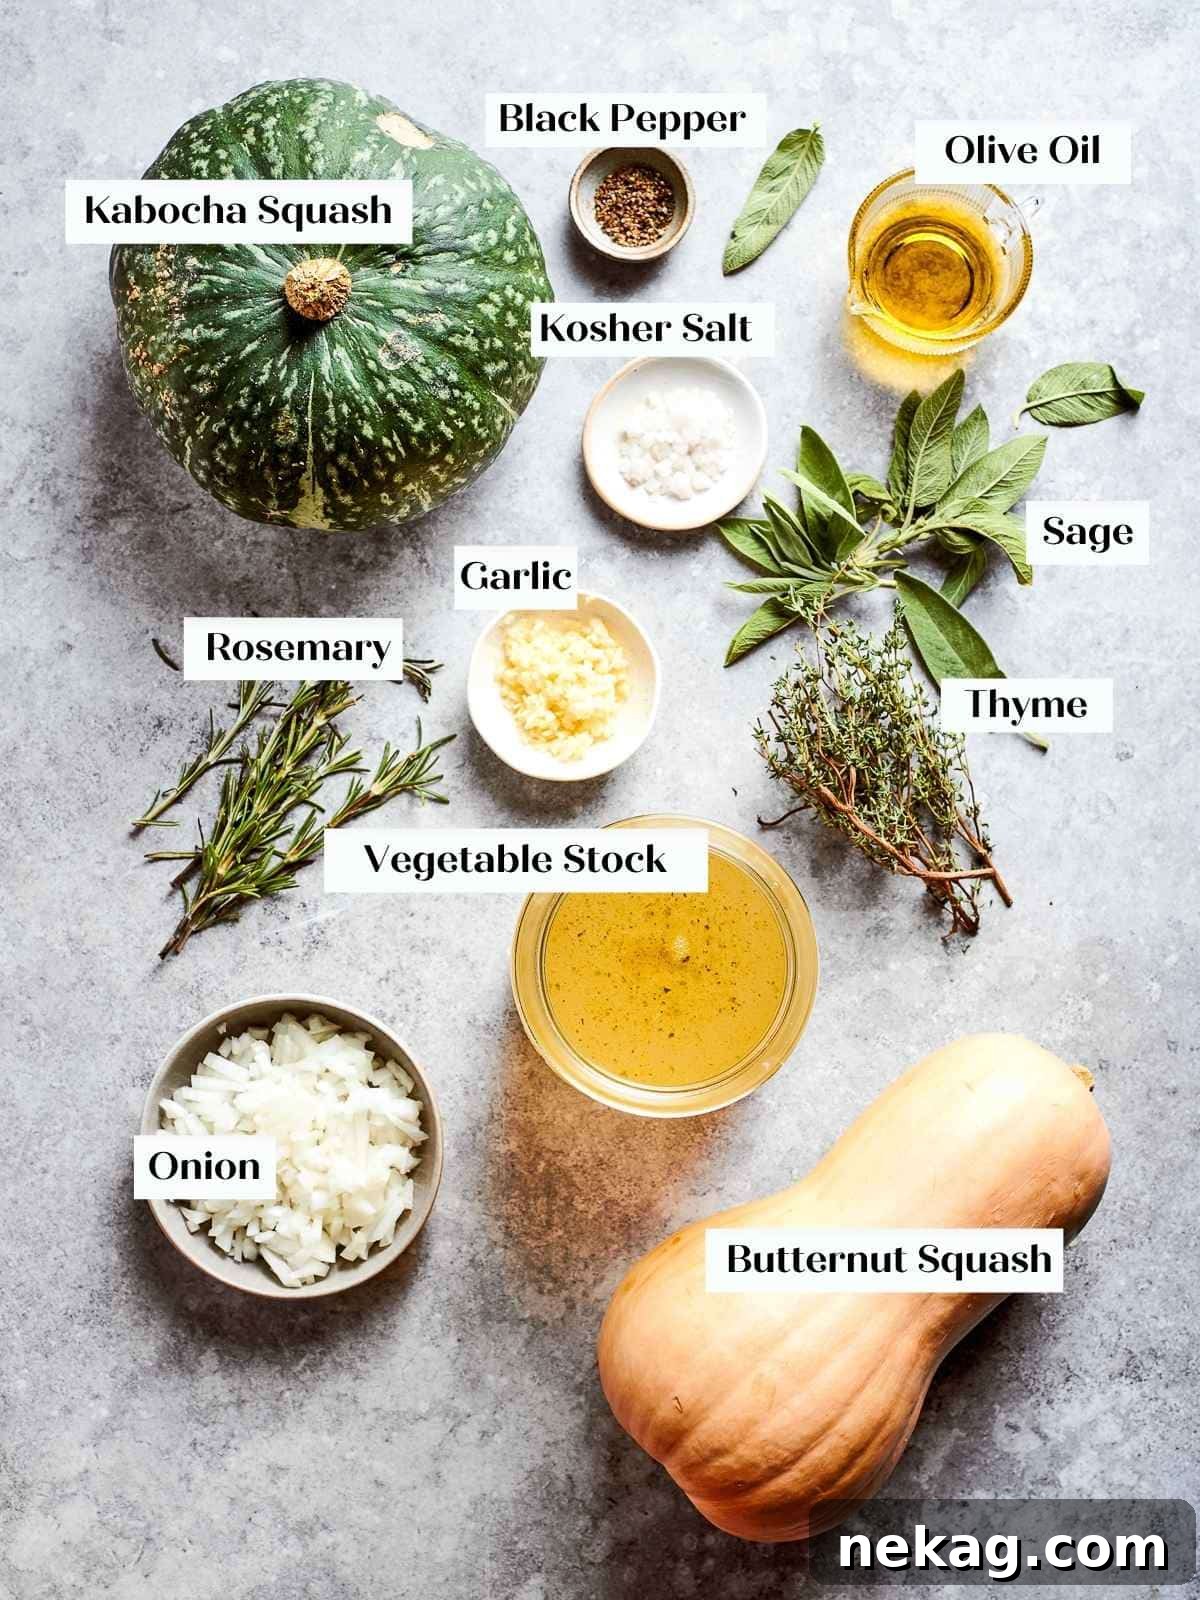
- Butternut Squash: The sweet foundation of our soup, providing a lovely, creamy texture and natural sugars that intensify with roasting.
- Substitution: If butternut isn’t available, other sweet, orange-fleshed squashes like honeynut squash or even pumpkin puree (ensure it’s 100% pumpkin, not pie filling) can work, though the flavor profile will shift slightly.
- Kabocha Squash or Blue Hubbard: These varieties contribute an incredibly dense, velvety texture and a richer, nuttier flavor that complements the butternut beautifully. This blend is key to the soup’s complexity.
- Substitution: Acorn squash can be used for a similar texture, or even more butternut if you prefer a simpler flavor profile.
- Vegetable Stock or Vegetable Broth: The liquid base for our soup. Using good quality stock is crucial for a flavorful outcome.
- Substitution: Chicken stock or bone broth can be used if you’re not making a vegan soup, adding even more depth. Always opt for low-sodium options to control the seasoning.
- Fresh Sage, Thyme, and Rosemary: These woody herbs are the aromatic heart of the soup, lending an unparalleled earthy, comforting fragrance and taste. Cooking them gently in olive oil helps release and intensify their essential oils.
- Substitution: Dried herbs can be used in a pinch, but remember that dried herbs are more potent than fresh. Use about 1/3 the amount (e.g., 1 teaspoon dried for 1 tablespoon fresh). Add them with the onions and garlic to give them time to rehydrate and bloom their flavors.
- Onions (Yellow or Sweet): Sautéed until translucent, onions provide a foundational sweetness and savory depth.
- Substitution: White onions or even leeks (white and light green parts) can be used. Their gentle sweetness is essential for the soup’s overall balance.
- Garlic: A staple aromatic that adds a pungent, savory kick, essential for a well-rounded flavor.
- Substitution: Garlic powder can be used (about 1/2 teaspoon per clove), but fresh garlic offers superior flavor.
- Olive Oil: Used for roasting the squash and sautéing the aromatics. Its fruity notes complement the squash beautifully.
- Substitution: Avocado oil or grapeseed oil are good neutral alternatives. Butter can also be used for sautéing if dairy is not an issue, adding a rich, nutty flavor.
- Kosher Salt: My preferred salt for cooking due to its larger crystals, which make it easier to control seasoning without over-salting. It enhances all the other flavors.
- Substitution: Fine sea salt can be used, but use about half the amount of kosher salt as it’s saltier by volume. Always taste and adjust!
- Black Pepper: Freshly ground black pepper adds a hint of spice and aromatic warmth.
- Substitution: White pepper can offer a milder heat without visible flecks, if preferred.
- Pepitas (Roasted Pumpkin Seeds): These optional but highly recommended spiced pumpkin seeds provide a fantastic crunch and a burst of savory, smoky flavor, adding a textural contrast to the smooth soup.
- Substitution: Homemade croutons, toasted nuts (like pecans or walnuts), or even a drizzle of chili oil can provide a similar textural and flavor boost. Consider making croutons from leftover crusty bread or even sweet potato rolls for extra autumnal flair!
For precise quantities and detailed instructions, refer to the full recipe card below.
Selecting the Perfect Butternut Squash for Soup
Choosing the right fresh produce is key to any great recipe, and squash is no exception. Because fresh vegetables vary greatly in size, standardizing a recipe can be a fun challenge. But don’t worry – this recipe is forgiving!
- Size Doesn’t Matter (Much): The recipe is written in cups (4 cups = 1 quart) to provide a consistent measure, but don’t be afraid to use a larger squash. The most important thing is to adjust your seasoning and liquid as needed. A larger squash will simply yield more delicious soup!
- Adjusting Aromatics for Size: For a larger squash, you might opt for a slightly bigger onion and use a rounded tablespoon of minced garlic instead of a level one. A few more sprigs of fresh herbs will also enhance the flavor, or you can stick to the original amount if you prefer. Just be mindful that you might need more vegetable stock to thin out the soup to your desired consistency if you have more squash flesh.
- Key Indicators for Ripeness: When picking a butternut squash, look for one that has a uniform, dull, creamy beige or tan color. Avoid any squash with green patches, which indicate it wasn’t fully ripe. A ripe squash should also feel heavy for its size, signaling dense, moist flesh inside. A hollow sound when tapped lightly can also be a good sign.
- Stock Up and Get Creative: Grab a few while you’re at the store! After making this creamy soup, you could use another butternut squash to whip up my incredibly satisfying Vegan Butternut Squash Chili – another fantastic way to enjoy this versatile vegetable.
Creative Variations for Your Creamy Squash Soup
This roasted squash soup recipe is incredibly versatile, offering endless possibilities to customize it to your taste. Here are some delightful variations to inspire your culinary creativity:
- Experiment with Different Vegetables: While squash is the star, you can easily incorporate other root vegetables to add complexity and heartiness. Try swapping in parsnips for a subtle sweetness, russet potatoes for extra body and starch, or sweet potatoes for an even richer, sweeter flavor profile. If you love the squash theme, my Pumpkin Soup Recipe is a wonderful next step!
- Introduce a Sweet-Tangy Apple Kick: For an intriguing autumnal twist, add a tart apple, such as a Granny Smith, along with the squash before roasting. The apple’s acidity will provide a bright, sweet-tangy lift that beautifully complements the earthy squash, making the soup especially vibrant and fun in the autumn months.
- Boost the Creaminess (Non-Vegan Options): For an extra layer of decadence, stir in a swirl of heavy cream, coconut milk (for a dairy-free option that also adds a subtle tropical note), or a dollop of crème fraîche just before serving. These additions will make the soup even more luxurious.
- Spice It Up: Enhance the flavor with a touch of warmth. A pinch of nutmeg, cinnamon, or even a tiny amount of curry powder can bring out new dimensions in the squash. For a spicier kick, a dash of cayenne pepper or a swirl of harissa paste at the end is fantastic.
- Garlic Lover’s Dream: Roast an entire head of garlic alongside your squash. Squeeze out the softened cloves and add them to the soup for a milder, sweeter, and deeply aromatic garlic flavor.
- Homemade Topping from Squash Seeds: While pepitas (hulled pumpkin seeds) are convenient and delicious, you can absolutely use the seeds you scoop out from your fresh squash! Clean them thoroughly, toss with olive oil and spices, and roast them for a truly homemade garnish. It’s a bit more effort, but incredibly rewarding.

Professional Chef Tips for Success
Unlock the full potential of your squash soup with these expert insights, designed to elevate your cooking and ensure a flawless result every time:
- Roast for Flavor, Not Just Softness: This is arguably the most critical step. Don’t just roast your squash until it’s tender; aim for beautiful caramelization on the cut edges. Placing the squash cut-side down on the baking sheet allows these natural sugars to brown and develop a deep, complex sweetness. This process is essential for preventing a watery soup and creating that rich, roasted flavor that canned purees simply can’t replicate.
- To Peel or Not to Peel (Before Cooking): While the skin of some squashes can become soft enough to eat when baked covered, for a truly silky, restaurant-quality soup, it is best to peel the squash. While you can peel it cold, I find it much easier to remove the skin once the squash has been roasted and is still warm. The flesh will practically slide away from the skin, ensuring your soup has no unwanted fibrous bits. For butternut, you can scoop the flesh right out, but kabocha needs a bit more attention (see Chef Lindsey’s Tip below!).
- Add the Stock in Stages During Blending: This technique is key to controlling the consistency of your soup. Instead of adding all the stock at once, gradually incorporate it as you blend. This allows you to achieve the perfect thick, creamy, and pourable consistency without accidentally thinning the soup too much. You want it smooth, but with enough body to feel luxurious.
- Season as You Go, and Finish Strong: Taste your soup at every major stage – after roasting the squash, after sautéing aromatics, and especially after blending. Flavors deepen and change. Starting with a conservative amount of salt and pepper and then adjusting at the end ensures a perfectly balanced seasoning.
- Don’t Skimp on Fresh Herbs: While dried herbs are a fine substitute in a pinch, fresh herbs truly make this soup sing. Their vibrant, aromatic oils are best released when gently sweated with the onions and garlic, infusing the entire soup with a fresh, earthy depth that’s incomparable.
Mastering Your Roasted Squash Soup: Step-by-Step Guide
Follow these detailed instructions to create the perfect silky, flavorful squash soup every time. For exact measurements and a printable version, please refer to the recipe card further down this page.
How to Roast Butternut Squash for the Best Flavor:
Roasting the butternut squash properly is paramount to developing its deep, sweet flavor and ensuring a smooth soup.
Chef’s Note: I prefer a slow roast at a slightly lower temperature to allow for maximum caramelization, which truly deepens the squash’s sweetness and prevents a watery soup. This step is where much of the magic happens, but feel free to adjust to your oven and schedule!
Step 1: Preheat Your Oven. Adjust your oven rack to a middle position and preheat to 350°F (175°C).
Step 2: Prepare the Butternut Squash. Carefully use a large, sharp chef’s knife to trim off both the top and bottom ends of the butternut squash, creating two flat, stable surfaces. Stand the squash upright on one of its newly cut flat ends on a sturdy cutting board. With careful, even pressure, slice the squash in half lengthwise, pushing the knife down through the center. Always keep your fingers curled away from the blade for safety.
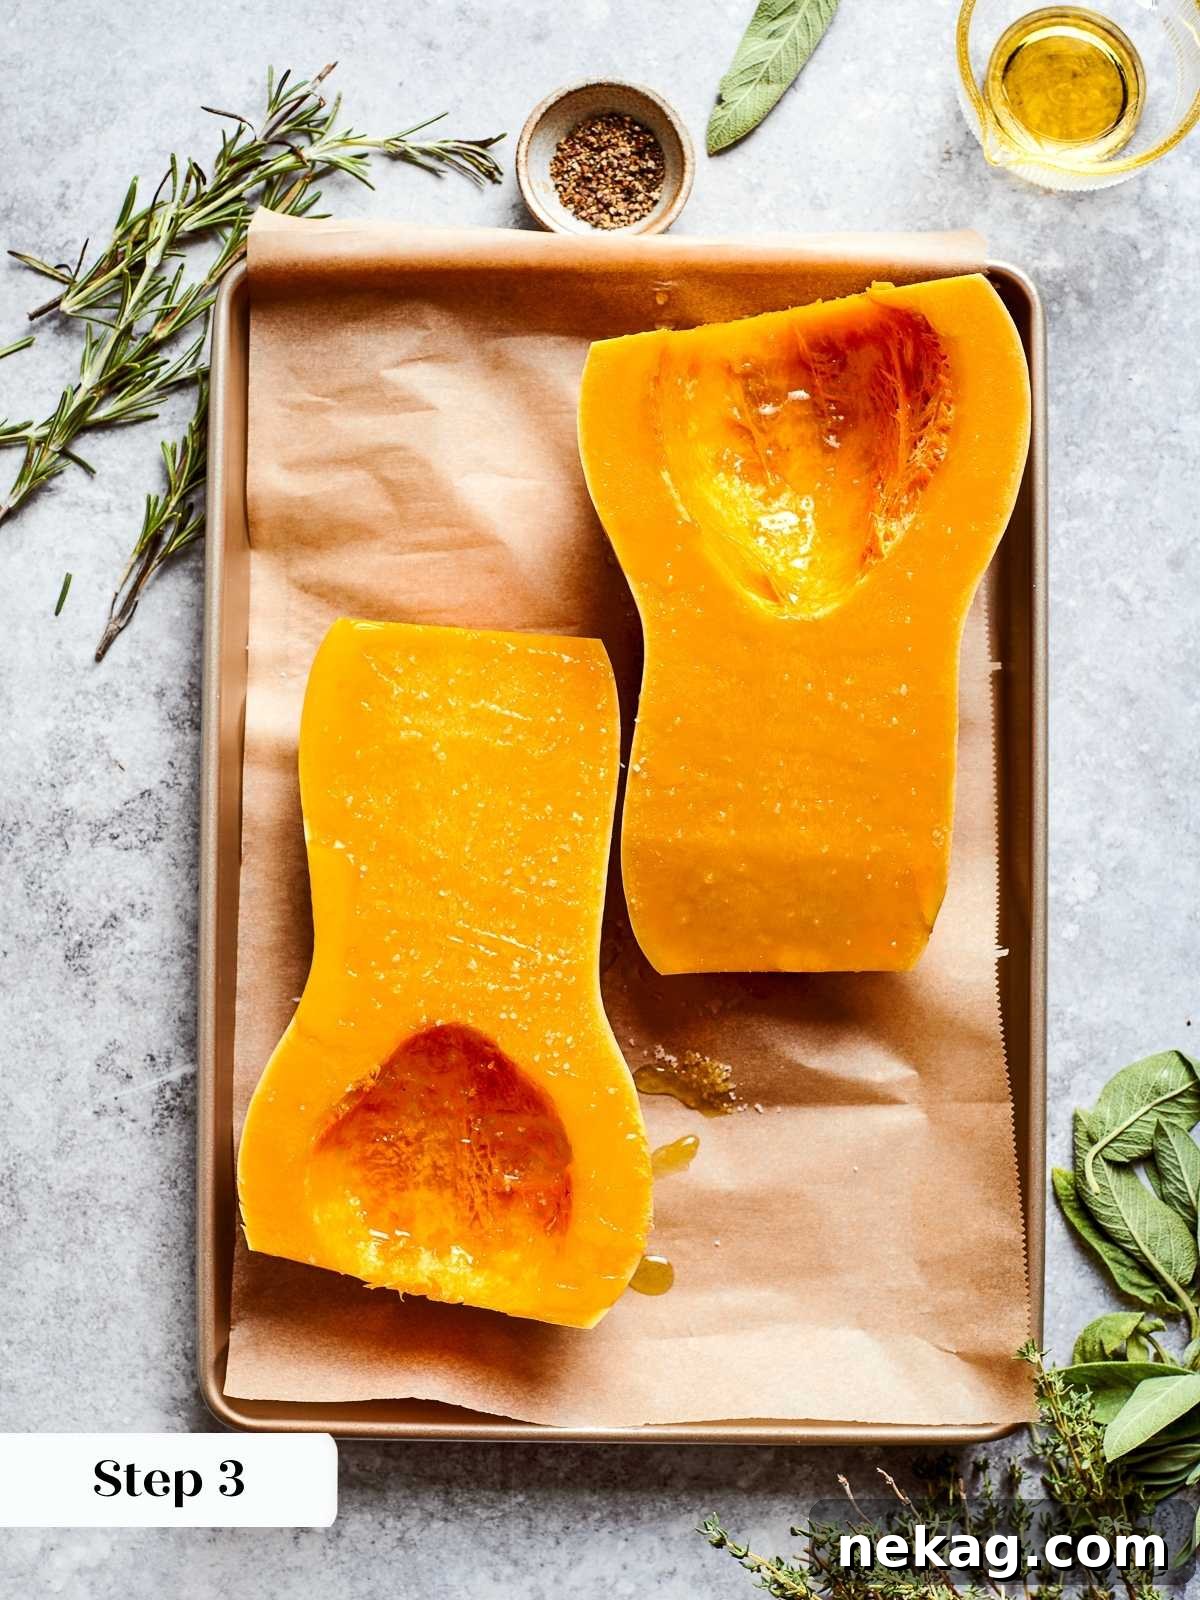
Step 3: Scoop Out the Seeds. Using a spoon, scoop out all the seeds and fibrous strings from the cavity of each squash half (photo 1). You can discard them, or if you’re feeling ambitious, clean them and set them aside to roast separately for a tasty snack or garnish.
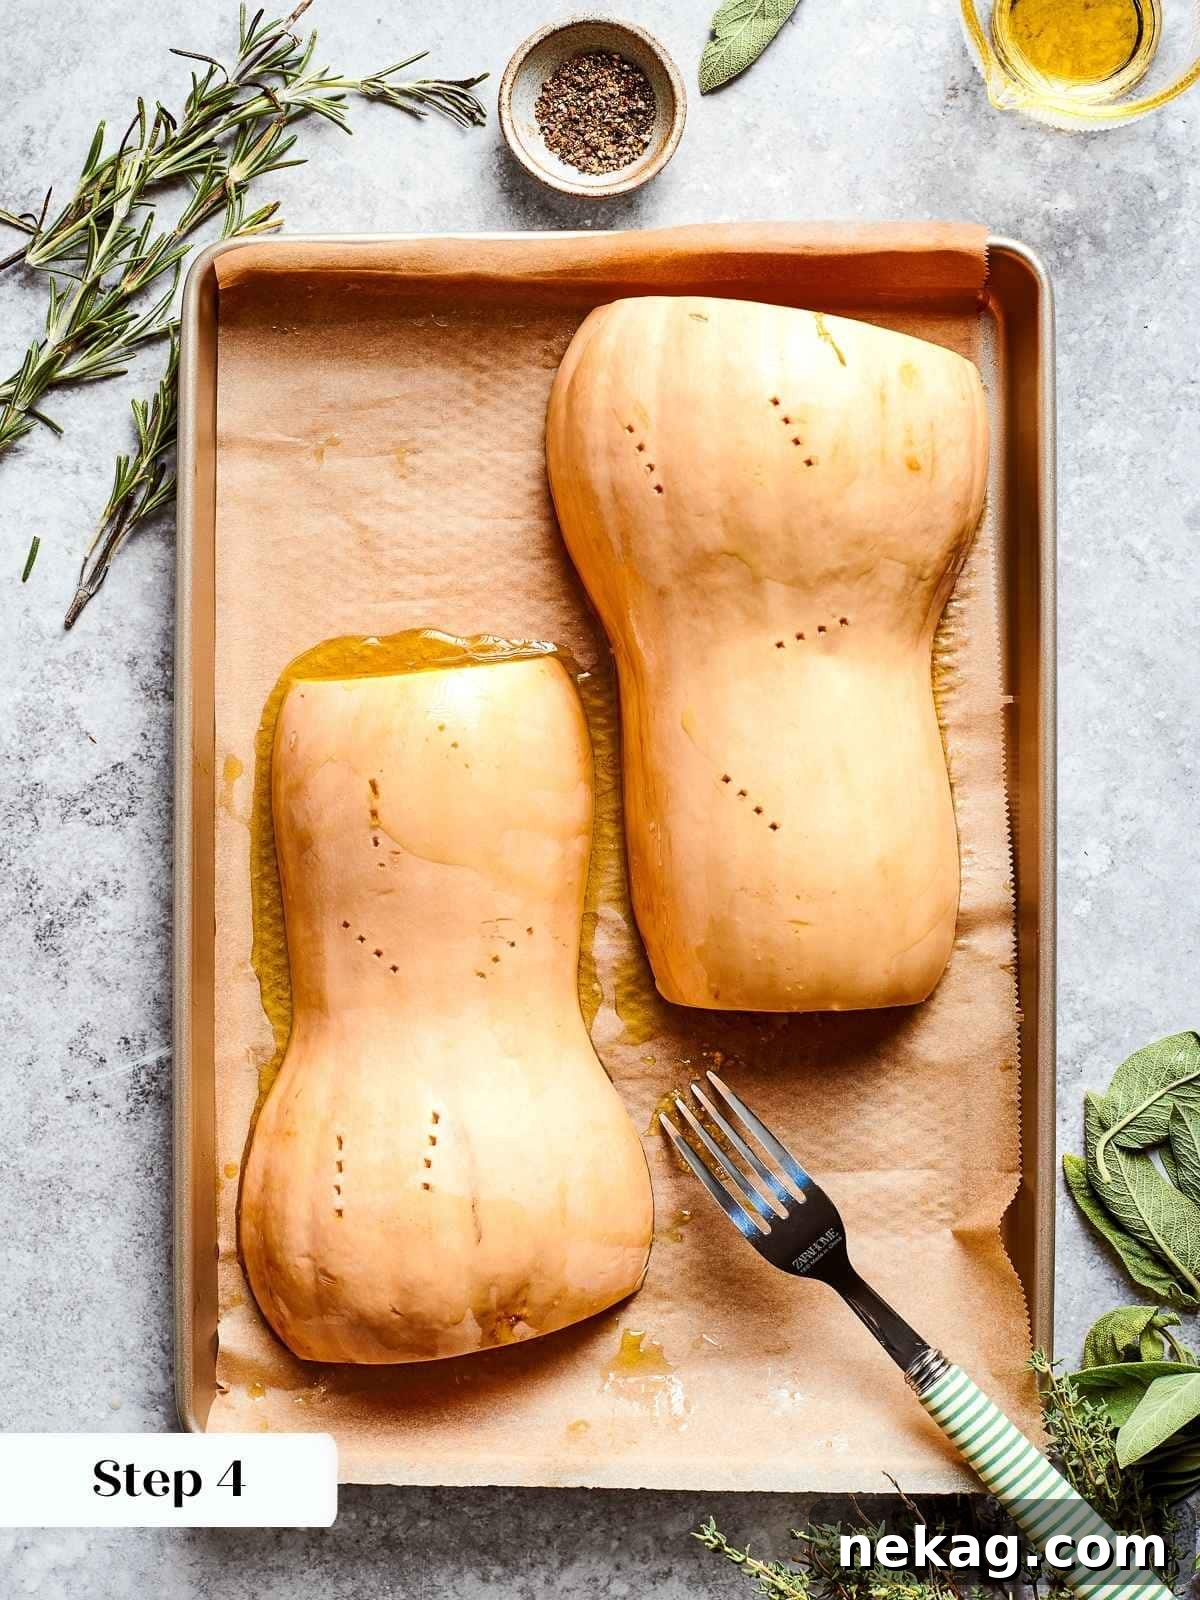
Step 4: Season and Prepare for Roasting. Line a large baking sheet with parchment paper to prevent sticking and aid in cleanup. Place the squash halves cut-side up on the prepared baking sheet. Drizzle generously with olive oil and sprinkle with a pinch of kosher salt. Now, flip the squash halves over so they are cut-side down. Using a fork or the tip of your knife, carefully poke several holes along the skin of each squash half (photo 2). This allows steam to escape, preventing the squash from bursting and ensuring even cooking.
Step 5: Roast Until Tender and Caramelized. Transfer the baking sheet to your preheated oven. Bake until the squash is very soft and tender when gently pressed with your finger or easily pierced with a paring knife. The roasting time will vary significantly based on the size and thickness of your squash, typically ranging from 25 to 40 minutes. Look for slight browning and caramelization on the edges – this is where the flavor magic happens!
Step 6: Remove Flesh. Once roasted and slightly cooled (but still warm enough to handle), scoop all the soft, sweet butternut squash flesh from the skins using a spoon. Discard the skins. Set the roasted flesh aside in a bowl, or if preparing in advance, allow it to cool completely before storing it in an airtight container in the refrigerator for up to 3 days.
Roasting Kabocha or Blue Hubbard Squash: A Detailed Guide
These squashes add unique depth and creaminess. Here’s how to prepare them for roasting:
Step 7: Preheat the Oven. Just like with the butternut, preheat your oven to 350°F (175°C).
Step 8: Break Down the Kabocha. Kabocha and Blue Hubbard squashes are known for their incredibly thick, tough rinds, which can be challenging to cut. Begin by carefully trimming off the top and bottom ends with a large, sharp chef’s knife to create stable, flat surfaces. Stand the squash upright on one end. Now, carefully cut the squash in half lengthwise. This might require significant force and a steady hand. If you struggle, you can carefully lift the squash and gently bang the top of the knife down onto a sturdy cutting board (away from your fingers!) to help split it.
Chef’s Insight: Honestly, a cleaver would be an ideal tool for these hard-shelled squashes, but if you don’t have one, patience and a very sharp chef’s knife will suffice. If your grocery store conveniently sells them pre-halved, consider it a blessing and definitely opt for that! It’s worth paying a little extra to save the effort and ensure safety.
Step 9: Remove Seeds. Scoop out the seeds and any stringy bits from the center of each kabocha half. You can discard them or save them for roasting later.

Step 10: Cut into Uniform Pieces. Working with one half of the squash at a time, slice it into strips approximately 2 inches wide. Then, cut each strip into roughly 2-inch pieces. The exact size doesn’t need to be perfect, but aiming for similar dimensions will ensure they cook evenly. Repeat this process with the other squash half, if you have one (photo 3).
Step 11: Arrange for Roasting. Line a baking sheet with parchment paper. Arrange all the kabocha pieces on the sheet, placing them skin-side down (with the cut side facing up). It’s perfectly fine if they are a bit crowded; they will steam cook beautifully. Sprinkle them with a little kosher salt. Crucially, cover the squash pieces with another sheet of parchment paper, and then tightly seal the entire baking sheet with a large piece of aluminum foil. Crimp the foil around the rim of the pan to create a secure seal. This traps steam, helping the tough skin and flesh to soften effectively.
Helpful Hint: Depending on the amount of squash you’re roasting and your kitchen equipment, you can also use a large roasting pan or a sturdy baking dish for this step. The goal is to create a steamy, covered environment for optimal softening.
Step 12: Bake Until Fork-Tender. Place the covered baking sheet in your preheated oven. Bake until the kabocha squash is exceptionally soft and can be easily pierced without resistance by a cake tester or the tip of a paring knife. This usually takes around 25 minutes. Once tender, carefully remove the baking sheet from the oven and carefully remove the foil and top parchment paper, being mindful of escaping steam. Let it cool slightly, then you can easily scrape the soft flesh from the skin (see Chef Lindsey’s Tip for more detail).
Assembling the Roasted Squash Soup: From Pot to Puree
With your squash perfectly roasted, it’s time to bring all the flavors together in a luscious, creamy soup.
Pro Tip: For best results, use a heavy-bottomed Dutch oven or a thick-bottomed saucepot. This helps distribute heat evenly and prevents sticking. Heat your olive oil over medium-low heat until it shimmers gently, but avoid letting it smoke.
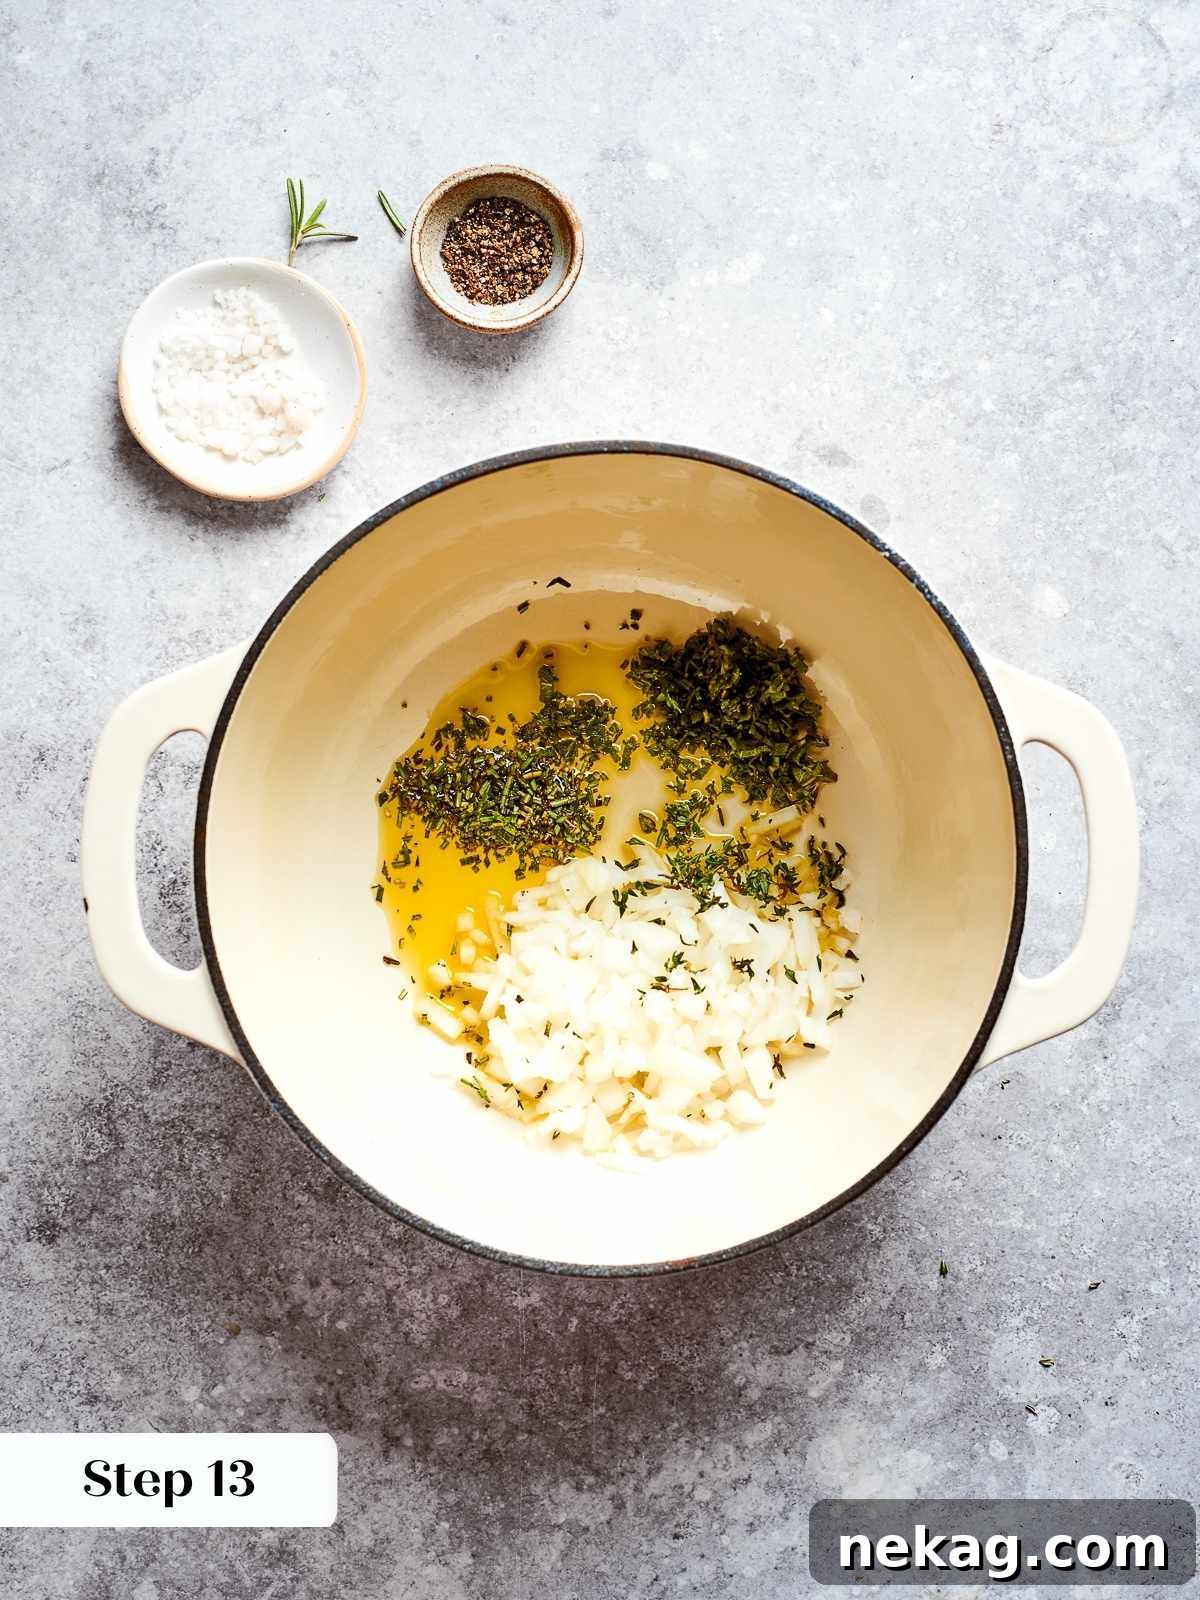
Step 13: Sweat the Aromatics. In your prepared pot, add 2 tablespoons of olive oil, the finely diced onion, and the fresh herbs (rosemary, sage, and thyme). Turn the heat down to medium-low. Gently “sweat” the onions and herbs, stirring occasionally, until the onions are almost translucent and softened, but not browned. This slow cooking allows the flavors of the herbs and onions to meld and deepen without bitterness (photo 4).
Culinary Term: “Sweating” refers to cooking vegetables over low heat, usually covered, to soften them and release their moisture and flavor without allowing them to brown or caramelize. This creates a tender, aromatic base for your soup.
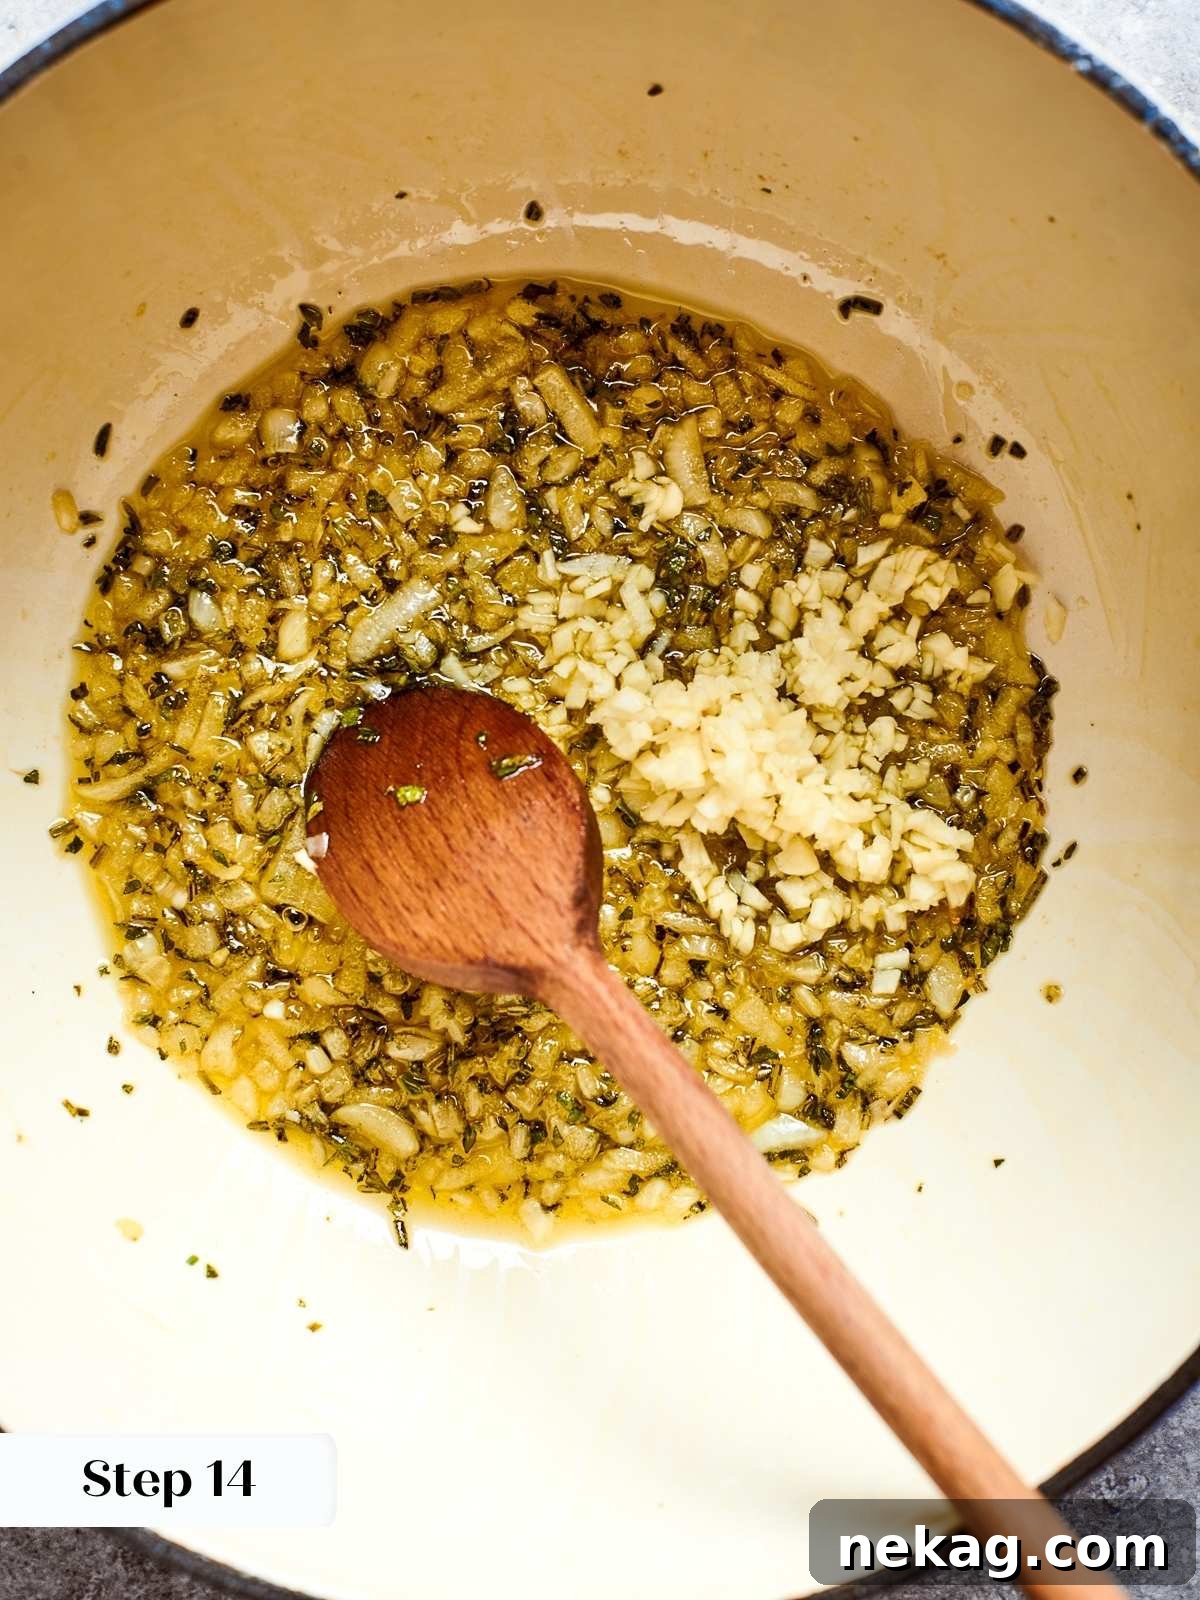
Step 14: Introduce the Garlic. Add the minced garlic to the pot. Continue to sweat for another 1-2 minutes until the garlic is fragrant but not burnt. If the onions start to stick to the bottom of the pot, even on low heat, add a tiny bit more olive oil. The goal is perfectly translucent onions and fragrant garlic (photo 5).
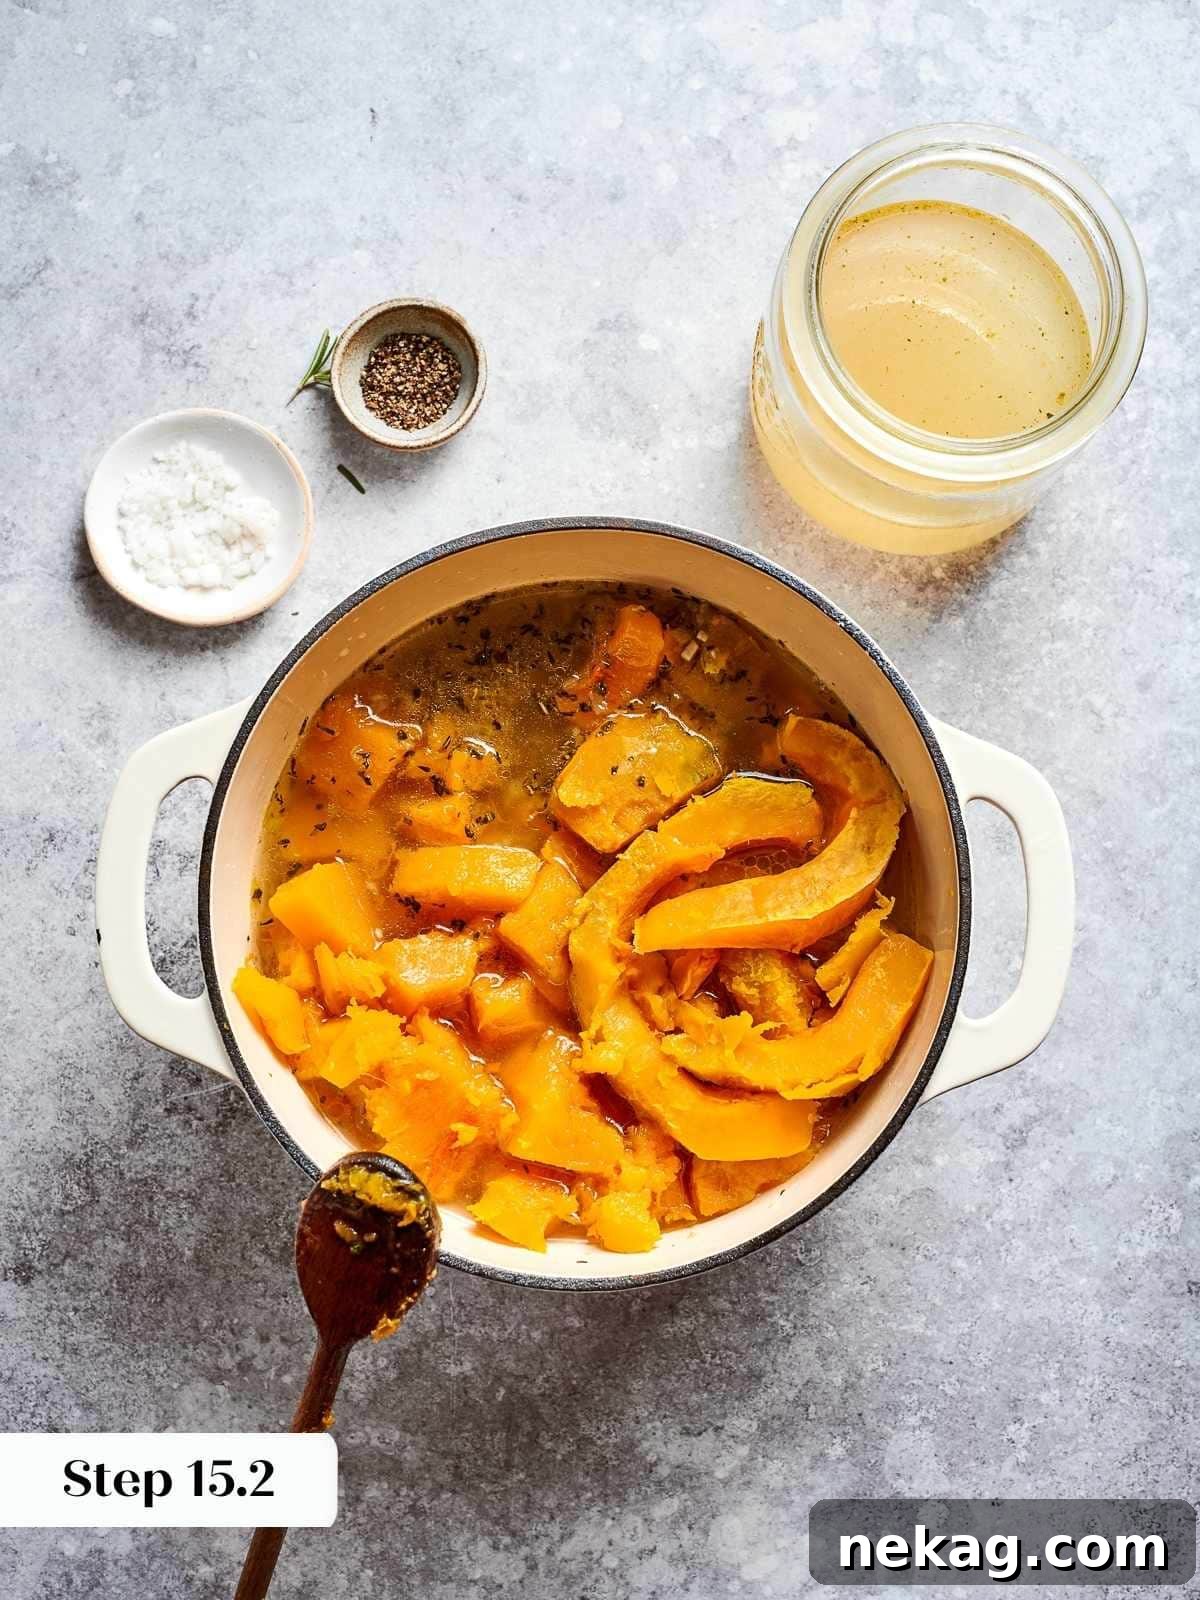

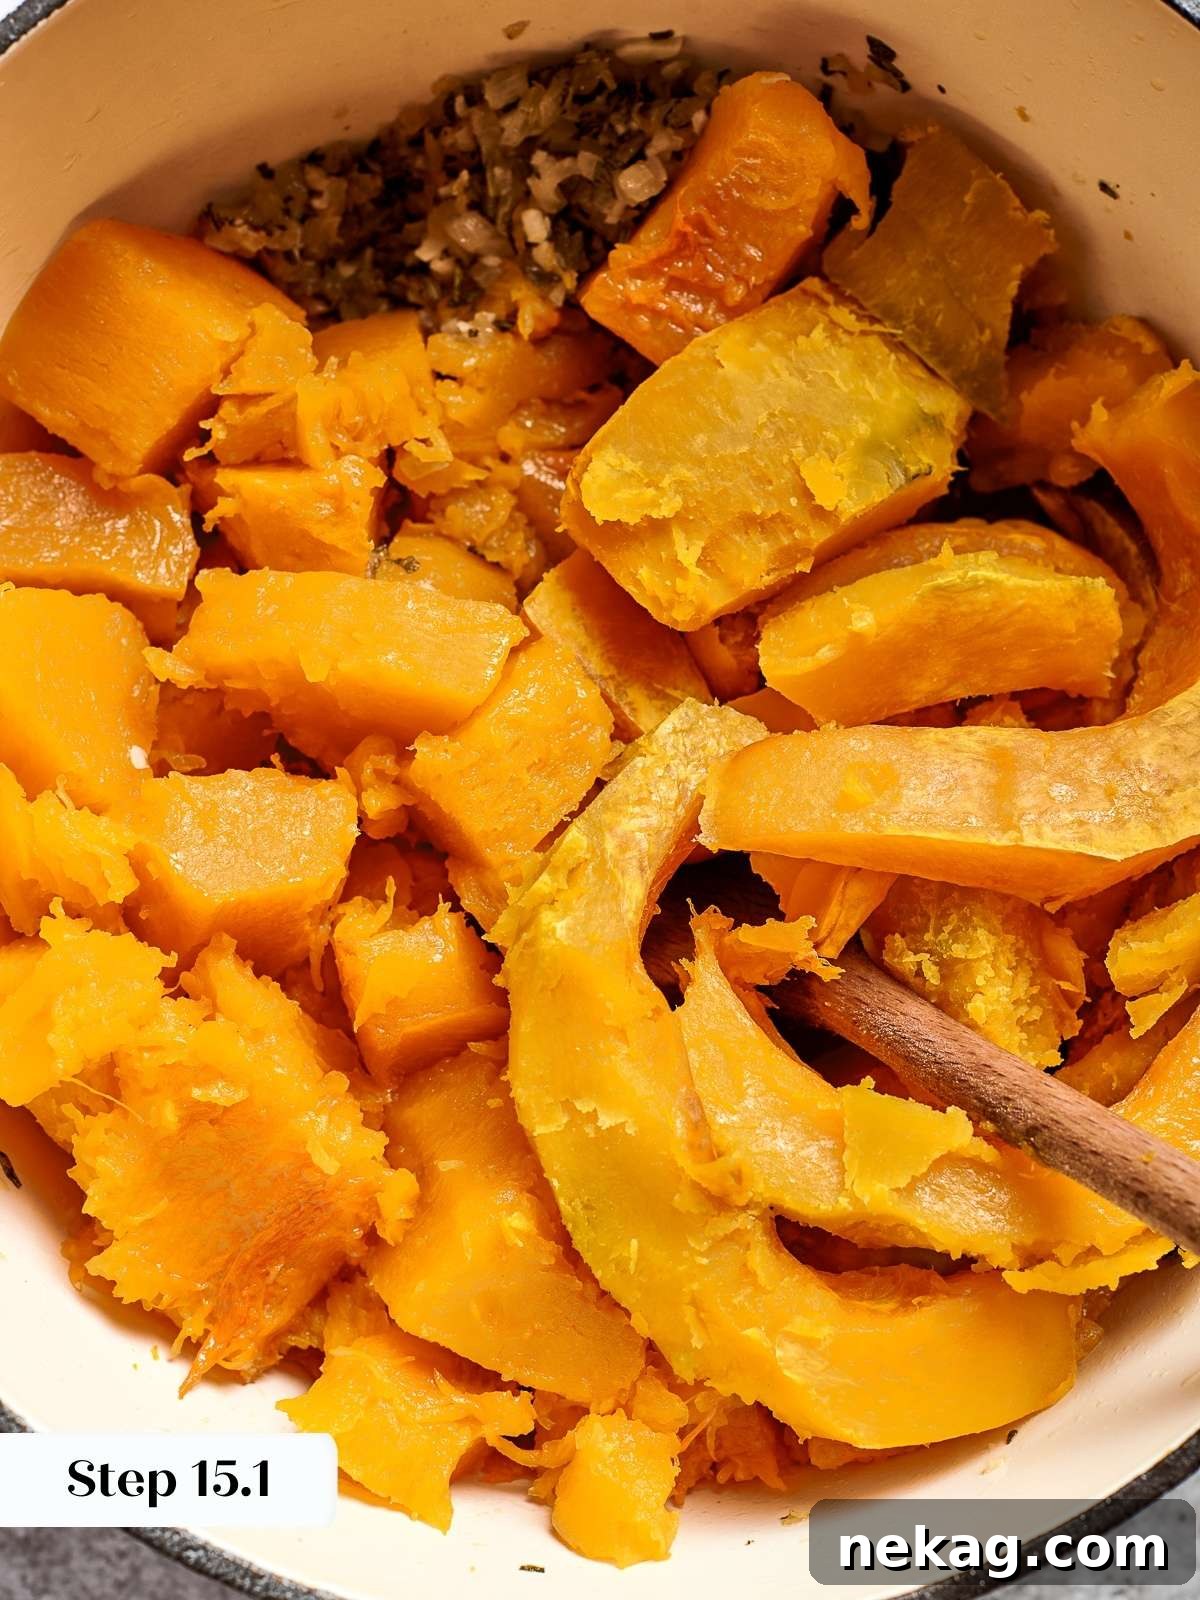
Step 15: Combine Squash and Stock. Add all the roasted squash flesh to the pot with the aromatics. Pour in about half of the vegetable stock. Stir well to combine, then let it simmer gently over medium-low heat for about 5-10 minutes. This allows the squash to further break down and infuse its flavors into the stock, creating a cohesive base for your soup (photos 6 & 7).
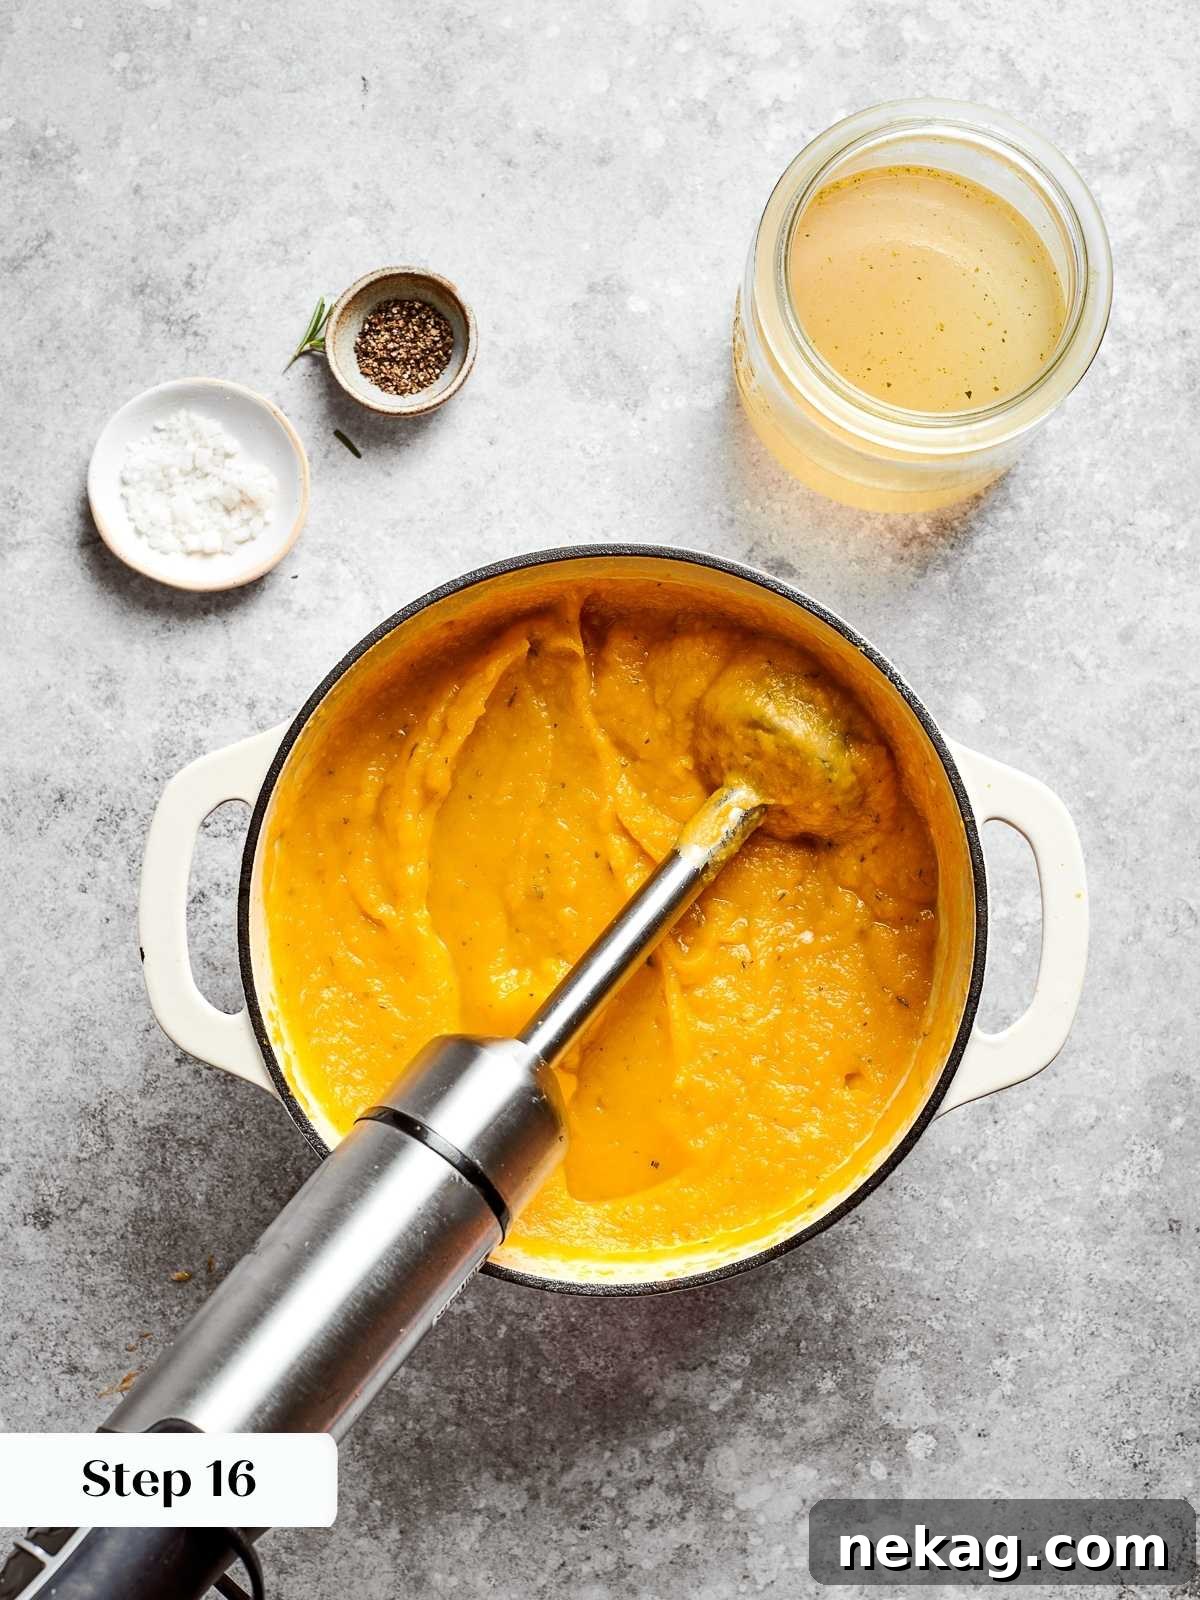
Step 16: Blend to Perfection. Remove the pot from the heat. Using an immersion blender, carefully blend the soup directly in the pot until it is completely smooth and creamy. As you blend, gradually add the remaining vegetable stock, a little at a time, until the soup reaches your desired consistency – smooth, pourable, and beautifully viscous (photo 8).
Alternative Blending Method: If you don’t have an immersion blender, you can purée the soup in batches using a traditional stand blender. Be very cautious when blending hot liquids: only fill the blender jar halfway, remove the small cap from the lid (to allow steam to escape), and cover the opening with a folded kitchen towel to prevent splatters. Blend until smooth, then transfer to a clean pot. You can still loosen with additional stock as you go to achieve the perfect texture.
Step 17: Final Seasoning. Once blended, return the soup to low heat if needed. Taste the soup and adjust the seasoning generously with kosher salt and freshly ground black pepper to your preference. Remember, a well-seasoned soup makes all the difference.
Crafting the Perfect Spiced Pepita Garnish
A crunchy, flavorful garnish elevates this soup from great to extraordinary. Here’s how to make those irresistible spiced pepitas:
Step 18: Season the Pepitas. In a medium bowl, combine the raw pumpkin seeds (pepitas) with a drizzle of olive oil, a pinch of kosher salt, smoked paprika, ground cumin, and a dash of cayenne pepper (if you like a little heat), and brown sugar. Toss everything together until the pepitas are evenly coated. Spread them in a single layer onto a baking pan lined with a piece of parchment paper.
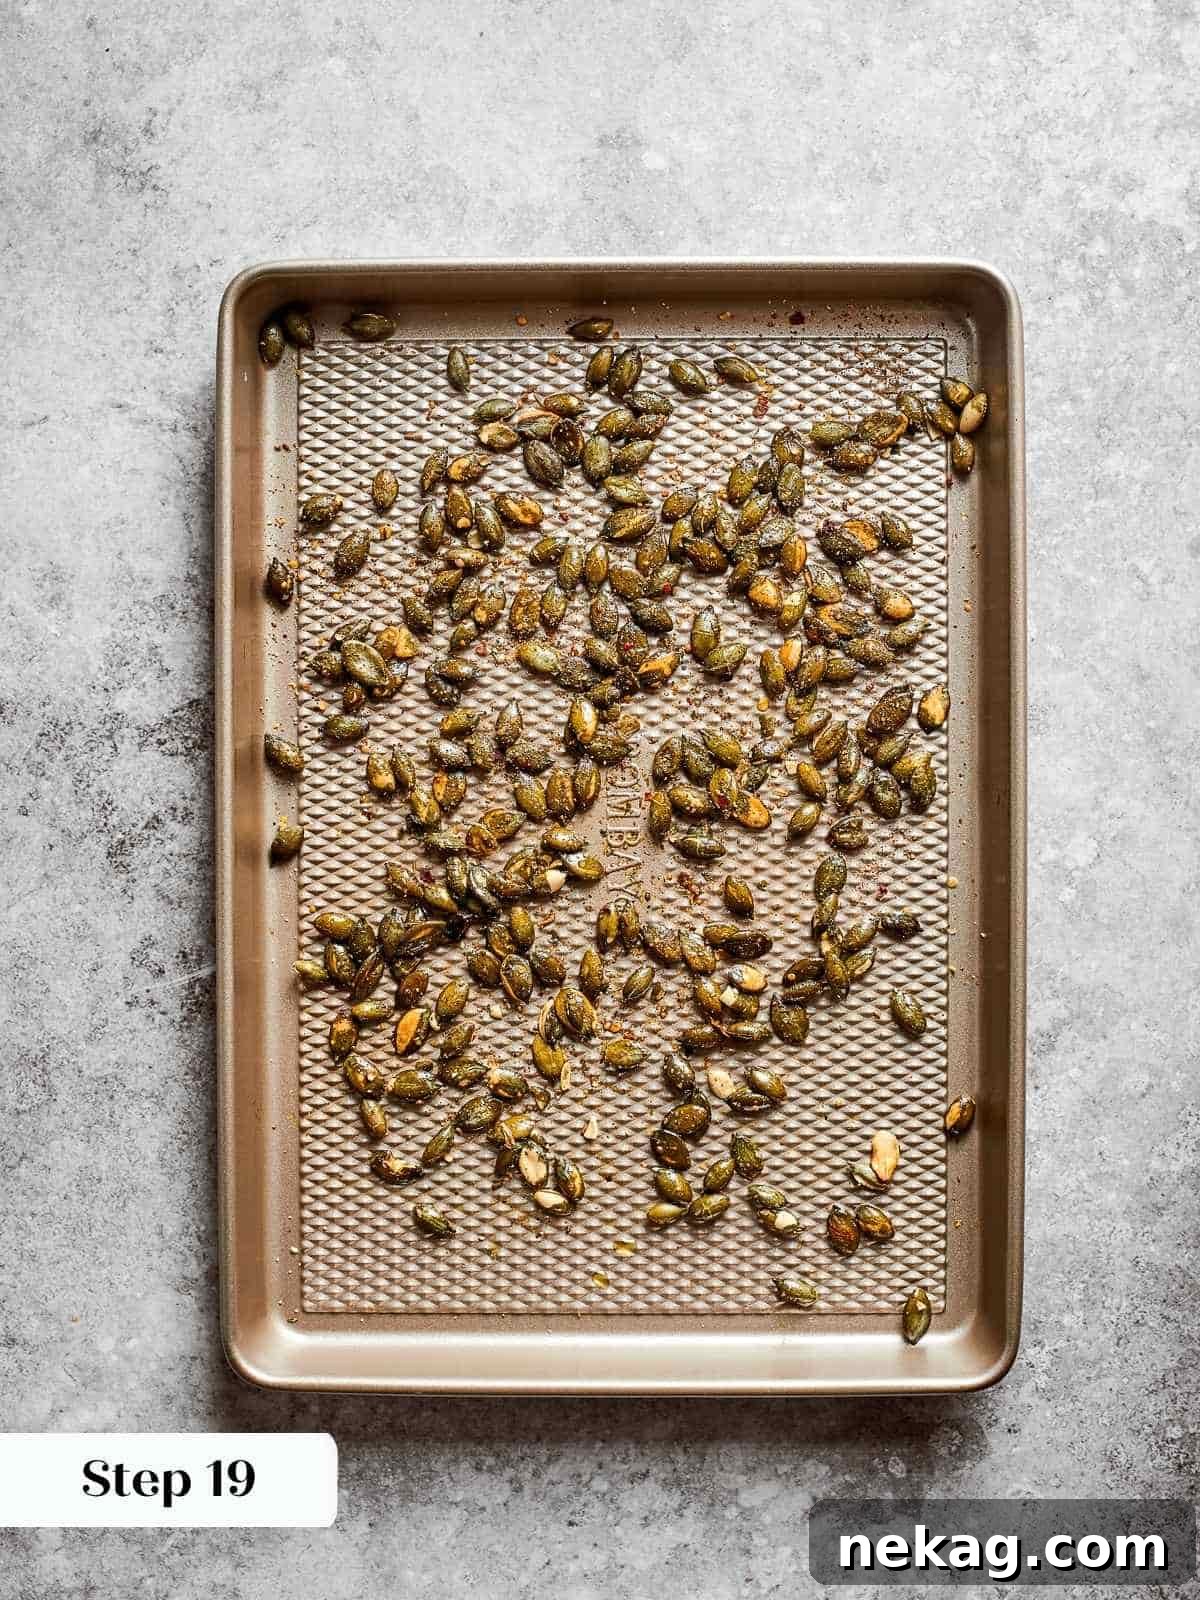
Step 19: Roast Until Golden and Fragrant. Place the baking sheet in the oven (you can even do this while the squash is roasting if there’s room, keeping an eye on them) or on the stovetop in a dry skillet over medium heat. Stir or toss the seeds frequently to ensure even toasting and prevent burning. Roast until they lose their initial sheen, become matte, and turn a beautiful golden brown while emitting a wonderfully nutty aroma (photo 9). This typically takes 5-10 minutes. Remove them from the heat and allow them to cool completely on the baking sheet; they will crisp up further as they cool.
Step 20: Serve and Enjoy. Ladle the hot, creamy squash soup into individual bowls. Garnish each serving generously with a sprinkle of your freshly roasted spiced pepitas and/or a few homemade croutons. A final drizzle of olive oil or a small sprig of fresh thyme adds a beautiful finish (photo 10). Serve immediately and savor every spoonful!
Chef Lindsey’s Expert Tip for Kabocha Squash
Unlike butternut or pumpkin, where the soft flesh easily scoops out from the skin, kabocha squash skin is much tougher. For kabocha, you will need to scrape the soft flesh away from the skin of each roasted piece individually. Focus on removing the vibrant orange flesh, where the color transitions from orange to green. Don’t stress too much about getting every last bit or perfectly cleaning the area in between the flesh and skin; it’s a minor detail that won’t make a noticeable difference in the final taste or texture of your beautifully blended soup!
Frequently Asked Questions About Squash Soup
This roasted squash soup tastes even better the next day as the flavors have more time to meld and deepen. Store any leftover soup in an airtight container in the refrigerator for 3-5 days. Ensure the soup has cooled completely before transferring it to storage containers to maintain freshness and safety.
For individual servings, the easiest way to reheat squash soup is in the microwave. Heat in 30-second intervals, stirring in between, until it is thoroughly warmed through. For larger quantities, gently reheat the soup in a saucepot on the stovetop over medium-low heat, stirring occasionally, until hot. If the soup has thickened too much in the fridge, you can add a splash of vegetable stock or water to reach your desired consistency.
Absolutely! This squash soup freezes beautifully, making it an excellent meal prep option. First, allow the soup to cool completely to room temperature. Then, transfer it to freezer-safe containers or heavy-duty freezer bags, leaving a little headspace for expansion. Freeze for up to 3 months. When you’re ready to enjoy, thaw the soup overnight in the refrigerator. Reheat gently on the stovetop or in the microwave, adding a little stock or water if needed to adjust the thickness.
Yes, this creamy roasted squash soup recipe is naturally gluten-free, assuming you use gluten-free vegetable stock. It’s a wonderful option for those with gluten sensitivities or anyone looking for a wholesome, naturally gluten-free meal.
While the recipe emphasizes roasting for deep flavor, you can adapt it for an Instant Pot or slow cooker. Sauté the aromatics (onion, garlic, herbs) as instructed. Then add the peeled, cubed squash and vegetable stock to your appliance. Cook on high pressure for 10-15 minutes in an Instant Pot, or on low for 6-8 hours/high for 3-4 hours in a slow cooker, until the squash is tender. Blend as directed. Note that the roasted flavor won’t be as pronounced, so consider adding a pinch of smoked paprika or a roasted vegetable seasoning blend to compensate.

More Delicious Squash Recipes to Explore
Easy Side Dish Recipes
Roasted Spiced Butternut Squash
Date Night
Vegan Butternut Squash Chili
Easy Side Dish Recipes
Brown Sugar Baked Acorn Squash Halves
Winter Dinner Recipes
Twice Baked Spaghetti Squash
If you tried this recipe and absolutely loved it, please take a moment to leave a 🌟 star rating and share your experience in the comments section below. Your feedback truly makes my day and helps other home cooks discover delicious recipes!

★
★
★
★
Creamy Roasted Squash Soup
Comment
Print Recipe
Ingredients
- 3-4 cups roasted butternut squash flesh
- ½ roasted kabocha squash or Blue Hubbard, flesh scooped
- 4 cups vegetable stock (32 ounces)
- 2 tablespoons fresh rosemary finely minced
- 1-2 tablespoons fresh sage finely chopped
- 1 tablespoon fresh thyme leaves picked
- 1 small onion small dice (finely chopped)
- 1 tablespoon minced garlic
- 2 tablespoons olive oil
- kosher salt to taste
- black pepper freshly ground, to taste
For the spiced pepitas:
- ½ cup raw pumpkin seeds (pepitas)
- 1 teaspoon olive oil
- ½ teaspoon smoked paprika
- ¼ teaspoon ground cumin
- ¼ teaspoon cayenne pepper (optional, for heat)
- ½ teaspoon brown sugar
- ¼ teaspoon kosher salt
Instructions
How to roast butternut squash for soup:
-
Preheat the oven to 350°F (175°C).
-
Carefully cut the top and bottom off the butternut squash with a large chef’s knife. Stand the squash upright on a flat end, then slice it in half lengthwise, pushing down from the top of the knife while keeping your fingers clear of the blade.
-
Scoop out the seeds and fibrous strands; discard or set aside for roasting.
-
Line a baking sheet with parchment paper. Place the squash halves cut-side up, drizzle with olive oil, and sprinkle with kosher salt. Flip them cut-side down. Poke several holes along the skin with a fork or knife tip.
-
Roast in the oven until the squash is very soft when pressed and easily pierced, typically 25-40 minutes depending on size. Look for slight caramelization on the edges.
-
Scoop all the soft, roasted butternut squash flesh from the skins and set aside.
How to roast kabocha or Blue Hubbard squash for soup:
-
Preheat the oven to 350°F (175°C).
-
Carefully cut the top and bottom off the kabocha squash with a large chef’s knife. Stand upright and slice in half lengthwise. This may require force due to the thick rind.
-
Scoop out the seeds; discard or set aside for roasting.
-
Working with one half, cut strips about 2 inches wide, then cut each strip into 2-inch pieces. Repeat with the other half.
-
Arrange all pieces skin-side down (cut side face up) on a parchment-lined baking sheet. Sprinkle with kosher salt. Cover with another piece of parchment paper, then tightly seal with aluminum foil by crimping edges around the pan.
-
Bake until the squash is soft and easily pierced, typically around 25 minutes. Remove from oven, carefully remove foil and top parchment, and set aside.
How to Make Roasted Squash Soup:
-
In a medium sauce pot or Dutch oven, heat 2 tablespoons olive oil over medium-low heat. Add the onion and fresh herbs (rosemary, sage, thyme). Gently sweat, stirring occasionally, until the onions are almost translucent and softened (about 5-7 minutes).
-
Add the minced garlic to the pot. If onions stick, add a little more olive oil. Continue to sweat until the onions are fully transparent and garlic is fragrant (1-2 minutes).
-
Add all the roasted squash flesh and half of the vegetable stock to the pot. Stir to combine and simmer over medium-low heat for 5-10 minutes, allowing the squash to break down into the stock.
-
Remove from heat. Using an immersion blender, blend the soup directly in the pot until completely smooth and creamy. Gradually add the remaining stock until the soup reaches your desired smooth, pourable, yet viscous consistency. (Alternatively, blend in batches in a stand blender, being careful with hot liquids).
-
Taste the soup for seasoning and add fresh ground black pepper and kosher salt to taste. Adjust as needed.
How to make the roasted pepitas:
-
In a medium bowl, toss the raw pumpkin seeds (pepitas) with 1 teaspoon olive oil, ½ teaspoon smoked paprika, ¼ teaspoon ground cumin, ¼ teaspoon cayenne pepper (optional), ½ teaspoon brown sugar, and ¼ teaspoon kosher salt until evenly coated.
-
Spread the seasoned pepitas onto a baking pan lined with parchment paper. Roast in the oven (or in a dry skillet over medium heat) for 5-10 minutes, stirring frequently, until they are matte, golden brown, and fragrant. Remove and let cool on the baking sheet to crisp up.
-
Serve the warm squash soup in bowls, garnished generously with the spiced pepitas and/or croutons.
Notes
Flavor Tips – When using vegetable stock that isn’t reduced-sodium, you may not need to add additional salt until tasting at the end. Always taste and adjust!
Variations – Adding a tart apple, like a Granny Smith, when you add the squash will give you a sweet-tangy lift that’s especially fun in autumn. For extra creaminess, stir in a touch of coconut milk or cashew cream at the end for a vegan option.
Storage – Store leftover soup in an airtight container in the refrigerator for 3-5 days. This soup also freezes exceptionally well for up to 3 months.
Nutrition
Carbohydrates: 19g
Protein: 2g
Fat: 5g
Saturated Fat: 1g
Polyunsaturated Fat: 1g
Monounsaturated Fat: 3g
Sodium: 634mg
Potassium: 557mg
Fiber: 3g
Sugar: 5g
Vitamin A: 8875IU
Vitamin C: 28mg
Calcium: 75mg
Iron: 1mg
Before You Go: Your Culinary Journey Continues
I sincerely hope you enjoyed creating and savoring this wonderfully cozy and nourishing roasted squash soup recipe. It’s a dish that truly embodies the warmth and comfort of home cooking. Don’t let your culinary exploration end here! I invite you to delve into my other delightful soup and stew recipes, where you’ll find an array of options perfect for any season or occasion. Happy cooking!