
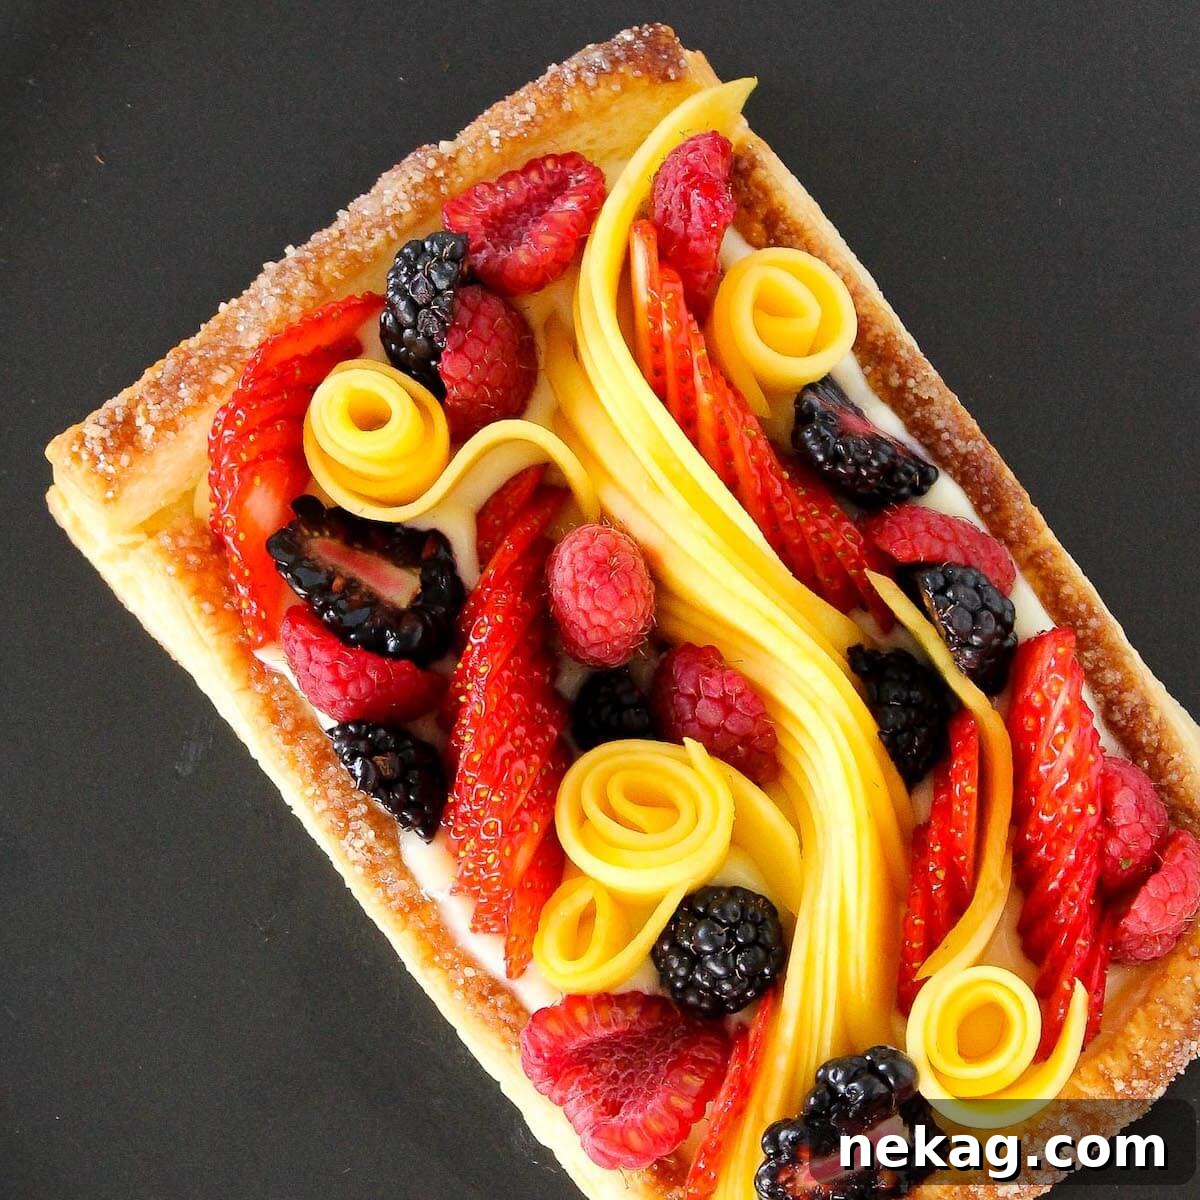
Indulge in a dessert that’s as breathtakingly beautiful as it is surprisingly simple to create: the Puff Pastry Fruit Tart. This recipe guides you through crafting a delectable base from store-bought or homemade puff pastry, filling it with a luscious pastry cream, and adorning it with a vibrant assortment of your favorite fresh fruits. It’s the perfect showstopper for any gathering, proving that gourmet desserts don’t have to be complicated.
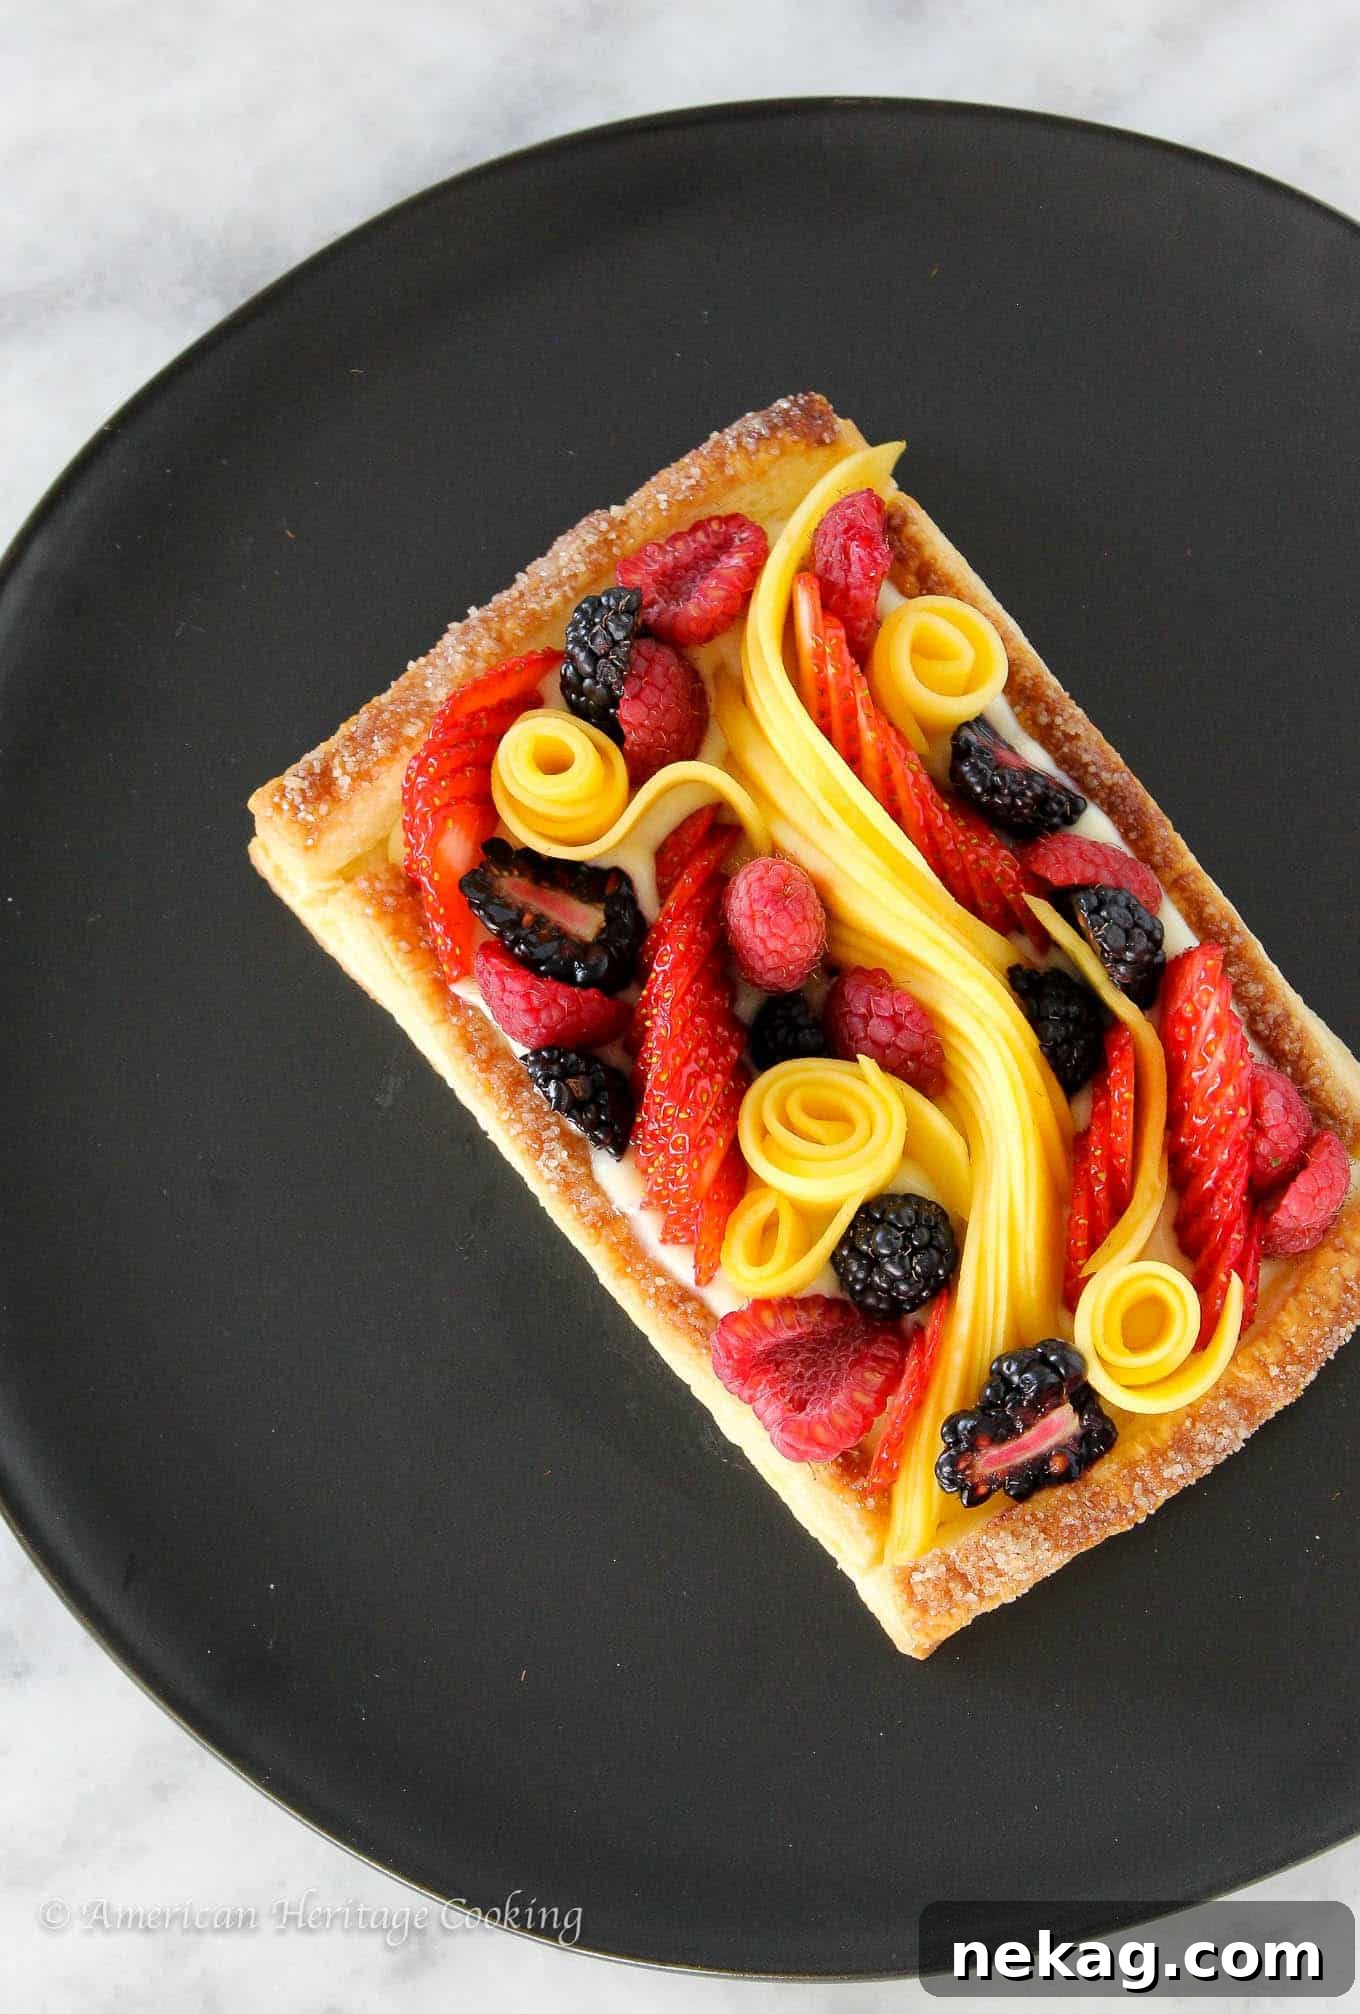
Are you searching for an elegant yet easy-to-prepare dessert that will leave a lasting impression? Look no further than this exquisite Puff Pastry Fruit Tart! Designed to be the grand finale of any dinner, this tart requires just a few key components: wonderfully flaky puff pastry and a smooth, rich vanilla bean pastry cream. To elevate the flavor profile, I’ve infused my pastry cream with a hint of bourbon, though you can easily customize it to suit your personal taste. Crown it with an array of fresh, seasonal fruits, and voilà – a magnificent dessert is ready to be savored!
Table of Contents
- Why You Will Adore This Puff Pastry Fruit Tart
- Essential Tips for a Perfect Fruit Tart
- Gathering Your Ingredients
- Creative Variations to Explore
- Smart Substitutions for Your Tart
- Step-by-Step: How to Make Your Tart
- Chef Lindsey’s Recipe Pro Tip
- Making the Most of Puff Pastry Scraps
- Frequently Asked Questions
- Puff Pastry Fruit Tart Recipe Card
- Before You Go!
Why You Will Adore This Puff Pastry Fruit Tart
- Effortless Elegance: If you dream of serving a dessert that looks like it came from a high-end patisserie but without the fuss, this tart is your answer. Its stunning appearance belies an incredibly straightforward preparation process, allowing you to impress guests with minimal effort. Your secret is safe with us!
- Tailored to Your Taste: This easy puff pastry dessert offers unparalleled customization. From selecting the perfect size – be it individual tartlets or a grand centerpiece – to experimenting with different flavor profiles and an array of fresh fruits, you have complete creative control. I’ll guide you through the details, ensuring your creation is flawlessly tailored to your preferences.
- Harmonious Flavors and Textures: Every bite of this delightful tart is a symphony of contrasting textures and balanced flavors. The delicate crispness of the flaky puff pastry perfectly complements the creamy, smooth pastry filling, all brightened by the juicy freshness of the fruit. It’s a dessert that’s never overly sweet, striking a “just right” balance that will captivate every palate. This makes it an ideal choice for a refreshing summer tart or a lighter option year-round.
Essential Tips for a Perfect Fruit Tart
- Keep Your Puff Pastry Chilled: The secret to achieving those coveted light, airy, and distinct layers in puff pastry lies in maintaining a cold temperature. Always work quickly and return your puff pastry to the refrigerator if it starts to soften. This ensures the butter layers remain separate, resulting in maximum puff and flakiness.
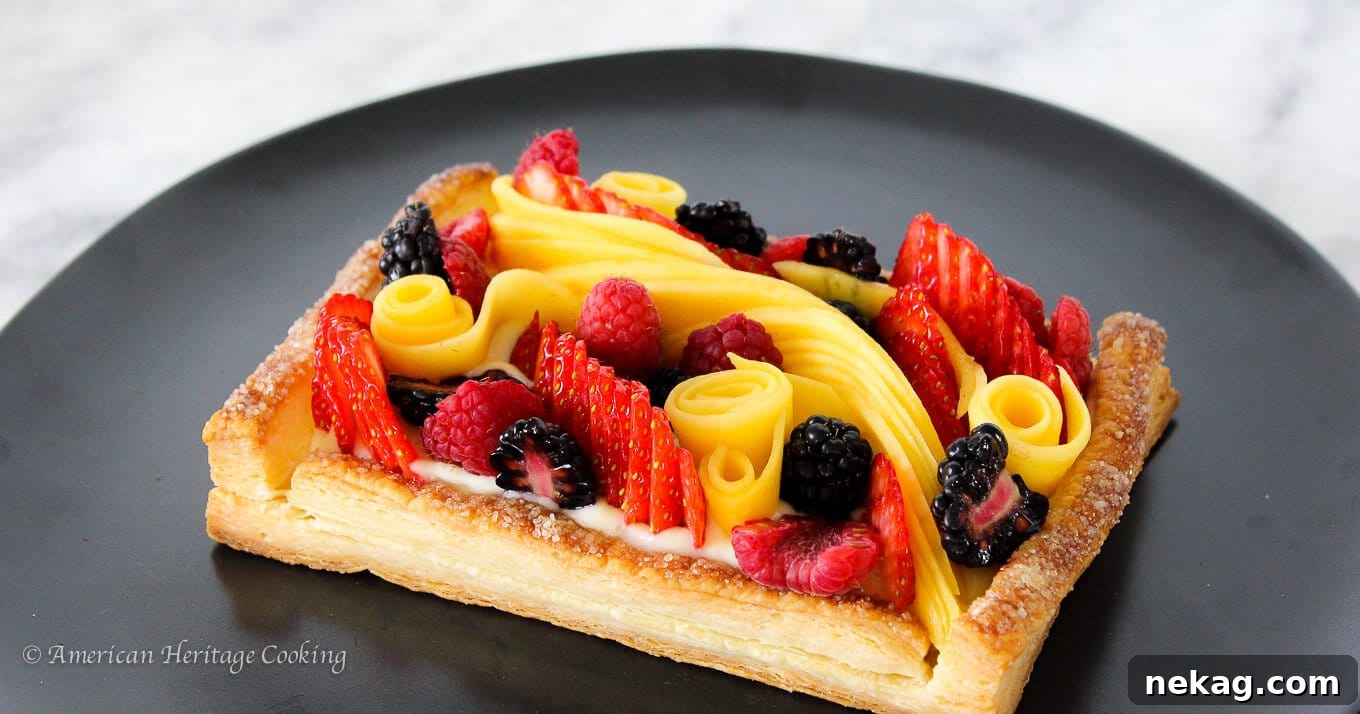
- Constructing Pastry Walls: The structural integrity of this tart relies on creating a sturdy “boat” with puff pastry walls. These slightly raised edges act as a delicious barrier, preventing your rich pastry cream filling from overflowing during baking and ensuring all that goodness stays perfectly contained. Precision in cutting and attaching these walls is key to a beautiful finish.
- The Magic of Egg Wash: For securely adhering two pieces of puff pastry together, a simple egg wash is your best friend. A single egg, lightly beaten until smooth, provides the perfect adhesive. It’s a versatile baking trick; you can simply crack an egg into a small container, seal it, and shake vigorously for a quick and effective egg wash. Watch this Egg Wash Video Tutorial for a visual guide!
Pro Tip: Don’t waste leftover egg wash! Stir it into your morning egg scramble for an extra boost of flavor and richness.
- Don’t Forget to Dock Your Dough: “Docking” simply means gently poking holes into the base of your puff pastry with a fork at regular intervals. This crucial step is vital for even rising. The small perforations allow steam to escape during baking, preventing the pastry from puffing up excessively in the center and ensuring a flat, stable base for your filling. Curious about other applications? As a devoted pastry enthusiast, I’ve dedicated an entire post to explaining When to Dock a Pie Crust, offering even more insights!
Gathering Your Ingredients
Crafting this exceptional Puff Pastry Fruit Tart begins with a selection of high-quality ingredients. Here’s a detailed look at what you’ll need and why each component is important:
- Whole Milk: This forms the essential liquid base for our creamy pastry cream. While milk fat does contribute to flavor, its primary role here is structural. Feel free to use your preferred alternative or lower-fat milk, as the thickening properties of eggs and cornstarch are paramount.
- Granulated Sugar: Beyond providing sweetness, sugar plays a dual role. When whisked with the eggs, it helps protect them from curdling when introduced to heat and contributes to the overall texture of the pastry cream.
- Whole Egg: A cornerstone of any custard, the whole egg is integral for thickening the pastry cream. Whisking it thoroughly with sugar before heating is a critical step in tempering, preventing the egg from cooking too quickly and creating a smooth, velvety consistency.
- Egg Yolk: Adding extra egg yolks to the pastry cream enhances its richness and thickening power without introducing additional moisture from egg whites. This results in a truly luxurious, thick, and deeply flavored custard.
- Vanilla Bean: Though one of the world’s more precious ingredients, fresh vanilla beans impart an unmistakable depth and aromatic complexity to vanilla fruit tarts that extract simply can’t replicate. You’ll use the tiny seeds within the pod for the pastry cream. Remember to save the scraped pods for infusing into other delightful creations like vanilla ice cream, crème anglaise, puddings, or even vanilla sugar.
- Cornstarch: This acts as a secondary thickener, working in tandem with the eggs. Cornstarch provides stability and also helps protect the eggs from overcooking as the custard comes to a boil, ensuring a consistently smooth texture.
- Puff Pastry Sheets: The foundation of our tart! While I’ve explored the intricacies of homemade puff pastry and inverse puff pastry, store-bought puff pastry is a fantastic time-saver. Don’t hesitate to use it for an equally gorgeous and delicious dessert. You can typically find it in the freezer aisle of most grocery stores.
Shopping Tip: Look for store-bought puff pastry in your grocery store’s freezer section, often near frozen pie crusts. Occasionally, you might find it in the refrigerated section alongside pre-made doughs like cinnamon rolls.
- Bourbon (Optional): The bourbon in the pastry cream filling adds a sophisticated, nuanced flavor. Choose a bourbon you genuinely enjoy drinking, as its taste will be discernible. If whiskey isn’t to your liking, opt for a different liqueur with a complementary aroma, such as Grand Marnier or rum, or simply omit it for a classic vanilla profile.
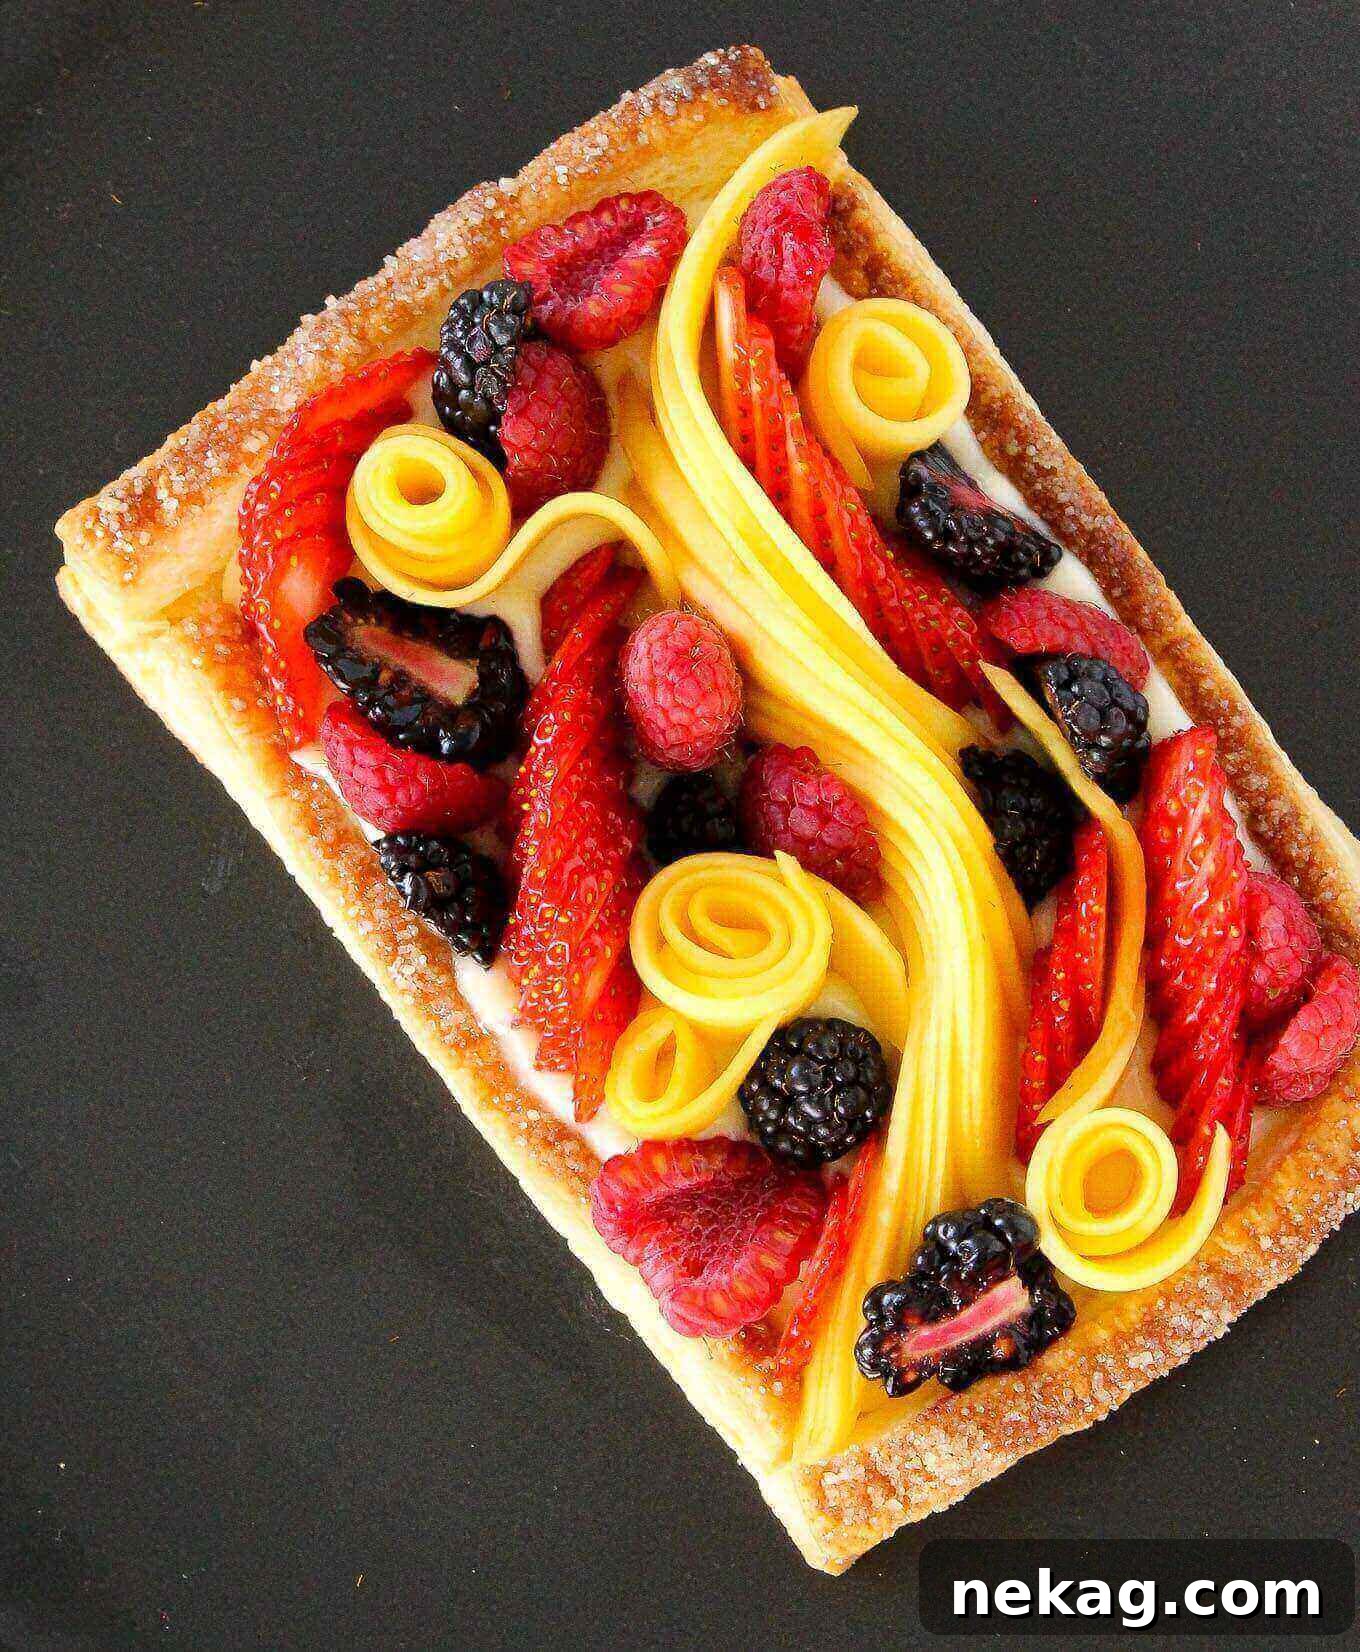
- Fresh Fruits: The crowning glory of your tart! For my tart, I used a vibrant mix of fresh mangoes, strawberries, raspberries, and blackberries. The beauty of this recipe lies in its adaptability; feel free to use your favorite combination of fresh, in-season fruits. Imagine the autumnal elegance of sliced apples or pears, perhaps with a sprinkle of cinnamon!
Creative Variations to Explore
While the classic Puff Pastry Fruit Tart is undeniably perfect, there’s ample room for culinary creativity. Here are some ideas to inspire your next masterpiece:
- Elaborate Fruit Styling: My inner perfectionist pastry chef often tempts me to spend hours arranging fruit with tweezers! If you share that artistic inclination, consider creating an intricate, show-stopping fresh fruit design. Think about incorporating vibrant additions like thinly sliced red wine poached pears or a dollop of intensely colored mixed berry jam to add striking visual appeal and depth of flavor.
- Alternative Fillings: This recipe shines with my vanilla bean pastry cream, but it’s a versatile canvas for other delicious fillings. For a slightly less sweet option with a delicate caramelized note, I highly recommend my caramel pastry cream. You could also venture into nut-based creams like almond cream or hazelnut cream, but note that these require an additional baking step before serving.
Important Note for Nut Creams: If you opt for almond or hazelnut cream, your tart will require two baking stages. First, bake the puff pastry shell until it’s golden brown. Then, remove it from the oven, gently spread or pipe the softened nut cream into the shell, and return it to bake until the cream is golden brown and slightly firm to the touch.
- Endless Flavor Combinations: Let your imagination run wild with fruit choices! For a tropical flair, combine luscious mango, sweet papaya, and tangy pineapple, perhaps sprinkled with toasted coconut for an elegant crunch. A generous mound of mixed berries is always a crowd-pleaser. In colder months, create a vibrant and bright tart with a medley of oranges, blood oranges, and grapefruit slices.
- Any Size, Any Occasion: The tart pictured, measuring around 4×6 inches, is perfect for two people. However, this recipe is incredibly adaptable. You can easily create charming individual tartlets for a party or a larger family-sized tart. Just ensure you have enough puff pastry for your desired dimensions and adjust the baking time accordingly; smaller tarts will bake faster, while larger ones will need more time.
Smart Substitutions for Your Tart
Sometimes you might not have every ingredient on hand, or you might wish to tailor the recipe to dietary preferences. Here are some effective substitutions:
- Vanilla Bean Alternative: If fresh vanilla beans are unavailable for this recipe, you can certainly use vanilla extract. While you might lose a bit of the complex depth of flavor that only real vanilla beans can provide, the tart will still be utterly delicious. For one full batch of vanilla pastry cream (equivalent to the amount needed here), substitute ¼ of a vanilla bean with ¾ teaspoon of good quality vanilla extract. Remember, vanilla extract’s delicate flavors can diminish with prolonged heat; therefore, it’s best to add it towards the end of the pastry cream cooking process, alongside the bourbon, or just before cooling.
- Fresh Fruit Alternatives: This recipe truly shines with fresh fruit due to its vibrant texture and minimal moisture content. I generally do not recommend using frozen fruit directly, as even after thawing, it tends to release excess liquid, which can make your tart soggy and alter its texture. If fresh fruit isn’t an option, consider using dried fruits (like apricots, figs, or cranberries) or various nuts for a different, but still delicious, outcome. Be aware that these alternatives will change the tart’s aesthetic, balance, and bright flavor profile.
- Egg Wash Alternatives: While some bakers add a pinch of salt or a splash of milk to their egg wash, I prefer to keep it beautifully simple with just a beaten egg. However, if you’re looking for an alternative for adhering puff pastry pieces, plain milk or even heavy cream can also be effective. They provide enough moisture to create a seal, though an egg wash often provides a richer golden sheen.
Step-by-Step: How to Make Your Tart
Follow these detailed instructions to create a perfectly executed puff pastry fruit tart every single time. More precise measurements and additional details can be found in the comprehensive recipe card below!
Part 1: Making the Pastry Cream
Chef’s Note: This recipe yields the smallest batch of pastry cream I’d typically recommend making. Any less makes it challenging to prevent clumping or burning during cooking. Even at this size, it can be a bit tricky. For an easier experience and more versatility, consider doubling the batch. Leftover pastry cream is fantastic for other desserts like banana cream pie, éclairs, profiteroles, or as a delightful filling for cakes and donuts.
Step 1: Prepare the Vanilla Bean. Carefully split half a vanilla bean pod lengthwise and scrape out the fragrant seeds. Set the seeds aside for the cream. You can save the empty pod to infuse sugar or liquids, or simply add it to the milk for extra flavor during cooking.
Step 2: Heat the Milk Mixture. In a medium-sized pot, combine the whole milk, granulated sugar, and vanilla bean seeds (and pod, if using). Bring this mixture to a gentle boil over medium heat, stirring occasionally to dissolve the sugar. Once boiling, remove it from the heat.
Step 3: Temper the Eggs. In a separate bowl, thoroughly whisk the whole egg and egg yolk with the cornstarch until completely smooth and free of any lumps or streaks. This process is called “blanchir.” Next, gradually introduce about half of the hot milk mixture into the egg mixture while continuously whisking. This slow addition, known as ‘tempering,’ gently raises the temperature of the eggs, preventing them from scrambling.
Step 4: Thicken the Custard. Pour the tempered egg-milk mixture back into the pot with the remaining hot milk. Return the pot to medium heat and whisk continuously. As the mixture heats, it will begin to thicken. Bring it to a rolling boil and continue whisking vigorously for exactly one minute. This ensures the cornstarch fully activates and the cream is properly thickened and stable.
Step 5: Cool the Pastry Cream. Immediately pour your freshly made pastry cream onto a baking pan or shallow dish lined with plastic wrap. Place another sheet of plastic wrap directly onto the surface of the cream (to prevent a skin from forming), and poke a few small holes in the top plastic layer to allow steam to escape. Cool the pastry cream completely at room temperature, then transfer it to the refrigerator. It can be stored for up to 7 days.
Part 2: Assembling the Tart Base
Step 6: Prepare the Puff Pastry. If using frozen puff pastry, allow it to thaw on your counter until it’s pliable enough to lay flat without cracking. Crucially, it should still be cold to the touch. Maintaining a cold temperature is essential for preserving the distinct layers of the puff pastry, which will ensure maximum flakiness.
Reminder: Always keep your puff pastry cold while you’re manipulating it to safeguard its precious layers! Warm pastry loses its ability to puff properly.
Step 7: Cut the Base. On a lightly floured surface, carefully unroll your puff pastry sheet. Use a ruler and a sharp knife or pizza cutter to cut the base of your tart to your desired size and shape. The tart pictured measures 4×6 inches, but you can create tiny individual tartlets or a much larger tart. Just ensure you have enough remaining pastry to cut strips for the 2cm-wide walls.
Step 8: Cut the Walls. Next, cut four individual strips of puff pastry, each approximately 2cm (about ¾ inch) wide. These strips will form the raised border of your tart, creating a “boat” to hold the creamy filling.
Step 9: Attach the Walls with Egg Wash. Using a pastry brush or even your fingertips, lightly brush a thin layer of egg wash (just one beaten egg) along the edges of your puff pastry base. Carefully place the 2cm-wide strips on top of these brushed edges, pressing gently to adhere them and form a continuous border. The egg wash acts as a culinary glue, ensuring the strips stay firmly in place.
Part 3: Chilling and Baking the Puff Pastry
Step 10: Dock the Dough. With a fork, gently poke holes across the entire base of the puff pastry inside the border. This “docking” technique is crucial; it provides escape points for steam during baking, ensuring the base rises evenly without forming large bubbles and creates a stable platform for your filling.
Step 11: Thoroughly Chill. Transfer the assembled puff pastry tart base to the refrigerator and chill it completely for at least 45 minutes. This chilling period allows the pastry to firm up, preventing it from shrinking or distorting in the oven and helping to maintain those distinct, flaky layers.
Step 12: Prepare for Baking. Once chilled, lightly brush the top edge of the puff pastry border with a little more egg wash or a tiny bit of water. Be very careful to avoid letting the liquid drip down the sides of the pastry, as this can seal the layers together and prevent them from puffing up properly. Finally, sprinkle a little raw sugar (like turbinado or demerara) over the egg-washed border for a lovely golden crunch and sparkle.
Re-Chill if Needed: If at any point your puff pastry feels warm or soft to the touch, don’t hesitate to pop it back into the refrigerator for a bit longer. Cold pastry is key to success!
Step 13: Bake to Golden Perfection. Preheat your oven to 375°F (190°C) with the convection fan on (if you have one; otherwise, a standard oven works too). Line a baking sheet with parchment paper, optionally spraying with a nonstick spray for extra security. Carefully transfer your puff pastry “boat” onto the prepared sheet. Bake for 12-20 minutes. The exact baking time will vary depending on the size and thickness of your tart. You’re looking for beautifully golden-brown edges and clearly visible, separated puff pastry layers on the sides, indicating a perfectly flaky crust.
Step 14: Cool Completely. Once baked, remove the tart shell from the oven and allow it to cool completely on a wire rack. It’s crucial for the shell to be fully cooled before adding the pastry cream to prevent melting or sogginess.
Part 4: Assembling the Final Tart
Step 15: Revitalize the Pastry Cream. Take your chilled pastry cream from the refrigerator. Beat it vigorously in the bowl of a stand mixer fitted with the paddle attachment, or by hand with a sturdy rubber spatula. This step “refreshes” the cream, making it smooth, light, and easily spreadable. This is also the perfect moment to mix in the optional bourbon, adding it to taste until you reach your desired flavor.
Step 16: Fill the Tart Shell. Once the puff pastry shell is completely cool, dollop a generous amount of the refreshed pastry cream into the center. Using an offset spatula, gently spread the cream evenly across the base of the tart, ensuring it fills the entire cavity but stays just below the top edge of the pastry walls. Be careful not to overfill, as adding fruit will cause the cream to overflow.
Step 17: Arrange Your Fresh Fruit. Now for the artistic part! Slice and arrange your chosen fresh fruits however you like. For a refined look, you might carefully place individual slices and berries. For a more rustic and bountiful presentation, a towering pile of mixed berries is equally stunning. Select fruits that are in season for the best flavor and vibrant colors.
Step 18: Chill Before Serving. For optimal taste and texture, refrigerate your assembled fruit tart for at least 30 minutes before serving. This allows the pastry cream to set firmly and marry beautifully with the fruits. While delicious, this tart is truly at its peak when served on the same day it is assembled, ensuring the puff pastry remains wonderfully crisp.
Chef Lindsey’s Recipe Pro Tip
Master the art of precision: Always use a ruler when cutting your puff pastry! This simple tool guarantees an even border and perfectly straight lines, which are crucial for a chic, professional-looking finish. Details truly make all the difference in pastry arts!
Making the Most of Puff Pastry Scraps
It’s almost inevitable to have some leftover puff pastry scraps when crafting desserts or savory dishes. Don’t let them go to waste! Puff pastry is too delicious for that. Here are some creative and delicious ways to utilize those precious remnants:
- Re-roll and Repurpose: Gather your puff pastry scraps gently, stack them, and re-roll them one time. Avoid overworking the dough, as this can compromise its flaky layers. Thoroughly chill your newly formed sheet. This re-rolled pastry is perfect for applications where the “puff” factor isn’t the absolute highest priority, such as crafting elegant palmiers (check out my video tutorial!) or simple tart bases that don’t need a high rise.
- Sweet or Savory Twists: Transform scraps into delightful twists! For a sweet treat, sprinkle them with cinnamon sugar, twist, and bake to create irresistible cinnamon sugar twists. Alternatively, embrace a savory direction by dusting them with cayenne pepper and cheese for a batch of addictive cheese straws, perfect for appetizers.
- Charming Dessert Décor: Unleash your inner artist! Use small cookie cutters to create whimsical shapes like leaves, flowers, or stars from your puff pastry scraps. Brush them with egg wash, sprinkle with sugar, and bake until golden and puffy. These delicate shapes make exquisite garnishes for desserts like a rich dark chocolate pudding, a layered tropical trifle, or a vibrant strawberry triumph pie. You could even use them to add an extra decorative flourish to the top of your next puff pastry tart! Let me know in the comments below what creative designs you come up with!
Frequently Asked Questions
A fully-assembled fruit tart with puff pastry is truly best enjoyed immediately after preparation! The crispness of the puff pastry begins to soften as it absorbs moisture from the pastry cream and fruit after about 8 hours. If you must store it, place it in an airtight container in the refrigerator. For optimal freshness, it’s actually best to store the components separately: keep the baked puff pastry shell in an airtight container at room temperature, and the prepared pastry cream in the refrigerator.
Yes, with laminated doughs like puff pastry, chilling before baking is highly recommended. This step helps the butter layers remain distinct and firm, which is crucial for achieving maximum flakiness and preventing shrinkage in the oven. You can even bake it directly from a frozen state if time is tight, though a brief thaw for pliability is often easier for shaping.
Absolutely! This recipe is well-suited for advance preparation. The puff pastry tart shell can be baked a day ahead of time and stored at room temperature. The vanilla bean pastry cream can be made up to seven days in advance and stored in the refrigerator, ready to be whipped smooth and assembled when you are.
This recipe is highly scalable and will multiply beautifully! Simply adjust the quantities of ingredients based on how much puff pastry you plan to use and how many tarts you wish to create. Just be mindful of oven space if making multiple large tarts.
I generally do not recommend freezing the assembled tart with pastry cream, as the texture of the cream can change upon thawing, and the puff pastry will become soggy. However, unbaked puff pastry sheets can be stored in the freezer for extended periods, and the baked, unfilled puff pastry shells can also be frozen for a short time, though freshness is always best.
Yes, docking the puff pastry shell is a vital step prior to baking. Poking holes into the base ensures that steam can escape evenly during baking, preventing the pastry from puffing up unevenly or creating large air pockets. This results in a flat, stable, and perfectly flaky base for your fruit tart.
The best fruit for this tart is truly a matter of personal preference and seasonal availability! I love using a mixture of fruits to create visual interest and a balance of flavors. When choosing, consider what flavors will complement your pastry cream (e.g., berries with vanilla, caramelized apples with caramel cream). Also, think about the aesthetic you desire: do you want a chic, refined look or a rustic, bountiful display? What colors will pop, and how much fruit do you want in each bite? Ultimately, it’s your tart – so adorn it with your absolute favorite fruits!
If you tried this recipe and loved it, please consider leaving a 🌟 star rating and share your experience in the comments below. Your feedback truly makes my day!
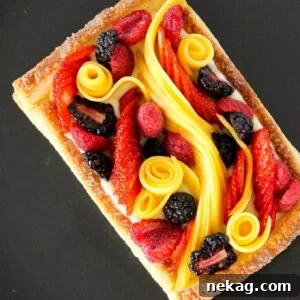
Puff Pastry Fruit Tart
Chef Lindsey
15 mins
30 mins
45 mins
4 people
Comment
Print Recipe
Ingredients
Vanilla Bean Pastry Cream
- 1 egg yolk
- 1 cup milk
- 2 tablespoons cornstarch
- ¼ cup sugar
- ½ whole egg Whisk an egg until completely smooth with no egg white streaks and eyeball half. Save the other half for your egg wash.
- ¼ vanilla bean seeded
Tart Shell & Topping
- 1 sheet puff pastry homemade or store-bought
- 2 teaspoons Bourbon optional, for pastry cream
- Fresh fruits for topping, choose your favorites!
- 1 whole egg for egg wash
- Raw sugar for sprinkling on crust
Instructions
Make the pastry cream:
-
Split and scrape the seeds from half a vanilla bean pod. Save the pod for another use or throw it in!
-
Heat the milk, sugar and vanilla beans in a medium pot and bring to a boil.
-
Blanchir (whisk) the eggs and yolks in a bowl with cornstarch. Next, add the milk to the whisked eggs with a process called ‘tempering’. Temper your milk into the eggs by slowly adding the hot milk mixture while whisking. This allows the eggs to come up to the temperature of the milk without cooking them.
-
Return the newly tempered mixture to the pot and turn the heat to medium. Whisk until it begins to thicken. Boil this mixture for 1 minute while constantly whisking.
-
Pour out your newly made pastry cream onto a plastic-wrap lined baking pan. Cover it with another sheet of plastic wrap, poke holes in the top, and cool it completely. You can store it for up to 7 days in the refrigerator.
Assemble the tart base:
-
If your puff pastry is frozen, allow it to warm up by placing it on the counter. You want it only warm enough to lay flat and be pliable. It should still be cold. Always keep your puff cold while you are working with it to preserve the layers!
-
Using a ruler or a pizza cutter, cut the base of your pastry. It really isn’t important what size you make it.The one I made in the picture is 4×6 inches for reference, but you could make tiny tartlets if you like or large ones. Be sure you have enough puff pastry to cut strips for the 2cm-wide walls.
-
Next, cut the strips to place on top to create a little puff pastry boat which will hold the filling. Cut 4 individual strips of puff about 2cm wide, one for each side.
-
Using a pastry brush or your fingers, adhere the strips to the top of the base with egg wash like a border. Egg wash is just one beaten egg, nothing fancy! You can also use half the egg left over from the pastry cream.
Chill and bake the puff pastry:
-
Dock your dough by using a fork to poke holes in the puff pastry base. This ensures it rises evenly by giving the steam specific exit-points.
-
Chill the dough completely, which will take at least 45 minutes.
-
After chilling the dough, quickly brush the top edge of the border with egg wash or a little water. Be careful that the egg wash or water doesn’t drip down the edges of the puff pastry, which would glue the layers together. {If these layers glue together, your puff pastry won’t puff!} Sprinkle the top with raw sugar.
-
Chill again if necessary. If your puff no longer feels cold to the touch and has softened, pop it back in the fridge for a little bit longer!
-
Preheat the oven to 375°F convection. Prepare a baking sheet by spraying with nonstick spray and placing a piece of parchment paper on top. Bake your puff pastry boat on the prepared sheet for 12-20 minutes. The bake-time will depend on the size of the tart. You want your pastry edges to be golden brown, and your puff pastry layers visible on the sides.
-
Allow the tart to cool completely.
Assemble the tart:
-
Refresh your pastry cream by beating it again in the bowl of a stand mixer fitted with the paddle attachment or by hand with a rubber spatula. This is when you would mix the bourbon in to taste. You want to beat the pastry cream until it is smooth and more easily spreadable.
-
Dollop some of the pastry cream into your completely cooled tart shell. Spread the cream with an offset spatula until it covers the whole base of the tart and comes just below the top of the sides. You don’t want to overfill it or when you add the fruit, the cream will squish out.
-
Cut and arrange the fruit however you like! I chose to arrange it more daintily, but a towering pile of mixed berries would also be beautiful. Use the berries you like the best, or any fruit that is in season!
-
Refrigerate before serving. It is best served the day it is assembled!
Video
Notes
Storage – This tart is best consumed the day it is made. If needed, it’s best to store the components separately!
Nutrition
Carbohydrates: 55g |
Protein: 8g |
Fat: 27g |
Saturated Fat: 8g |
Polyunsaturated Fat: 3g |
Monounsaturated Fat: 14g |
Trans Fat: 0.003g |
Cholesterol: 76mg |
Sodium: 189mg |
Potassium: 195mg |
Fiber: 2g |
Sugar: 23g |
Vitamin A: 373IU |
Vitamin C: 1mg |
Calcium: 93mg |
Iron: 2mg
Breakfast, Dessert
American, French
500
Like this? Leave a comment below!
Before You Go!
I sincerely hope you’ve enjoyed this professional chef-tested recipe for an exquisite Puff Pastry Fruit Tart. It’s a testament to how simple ingredients and techniques can yield truly spectacular results. Don’t stop here – explore our other delicious, chef-developed tart recipes and expand your baking repertoire. Happy baking!