
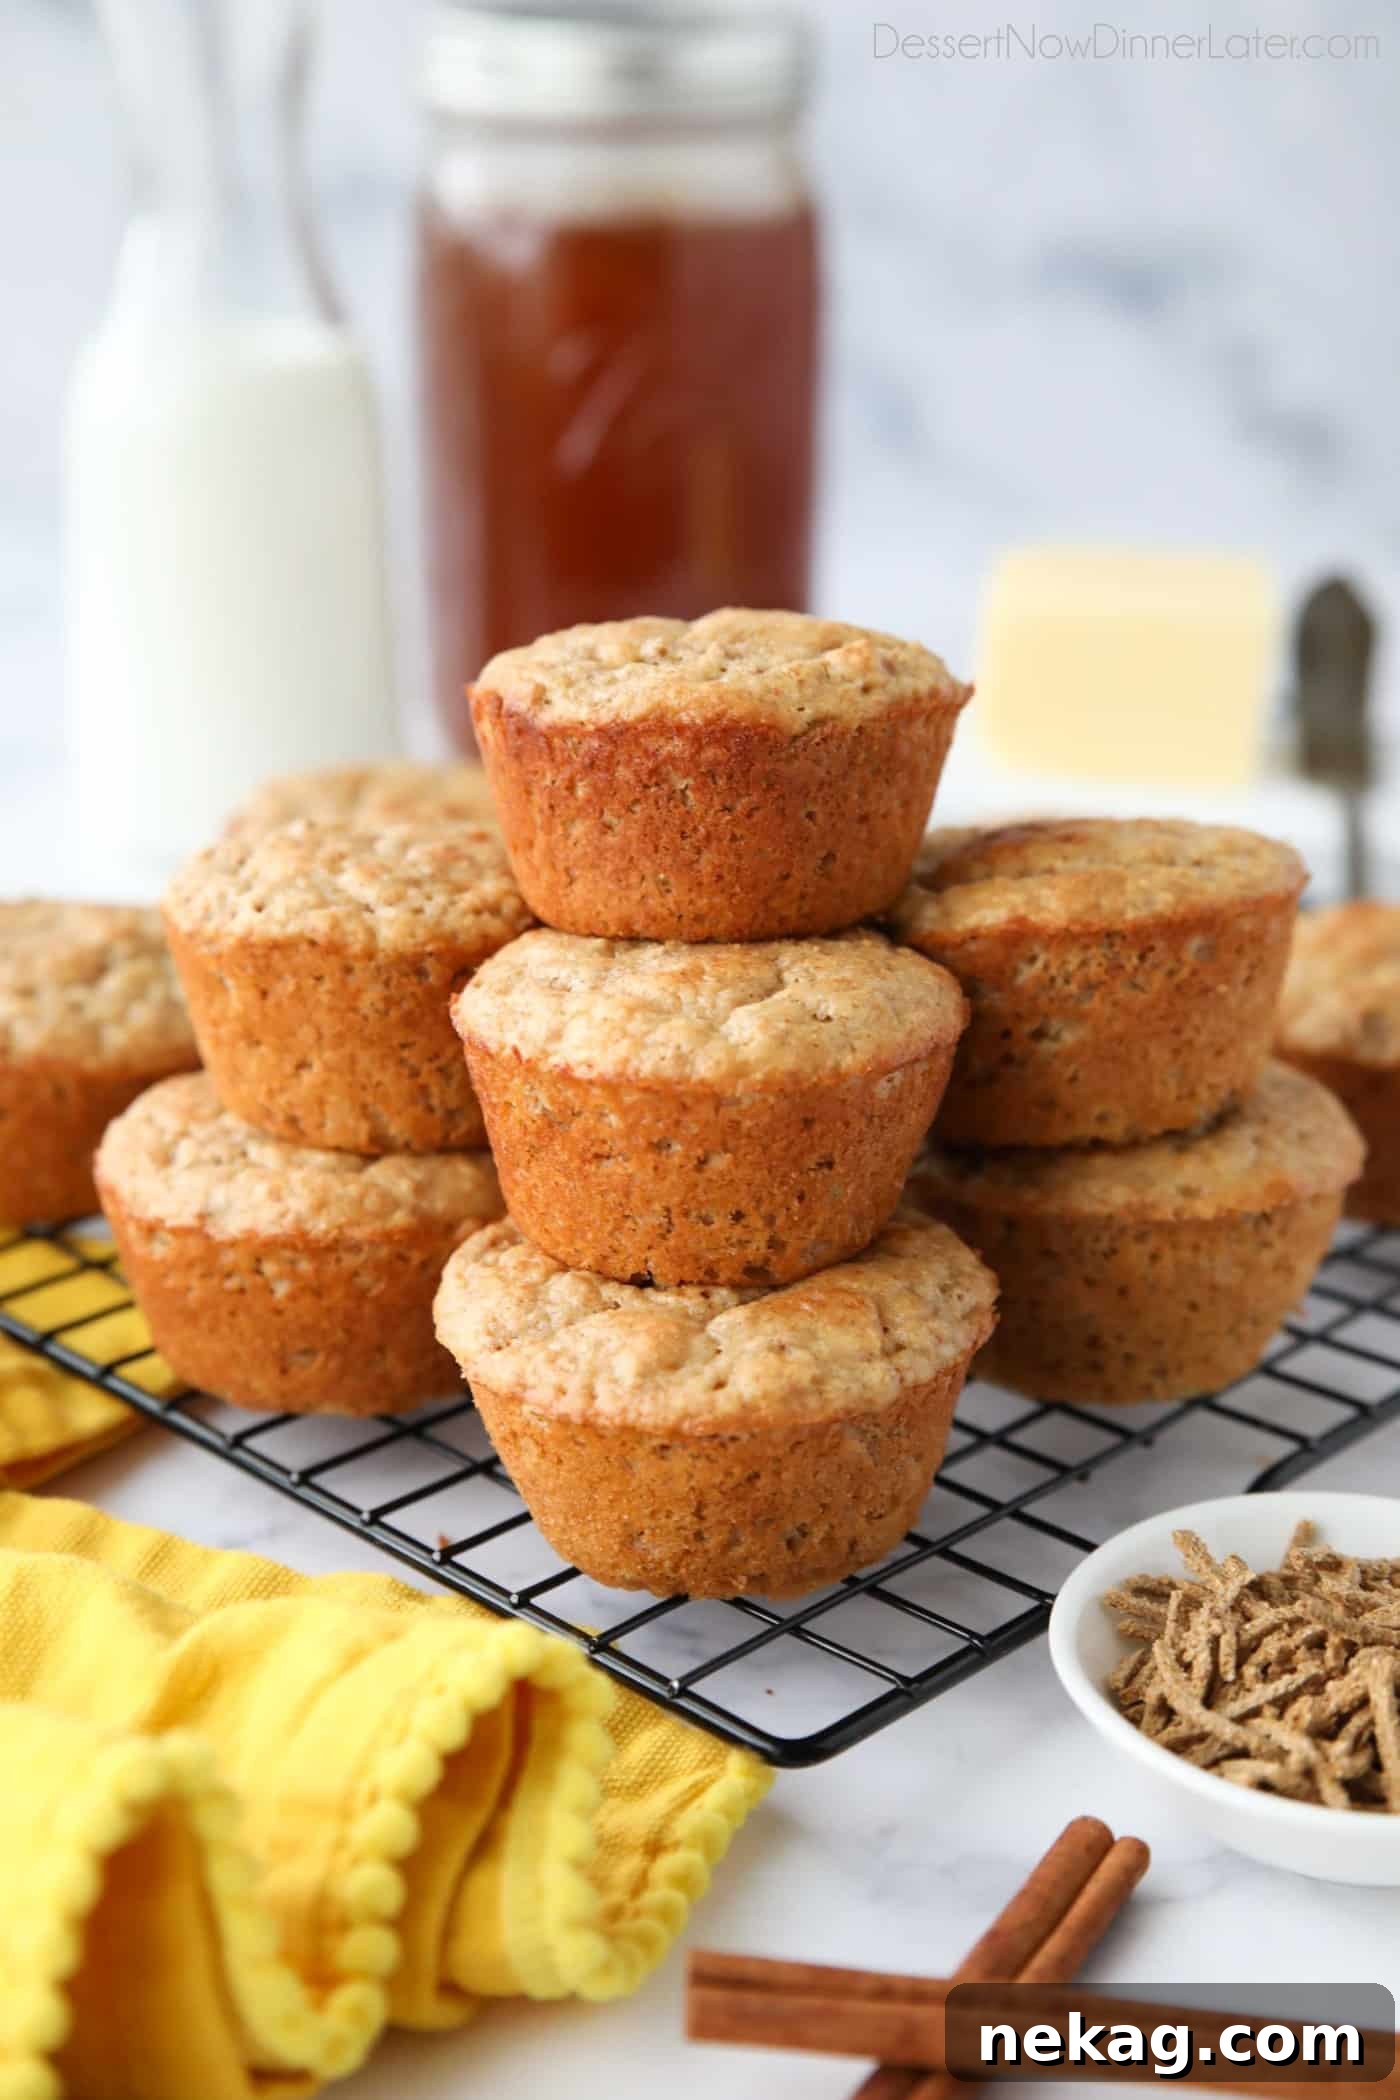
Unlock the secret to wholesome and undeniably delicious breakfast with our improved All Bran Muffins recipe. Moving beyond the often-dense and dry reputation of traditional bran muffins, this recipe crafts muffins that are incredibly hearty, yet surprisingly light, moist, and wonderfully fluffy. Infused with a comforting hint of sweet cinnamon and vanilla, these muffins are not just a treat for your taste buds but also a powerhouse of nutrition, boasting high levels of fiber and protein. Perfect for busy mornings or as a fulfilling snack, these homemade delights prove that healthy eating can be truly enjoyable.
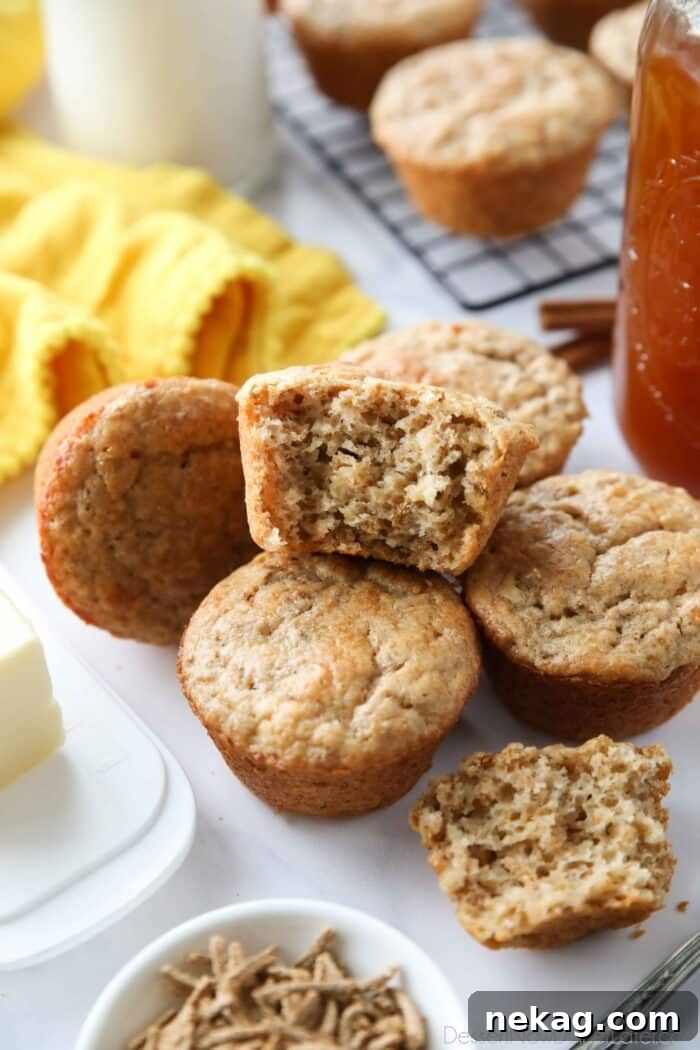
Your Ultimate Make-Ahead Breakfast or Healthy Snack
In our fast-paced lives, finding time for a nutritious breakfast can often feel like a challenge. That’s where homemade muffins truly shine. These All Bran Muffins are an ideal make-ahead breakfast option, offering a convenient and satisfying start to your day, especially on those hectic on-the-go mornings. Beyond breakfast, they also serve as an excellent mid-afternoon snack, providing sustained energy and helping to curb those unhealthy cravings.
However, not all muffins are created equal. You might be tempted by the oversized, seemingly wholesome muffins at your local grocery store, but a closer look often reveals they are little more than cupcakes in disguise. Having firsthand experience working in a grocery store bakery, I can attest to the often excessive sugar content and highly processed ingredients in these commercial offerings. Opting for homemade muffins gives you complete control over the amount of sugar and the quality of ingredients that go into your food, allowing you to tailor them to your health preferences and dietary needs.
When it comes to truly healthy muffins, bran muffins stand out as a top contender. Bran, the outer layer of grain kernels, is an exceptional source of dietary fiber and protein. Incorporating bran into your diet can significantly contribute to digestive health, help maintain stable blood sugar levels, and provide a feeling of fullness that lasts, making these muffins a smart choice for anyone looking to boost their nutritional intake without sacrificing flavor.
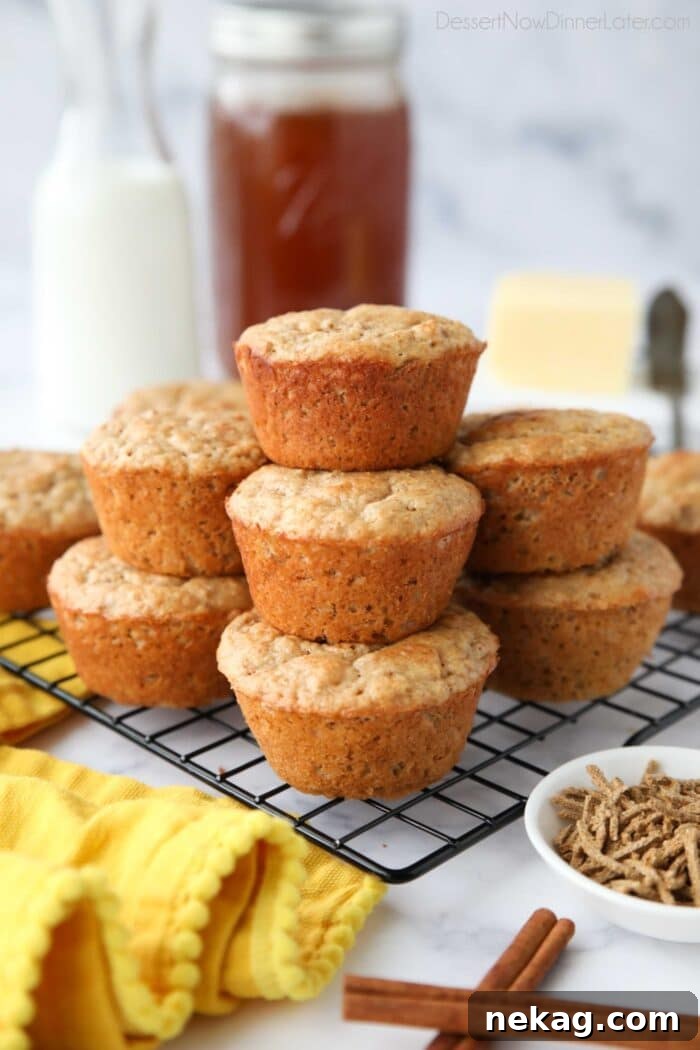
From Dense to Delicious: Perfecting the All-Bran Muffin Recipe
The common perception of bran muffins often involves them being really dense, disappointingly dry, and frankly, not that great tasting. Many home bakers have faced the challenge of creating a bran muffin that truly satisfies both health goals and taste expectations. The original All-Bran Muffins recipe from Kellogg’s has long been a foundational starting point for many variations, including my own.
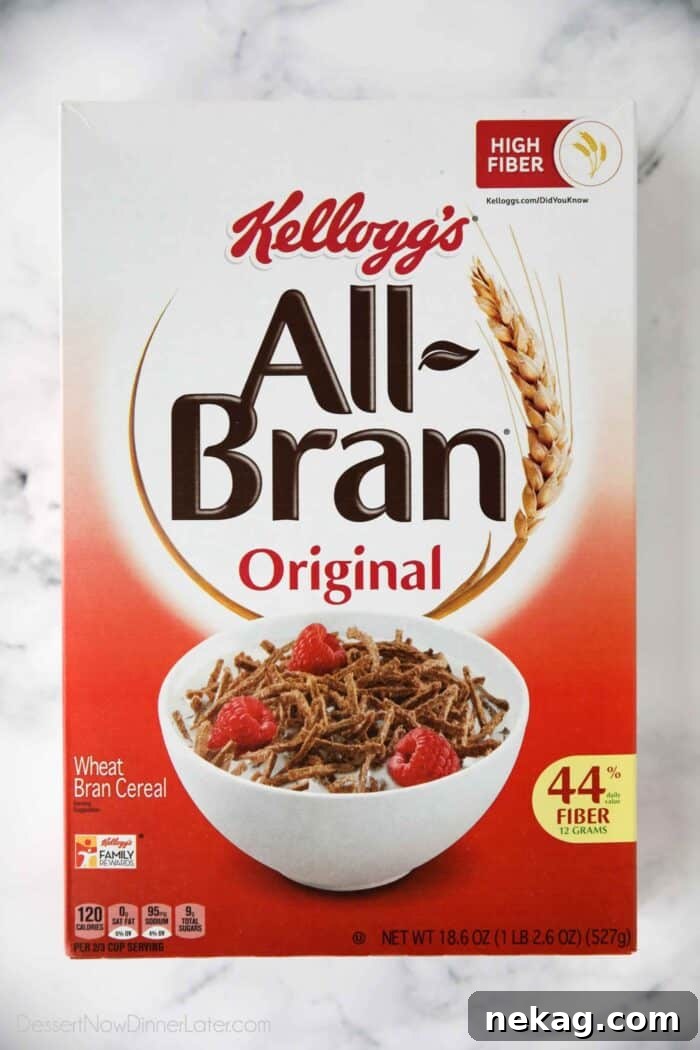
My goal was to transform the classic bran muffin into something everyone, especially kids, would eagerly ask for more of. I specifically chose to use bran cereal instead of raw wheat bran for my recipe, primarily because it’s more readily available and easier for the average home cook to work with. Using cereal for muffins might sound unconventional, but it’s actually quite simple and yields fantastic results, especially when aiming for a lighter texture.
What Makes My All Bran Muffin Recipe Unique?
Knowing that my family, like many others, isn’t accustomed to eating “healthy” muffins that compromise on flavor, I dedicated myself to making this recipe truly outstanding. My objective was to create muffins that were significantly lighter, moister, and bursting with flavor. The enthusiastic approval from my three children, who quickly devoured them and requested more, was all the validation I needed! Here’s how my recipe significantly improves upon the original:
- Reduced All-Bran Cereal: I opted for 1 1/4 cups of All-Bran Cereal instead of the original 2 cups. This crucial adjustment allows the muffins to retain the nutritional benefits of bran while achieving a texture closer to a regular, beloved muffin – light, airy, and never too heavy.
- Buttermilk for Unmatched Tenderness: Instead of fat-free milk, I incorporate buttermilk. While buttermilk is naturally low in fat, its acidity plays a vital role in tenderizing the gluten in the flour and significantly boosting the leavening agents. This chemical reaction results in an incredibly soft, moist crumb that sets these muffins apart.
- Brown Sugar for Rich Depth: Swapping granulated sugar for light brown sugar infuses the muffins with a deeper, more complex flavor profile. The molasses content in brown sugar not only adds a beautiful caramel-like note but also contributes to the overall moisture of the baked goods.
- Aromatic Cinnamon and Vanilla: The addition of ground cinnamon and pure vanilla extract transforms these classic bran muffins into a comforting, aromatic experience. Cinnamon, often celebrated as a “super-spice,” is packed with antioxidants and anti-inflammatory properties, offering a delicious boost to your health. These warm spices elevate the taste, making them irresistible to even the pickiest eaters.
These muffins, in their foundational form, might appear simple, without elaborate “fillers.” However, their inherent deliciousness lies in the careful balance of ingredients. For those who enjoy a bit more variety, I’ll share some delightful additional mix-in options a bit later in this guide to further customize your baking adventure.
The Nutritional Powerhouse: Why Bran is Essential
Before we dive deeper into the baking process, let’s briefly touch upon why bran muffins are such a stellar choice for your diet. Bran, specifically from whole grain cereals like Kellogg’s All-Bran, is an outstanding source of dietary fiber. Fiber is crucial for maintaining a healthy digestive system, aiding in regularity, and preventing common issues like constipation. Beyond digestive health, a fiber-rich diet is linked to numerous long-term health benefits, including better blood sugar control, lower cholesterol levels, and a reduced risk of heart disease.
Moreover, these muffins also provide a good source of protein. Protein is essential for building and repairing tissues, producing enzymes and hormones, and supporting satiety. Combined, the fiber and protein in these All Bran Muffins contribute to sustained energy release, helping you feel fuller for longer and reducing the urge for unhealthy snacking throughout your day. This makes them not just a tasty treat, but a truly functional food that supports your overall well-being.
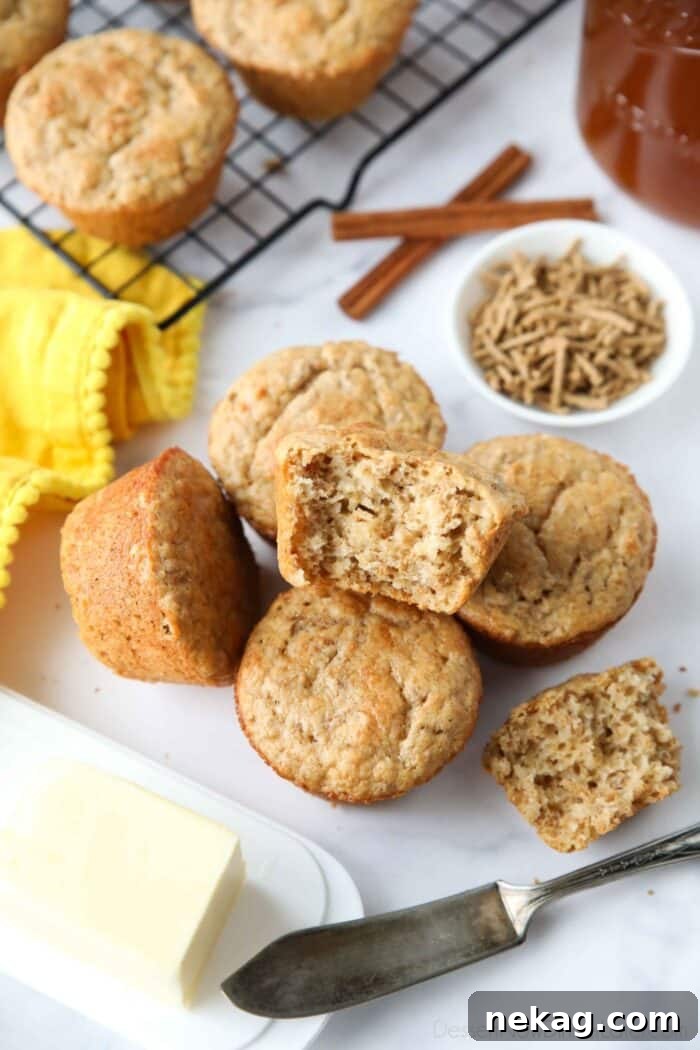
Step-by-Step Guide: How to Make Irresistible All Bran Muffins
Making these delightful All Bran Muffins is incredibly straightforward, even for novice bakers. Follow these simple steps to ensure your muffins turn out perfectly moist, fluffy, and full of flavor every time.
- Prepare Your Oven and Muffin Tin: Begin by preheating your oven to 400 degrees Fahrenheit (200 degrees Celsius). This ensures the oven is at the correct temperature for an even bake. Next, generously grease a 12-cup muffin tin with non-stick cooking spray. It’s important to note that bran muffins have a tendency to stick to paper liners more than other varieties, so for the best results, I strongly recommend avoiding them if possible and sticking to a well-greased tin.
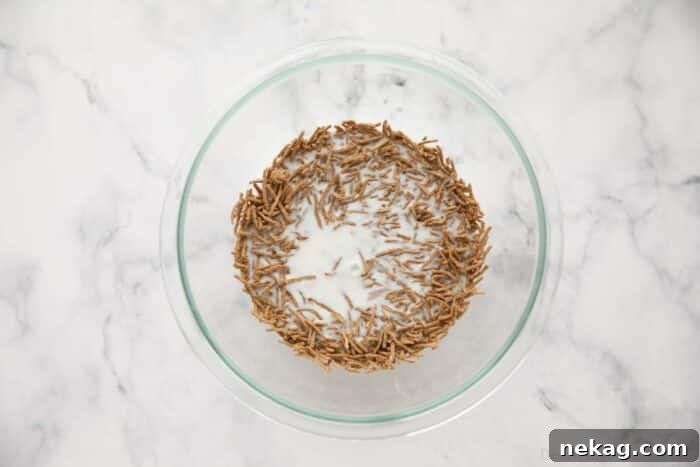
- Soak the Bran Cereal: In a large mixing bowl, combine the 1 1/4 cups of All-Bran Cereal with 1 1/4 cups of buttermilk. Stir them together gently to ensure all the cereal is coated. Set this mixture aside for a crucial 10 minutes. This soaking period allows the bran cereal to fully absorb the buttermilk, softening it and preventing your muffins from becoming dry or gritty. This step is key to achieving that wonderfully moist texture.
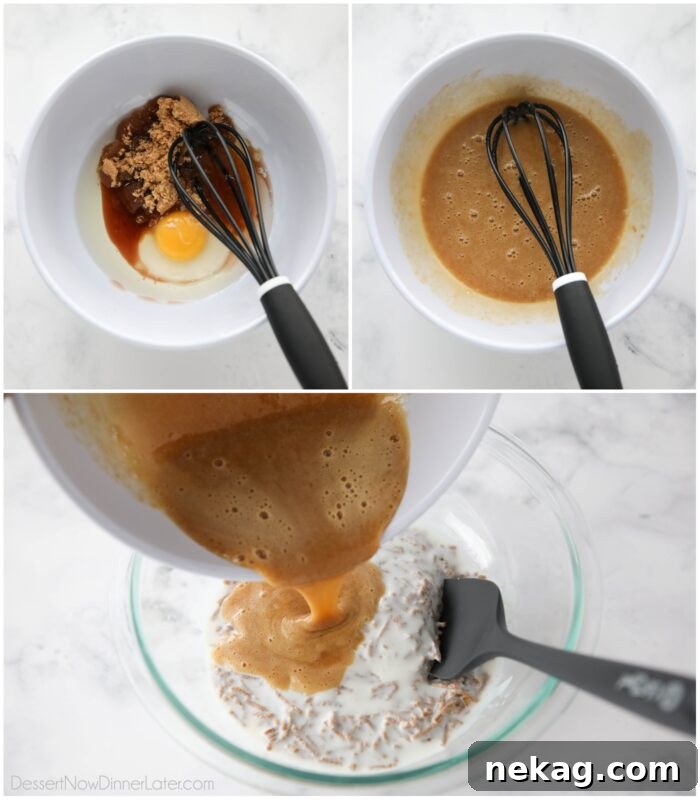
- Combine Wet Ingredients: While the bran soaks, prepare your other wet ingredients. In a separate large bowl, whisk together the 1/2 cup of gently packed light brown sugar, 1/4 cup of oil (canola or vegetable work well), one large egg, and 1 teaspoon of vanilla extract until the mixture is smooth and well combined.
- Integrate Wet with Cereal Mixture: Once the cereal has softened, pour the whisked wet ingredients into the bowl with the bran cereal and buttermilk mixture. Stir gently with a spatula until everything is just combined. Avoid overmixing at this stage.
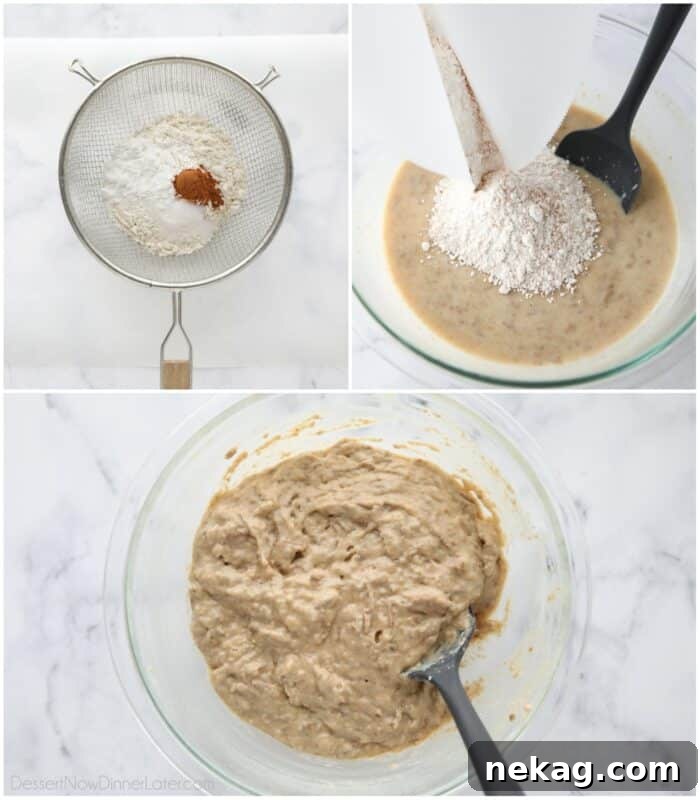
- Sift Dry Ingredients: In a medium bowl, sift together 1 1/4 cups of all-purpose flour, 1 tablespoon of baking powder, 1/2 teaspoon of ground cinnamon, and 1/4 teaspoon of salt. Sifting these dry ingredients is a small but impactful step that aerates the flour, preventing clumps and contributing to a lighter, fluffier muffin texture. If you don’t own a fine mesh sieve, simply whisk these ingredients together vigorously for about 30 seconds to achieve a similar effect.
- Gently Combine Dry and Wet: Add the sifted dry ingredients to the wet ingredients and the softened bran mixture. Stir until just combined. It’s crucial not to overmix the batter; a few lumps are perfectly fine. The batter will be noticeably thick, but don’t worry – you’ll notice it starting to fluff up as the buttermilk reacts with the baking powder, initiating the leavening process.
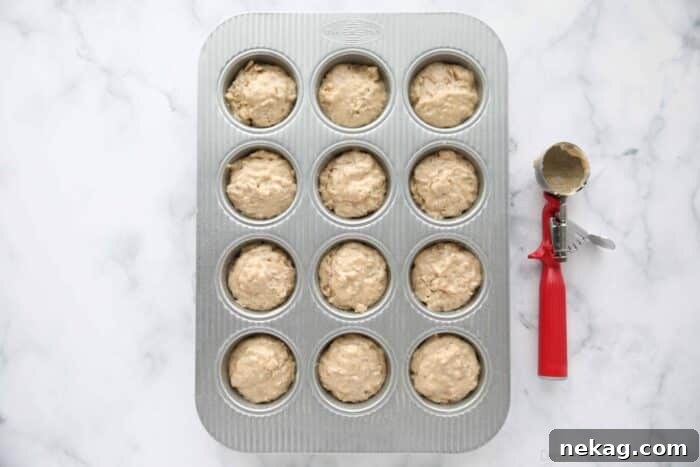
- Fill and Bake: Divide the thick batter evenly among the 12 greased muffin cups. I find that a rounded #24 scoop works perfectly for this. Because the batter is quite thick, you can fill the cavities approximately 3/4 full, or even a little more, without worrying about overflow. Bake in the preheated oven at 400˚F (200˚C) for 14-18 minutes, or until the tops are golden brown and a toothpick inserted into the center of a muffin comes out clean.
- Cooling: Once baked, allow the muffins to cool in the pan for a few minutes. This allows them to set properly before you remove them. Then, carefully transfer the muffins from the pan to a wire rack to cool completely. Cooling on a rack prevents the bottoms from becoming soggy.
Serving Suggestions and Smart Storage Tips
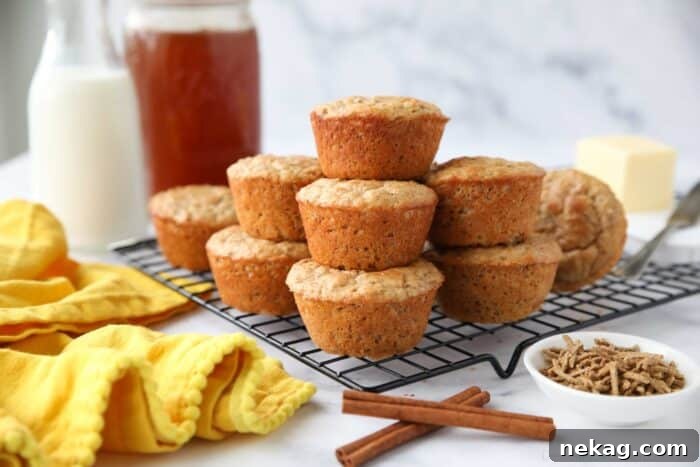
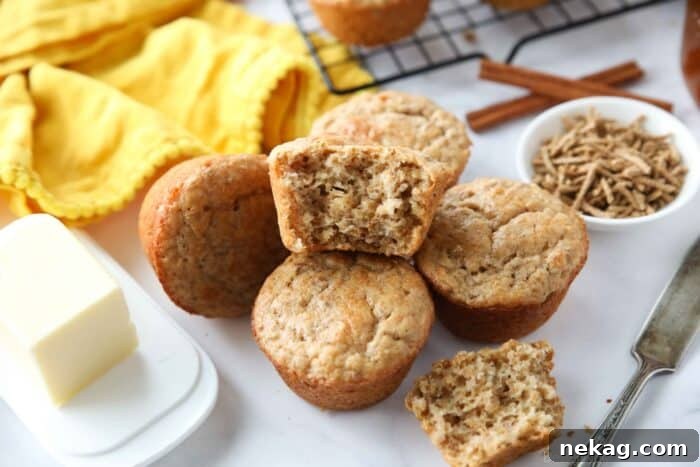
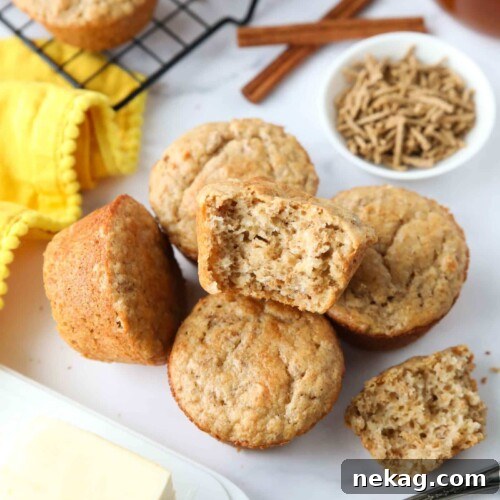
These All Bran Muffins are incredibly versatile and delicious whether enjoyed warm or completely cool. Personally, I find them most enjoyable when served slightly warm; warming them enhances their moistness and brings out their comforting aromas of cinnamon and vanilla.
For optimal freshness, store your baked muffins in an airtight container or a zip-top bag at room temperature for up to 3-4 days. If you want to extend their shelf life, you can individually wrap each muffin in plastic wrap and then refrigerate them for up to 2 weeks. This individual wrapping helps to lock in moisture and prevent them from drying out.
Pro Tip: To refresh leftover muffins and make them taste as if they just came out of the oven, simply pop one in the microwave for 10-15 seconds. The gentle warmth will restore their soft texture and delightful aroma.
To Freeze Bran Muffins for Longer Storage: Allow the muffins to cool completely on a wire rack first. Once thoroughly cooled, place them in a freezer-safe container or a zip-top freezer bag. If stacking layers, use parchment paper to separate them to prevent sticking. They can be safely frozen for up to 2-3 months. When you’re ready to enjoy, thaw them overnight in the refrigerator, or microwave them for 30-40 seconds for a quick treat.
Flexible Baking: Smart Substitutions for Your All Bran Muffins
One of the beauties of home baking is the ability to adapt recipes to suit your dietary needs or what you have on hand. Here are some reliable substitutions you can make for this All Bran Muffins recipe, keeping in mind that any alteration might slightly affect the final texture.
- Oil Alternatives: If you’re looking to reduce fat or simply don’t have oil, applesauce is an excellent substitute. Use 1/4 cup of unsweetened applesauce to replace the oil. A single 4-oz applesauce cup is perfectly equivalent to 1/4 cup. Alternatively, 4 tablespoons of melted butter, cooled slightly, can also be used, which will add a richer flavor.
- Buttermilk Replacement: No buttermilk in the fridge? No problem! You can easily make your own buttermilk substitute. Simply pour 1 1/4 cups of regular milk into a measuring cup, then stir in 2 teaspoons of white vinegar or fresh lemon juice. Let the mixture sit for 5 minutes; it will curdle slightly, indicating it’s ready to use. This DIY version will provide the necessary acidity for a tender crumb.
- Flour Choices: For those who prefer a whole-grain option, you may use wheat flour in place of all-purpose flour. Be aware, however, that while still delicious and nutritious, the muffins will likely be slightly more dense and have a heartier texture than those made with all-purpose flour.
Important Note: Keep in mind that while these substitutions are effective, any alterations may subtly change the muffin texture and flavor. Experiment to find your perfect balance!
Elevate Your Muffins: Exciting Optional Mix-ins
While these All Bran Muffins are wonderfully simple and delicious on their own, they also provide a perfect canvas for your culinary creativity. You can easily add up to 1/2 cup of your favorite mix-ins to the batter to introduce new textures and flavors, making each batch uniquely yours. Here are some highly recommended additions:
- Chocolate Chips: For a touch of indulgence, chocolate chips are always a hit. Mini chocolate chips are particularly recommended as they distribute more evenly throughout the batter, ensuring a delightful chocolatey bite in every part of the muffin. Dark chocolate chips can also add a richer flavor and extra antioxidants.
- Chopped Nuts: Introduce a satisfying crunch and nutty flavor with chopped nuts. Pecans or walnuts are classic choices that pair beautifully with the warm spices in the muffins. For an even deeper flavor, lightly toast the chopped nuts in a dry pan for a few minutes before adding them to the batter.
- Dried Fruit: Enhance the natural sweetness and chewiness of your muffins with dried fruit. Raisins and dried cranberries are popular options. For an extra plump and juicy texture, I highly recommend soaking these dried fruits in hot water for 20-30 minutes before adding them to the batter. Just be sure to drain any excess water thoroughly and pat them dry to prevent them from making the batter too wet. Other options include chopped dried apricots or cherries.
- Citrus Zest: For a bright, fresh flavor, consider adding 1-2 teaspoons of finely grated orange or lemon zest to the batter. It adds a subtle aromatic lift that complements the cinnamon beautifully.
Feel free to experiment with combinations, but remember to keep the total amount of mix-ins to about 1/2 cup to maintain the muffin’s structure and ensure even baking.
Discover More Muffin Recipes You’ll Love
If you’ve enjoyed baking these wholesome All Bran Muffins, you’ll be delighted to explore other delicious muffin recipes from our collection:
- Almond Poppy Seed Muffins
- Zucchini Chocolate Muffins
- Banana Crumb Muffins
- Pumpkin Cream Cheese Muffins
- High Altitude Blueberry Muffins
- Coffee Cake Muffins
- Fresh Cranberry Orange Muffins
- Apple Cinnamon Muffins with Crumb Topping
- Banana Chocolate Chip Muffins with Sour Cream
If you try this recipe, we’d love to hear from you! Please rate and review it in the comments below. Your feedback helps us and other bakers. THANKS!
All Bran Muffins Recipe
Pin Recipe
Ingredients
- 1 ¼ cups (77 g) Kellogg’s All-Bran Cereal
- 1 ¼ cups (296 ml) buttermilk
- ½ cup (100 g) light brown sugar, gently packed
- ¼ cup (59 ml) oil (canola/vegetable)
- 1 large egg
- 1 tsp vanilla extract
- 1 ¼ cups (150 g) all-purpose flour (stir, spoon & level)
- 1 Tbsp baking powder
- ½ tsp ground cinnamon
- ¼ tsp salt
Equipment
- Fine Mesh Strainer/Sieve
- Silicone Spatula Set
- Pyrex Glass Bowl Set of 3
- Nylon Whisk
- USA Bakeware 12-cup Muffin or Cupcake Pan
- #24 scoop
Instructions
- Preheat the oven to 400℉ (200°C) and grease a muffin tin with non-stick cooking spray. NOTE: Bran muffins tend to stick to paper liners more, so avoid using them, if possible.
- Combine the bran cereal and buttermilk in a large bowl. Set aside for 10 minutes to allow the cereal to absorb the liquid and soften.
- In a large bowl, whisk together the brown sugar, oil, egg, and vanilla.
- Add the wet ingredients to the cereal mixture and stir to combine.
- Sift the flour, baking powder, cinnamon, and salt into a medium bowl. NOTE: Sifting the dry ingredients creates lighter muffins. If you don’t own a fine mesh sieve, whisk these ingredients together well.
- Add the dry ingredients to the wet ingredients and stir until just combined. NOTE: The batter will be thick, but it will start to fluff up from the buttermilk reacting to the baking powder.
- Divide the batter evenly into 12 muffin cups. NOTE: I use a rounded #24 scoop. Because this batter is thicker, you can fill the cavities about 3/4 full.
- Bake at 400℉ (200°C) for 14-18 minutes or until golden brown and a toothpick inserted into the center of the muffins comes out clean. Allow the muffins to cool in the pan for a few minutes, then remove them from the pan to cool completely on a wire rack.
Notes
- Store muffins in an airtight container or zip-top bag at room temperature for up to 3-4 days. Alternatively, you can individually wrap the muffins and refrigerate them for up to 2 weeks.
- TIP: Nuke leftover muffins in the microwave for 10-15 seconds to make them extra fresh tasting.
- To Freeze Bran Muffins: Cool the muffins completely. Then place them in a freezer-safe container or zip-top bag with parchment paper separating any layers. Freeze for up to 2-3 months. Thaw overnight or microwave for 30-40 seconds.
- Substitute for Buttermilk: Use regular milk mixed with 2 tsp of white vinegar or lemon juice. Let the mixture sit for 5 minutes before using.
- Substitute for Oil: Use ¼ cup applesauce or one 4-oz applesauce cup. You could also use 4 Tbsp of melted butter, cooled slightly.
- Optional Mix-Ins: Chocolate chips (mini are best), chopped nuts (pecans, walnuts), or dried fruit (raisins, cranberries). Add up to ½ cup total mix-ins.
Nutrition
Calories: 163 kcal |
Carbohydrates: 25g |
Protein: 3g |
Fat: 6g |
Saturated Fat: 1g |
Polyunsaturated Fat: 2g |
Monounsaturated Fat: 3g |
Trans Fat: 0.02g |
Cholesterol: 16mg |
Sodium: 205mg |
Potassium: 132mg |
Fiber: 2g |
Sugar: 11g |
Vitamin A: 174IU |
Vitamin C: 1mg |
Calcium: 125mg |
Iron: 2mg
Disclaimer: Nutritional values were calculated using a third-party tool and are provided as an estimation only.
Sharing this recipe with a link is both encouraged and appreciated. Copying/pasting and/or screenshots of full recipes to any social media is strictly prohibited. Content and photographs are copyright protected.
Did you make this?
Don’t forget to leave a rating below and make sure to follow on Pinterest and Instagram for more!