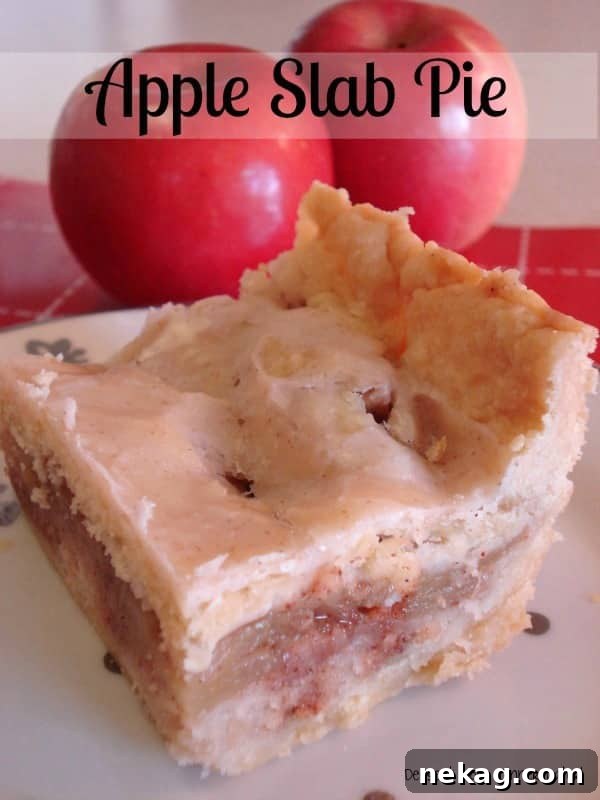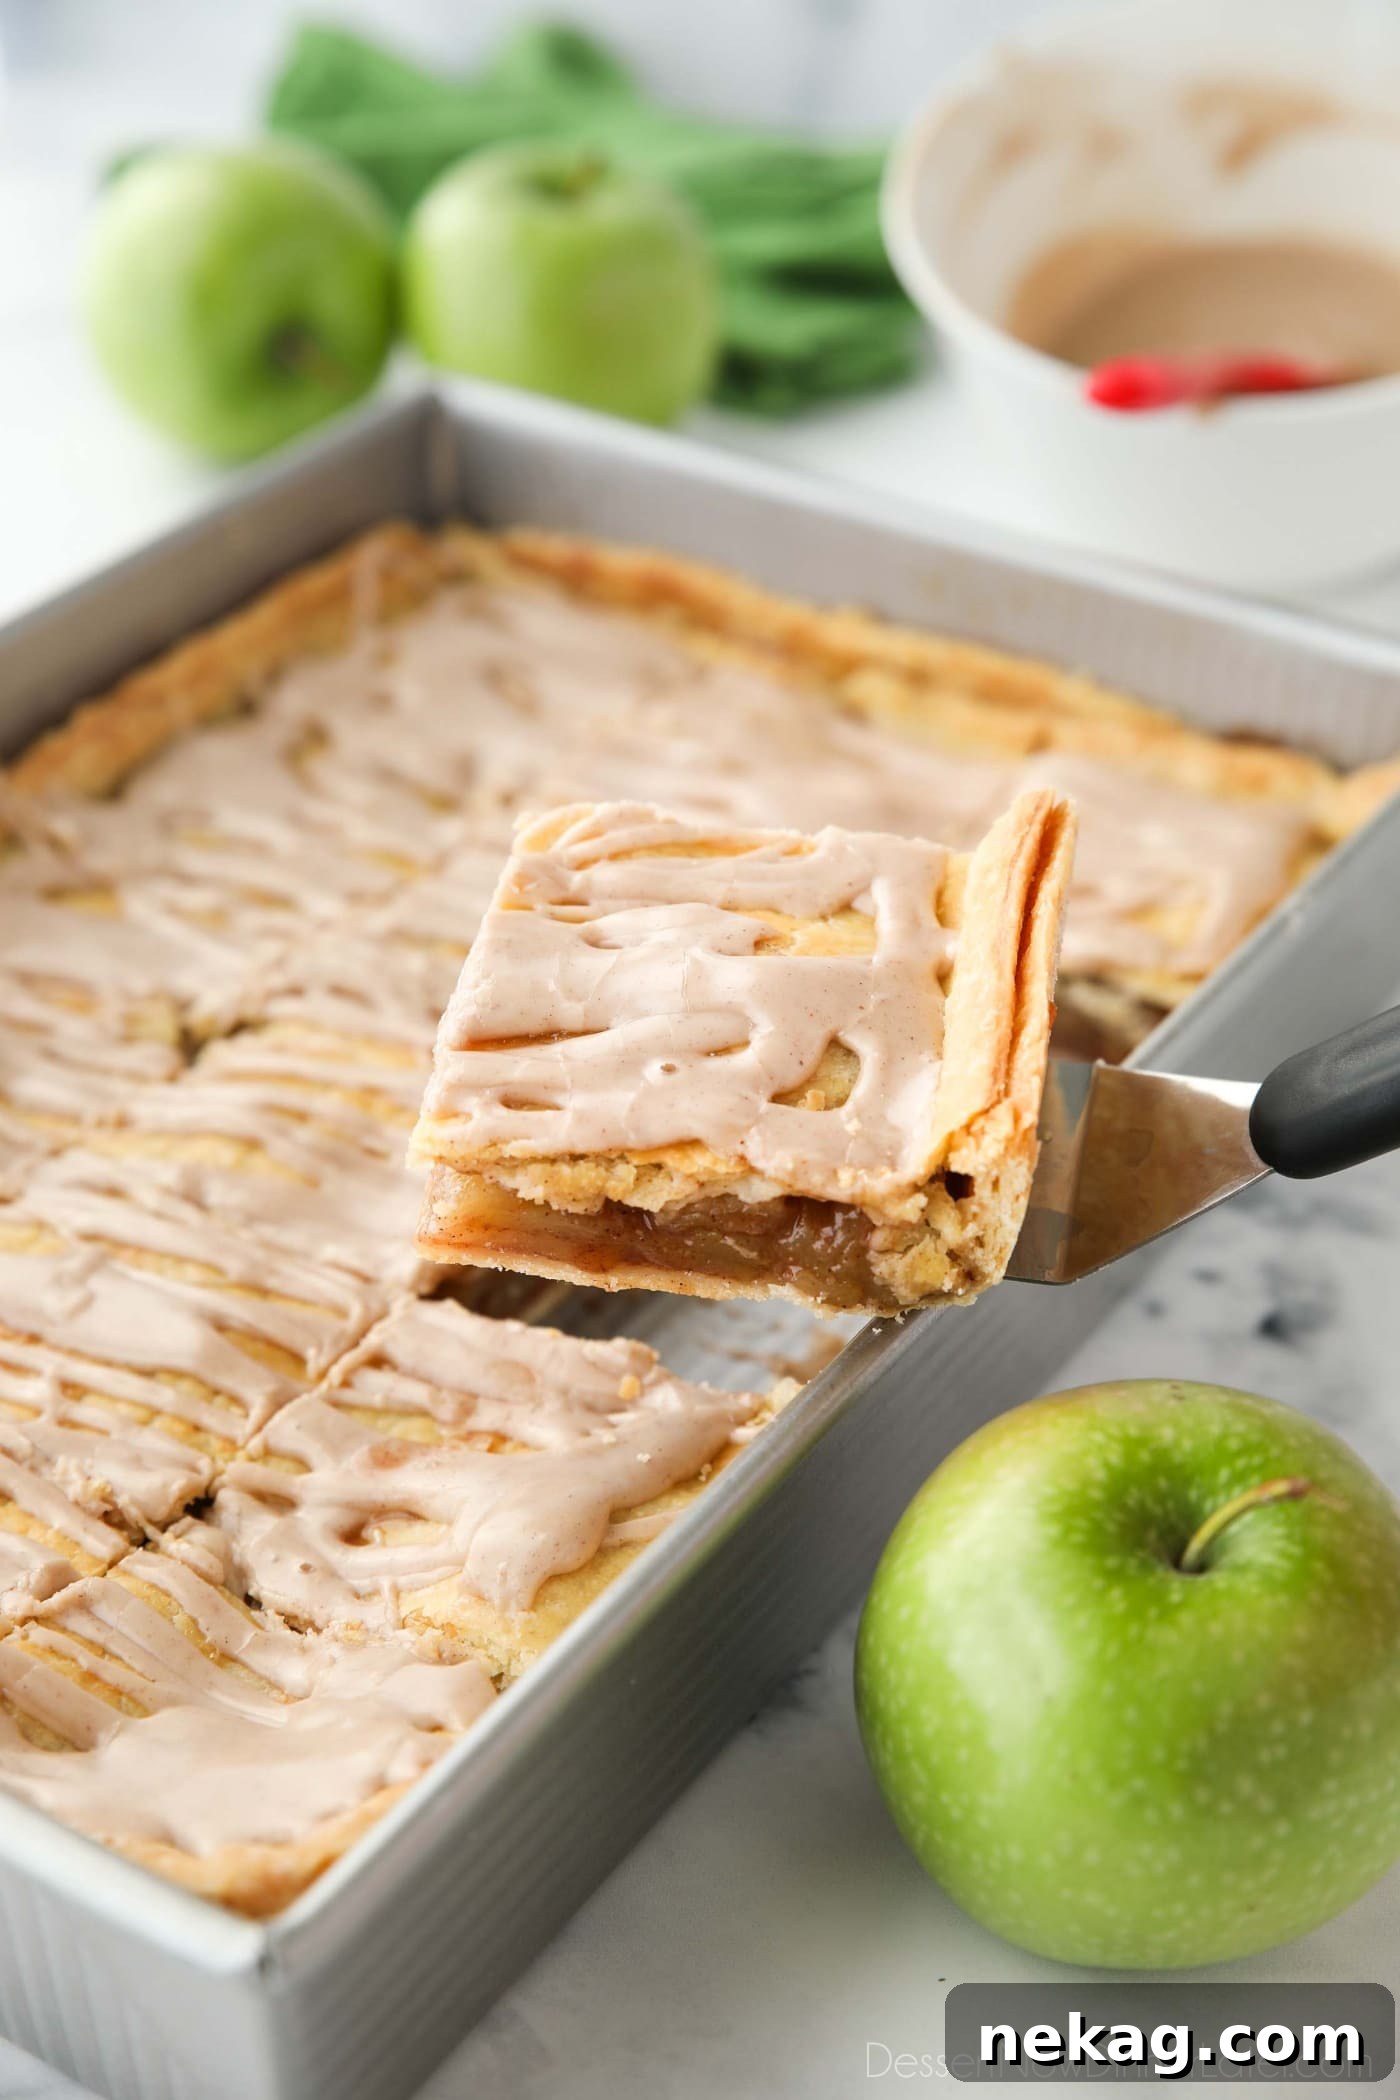
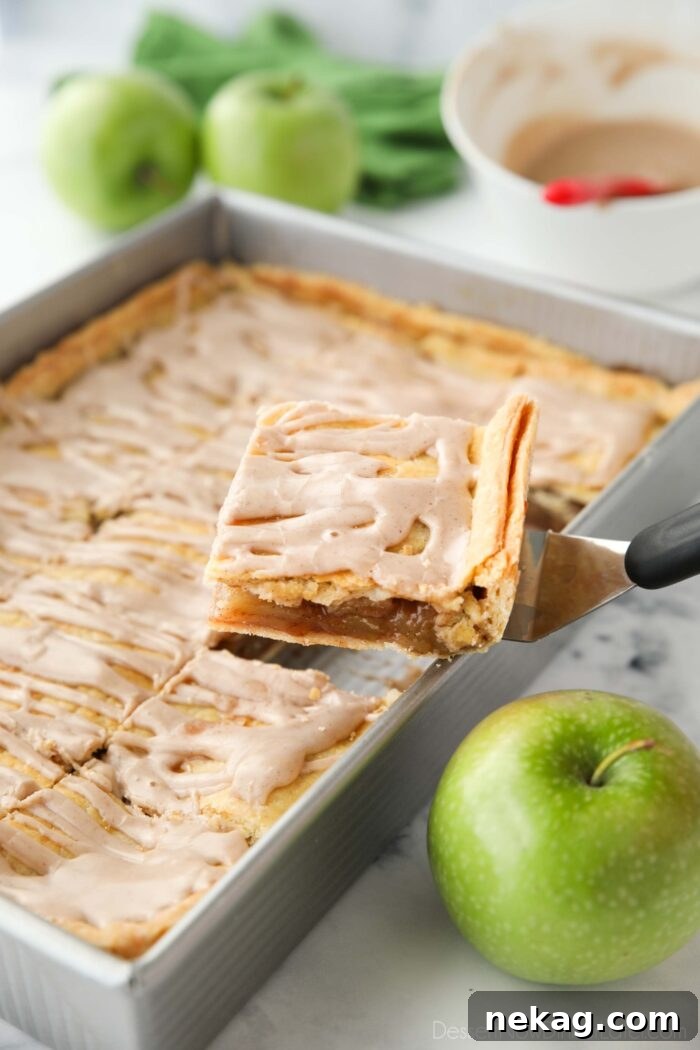
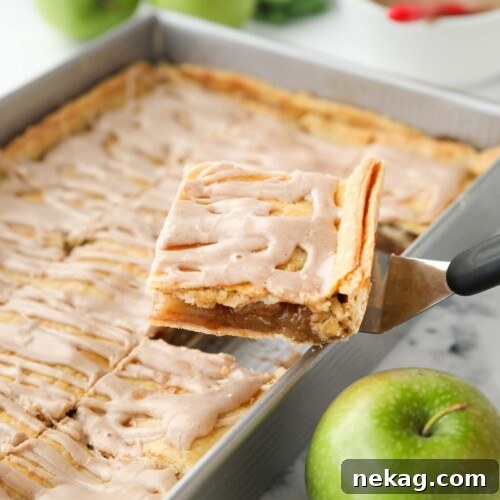
Thanksgiving gatherings often call for a dessert that’s as grand as the occasion, and nothing quite fits the bill like a homemade Apple Slab Pie. Imagine a generously sized, flaky pastry crust brimming with warm, cinnamon-spiced apples, all finished with a luscious maple glaze. This isn’t just any apple pie; these delectable apple pie bars offer a wonderful twist on the classic, designed specifically to serve a hungry crowd. Prepare for your guests to express immense gratitude for every single, scrumptious bite of this festive treat.
Looking for more crowd-pleasing slab pie recipes? Explore our other delightful variations: try our Cherry Slab Pie Bars, indulge in the rich flavors of our Pecan Pie Bars, or enjoy the vibrant taste of our Blueberry Pie Bars.
What Exactly is an Apple Slab Pie?
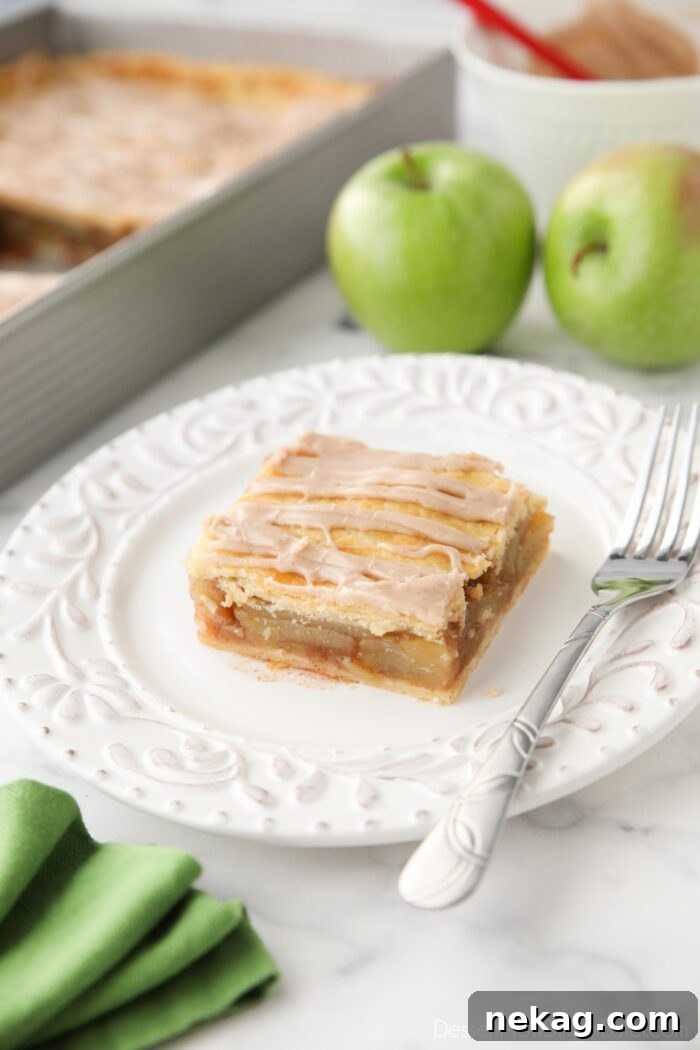
A slab pie is a brilliant culinary innovation – essentially, a supersized, rectangular version of your beloved traditional round pie. Unlike its circular counterpart, a slab pie is baked in a rectangular pan, typically a 9×13-inch baking dish (though larger sheet pans can also be used for even bigger gatherings). This rectangular format significantly increases the surface area, allowing you to prepare a much larger quantity of dessert with less effort than baking multiple individual pies.
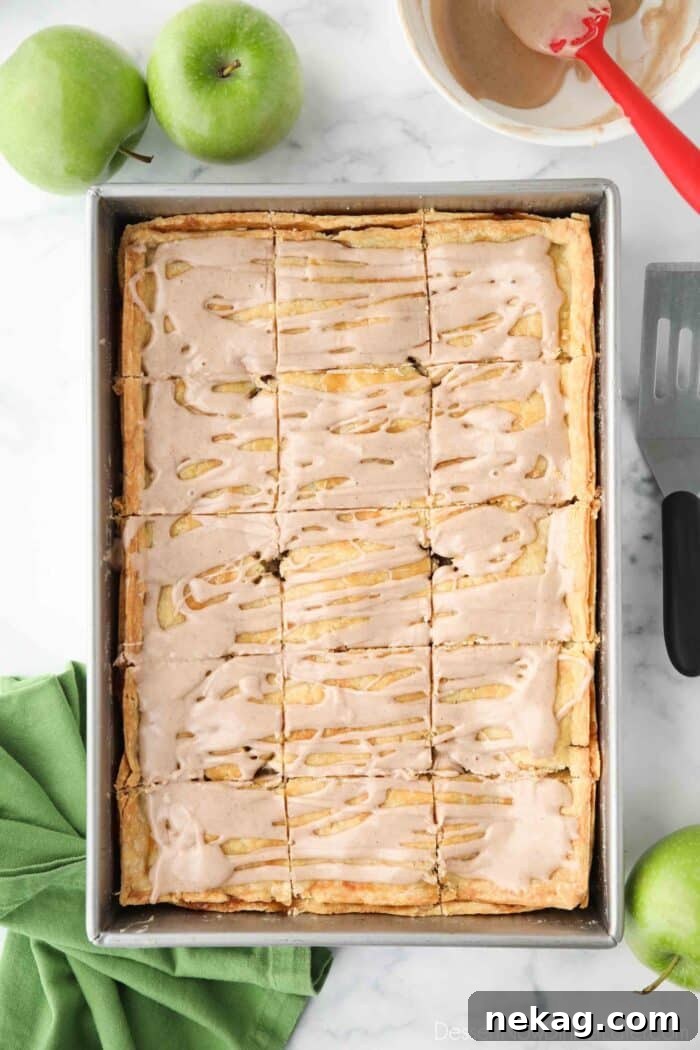
The primary advantage of this design is its incredible efficiency in serving. When cut into neat squares or rectangles, a slab pie can effortlessly serve approximately twice as many people compared to the wedge-shaped slices from a standard round pie. This makes it an ideal choice for large family reunions, holiday feasts like Thanksgiving, potlucks, or any occasion where you need to cater to many guests without spending hours on individual desserts.
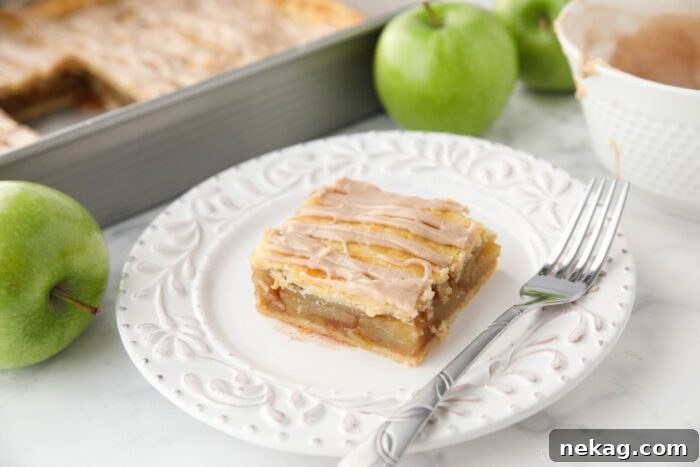
Our Apple Slab Pie, also affectionately known as apple pie bars, is the ultimate solution for ensuring there’s enough delicious apple pie for everyone at your Thanksgiving table. Beyond its generous yield, the smaller, manageable pieces also encourage guests to sample a variety of sweets from the dessert spread, without feeling overly full from a single, large slice of pie.
Why You’ll Fall in Love with This Apple Slab Pie Recipe
Beyond its unmatched capacity to feed a hungry crowd, this Apple Slab Pie stands out for several compelling reasons that make it a favorite among home bakers and dessert enthusiasts alike:
- Effortless Rustic Charm: Say goodbye to the intricate art of crimping pie edges or striving for a picture-perfect presentation. The beauty of a slab pie lies in its relaxed, rustic simplicity. Just assemble the components, bake, and let its inherent charm shine through. It’s proof that homemade deliciousness doesn’t always require perfection.
- Remarkable Versatility: This recipe is incredibly adaptable, allowing you to customize it to your heart’s content. While a delicate maple glaze is featured here, feel free to experiment with various toppings. Consider a simple sprinkle of cinnamon-sugar for a classic touch, a crunchy streusel topping for added texture, or even an elaborate lattice crust if you’re feeling ambitious. You can also vary the spices in the filling or add a splash of bourbon for an adult twist. Serve it warm with a scoop of vanilla bean ice cream or a drizzle of caramel sauce for an elevated experience.
- Outstanding Make-Ahead Convenience: Holiday baking can be stressful, especially with limited oven space. This Apple Slab Pie is a fantastic make-ahead dessert. You can easily bake it a day in advance, allowing you to save your precious oven for roasting the turkey and preparing other savory fixings on Thanksgiving day. This flexibility helps streamline your holiday meal preparation, ensuring a stress-free celebration.
- Easy Transportation: Need to bring a dessert to a potluck, family gathering, or school event? The sturdy rectangular shape of a slab pie makes it remarkably easy to transport. No more worrying about delicate pie crusts or unstable round dishes. Just cover the pan, and you’re good to go!
- Perfect for Any Occasion: While Thanksgiving is a perfect fit, Apple Slab Pie is equally at home at summer barbecues, birthday parties, or casual weeknight dinners. Its crowd-pleasing nature and customizable options make it suitable for any festive occasion or a simple family treat.
Mastering the Art of Apple Slab Pie: A Step-by-Step Guide
Crafting a perfect Apple Slab Pie begins with a robust and flavorful crust, followed by a juicy, perfectly spiced apple filling. Here’s how to achieve that delightful balance:
Starting with the Perfect Pie Crust
The foundation of any great pie is its crust. While it’s certainly possible to use store-bought pie crust for convenience, especially if you’re short on time, making your own offers superior flavor and texture. For a slab pie, which requires larger sheets of dough, homemade crust also provides more flexibility. It’s easier to divide homemade dough into the specific 60/40 ratio needed for the bottom and top crusts, ensuring a generous base and a complementary top layer. If you prefer a different topping, an oat crumb streusel can be a delicious alternative to a traditional top crust.
For this particular recipe, I highly recommend using my Crisco pie crust recipe over an all-butter one. While a double or triple batch of all-butter pie crust could work, Crisco-based crusts are generally more forgiving, easier to handle, and less prone to shrinking during baking, which is a significant advantage when working with a large slab pie. The Crisco crust maintains its shape beautifully and results in an incredibly flaky, tender texture every time.
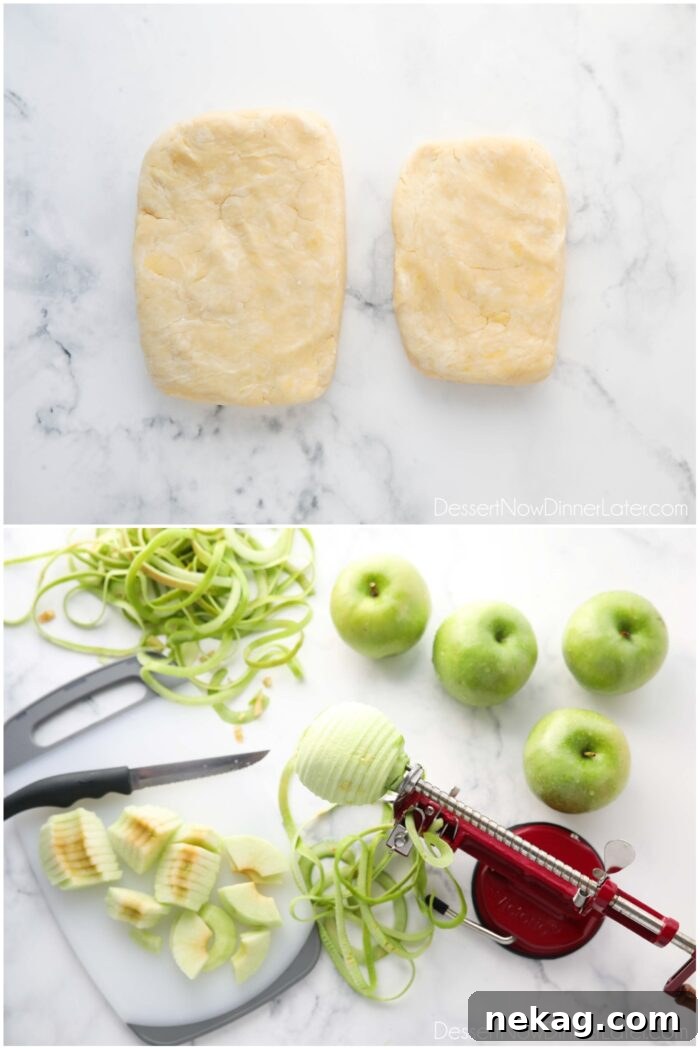
- Begin by preparing your chosen pie crust recipe. Once the dough comes together, divide it into two portions, roughly at a 60/40 ratio. The larger portion will be for the bottom crust, and the slightly smaller one for the top. Gently shape each portion into a rectangular disc, wrap them tightly in plastic wrap, and chill them in the refrigerator for at least 30 minutes. This chilling process is crucial; it allows the gluten to relax, making the dough easier to roll out, and keeps the fat solid, which contributes to a flaky crust.
Preparing the Apple Filling
- Next, turn your attention to the star of the show: the apples. Begin by peeling, coring, and slicing a generous amount of fresh apples. For maximum efficiency, I highly recommend utilizing an apple peeler, corer, and slicer tool (affiliate link). This handy gadget streamlines the process, transforming what could be a tedious task into a quick and enjoyable one. For the best flavor and texture, a blend of apples is often preferred. Granny Smith apples offer a tartness that beautifully balances the sweetness of the other ingredients, while Honeycrisp or Fuji apples add a lovely sweetness and retain their shape well during baking. Aim for slices about 1/4 inch thick to ensure they cook evenly and become tender.
Crafting the Perfect Filling and Assembling Your Slab Pie
With your crust chilling and apples prepped, it’s time to bring the flavors together and assemble your magnificent slab pie.
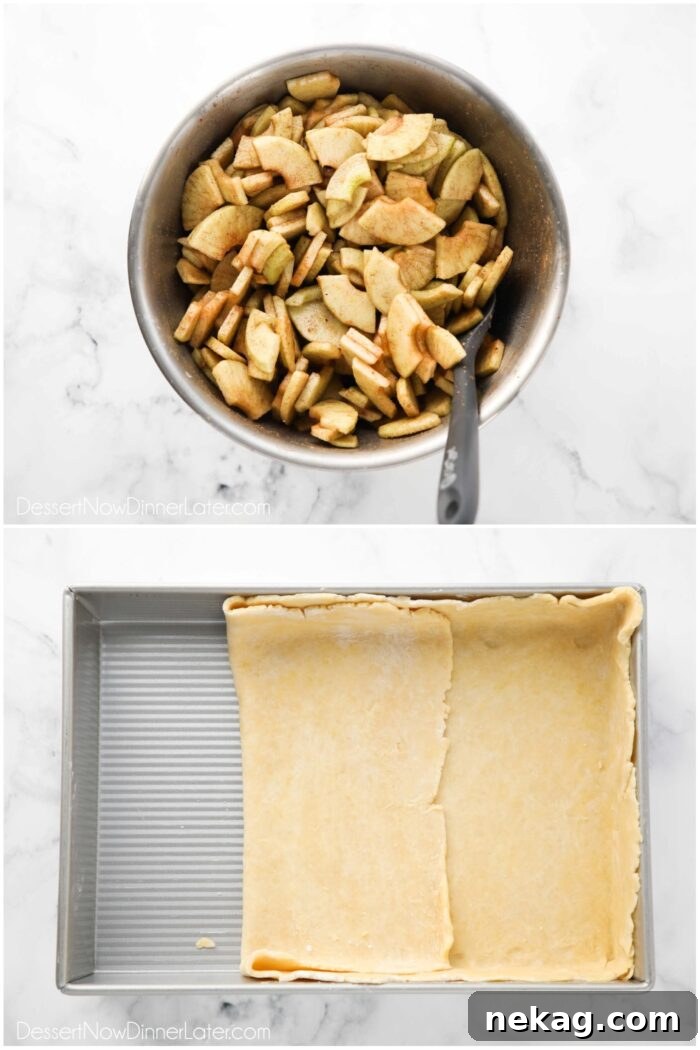
- In a large mixing bowl, combine the prepared apple slices with light brown sugar, granulated sugar, cornstarch, fresh lemon juice, ground cinnamon, and a pinch of ground nutmeg. Toss gently to ensure all the apples are thoroughly coated with the sweet and spiced mixture. The lemon juice is crucial here, not only adding a bright counterpoint to the sweetness but also preventing the apples from browning. Let the apples macerate at room temperature while you proceed with the next steps. This maceration process allows the sugars to draw out some of the apple’s natural juices, creating a rich, flavorful syrup and preventing a watery filling later on.
- Preheat your oven to 350 degrees Fahrenheit (175 degrees Celsius). This ensures the oven is at the correct temperature when your pie is ready to bake, contributing to an even cook.
- Retrieve the larger portion of chilled pie crust from the refrigerator. On a lightly floured surface, roll it out into a rectangle approximately 12×16 inches and about 1/8-inch thick. Carefully transfer this rolled-out crust to your 9×13-inch baking pan, gently pressing it into the bottom and up the sides. Ensure there’s a slight overhang around the edges. Return the pan with the fitted crust to the refrigerator while you prepare the top crust and finalize the filling. Keeping the crust cold prevents it from becoming too soft and helps maintain its flakiness.
Finishing Touches: Topping and Baking Your Apple Slab Pie
The moment of truth is approaching! With the filling ready and the bottom crust in place, it’s time to seal in all that deliciousness and send your slab pie to the oven.
- Take the smaller portion of chilled pie crust. On a lightly floured surface, roll it out into a rectangle approximately 10×14 inches and 1/8-inch thick. Use a knife or pastry wheel to trim any ragged edges, creating a neat rectangle that will fit perfectly over your apple filling. This step also minimizes excess crust, ensuring an optimal crust-to-filling ratio.
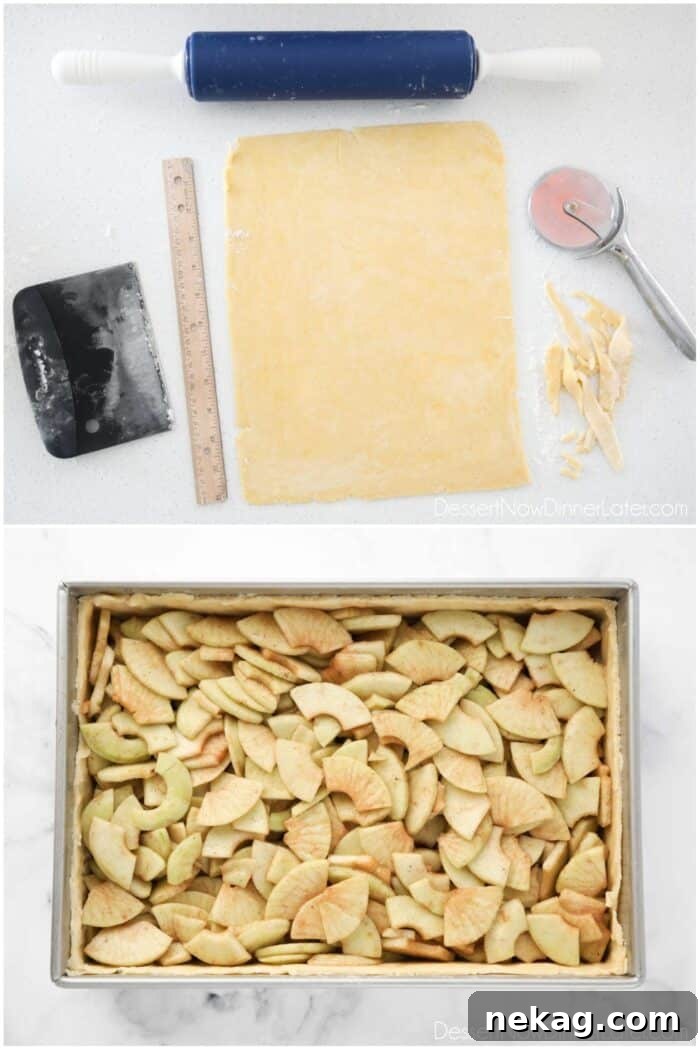
- Remove the baking pan, with its bottom crust, from the refrigerator. Pour the macerated apples and any accumulated liquid evenly over the bottom crust. Spread the filling from edge to edge, ensuring every bite will be full of apple goodness.
- To create a strong seal, lightly dab the edges of the bottom crust with a small amount of water or a simple egg wash (prepared by whisking together 1 large egg with 1 tablespoon of cold water). Then, carefully place the rolled-out top crust over the apple filling. Press the edges of the top crust firmly against the moistened edges of the bottom crust, pinching them together to create a tight seal. You can crimp the edges decoratively or simply press them with a fork for a neat finish.
- For a golden, appealing finish and to aid in proper ventilation, brush the entire top surface of the pie crust with a thin, even layer of the egg wash. This promotes a beautiful golden-brown color and a slightly crispy texture. Finally, use a sharp knife to cut several slits into the top crust. These vents are essential, allowing steam to escape during baking, preventing the crust from puffing up excessively and ensuring the apples cook thoroughly.
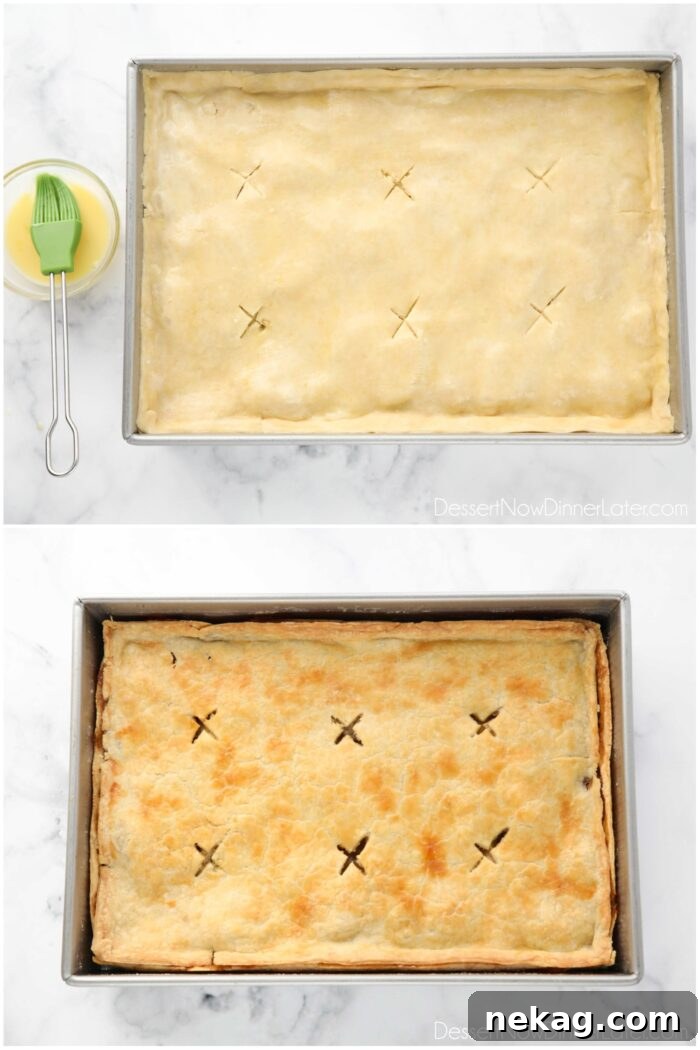
- Place the apple slab pie in your preheated 350˚F (175˚C) oven. Bake for approximately 65-70 minutes, or until the crust is a rich, golden brown and you see the filling bubbling vigorously in the center of the pie, not just around the edges. The bubbling indicates that the juices are thickening properly. To confirm the apples are tender, you can gently insert a fork through one of the slits in the crust. If it pierces the apples with ease, your pie is perfectly baked.
The Irresistible Maple Glaze
While a traditional apple pie often benefits from a simple sprinkle of cinnamon-sugar over an egg-washed crust before baking, for these delightful apple pie bars, adding a glaze *after* baking elevates the experience. Much like the sweet finish on my apple hand pies, a post-bake glaze adds an extra layer of sweetness and a touch of sophisticated flavor. For this particular slab pie, I’ve chosen a delicious cinnamon maple glaze, which perfectly complements the warm apple spices and flaky crust.
- To prepare the glaze, combine powdered sugar, pure maple syrup, ground cinnamon, and a tiny pinch of salt in a medium bowl. Whisk these ingredients together until smooth. The consistency should be thick but pourable. If the glaze is too thick, add additional water or milk, one teaspoon at a time, until it reaches your desired drizzling consistency. The quality of your maple syrup will impact the depth of flavor, so opt for pure maple syrup for the best results.
Flavor Alternatives for Your Glaze: If you’re looking to experiment or don’t have maple syrup on hand, there are fantastic alternatives! You can swap the pure maple syrup for apple cider, which will amplify the apple flavor in the pie, or use thawed frozen apple juice concentrate for a similar effect. Start with about 1/4 cup of the liquid and adjust as needed. Another wonderful option would be to prepare my cinnamon brown sugar glaze, which offers a warm, caramelized flavor profile that would also pair beautifully with the apples.
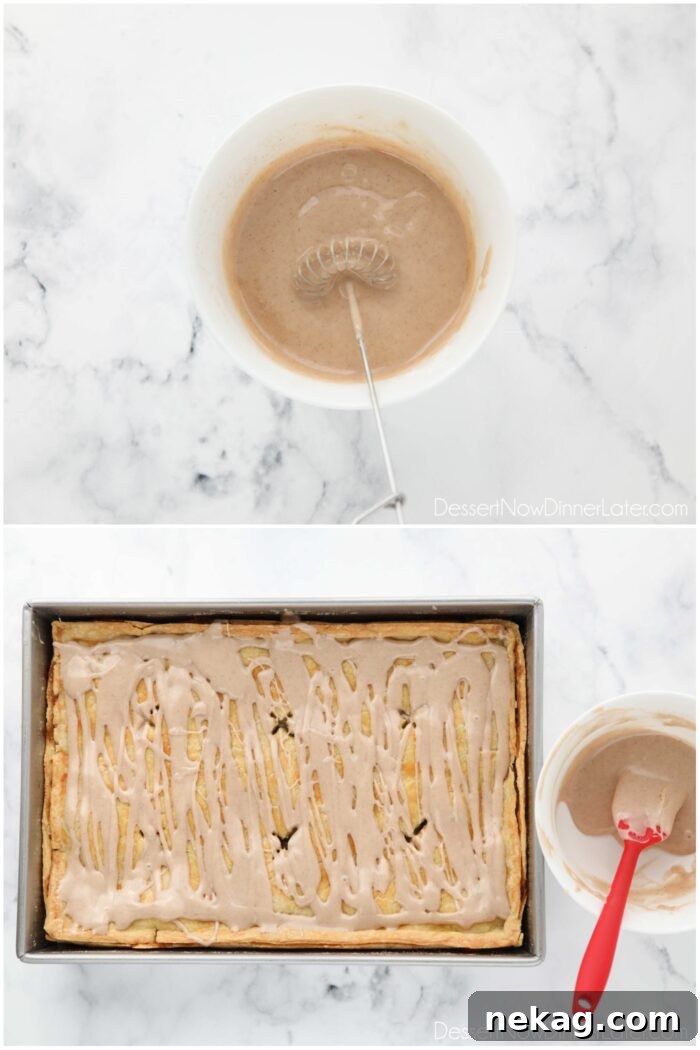
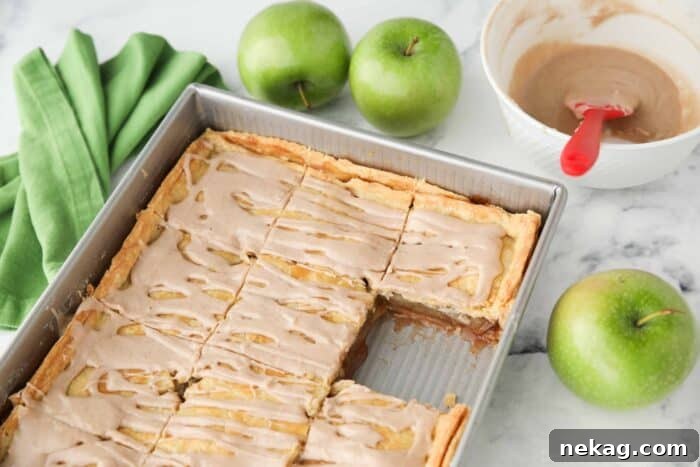
- Once your Apple Slab Pie has completely cooled, generously drizzle the prepared glaze over the entire surface. Allowing the pie to cool thoroughly is crucial; otherwise, the glaze will simply melt and absorb into the crust, rather than setting into a beautiful, opaque layer. Give the glaze ample time to set before slicing the pie into squares. This ensures clean cuts and prevents the glaze from smearing, making for a truly impressive presentation of your homemade apple pie bars.
Essential Tools for Baking the Best Apple Slab Pie
Having the right kitchen tools can make a significant difference in the ease and success of your baking endeavors. For crafting this delicious Apple Slab Pie, these helpful items are highly recommended:
- Pastry Blender: (affiliate) An absolute game-changer for pie crusts, a pastry blender quickly and efficiently cuts cold shortening or butter into flour. This creates those essential pea-sized pieces of fat that are key to achieving a wonderfully flaky and tender pie crust, without overworking the dough with your warm hands.
- 6-Quart Steel Mixing Bowl: A large, sturdy mixing bowl is indispensable for combining all the pie crust ingredients and, more importantly, for tossing the generous quantity of apple slices with the sugar and spices. Its ample size prevents spills and allows for thorough mixing.
- Rolling Pin: (affiliate) A quality rolling pin is essential for evenly rolling out your pie dough to the precise rectangular dimensions and consistent thickness required for a slab pie. It ensures uniform coverage of your baking pan and a balanced crust in every bite.
- Apple Peeler, Corer, Slicer: (affiliate) This specialized tool is a tremendous time-saver when preparing a large volume of apples. It peels, cores, and slices apples quickly and uniformly, ensuring even cooking and consistent texture throughout your pie filling.
- 9×13-inch Baking Pan: (affiliate) The star of this recipe, a sturdy 9×13-inch baking pan (like the one shown in this post), is crucial for achieving the signature rectangular shape and generous portions of a slab pie. Its raised edges are perfect for containing the abundant apple filling and providing the structural integrity for your apple pie bars.
- Pastry Brush: (affiliate) A pastry brush is incredibly useful for applying the egg wash to the top crust. This crucial step contributes to that beautiful golden-brown color and slightly crispy, flaky finish that makes your slab pie truly irresistible.
Expert Recipe Tips & Frequently Asked Questions
Proper storage is key to enjoying your delicious Apple Slab Pie for days to come. Store any leftover pie directly in its baking pan, ensuring it’s tightly covered with plastic wrap or aluminum foil to prevent it from drying out. Alternatively, you can transfer slices to an airtight container. At room temperature, the pie will stay fresh for 3-4 days. For extended freshness, you can refrigerate it for up to 1 week. If you’re looking for even longer storage, apple slab pie freezes exceptionally well. Simply ensure it’s thoroughly cooled and then wrapped securely in multiple layers of plastic wrap and foil to prevent freezer burn before freezing for up to 2-3 months. Thaw in the refrigerator before serving or reheating.
Indeed, you have a variety of apples to choose from, and often, a mix yields the best results. Popular choices for baking include firm, slightly tart apples like Granny Smith, which hold their shape well and provide a good balance to the sweetness of the filling. Sweet apples like Honeycrisp, Fuji, or Braeburn are also excellent choices, offering a delightful flavor and texture. For a complex flavor profile, consider using a combination of sweet and tart varieties. Remember to adjust the amount of sugar added to the filling based on the inherent sweetness of the apples you select to achieve your preferred taste.
A soggy bottom crust is a common concern with fruit pies, but it’s easily avoidable with a few tricks. One effective method is to sprinkle a thin layer of plain panko bread crumbs, crushed cornflakes, or even finely crushed gingersnap cookies directly onto the bottom pie crust before adding the apple filling. These absorb any excess moisture released by the apples during baking. Another crucial step is to ensure you properly macerate the apples and, if a significant amount of liquid collects, drain any excessive juice from the apple filling mixture before placing it into the crust. Additionally, make sure your oven is preheated to the correct temperature, and bake until the bottom crust is golden and firm.
While the assembly of the pie can be done ahead of time, it’s generally best to bake the pie fully once it has been assembled. This is because raw apples will continue to release liquid over time, which can lead to a soggy crust if left unbaked for too long. However, you can absolutely bake the entire pie a day in advance if needed for holiday planning. Simply allow it to cool completely at room temperature, then cover it tightly until you’re ready to serve. You can gently rewarm it in a low oven (around 250°F / 120°C) for about 15-20 minutes before serving, if desired, to bring out those warm, comforting aromas.
Yes, you can certainly use store-bought pie crusts for convenience, especially if you’re looking to save time. However, a standard package of store-bought pie crusts typically contains two round crusts, which isn’t enough for a large rectangular slab pie. You would likely need to purchase at least two boxes (totaling four crusts) and carefully combine and roll together two crusts for each rectangle (one for the bottom layer and one for the top). This requires a bit of gentle handling to ensure the seams are well-sealed and the crust remains flaky. Using homemade crust, as outlined in this recipe, gives you more control over the size and integrity of your dough.
If You Make This Recipe, Please Rate and Review it in the Comments Below. THANKS!
Apple Slab Pie
Ingredients
Crust
- 3 cups (360 g) all-purpose flour (stir, spoon, & level)
- 1 tsp salt
- 1 cup (189 g) butter flavored Crisco shortening
- 1 large egg
- 1 Tbsp white vinegar
- 5 Tbsp cold ice water, or more, if needed
Filling
- 8 cups (747 g) Granny Smith apples, peeled, cored, and sliced (about 3.5lbs or roughly 8 apples depending on size)
- ½ cup (100 g) light brown sugar, gently packed
- ¼ cup (50 g) granulated sugar
- 2 Tbsp cornstarch
- 1 Tbsp lemon juice
- 2 tsp ground cinnamon
- ¼ tsp ground nutmeg
Egg Wash
- 1 large egg
- 1 Tbsp cold water
Glaze
- 1½ cups (180 g) powdered sugar
- ⅓ cup (80 ml) pure maple syrup, See Notes
- ½ tsp ground cinnamon
- 1 pinch salt
- 1-2 tsp water or milk, if needed, to thin the glaze
Equipment
- Pastry Blender
- 6-Quart Steel Mixing Bowl
- Rolling Pin
- Apple Peeler, Corer, Slicer
- 9×13-inch Pan
- Silicone Pastry Brush
Instructions
- CRUST: Combine flour and salt in a large bowl. Stir well. Cut in shortening with a pastry blender until the mixture resembles coarse crumbs with some pea-sized pieces of shortening remaining. In a separate small bowl, whisk together the egg, white vinegar, and 5 tablespoons of ice-cold water. Gradually add the wet ingredients to the flour mixture, stirring gently until all ingredients are just incorporated and a cohesive dough forms. Add additional cold water, one tablespoon at a time, only if needed, to bring the dough together without making it sticky.
- Separate the dough into two pieces, with one slightly larger than the other (approximately a 60% and 40% split). Gently shape each portion into a rectangular disc, then wrap tightly in plastic wrap. Place both wrapped dough portions in the fridge to chill for at least 30 minutes while you prepare the apples.
- FILLING: Peel, core, and slice the apples into uniform 1/4-inch slices. Place the prepared apples in a large bowl. Add the light brown sugar, granulated sugar, cornstarch, lemon juice, ground cinnamon, and ground nutmeg. Toss gently until the apples are thoroughly coated. Allow the apples to macerate at room temperature during the subsequent steps; this helps draw out juices and create a richer filling.
- Preheat your oven to 350°F (175°C).
- Remove the larger pie crust portion from the fridge. On a lightly floured surface, roll it out into a rectangle approximately 12×16 inches and about 1/8-inch thick. Carefully fit the crust into the bottom and up the sides of your 9×13-inch baking pan, allowing a slight overhang. Place the pan back in the fridge to keep the crust cold.
- Roll the smaller pie crust portion into a rectangle approximately 10×14 inches and 1/8-inch thick. Trim off any ragged edges to create clean lines and minimize excess crust.
- Retrieve the pan with the bottom crust from the fridge. Pour the apple filling, including any accumulated liquid, evenly into the bottom crust. Spread the apples to cover the entire surface inside the crust.
- Lightly dab the edges of the bottom crust with water or a prepared egg wash (whisk 1 large egg with 1 tablespoon of cold water). Carefully place the top crust over the apples, aligning the edges. Pinch the seams of the two crusts together firmly to seal the pie. You can create a decorative edge or simply press with a fork.
- Brush the top of the pie crust with a thin, even layer of the egg wash for a beautiful golden-brown finish. Then, use a sharp knife to cut several slits into the top crust. These vents allow steam to escape during baking, preventing the crust from becoming soggy.
- Bake the apple slab pie in the preheated oven at 350°F (175°C) for 65-70 minutes, or until the crust is golden brown and the filling is visibly bubbling thickly in the center (not just around the edges). You can check for apple tenderness by inserting a fork through a slit.
- GLAZE: Once the pie is baked, remove it from the oven and let it cool completely on a wire rack. In a bowl, combine the powdered sugar, pure maple syrup, ground cinnamon, and a pinch of salt. Whisk until smooth. If the glaze is too thick, add water or milk 1 teaspoon at a time until it reaches a desired drizzling consistency. Drizzle the glaze evenly over the cooled pie and allow it time to set before cutting into squares and serving.
Notes
- For the glaze, you can substitute the maple syrup with apple cider or thawed frozen apple juice concentrate. Start with 1/4 cup and adjust to achieve desired consistency. Another delicious option is to use my cinnamon brown sugar glaze.
- Store leftover apple slab pie in the pan, tightly covered with plastic wrap or foil (or in an airtight container) at room temperature for 3-4 days or in the refrigerator for up to 1 week. For longer storage, freeze the cooled pie, ensuring it’s well-wrapped to prevent freezer burn.
- To prevent a soggy bottom crust, consider sprinkling a thin layer of plain panko bread crumbs or finely crushed gingersnap cookies over the bottom crust before adding the apple filling. This helps absorb excess moisture. Alternatively, drain any significant amount of liquid that accumulates from the macerated apple filling.
Nutrition
Disclaimer: Nutritional values were calculated using a third-party tool and are provided as an estimation only.
Sharing this recipe with a link is both encouraged and appreciated. Copying/pasting and/or screenshots of full recipes to any social media is strictly prohibited. Content and photographs are copyright protected.
Did you make this?
Don’t forget to leave a rating below and make sure to follow on Pinterest and Instagram for more!
*Originally published 11/8/2012. Post updated November 2023.