
Creative Homemade Birthday Cakes: Celebrating Milestones with Sweet Delights
Every parent knows the joy and occasional madness that comes with planning a child’s birthday. For our family, the first week of June transforms into a whirlwind of creativity and sugar, as we celebrate two birthdays just three days apart. This past year marked a particularly ambitious undertaking, but with careful planning and a few late nights, I successfully crafted unique, homemade cakes that brought immense smiles to my children’s faces. It had been over a year since I last delved into any fancy cake decorating, but like riding a bicycle, the skills quickly returned, making the process both challenging and incredibly rewarding.
Crafting Unique Birthday Treats: A Dual Celebration
When the time came to decide on the birthday treats, I knew I didn’t want the overwhelming task of baking two large, elaborate cakes. Instead, I opted for a creative compromise: delightful cupcakes for my energetic boy and a charming traditional cake for my sweet girl. This approach allowed me to focus on two distinct themes and techniques, ensuring each child received a truly special and personalized dessert for their big day.
Dive into Delight: Adorable Turtle Cupcakes with Royal Icing
Embracing the Challenge: My First Royal Icing Experience
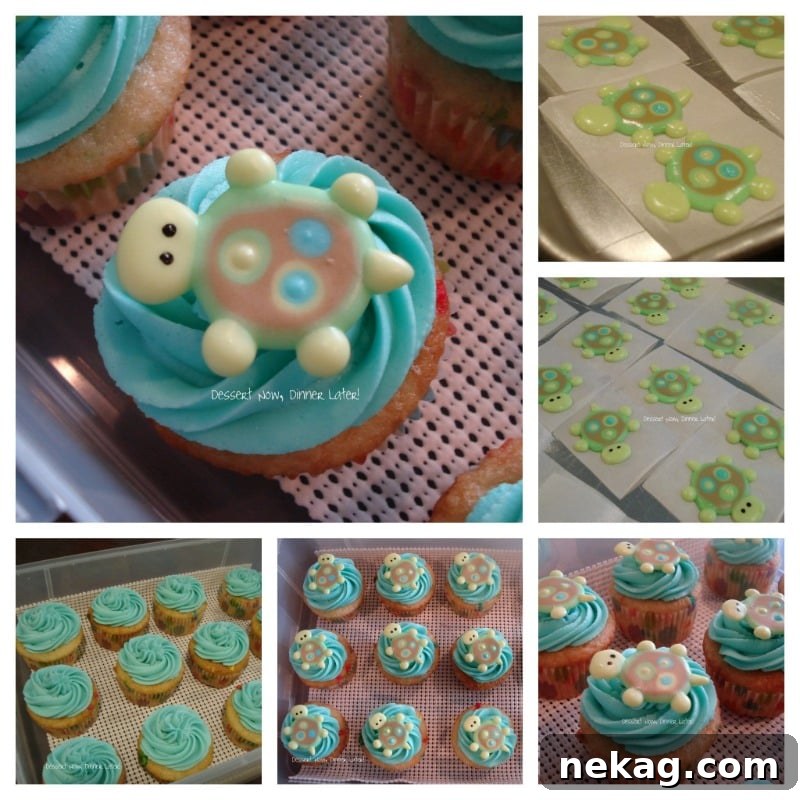
For my son’s third birthday, his current obsession with turtles made the theme an easy choice. I stumbled upon the most adorable turtle cupcake design on Pinterest, originally shared by Sweetopia, and instantly knew I had to try them. The catch? I had never worked with royal icing before! It was a technique not covered during my culinary college education, so I embarked on a crash course, poring over tutorials on how to make and properly use royal icing. I admit, I was quite nervous about the icing drying too quickly or getting the consistency wrong. However, despite my lack of prior experience, the results were surprisingly good, and the process turned out to be incredibly fun.
While a slightly stiffer consistency might have been ideal for some details, and I occasionally forgot to tap out air bubbles, these turtle toppers were a joy to create! This initial foray into royal icing has truly piqued my interest, and I can foresee myself delving into more projects, perhaps decorating intricate cut-out sugar cookies. Practice, after all, makes perfect, and there’s something incredibly satisfying about the neat, clean finish that royal icing provides. For anyone interested in exploring royal icing, here are some invaluable resources I utilized during my research:
- Cookie Decorating Tutorial: This tutorial provided the royal icing recipe I used, yielding approximately 4-5 cups of icing. Knowing the generous quantity beforehand would have been helpful, as I ended up with quite a bit left over after creating about 30 turtle cupcake toppers.
- How to Store Royal Icing & Its Shelf Life: Crucial information for managing leftovers and planning ahead for future decorating projects.
Mastering Royal Icing: Essential Tips for Success
From my recent royal icing adventure, I’ve gathered several indispensable tips that I want to remember for myself and share with fellow bakers. Proper preparation, often referred to as “mise en place,” is absolutely paramount for a smooth and stress-free decorating session:
- Set Up Your Station Thoroughly:
- Color Mixing: Have all your bowls, spatulas, and food coloring ready before you begin to mix different hues. This prevents rushing and ensures consistent colors.
- Piping Bags & Tips: Prepare your piping bags and tips in advance. Disposable clear bags are particularly useful as they allow you to easily identify the color inside.
- Moisture Control for Icing: Use rubber bands to secure the tops of your piping bags to keep the icing from drying out.
- Tip Protection: Keep tall glasses or cups with lightly dampened paper towels at the bottom. Rest your piped icing tips in these cups to prevent the icing from hardening and clogging the tips while you work. Clear glasses are a bonus for easily seeing which color is in which cup.
- Decorating Surface: Prepare small parchment squares, lightly greased with shortening (applied with a paper towel), as a non-stick surface for your royal icing decorations to dry on. While parchment paper on a roll works, flat sheets from a specialty store are often easier to work with, as a curved surface can complicate precise piping.
- Mixer & Cover: Keep your mixer ready, and a damp towel handy to cover the bowl of icing while you’re coloring and bagging different batches. This minimizes exposure to air and prevents premature drying.
- Design Reference: Always have a picture of your desired design or your own drawn sketch nearby for easy reference.
- Drying Time: Allow your royal icing decorations a full 24 hours to dry completely before attempting to add any additional details with food color pens. Rushing this step can lead to smudging and damage.
- Crucial Tip for Toppers: If you are creating royal icing toppers for cupcakes, like my turtles, it is absolutely vital that you do NOT place them on the cupcakes until JUST BEFORE SERVING. Royal icing is highly susceptible to moisture; it will absorb humidity from the cupcake frosting, causing it to soften, potentially break, and even lead to colors bleeding into each other. I was fortunate to know this rule beforehand, but even a mere two hours after placing some toppers, I noticed them beginning to soften and the black eyes starting to run into the green of the turtles’ heads. This patience is key for flawless presentation!
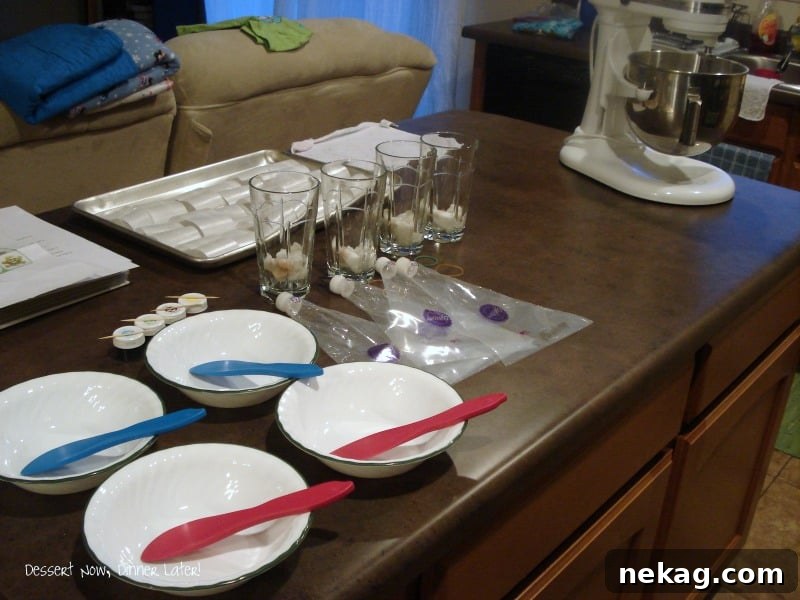
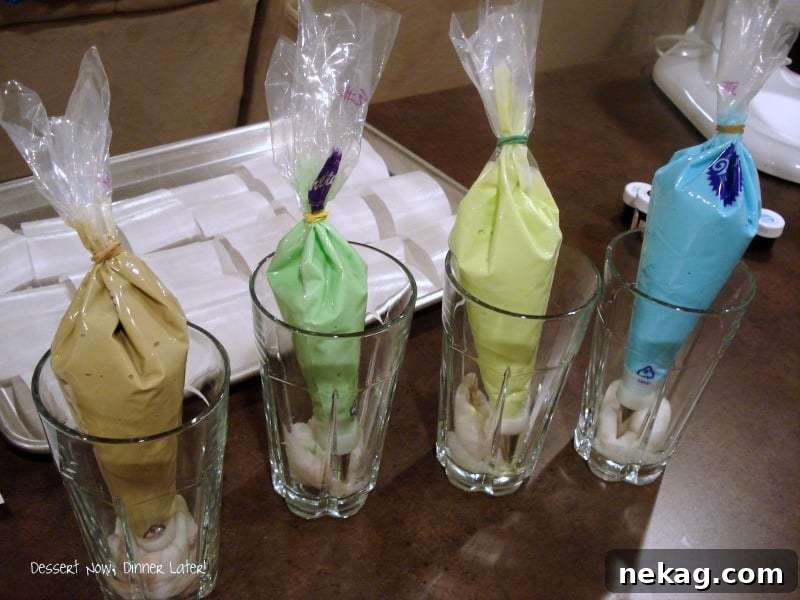
Initially, my fear of the icing drying out in the piping tips led me to use overly wet paper towels in my cups. A word of caution: wring out those paper towels sufficiently so that no water pools at the bottom. Excess moisture can make your icing watery, directly affecting the precision and integrity of your design. Once all your components are meticulously prepared, the decorating process becomes incredibly smooth, allowing you to focus on your artistry without the added stress of things drying out or frantically searching for forgotten tools in the kitchen.
A Sweet Milestone: Adorable Ladybug Cake for a First Birthday
Designing a Whimsical Ladybug Creation
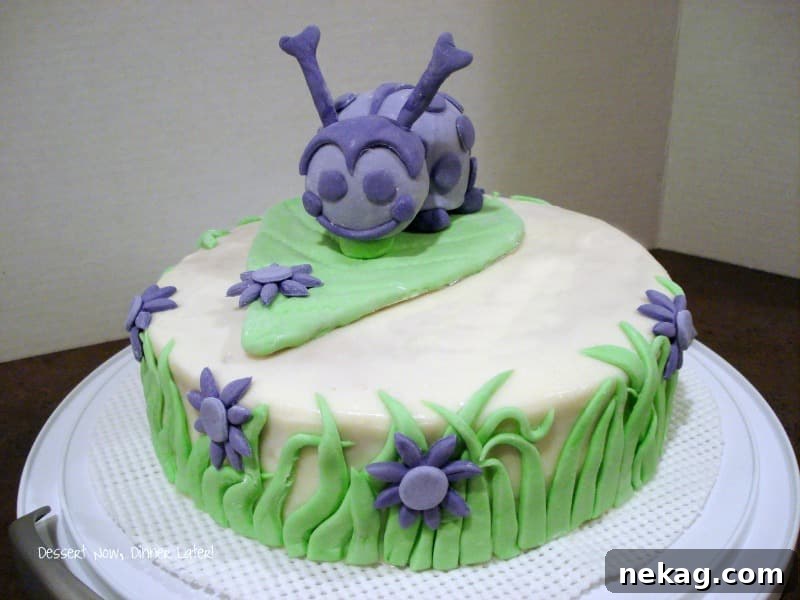
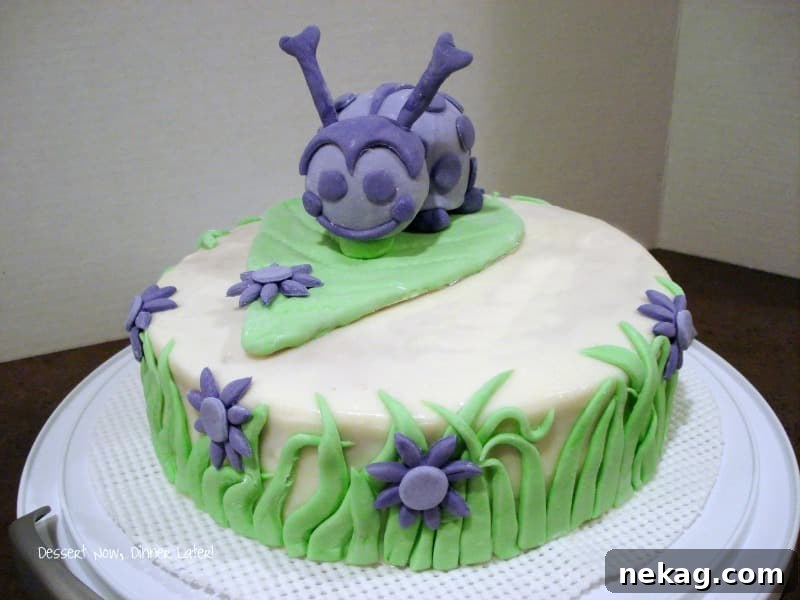
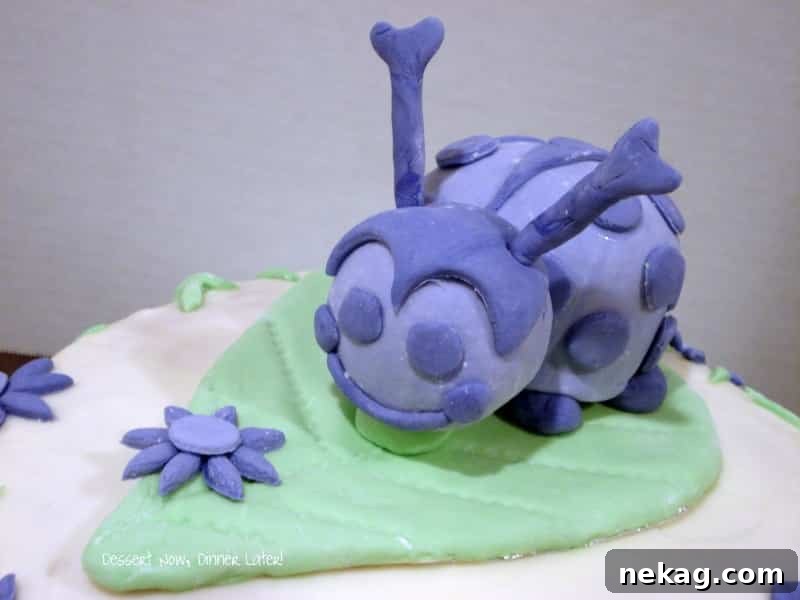
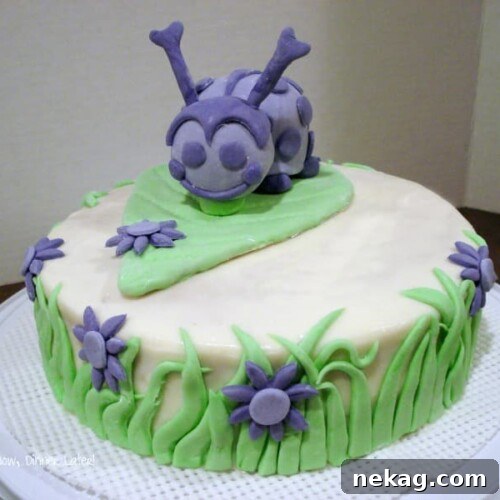
For my baby girl’s first birthday, a delightful ladybug cake was the perfect choice. While many traditional ladybug cakes feature red, I decided to put a personal spin on it and made a charming purple ladybug cake, reflecting my daughter’s favorite color. The cake itself was a delicious strawberry creation, generously filled and frosted with a rich cream cheese frosting. The simple white exterior provided an excellent, neutral canvas, allowing the vibrant fondant decorations to adhere easily and truly pop. Although her name was beautifully displayed on the cake, I’ve chosen to omit it from the image for privacy; rest assured, that prominent white space was filled with cute purple letters spelling out her name.
Here are some of the design elements and techniques I employed for this special cake:
- Edible Leaf Detail: The large green leaf underneath the ladybug was placed on a separate cardboard cutout. This thoughtful detail allowed for its easy removal, transforming the ladybug into a perfect “smash” cake for my daughter to enjoy unencumbered.
- Molded Antennae: The delicate antennae were meticulously molded around toothpicks, providing both structure and a touch of realism to the ladybug’s features.
- Cupcake Body Structure: The ladybug’s head and body were ingeniously constructed from cupcakes, providing a soft, edible core for the fondant.
- The head was fashioned from a mini cupcake, perfectly sized for proportion.
- The body comprised 1 1/2 regular cupcakes, carefully pieced together to create a rounded, layered effect.
- To secure the head and ensure it remained upright, I used a toothpick to attach it to the body and added a small ball of green fondant beneath the chin for extra support.
The Secret Ingredient: Easy Homemade Marshmallow Fondant
Many experienced bakers are already familiar with this fantastic trick, but for those new to cake decorating, you can easily make your own delicious and pliable fondant right from marshmallows! I learned this invaluable technique in school, and it remains one of my favorite, most cost-effective methods for creating beautiful cake decorations. Below, I’m excited to share the recipe for this versatile marshmallow fondant.
Marshmallow Fondant
Amber Brady
16 servings
Ingredients
- 16 oz mini marshmallows, (100 mini marshmallows = 10 large marshmallows)
- 2 Tbsp. water, *If using large marshmallows add 1 tsp more water.
- Up to 2 lbs. confectioner’s powdered sugar, (approximately 8 cups)
- Crisco shortening, as needed
Instructions
-
Grease a large microwave-safe bowl with a paper towel and some shortening. Pack in the marshmallows and add the water. Microwave on high for 20-30 seconds at a time, just long enough for the marshmallows to soften and puff up. After each 20-30 second interval, stir the marshmallow mixture with a greased plastic or wooden spoon. Continue this process until you achieve a smooth, soupy texture.
-
Gradually sift powdered sugar over the melted marshmallows, adding one or two cups at a time. Fold the mixture until all the sugar is incorporated and the fondant is no longer sticky. This step can also be performed in a stand mixer using a bread-hook attachment; just remember to grease the bowl and hook thoroughly before mixing.
-
Once most of the sugar is incorporated and the mixture forms a cohesive ball, remove it from the bowl. Lightly dust your countertop with a little powdered sugar, and also dust your hands. Knead the fondant by hand until it becomes quite stiff, which typically takes about 5-7 minutes. Be careful not to use excessive amounts of powdered sugar, as this can cause the fondant to dry out. Form the finished fondant into a ball and keep it covered tightly until you are ready to use it.
-
To apply the fondant, first coat your cake with a thin, even layer of buttercream frosting. Roll the fondant on a powdered sugar-dusted counter until it is approximately ⅛-inch thick. Gently drape it over your cake. Smooth the surface with a fondant smoother or your hands, and then trim any excess below the cake board. This ensures that as the fondant slightly shrinks, it will be the perfect length. If any small tears occur, apply a tiny bit of Crisco and gently rub with your finger until the fondant comes back together. Now, unleash your creativity and have fun decorating!
Notes
- YIELD: This recipe yields enough fondant for one 9-inch cake and additional decorations.
- To color the fondant, incorporate drops of food coloring and knead the fondant until the color is evenly distributed. An alternative method is to add food coloring after melting the marshmallows but before adding the powdered sugar. However, this can be a bit challenging if you plan to divide the mixture into multiple colors. If any part of your marshmallow mixture sits in a bowl while you’re working on other colors, you will need to gently reheat it before adding more food coloring and powdered sugar. While both methods work, I find kneading the color into prepared white fondant to be just as efficient.
- You can prepare marshmallow fondant ahead of time. Store the fondant in an airtight container, where it can last for about 5-7 days if properly sealed. I prefer to wrap mine tightly in plastic wrap (ensuring it’s not sticky) and then place it in a container. When you’re ready to use it, remove it from the container and plastic wrap, and you can warm it up on a plate in the microwave for approximately 5 seconds. This will make it pliable enough to knead easily. Crucially, do NOT heat it for more than 5-10 seconds at a time, as it will melt and can cause severe burns to your hand. Overheating will also necessitate adding extra powdered sugar to restore its non-runny consistency. (These warnings come from personal experience!)
The Heart of Baking: Cherished Moments and Creative Expression
Baking my children’s birthday cakes is an annual tradition I truly cherish and look forward to throughout their lives. It’s more than just a task; it’s a creative outlet where I get to use my passion and talents to bring a bit of magic to their special days. Beyond the personal fulfillment, I genuinely believe that these homemade creations are achievable for anyone willing to try. You don’t need years of professional training to create something wonderful. With a little practice, patience, and a willingness to have fun, anyone can master these techniques and create memorable, delicious treats for their loved ones. Happy baking!