
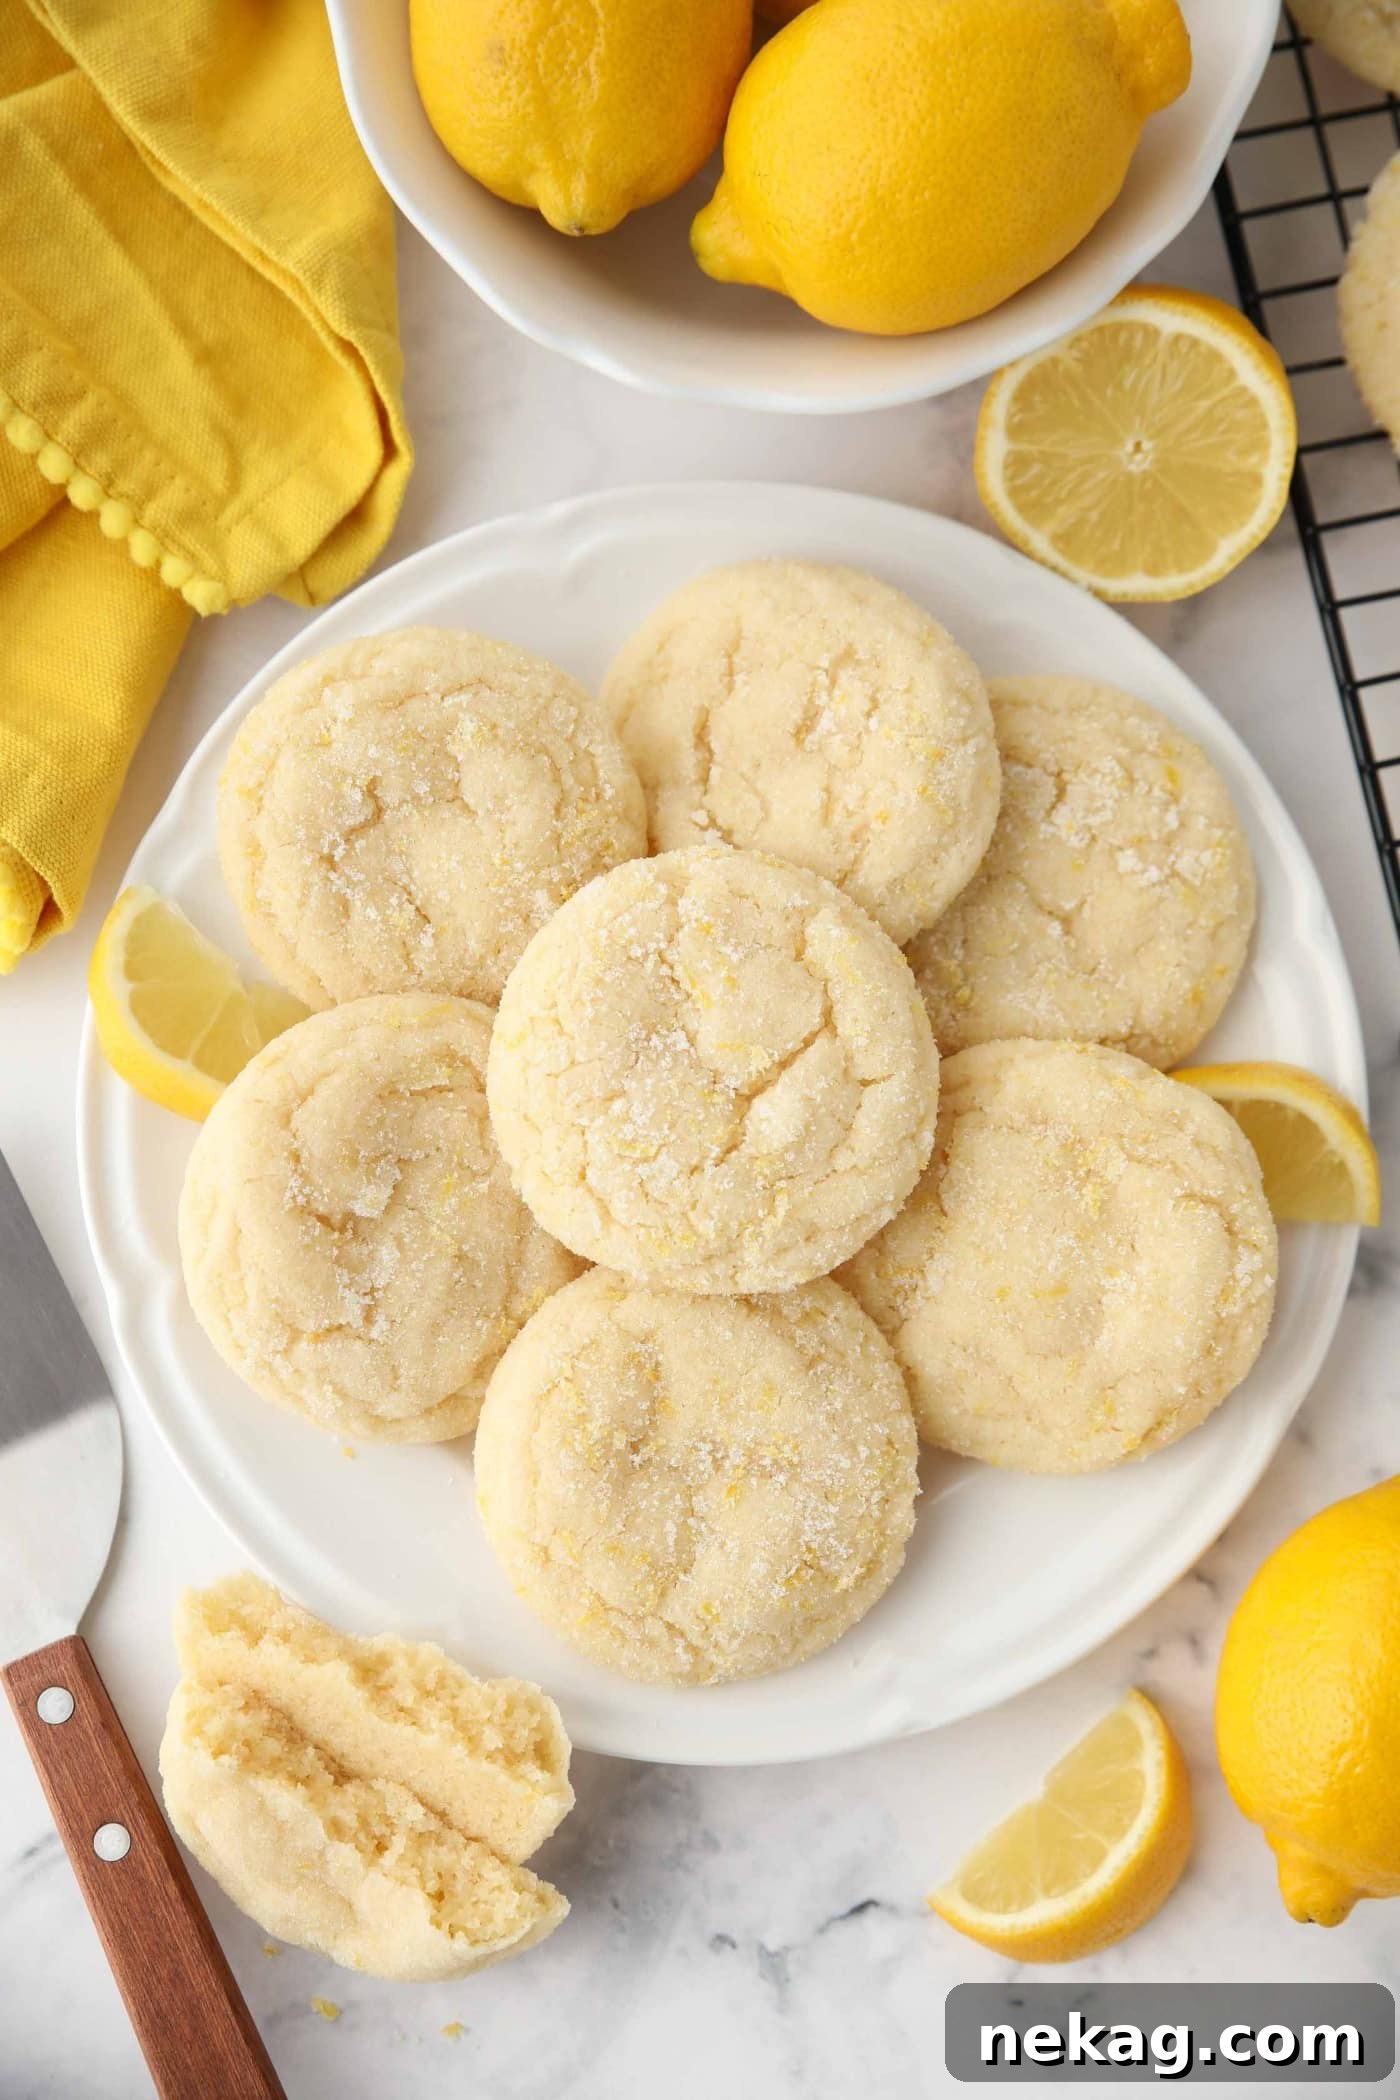
Welcome to the ultimate guide for crafting the most exquisite, quick, and easy lemon cookies recipe! Imagine biting into a soft, slightly chewy cookie that bursts with vibrant, fresh lemon flavor – a delightful treat that requires absolutely no chilling of the dough. Perfect for any season, especially refreshing in spring and summer, these lemon sugar cookies offer a bright, zesty twist on a timeless classic.
Craving more lemon desserts? Explore our other popular recipes like Lemon Curd Cookies, Lemon Coffee Cake, Lemon Crinkle Cookies, and classic Lemon Bars for an ultimate citrus indulgence.
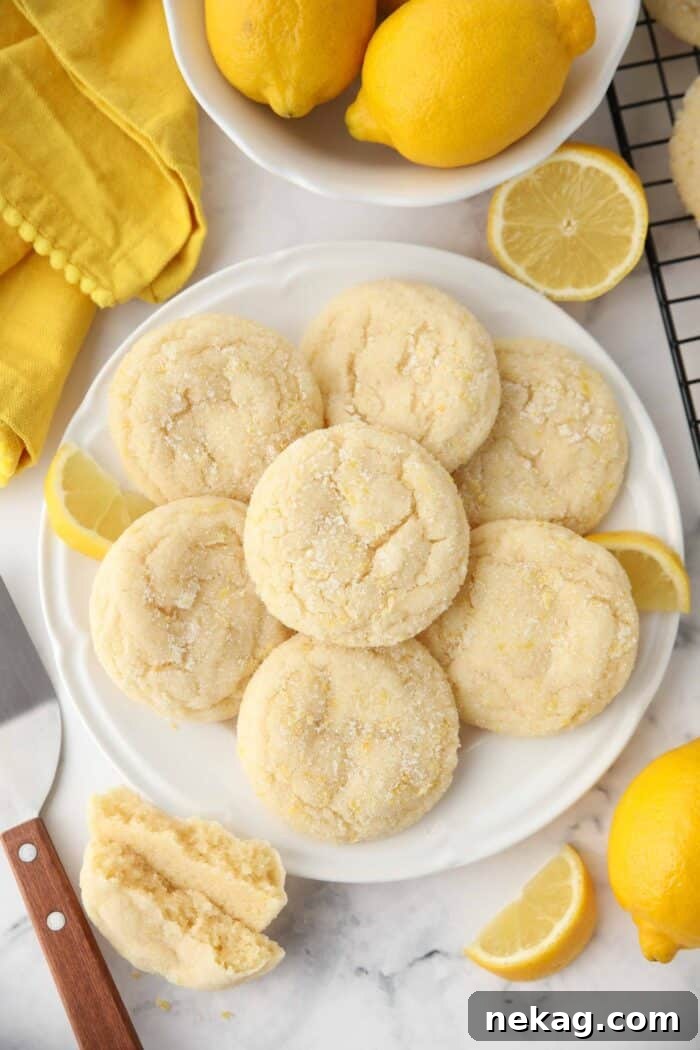
Why These Lemon Cookies Are a Must-Try
Our lemon cookies are not just another dessert; they are a culinary experience designed for simplicity and incredible flavor. Here’s why they are bound to become a staple in your recipe collection:
- Effortlessly Simple to Make: Forget complicated dough rolling, fussy cutters, or tedious chilling times. This recipe embraces the ease of a drop cookie, allowing you to whip up a batch of homemade lemon cookies with minimal effort and maximum satisfaction.
- Bright & Unforgettably Citrusy: The secret to their irresistible taste lies in the generous use of both fresh lemon zest and juice. This dynamic duo infuses every bite with a bold, refreshing citrus flavor that is both invigorating and deeply satisfying.
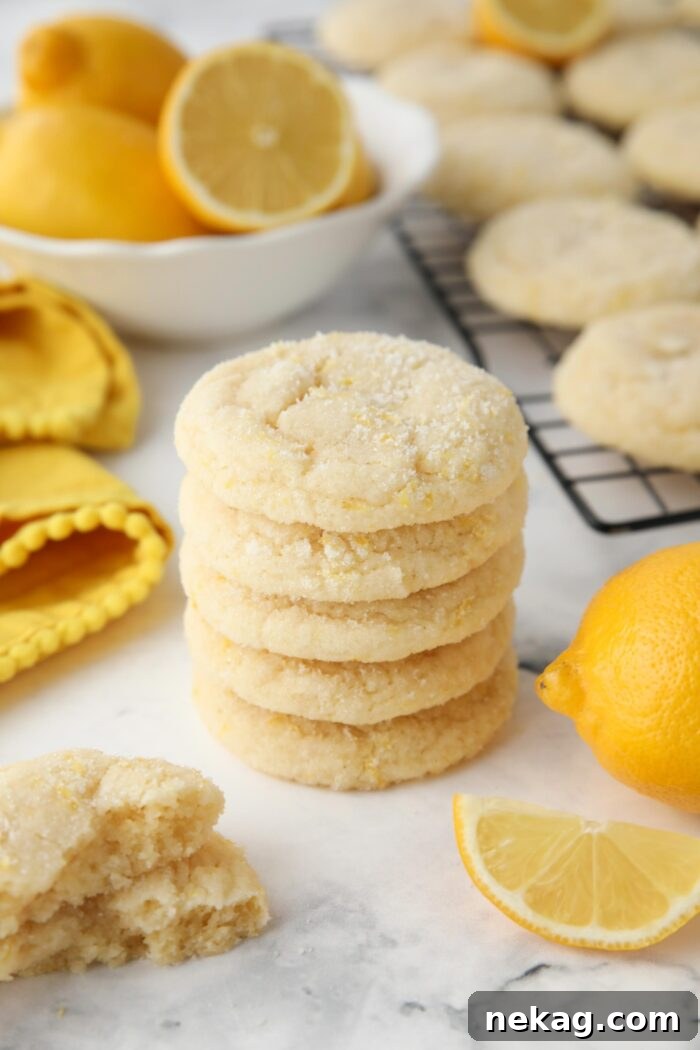
- Perfectly Soft and Chewy Texture: Achieve that coveted cookie texture – tender in the center with a slight chewiness around the edges. They’re baked to perfection, ensuring a delightful mouthfeel that will have you reaching for more.
- Versatile for Any Celebration: Whether you’re hosting a springtime brunch, a summer picnic, a holiday gathering, or simply need a sweet pick-me-up for your weekend, these lemon sugar cookies are an ideal choice. Their bright flavor complements any occasion.
- Zero Chill Time: A baker’s dream! The dough comes together quickly and is ready to bake immediately, meaning fresh-from-the-oven lemon cookies can be enjoyed sooner than you think.
Embrace the joy of baking with this straightforward recipe that promises big lemon flavor in a convenient package.
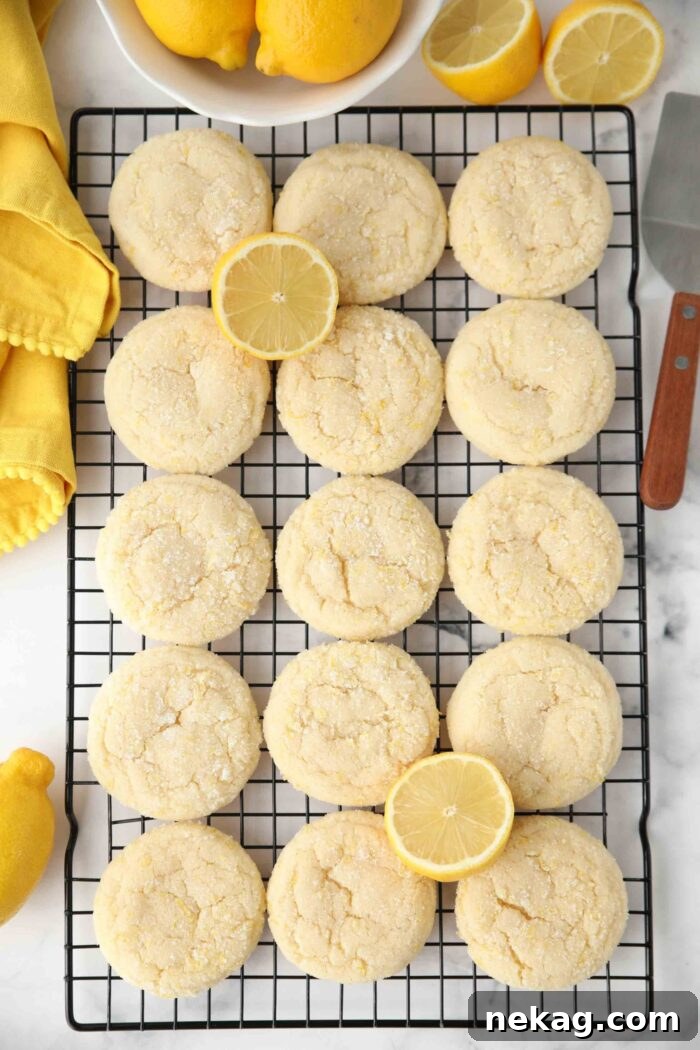
The Inspiration Behind Our Easy Lemon Sugar Cookies
The foundation of this incredible recipe comes from my beloved easy sugar cookies recipe. The simplicity and consistent results of that recipe made me eager to develop a lemon-infused version that maintained the same user-friendly approach. Drop sugar cookies are truly a baker’s best friend: mix the dough, scoop it onto trays, and bake. While these lemon cookies largely follow that effortless method, we’ve added one extra step that elevates their lemon flavor to new heights.
These lemon cookies achieve an unparalleled burst of citrus by being rolled in a special lemon zest sugar mixture, much like how classic snickerdoodle cookies are coated in cinnamon-sugar. This technique creates a slightly crisp exterior that gives way to a wonderfully soft and chewy interior, mirroring the delightful texture of snickerdoodles. The lemon sugar coating not only enhances the flavor but also adds a beautiful sparkle and aroma, making these lemon cookies incredibly good and wonderfully easy to prepare.
Essential Ingredients for Zesty Lemon Cookies
NOTE: For precise ingredient measurements and a comprehensive, printable step-by-step guide, please refer to the detailed recipe card at the conclusion of this article.
Jump to Recipe
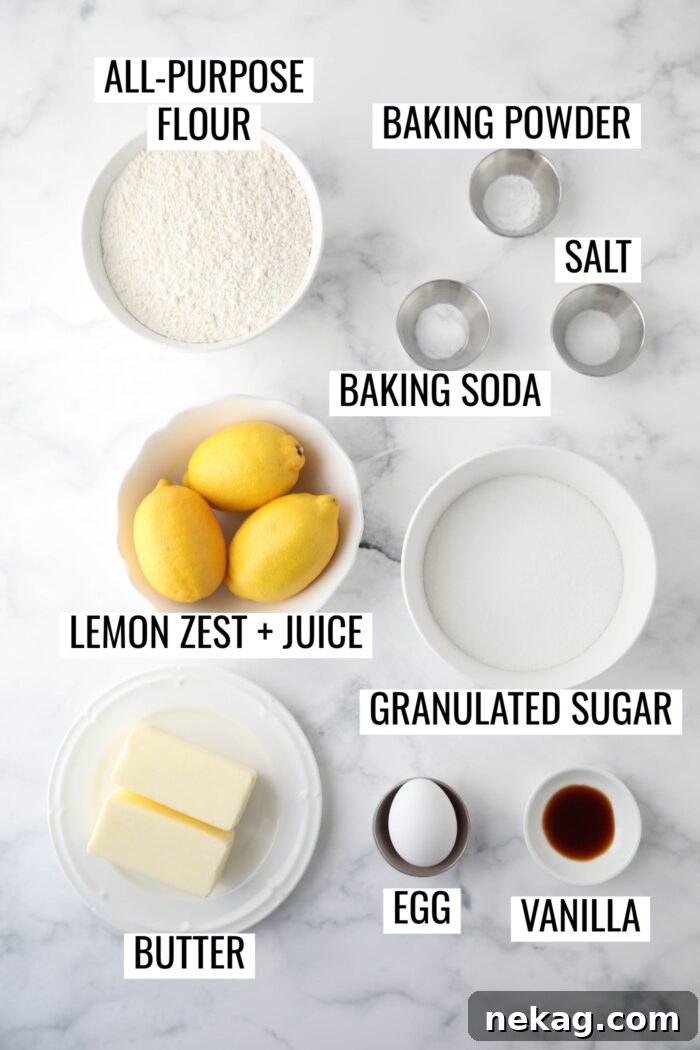
To create this batch of truly delightful lemon cookies, you’ll need a selection of common pantry staples, transformed by the magic of fresh lemon:
- All-Purpose Flour: The structural backbone of our cookies. Proper measurement is critical for the right texture. Always fluff your flour, then spoon it into the measuring cup and level it off with the back of a knife. For ultimate accuracy, weighing your flour with a kitchen scale is highly recommended. Too much flour can lead to dense, dry cookies.
- Baking Powder: This leavening agent contributes to the cookies’ tender rise and helps them achieve a pleasant thickness, preventing them from spreading too thinly.
- Baking Soda: Working in conjunction with the acidity of the lemon juice, baking soda helps the cookies spread perfectly and encourages a beautiful, subtle browning on the edges.
- Salt: A small but mighty ingredient, salt enhances all the other flavors, balancing the sweetness and brightening the lemon notes.
- Fresh Lemon Zest & Juice: These are the stars of the show! The zest contains concentrated lemon oils, providing intense aromatic flavor, while the fresh juice adds a tangy brightness and essential moisture to the dough. Always use fresh lemons for the best results.
- Unsalted Butter: Using unsalted butter allows you to control the exact amount of salt in your recipe. Ensure it’s at a proper room temperature – slightly cool to the touch but pliable enough to indent with a finger. This ensures it creams properly with the sugar, incorporating air for a light texture.
- Granulated Sugar: Beyond sweetness, sugar plays a crucial role in creating the cookie’s texture, contributing to its spread and crispness.
- Large Egg: The egg acts as a binder, holding the ingredients together and adding structure, richness, and moisture to the cookies. Make sure it’s at room temperature for better emulsion with the butter mixture.
- Vanilla Extract: A touch of vanilla rounds out the bright lemon flavor, adding a warm, subtle sweetness that complements the citrus beautifully without overpowering it.
Step-by-Step Guide to Baking Perfect Lemon Cookies
Creating these lemon-infused delights is a straightforward process. Follow these detailed instructions to achieve bakery-quality results right in your own kitchen:
- Begin by preheating your oven to a steady 350 degrees Fahrenheit (175 degrees Celsius). Prepare your baking sheets by lining them with high-quality silicone baking mats or parchment paper. This prevents sticking and ensures even baking. Set these prepared pans aside.
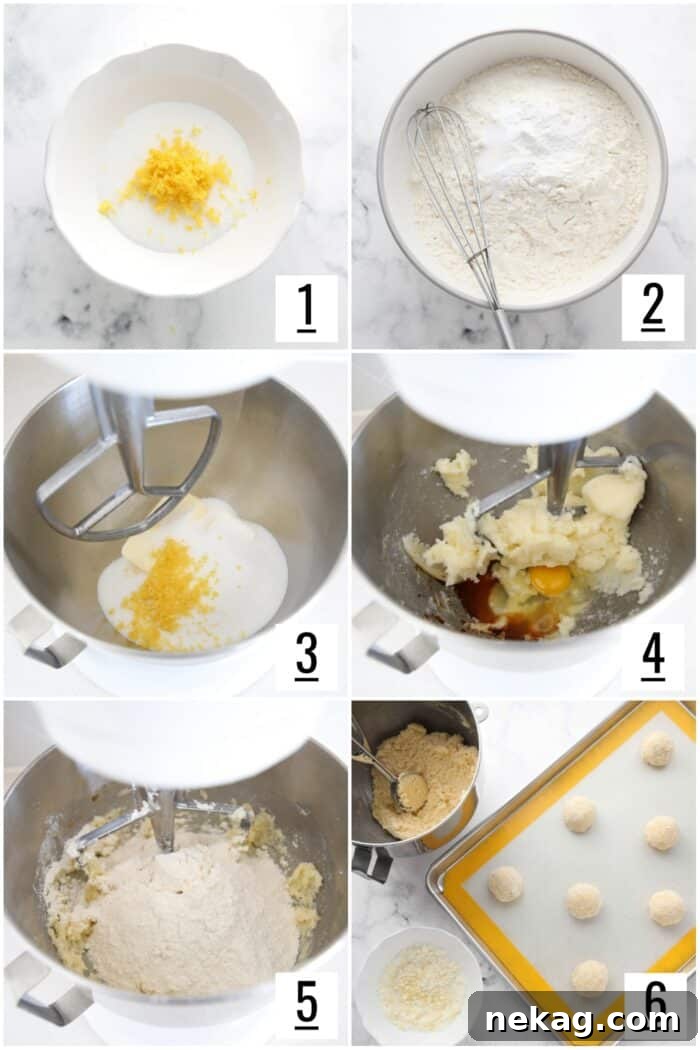
- Prepare the Lemon Sugar Coating: In a small bowl, combine the granulated sugar and lemon zest. Use your fingertips to rub the zest into the sugar. This crucial step releases the essential oils from the lemon peel, infusing the sugar with intense citrus flavor and aroma. Set this aside; it will be used to coat the cookie dough balls just before baking.
- Whisk Dry Ingredients: In a separate medium-sized bowl, whisk together the all-purpose flour, baking powder, baking soda, and salt until they are thoroughly combined. Ensuring an even distribution of leavening agents is key for consistent cookie texture. Set this bowl aside.
- Cream Wet Ingredients: In the bowl of a stand mixer fitted with the paddle attachment (or using a hand mixer), cream together the room temperature unsalted butter, the remaining granulated sugar, and the lemon zest for the cookie dough until the mixture is light and fluffy. This usually takes about 2-3 minutes on medium speed. Scrape down the sides of the bowl as needed to ensure everything is well incorporated.
- Add Egg and Liquids: To the creamed butter mixture, add the large room temperature egg, fresh lemon juice, and vanilla extract. Mix on low speed until just combined, being careful not to overmix. Continue to scrape down the sides of the bowl to ensure a homogeneous mixture.
- Combine Wet and Dry: Gradually add the dry ingredient mixture to the wet ingredients in the stand mixer. Mix on low speed until the dough just comes together and no streaks of dry flour remain. Be mindful not to overmix the dough, as this can lead to tough cookies.
- Scoop and Coat Dough: Using a #30 cookie scoop (which measures approximately 2 tablespoons of dough), portion the cookie dough into uniform balls. Roll each dough ball generously in the previously prepared lemon sugar coating, ensuring it’s evenly covered. Place the coated cookie dough balls onto your prepared baking sheets, spacing them about 2-3 inches apart. To achieve thicker cookies, aim for no more than 8 cookies per standard half-sheet tray, allowing enough room for even heat distribution.
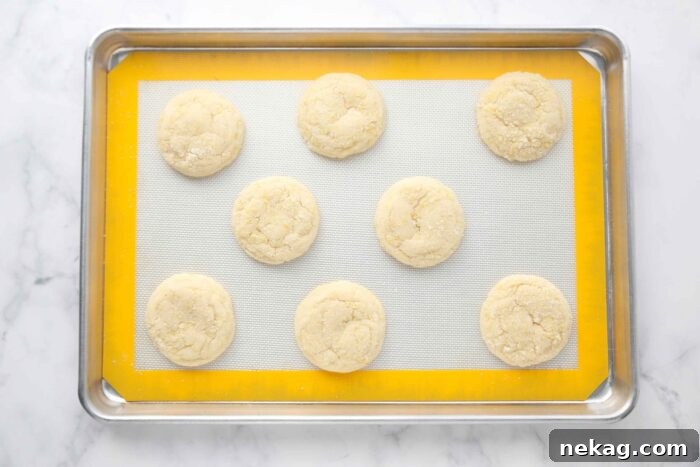
- Bake to Perfection: Transfer the baking sheets to your preheated oven and bake for 10-12 minutes. Look for signs that the cookies have spread nicely and their edges are set. It’s crucial not to over-bake these cookies, as they are designed to remain soft and chewy. Unlike some cookies, these lemon sugar cookies will not brown significantly. Once baked, remove the trays from the oven and allow the cookies to cool on the baking sheet for 1-2 minutes before carefully transferring them to a wire rack to cool completely. This brief cooling period on the hot tray helps them set further without overcooking.
This lemon cookie recipe is meticulously crafted to be approachable enough for even novice bakers, yet it delivers a flavor profile sophisticated and satisfying enough for the most discerning dessert enthusiasts who adore a bright citrus treat. With its blend of simple, readily available ingredients and straightforward, easy-to-follow steps, these vibrant lemon sugar cookies are destined to become a cherished, go-to favorite in your culinary repertoire.
Did You Bake These Zesty Lemon Cookies?
We would absolutely love to hear about your baking experience! Please take a moment to leave a review and rating for this recipe. Your valuable feedback is instrumental in supporting our small business and enables us to continue sharing delicious, free recipes with our community of passionate bakers.
Storing, Freezing, and Make-Ahead Tips for Lemon Cookies
These lemon cookies are delightful fresh out of the oven, but they also store beautifully, allowing you to enjoy their zesty flavor for days or even weeks. Here’s how to best preserve your homemade treats:
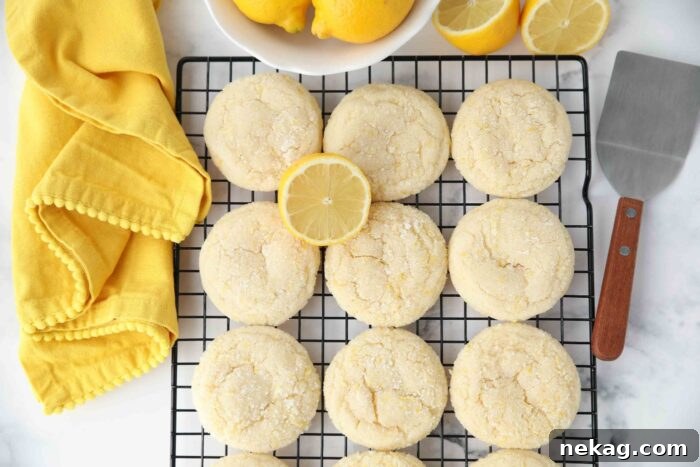
- Proper Storage: Once completely cooled, store your baked lemon cookies in an airtight container at room temperature. For optimal freshness, you can also arrange them on a plate and cover them tightly with plastic wrap. They will maintain their soft texture and vibrant flavor for up to 3-4 days.
- Freezing Cookie Dough: To prepare ahead or have fresh cookies on demand, you can freeze the raw cookie dough. Scoop the dough into individual balls, as instructed, and arrange them on a parchment paper or silicone-lined baking sheet. Place the sheet in the freezer for 1-2 hours, or until the dough balls are firm. Once frozen solid, transfer them to a freezer-safe zip-top bag, ensuring to squeeze out as much air as possible to prevent freezer burn. The dough can be frozen for up to 3 months.
Important Note: Do not coat the dough balls in the lemon sugar mixture before freezing. The sugar coating should only be applied just before baking.
To Bake from Frozen: When ready to bake, allow the frozen dough balls to come to room temperature for about 20-30 minutes. You might need to gently roll them in your hands for a few seconds to slightly warm the surface, which helps the lemon sugar stick effectively. Then, roll them in the lemon sugar and bake as directed in the recipe. - Freezing Baked Cookies: If you have leftover baked cookies or want to prepare a large batch in advance, they freeze wonderfully. Once cooled completely, arrange the cookies in single layers, separated by parchment paper, inside a freezer-safe container or a heavy-duty freezer bag. Ensure they are well-wrapped to prevent ice crystals. Baked lemon cookies can be frozen for up to 3-4 weeks. To enjoy, simply thaw them at room temperature.
Pro Tips for Baking the Best Lemon Sugar Cookies
Elevate your lemon cookie game with these expert tips, ensuring every batch you bake is nothing short of perfection:
- Infuse Your Sugar with Lemon Zest for Maximum Flavor: This is a game-changer! When combining lemon zest with granulated sugar, vigorously rub them together with your fingers. This action helps to release the potent, aromatic oils from the zest, thoroughly infusing the sugar with intense lemon flavor. While we specifically recommend this for the coating, you can also apply this technique to the sugar used within the cookie dough itself for an even deeper lemon punch.
- Do Not Over-bake – Master the Art of Doneness: The key to soft, chewy cookies is knowing when to pull them from the oven. Remove your lemon cookies when their edges appear set and the tops show just the first signs of tiny cracks. The centers might still look slightly soft or underdone, but trust the process – they will continue to set and firm up as they cool on the baking sheet. Slightly underbaking ensures they remain moist and tender for longer. Remember, these cookies don’t typically brown much, so rely on the edge firmness and slight cracking as your cues.
- Coat Cookie Dough Balls Just Before Baking: For the ideal texture and spread, it’s crucial to roll the cookie dough balls in the lemon sugar coating immediately before they go into the oven. If you coat them too far in advance, the sugar can draw moisture out of the dough, causing the cookies to spread less and potentially develop a dry, crusty, or excessively cracked exterior.
- Consider Your Finishing Touches: If your plan is to top these lemon cookies with a frosting or glaze after baking, you might want to omit the lemon sugar coating. The coarse sugar can sometimes prevent frosting from adhering properly. In such a case, to ensure the cookies still have ample lemon flavor, consider adding an extra tablespoon of lemon zest directly into the cookie dough mixture. This way, you get the vibrant lemon taste without compromising the smooth application of your chosen topping.
- Measure Flour Accurately: Flour is notorious for being difficult to measure consistently. For the most precise results, especially in baking, a kitchen scale is invaluable. If measuring by volume, always fluff your flour in its container, then spoon it lightly into the measuring cup. Level off the top with a straight edge (like the back of a knife) without packing or shaking the cup. Too much flour leads to dense, dry cookies, while too little can result in excessive spreading.
- Use a Cookie Scoop for Uniformity: Investing in a good cookie scoop (we recommend a #30 scoop, which holds about 2 tablespoons) ensures that all your cookies are the same size. This consistency is vital for even baking, as cookies of different sizes will cook at different rates. Uniformity also makes for a more appealing presentation.
- Proper Spacing on Baking Sheets: To prevent your cookies from merging into one giant cookie and to encourage even heat distribution, place them at least 3 inches apart on the baking sheet. While many recipes suggest 12 cookies per tray, baking 8 cookies per standard half-sheet pan allows for better airflow around each cookie, often resulting in thicker, more perfectly shaped treats. Overcrowding can lead to thinner, unevenly baked cookies.
Recipe Notes
- Flour Measurement Precision: Accurate flour measurement is paramount for cookie texture. As highlighted in our tips, using a kitchen scale is the gold standard for exactness. For this recipe, we experimented with 3 ¼ cups (406g) and 3 cups (375g) of all-purpose flour. The higher amount produced thicker cookies, which, while delightful, tended to dry out quicker if not slightly underbaked. The lower amount resulted in a slightly thinner cookie that could spread more if butter or dough were too warm (a potential pitfall for novice bakers). An optimal middle ground might be 3 cups + 2 tablespoons (391g) of flour for a perfect balance, though this is a less common measurement.
- Room Temperature Butter is Key: Ensure your unsalted butter is at the correct room temperature. This means it should be slightly cool to the touch but still pliable enough that your finger leaves a slight indentation when pressed gently. Butter that is too soft or melted will prevent proper creaming with sugar, leading to flat, greasy cookies.
- Lemon Sugar Coating Timing: As a crucial pro tip, apply the lemon sugar coating to your cookie dough balls just before they enter the oven. Premature coating can inhibit proper cookie spread and result in a drier, tougher exterior.
- Frosting Considerations: If you intend to frost your lemon cookies, omit the lemon sugar coating. The granular sugar can make it difficult for frosting to adhere smoothly. To compensate for the flavor, integrate an additional tablespoon of lemon zest directly into the cookie dough mixture.
More Citrus-Inspired Delights You’ll Love
Lemon Curd Cookies
Lemon Coffee Cake + Video
Lemon Crinkle Cookies
Lemon Bars

Lemon Cookies Recipe
Pin
Rate
Save
Ingredients
Lemon Sugar Coating
- ▢ ⅓ cup (68 g) granulated sugar
- ▢ 1 Tbsp lemon zest, (about 1 large lemon)
Lemon Cookies
- ▢ 3 ¼ cups (406 g) all-purpose flour, (stir, spoon & level) *See Notes
- ▢ ½ tsp baking powder
- ▢ ½ tsp baking soda
- ▢ ½ tsp salt
- ▢ 1 cup (226 g) unsalted butter, room temperature*
- ▢ 1 ½ cups (300 g) granulated sugar
- ▢ 1 Tbsp lemon zest, (about 1 large lemon)
- ▢ 1 large egg, room temperature
- ▢ ¼ cup (59 ml) lemon juice, fresh
- ▢ ½ tsp vanilla extract
Equipment
-
Aluminum Half Sheet Tray (2 Pack)
-
Silicone Baking Mats
-
#30 Cookie Scoop
-
KitchenAid 5-Qt. Stand Mixer
-
Kitchen Scale
-
Zester
Instructions
-
Preheat the oven to 350 degrees Fahrenheit (175°C). Line half sheet pans with silicone baking mats or parchment paper. Set aside.
-
For the Lemon Sugar Coating: Rub together the sugar and lemon zest in a small bowl until aromatic. Set aside for coating the cookies.
-
For the Lemon Cookies: Whisk together the flour, baking powder, baking soda, and salt in a separate medium-sized bowl. Set aside.
-
In the bowl of a stand mixer with the paddle attachment, cream the butter, sugar, and lemon zest together until light and fluffy. Add the egg, lemon juice, and vanilla and mix until just combined, scraping the bowl as needed.
-
Add the dry ingredients all at once to the wet ingredients, and mix on low speed until everything comes together and no dry streaks remain. Do not overmix.
-
Use a #30 cookie scoop (about 2 Tbsp of cookie dough) to scoop the dough into balls. Roll each ball in the lemon sugar to coat the outside, and then place it onto the prepared baking sheets about 2-3 inches apart (no more than 8 per tray for thicker cookies).
-
Bake at 350˚F (175°C) for 10-12 minutes until the cookies have spread, and the edges are set. Do not over-bake; cookies will not brown significantly. Allow cookies to cool for 1-2 minutes on the tray, then transfer them to a wire rack to cool completely.
Notes
- Measure the flour carefully. I highly recommend using a kitchen scale. I tested this recipe with 3 ¼ cups (406g) of flour (cookies shown in pictures) and 3 cups (375g) of flour. The greater amount will create thicker cookies, but they tend to dry out faster unless you slightly underbake them. The lower amount is a just bit thinner, but could spread a lot if your butter or cookie dough gets too warm. (Risky for novice bakers.) If you want to go in-between that, 3 cups + 2 Tbsp (391g) of flour would probably be just right, even though it’s a weird measurement.
- Use room temperature butter. This is colder than you think. The butter should be slightly cold still, and give a little when touched.
- Only coat the cookie dough balls with lemon sugar just before baking. Otherwise the cookies won’t spread as far and the outside will crust (dry out slightly) and crack more.
- Do not coat with sugar if adding frosting. Or the sugar may make it hard for the frosting to stick to the dough. You may also want to add that extra lemon zest to the cookie dough itself if you don’t plan to use the lemon sugar coating.
- STORAGE: Store cookies in an airtight container or on a plate covered tightly with plastic wrap for up to 3-4 days.
- TO FREEZE COOKIE DOUGH: Scoop cookie dough balls onto a parchment or silicone lined baking sheet. Set in the freezer for 1-2 hours until firm. Then transfer frozen dough balls into a freezer-safe zip-top bag and freeze for up to 3 months. (NOTE: Do not coat dough balls in lemon sugar until ready to bake.) Allow the cookie dough to come to room temperature for 20-30 minutes. Then roll it with your hands slightly before rolling it in the lemon sugar, so it will be warm enough for the sugar to stick to the cookie dough. Then bake normally.
- TO FREEZE BAKED COOKIES: Freeze baked cookies in single layers divided by parchment paper, wrapped well or in a freezer bag, up to 3-4 weeks. Thaw at room temperature.
Nutrition
Disclaimer: Nutritional values were calculated using a third-party tool and are provided as an estimation only.
Sharing this recipe with a link is both encouraged and appreciated. Copying/pasting and/or screenshots of full recipes to any social media is strictly prohibited. Content and photographs are copyright protected.
Did you make this?
Don’t forget to leave a rating below and make sure to follow on Pinterest and Instagram for more!