
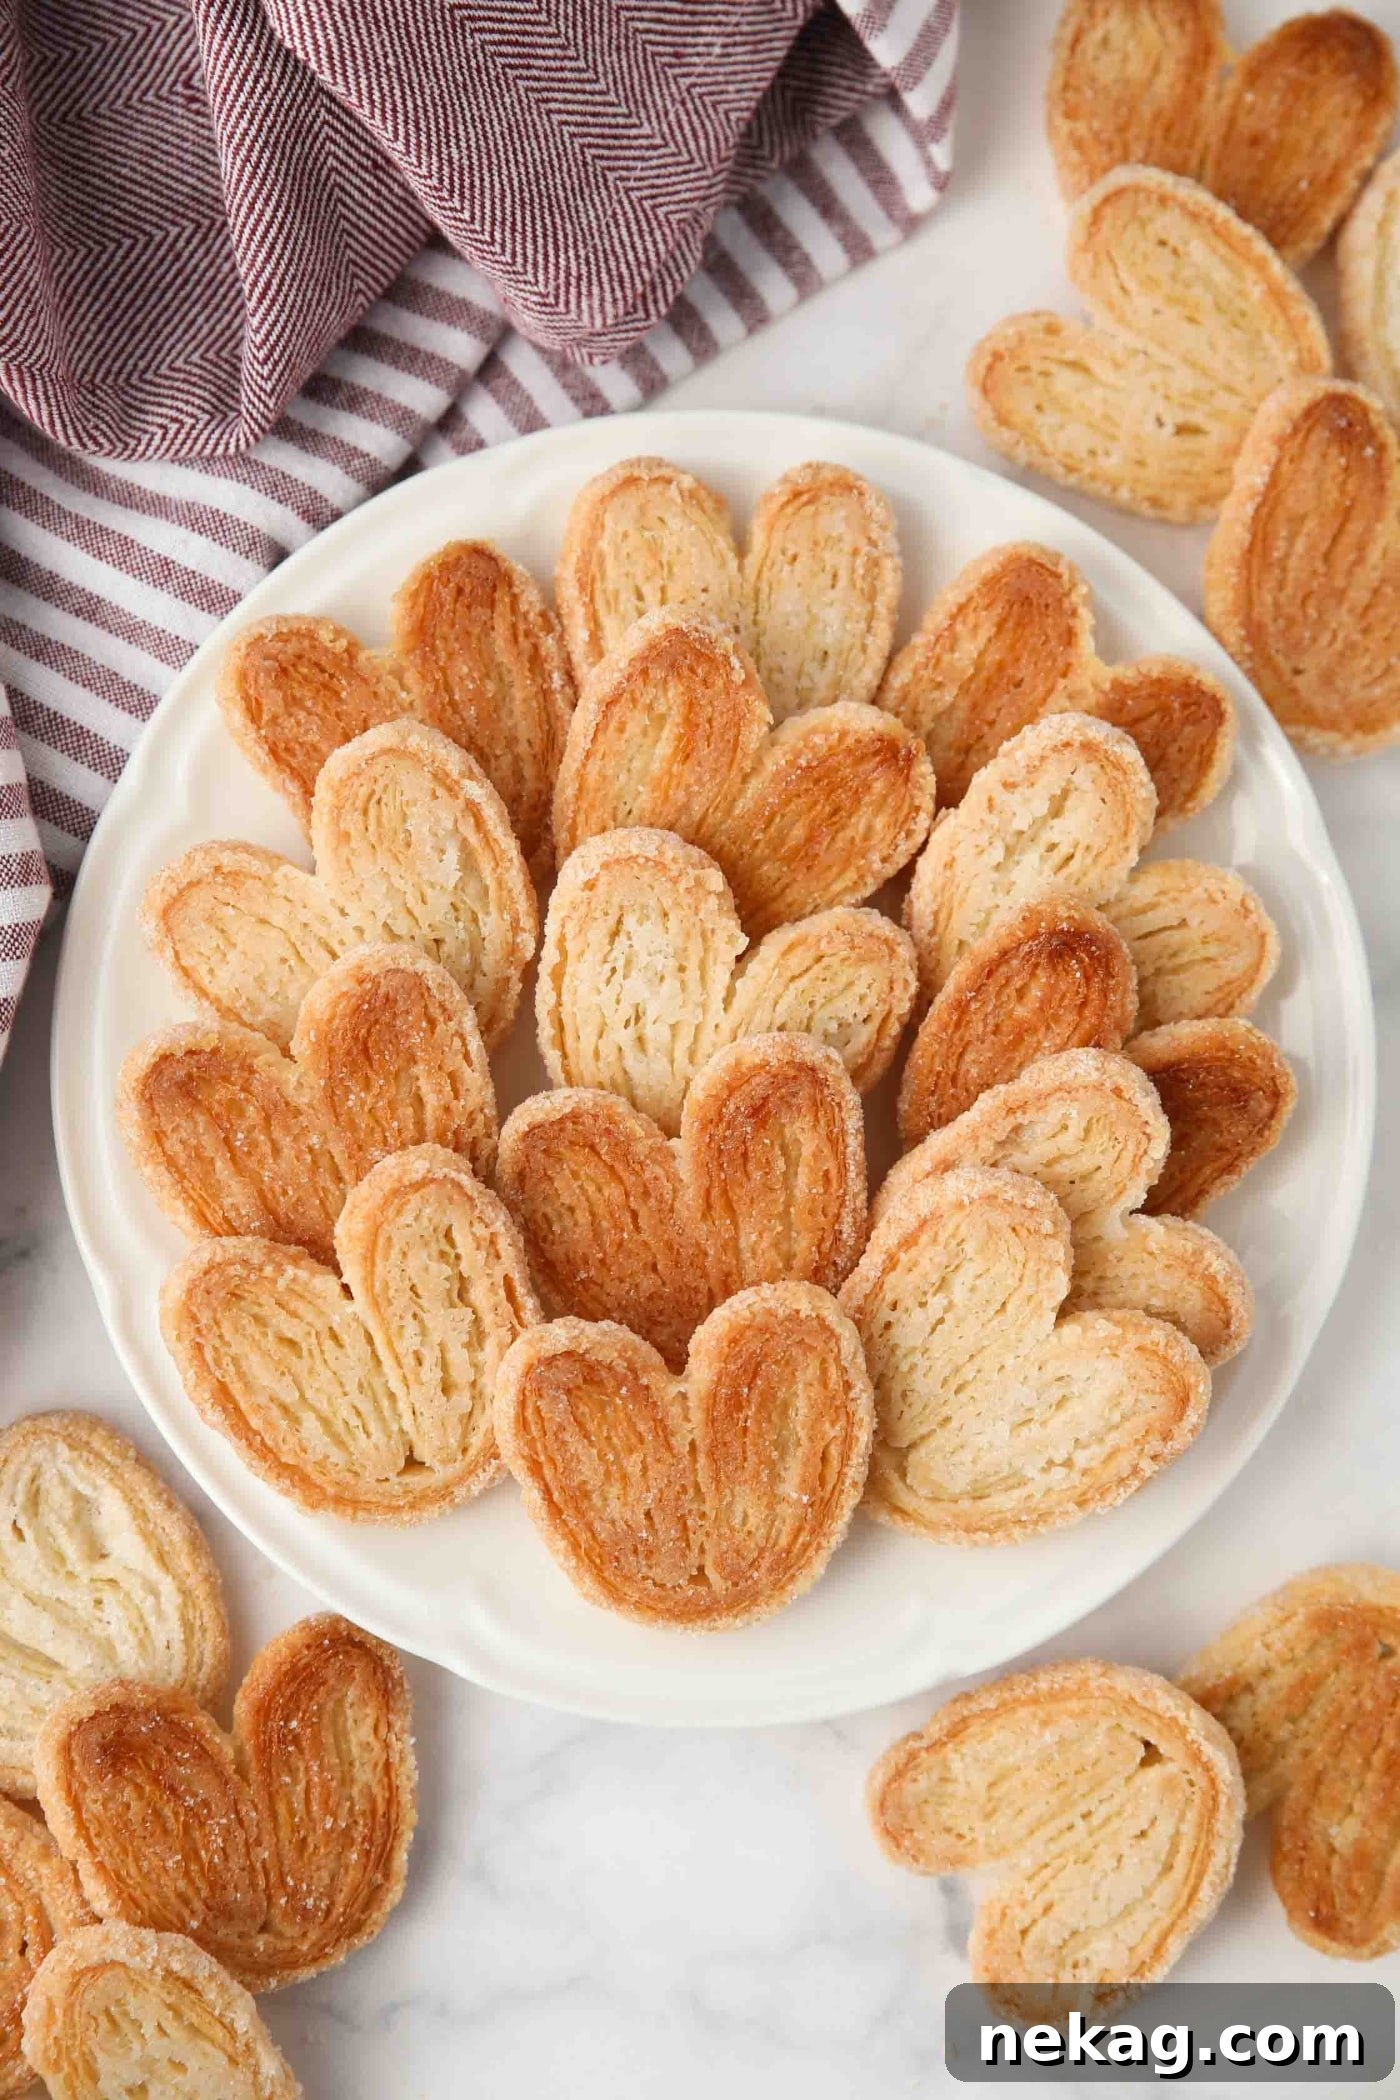
Mastering Palmiers: The Elegant 2-Ingredient French Pastry You Can Make at Home
Palmiers, often known as palmier cookies or “elephant ears,” are a timeless French pastry renowned for their elegant simplicity and irresistible flavor. These delightful treats, characterized by their beautiful heart-shaped or palm-leaf spirals, offer a harmonious blend of crisp, buttery layers and a sweet, caramelized sugar crunch. They are the quintessential companion for your morning coffee, afternoon tea, or as a light, sophisticated dessert that never fails to impress.

My culinary school days introduced me to the exquisite world of French baking, where I first learned to craft these ridiculously buttery and crisp pastries. Traditionally, palmiers are made from scratch, a meticulous process involving the lamination of dough with butter, followed by painstaking rolling and chilling of each layer. While the artisanal approach yields incredible results, modern life often calls for clever shortcuts.
Thankfully, the secret to achieving these divine pastries at home lies in a brilliant hack: store-bought puff pastry. Readily available in the freezer section of most grocery stores, it transforms what was once a multi-hour endeavor into a super easy, two-ingredient recipe. This convenient ingredient makes it possible for anyone to enjoy fresh, warm palmiers straight from their oven in a fraction of the time.
While larger retailers like Costco might offer palmiers for convenience, there’s a unique satisfaction and undeniable freshness that comes from baking them yourself. Not only can you often make them more affordably, but nothing truly compares to the aroma and taste of warm palmiers, still glistening with caramelized sugar, enjoyed just minutes after they emerge from the oven.
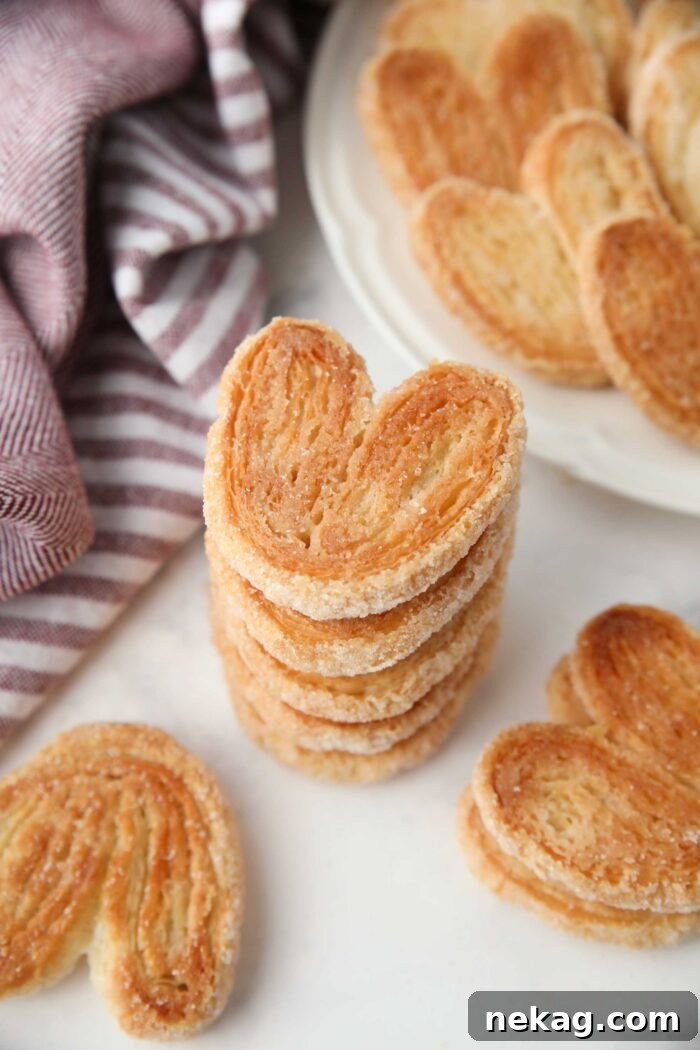
What Exactly Are Palmiers? Unveiling the Classic French Pastry
At their core, palmiers are delicate cookies crafted from puff pastry and granulated sugar. Their distinctive shape, resembling a palm leaf or a heart, is where they get their charming name. Originating in France, these pastries (pronounced “palm-ee-ays”) are created by rolling out puff pastry, generously coating it with sugar, and then folding it in a specific manner to form thin, flaky spirals. As they bake, the sugar caramelizes, creating a gloriously golden, crunchy exterior that contrasts beautifully with the tender, buttery interior layers.
Beyond “palmiers,” these beloved treats go by several other affectionate names around the world:
- Elephant Ears: A popular moniker reflecting their broad, ear-like shape.
- French Heart Cookies: Highlighting their romantic, symmetrical form.
- Palmier Cookies: The common English-friendly term used in bakeries globally, emphasizing their cookie-like consumption.
- Schweineohren: As my father-in-law, who grew up in Austria, shared, in German-speaking regions, they are sometimes humorously referred to as “pig’s ears.”
Regardless of what you call them, these elegant yet surprisingly simple cookies are a testament to the magic of puff pastry. They are perfect for special occasions, holiday gatherings, or simply when you desire an easy-to-make, yet undeniably impressive, homemade treat. Their sophisticated appearance belies the minimal effort required, making them a go-to for both seasoned bakers and beginners alike.
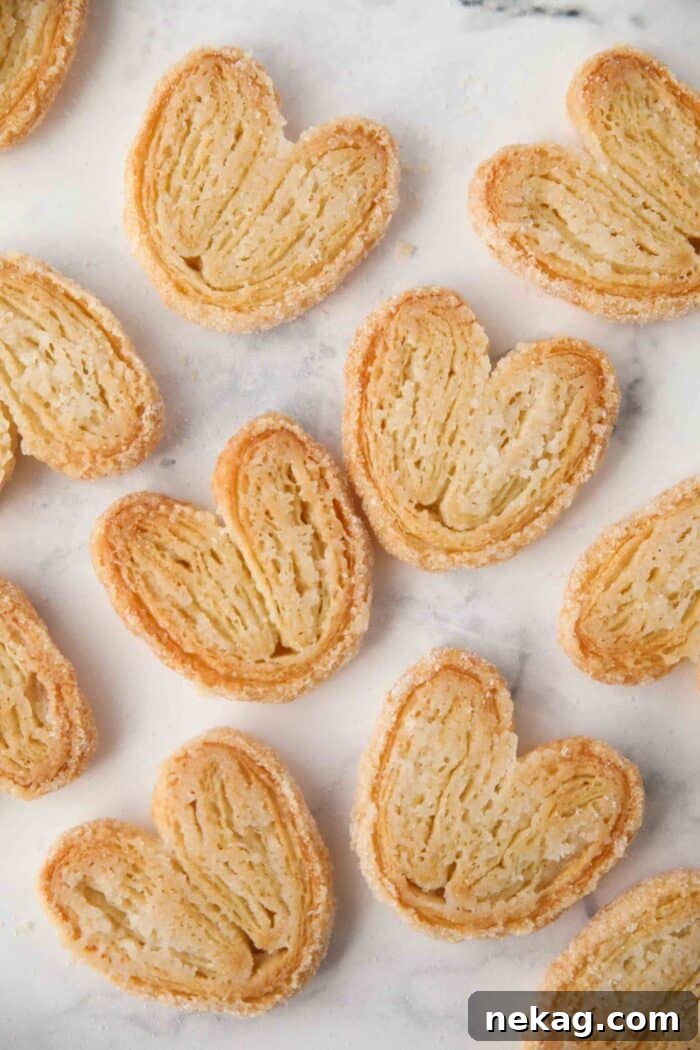
Essential Ingredients for Homemade Palmiers
The beauty of this palmier recipe lies in its elegant simplicity, requiring just two primary ingredients to achieve culinary perfection. This minimalism makes them an ideal choice for a last-minute dessert or an impromptu baking session.
- Puff Pastry: This is the star of the show. Puff pastry, or pâte feuilletée, is a delicate laminated dough composed of many thin layers of butter and dough. When baked, these layers separate and puff up, creating the signature airy, flaky texture of palmiers. While making puff pastry from scratch is a rewarding experience, high-quality store-bought varieties, like Pepperidge Farm Puff Pastry Sheets, offer incredible convenience without compromising on flavor or texture. Look for all-butter puff pastry if available for the best flavor, though standard varieties work wonderfully too.
- Granulated Sugar: This simple sweetener plays a dual role in palmiers. It provides sweetness, of course, but crucially, it also caramelizes during baking, forming that irresistible golden, crunchy crust that defines the pastry. Ensure you have enough to generously coat both sides of the pastry dough.
Pro Tip for Perfect Puff Pastry Handling:
Properly thawing your puff pastry is paramount to success. Thaw it overnight in the refrigerator for the best results. If you’re short on time, you can thaw it at room temperature for no more than 40 minutes, remembering to flip it every 10-15 minutes to ensure even thawing. The key is to use the dough as soon as it becomes pliable. Over-thawing can cause the butter within the dough to melt, which will prevent the layers from puffing up correctly during baking, resulting in a less flaky texture.
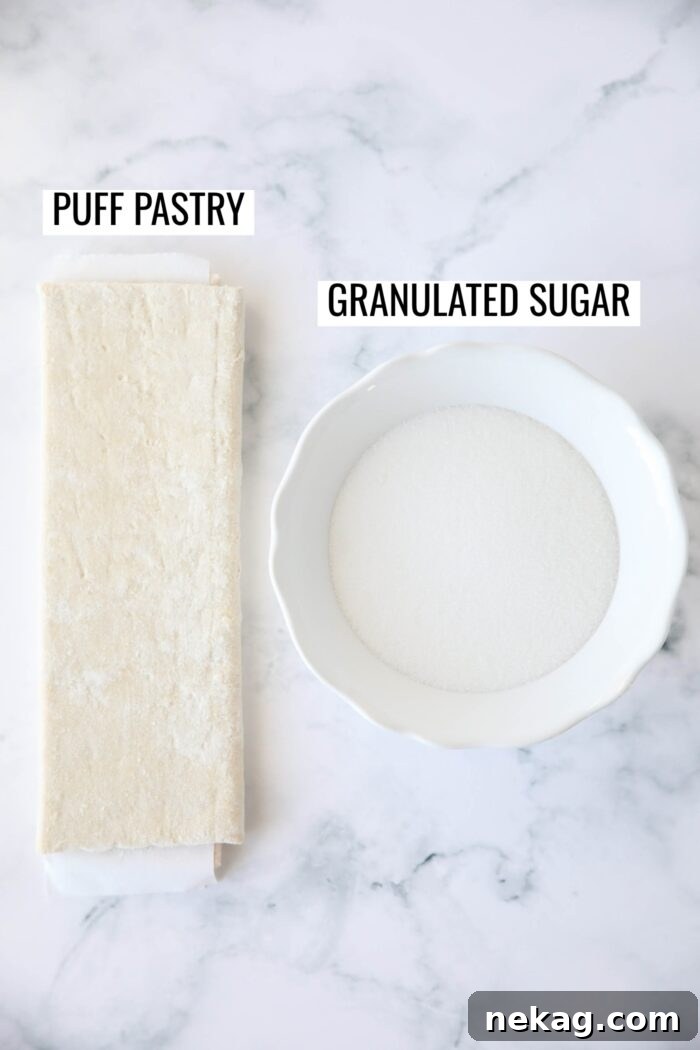
Elevate Your Palmiers with Optional Flavor Add-ins:
While classic palmiers are exquisite on their own, a touch of extra flavoring can transform them into a unique culinary creation. Consider these delicious additions:
- Spices: A sprinkle of ground cinnamon, cardamom, or even a blend like pumpkin pie spice can add a warm, aromatic depth.
- Vanilla Sugar: For a subtle, fragrant vanilla note, use vanilla sugar instead of plain granulated sugar, or simply mix a teaspoon of vanilla extract into a small amount of sugar before sprinkling.
- Melted Chocolate: After baking, a drizzle of melted dark, milk, or white chocolate, or dipping one half of the cooled palmier into chocolate, adds a decadent touch.
- Citrus Zest: Finely grated lemon or orange zest can infuse a bright, refreshing aroma.
Crafting Palmiers: A Step-by-Step Guide to Flaky Perfection
Making palmiers might seem intricate, but with these clear, step-by-step instructions, you’ll achieve bakery-quality results right in your own kitchen. The process is straightforward and incredibly rewarding.
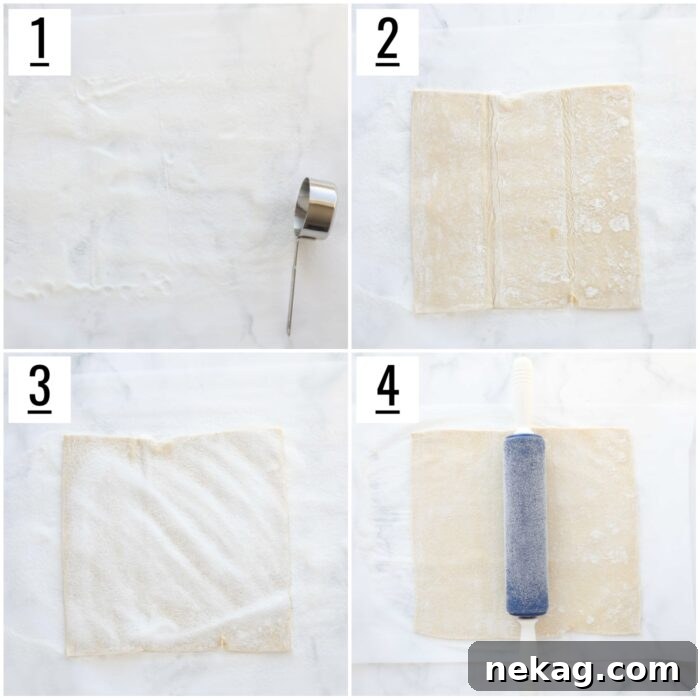
- Prepare Your Work Surface: Begin by sprinkling approximately 1/3 cup of granulated sugar generously onto a large piece of parchment paper. This parchment paper will serve as your non-stick surface and make cleanup a breeze.
- Lay Out the Puff Pastry: Carefully unroll your thawed, store-bought puff pastry sheet directly on top of the sugar-coated parchment paper. Ensure it lies flat without any creases or tears.
- Generously Sugar the Top: Sprinkle another 1/3 cup of granulated sugar evenly over the entire surface of the puff pastry. Don’t be shy with the sugar; it’s essential for that beautiful caramelization and crunch.
- Roll the Dough: Using a rolling pin, gently roll the dough into a larger square, aiming for approximately 12×12 inches. The sugar helps prevent sticking and incorporates into the dough’s surface as you roll.
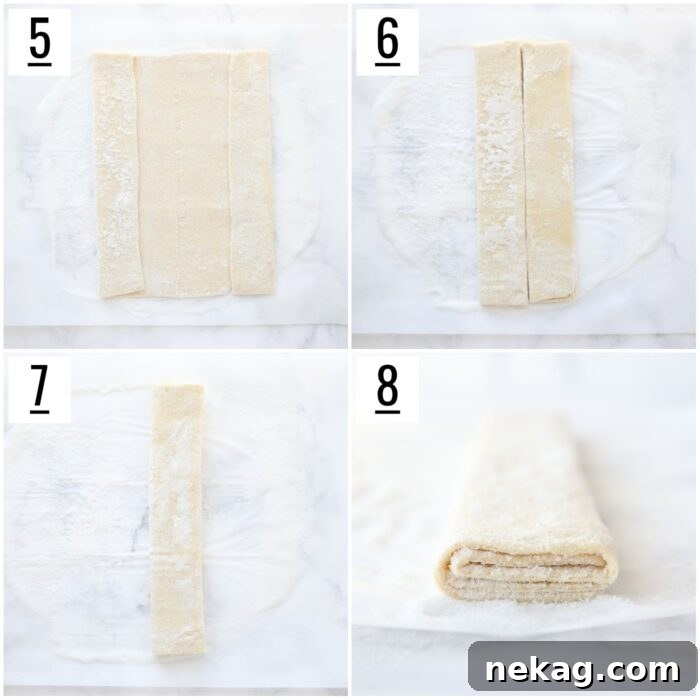
- Initiate the First Fold: Visualize the center line of your pastry. Fold the left edge of the dough inward so it meets the center line. Repeat this action with the right edge, folding it inward to meet the center line as well. This creates two parallel rolls of dough. If helpful, you can lightly draw a line through the sugar in the center to guide your folds.
- Second Fold for Compactness: Now, fold both the left and right sides inward once more, so they again meet perfectly in the very middle. This will make the dough even more compact.
- The “Book” Fold: Finally, fold the entire dough in half lengthwise, as if you are closing a book. This creates a tightly rolled, multi-layered log ready for slicing.
- Chill the Dough: Transfer the folded dough to the refrigerator and chill for 15-30 minutes. This crucial step helps to firm up the butter within the puff pastry, making it much easier to slice neatly and ensuring the palmiers maintain their shape during baking. Use the parchment paper as a convenient sling to lift the dough onto a sheet pan.
- Preheat Your Oven: While the dough is chilling, preheat your oven to 400 degrees Fahrenheit (200°C). Ensure the oven reaches the correct temperature before you begin baking.
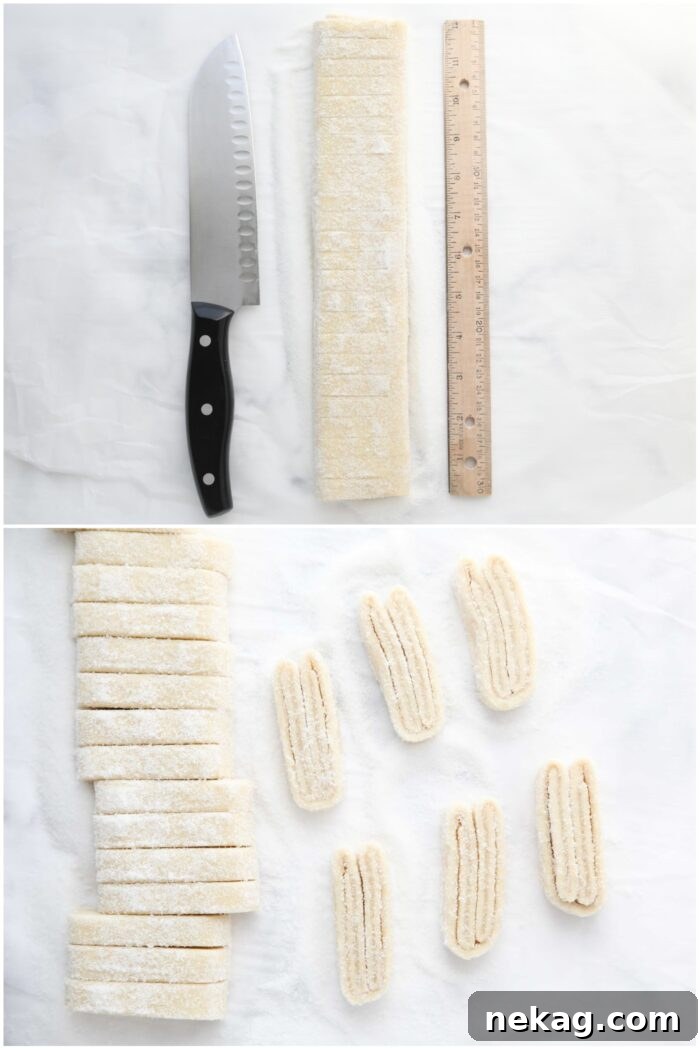
- Slice and Sugar the Cookies: Once chilled, remove the dough from the refrigerator. Using a sharp knife, cut the dough into 1/2-inch thick slices. For perfectly uniform pieces, a pro tip is to use a ruler to lightly score the top of the rolled dough before cutting all the way through. This technique should yield approximately 24 cookies from one sheet of puff pastry. Take each sliced piece and coat its cut edges with any excess sugar from your parchment paper, or sprinkle on fresh sugar. This extra sugar on the edges enhances the caramelization and provides additional crunch. Place the sugared slices onto a baking sheet lined with fresh parchment paper.
Shaping and Baking Palmiers to Golden Perfection
The final steps involve a bit of shaping magic and precise baking to achieve those iconic, crispy, and golden palmiers.
- Space and Shape on Baking Sheets: Arrange the sliced palmiers on parchment-lined baking sheets, ensuring they are spaced at least 2 inches apart. Overcrowding can lead to uneven baking. Aim for no more than 12 palmiers per standard baking tray. For that classic heart shape, gently separate the tips of each cookie, giving them a “bunny ear” appearance. This slight adjustment helps them fan out and crisp up beautifully during baking.
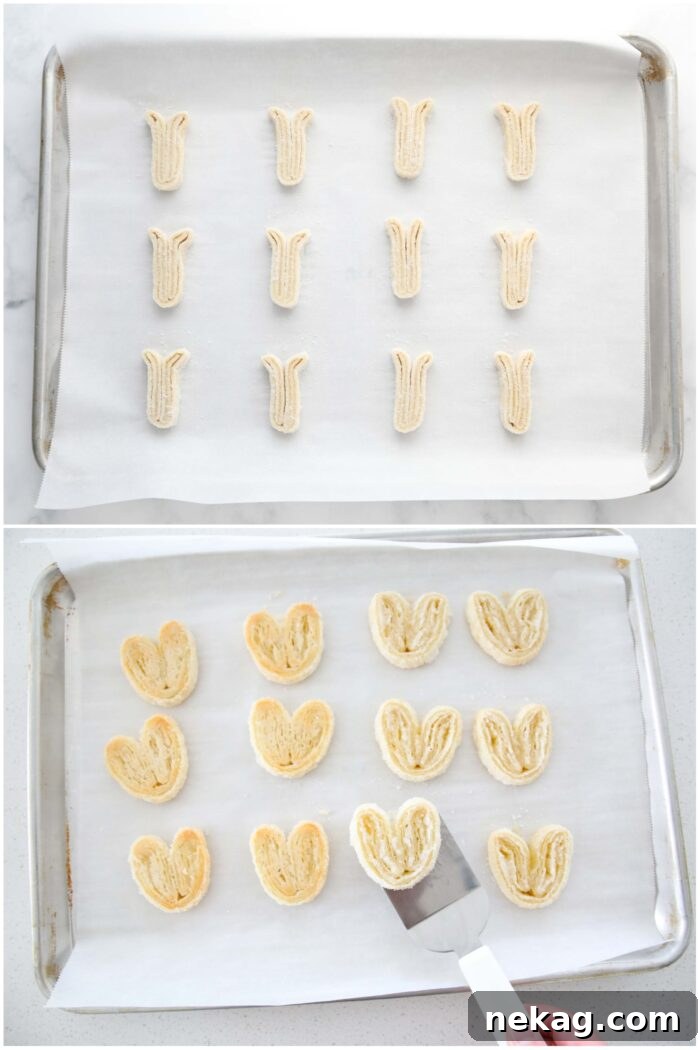
- Baking Process: Bake the palmiers in your preheated 400°F (200°C) oven for about 12 minutes. At this point, they should be lightly golden on one side. Carefully remove the baking sheet from the oven, and using a spatula, flip each palmier over. Return the tray to the oven and continue baking for another 3-7 minutes, or until both sides are beautifully golden brown and the sugar has caramelized to a deep, rich hue. Keep a close eye on them during this second stage, as sugar can burn quickly.
- Cooling and Enjoyment: As soon as the palmiers are ready, immediately transfer them from the hot baking sheet to a wire cooling rack. This prevents them from overcooking and sticking. Allow them to cool for at least 10 minutes before handling or eating, as the caramelized sugar will be extremely hot and can cause burns. Once cooled slightly, these crisp, buttery, and slightly chewy cookies will melt in your mouth, delivering a truly delightful experience.
To Flip or Not to Flip: The Palmier Baking Debate
One common question when baking palmiers is whether or not to flip them halfway through the cooking process. I conducted a test to compare the results of both methods:
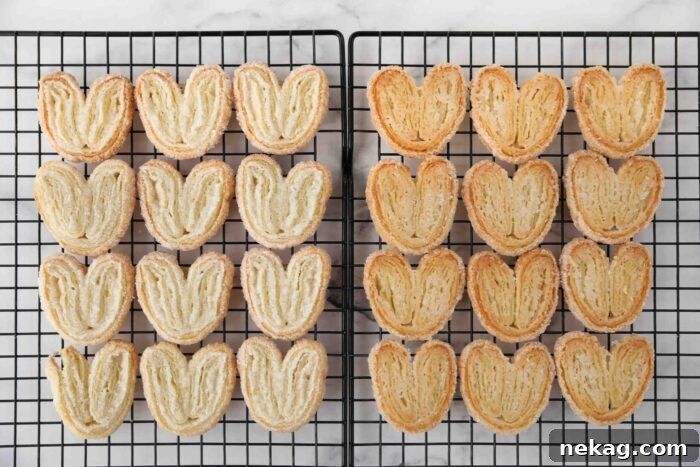
- Flipped Palmiers: The traditional method involves flipping the cookies partway through baking. This technique promotes a more even and consistent caramelization on both sides of the palmier, resulting in a uniformly golden-brown appearance and balanced crispness.
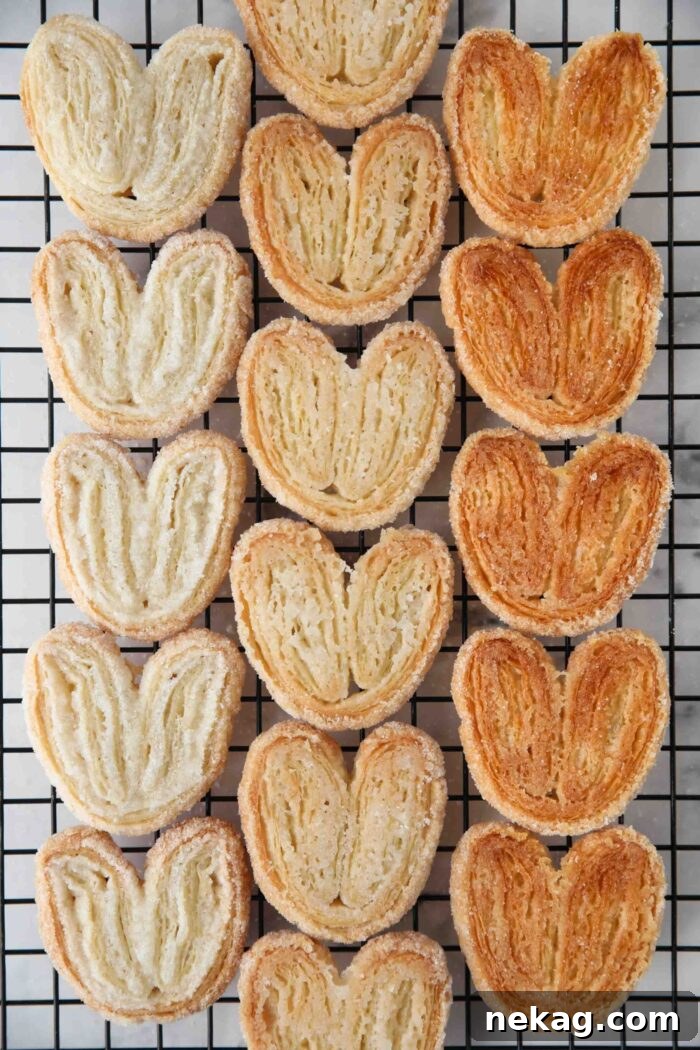
- Unflipped Palmiers: Baking without flipping results in a darker, crisper bottom due to prolonged contact with the hot baking sheet and caramelized sugar. The edges may be slightly more browned, while the top remains a lighter golden hue. While the appearance differs, this method still yields a delicious cookie and simplifies the baking process.
- Conclusion: In terms of crunch and overall texture, both methods produce wonderfully satisfying results. The choice primarily comes down to aesthetic preference. Having a mix of both flipped and unflipped palmiers on a serving platter can actually add visual interest and a delightful variety to your cookie spread.
Important Baking Note:
If you opt not to flip your palmiers, it is absolutely crucial to position your oven rack away from the heating element. Additionally, you must periodically check the bottom of the cookies to prevent burning. Sugar caramelizes and then burns very quickly, so do not leave your oven unattended when baking palmiers. Precision and vigilance are key to preventing a burnt batch!
Recipe Notes & Tips for Perfect Palmier Cookies
Achieving Palmier Perfection:
- Chill Before Slicing: Always ensure your dough is well-chilled before cutting. Cold dough is firmer, making it easier to slice cleanly and helping to maintain the distinct layers that result in a crisp and defined texture. Warm dough can lead to squished layers and a less flaky final product.
- Use Plenty of Sugar: Don’t skimp on the granulated sugar! It’s not just for sweetness; the generous coating provides the necessary sugar for beautiful caramelization, creating that signature crunchy crust. The sugar also acts as a barrier, preventing the dough from sticking to your rolling pin and work surface.
- Flip Partway Through (Optional but Recommended): For an evenly golden and caramelized finish on both sides, flipping the palmiers halfway through baking is recommended. This ensures uniform browning and a consistent crispness throughout.
- Experiment with Flavors: While sweet palmiers are traditional, don’t be afraid to venture into savory territory! Instead of sugar, try sprinkling the puff pastry with grated Parmesan cheese, fresh or dried herbs (like rosemary or thyme), black pepper, or even a thin layer of pesto before rolling. These savory variations make excellent appetizers or party snacks.
Why You’ll Absolutely Love Making Palmiers at Home
Palmiers are a baking revelation, offering an unparalleled combination of elegance and ease. They are one of those rare desserts that possess a genuinely “fancy” appearance, making them perfect for impressing guests, yet are deceptively simple to prepare. Here’s why they’ll quickly become a cherished recipe in your culinary repertoire:
- Minimal Tools, Maximum Impact: You don’t need any specialized equipment beyond a rolling pin and a sharp knife. This accessibility means anyone, regardless of baking experience, can create these stunning pastries.
- Quick Assembly: With store-bought puff pastry, palmiers come together in minutes. The majority of the time is spent chilling and baking, leaving you free to attend to other tasks.
- Endless Versatility: As mentioned, palmiers can be sweet or savory. This adaptability means they fit almost any occasion, from a sweet treat with coffee to a sophisticated appetizer.
- Sensory Delight: The delicate crunch, the rich buttery taste, and the shimmering caramelized sugar provide a multi-sensory experience that is truly addictive.
Whether you affectionately call them palmiers, palmier cookies, or French heart cookies, these pastries are a testament to how simple ingredients, when treated with a touch of technique, can yield extraordinary results. Get ready to fall in love with this easy, impressive, and utterly delicious French classic.
Frequently Asked Questions About Palmiers
Are palmiers cookies or pastries?
They are delightfully both! Technically, palmiers are classified as a pastry cookie. They are made from flaky puff pastry dough, a characteristic of pastries, but their size, individual portioning, and crisp texture make them perfect for serving and eating like cookies.
How do you store palmier cookies?
For optimal freshness and crispness, palmiers are truly best enjoyed the day they are made. If you have any leftovers, store them in an airtight container at room temperature. They will retain good quality for up to 5 days, though their delicate crispness may soften slightly over time.
Can I freeze palmiers?
Yes, but with a crucial distinction: you should only freeze palmiers before baking them. To do so, slice the raw, folded dough according to the instructions. Place the slices flat on a baking tray and freeze until solid. Once frozen, transfer them to a freezer-safe airtight container or bag. They can be frozen for up to 3 months. When ready to bake, simply place the frozen palmiers on a parchment-lined baking sheet and bake for a few extra minutes compared to fresh dough, until golden and caramelized.
What do palmiers taste like?
Palmiers offer a unique and irresistible flavor profile. They are wonderfully light and airy, intensely buttery from the puff pastry, and perfectly sweet. The star, however, is the caramelized sugar coating, which provides a satisfying crunch and a hint of toffee-like richness. Imagine a delightful cross between a flaky croissant and a crisp sugar cookie, and you’re close to understanding the magic of a palmier.
Can I use brown sugar instead of granulated sugar?
While granulated sugar is traditional for its distinct caramelization, you can experiment with light brown sugar for a slightly chewier texture and a deeper, molasses-like flavor. However, brown sugar tends to melt and spread more, potentially altering the crispness and shape slightly. If using brown sugar, keep a closer eye on them during baking.
What if my palmiers aren’t crispy?
Several factors can affect crispness. Ensure your oven is fully preheated to the correct temperature. Not enough sugar, or insufficient baking time, can lead to a softer texture. Also, make sure the puff pastry was properly thawed and not too warm when rolled, as melted butter can prevent flakiness. High humidity can also affect crispness, so bake on a dry day if possible.
How should I serve palmiers?
Palmiers are incredibly versatile. They are perfect on their own as a simple cookie or pastry. Serve them alongside coffee, tea, hot chocolate, or a glass of milk. For a more elaborate dessert, pair them with fresh berries, a dollop of whipped cream, or a scoop of vanilla ice cream. Dipping them in melted chocolate adds another layer of indulgence.
More You’ll Love
Raspberry Thumbprint Cookies + Video
Easy Sugar Cookies
The BEST Sugar Cookies
Almond Bars
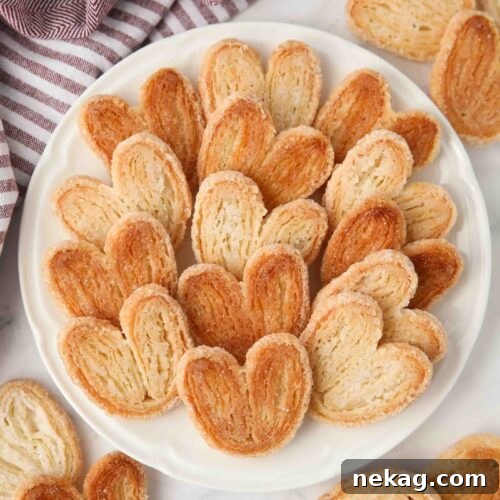
Palmiers
Pin
Rate
SaveSaved!
Ingredients
- ⅔ cup (134 g) granulated sugar
- 1 puff pastry sheet
Equipment
-
Rolling Pin
-
Santoku Knife
Instructions
-
Thaw the puff pastry overnight in the refrigerator or at room temperature for no longer than 40 minutes, flipping it over every 10-15 minutes to help it thaw evenly. Once the dough is pliable, you will want to use it immediately as to prevent the butter inside the dough from melting.
-
Sprinkle 1/3 cup of sugar onto a large piece of parchment paper. Place the puff pastry on top of the sugar. (Unroll the thawed, store-bought puff pastry.) Sprinkle another 1/3 cup of sugar on top of the puff pastry. Use a rolling pin to roll the dough into a larger square, about 12×12-inches.
-
Fold the left and right sides inward halfway towards the middle. (I lightly drew a line through the sugar in the center to help eyeball it better.) Fold the left and right sides again to meet in the middle. Then fold the dough in half to make a closed book.
-
Chill the dough in the fridge for 15-30 minutes to help firm up the butter inside the puff pastry. (TIP: I like to use the parchment paper like a sling to pick up the puff pastry and place it on a sheet pan since you will still need the excess sugar in the next step.)
-
Preheat the oven to 400 degrees Fahrenheit while the dough is chilling. (Make sure it comes to temperature before the next step.)
-
Use a sharp knife to cut the dough into 1/2-inch slices. Coat the cut edges with extra sugar and place on a parchment-lined baking sheet. (TIP: I used a ruler and scored the top of the rolled dough to create uniform pieces before cutting through.)
-
Place the cookies 2-inches apart onto parchment lined sheet pans, with no more than 12 per tray. Separate the tips of the cookies like bunny ears to make them bake into a heart shape.
-
Bake at 400˚F for 12 minutes, then flip them over to the other side and bake 3-7 minutes more, until golden and caramelized. Immediately transfer baked palmiers to a wire cooling rack and wait 10 minutes before eating, as the sugar gets really hot.
Notes
- You can bake these for 15-18 minutes straight, without flipping them over. Make sure your oven rack is not too close to the heating element and at least periodically check the bottom of the cookies, if you don’t plan to flip them. Sugar burns shortly after it caramelizes, so don’t walk away from these.
- TO STORE: Palmiers are best eaten the day you make them. Store any leftovers in an airtight container at room temperature for up to 5 days.
- TO FREEZE: You can only freeze palmiers before baking them. Slice and freeze flat on a tray. Then transfer to a freezer-safe airtight container or bag. Freeze for up to 3 months. Bake for a few extra minutes from frozen.
Nutrition
Disclaimer: Nutritional values were calculated using a third-party tool and are provided as an estimation only.
Sharing this recipe with a link is both encouraged and appreciated. Copying/pasting and/or screenshots of full recipes to any social media is strictly prohibited. Content and photographs are copyright protected.
Did you make this?
Don’t forget to leave a rating below and make sure to follow on Pinterest and Instagram for more!