
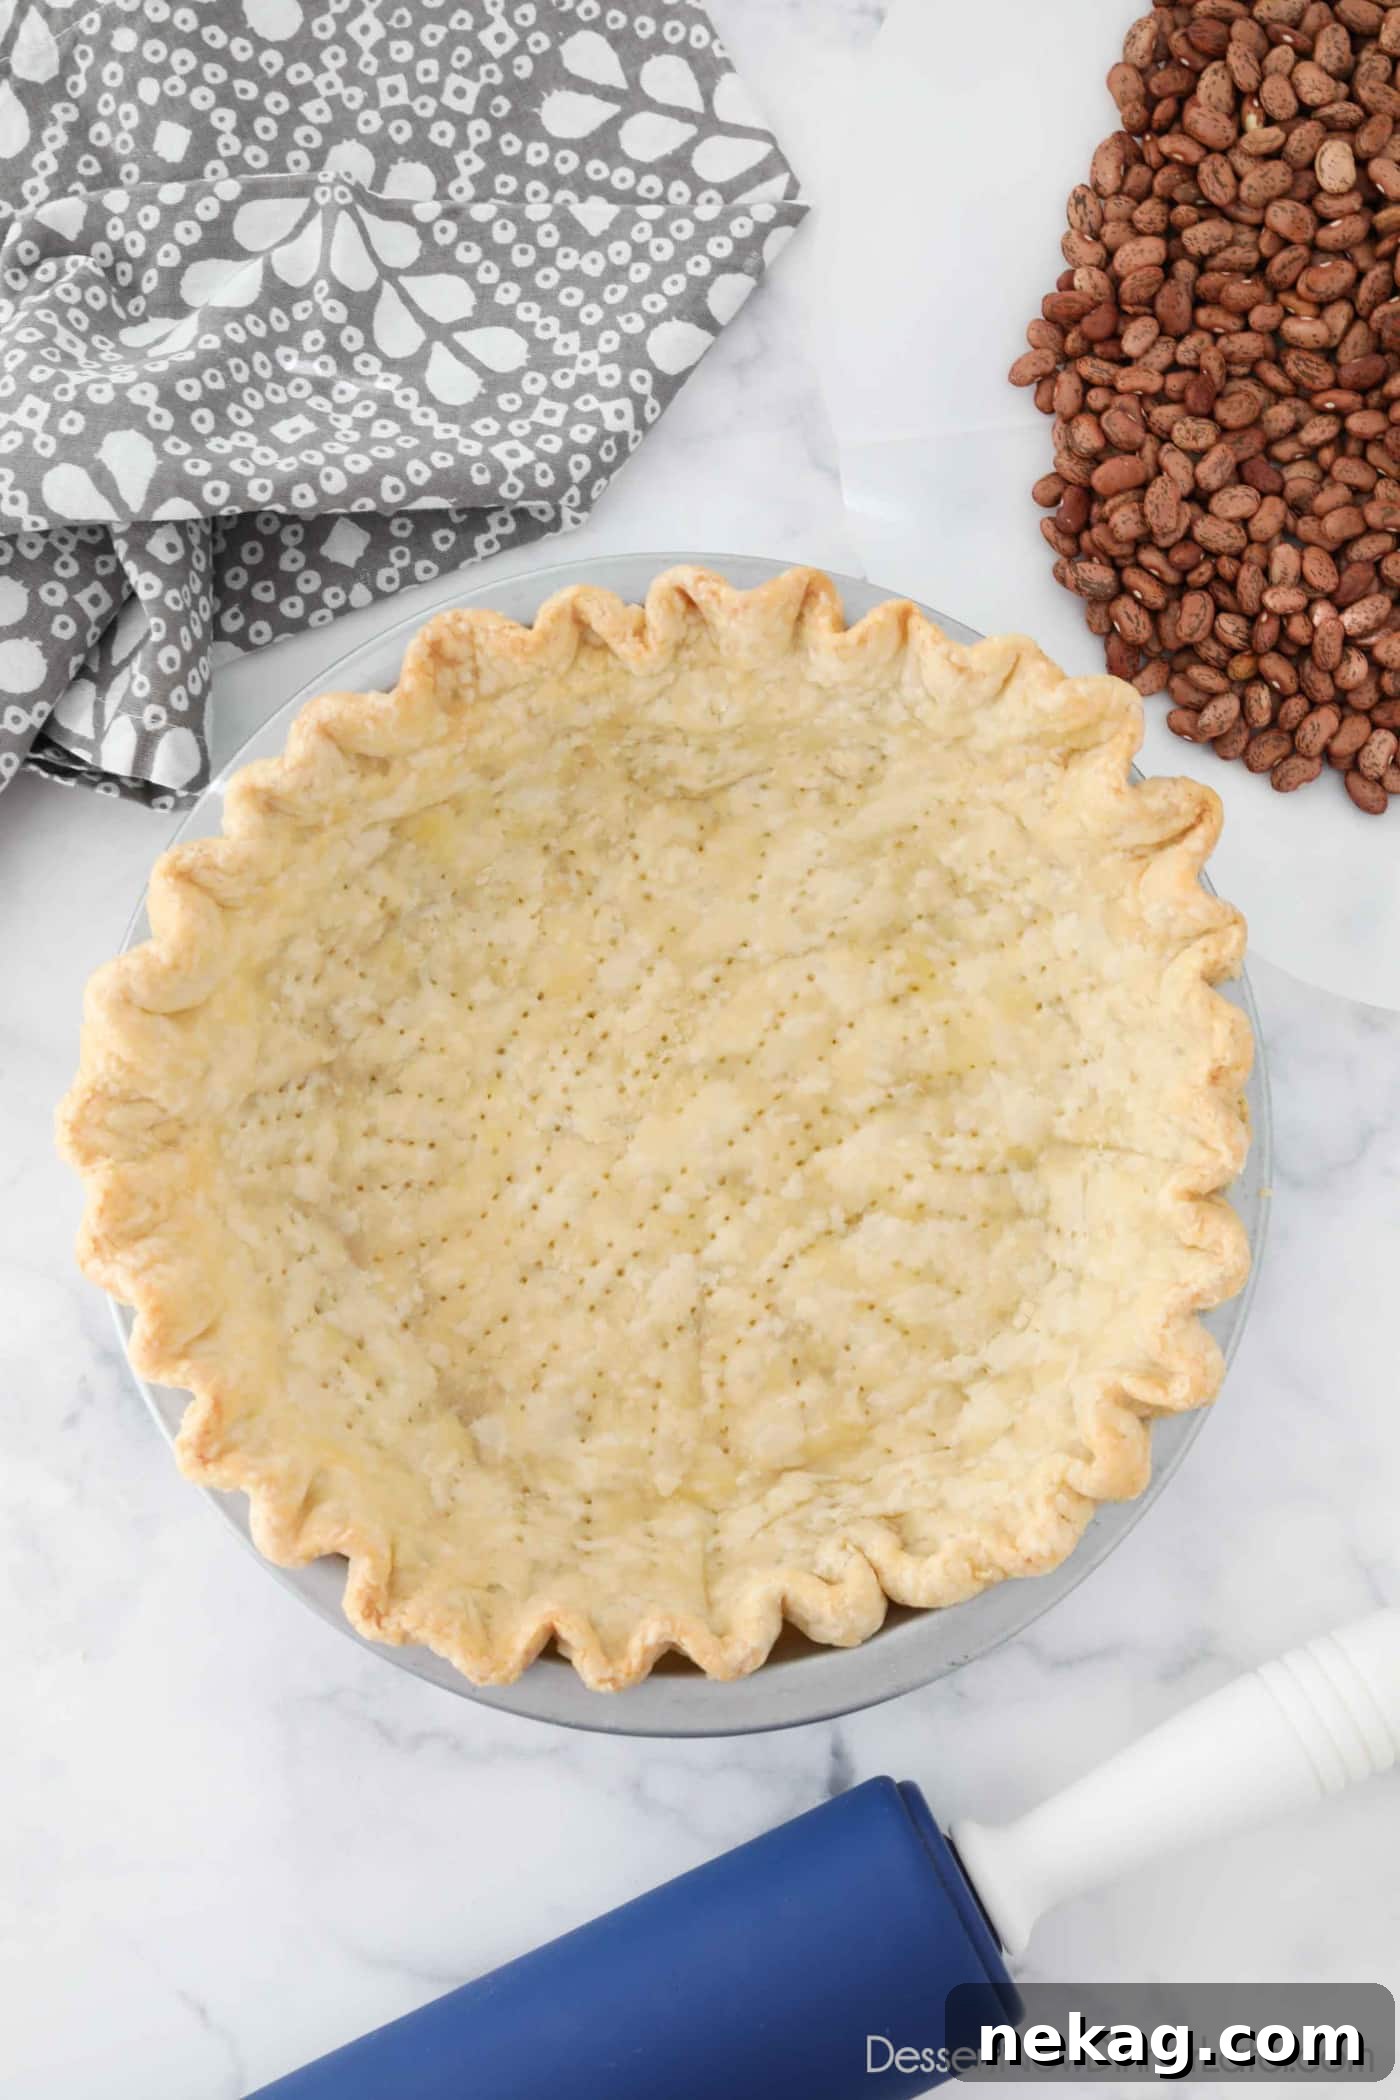
This comprehensive tutorial will guide you through the essential process of how to blind bake pie crust, ensuring a perfectly crisp and un-shrunken shell every time. Whether you’re preparing a luscious cream pie, a vibrant fresh fruit tart, a comforting pudding pie, or any other delicate-filling dessert like a classic lemon meringue, mastering this technique is key to pastry perfection. Say goodbye to soggy bottoms and unruly edges; we’ll show you how to achieve a professional-quality crust using simple items you likely already have in your kitchen, no special weights required.
What Exactly is Blind Baking a Pie Crust?
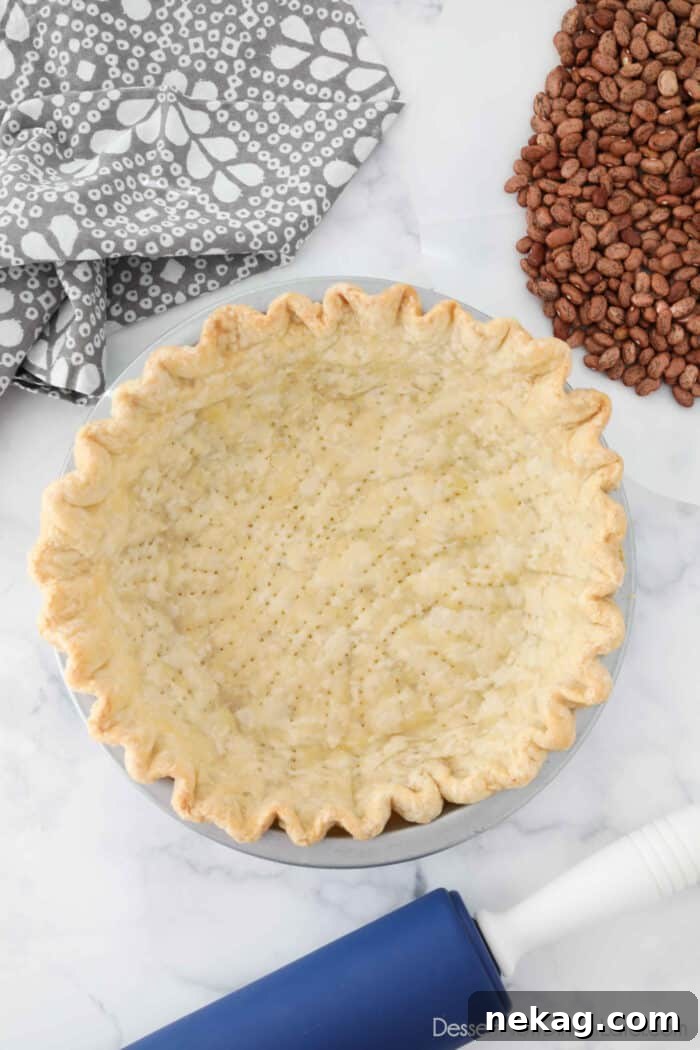
Blind baking a pie crust is a fundamental technique in baking that involves pre-baking an empty pie shell before adding its filling. This crucial step prevents the pie crust from becoming soggy, especially when paired with wet or unbaked fillings, and also ensures the crust is fully cooked and delightfully crisp. Many sweet and savory pie recipes, particularly those with liquid-heavy or no-bake fillings, rely on a partially or fully baked pie crust to achieve optimal texture and structural integrity. Without blind baking, the moisture from the filling can seep into the raw dough, turning what should be a flaky, golden base into a disappointing, gummy mess.
The term “blind baking” likely originates from the idea of baking the crust “blindly,” or without being able to see its final filled state. It’s an essential skill for any home baker looking to elevate their pie-making game, guaranteeing a sturdy foundation that can stand up to even the most delicate fillings.
When is Blind Baking Your Pie Crust Essential?
Understanding when to blind bake is just as important as knowing how. There are primarily two scenarios where blind baking becomes a non-negotiable step in your pie-making process:
For Custard and Liquid Fillings (Par-Baked)
If you’re making a pie with a wet or custard-like filling that will be baked along with the crust, such as pumpkin pie, pecan pie, or a savory quiche, a par-baked (partially baked) crust is often required. The moisture in these fillings can make the crust soggy before it has adequate time to bake through and crisp up. By partially baking the crust beforehand, you create a barrier and give the dough a head start, ensuring it isn’t under-baked or raw when the filling is perfectly set. This is particularly crucial for pies that have long baking times, allowing the crust to develop its structure and color without overcooking the delicate filling.
For Unbaked Fillings (Fully Baked)
For pies where the filling is not baked at all, or only requires minimal setting, a completely baked pie crust is essential. This includes popular desserts like pudding pies, fresh fruit pies or tarts (where fruit is added fresh or lightly cooked separately), and various cream pies such as chocolate cream, banana cream, or lemon meringue pie. Since these fillings are typically prepared on the stovetop or are entirely no-bake, the crust needs to be fully cooked, golden, and crisp on its own, ready to support and complement the cool, soft filling without contributing any raw dough flavors or textures.
Blind Baking Without Specialty Pie Weights: Your Pantry is Your Ally
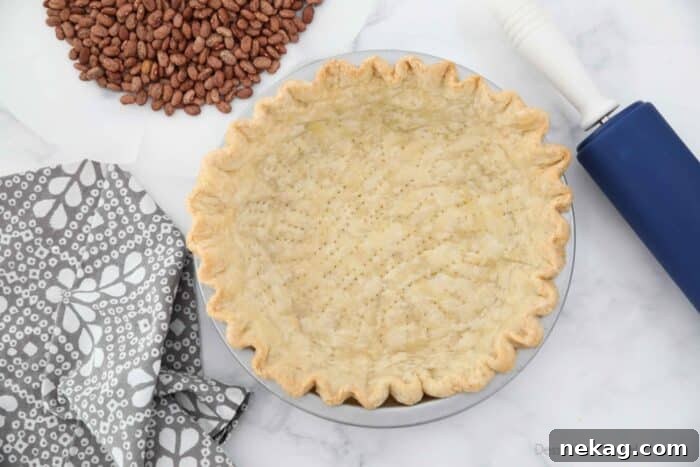
Many aspiring bakers are hesitant to try blind baking, fearing they need specialized pie weights. The good news is, you absolutely do not need any fancy equipment. The primary purpose of pie weights is to prevent the pie crust from shrinking down the sides of the pan and from bubbling up in the center during baking. As the fat in the dough melts, the crust can lose its shape. Weighing it down helps maintain its structure, ensuring a beautifully even and structurally sound shell. Fortunately, your pantry likely holds several excellent alternatives.
Accessible Alternatives to Traditional Pie Weights
You might be surprised by how many everyday kitchen staples can double as effective pie weights. The goal is to find something heavy enough to cover the bottom and extend up the sides of the pie crust, applying even pressure to prevent shrinkage and puffing.
Dry Beans or Rice
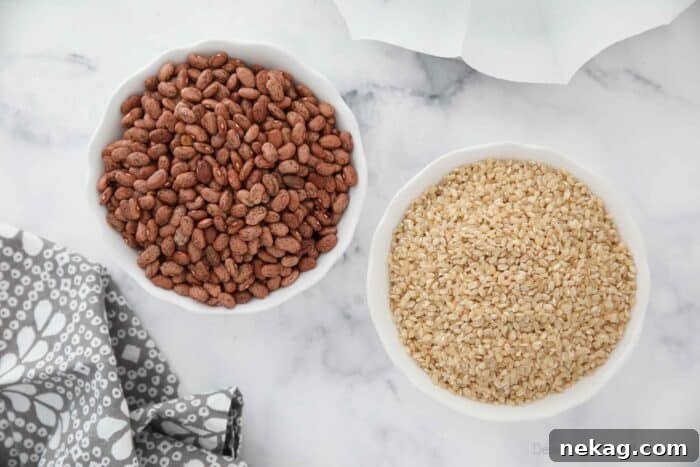
A time-honored method I learned in culinary school is to use dry beans or uncooked rice. These pantry staples are readily available, inexpensive, and excellent at conducting and retaining heat, helping to cook the crust evenly. You’ll need a substantial amount—typically about 1 1/2 pounds—to adequately fill a standard 9-inch pie crust up to the rim. I personally prefer using dry beans because their larger size makes them easier to pick out of the crust if any accidentally spill out during removal. While you won’t be able to cook and eat these beans or rice after blind baking (as they become extremely dry and hard), you can certainly save them in a jar or bag and reuse them repeatedly for future blind baking projects, making them a very economical choice.
Granulated Sugar
A more modern and increasingly popular technique involves using granulated sugar as a weight. Sugar offers several advantages: it distributes weight incredibly evenly across the entire surface of the crust, minimizing shrinkage and promoting uniform baking. It’s also a common ingredient for most bakers, and like beans or rice, it can be reused multiple times for the same purpose. An added benefit of using sugar is that it lightly caramelizes during baking, imparting a subtle, delicious flavor. While I haven’t personally tried this method yet, it’s highly regarded by many reputable culinary sources and is on my list to experiment with soon. For now, I’ll share the tried-and-true dry beans or rice method that has served me well for over 15 years.
Choosing Your Liner: Parchment Paper vs. Aluminum Foil
Beyond selecting your preferred weight, you also need a liner to place between the pie dough and your chosen weights. This liner serves a crucial purpose: it prevents your weights (be it beans, rice, or sugar) from baking directly into the dough and makes their removal quick and clean. Most blind baking methods, especially for fully baked crusts, employ a “double baking” technique where the crust is first baked with weights, then the weights are removed for a final bake.
Heavy Duty Aluminum Foil
Aluminum foil is a quick and convenient option. It’s easy to shape to the contours of the pie dish and can effectively cover the edges of the crust, which helps prevent them from over-browning too quickly. However, there’s a slight risk of the foil sticking to the dough or tearing when you try to lift it out, potentially spilling your weights into the partially baked crust. Trust me, picking tiny flecks of rice out of a warm, delicate crust is no baker’s delight! If you opt for foil, I highly recommend using heavy-duty non-stick aluminum foil to minimize these risks.
Parchment Paper
My preferred liner is parchment paper. It’s incredibly reliable because it rarely sticks to the dough and I’ve never experienced it tearing during removal. This makes lifting the weights out of the crust a smooth and mess-free process. You can simply place a large piece of parchment paper into the crust and then add your weights, gently pressing them to help the paper conform to the pan’s bottom and sides. While simply scrunching a square of parchment paper works perfectly fine, I often like to create a neat parchment circle for a tidier fit. I’ll show you exactly how to do that next.
Step-by-Step Guide: Crafting the Perfect Parchment Paper Circle
Creating a parchment paper circle isn’t strictly necessary, but it provides a neat fit and ensures even coverage for your pie weights. It’s a simple folding and cutting technique that will make your blind baking process even smoother.
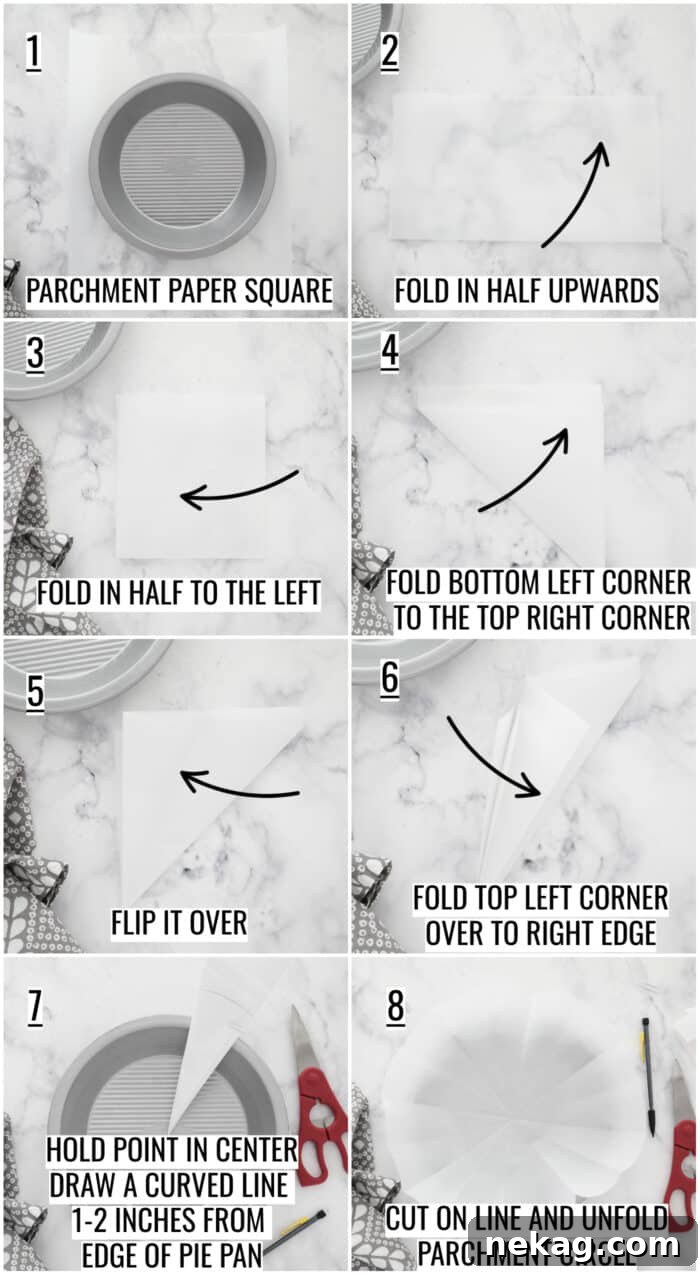
- Start with a square (or an almost square) piece of parchment paper that is comfortably larger than your pie dish. This ensures you have enough material to work with.
- Fold the square in half upwards, bringing the bottom edge to meet the top edge. Crease it sharply.
- Fold it in half again, this time bringing the right side over to the left side. You should now have a smaller square.
- Take the bottom left corner and fold it upwards to meet the top right corner, creating a precise triangle shape.
- Now, grab the newly formed top right corner of the triangle and flip it over so it is on the top left side. This creates a longer, narrower triangle.
- Next, fold the top left corner of this new triangle over to align with the right edge. You’ll end up with a very narrow, pointed triangle.
- Place the pointed tip of this folded parchment in the absolute center of your empty pie dish. With a pencil, draw a curved line along the edge of the pie pan, extending 1-2 inches from the rim. This will be your cutting guide.
- Carefully cut along the drawn line. Unfold the parchment paper, and you will reveal a perfectly circular liner ready for your pie crust.
The Double Baking Method: How to Blind Bake a Pie Crust to Perfection
With your chosen pie weights and custom-fit liner ready, you are now fully equipped to blind bake your pie crust using the highly effective double baking method. This technique ensures a beautifully crisp, golden, and perfectly shaped pie shell every time.
Preparation Phase
- Prepare Your Pie Dough: Begin by making your favorite pie dough recipe. Once chilled, roll out the dough, carefully transfer it into your pie dish, and then trim and crimp the edges to create a decorative finish. For optimal results and minimal shrinkage, a helpful tip is to trim the dough slightly farther from the rim of the pie plate and crimp the crust as far away from the inner sides as possible. Think of it as allowing the edges to “dangle” slightly, which gives them less opportunity to pull inwards as they bake.
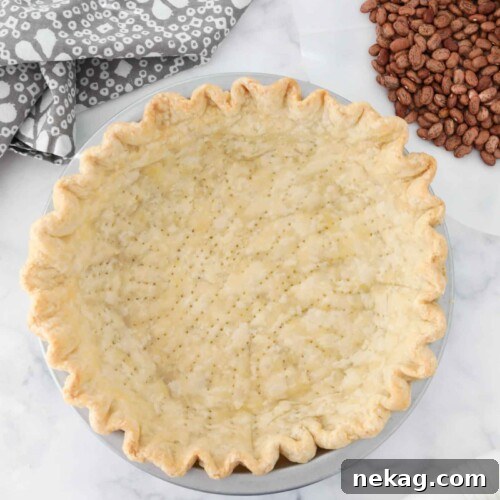
NOTE: The type of pie crust you use can impact its stability. A pie crust made with shortening tends to hold its shape better during baking due to shortening’s higher melting point. Conversely, an all-butter pie crust, while exquisitely flavorful and flaky (and used in the accompanying photos), may be more prone to shrinkage. Choose the crust type that aligns best with your priorities – shape retention or maximum flavor.
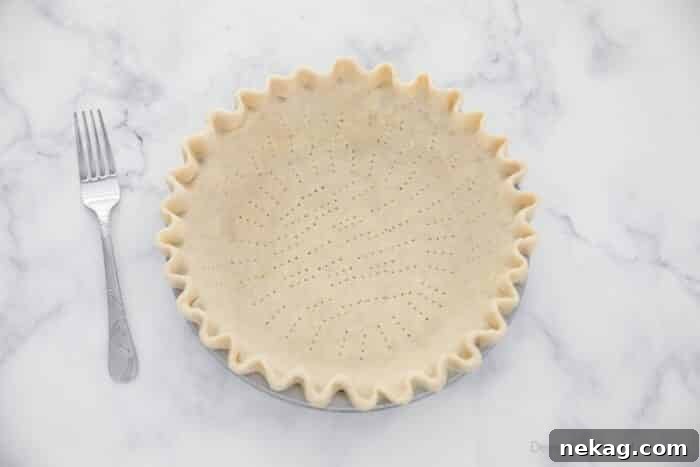
- Dock the Crust: Using a fork, carefully “dock” (prick) the entire bottom and sides of the pie crust. These small holes are vital as they allow steam to escape from underneath the dough during baking. Without docking, the steam would accumulate, causing the pie crust to puff up unevenly or create large bubbles in the oven, leading to an irregular and poorly shaped base.
- Optional Chilling/Freezing: For an extra layer of protection against shrinkage, consider chilling your prepared pie crust in the freezer for about 10 minutes before baking. This brief chill helps to firm up the fat in the dough and set the crimped edges, giving them a better chance to hold their shape and structure before the fat begins to melt rapidly in the hot oven.
First Bake with Weights (Par-Baking)
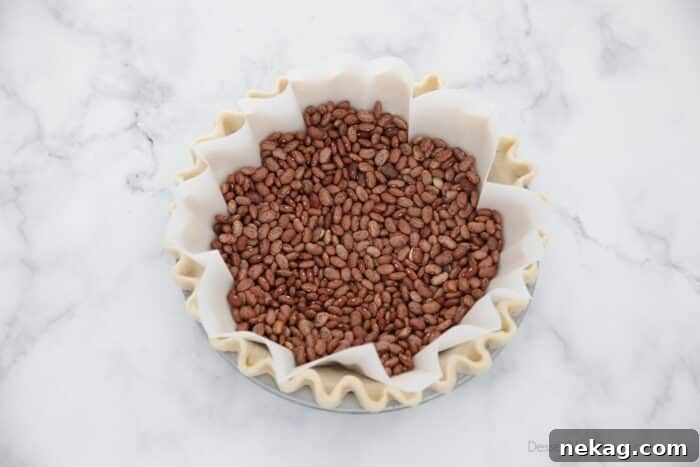
- Line and Fill with Weights: Gently place your prepared parchment paper circle (or aluminum foil) into the docked pie crust. Then, fill this liner generously with your chosen dry beans or rice, ensuring they reach almost to the top of the crimped edges. This substantial weight is crucial for holding the crust firmly in place, preventing it from shrinking down the sides of the pan and effectively stopping the bottom from bubbling up.
- Initial Bake: Preheat your oven to 350 degrees Fahrenheit (175°C). Place the pie crust, filled with weights, into the preheated oven and bake for 20-25 minutes. During this stage, you are looking for the edges of the crust to just begin turning a very light golden brown. This indicates that the crust is partially set.
- Remove Weights: Carefully remove the pie crust from the oven. Using the edges of the parchment paper or foil as handles, gently lift and remove the weights and the liner from the crust. Place the parchment and weights on a wire rack to cool completely. Remember, these weights are reusable, so store them for your next blind baking adventure! This initial bake sets the crust, providing a stable foundation and partially cooking the dough.
NOTE: If your recipe calls for a custard-style filling that will bake with the crust (e.g., pumpkin pie or quiche), this is the precise moment to add your prepared filling. You may need to cover the edges of the crust with foil if the recipe requires a higher oven temperature or a longer baking time to prevent them from over-browning.
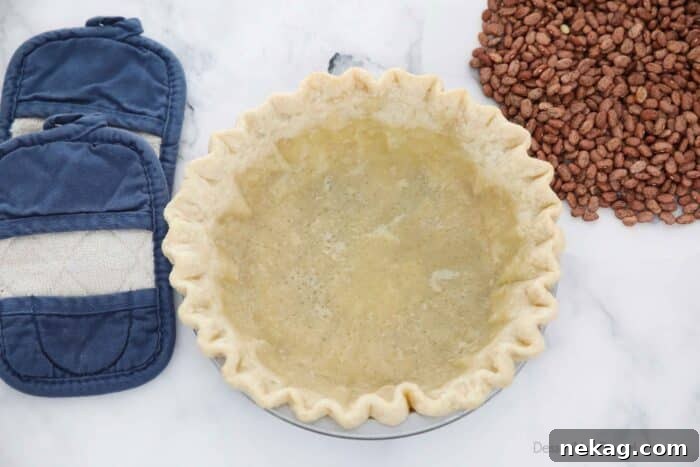
Second Bake Without Weights (Full Baking)
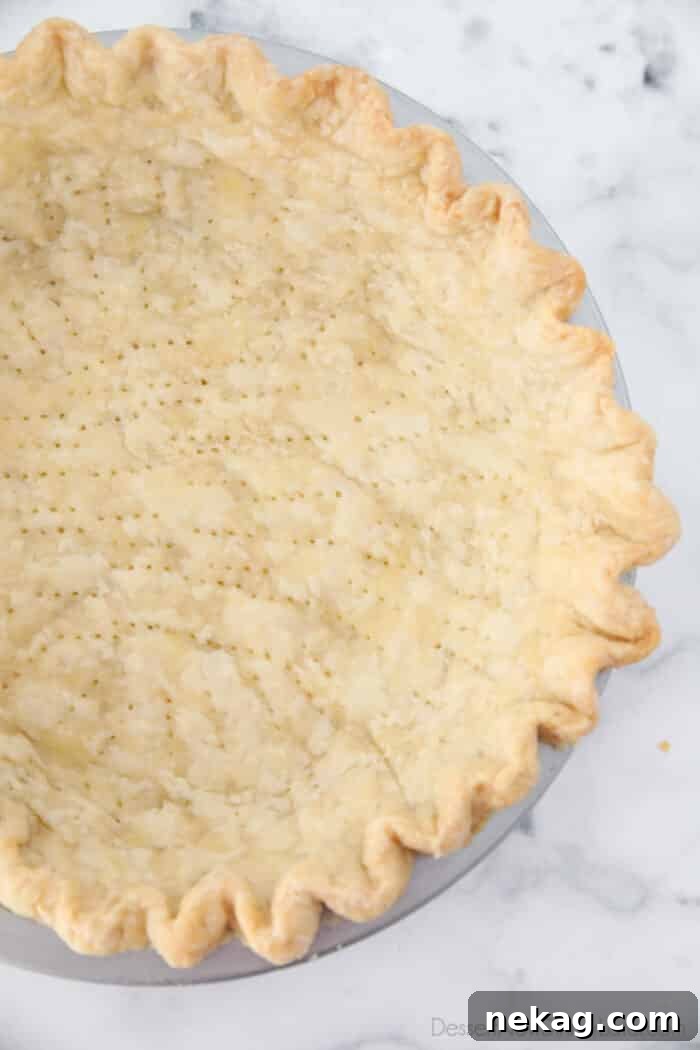
- Final Bake for Crispness: Return the now-empty pie crust to the 350°F (175°C) oven for an additional 15-20 minutes. This second bake is where the magic happens, allowing the bottom of the crust to become beautifully golden brown, dry, and thoroughly crisp. The goal is a crust that looks completely baked through, with no wet or oily patches. If the crust appears oily, it usually indicates that the fat (butter or shortening) in your dough was too soft before it entered the oven, or that the dough was overworked.
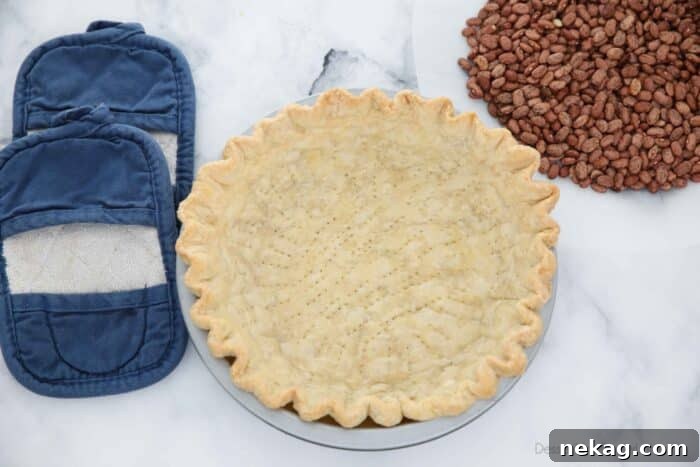
- Cool and Fill: Once completely baked, remove the pie crust from the oven and allow it to cool entirely on a wire rack before adding your fresh fruit, pudding, cream, or other soft, unbaked fillings. Filling a warm crust will cause condensation and make your beautiful, crisp crust soggy again. Patience is a virtue in pie making!
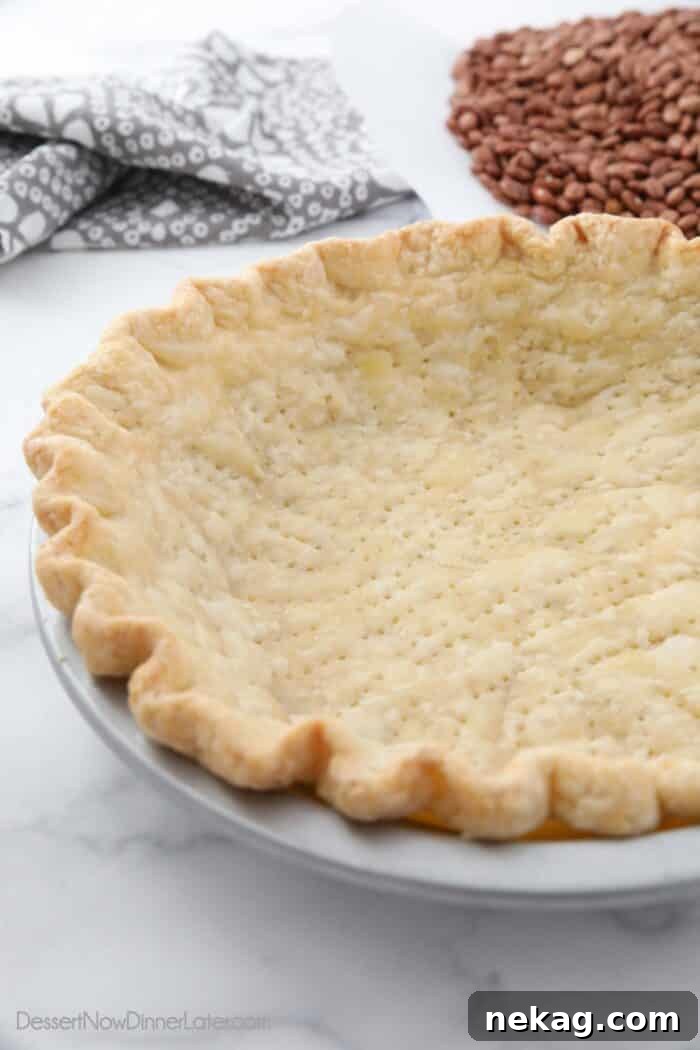
Blind Baking a Store-Bought Frozen Pie Crust
While the detailed method above focuses on homemade pie crusts, which are typically richer and thicker, blind baking store-bought frozen pie crusts is also possible and often quicker. Pre-made crusts usually contain less dough and fat than their homemade counterparts, meaning they will brown much faster and require adjusted baking times.
If you opt for a pre-made crust, I highly recommend using a frozen pie crust over refrigerated dough. Frozen crusts tend to hold their shape better due to their frozen state. Always follow the specific instructions on the package for the best results, as brands can vary significantly in their recommendations.
For example, a typical frozen pie crust might instruct you to thaw the crust for about 15 minutes, then prick it thoroughly with a fork, and bake at a higher temperature, such as 400°F (200°C), for a shorter duration of 10-12 minutes with weights, followed by an additional 5-8 minutes without weights until golden. Always refer to your product’s specific guidelines.
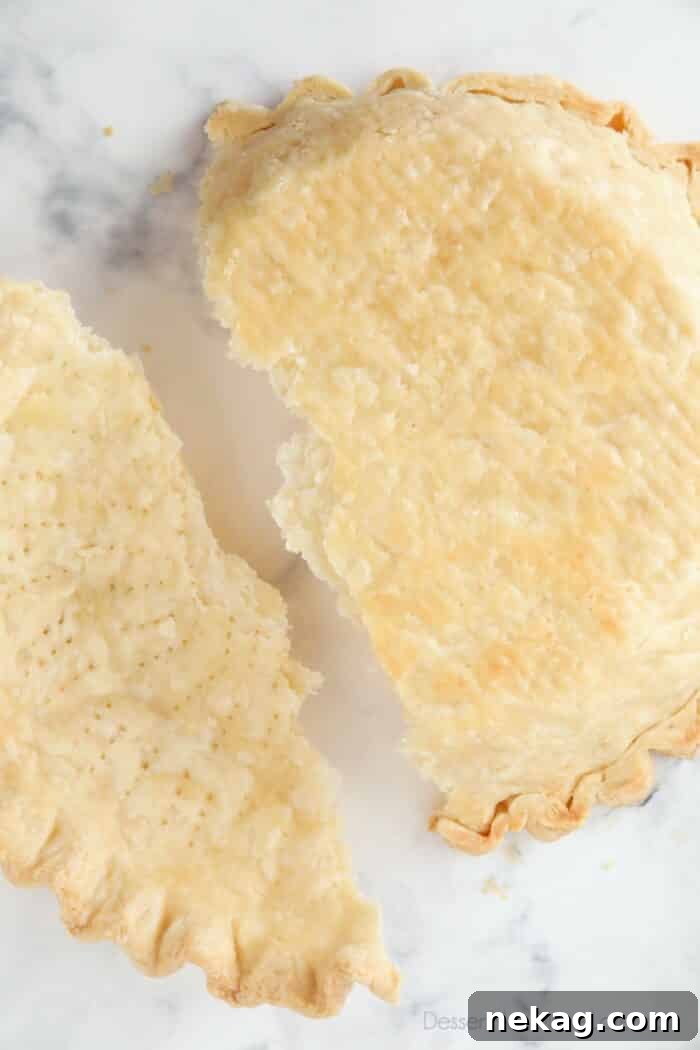
Advanced Tips for Preventing Pie Crust Shrinkage
Achieving a perfectly shaped, un-shrunken pie crust is a common goal for bakers. Here are some additional expert tips to ensure your empty pie crust retains its beautiful form during blind baking:
- Strategic Trimming and Crimping: To minimize shrinkage, don’t trim your dough too close to the pie dish rim. Leave a bit of overhang. When crimping, try to create your decorative edge as far away from the inner sides of the pan as possible. Imagine the edges “dangling” slightly beyond the rim. This technique is especially effective when using a pie plate with a wider rim, as it provides more surface area for the crust to adhere to and reduces the likelihood of it shrinking inwards.
- The Power of the Freeze: Before blind-baking, place your pie crust (already in its pan) into the freezer for at least 10 minutes, or even up to 30 minutes. When the crust is slightly frozen or very cold as it enters the hot oven, the fat within the dough (butter or shortening) takes longer to melt. This extended chilling period allows the gluten structure in the dough to set more effectively, helping the outside edges of the crust maintain their shape and height before they can slump.
- Full Coverage with Weights: Ensure your pie weights (whether beans, rice, or sugar) fill the lined crust completely to the top edge. The uniform pressure exerted by a full load of weights against the sides of the crust is crucial for preventing them from shrinking downwards or slumping. Don’t skimp on the weights – more is better in this case for robust structural support.
- Don’t Overwork Your Dough: Over-mixing or over-handling pie dough can develop the gluten too much, leading to a tough crust that is more prone to shrinking. Work quickly and handle the dough as little as possible to keep it tender and manageable.
- Use a Metal Pie Pan: While glass pie dishes are beautiful for presentation, metal pie pans (especially dark-colored ones) conduct heat more efficiently. This can lead to a more evenly baked and crispier bottom crust, which is especially beneficial for blind baking.
Troubleshooting Common Blind Baking Challenges
Even with the best techniques, challenges can sometimes arise. Here’s how to troubleshoot common blind baking problems:
- Soggy Bottom: The most common issue! This usually means the crust wasn’t baked long enough in the second stage without weights, or that it wasn’t cooled completely before adding a wet filling. Ensure the crust is golden brown and feels dry to the touch. For extremely wet fillings, consider brushing the par-baked crust with a thin layer of egg white before the second bake; this creates a moisture barrier.
- Burnt Edges: If the edges of your crust are browning too quickly, gently create a “collar” with aluminum foil. Fold a strip of foil into a ring and place it over the crimped edges of the pie crust for the last 10-15 minutes of baking.
- Excessive Shrinkage: This is often due to overworked dough (too much gluten development), insufficient chilling before baking, or not enough pie weights (or weights not reaching high enough up the sides). Ensure your dough is well-chilled, gently handled, and fully supported by weights during the first bake.
- Puffing or Bubbling Up: If the bottom of your crust still puffs up despite using weights, it might not have been docked thoroughly enough. Ensure you prick the bottom and sides generously with a fork, covering all areas.
- Tough Crust: Over-mixing the dough or adding too much flour during rolling can lead to a tough crust. Aim for light handling and a tender dough texture.
Delightful Recipes Requiring a Blind Baked Crust
Now that you’re a blind baking pro, here are some exquisite recipes where your newly acquired skill will shine, resulting in flawless desserts:
- Chocolate Cream Pie with instant pudding: A rich, creamy filling demands a crisp crust for textural contrast.
- Blueberry Cream Cheese Pie: The cool, soft filling is beautifully complemented by a fully baked base.
- Fresh Peach Pie Recipe: Highlight the fresh fruit flavor with a pre-baked shell.
- Jello Coconut Cream Pie Recipe: This no-bake filling is perfectly served in a golden crust.
- Strawberry Cream Pie: A light and airy filling needs a sturdy, fully baked foundation.
- Pink Lemonade Pie: A refreshing chilled pie that relies on a pre-baked, cooled crust.
- Chocolate Mint Pie: The cool, minty filling pairs wonderfully with a crisp, chocolate-kissed crust.
How To Blind Bake Pie Crust
Pin
Rate
SaveSaved!
Ingredients
- Homemade Butter Pie Crust
- OR
- Homemade Shortening Pie Crust
Equipment
-
9-Inch Pie Pan USA Pan Bakeware
-
Rolling Pin
-
Parchment Paper
-
9-inch Standard Glass Pie Dish
Instructions
-
Make pie dough and chill it. Preheat oven to 350 degrees Fahrenheit (175°C).
-
Roll out the pie crust, place it in a pie dish, trim and crimp the edges. (See tutorial for either crust in links above.) NOTE: Trim the dough a bit farther from the rim, and crimp the crust as far away from the inner sides as possible. (For less shrinkage.)
-
Dock (prick) the crust all over the bottom and sides with a fork.
-
OPTIONAL: Chill pie crust in freezer for 10 minutes. This will help set the edges before the fat melts.
-
Line parchment paper (or foil) inside the crust and fill it to the top with dry beans or rice.
-
Bake at 350˚F (175°C) for 20-25 minutes (until edges are just starting to brown). Carefully remove the parchment paper and weights and set on a wire rack to cool. (Can save beans to use again for this same purpose.)
NOTE: If your recipe calls for baking the filling (ex. for pumpkin pie), then this is the point where you would add the filling and continue with your recipe. You may need to cover the edges of the crust with foil if the recipe wants you to increase the oven temperature.
-
Return crust to oven and bake at 350˚F (175°C) for an additional 15-20 minutes or until golden brown and baked through. NOTE: It should look dry and crisp, not wet or oily. (If the crust is oily, the fat in the crust was too soft before it went in the oven.)
-
Cool completely, then fill with fresh fruit, pudding, cream, or other soft filling.
Notes
Nutrition
Disclaimer: Nutritional values were calculated using a third-party tool and are provided as an estimation only.
Sharing this recipe with a link is both encouraged and appreciated. Copying/pasting and/or screenshots of full recipes to any social media is strictly prohibited. Content and photographs are copyright protected.
Did you make this?
Don’t forget to leave a rating below and make sure to follow on Pinterest and Instagram for more!