
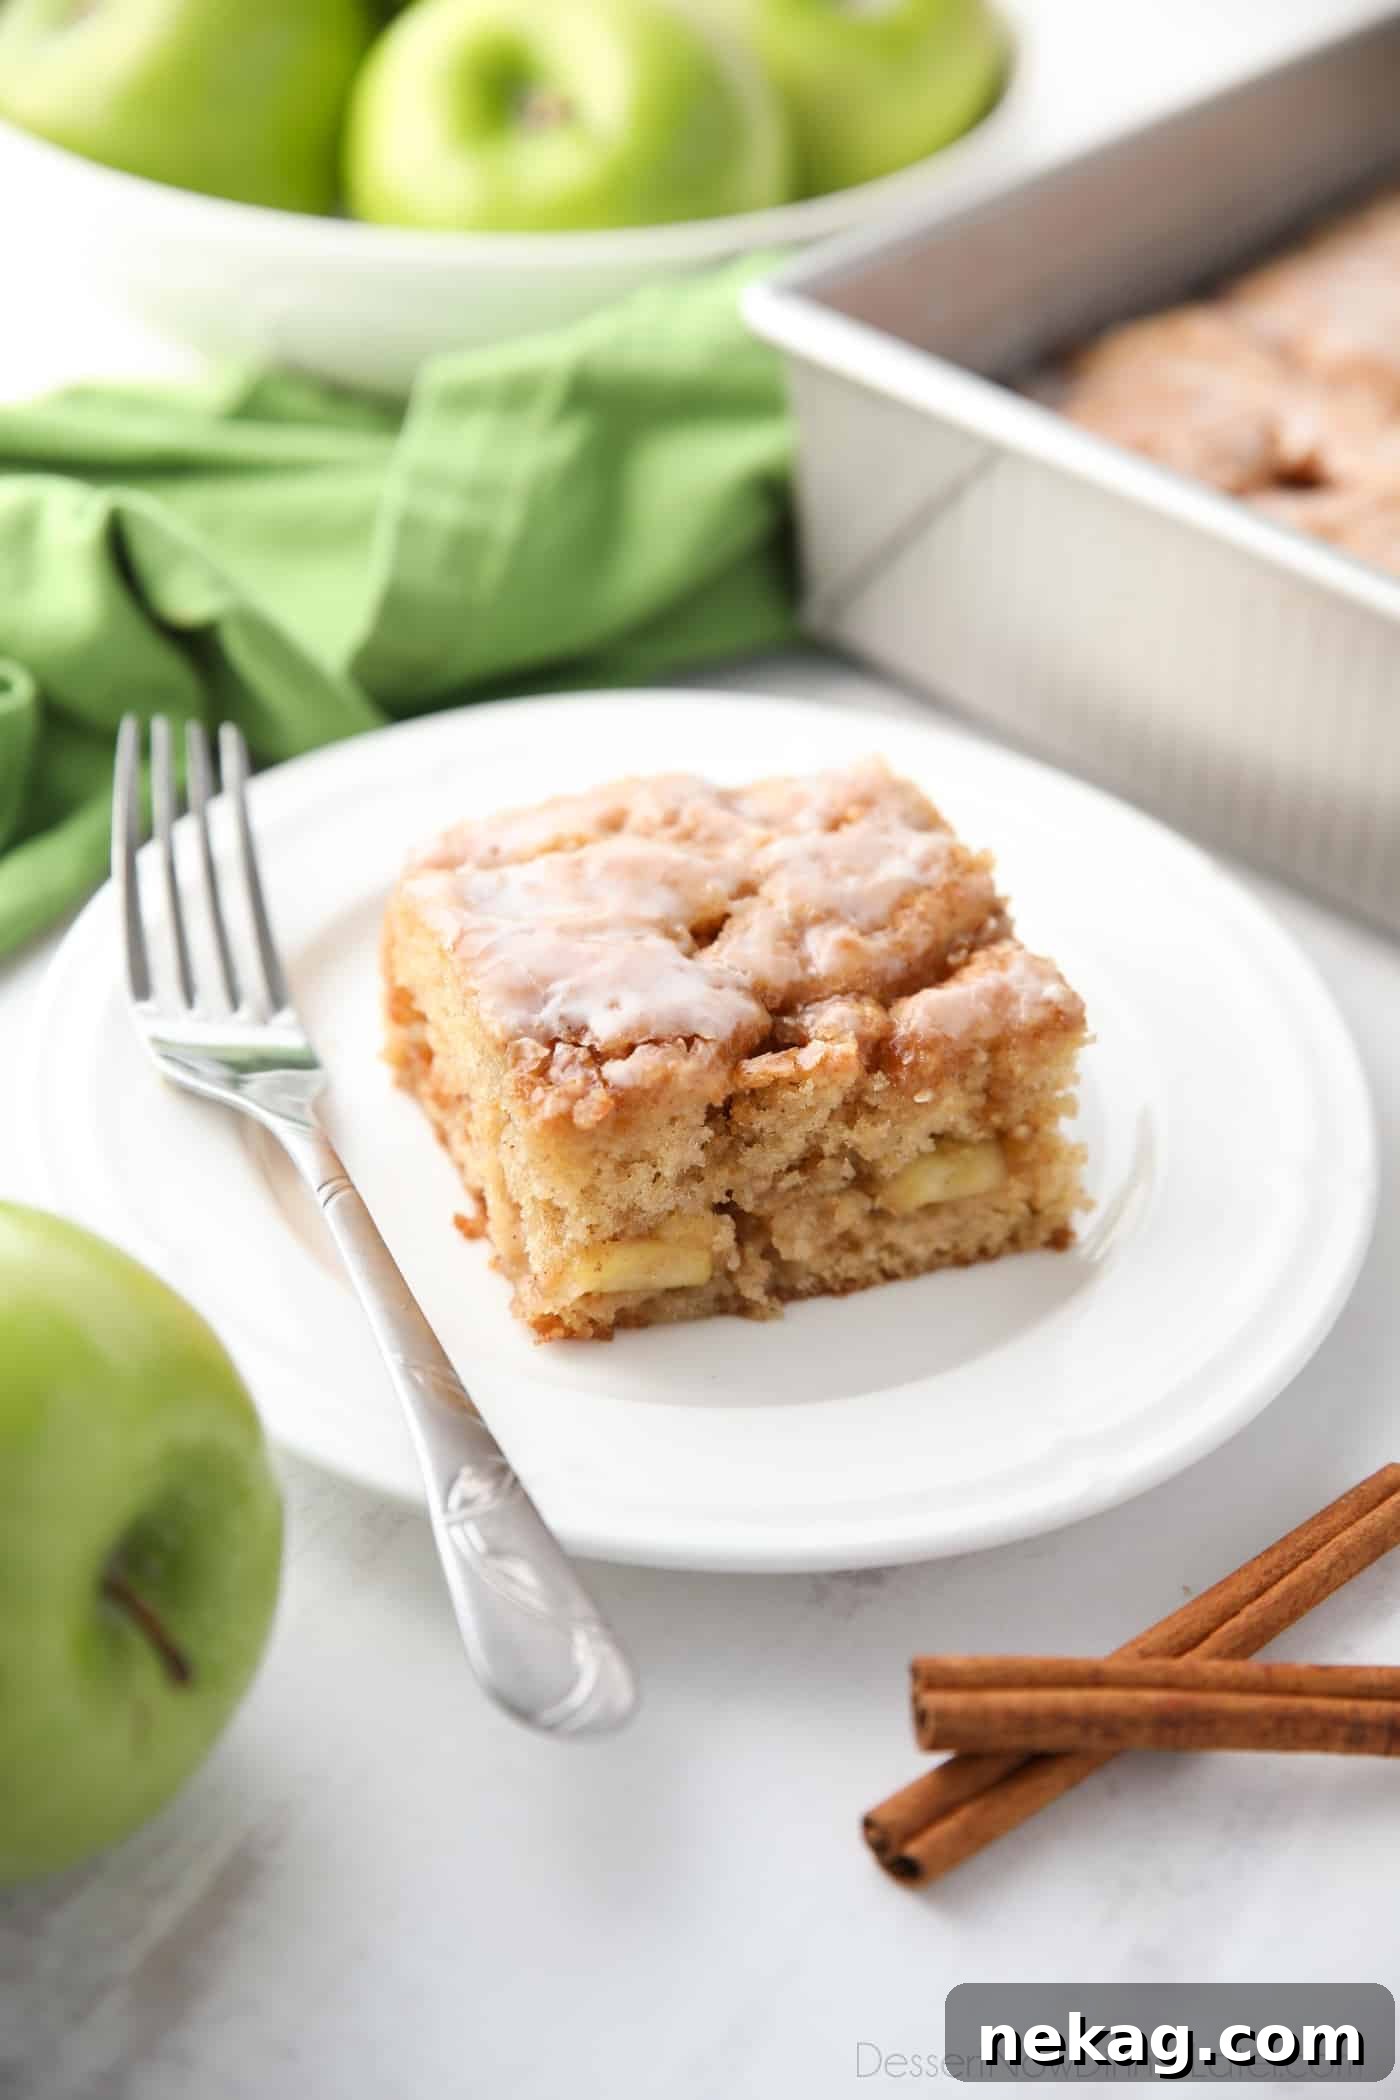
Welcome to the ultimate autumn indulgence: the Apple Fritter Cake. Imagine the irresistible charm of a classic apple fritter doughnut—its tender, fruit-filled interior, aromatic spices, and a sweet, glistening glaze—transformed into an easy-to-bake, crowd-pleasing cake. This isn’t just any apple cinnamon cake; it’s a delightful fusion, capturing all the beloved flavors and textures of your favorite bakery treat in a convenient, sliceable form. Perfect for a cozy breakfast, a delightful brunch, or a comforting dessert, this homemade apple fritter cake promises a memorable taste experience that will have everyone reaching for another piece.
The Irresistible Breakfast Cake Phenomenon
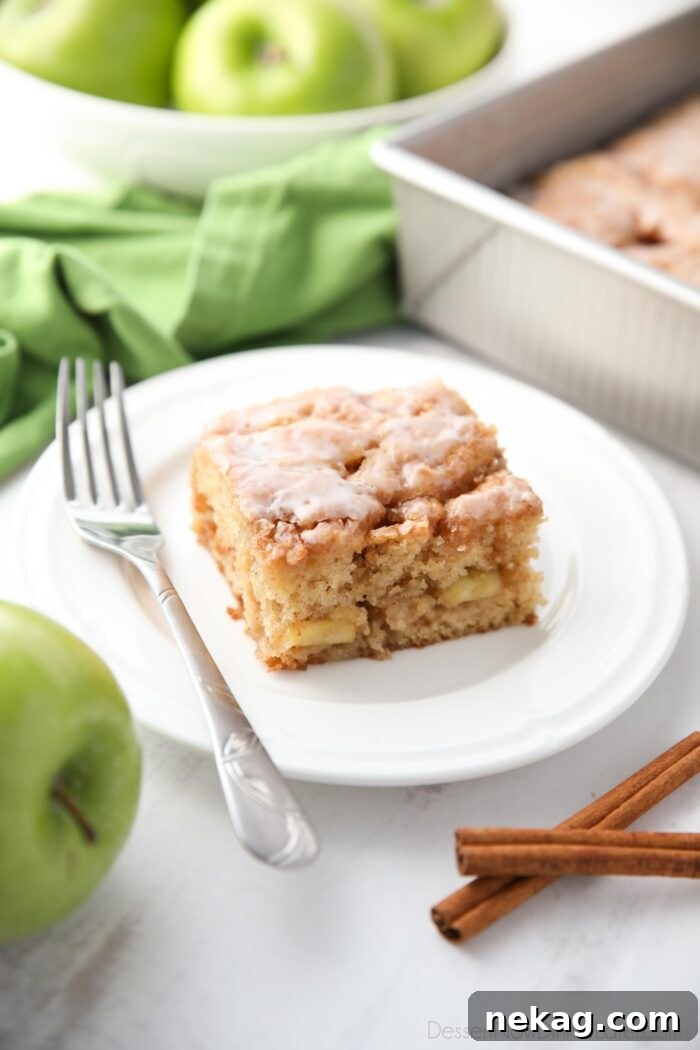
Cake for breakfast? When it’s an apple fritter cake, inspired by your favorite bakery donut, the answer is a resounding “yes!” Donuts have long held a cherished spot on breakfast tables, and this cake brings all that sugary, cinnamony goodness right into your home, without the need for deep frying. This isn’t just an excuse to eat cake first thing in the morning; it’s a genuine culinary delight that bridges the gap between a satisfying pastry and a comforting dessert. Imagine waking up to the aroma of warm apples and cinnamon, knowing that a tender, glazed slice of perfection awaits. It’s the ideal treat to elevate any morning, whether it’s a quiet weekend or a festive holiday gathering.
Why This Apple Cinnamon Cake Stands Out
During my time working in a grocery store bakery, the apple fritter donuts were consistently the most sought-after treat. Their immense popularity wasn’t a mystery; it was due to a trifecta of irresistible elements that made them truly special. I’ve taken those very elements and lovingly incorporated them into this fluffy apple cinnamon cake, ensuring every bite delivers that classic fritter experience.
- Generous Chunks of Apples: We’re talking real pieces of tender, caramelized apples throughout the cake, not just a hint of apple flavor. These delightful bursts of fruit are what truly define a fritter.
- Abundant Cinnamon Flavor: More than just a sprinkle, this cake is infused with a rich, warm cinnamon spice that perfectly complements the apples and brown sugar. It’s the comforting essence of fall in every mouthful.
- Sweet, Irresistible Glaze: A hallmark of any good fritter is its sweet, pourable glaze. Our cake is generously coated in a simple yet decadent powdered sugar glaze that adds another layer of sweetness and a beautiful sheen.
Beyond the incredible flavor, this cake even mimics the distinctive, slightly “bumpy” texture that gives traditional apple fritters their rustic, homemade appeal. It’s a texture that promises delightful pockets of apple and cinnamon in every slice. This homemade apple fritter cake is not just a dessert; it’s a nostalgic journey back to your favorite bakery, meticulously crafted in your own kitchen.
How to Make the Perfect Apple Fritter Cake from Scratch
Crafting this delectable apple fritter cake is a rewarding process that combines simple steps with incredible flavors. The secret to its success lies in balancing the sweet cake and glaze with the bright, tartness of fresh apples.
Choosing Your Apples
For this recipe, I specifically recommend using Granny Smith Apples. Their robust texture holds up beautifully during cooking, and their characteristic tart flavor provides a crucial counterpoint to the richness of the cinnamon-sugar and the sweetness of the powdered sugar glaze. This contrast prevents the cake from being overly sweet, creating a perfectly balanced profile that truly shines. Before you begin, peel and slice the apples into thin pieces, then chop them into manageable 1-inch chunks. This size ensures you get delightful apple pieces in every bite without them overwhelming the cake’s delicate structure.
While Granny Smiths are ideal, you can experiment with other firm, tart apples like Honeycrisp or Braeburn for slightly different flavor nuances. Just ensure they are not too soft, as they might turn mushy during the cooking process.
Preparing the Apple Filling and Cake Batter
The journey to your perfect homemade apple fritter cake begins with two main components: the luscious apple filling and the tender, moist cake batter. Precision and attention to detail at each stage will guarantee a showstopping result.
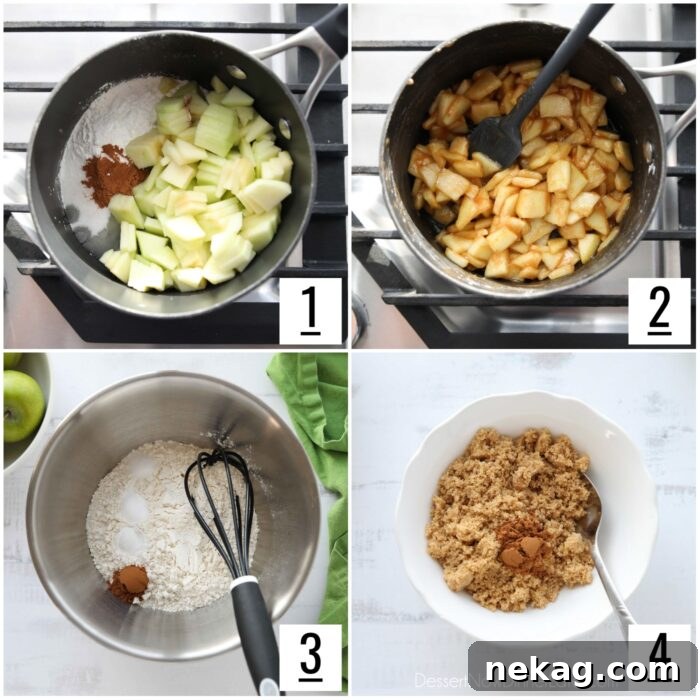
- **Caramelizing the Apples:** In a medium saucepan, combine your prepared 1-inch apple chunks with granulated sugar, a hint of cinnamon, cornstarch (our secret thickening agent), and a splash of lemon juice to prevent browning and enhance flavor. Cook this mixture over medium heat for approximately 5-6 minutes, stirring occasionally. You’ll notice the apples beginning to soften, and the liquid will thicken into a beautiful, glossy sauce. Once achieved, remove from heat and set it aside to cool completely. This step ensures the apples are perfectly tender and flavorful before baking.
- **Mixing the Dry Ingredients:** In a large mixing bowl, whisk together the all-purpose flour, baking powder, baking soda, salt, and ground cinnamon. Whisking thoroughly ensures all leavening agents and spices are evenly distributed, which is key for a consistent rise and flavor in your cake. Set this dry mixture aside.
- **Preparing the Cinnamon-Sugar Swirl:** In a separate small bowl, combine the light brown sugar and ground cinnamon. Stir well until the cinnamon is fully incorporated into the sugar. This aromatic mixture will create delightful pockets of spiced sweetness throughout the cake. Set aside.
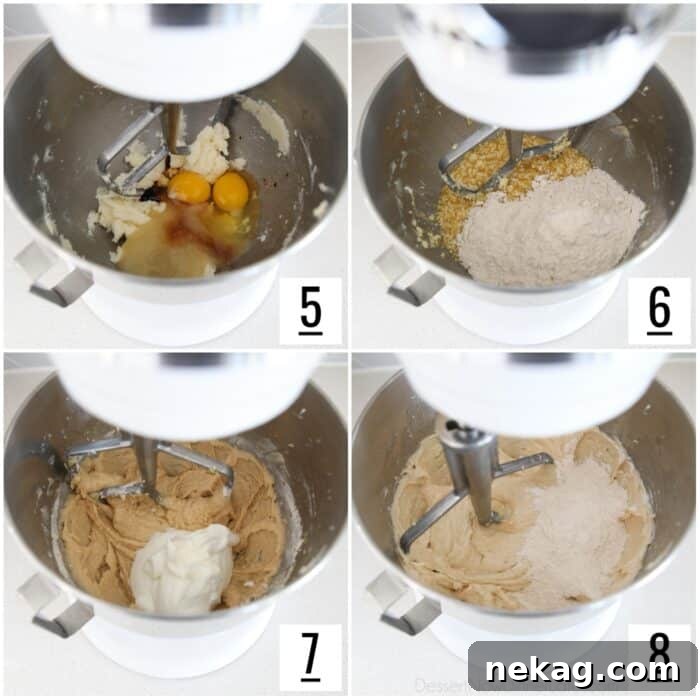
- **Creaming Butter and Sugar:** Using the bowl of a stand mixer fitted with the paddle attachment (or a hand mixer), cream the room-temperature butter and granulated sugar together. Beat them on medium-high speed until the mixture becomes visibly light, pale, and fluffy. This aeration process is crucial for a tender cake texture.
- **Adding Wet Ingredients:** To the creamed butter and sugar, gradually add the room-temperature applesauce, large eggs, and vanilla extract. Mix on low speed until just combined. Don’t worry if the mixture appears slightly curdled at this stage; it’s a common occurrence when adding liquids to a butter-based creamed mixture and will smooth out with the addition of dry ingredients.
- **Incorporating Dry and Wet Alternately:** To prevent overmixing and ensure a tender crumb, we’ll add the dry ingredients and sour cream in stages. First, add about half of the whisked flour mixture to the wet ingredients. Mix on low speed until the flour is *just* combined—meaning no streaks of dry flour remain.
- **Adding Sour Cream for Moisture:** Next, add all of the room-temperature sour cream (or plain Greek yogurt, if preferred, for a similar tang and moisture). Mix until just combined. The sour cream is essential for keeping the cake incredibly moist and adding a subtle tang that complements the apples.
- **Finishing the Batter:** Finally, add the remaining half of the flour mixture. Mix on the lowest speed until the batter is *just* combined. The golden rule for cakes is: **do not over-mix!** Overmixing develops gluten, leading to a tough, dry cake. A few small lumps are perfectly acceptable.
Assembling the Layered Apple Fritter Cake
With your perfectly cooked caramelized apples, fragrant cinnamon-sugar, and velvety cake batter ready, it’s time for the exciting part: assembling this magnificent layered cake. This layering technique is what gives the apple fritter cake its signature depth of flavor and beautiful appearance.
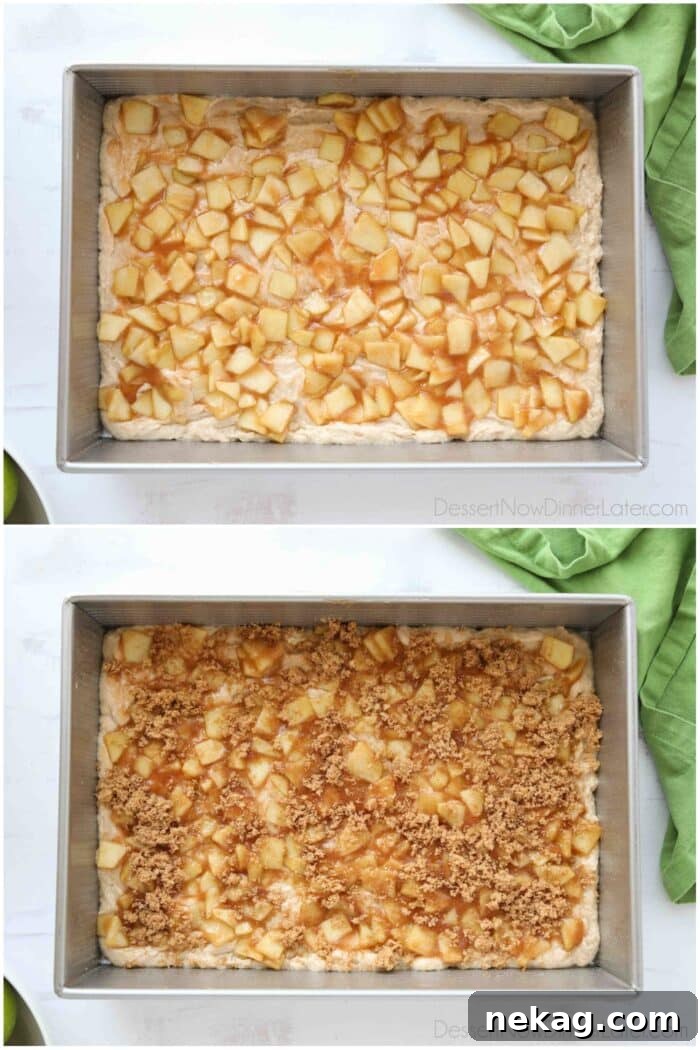
- First Batter Layer: Begin by spreading exactly half of your prepared cake batter evenly into a 9×13-inch baking pan that has been generously greased with non-stick cooking spray. Take your time to create a smooth, consistent base.
- Apple Filling Layer: Carefully spoon the cooled apple mixture over the first layer of batter, spreading it gently to cover as much of the surface as possible. Be mindful not to press down too hard, as you want the apples to nestle into the batter.
- Cinnamon-Sugar Sprinkle (Part 1): Now, sprinkle approximately two-thirds of your cinnamon-brown sugar mixture evenly over the apple layer. This layer will melt into the apples and cake during baking, creating pockets of spiced caramelization.
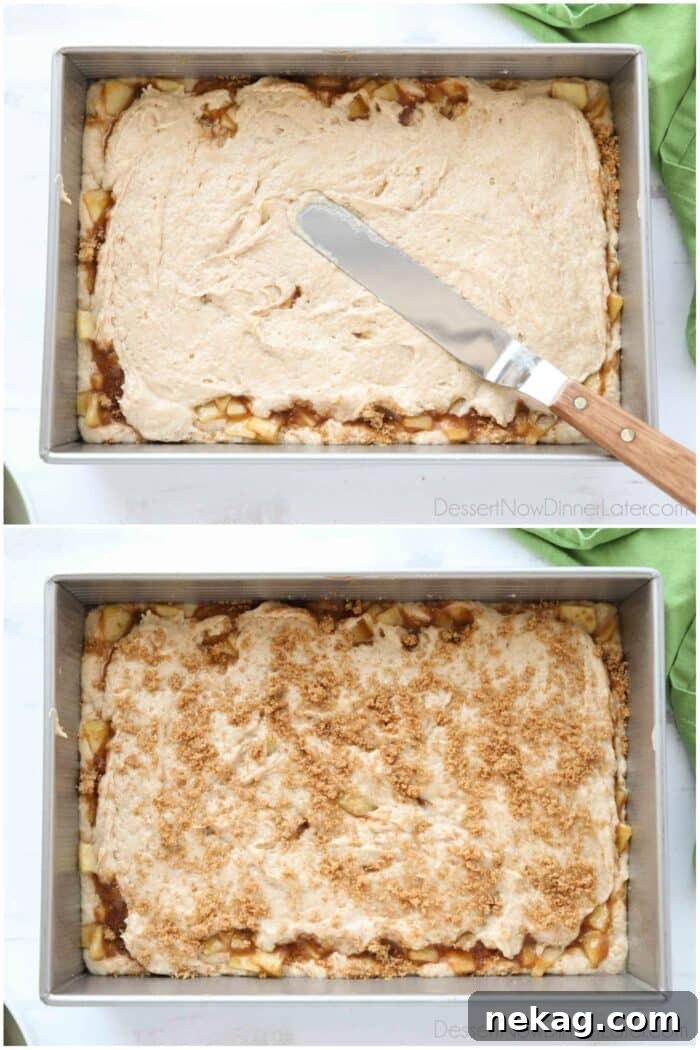
- Second Batter Layer: Using the remaining cake batter, dollop spoonfuls strategically over the apples and cinnamon-sugar. Then, with a spatula, carefully spread the batter to create an even layer. Don’t worry if it doesn’t completely cover every inch; the batter will spread during baking. The goal is to encapsulate the apple and cinnamon layer within the cake.
- Final Cinnamon-Sugar Sprinkle: Finally, sprinkle the remaining one-third of the cinnamon-brown sugar mixture over the top of the cake batter. This final layer will form a delightful, slightly crisp, and intensely flavored crust on the finished cake.
Baking and Glazing Your Apple Fritter Masterpiece
The final steps bring your apple fritter cake to glorious completion. Baking it to perfection and then generously glazing it are crucial for that authentic, bakery-style finish.
Baking the Cake
Preheat your oven to 350˚F (175˚C). Place the assembled cake into the preheated oven and bake for 30-35 minutes. Baking times can vary, so keep a close eye on your cake. To test for doneness, insert a toothpick into the center of the cake. It should come out clean or with just a few moist crumbs clinging to it. Additionally, gently touch the center of the cake; if it springs back, it’s ready. Avoid overbaking, as this can lead to a dry cake.
Preparing and Applying the Glaze
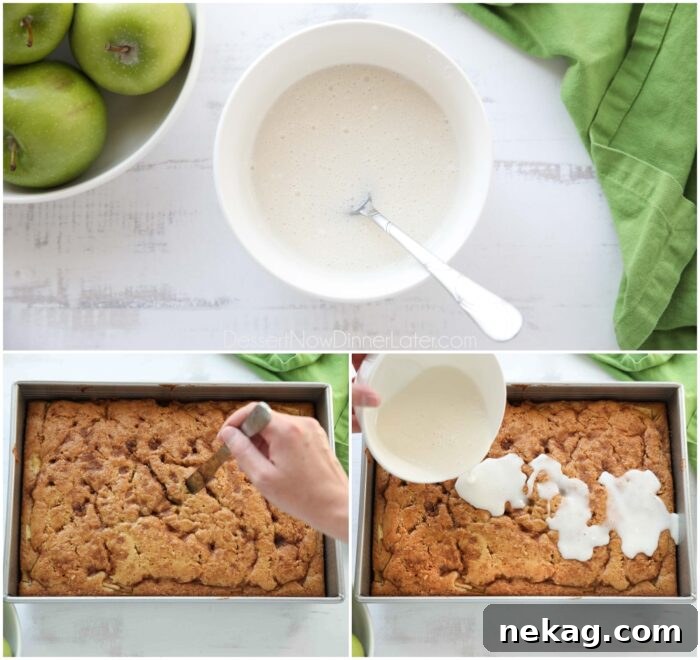
- Whip up the Glaze: While your cake is in its final minutes of baking, prepare the simple yet essential glaze. In a small bowl, combine the powdered sugar, vanilla extract, and milk. Whisk until completely smooth and free of lumps. You want a pourable consistency that is thick enough to coat, but not too thin that it runs right off. If it’s too thick, add a tiny bit more milk; if too thin, add a little more powdered sugar.
- Poking for Perfection: Immediately after removing the warm cake from the oven, grab a butter knife and systematically poke holes all over the top surface. Aim for about 40 or so holes, evenly distributed. These perforations will allow the warm cake to absorb the sweet glaze, infusing every bite with moisture and flavor.
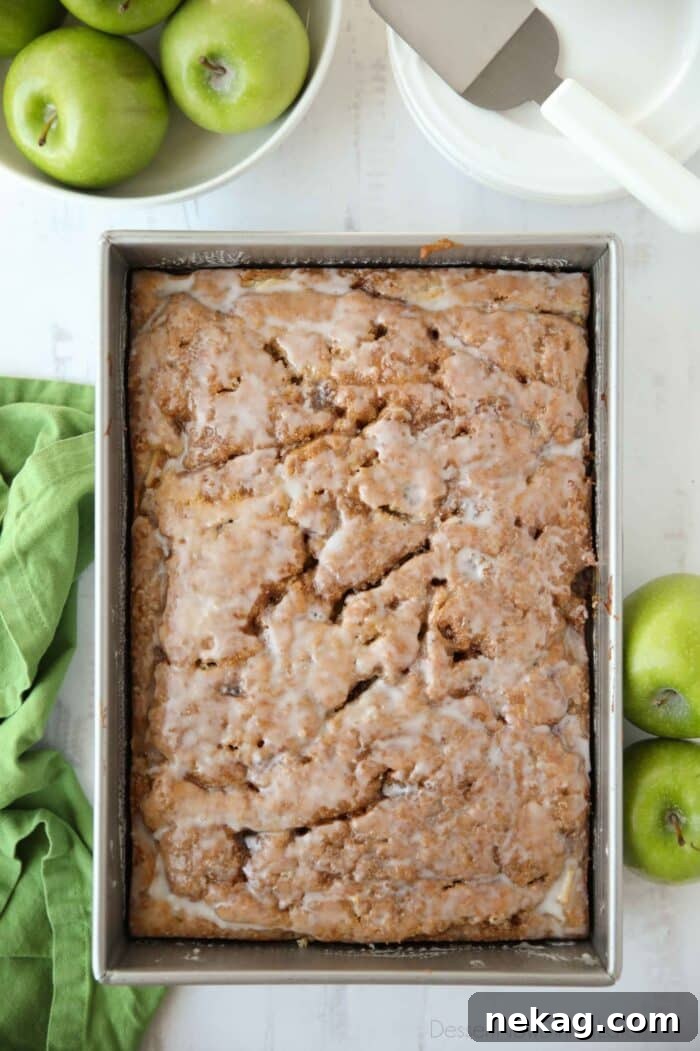
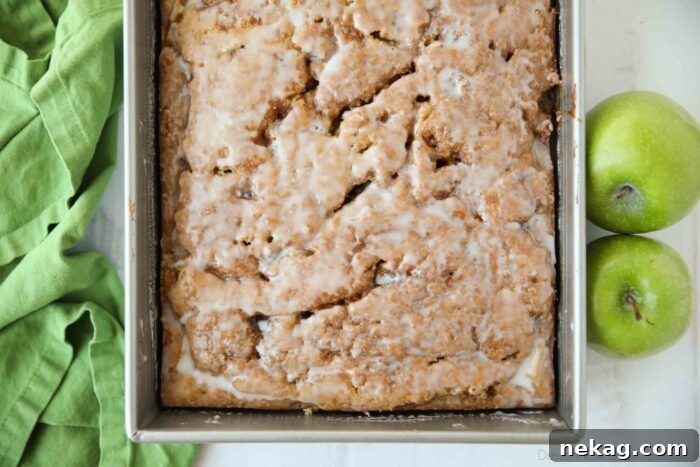
- Glaze and Set: Generously pour the prepared glaze over the still-warm, poked cake. Use a spatula to gently spread the glaze evenly across the entire surface. The warmth of the cake will help the glaze melt slightly and seep into the holes, creating an incredibly moist and flavorful crumb. Allow the glaze to set for about 20 minutes before slicing and serving. This setting time ensures the glaze has a chance to firm up slightly, creating that beautiful, slightly crackled finish.
Pro Tip for a Thicker Glaze: If you prefer a more pronounced, thicker layer of glaze on top that doesn’t fully melt into the cake, allow the cake to cool for 10-15 minutes after baking before applying the glaze. This slight cooling will prevent too much absorption. Then, wait another 20 minutes for the glaze to properly set. For an even more professional-looking finish, you can also use a pastry brush to apply the glaze in thin, even layers.
Serving and Storing Your Delightful Apple Fritter Cake
Once your apple fritter cake is baked to perfection and beautifully glazed, it’s time to enjoy the fruits of your labor!
Serving Suggestions
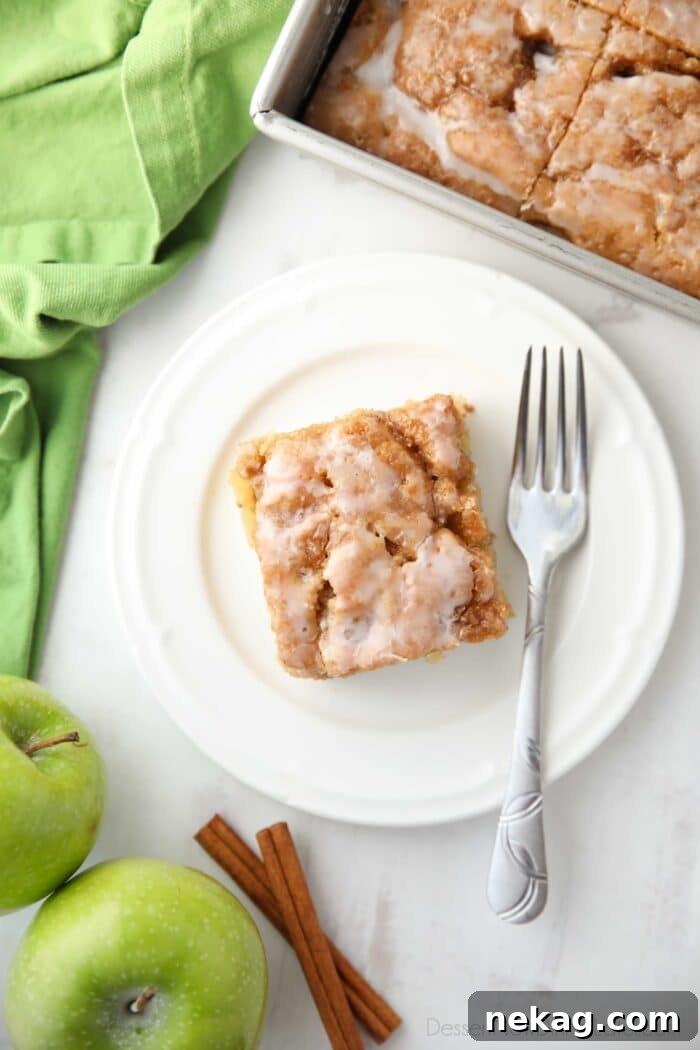
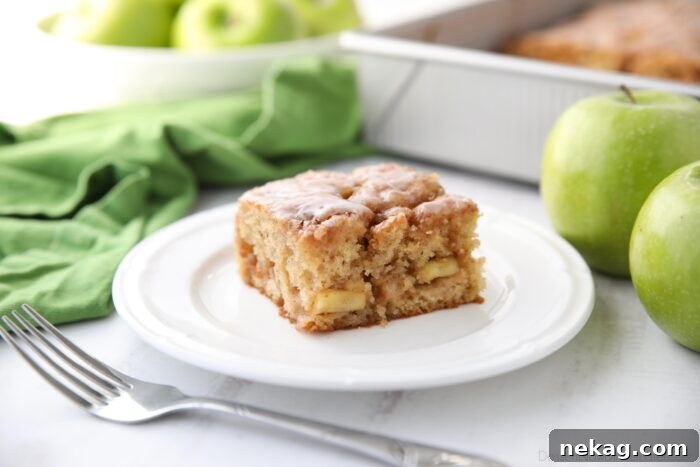
For optimal enjoyment, cut the cake into 15 generous pieces (typically 3 rows by 5 rows in a 9×13-inch pan) and serve while it’s still warm. The warmth enhances the aroma of the cinnamon and apples, making for an incredibly comforting treat. This cake is wonderful on its own, but you can elevate the experience even further.
- Morning Glory: Pair a slice with a hot cup of coffee, a steaming mug of tea, or a glass of cold milk for a truly satisfying breakfast or brunch.
- Dessert Delight: For a more decadent dessert, serve warm slices with a scoop of vanilla bean ice cream or a dollop of freshly whipped cream. A drizzle of warm caramel sauce would also be an exquisite addition.
- Simple Elegance: A light dusting of powdered sugar just before serving adds a touch of simple elegance, especially if your glaze has fully absorbed.
Storage Tips
To keep your homemade apple fritter cake fresh, cover the baking pan tightly with aluminum foil or plastic wrap. Store the cake at room temperature for up to 3 days. While delicious, be aware that the glaze tends to absorb into the cake during storage, which can make the top appear slightly wet or less distinct. This is a natural process and doesn’t affect the incredible flavor or moist texture of the cake. If you prefer a fresher glaze look, you can always make a small batch of fresh glaze and drizzle it over individual slices before serving.
For longer storage, this cake also freezes well! Wrap individual slices tightly in plastic wrap, then again in aluminum foil. They can be frozen for up to 2-3 months. Thaw at room temperature or warm gently in the microwave before serving.
More Irresistible Apple Desserts to Try
If you’ve fallen in love with this spiced apple cinnamon cake, you’re in for a treat! The world of apple desserts is vast and wonderful. Here are some other delightful apple-centric recipes that are sure to satisfy your cravings for warm, comforting flavors:
- Classic Apple Fritters (Yeast-based): For those who love the original fried doughnut experience.
- Apple Sheet Cake with Brown Sugar Glaze: A simpler, yet equally delicious, sheet cake version with a rich brown sugar topping.
- Amish Apple Dumplings: Whole apples baked in a flaky pastry with a sweet syrup.
- Apple Fritter Monkey Bread: A fun, pull-apart bread with all the apple fritter flavors.
- Apple Brown Betty: A comforting baked apple dessert with a crispy, buttery topping.
Apple Fritter Cake
Created by: Amber Brady
Prep Time: 20 mins | Cook Time: 30 mins | Total Time: 50 mins
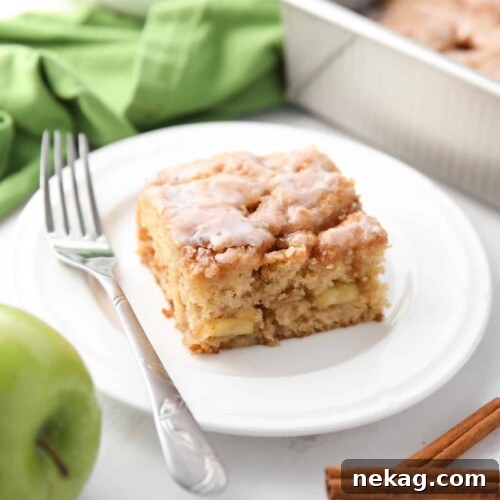
Soft apple cinnamon cake with a sweet powdered sugar glaze, inspired by classic apple fritter doughnuts.
Pin Recipe
Yields: 15 servings
Ingredients
Apple Filling:
- 2 cups (187 g) Granny Smith apples, peeled, thinly sliced, and then cut into 1-inch pieces (about 2-3 apples)
- ⅓ cup (68 g) granulated sugar
- ½ tsp ground cinnamon
- 2 Tbsp cornstarch
- 1 Tbsp lemon juice (or water)
Cinnamon-Sugar:
- ½ cup (100 g) light brown sugar, gently packed
- ½ tsp ground cinnamon
Cake:
- 2 ¼ cups (270 g) all-purpose flour (stir, spoon & level)
- 1 tsp baking powder
- 1 tsp baking soda
- ½ tsp salt
- 1 tsp ground cinnamon
- ⅓ cup (75 g) butter, room temperature
- ¾ cup (150 g) granulated sugar
- ½ cup (122 g) applesauce, room temperature
- 2 large eggs, room temperature
- 1 tsp vanilla extract
- 1 cup (240 g) sour cream (or plain Greek yogurt), room temperature
Glaze:
- 2 cups (240 g) powdered sugar
- 1 tsp vanilla extract
- ¼ cup (59 ml) milk
Equipment
- Silicone Spatula Set
- KitchenAid 5-Qt. Stand Mixer
- 9×13-inch Pan
- 6-Quart Steel Mixing Bowl
- Nylon Whisk
- Wilton 3-Piece Icing Spatula Set
Instructions
- Preheat oven to 350 degrees Fahrenheit (175°C). Grease a 9×13-inch cake pan with non-stick cooking spray and set aside.
- In a medium saucepan, combine the sliced apples, granulated sugar, cinnamon, cornstarch, and lemon juice.
- Cook over medium heat for 5-6 minutes until the apples soften and the liquid thickens. Set aside to cool.
- In a large bowl, whisk together the flour, baking powder, baking soda, salt, and cinnamon. Set aside.
- In a separate bowl, combine the brown sugar and cinnamon. Stir together and set aside.
- In the bowl of a stand mixer fitted with the paddle attachment, cream the butter and sugar together until light and fluffy. Add the applesauce, eggs, and vanilla. Mix to combine until just incorporated (mixture may look curdled).
- Add half of the flour mixture to the wet ingredients. Mix until just combined. Add all of the sour cream. Mix until just combined. Add the remaining flour mixture. Mix until just combined, being careful not to over-mix.
- Spread half of the cake batter into the prepared cake pan. Top with the cooled apple mixture, spreading carefully to cover the batter. Sprinkle with ⅔ of the cinnamon-brown sugar mixture.
- Dollop the remaining cake batter over the apples and carefully spread it evenly with a spatula. (Note: It may not cover the whole cake completely, which is fine.) Sprinkle the remaining ⅓ of the cinnamon-brown sugar over the cake batter.
- Bake the apple fritter cake at 350˚F (175°C) for 30-35 minutes, or until a toothpick inserted into the center comes out clean or with a few moist crumbs, and the cake springs back when lightly touched.
- When the cake is almost done baking, make the glaze by mixing together the powdered sugar, vanilla extract, and milk in a small bowl until smooth.
- Immediately after removing the cake from the oven, poke holes all over the top of the cake using a butter knife (approximately 40 times). Pour the glaze over the warm cake and spread evenly with a spatula. Allow the glaze to set for about 20 minutes before serving.
Notes
- If you prefer a thick, visible layer of glaze on top, let the cake cool for 10-15 minutes before applying the glaze. Otherwise, the warm cake will absorb more of the glaze. Then, wait another 20 minutes for the glaze to properly set up. You can also brush the glaze on the cake with a pastry brush for a more even coating.
- Cover the pan with foil or plastic wrap and store the cake at room temperature for up to 3 days. Note that the glaze will absorb into the cake during storage, making the top of the cake appear wet, but it will still be delicious and moist.
Nutrition
Serving: 1 slice | Calories: 303kcal | Carbohydrates: 55g | Protein: 3g | Fat: 8g | Saturated Fat: 4g | Polyunsaturated Fat: 3g | Cholesterol: 45mg | Sodium: 245mg | Fiber: 1g | Sugar: 38g
Disclaimer: Nutritional values were calculated using a third-party tool and are provided as an estimation only.
Sharing this recipe with a link is both encouraged and appreciated. Copying/pasting and/or screenshots of full recipes to any social media is strictly prohibited. Content and photographs are copyright protected.
Did you make this delicious Apple Fritter Cake?
We’d love to hear from you! Don’t forget to leave a rating below and make sure to follow us on Pinterest and Instagram for more incredible recipes and sweet inspiration!