
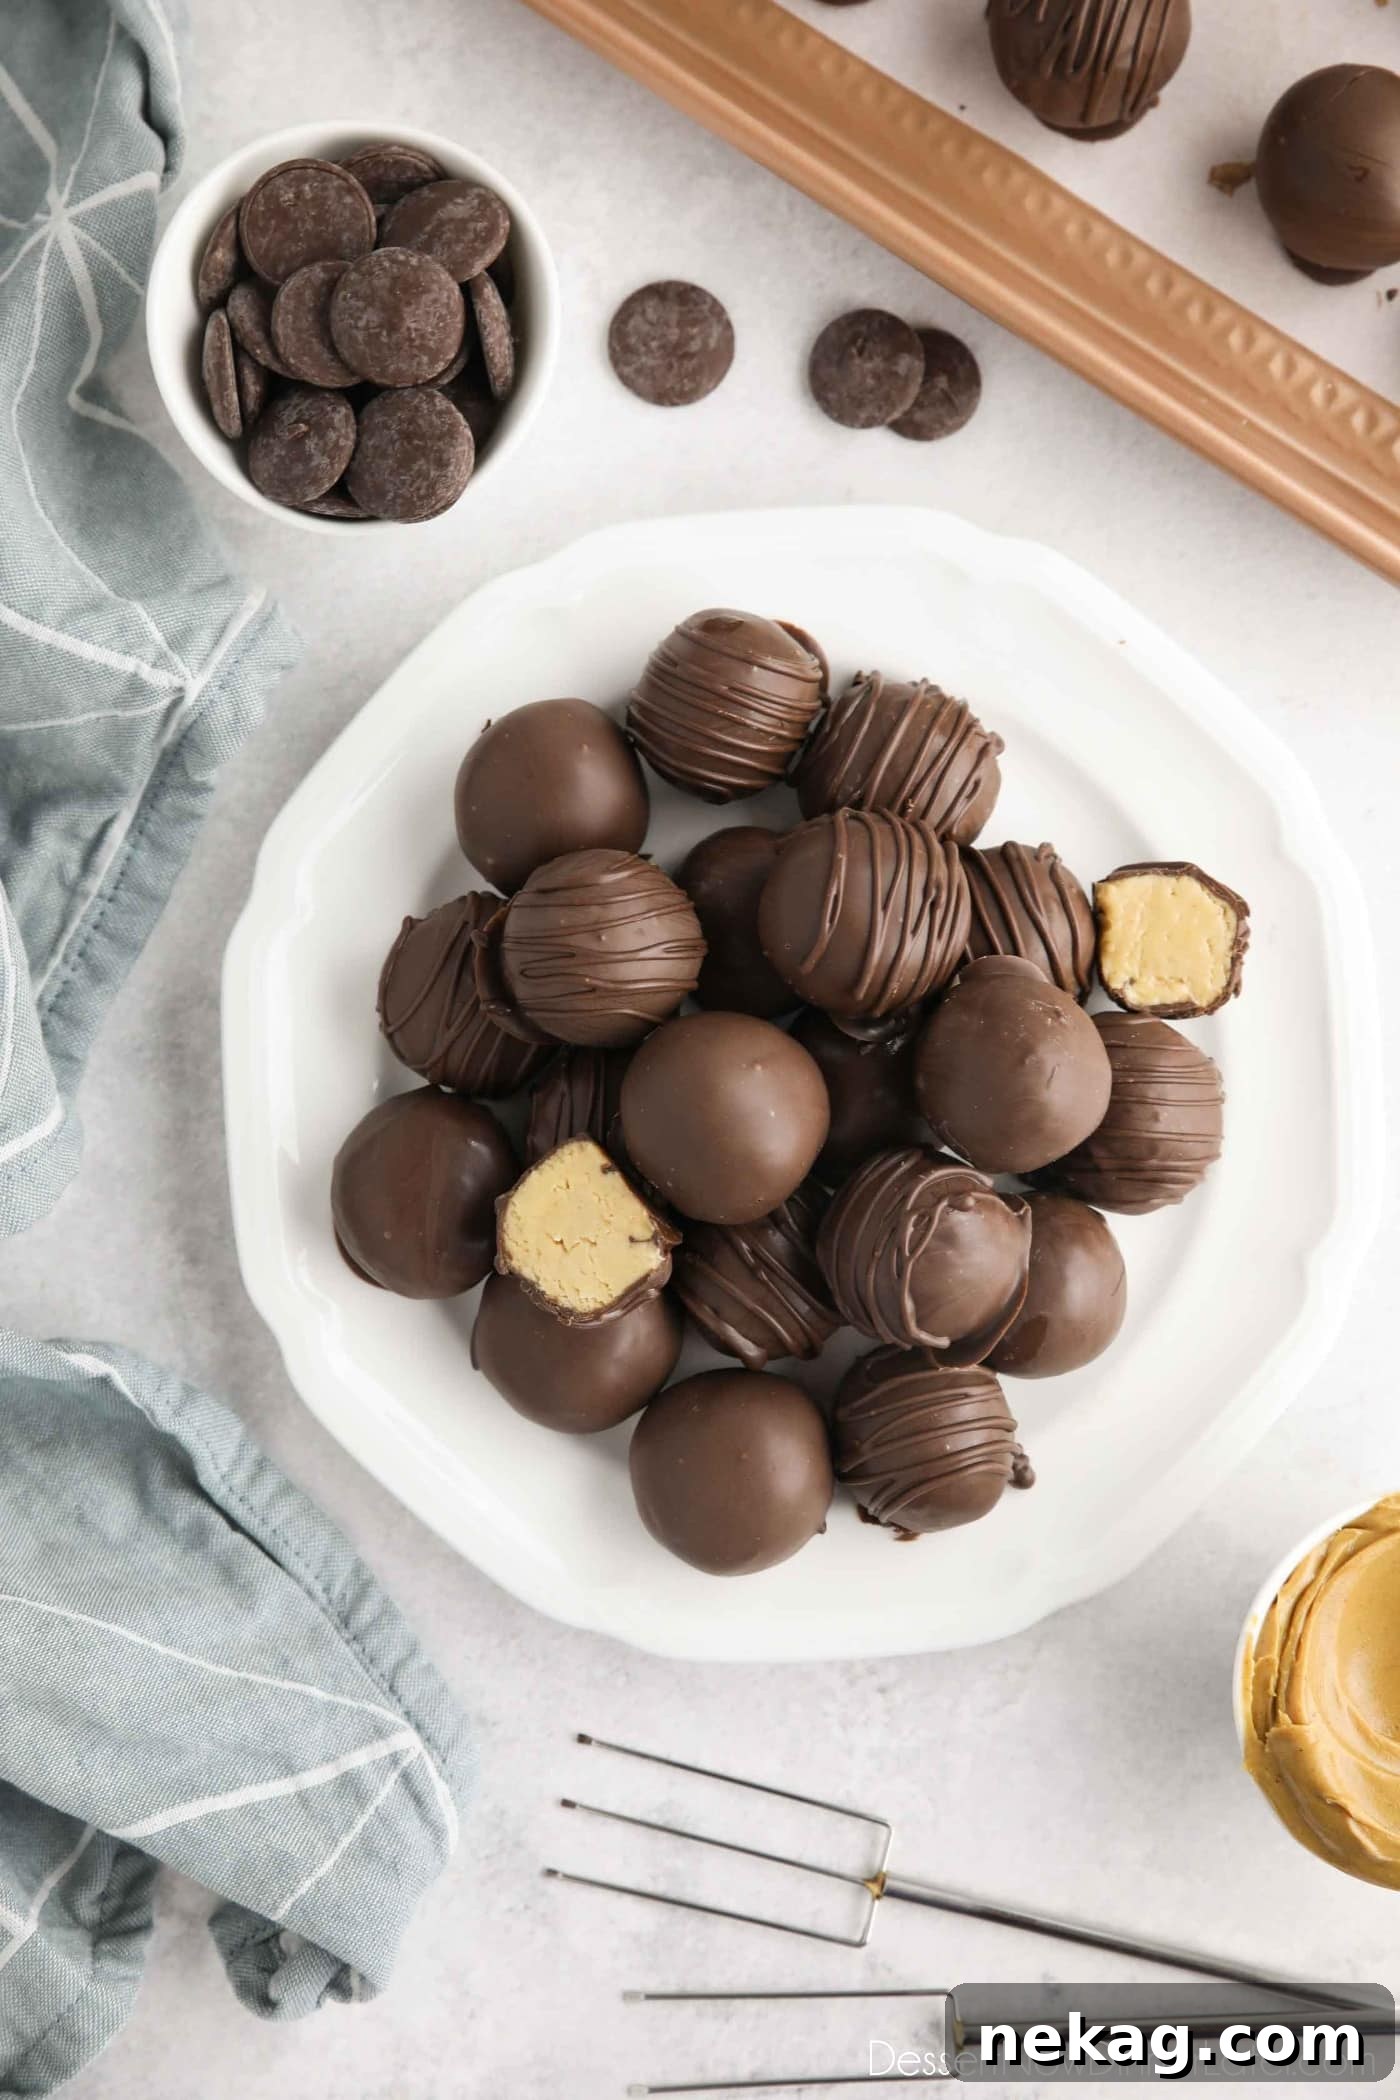
Peanut Butter Balls, also affectionately known as buckeyes or delightful truffles, represent the pinnacle of easy Christmas candy making. Crafted with just a handful of simple ingredients, these creamy, no-bake chocolate peanut butter treats are not only a joy to prepare but also perfect for holiday gifting and festive gatherings. Their rich, melt-in-your-mouth texture, combined with the irresistible duo of peanut butter and chocolate, makes them an instant classic and a staple for any holiday dessert platter.
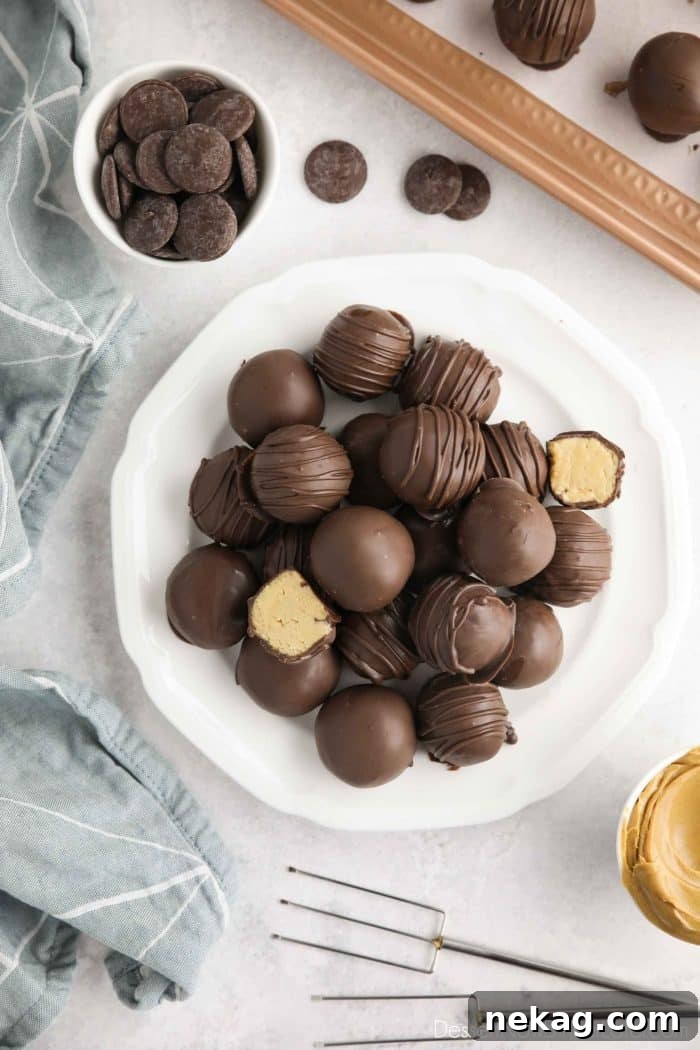
The magic of the holiday season often brings with it the delightful tradition of candy making. Yet, this tradition doesn’t have to be a source of stress or require hours in the kitchen. Enter these incredibly simple, no-bake easy peanut butter balls. Imagine the beloved taste of a Reese’s peanut butter cup, but made fresh in your own home with minimal effort. Their simplicity and classic flavor profile make them a universally loved treat, appealing to both children and adults alike.
One of the greatest advantages of these scrumptious chocolate peanut butter balls is their impressive shelf life and freezer-friendliness. They freeze exceptionally well for several months, making them an ideal candidate for ahead-of-time preparation. This allows you to tackle your holiday baking much earlier, freeing up precious time closer to Christmas for other festivities and preparations. Don’t hesitate to double or even triple this recipe; you’ll want a generous supply for unexpected guests, gifting, or simply to satisfy your own sweet cravings throughout the season!
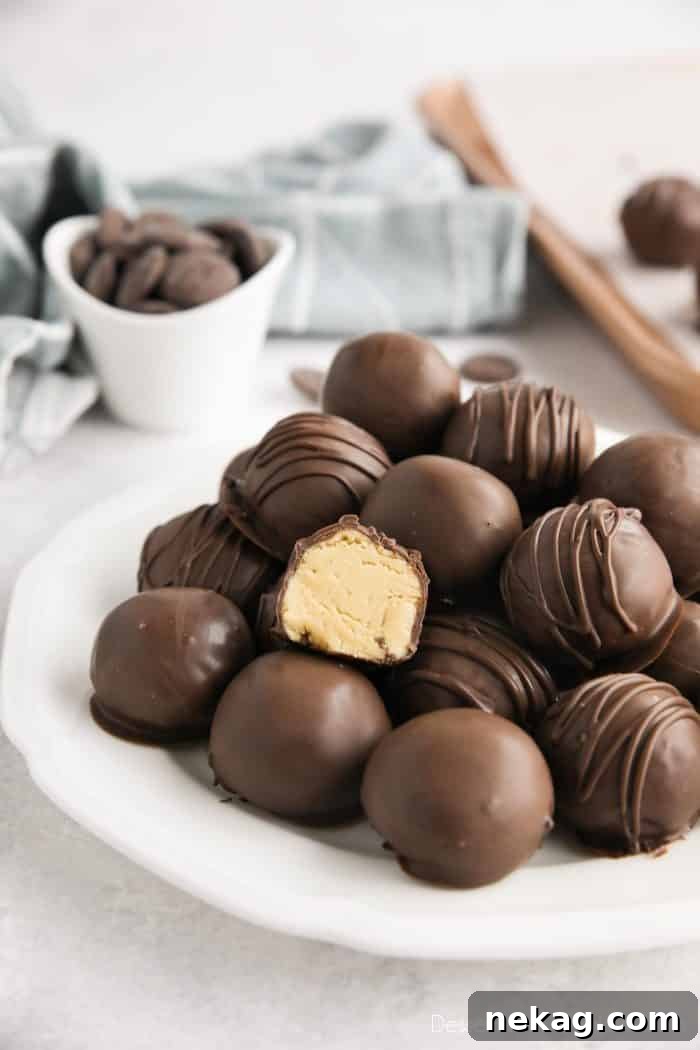
Why You’ll Love These No-Bake Peanut Butter Balls
Beyond their irresistible taste, there are numerous reasons why these easy peanut butter truffles will become your go-to holiday dessert:
- Effortless Preparation: As a no-bake recipe, they eliminate the need for an oven, saving you time and energy, especially during a busy holiday season.
- Few Ingredients: With only six core ingredients, this recipe is budget-friendly and requires no exotic items.
- Make-Ahead Friendly: Their excellent freezing capability means you can prepare them weeks or even months in advance.
- Perfect for Gifting: Beautifully presented, these balls make thoughtful, homemade gifts for friends, family, and neighbors.
- Customizable: Easily adapted with different chocolate coatings, toppings, or even flavored extracts.
- Kid-Friendly: The process of rolling the peanut butter mixture into balls is a fun activity for children to help with (and taste test!).
Tips for Achieving Perfect Peanut Butter Balls
While making these chocolate peanut butter balls is straightforward, dipping them in melted chocolate can be a little messy. But fear not! With a few expert tips, you can minimize the mess and achieve beautifully coated treats every time.
- Opt for Creamy Peanut Butter: The type of peanut butter you use makes a significant difference. For the creamiest, most pliable filling, stick to classic creamy varieties like Jif or Skippy. Natural-style peanut butters, which often separate and require stirring, tend to yield a drier, more crumbly filling that’s harder to roll and can affect the final texture.
- Utilize a Small Cookie Scoop: Consistency is key for uniform and aesthetically pleasing treats. A #50 or #60 cookie scoop is ideal for portioning the peanut butter mixture. This ensures each ball is roughly the same size, making them easier to dip and ensuring even chilling and setting. After scooping, a quick roll between your palms will create a perfectly round ball.
- Chilling is Non-Negotiable: This step is absolutely crucial! Chilling the peanut butter balls before dipping them serves multiple purposes: it helps the chocolate set quickly, prevents the peanut butter from sticking excessively to your dipping tools, and ensures a cold, firm ball that maintains its shape beautifully when submerged in warm chocolate. Aim for at least an hour in the refrigerator or 20-30 minutes in the freezer, but be careful not to over-freeze, as extreme cold can sometimes cause the chocolate coating to crack as it sets.
- Choose the Right Chocolate for Dipping: The quality and type of chocolate you use will significantly impact the final taste and appearance.
- Ghirardelli Melting Wafers are highly recommended for their smooth consistency and ease of melting. They don’t require any tempering and melt beautifully over a double boiler or in the microwave using short 30-second bursts, stirring well between each interval.
- Alternatively, you can use high-quality baking chocolate (typically sold in 4oz bars in the baking aisle). You’ll need to chop it into small pieces for even melting.
- Chocolate chips can be used, but they often require an extra step. To achieve a smooth, dippable consistency, add two tablespoons of shortening or coconut oil for every 10-12 ounces of chocolate chips. This helps to thin the chocolate and makes dipping much easier.
- For a classic look and easy handling, almond bark is also a viable option and melts very smoothly.
- Master the Dipping Technique: For a clean, even coating, a fork and a toothpick are your best friends. Gently drop a chilled peanut butter ball into the melted chocolate. Use a fork to roll it around until it’s fully coated. Lift the ball out with the fork, tapping the fork gently on the edge of the bowl to remove any excess chocolate. Then, use a toothpick to carefully slide the ball off the fork onto a parchment-lined baking sheet. For those who enjoy specialized kitchen gadgets, a set of chocolate dipping tools can make this process even smoother.
- Re-warm Chocolate as Needed: Melted chocolate can thicken as it cools, making dipping more challenging. If your chocolate becomes too thick during the process, simply return it to the double boiler or microwave for another short burst (around 30 seconds), stirring until it regains its smooth, dippable consistency.
Peanut Butter Balls vs. Buckeyes: The Sweet Distinction
The terms “Buckeyes” and “Peanut Butter Balls” are often used interchangeably, but there’s a subtle, charming difference that gives the former its unique identity.
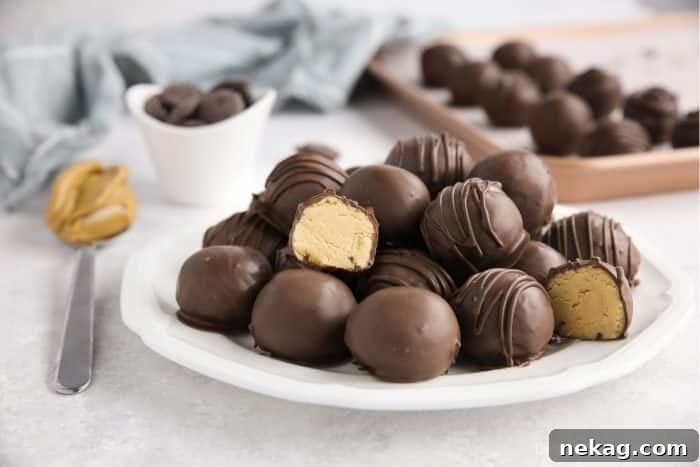
While both are delectable chocolate peanut butter treats, traditional Buckeyes are only partially coated in chocolate, leaving a small circle of peanut butter visible at the top. This distinctive look is designed to mimic the nut of the buckeye tree, which is the state tree of Ohio. This regional resemblance is precisely how the chocolate-dipped peanut butter confection earned its famous name.
Our recipe for peanut butter truffles, however, embraces a full chocolate coating, creating a perfectly encased sphere of peanut butter bliss. Regardless of whether you prefer them fully enrobed or with a “buckeye” exposed, these delightful confections are an absolute must-make for the holiday season. They offer a taste of nostalgia and pure indulgence, perfect for sharing. Package them in charming cellophane Christmas bags, and they transform into delightful and easy neighbor gifts or thoughtful party favors.
The Simple Ingredients for Irresistible Peanut Butter Balls
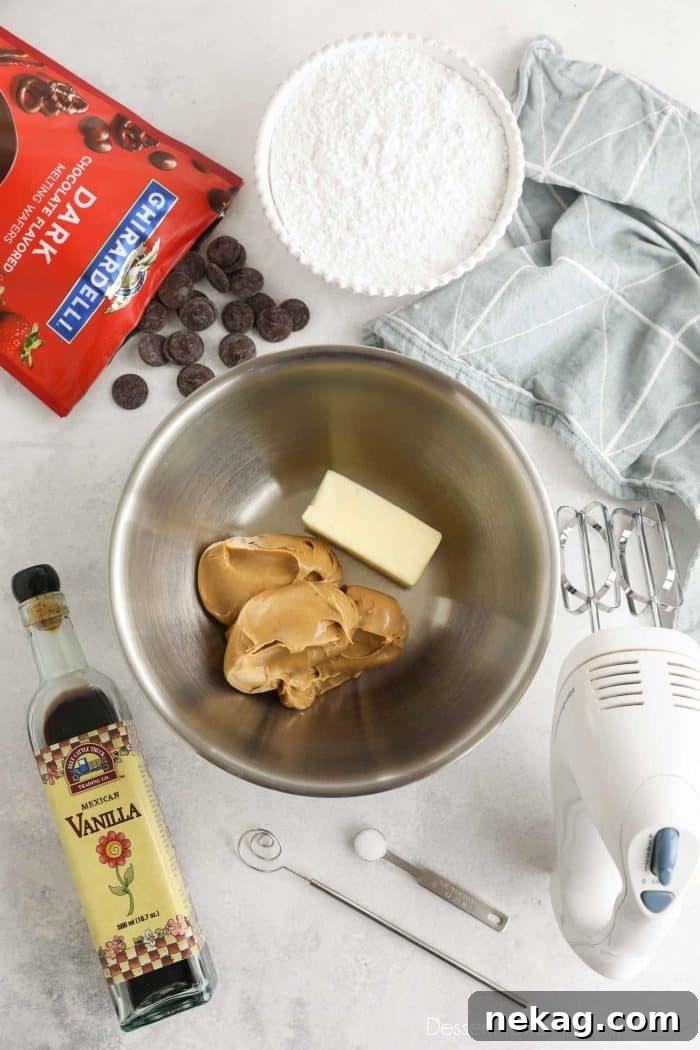
You’ll be delighted to know that these decadent chocolate peanut butter balls require only six essential ingredients, each playing a crucial role in creating their perfect texture and flavor:
- Creamy Peanut Butter: This is the heart of our recipe, providing the signature flavor and creamy base for the filling. For best results, always use a smooth, creamy peanut butter such as Jif or Skippy. Avoid natural peanut butters, as their tendency to separate and be less cohesive can lead to a dry, crumbly filling that’s difficult to work with.
- Butter: Whether you choose salted or unsalted butter, ensure it’s softened to room temperature for easy blending. I personally prefer salted butter as its subtle saltiness beautifully balances the sweetness of the other ingredients, enhancing the overall flavor profile.
- Vanilla Extract: Much like salt in savory dishes, vanilla extract is a flavor enhancer in desserts. It adds depth and warmth, rounding out the sweet and nutty notes of the peanut butter filling.
- Salt: Even if you opt for salted butter, a small amount of additional salt is recommended. It works wonders in offsetting the intense sweetness of the powdered sugar and chocolate, creating a more balanced and sophisticated taste experience.
- Powdered Sugar: Also known as confectioners’ sugar, this ingredient is vital for both sweetness and structure. Its fine texture helps to bind the filling together into a smooth, pliable dough that’s easy to roll and holds its shape.
- Ghirardelli Melting Wafers: For the chocolate coating, melting wafers are a fantastic choice due to their smooth melting properties and consistent results. They streamline the process by eliminating the need for chopping or tempering that pure baking chocolate might require. This saves you valuable time and reduces the number of dishes you’ll have to wash!
Step-by-Step Instructions for No-Bake Peanut Butter Balls
Making these delightful treats is a simple process. Follow these instructions for perfect chocolate peanut butter truffles every time:
1. Prepare the Peanut Butter Filling: In a large mixing bowl, combine the creamy peanut butter, softened butter, vanilla extract, and salt. Using an electric hand mixer, beat these ingredients together until the mixture is light, creamy, and well combined. Gradually add the powdered sugar, mixing on low speed until it’s fully incorporated. The filling might appear slightly crumbly and dry at first, but don’t worry—it will come together beautifully once you start rolling it in your hands.
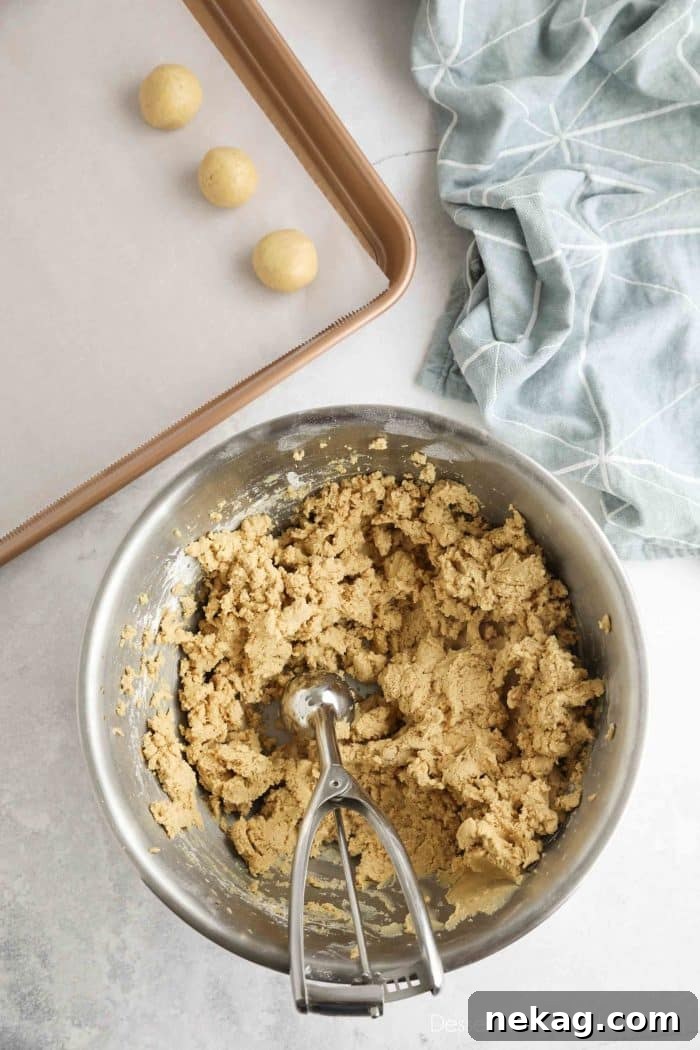
2. Roll into Uniform Balls: Using a tablespoon measure or a #50 or #60 mini cookie scoop, portion out the peanut butter filling. Roll each portion between your palms until it forms a smooth, round ball. Place these perfectly shaped balls onto a baking sheet lined with parchment paper. This parchment paper will prevent sticking and make for easy cleanup.
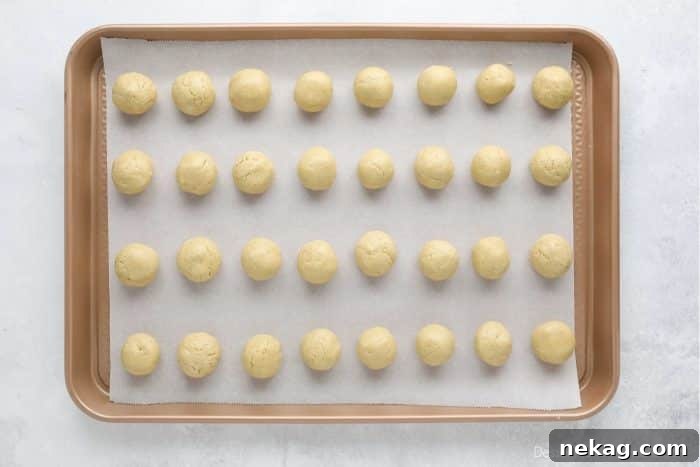
3. Chill Thoroughly: This is a critical step for successful dipping! Transfer the baking sheet with the rolled peanut butter balls to the refrigerator and chill for at least 1 hour. Alternatively, you can place them in the freezer for 20-30 minutes. The goal is to get them cold and firm. Be cautious not to leave them in the freezer for too long, as excessively cold balls can sometimes cause the chocolate coating to crack as it sets. Patience here will result in the best-looking truffles.
4. Melt the Chocolate:
- Microwave Method: Place your chosen melting wafers (or other chocolate) in a microwave-safe bowl. Heat in short bursts of 30 seconds, stirring thoroughly after each interval. Continue until the chocolate is smooth and completely melted.
- Double Boiler Method: Set a heat-safe glass or metal bowl over a pot of simmering water (ensure the bowl doesn’t touch the water). Stir the chocolate constantly until it’s smooth and melted. Remove the pot from the heat once melted and begin dipping. If the chocolate thickens while you’re working, simply return it to the microwave for a few seconds or over the double boiler to re-warm.
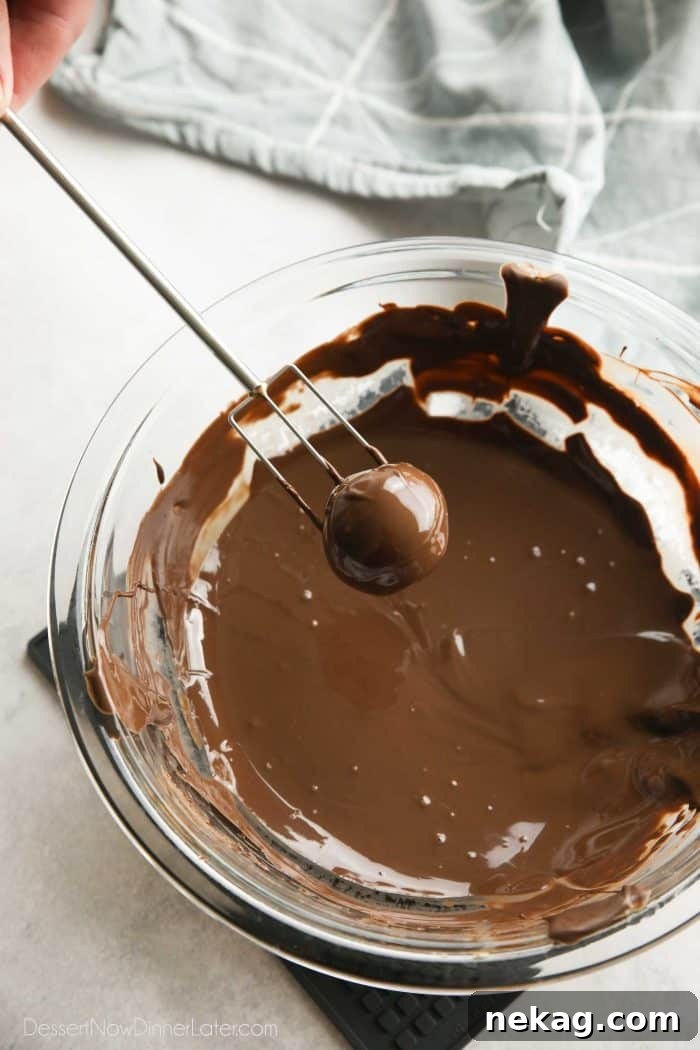
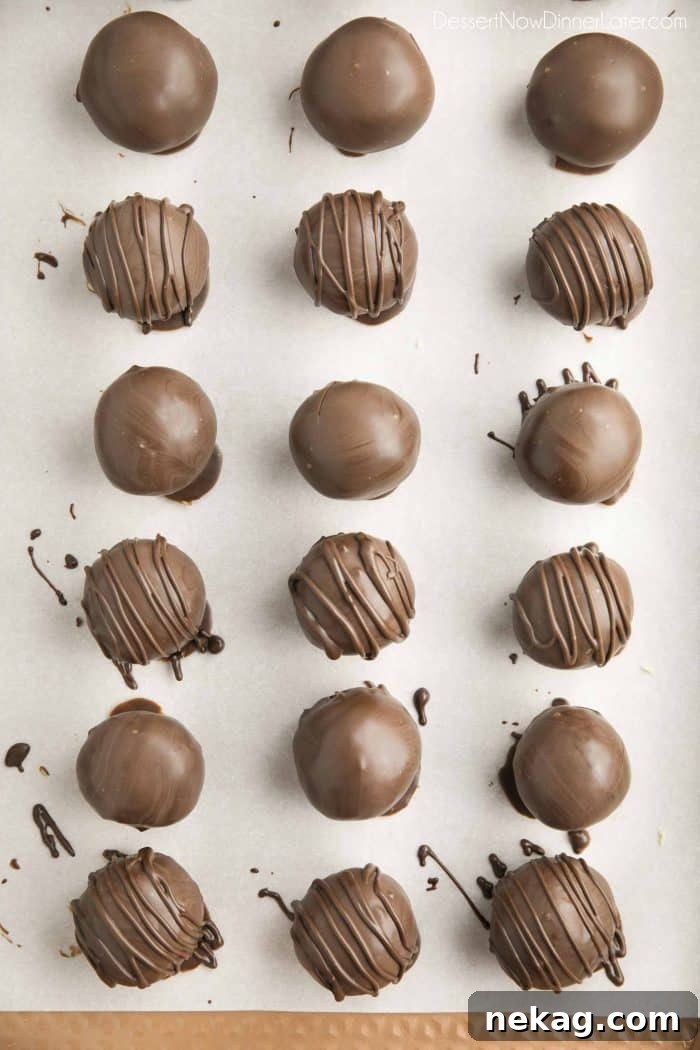
5. Dip in Chocolate: Drop one chilled peanut butter ball into the melted chocolate. Using a fork, roll it around gently until it’s fully coated. Lift the ball out with the fork, tapping the fork lightly against the rim of the bowl to allow any excess chocolate to drip off. Then, with a clean toothpick, carefully slide the chocolate-covered ball off the fork and back onto the parchment-lined baking sheet. Repeat this process for all remaining peanut butter balls.
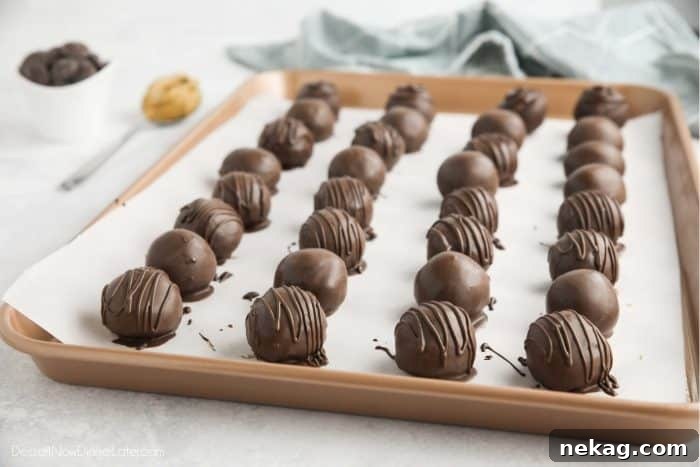
For an Elegant Chocolate Drizzle: If you desire a decorative touch, allow some of the dipped balls to set slightly. Then, place any leftover melted chocolate into a zip-top bag. Snip a tiny corner off the bag to create a small opening. Gently squeeze and drizzle the chocolate back-and-forth over the truffles for a beautiful finish.
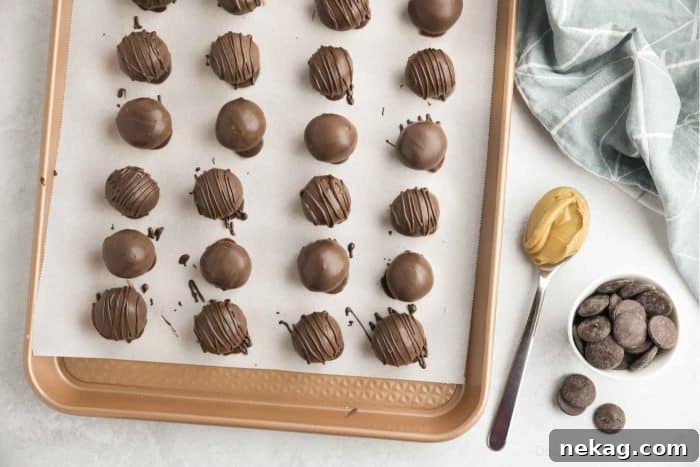
6. Allow Chocolate to Set: Once all the peanut butter balls are dipped, refrigerate them for 30-60 minutes, or until the chocolate coating has completely set and hardened. Once ready, they can be enjoyed immediately or transferred to an airtight container for storage.
If the dipping process seems daunting, consider trying no-bake peanut butter bars instead. They offer a similar flavor profile with a bit more substance from graham cracker crumbs, and simply involve pouring the chocolate on top for an easier finish.
Storing and Freezing Your Peanut Butter Balls
These delectable homemade peanut butter balls are not only delicious but also incredibly convenient to store, ensuring you can enjoy them for weeks to come or prepare them far in advance of any special occasion.
Refrigerator Storage: Once the chocolate coating has completely set, transfer your peanut butter balls to an airtight container. They will keep beautifully in the refrigerator for up to two weeks. Keep them chilled to maintain their firm texture and prevent the chocolate from softening.
Freezing for Long-Term Enjoyment: Freezing is an excellent option for longer storage. First, ensure the chocolate coating is fully set. Then, arrange a single layer of peanut butter balls at the bottom of a freezer-safe container. Place a sheet of parchment paper over the first layer to prevent sticking, and then stack additional layers of peanut butter truffles, separating each with parchment paper. Seal the container tightly and freeze for up to three months. When you’re ready to enjoy them, simply transfer them to the refrigerator to thaw for a few hours or let them sit at room temperature for about 30 minutes until softened to your liking.
More Irresistible Chocolate Peanut Butter Desserts
If you’re a true connoisseur of the classic chocolate and peanut butter pairing, you’re in for a treat! This dynamic duo is a favorite for a reason, and there’s a world of delicious desserts waiting to be explored. Here are some more delightful recipes that celebrate the magic of chocolate and peanut butter:
- Peanut Butter Pretzel Sandwiches: A perfect blend of salty and sweet, with a satisfying crunch.
- Baked Peanut Butter Bars: A hearty, classic bar dessert that’s easy to make and always a crowd-pleaser.
- Homemade Peanut Butter Chocolate Chip Cookies: The best of both cookie worlds, soft, chewy, and utterly delicious.
- No Bake Peanut Butter Pie: A dreamy, creamy pie that comes together in a flash without ever turning on the oven.
- Christmas Peanut Butter Cookies (Blossoms or Kiss Cookies): A festive staple featuring a soft peanut butter cookie topped with a chocolate kiss.
- No Churn Chocolate Peanut Butter Ice Cream: Indulge in homemade ice cream without an ice cream maker – rich, creamy, and packed with flavor.
- Frozen Peanut Butter Cup Pie: A refreshing and decadent frozen dessert, perfect for warm weather or any time you crave a cool treat.
- Peanut Butter Swirl Cheesecake Bars: A sophisticated dessert combining the tang of cheesecake with irresistible peanut butter and chocolate swirls.
FOLLOW ME on PINTEREST, FACEBOOK, OR INSTAGRAM for more great recipes!
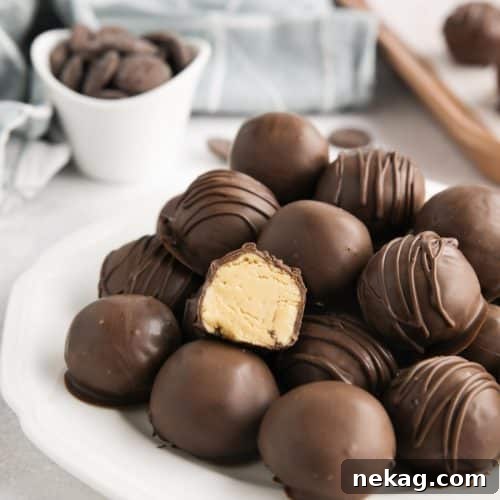
Easy Peanut Butter Balls
Pin
Ingredients
- 1 cup (264 g) creamy peanut butter, (Jif or Skippy)
- ½ cup (113 g) butter, (1 stick) softened
- ½ tsp vanilla extract
- ¼ tsp salt
- 3 cups (360 g) powdered sugar
- 10-12 oz (284 g) Ghirardelli Melting Wafers*
Equipment
-
#60 Cookie Scoop
-
Aluminum Half Sheet Tray (2 Pack)
-
Parchment Paper
-
Chocolate Dipping Set
Instructions
-
Combine peanut butter, butter, vanilla, and salt in a large bowl. Beat with an electric hand mixer until light and creamy. Add powdered sugar and mix on low until combined. May seem slightly dry and crumbly, but that’s ok.
-
Shape into 1-inch balls using a Tablespoon measure or mini cookie scoop (#50 or #60). Roll with hands until smooth and round. Place on a parchment lined baking sheet.
-
CHILL for 1 hour in the refrigerator or 20-30 minutes in the freezer, until cold and firm. Do not leave in the freezer for too long or chocolate may crack after setting. Refrigerating is preferred.
-
Melt the chocolate wafers. METHOD 1: Microwave melting wafers for short 30-second bursts, stirring between each interval. Repeat until smooth. METHOD 2: Use a double boiler by placing a heat-safe glass or metal bowl inside of a pot of water over medium-low heat on the stovetop. Do not allow the water to boil or touch the bottom of the bowl. Stir until melted. Then remove pot from heat and start dipping. (Return chocolate to microwave or stovetop if chocolate starts to get too thick while dipping.)
-
Dip peanut butter balls in chocolate. Simply toss a peanut butter ball into the chocolate and roll it around with a fork until it’s fully coated. Then use the fork to lift it out of the bowl. Tap the fork on the edge of the bowl to remove any excess chocolate, and use a toothpick to slide it off of the fork and back onto the parchment lined baking sheet. Repeat. FOR DRIZZLE: Place any extra chocolate in a zip-top bag. Make a small cut in one corner. Squeeze and drizzle the chocolate back-and-forth over the chocolate peanut butter balls.
-
Allow chocolate to set completely. Refrigerate the dipped truffles for 30-60 minutes or until the chocolate has completely set. Once they’re ready, you can either enjoy them right away, or transfer them to an airtight container for storing in the refrigerator up to 2 weeks. (See notes for freezing.)
Notes
- *Chocolate Substitutions: You may substitute melting wafers with 12oz of baking bars, chopped. Baking bars are found in the baking aisle in 4oz bars, so you’ll need three of them.
- If using 12oz of semi-sweet chocolate chips, melt them with 2 Tbsp of shortening or coconut oil to thin the chocolate to a proper dipping consistency.
- Can also substitute 12 oz of almond bark for the melting wafers.
- To freeze these homemade peanut butter balls, first let the chocolate set. Then fill the bottom of a freezer-safe container with some peanut butter balls. Place parchment paper on top of the first layer, then stack more on top. Repeat as needed, using parchment paper between each layer of peanut butter truffles. Freeze the candies for up to 3 months.
Nutrition Info.
Nutrition
Disclaimer: Nutritional values were calculated using a third-party tool and are provided as an estimation only.
Sharing this recipe with a link is both encouraged and appreciated. Copying/pasting and/or screenshots of full recipes to any social media is strictly prohibited. Content and photographs are copyright protected.
Did you make this?
Don’t forget to leave a rating below and make sure to follow on Pinterest and Instagram for more!