
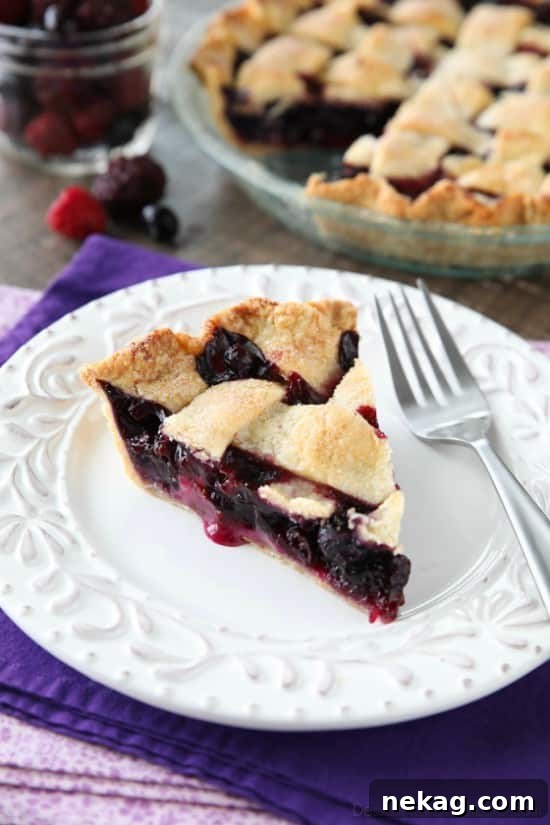
Indulge in the irresistible charm of a homemade pie any time of the year with this incredibly simple yet utterly delicious Frozen Mixed Berry Pie. Crafted using a convenient blend of frozen raspberries, blackberries, and blueberries, this recipe is a true game-changer, especially when fresh berries are out of season. Forget about the fuss of pre-cooking the filling; our straightforward method allows you to simply mix, fill, and bake, yielding a vibrant, juicy pie bursting with natural sweetness. Whether you’re preparing for a festive holiday gathering or simply craving a comforting dessert, this Mixed Berry Pie promises to be a delightful centerpiece, bringing joy to every slice.
The Journey to the Perfect Frozen Mixed Berry Pie
Baking has always been a passion of mine, and sharing that joy is even more fulfilling. Recently, I had the pleasure of hosting my friend Holly for a hands-on pie-making session. She was eager to master the art of pie crust, and it provided the perfect opportunity for me to revisit some of my earliest and most beloved recipes from when I first started this blog. It’s always fascinating to see how techniques evolve and how small adjustments can make a significant difference in the final product.
From Humble Beginnings to Blog Favorite
The original incarnation of this frozen mixed berry pie holds a special place in my heart. I still chuckle remembering the first photos – snapped with a simple point-and-shoot camera at my mom’s house during Christmas, with a red gingerbread man pie plate and various kitchen clutter in the background. Despite the less-than-professional photography, the pie itself was always a hit, a testament to its inherent deliciousness. Given that it’s a dish we happily bake at least once a year, it’s a wonder it took me so long to give it the updated photoshoot it deserved!
The Evolution of a Recipe: Baking with Berries Straight from the Freezer
One of the most exciting updates to this recipe is a direct response to popular demand and my own culinary experiments. I’ve refined the instructions to use frozen berries directly from the freezer, eliminating the need for thawing and draining excess juice. This simplification not only saves time but also seems to be the preferred method for many home bakers who’ve discovered this delightful recipe. Baking from frozen prevents the berries from becoming mushy and helps maintain their structural integrity, resulting in a more appealing texture in the finished pie. It’s a small change with a big impact, ensuring a consistent and delicious result every time.
The Art of Pie Making: Simple, Sweet, and Stunning
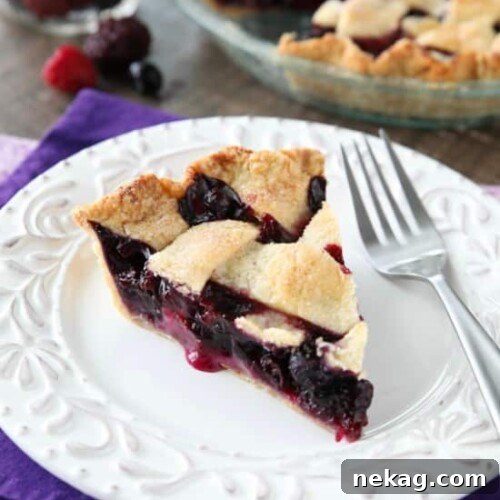
This frozen mixed berry pie embodies everything a classic dessert should be: simple, pleasing, and undeniably delicious. The vibrant, perfectly sweetened fruit filling, nestled between layers of my perfect pie crust recipe, creates a harmony of textures and flavors that is truly unforgettable. For those aspiring to elevate their baking skills, I also offer a comprehensive tutorial for crafting a beautiful lattice crust. There’s a profound satisfaction that comes from creating a gorgeous, homemade pie from scratch. I genuinely believe that mastering pie baking is an essential skill for any home cook, transforming simple ingredients into one of life’s best desserts. It’s more than just a recipe; it’s an invitation to create something truly special.
Frozen Mixed Berry Pie
Amber Brady
Pin
Rate
Save
1
standard 9-inch pie (8 servings)
25 minutes
1 hour 15 minutes
Ingredients
- Pie Dough, for top and bottom crust
- ¾ to 1 cup (150-200 g) granulated sugar, (depending on desired sweetness)
- ⅓ cup (54 g) cornstarch
- 4 cups (420 g) frozen berry blend, (blackberries, raspberries, and blueberries)
- 1 Tbsp lemon juice
Other Ingredients:
- 1 egg, whisked (for brushing the crust)
- 1-2 tsp granulated sugar, (for sprinkling on top)
Instructions
-
Preheat oven to 350 degrees Fahrenheit (175°C).
-
Prepare your pie crust. Divide the dough in half. Roll one half into a circular shape and carefully line a standard 9-inch pie plate. Trim any excess dough from the edges.
-
In a large bowl, whisk together the granulated sugar and cornstarch until well combined. Add the frozen berry blend (blackberries, raspberries, and blueberries) into the bowl. Measure the berries as accurately as possible (level cups, avoid heaping, or use a kitchen scale for precision). Pour in the lemon juice. Gently fold the mixture until all the fruit is evenly coated with the sugar and cornstarch.
[NOTE: Using too many berries can create excessive liquid during baking, potentially causing overflow and a filling that may not thicken properly. Stick to the recommended amount for the best results.] -
Carefully spoon the berry mixture into the prepared pie crust, ensuring the cornstarch-sugar mixture is distributed as evenly as possible among the berries. (Optional: Allow the berries to macerate for 5-10 minutes in the crust. This step helps release some juices and starts to dissolve the cornstarch-sugar, leading to a richer flavor and potentially more stable filling.)
-
Roll out the second half of your pie dough. You can either cut it into strips to create a beautiful lattice top or leave it whole for a solid top crust. Brush the edges of the bottom pie crust with the whisked egg wash, then carefully attach the top crust to the bottom. Trim any excess dough and crimp the edges as desired for a decorative finish. If using a whole top crust, remember to cut several slits into the center to allow steam to escape during baking.
-
Lightly brush the entire top of the pie crust with the remaining egg wash. This will help achieve a beautiful golden-brown finish. Sprinkle 1-2 teaspoons of granulated sugar evenly over the top for an extra touch of sweetness and sparkle.
-
Bake the pie in the preheated oven at 350°F (175°C) for approximately 1 hour and 15 minutes, or until the top crust is beautifully golden brown and the berry filling is visibly bubbling in the center. If you notice the crust browning too quickly before the filling has adequately bubbled, loosely cover the pie with aluminum foil.
(PRO TIP: Place a baking tray lined with foil on the oven rack directly below your pie. This will catch any potential drips or spills from the bubbling fruit filling, making cleanup much easier.)
Video
A video demonstration for this recipe is available to guide you through each step, ensuring perfect results every time. (Please note: The embedded video player from the original content has been removed as per instructions to clean Javascript code.)
Notes
Cooling is Key: For the best results and a perfectly set filling, allow your pie to cool completely for at least 3-4 hours after baking, or even overnight. This gives the cornstarch time to fully thicken the juices. Cutting into a warm pie too soon can result in a runny filling.
Storage: Leftover pie can be stored at room temperature for up to 2 days, or refrigerated for up to 4-5 days. Cover loosely with foil or plastic wrap. To reheat, you can warm slices gently in the oven.
Berry Customization: Feel free to experiment with different frozen berry combinations. A mix of strawberries, blueberries, and raspberries is also fantastic. Ensure the total quantity remains 4 cups.
Estimated Nutritional Information (per serving, 1/8th of pie):
Calories: Approx. 350-400 kcal
Fat: Approx. 15-20g
Saturated Fat: Approx. 7-10g
Carbohydrates: Approx. 50-60g
Sugar: Approx. 30-40g
Protein: Approx. 3-5g
Fiber: Approx. 3-5g
Sharing this recipe with a link is both encouraged and appreciated. Copying/pasting and/or screenshots of full recipes to any social media is strictly prohibited. Content and photographs are copyright protected.
Did you make this Frozen Mixed Berry Pie?
We’d love to hear about it! Don’t forget to leave a rating below and share your photos. Make sure to follow us on Pinterest and Instagram for more delicious recipes and baking inspiration!
Why Choose Frozen Berries for Your Pie?
While fresh berries are undeniably delightful, their seasonality and cost can sometimes limit our baking ambitions. This is where frozen berries truly shine, offering an accessible and equally delicious alternative. Frozen mixed berries provide several compelling advantages for pie making:
- Year-Round Availability: Enjoy the taste of summer berries no matter the month. Frozen berries are harvested at peak ripeness, ensuring maximum flavor and nutritional value.
- Cost-Effective: Generally more affordable than fresh berries, especially outside of their growing season, making pie baking more budget-friendly.
- Convenience: Pre-washed and ready to use, frozen berries eliminate prep time, allowing you to whip up a pie with minimal effort.
- Structural Integrity: Baking directly from frozen helps the berries maintain their shape better during the baking process, preventing them from becoming overly mushy and resulting in a more appealing texture.
- Consistent Flavor: Because they are flash-frozen at their prime, frozen berries offer a consistently sweet and tangy flavor profile, which can sometimes vary with fresh produce.
The Science Behind a Perfect Fruit Filling
The role of cornstarch in this pie is crucial. When combined with sugar, it acts as a thickening agent, binding the natural juices released by the berries during baking. Without it, you’d end up with a watery, unset pie. The direct-from-frozen method works beautifully because the cold berries gradually warm up in the oven, slowly releasing their juices. This slow release allows the cornstarch more time to absorb the liquid and thicken effectively, resulting in a beautifully set, yet still delightfully juicy, filling. The lemon juice adds a bright, zesty counterpoint to the sweetness of the berries, enhancing their natural flavor profile.
Mastering the Pie Crust: Your Foundation for Success
A truly great pie begins with a phenomenal crust. Whether you prefer a rustic, free-form look or a meticulously woven lattice, the quality of your pie dough is paramount. My perfect pie crust tutorial guides you through creating a flaky, tender, and flavorful base that will perfectly complement the vibrant berry filling. For an extra touch of elegance and a visual treat, our lattice crust tutorial will show you how to weave a beautiful top that allows glimpses of the jewel-toned berries within.
Don’t be intimidated by homemade pie crust. With a few simple tips – like using very cold butter, not overworking the dough, and chilling it thoroughly – you can achieve bakery-quality results right in your own kitchen. The effort is well worth it for that unparalleled homemade taste and texture.
Serving Suggestions and Delicious Variations
A slice of warm Frozen Mixed Berry Pie is a treat in itself, but a few simple additions can elevate the experience even further. Serve it:
- A la Mode: A scoop of vanilla bean ice cream melting over the warm pie is a classic pairing that’s hard to beat.
- With Whipped Cream: A dollop of freshly whipped cream adds a light, airy contrast to the rich filling.
- A Drizzle of Sauce: A light drizzle of raspberry coulis or a simple vanilla crème anglaise can add an extra layer of gourmet flair.
Feeling adventurous? Try these variations:
- Spiced Berry Pie: Add a pinch of cinnamon or a tiny grating of fresh nutmeg to the berry filling mixture for a warming spice note.
- Almond Extract: A quarter teaspoon of almond extract can bring a subtle, sophisticated depth to the berry flavors.
- Orange Zest: A teaspoon of finely grated orange zest can brighten the pie and add a citrusy aroma.
Frequently Asked Questions About Mixed Berry Pie
- Can I use fresh berries instead of frozen?
- Yes, you can use fresh berries. However, you might need to slightly increase the cornstarch by 1-2 tablespoons as fresh berries can release more liquid. You may also want to macerate them with sugar for about 30 minutes before filling the pie to draw out some liquid, then drain any excess juice.
- How do I know when the pie is done?
- The pie is done when the crust is golden brown, and the filling is visibly bubbling thickly in the center. If you only see bubbling around the edges, it’s not ready yet – the center needs to reach a high enough temperature for the cornstarch to fully activate and thicken.
- My pie filling is too runny. What went wrong?
- This is a common issue! It usually means the pie didn’t bake long enough for the cornstarch to fully thicken, or there was too much liquid (perhaps from over-measured berries or using fresh berries without draining). Ensure you bake until the center is bubbling vigorously and then allow ample cooling time.
- How can I prevent the crust from getting soggy?
- Ensuring your bottom crust is firm (from chilling), using enough cornstarch, and baking at the correct temperature for long enough are key. You can also brush the bottom crust lightly with an egg white wash before adding the filling to create a barrier against moisture.
- Can I prepare the pie ahead of time?
- You can assemble the pie up to one day in advance and store it in the refrigerator. Before baking, let it sit at room temperature for about 15-20 minutes while your oven preheats. You can also freeze an unbaked pie for up to 2-3 months. Bake from frozen, adding about 20-30 minutes to the baking time, covering with foil if needed.
*Originally published December 27, 2011. This post and its accompanying photos were updated on March 4, 2017, and further optimized for clarity and SEO on [Current Date of Generation].