
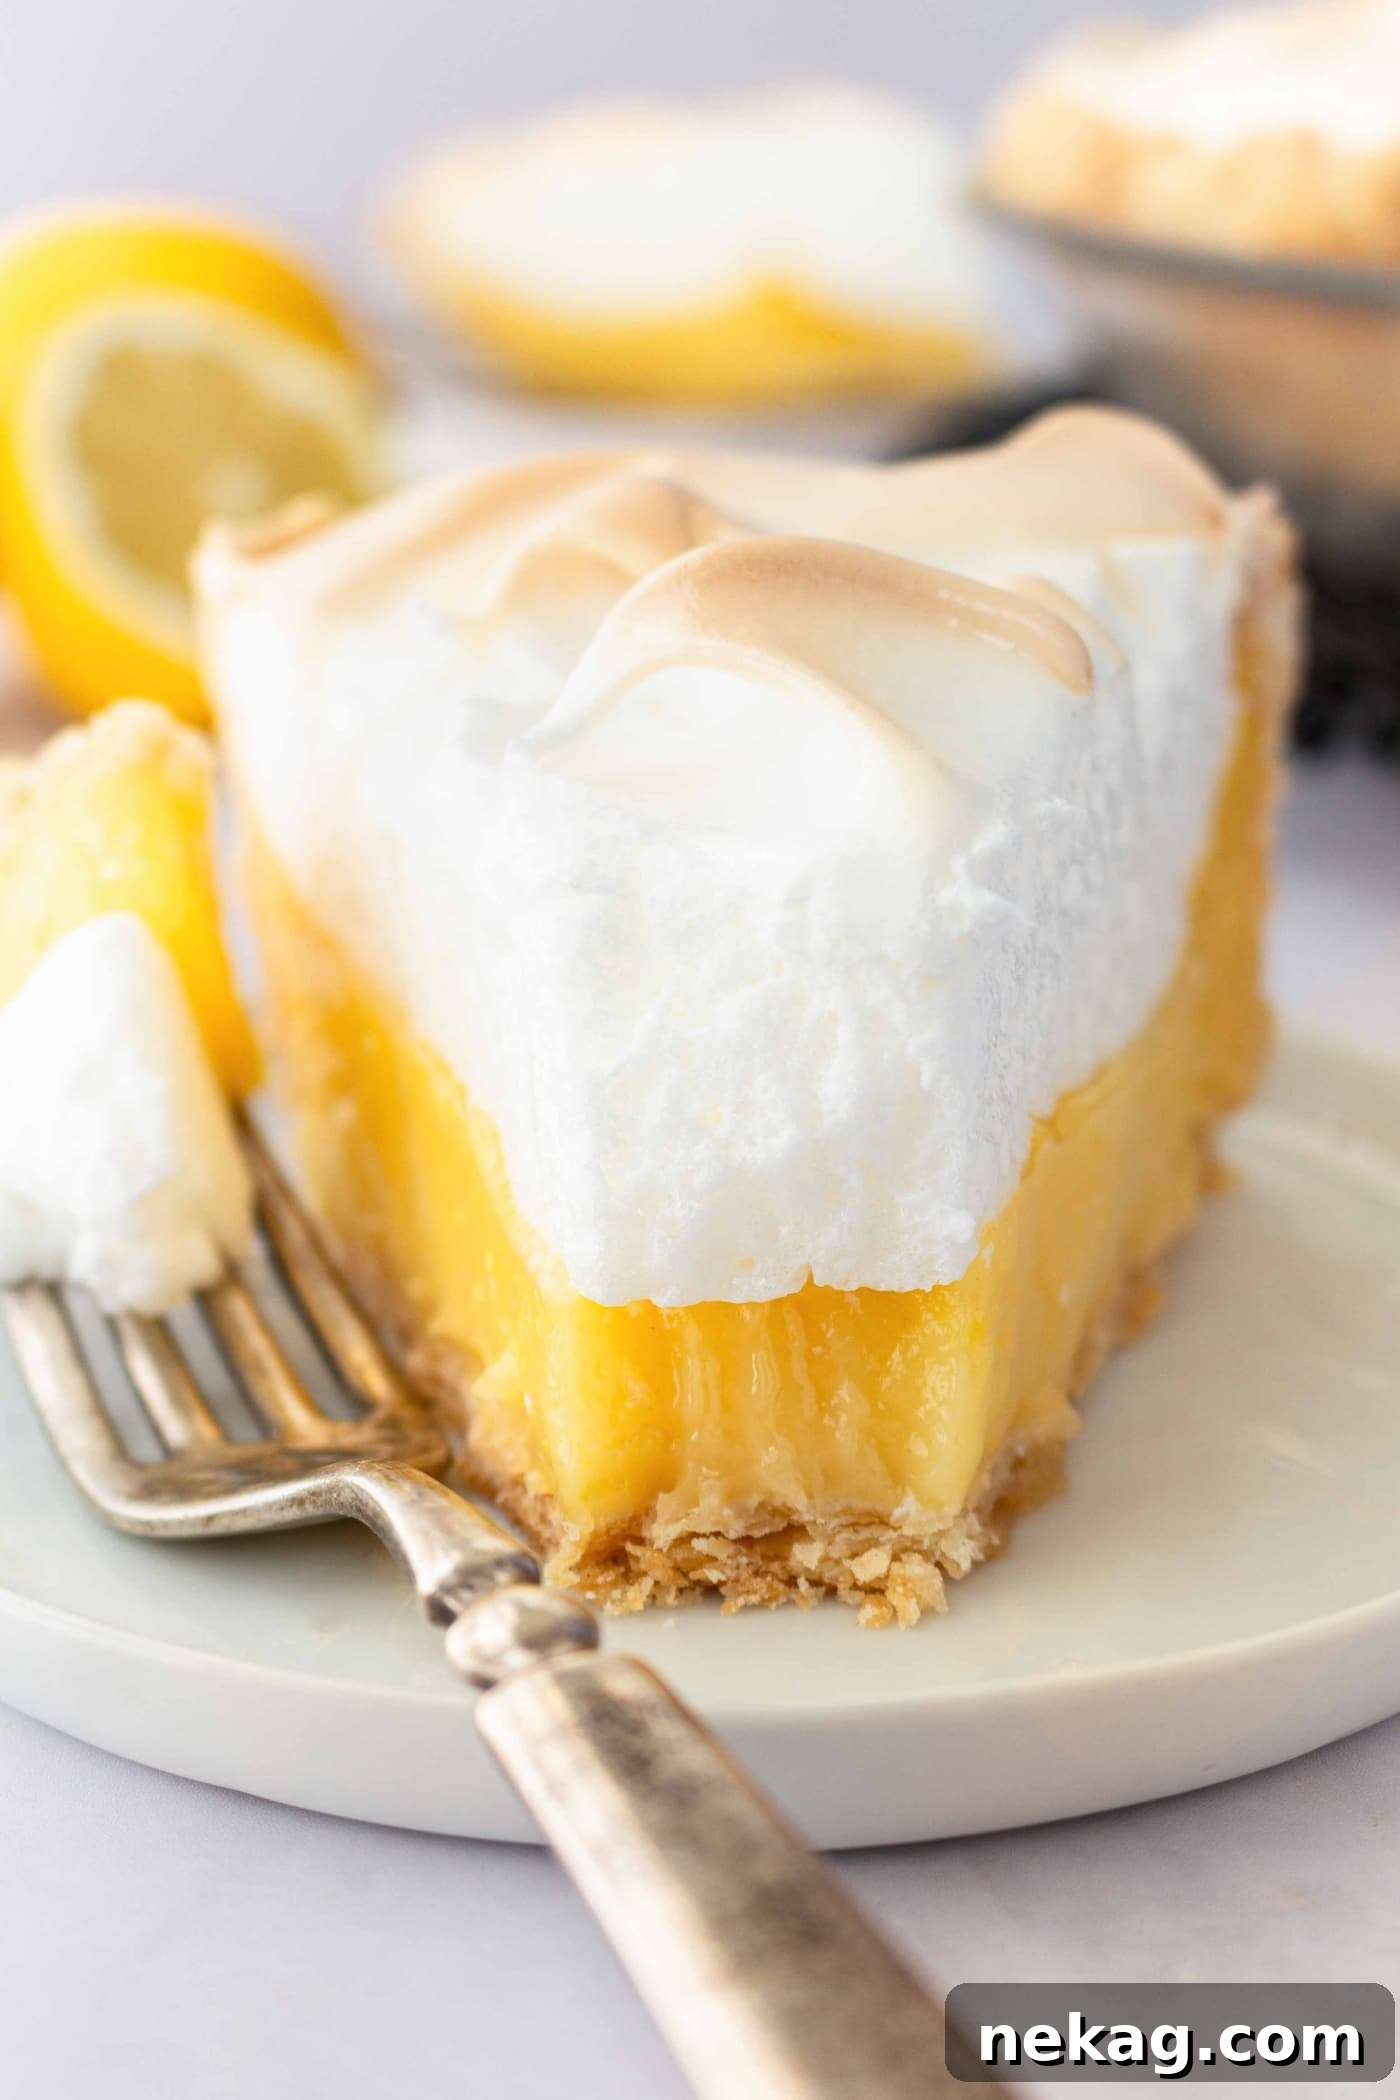
Indulge in the timeless charm of a truly exceptional Lemon Meringue Pie. This beloved classic features a perfectly flaky golden crust, a luscious and tangy homemade lemon filling, and a towering, cloud-like meringue topping, toasted to a beautiful golden brown. Whether you’re a seasoned baker or embarking on your first pie adventure, this comprehensive guide provides the best homemade recipe, invaluable baking tips, and clear, step-by-step instructions to achieve pure lemon meringue perfection.
While this recipe focuses on the quintessential lemon meringue pie, we understand that tastes vary! If you adore the vibrant lemon flavor but prefer a dessert without meringue, consider exploring our creamy lemon pie (similar to a key lime pie) or our decadent lemon cream cheese pie. And for those who prefer to skip the pie crust altogether, classic lemon bars or these delightful lemon crumb bars offer equally satisfying citrusy bliss.
Classic Lemon Meringue Pie Recipe: The Ultimate Guide to Perfection
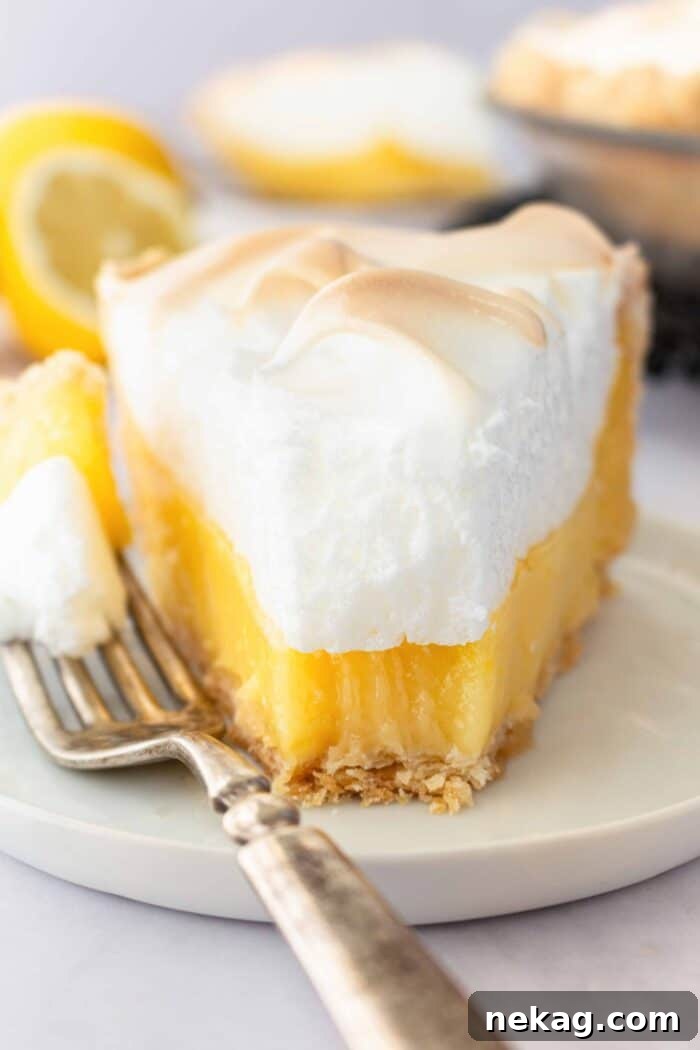
There’s an undeniable magic in a perfectly executed classic lemon meringue pie. This dessert is far more than just a combination of ingredients; it’s a symphony of textures and flavors that captivates with every bite. From the moment your fork breaks through the delicate, toasted meringue, past the vibrant, zesty lemon filling, and down to the crisp, buttery crust, each layer offers a unique and complementary sensation.
The visual appeal of this pie is just as captivating as its taste. The towering, golden peaks of meringue, often gently browned at the tips, make this lemon pie an absolute showstopper. It’s an elegant addition to any table, perfect for family gatherings, holiday celebrations, or simply as a well-deserved sweet indulgence. This recipe guides you through creating a dessert that is not only delicious but also visually stunning, leaving a lasting impression on anyone who tries it.
Why This Lemon Meringue Pie Recipe Stands Out
This recipe isn’t just another lemon meringue pie; it’s designed to deliver an exceptional dessert experience every single time. Here’s what makes our homemade lemon meringue pie truly special and why you’ll fall in love with it:
- Tangy & Smooth Lemon Pie Filling: Our easy homemade lemon filling strikes the perfect balance between sweet and tart. It’s bursting with fresh lemon flavor, incredibly smooth, and thick enough to hold its shape beautifully without being overly stiff or gelatinous. Unlike simple lemon curd, this filling is specifically formulated for pies, offering a robust flavor that perfectly complements the rich crust and light meringue. You won’t find any artificial flavors here – only the bright, zesty taste of real lemons.
- Perfectly Flaky Pie Crust: The foundation of any great pie is its crust, and ours is truly a masterpiece. We guide you through creating a flaky, golden-brown crust that provides a delightful textural contrast to the smooth filling and airy meringue. It’s buttery, tender, and robust enough to support the generous layers of lemon and meringue. While we highly recommend our easy homemade pie crust recipe for the ultimate flavor and texture, we also offer tips for achieving fantastic results with a store-bought crust.
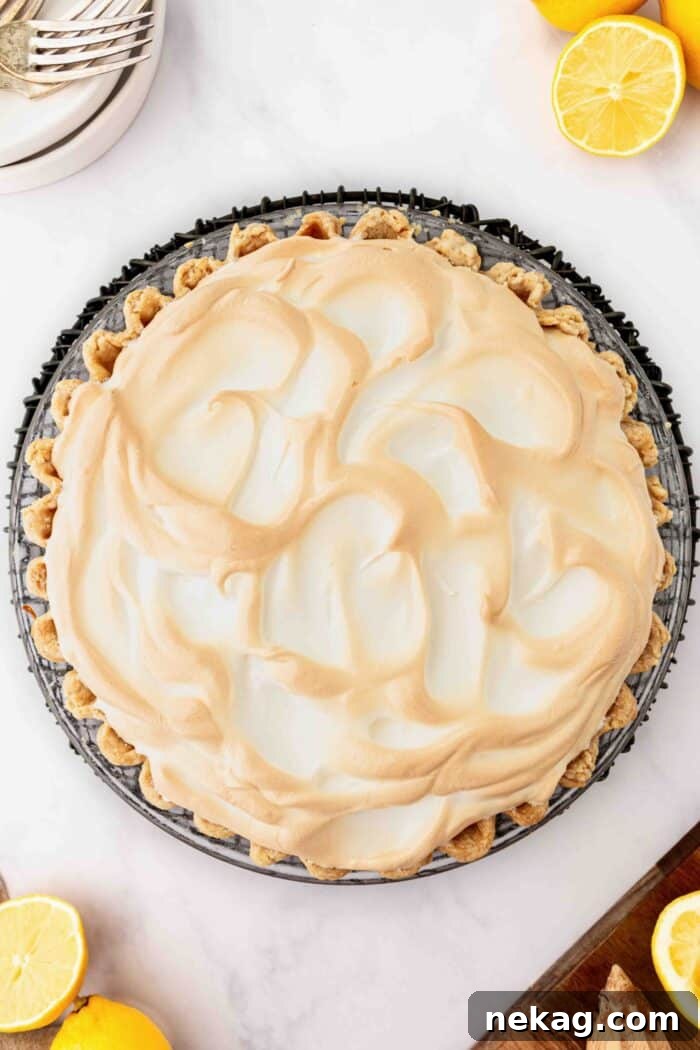
- Light & Billowy Meringue: The crowning glory of this pie is its sweet, airy, and cloud-like meringue topping. It’s whipped to perfection, creating majestic peaks that get wonderfully toasted and golden in the oven. The delicate sweetness of the meringue provides a beautiful counterpoint to the vibrant tang of the lemon filling, adding a luxurious texture that simply melts in your mouth. This meringue is designed to be stable, reducing the common issue of weeping and ensuring your pie looks as good as it tastes.

The Journey to Perfect Lemon Meringue Pie: A Step-by-Step Overview
Making a lemon meringue pie might seem intimidating at first, especially if you’re new to baking. However, with careful planning and a step-by-step approach, you’ll find the process remarkably smooth and rewarding. The key to success lies in proper preparation and following each stage diligently. Having all your ingredients measured and tools ready (“mise en place”) before you begin will make a significant difference.
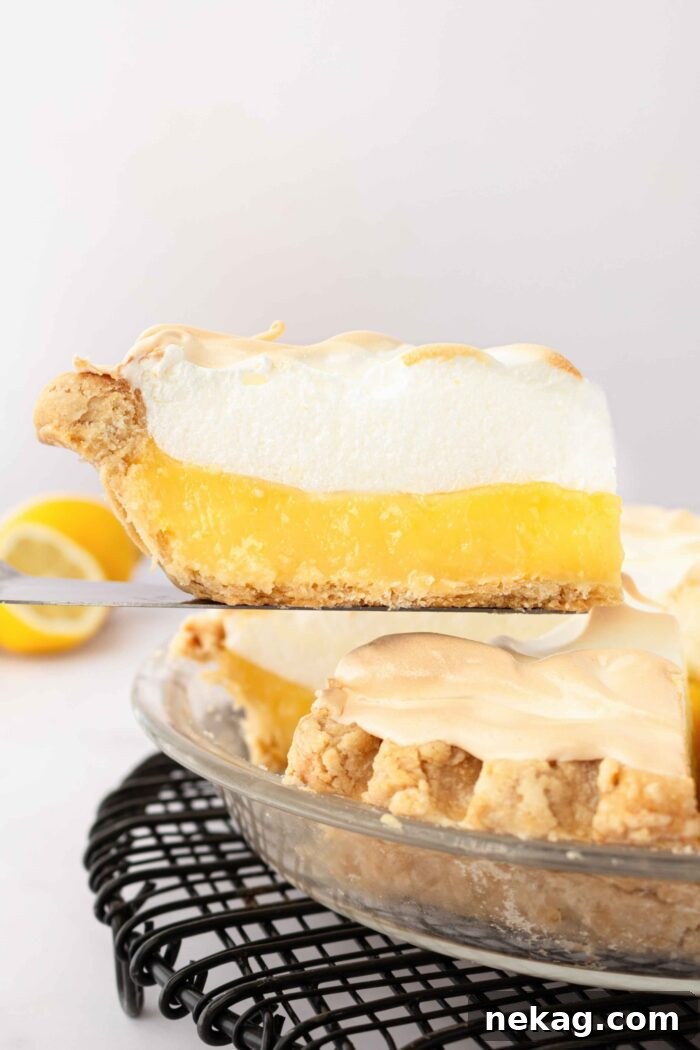
Here’s a quick breakdown of the main stages:
- Blind bake the pie crust until golden and crisp.
- Prepare the luscious lemon pie filling, ensuring it’s thick and hot.
- Whip the egg whites into a glossy, stable meringue topping.
- Spread the meringue over the hot lemon filling, sealing it to the crust.
- Bake the pie briefly until the meringue turns a beautiful golden brown.
- Allow the pie to cool completely to room temperature before slicing and serving.
Essential Ingredients for Your Masterpiece
Creating a truly remarkable lemon meringue pie starts with high-quality ingredients. Each component plays a vital role in achieving the perfect balance of flavors and textures. Below is a detailed list of what you’ll need, along with insights into their purpose. (Full ingredient amounts and detailed instructions are provided in the printable recipe card at the end of this post.)
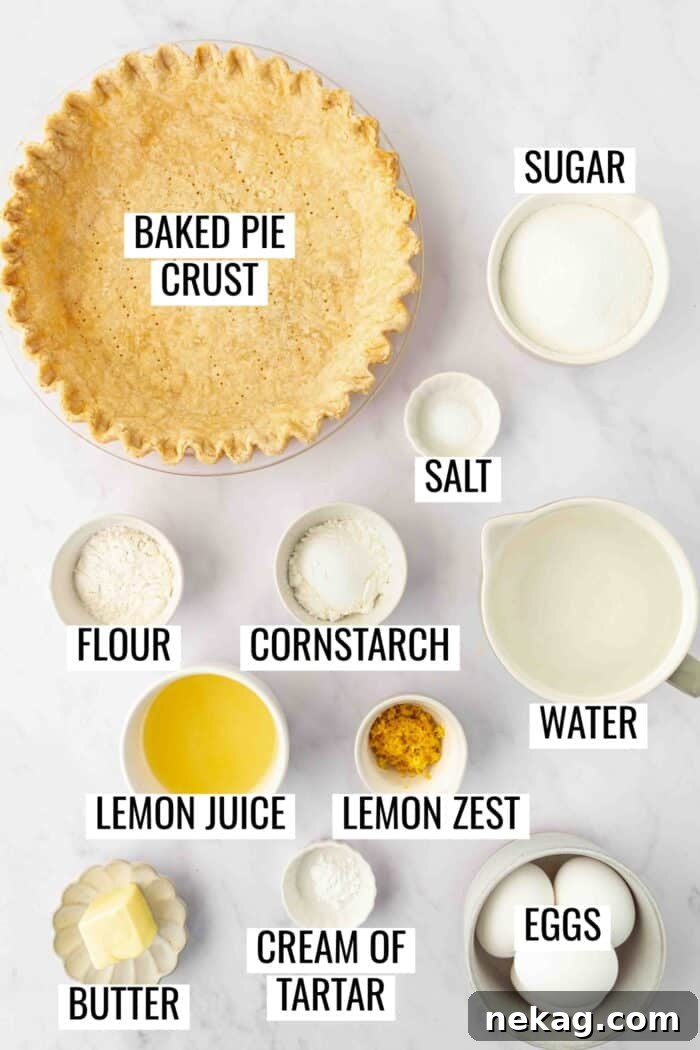
- Pie Crust: The foundation of your pie. You can use your favorite homemade pie crust for the best flavor and texture, or opt for a store-bought 9-inch frozen deep-dish pie crust for convenience. Ensure it’s pre-baked (blind baked) before adding the filling.
- Granulated Sugar: This essential sweetener balances the tartness of the lemons in the filling and adds stability and sweetness to the meringue, creating those desirable glossy peaks.
- All-Purpose Flour: Used as a primary thickening agent for the lemon filling, providing body and a smooth consistency.
- Cornstarch: Working in conjunction with flour, cornstarch further stabilizes and thickens the lemon pie filling. This combination ensures a robust, stable filling that slices cleanly, preventing it from being runny, while maintaining a silky-smooth texture free from any starchy aftertaste.
- Salt: A small amount of salt enhances and brightens all the flavors in the lemon filling, ensuring a well-rounded taste profile.
- Water: Adds necessary volume to the lemon pie filling, helping to create its smooth, gel-like consistency when combined with the thickeners.
- Lemons: The star of the show! You’ll need fresh lemons for both their vibrant zest and their tangy juice. The zest provides intense aromatic flavor, while the juice delivers the characteristic tartness that defines a classic lemon meringue pie. Always use fresh lemons for the best results.
- Butter: Unsalted butter is crucial for adding richness, silkiness, and a luxurious mouthfeel to the lemon filling. It smooths out the texture and contributes to the overall decadence of the pie.
- Eggs: Large eggs are separated into yolks and whites. The yolks are used to enrich and thicken the lemon filling, giving it a beautiful golden hue and creamy texture. The whites are reserved for whipping into the light and fluffy meringue topping.
- Cream of Tartar: A key ingredient for the meringue, cream of tartar acts as a stabilizing agent. It helps the egg whites whip faster, achieve greater volume, and form firm, glossy peaks that hold their shape, preventing the meringue from deflating or weeping.
These carefully selected ingredients, when combined and prepared with attention to detail, work harmoniously to create a dessert that is not only light and luscious but also visually captivating. It’s a testament to how simple components can transform into something truly extraordinary.
Step 1: Crafting the Flaky Pie Crust (Blind Baking)
The journey to a perfect lemon meringue pie begins with a properly blind-baked crust. This crucial step ensures your pie crust is fully cooked, crisp, and won’t become soggy from the filling. Our specific method for how to blind bake pie crust is designed to prevent excessive browning and shrinking, resulting in a beautiful and sturdy base for your pie. You can apply this technique whether you’re using a homemade or a store-bought crust. That detailed post offers plenty of tips, tricks, and step-by-step photos to guide you.
A crucial note for store-bought crusts: Do NOT simply follow the package directions for blind baking, as they often lead to a shrunken or overly browned crust. Refer to our specific notes in the recipe card for the best way to blind bake a store-bought crust for this recipe. We recommend using a 9-inch glass pie dish for homemade crusts, as the glass grips better to the sides, helping to prevent shrinkage and ensuring an evenly baked result.
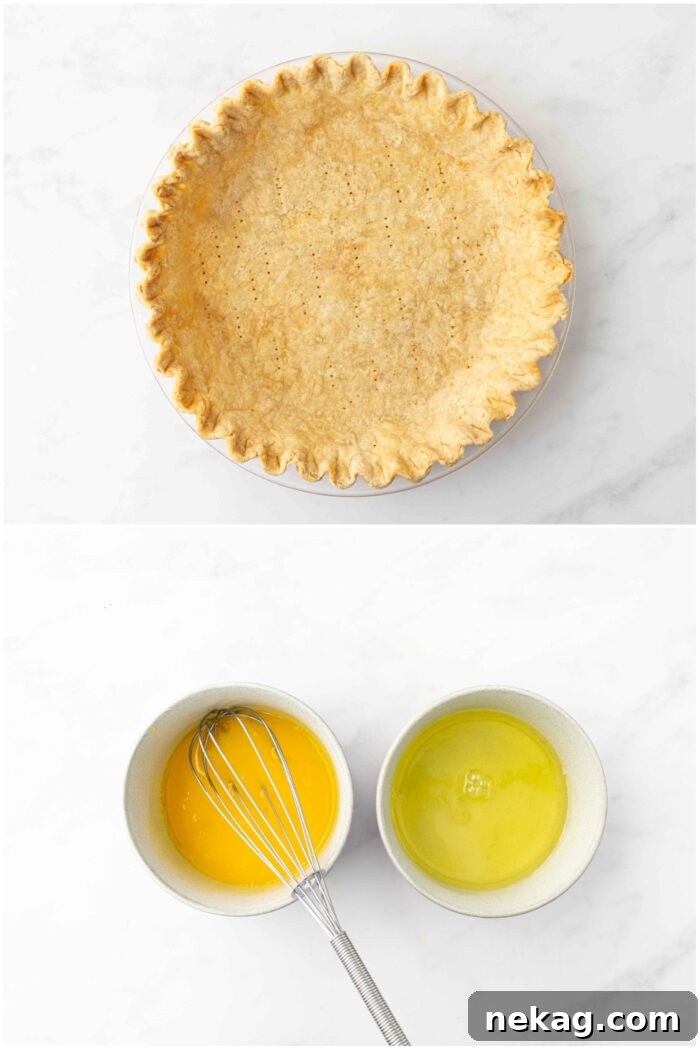
Once your crust is successfully blind-baked and cooled slightly, turn your oven temperature down to 325˚F (160˚C). Next, carefully separate 4 large eggs into two distinct bowls: one for the egg yolks (which you should whisk briefly) and another, completely clean bowl for the egg whites. Set both bowls aside to allow the eggs to come to room temperature. While the eggs are warming, gather and prepare all your other ingredients and baking tools. This “mise en place” approach will streamline the subsequent steps and ensure a smoother baking process.
Step 2: The Heart of the Pie – Tangy Lemon Filling
The lemon filling is the soul of this pie, offering a burst of bright, tangy flavor that is utterly irresistible. Achieving the right consistency is paramount for a pie that slices beautifully and doesn’t run when served. Follow these steps carefully to create a perfectly thick and flavorful filling.
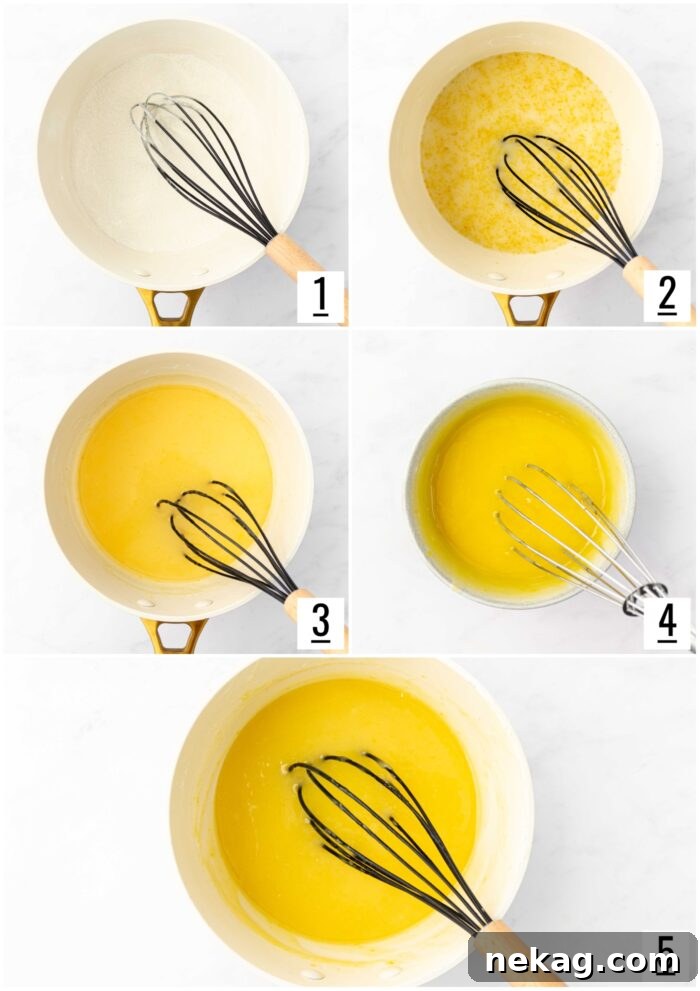
- In a medium-sized saucepan, thoroughly whisk together the granulated sugar, all-purpose flour, cornstarch, and salt. This ensures all dry ingredients are evenly distributed, preventing lumps in the final filling.
- Gradually stir in the water, fresh lemon zest, and fresh lemon juice. Continue stirring constantly over medium-high heat. The mixture will begin to thicken into a gel-like consistency as it comes to a boil. It’s essential to stir continuously to prevent scorching the bottom of the pan. Once it boils and thickens, remove the saucepan from the heat and stir in the unsalted butter until fully melted and incorporated, adding richness and a smooth finish.
- To prevent the egg yolks from scrambling, you must temper them. Slowly pour approximately ½ cup of the hot lemon mixture into your briskly whisked egg yolks, continuing to whisk the yolks vigorously as you pour. This gradually raises the temperature of the egg yolks without cooking them.
- Once tempered, whisk the egg yolk mixture back into the remaining lemon mixture in the saucepan. Return the pan to medium-high heat and continue to cook, stirring constantly, until the filling reaches a full boil and becomes very thick. This final cooking ensures the filling is properly set. Remove it from the heat immediately and cover the pan with a lid to keep the filling hot while you prepare the meringue. Keeping the filling hot is crucial for successful meringue adhesion and preventing weeping.
Step 3: Whipping Up the Cloud-Like Meringue Topping
The meringue topping is what gives lemon meringue pie its signature cloud-like appearance and airy texture. Achieving stiff, glossy peaks requires a few careful steps, but the result is a stunning and delicious contrast to the tangy lemon filling.
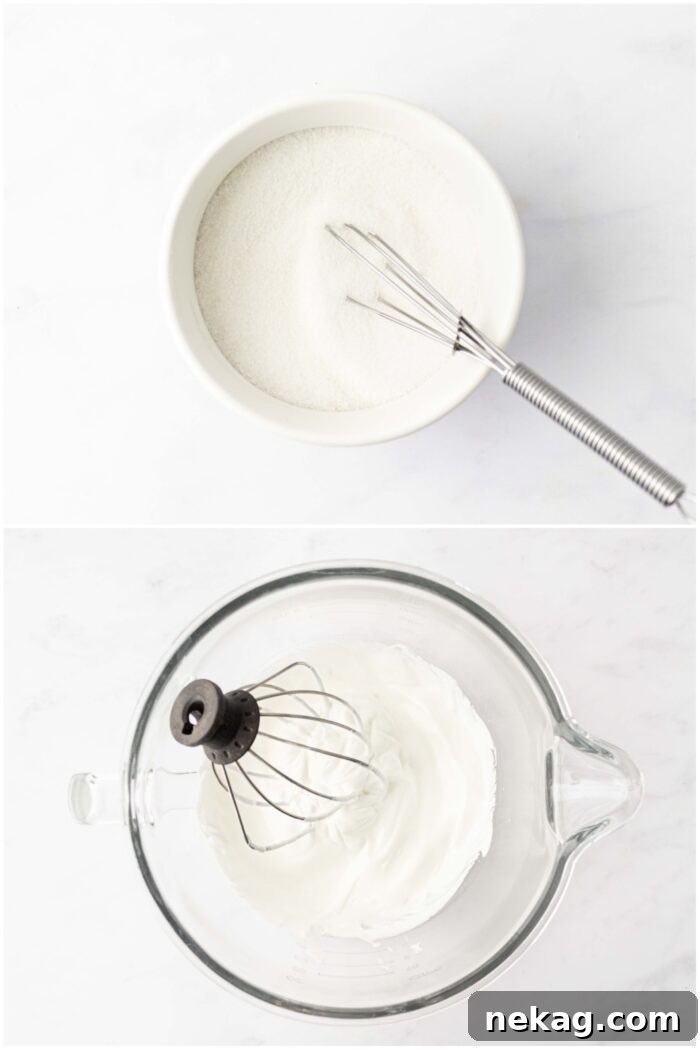
- In a small bowl, stir together the granulated sugar (for the meringue) and cream of tartar; set this mixture aside. This pre-mixing helps the sugar dissolve more evenly into the egg whites.
- Using an electric stand mixer fitted with the whisk attachment (or a hand mixer), begin beating the room-temperature egg whites on medium-high speed. Beat until they become thick, foamy, and opaque. At this stage, they should hold soft peaks.
- With the mixer still running on high, gradually add the reserved sugar and cream of tartar mixture, a tablespoon at a time. Continue beating on high speed until the meringue becomes glossy, smooth, and forms stiff peaks that stand straight up when the whisk is lifted. Be careful not to overbeat, as this can make the meringue dry and brittle. The meringue should be used immediately after whipping for best results.
Step 4: Assembling and Baking Your Lemon Meringue Pie
With your crust baked, your filling ready, and your meringue whipped, it’s time to bring all the elements together for the final bake. This stage is quick but critical for ensuring a beautiful, stable, and perfectly set pie.
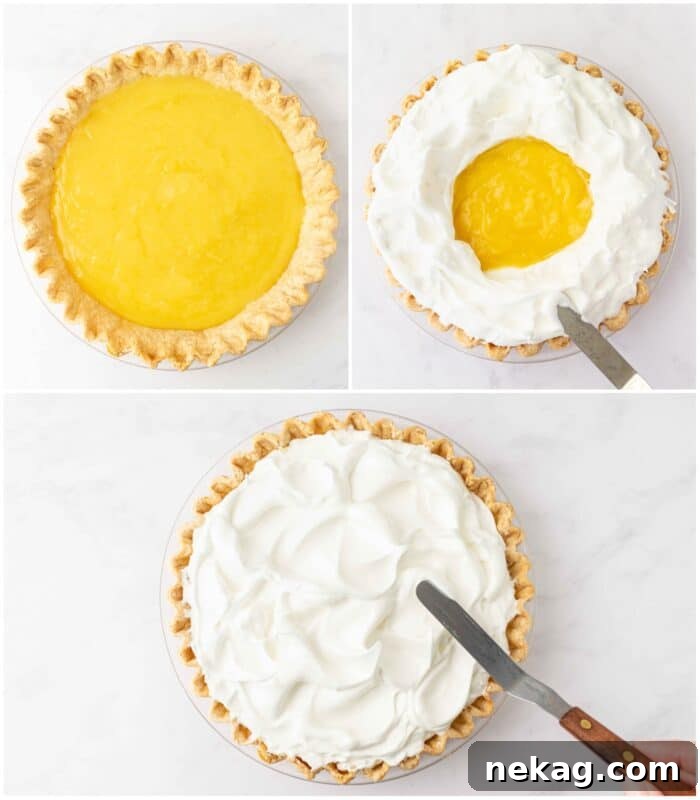
- Pour the hot lemon filling directly into the pre-baked pie crust. It is paramount that the filling is very hot when the meringue is added. If your filling has cooled, gently reheat it over low heat, stirring constantly, until it’s hot again. The heat from the filling helps the meringue adhere properly, prevents a watery layer (weeping) from forming between the layers, and aids in cooking the meringue from the bottom up.
- Using a spoon or spatula, dollop the freshly whipped meringue around the outer edges of the hot lemon filling, carefully sealing it to the pie crust. This creates a barrier that helps prevent the meringue from shrinking or sliding off. Once the edges are sealed, dollop the remaining meringue over the rest of the pie.
- Gently spread the meringue across the entire surface of the pie, ensuring it touches the crust all around. Then, use the back of your spoon or a spatula to create decorative peaks and swirls all over the meringue. These peaks will beautifully toast in the oven, adding to the visual appeal.
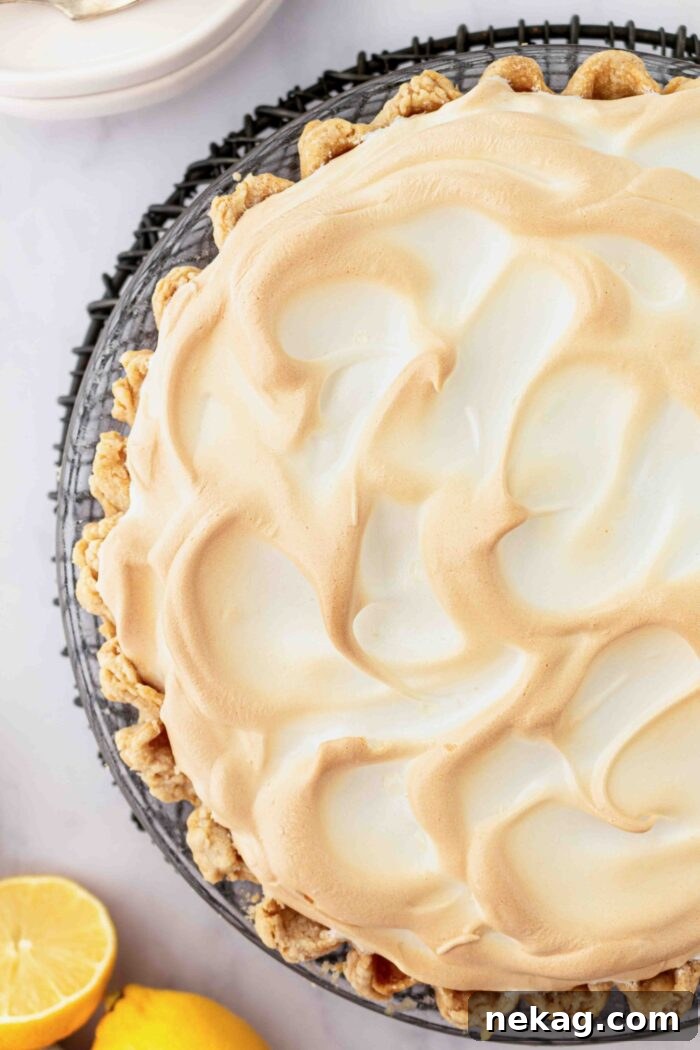
- Transfer the pie to your preheated 325˚F (160˚C) oven. Bake for approximately 20-25 minutes, or until the meringue has puffed up significantly and achieved a lovely golden-brown color on its peaks. Keep a close eye on it to prevent over-browning.
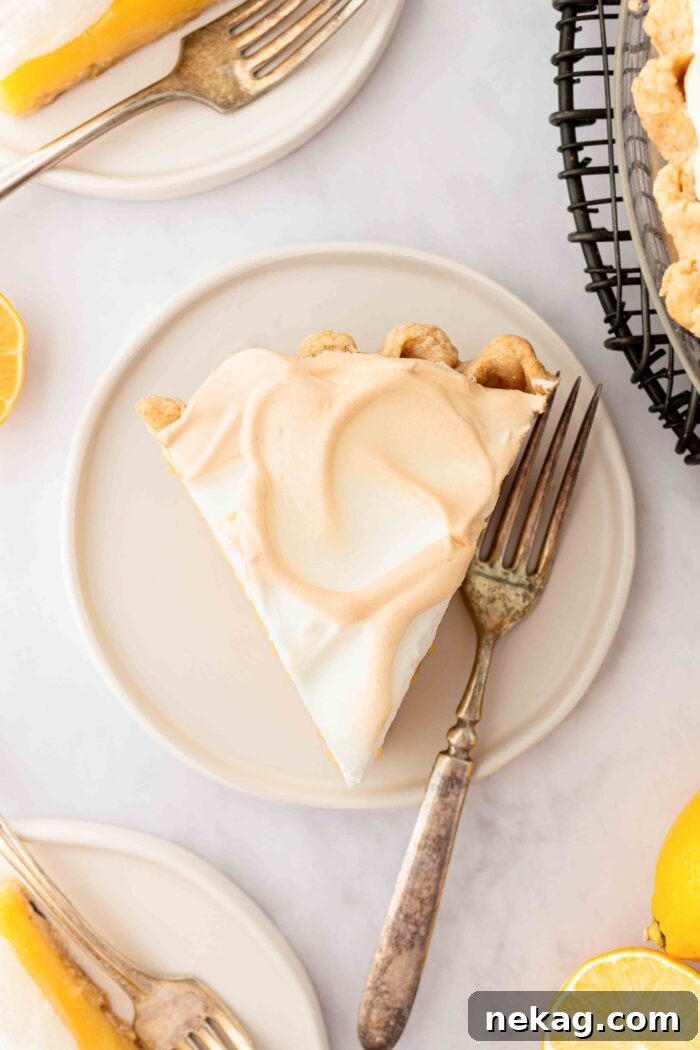
- Once baked, carefully transfer the lemon meringue pie to a wire rack and allow it to cool completely to room temperature. This crucial cooling process will take approximately 2-3 hours. RESIST THE URGE to cut into the pie while it’s still warm, as the lemon filling will likely be runny and will not set properly. Patience is key to a perfectly sliced pie.
Expert Tips for Lemon Meringue Pie Success
Creating a picture-perfect and delicious lemon meringue pie involves a few essential techniques and considerations. Heeding these expert tips will help you avoid common pitfalls and ensure your pie turns out beautifully every time.
- Mise en Place is Key: This French culinary term, meaning “everything in its place,” is incredibly important for this recipe. Have all your ingredients measured and your tools ready before you begin cooking. Both the lemon filling and the meringue are time-sensitive, so you don’t want to be scrambling for ingredients once you start. This organized approach minimizes stress and ensures the best results.
- Eggs: Cold Separation, Room Temperature Whites: Separate your eggs while they are still cold, as the yolks are firmer and less likely to break into the whites. However, for the meringue to whip up to its maximum volume and stability, egg whites absolutely must be at room temperature. Cold egg whites take longer to whip and won’t achieve the same fluffy volume. So, separate your eggs when cold, then let the whites sit out for 20-30 minutes to warm up. Remember, not even a tiny speck of yolk should get into the whites, or they won’t whip properly.
- Meringue Stability Secrets: Always start with an impeccably clean, dry mixing bowl and whisk attachment. Any trace of grease or moisture can prevent the egg whites from whipping correctly. Once the egg whites are foamy, slowly and gradually add the granulated sugar and cream of tartar mixture while beating on high. This slow addition allows the sugar to dissolve completely, resulting in a glossy, stable meringue. Cream of tartar is a vital stabilizer; without it, your meringue is more prone to weeping and deflating.
- Seal the Meringue to the Hot Filling: As mentioned in the assembly steps, applying the meringue to a very hot lemon filling is crucial. The residual heat from the filling helps to “cook” the bottom layer of the meringue, creating a seal and preventing the meringue from separating or weeping. This also helps ensure the meringue bakes thoroughly, not just on top.
- No Cream of Tartar? No Problem!: If you find yourself without cream of tartar, you can substitute 1 teaspoon of white vinegar or fresh lemon juice for every ¼ teaspoon of cream of tartar. Add this substitute to the egg whites before you begin beating them with the sugar. The acid acts similarly to cream of tartar, stabilizing the egg whites and helping them achieve firm peaks.
- Meringue’s Enemy: Steam and Moisture: Meringue is notoriously sensitive to moisture and steam. It is absolutely imperative that you allow the pie to cool completely to room temperature before attempting to cut into it. If cut while warm, the steam released from the hot filling will condense against the meringue, causing crystallized sugar drops (often called “weeping” or “beading”) and ruining its pristine appearance. Unfortunately, some weeping is almost unavoidable when storing the pie in the refrigerator due to condensation, which is why this pie is truly best enjoyed the day it’s made and fully cooled.
- Make Ahead Considerations: For the freshest and best-looking pie, it’s highly recommended to make and serve this pie on the same day. However, if you need a head start, you can prepare and blind bake your pie crust a day in advance. Store the baked crust at room temperature, loosely covered, until you are ready to assemble the pie.
Serving and Storing Your Lemon Meringue Pie
While lemon meringue pie is an absolute delight, it’s a dessert that truly shines when served fresh. The delicate balance of textures—the crisp crust, smooth filling, and airy meringue—is at its peak shortly after the pie has cooled completely.
For optimal enjoyment, this pie is best eaten the day it is made, once it has reached room temperature. If you have any leftovers, store them loosely covered with plastic wrap or aluminum foil in the refrigerator for up to 2-3 days. It’s important to cover it loosely to minimize condensation. However, be aware that meringue has a natural tendency to “weep” (develop small sugary droplets on its surface) the longer it sits in the refrigerator, due to moisture and temperature changes. For the freshest texture and appearance, try to enjoy your homemade lemon meringue pie as soon as possible after it’s fully chilled.

Frequently Asked Questions (FAQs)
Here are answers to some of the most common questions about making and troubleshooting lemon meringue pie:
Why is there liquid (weeping) in my lemon meringue pie?
The watery layer that sometimes forms between the meringue and the filling, known as “weeping,” is typically caused by undercooked meringue or by moisture condensation. A common reason is applying the meringue to a cooled filling. It’s crucial to spread your meringue onto the lemon filling while the filling is still very hot. This heat helps to cook the bottom layer of the meringue and create a proper seal, significantly reducing the likelihood of weeping.
How can I fix a runny lemon meringue pie filling?
A runny lemon filling usually indicates that it wasn’t cooked long enough to activate the thickening agents. To prevent this, ensure you bring the filling mixture to a full, rolling boil (one that you cannot stir down) while constantly stirring. Once it reaches this boil, continue to cook and stir vigorously for a good 30-60 seconds. This extended cooking time allows the flour and cornstarch to fully thicken the filling, ensuring it sets up nicely when cooled.
What is a good substitute for cream of tartar in lemon meringue pie?
Cream of tartar is a crucial ingredient for stabilizing meringue, helping egg whites whip to a high volume and maintain stiff peaks. If you don’t have cream of tartar, you can substitute it with an acidic ingredient like lemon juice or white vinegar. Use about 1 teaspoon of lemon juice or white vinegar for every ¼ teaspoon of cream of tartar specified in the recipe. Add this substitute to the egg whites before you begin beating them with the sugar.
Can I freeze lemon meringue pie?
Unfortunately, lemon meringue pie does not freeze well. The delicate texture of the meringue suffers significantly during freezing and thawing. The meringue tends to soften, become rubbery, and the moisture from freezing will almost certainly create crystallized sugar drops (weeping) on top, ruining both the appearance and the desirable texture of the golden peaks. It’s best enjoyed fresh, or refrigerated for a very short period.
Explore More Delicious Lemon Desserts
If you’re a true lemon lover, there’s a whole world of citrusy delights beyond the classic lemon meringue pie. Expand your dessert repertoire with these other fantastic lemon-infused treats:
Lemon Cream Pie + Video
A tangy and sweet pie with a buttery graham cracker crust, topped with fresh sweetened whipped cream. It’s like key lime pie, but with the bright flavor of lemons!
Lemon Cream Cheese Pie
Featuring layers of no-bake cheesecake and easy microwave lemon curd nestled in a vanilla wafer crust. A perfect blend of sweet and tart!
Lemon Bars
Extra tangy, perfectly sweet, and incredibly easy to make, these classic lemon bars are the ultimate treat for any lemon enthusiast.
Lemon Crumb Bars
These bars feature a lightly sweet and buttery cookie base that cleverly doubles as the crumb topping, encasing a creamy lemon filling in the center.

Lemon Meringue Pie
Everyone loves this classic Lemon Meringue Pie with a flaky crust, tangy homemade lemon pie filling, and fluffy, golden meringue. This recipe provides baking tips and step-by-step instructions for how to make it.
Pin Recipe
Ingredients
For the Pie Crust:
- 1 (9-inch) pre-baked pie crust
For the Lemon Pie Filling:
- 1 cup (200 g) granulated sugar
- 2 Tbsp all-purpose flour
- 3 Tbsp cornstarch
- ¼ tsp salt
- 1 ½ cups (355 ml) water
- 1 Tbsp lemon zest (from about 2-3 lemons)
- 6 Tbsp lemon juice (from about 2-3 lemons)
- 2 Tbsp (28 g) unsalted butter
- 4 large egg yolks, whisked
For the Meringue:
- ½ cup (100 g) granulated sugar
- ¼ tsp cream of tartar*
- 4 large egg whites, room temperature
Equipment
- 9-inch glass pie dish
- Nylon Whisk
- Pyrex Glass Bowl Set of 3
- KitchenAid 5-Qt. Stand Mixer
Instructions
- Blind bake a single 9-inch pie crust. Set aside. Then turn the oven to 325˚F (160˚C). (For homemade crusts, a glass pan is recommended for better grip and less shrinkage. For store-bought, use a 9-inch frozen deep dish pie crust, and follow the specific blind baking notes in the recipe card, not package directions.)
- Separate 4 large eggs into two separate bowls: one for the egg yolks (whisk briefly) and one for the egg whites; set aside to come to room temperature. Prepare all other ingredients and tools.
- LEMON PIE FILLING: In a medium saucepan, whisk the granulated sugar, flour, cornstarch, and salt. Stir in water, lemon zest, and lemon juice. Cook over medium-high heat, stirring frequently, until the mixture comes to a boil and thickens into a gel. Turn off heat and stir in butter.
- Slowly temper the egg yolks: gradually whisk ½ cup of the hot lemon mixture into the briskly whisked egg yolks. Then whisk the tempered egg yolk mixture back into the remaining lemon mixture in the saucepan. Return pan to medium-high heat and cook, stirring constantly, until it reaches a full boil and is very thick. Remove from heat and cover with a lid to keep hot.
- MERINGUE: In a separate bowl, stir together the meringue granulated sugar and cream of tartar; set aside. Beat the room-temperature egg whites with an electric stand mixer fitted with the whisk attachment until thick and foamy. Gradually add the sugar mixture while beating on high until stiff, glossy peaks form.
- ASSEMBLE: Pour the hot lemon filling into the baked pie crust. (If needed, gently reheat the filling. It must be very HOT for the meringue to adhere properly, prevent weeping, and cook through.)
- Using a spoon, dollop the meringue around the edges of the hot filling, sealing it directly to the crust. Then, dollop the remaining meringue over the rest of the pie and spread evenly with the back of a spoon. Create decorative peaks and swirls with the spoon.
- Bake at 325˚F (160˚C) for 20-25 minutes, or until the meringue puffs up and turns golden brown. Transfer the lemon meringue pie to a wire rack and let it cool completely to room temperature (approximately 2-3 hours) before cutting and serving. If the pie is even slightly warm when cut, the lemon filling may be runny.
Video
Notes
- This pie is best eaten the day it is made. Store leftover lemon meringue pie loosely covered with plastic wrap or foil in the refrigerator for up to 2-3 days. Meringue has a tendency to weep the longer that it’s in the refrigerator, so try to eat it as soon as you can.
- Meringue does not like steam/moisture. It is imperative not to cut into the pie while it’s still warm because the steam will create crystallized sugar drops and ruin the appearance of the meringue. Unfortunately, this is unavoidable when storing the pie in the fridge, which is why it’s best eaten after it has been made and cooled to room temp.
- Fresh eggs work best for the meringue to whip properly. Make sure no egg yolks get into the egg whites, and you use a clean, dry bowl and whisk attachment.
- *No cream of tartar? Substitute 1 tsp white vinegar or lemon juice added to the egg whites before beating with the sugar.
- Make ahead: You must make this pie the day that it’s served for optimal freshness, but if you want a jump start, you can prepare and blind bake the crust the day before.
Nutrition
Disclaimer: Nutritional values were calculated using a third-party tool and are provided as an estimation only.
Sharing this recipe with a link is both encouraged and appreciated. Copying/pasting and/or screenshots of full recipes to any social media is strictly prohibited. Content and photographs are copyright protected.
*Recipe adapted from AllRecipes