
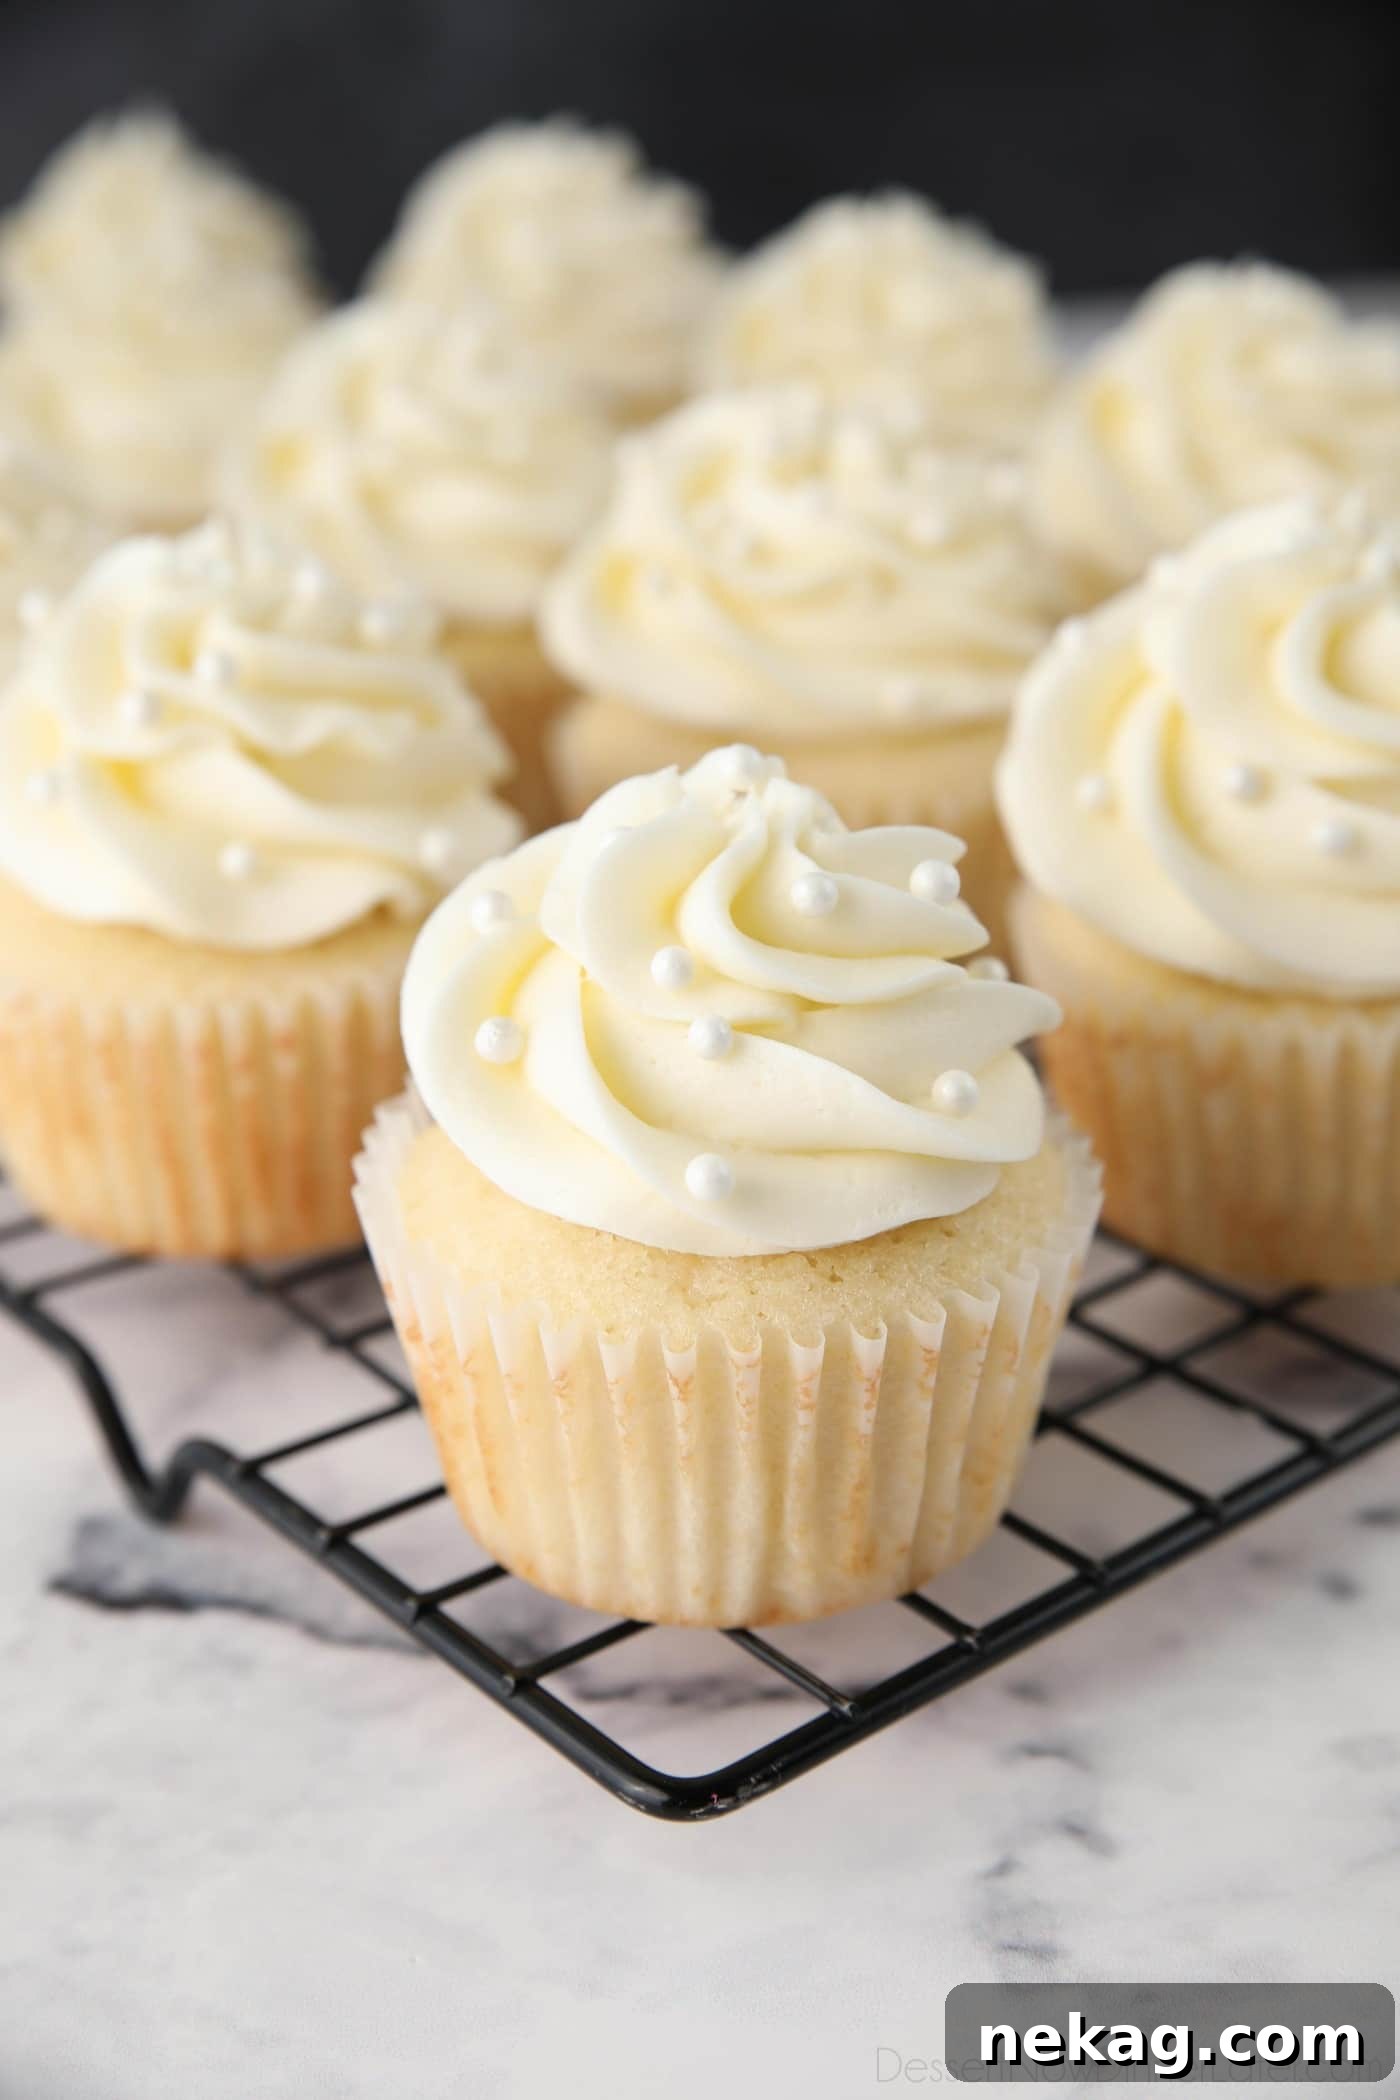
Discover the ultimate recipe for light, fluffy, and undeniably velvety homemade white cupcakes, crafted meticulously from scratch. This easy-to-follow guide leverages the power of egg whites and a simple all-purpose flour base to deliver a bake that’s truly a cut above the rest. Forget the boxed mixes; achieve bakery-quality results right in your own kitchen.
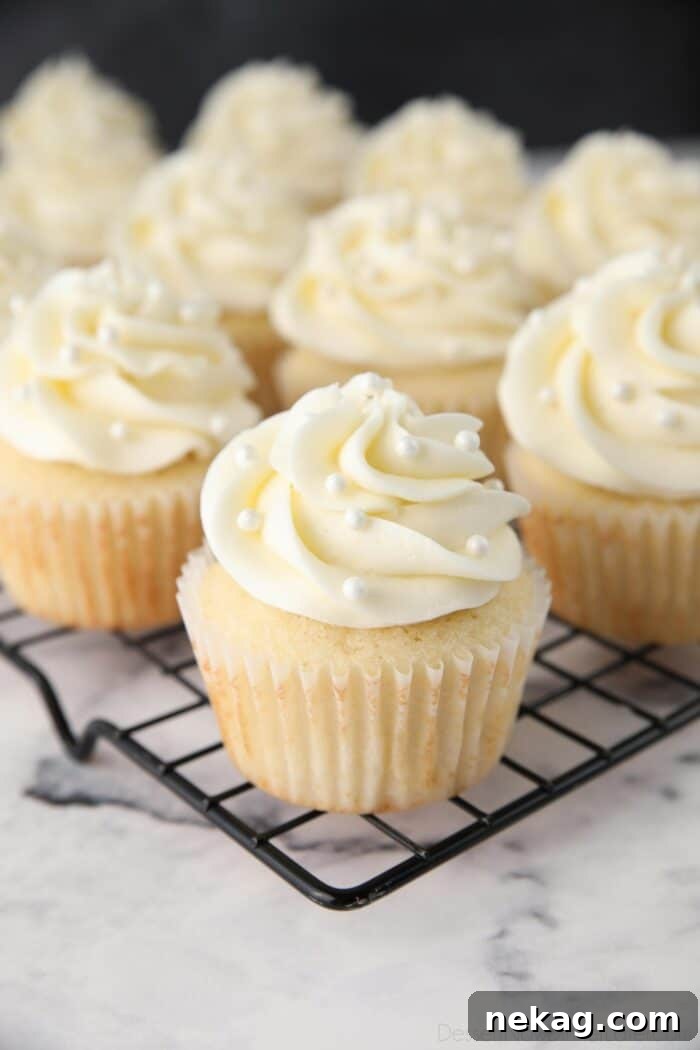
White cupcakes are a timeless classic, gracing tables at everything from elegant weddings to lively birthday parties. Their clean, pure flavor and pristine appearance make them incredibly versatile and a universal crowd-pleaser. With our detailed recipe, mastering these beloved treats at home has never been easier or more rewarding.
White vs. Vanilla: Unveiling the Cupcake Distinction
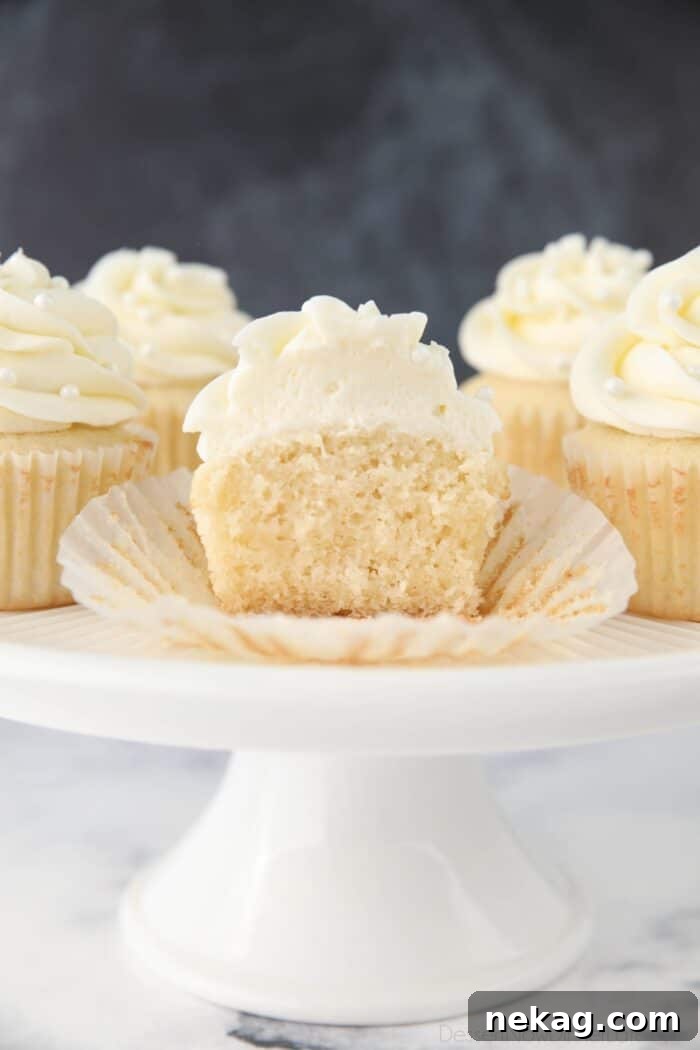
While often used interchangeably, there’s a key distinction between white cupcakes and standard vanilla cupcakes: the choice of eggs. White cupcakes achieve their signature pale, almost luminous crumb by exclusively using egg whites. This deliberate exclusion of egg yolks means no yellow hue, resulting in a cleaner, brighter white color. Vanilla cupcakes, on the other hand, typically incorporate whole eggs, lending them a slightly richer, yellowish tint from the yolks.
Beyond the egg choice, many traditional white cupcake recipes call for cake flour. This finely milled flour, with its lower protein content, creates an incredibly tender, delicate crumb that perfectly complements the lightness brought by the egg whites. However, don’t let a lack of cake flour deter you! You can easily create an effective “cake flour substitute” at home using readily available all-purpose flour and cornstarch. This simple trick allows you to achieve a similar soft, airy texture without a special trip to the store.
Pro Tip for the Whitest Cupcakes: To achieve an absolutely pristine white color, opt for clear vanilla extract instead of traditional brown vanilla. Additionally, selecting a lighter-colored unsalted butter can further enhance the pure white aesthetic of your finished cupcakes.
The Secret to Success: Room Temperature Ingredients
Achieving a perfectly smooth, evenly textured cupcake batter begins with one crucial step: ensuring your key ingredients are at room temperature. For this white cupcake recipe, that means your butter, egg whites, and milk should all be brought to an appropriate temperature before you begin mixing.
Why is this so important? Room temperature ingredients bond together seamlessly and easily. When butter is softened, not melted, it creams beautifully with sugar, trapping air and creating a light, fluffy foundation. Cold ingredients, conversely, resist emulsifying, leading to a lumpy, sometimes curdled batter. This uneven mixture translates to a denser, less uniform crumb in your baked cupcakes. A smooth, well-emulsified batter, on the other hand, ensures that air is incorporated consistently, resulting in a wonderfully light and uniformly textured final product.
Ideally, set out your butter, egg whites, and milk on the counter at least one to two hours before you plan to bake. If you’re short on time, here are a few quick tips to speed up the process:
- Butter: For softened butter in a flash, heat a glass cup with hot water in the microwave until boiling (1-2 minutes). Carefully empty the water, then invert the hot cup over your stick of butter for 5-10 minutes. Alternatively, slice the butter into smaller pieces and spread them on a plate; they’ll reach room temperature in about 30 minutes.
- Egg Whites: Place your separated egg whites in a bowl and fill it with warm (not hot!) water. Let them sit for 5-10 minutes. Be cautious not to use hot water, as it can inadvertently cook the egg whites.
- Milk: Warm the milk in the microwave in short 10-second intervals, stirring after each, until it’s warm to the touch. Avoid overheating, as this can affect the batter’s consistency.
Step-by-Step Guide: Crafting Your White Cupcake Batter
Once your ingredients have comfortably reached room temperature, you’re ready to embark on the delightful journey of baking! Follow these precise steps for a flawless white cupcake batter.
- Begin by preheating your oven to 350 degrees Fahrenheit (adjust to 375˚F for high altitude baking). Line your cupcake pan(s) with paper liners, preparing them for the batter. Set the prepared pan aside.
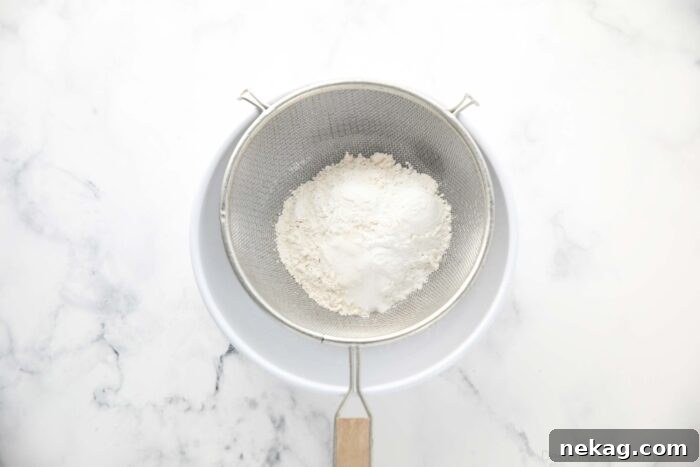
- Sift the dry ingredients: In a medium bowl, combine your all-purpose flour, cornstarch, baking powder, and salt. Sift these together using a fine mesh sieve. This crucial step isn’t just about removing lumps; it thoroughly aerates the ingredients, making them lighter and finer. This process is key to achieving a smoother batter and that desirable velvety texture in your baked cupcakes. If you don’t own a fine mesh sieve, simply whisk these dry ingredients together vigorously for about 30 seconds to achieve a similar effect.
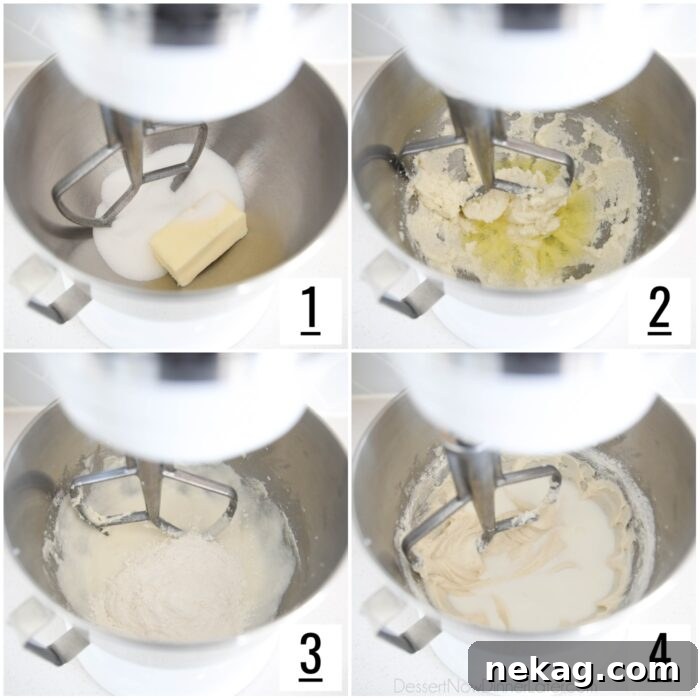
- In the bowl of a stand mixer fitted with the paddle attachment, combine the softened room-temperature butter and granulated sugar. Cream them together on high speed for a full 2 minutes. Setting a timer ensures you achieve the ideal light and fluffy consistency, which is vital for incorporating air into the batter.
- Next, add the clear vanilla extract (or regular vanilla if preferred) and the room-temperature egg whites. Beat on medium speed until these ingredients are just combined, scraping down the sides of the bowl as needed.
- Reduce the mixer speed to low. Add one-third of your sifted dry ingredients to the bowl. Mix only until the flour mixture is just incorporated into the wet ingredients. Over-mixing at this stage can develop gluten, leading to tough cupcakes.
- Pour in half of the room-temperature milk. Continue mixing on low speed until the milk is just combined.
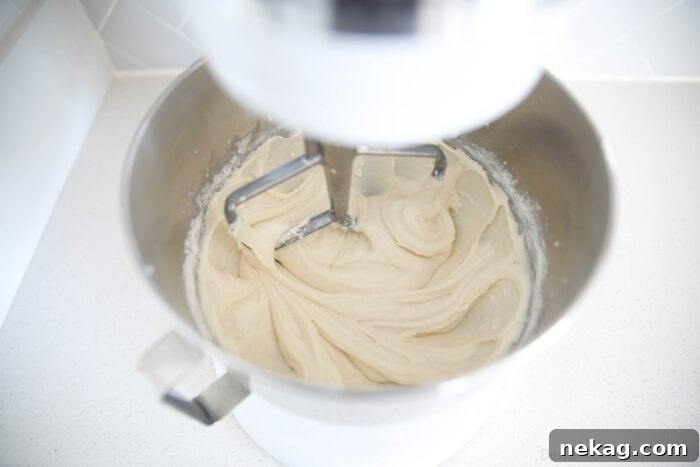
- Continue this alternating process: add another one-third of the flour mixture, mix until just combined, then add the remaining milk, mix until just combined, and finally, add the last one-third of the flour mixture. Remember the golden rule of baking: do not over-mix. Stop mixing as soon as the last streaks of flour disappear. Your batter should appear thick, smooth, and homogeneous.
Perfectly Scooped and Baked Cupcakes
The final steps involve carefully portioning your batter and baking your cupcakes to golden perfection.
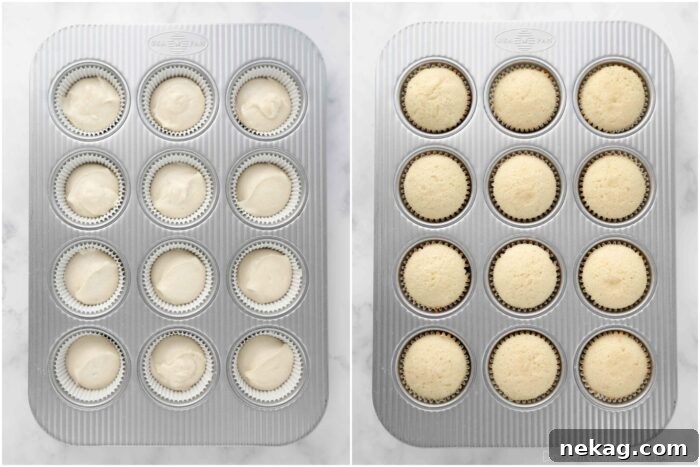
- For consistent sizing and even baking, use a rounded #24 scoop to fill each cupcake liner approximately two-thirds full. This ensures uniform cupcakes and prevents overflow.
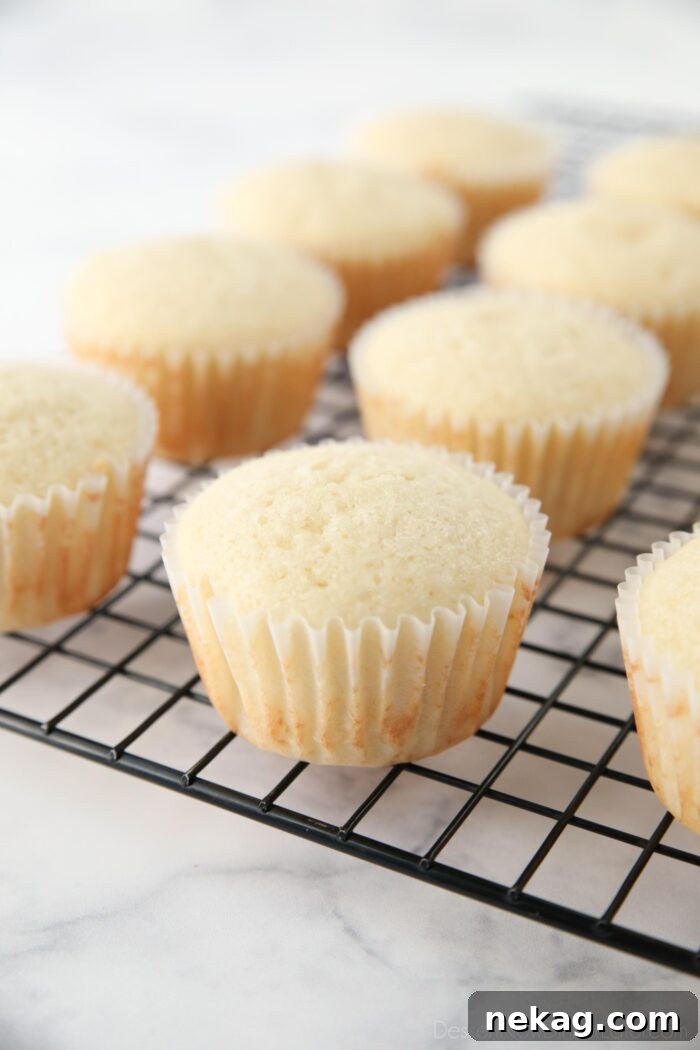
- Bake your cupcakes at 350˚F (or 375˚F for high altitude) for 16-18 minutes. The key to perfectly moist cupcakes is to avoid over-baking. You’ll know they’re done when the tops spring back gently to the touch in the center, or a toothpick inserted into the middle comes out with a few moist crumbs clinging to it, rather than being completely clean. These white cupcakes are best when they are just slightly less done than fully baked, ensuring maximum moisture. Do not over-bake!
- Once baked, allow the cupcakes to cool in the pan for about 5 minutes before carefully transferring them to a wire rack to cool completely. This prevents them from steaming in the pan and becoming soggy. Only frost once they are entirely cool.
Frosting & Finishing Touches: Your Creative Canvas
White cupcakes are truly a blank canvas, perfectly complementing an endless array of frostings and toppings. Their subtle vanilla flavor pairs beautifully with almost any accompaniment, making them ideal for any theme or occasion. Here are some delightful ideas to inspire your decorating:
Classic White Frostings for a Pure Look
- Vanilla Buttercream Frosting: The quintessential choice, offering a rich and smooth finish. For an even whiter buttercream, a clever trick involves adding a tiny dot of purple food coloring (it counteracts any yellow tones!).
- Cream Cheese Frosting: My personal favorite, boasting a delightful tang and a wonderfully creamy texture. My recipe is especially balanced with just 1 cup of powdered sugar.
- Stabilized Whipped Cream: For the lightest and airiest “frosting” option, perfect for those who prefer a less sweet topping.
- Whipped Cream Cheese Frosting: A heavenly hybrid that combines the best qualities of both whipped cream and cream cheese frosting—light, tangy, and incredibly satisfying.
Exciting Flavored Frostings to Experiment With
- Pudding Buttercream Frosting: Infuse your cupcakes with rich flavor using instant pudding mix. This method creates incredible taste without relying on Cool Whip or traditional whipped cream.
- Chocolate Buttercream Frosting: A timeless pairing for those who love the classic combination of vanilla and chocolate.
- Chocolate Cream Cheese Frosting: A richer, tangier take on chocolate frosting that’s always a hit.
- Strawberry Buttercream Frosting: Sweet and fruity, ideal for spring and summer celebrations.
- Strawberry Cream Cheese Frosting: A lovely balance of sweet strawberry and tangy cream cheese.
- Lemon Cream Cheese Frosting: Bright, zesty, and refreshing, offering a wonderful contrast to the sweet cupcake.
- Coconut Cream Cheese Frosting: A tropical delight that adds a lovely texture and exotic flavor.
Beyond frosting, consider adding sprinkles, fresh fruit (like raspberries or blueberries), chocolate shavings, or even a drizzle of caramel or fruit sauce for extra flair.
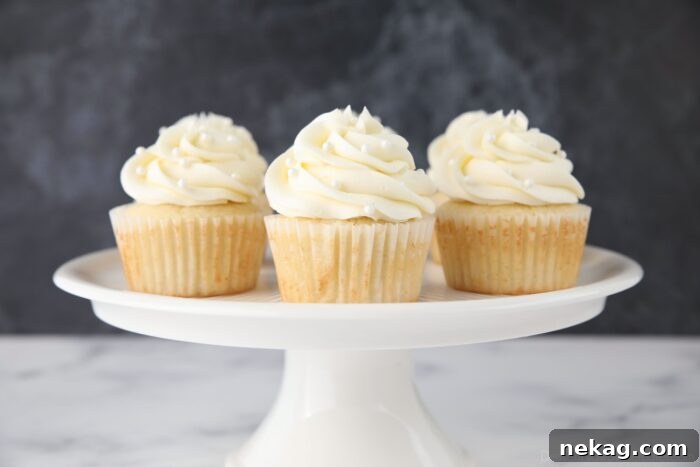
Enhancing Moisture: Tips for Extra Moist White Cupcakes
One common challenge with white cupcake recipes is achieving exceptional moisture, as the absence of egg yolks (which contribute fat) can sometimes lead to a slightly drier crumb. While these cupcakes are wonderfully moist on the first day and still taste great with frosting the next, their shelf life can decline relatively quickly without extra care.
To ensure your white cupcakes stay incredibly moist for longer, I highly recommend incorporating one of these two simple additions:
- Option 1: Dairy Boost. Add 1/4 cup of sour cream or plain Greek yogurt to the batter after you’ve mixed in the vanilla and egg whites. The fat and acidity in these dairy products will significantly enhance moisture and tenderness without altering the flavor profile.
- Option 2: Oil Infusion. Alternatively, introduce 2 tablespoons of a neutral-tasting oil (such as canola or vegetable oil) after the vanilla and egg whites have been added. Oil contributes a different kind of moisture that keeps cakes tender for longer periods.
Of course, using whole milk in the recipe naturally introduces more fat and moisture compared to skim or low-fat milk, further contributing to a richer, moister cake texture.
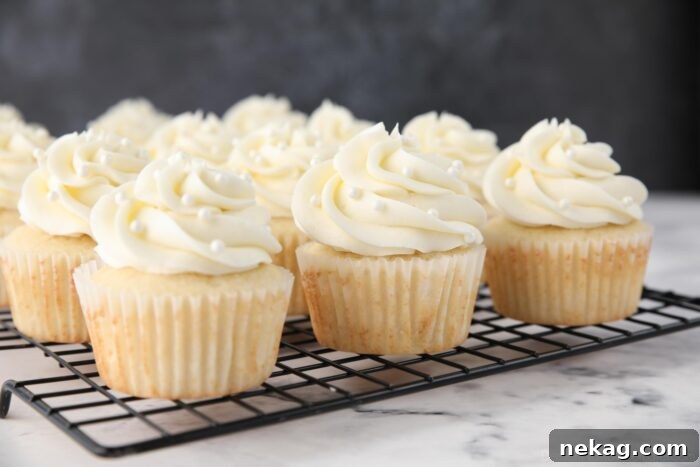
Essential Tips for Baking Perfect White Cupcakes Every Time
Baking can be an art and a science, and even with the best recipes, a few key techniques can elevate your results. I’ve tested this white cupcake recipe numerous times, facing challenges (especially at high altitudes!), to bring you these tried-and-true tips for success:
- Embrace Room Temperature Ingredients: As highlighted earlier, this tip is foundational. Using ingredients that are all at a similar, warmer temperature ensures they emulsify properly, creating a smooth, cohesive batter. This prevents a curdled appearance and ultimately yields a lighter, finer crumb in your finished cupcakes, rather than a dense, grainy texture. It’s the easiest way to ensure a uniform and tender bake.
- Measure Flour with Precision: The bane of many bakers, accurately measuring flour can be tricky with volume-based cups. For the most consistent and best results, always fluff up your flour first (give it a stir in its container to aerate it). Then, spoon the flour gently into your measuring cup until it overflows, and level it off with a straight edge (like the back of a knife). Scooping directly from the container compacts the flour, leading to too much flour and dry cupcakes.
- Verify Your Baking Powder’s Freshness: Leavening agents are crucial for airy cupcakes. If your baking powder has been opened for more than 6 months, its potency may have diminished. Always label your baking powder with the date you opened it, and replace it annually, or sooner if it’s past its prime. A quick test: sprinkle a teaspoon into hot water; if it fizzes vigorously, it’s still active.
- Avoid Over-mixing at All Costs: While butter-based cakes require thorough creaming to incorporate air, excessive mixing after flour is added is a common pitfall. Over-beating develops gluten, which can lead to tough, chewy cupcakes that might even sink in the middle. The butter and sugar mixture needs the most vigorous beating. After that, incorporate subsequent ingredients—especially the flour and milk additions—only until they are just combined. Turning off your mixer between additions can help prevent unintentional over-mixing and ensure a tender crumb.
Serving Your Delicious White Cupcakes
While white cupcakes are delightful on their own, especially when crowned with a luscious frosting, consider enhancing the experience with complementary pairings. A warm cup of coffee or a delicate tea makes for a perfect companion, balancing the sweetness of the cupcake. For a dessert spread, arrange them alongside fresh berries, a scoop of vanilla bean ice cream, or a light fruit compote. Their versatile flavor profile also means they pair wonderfully with a sparkling wine or a creamy liqueur for adult gatherings, making them a sophisticated choice for any occasion.
Storage and Freezing for Lasting Freshness
To keep your white cupcakes tasting their best, proper storage is essential. Unfrosted cupcakes can be stored in an airtight container at room temperature for up to 2 days. Once frosted, especially with a cream cheese or dairy-based frosting, they are best stored in an airtight container in the refrigerator for up to 3-4 days. Allow them to come to room temperature for about 15-20 minutes before serving for optimal flavor and texture.
For longer storage, unfrosted cupcakes can be frozen. Once completely cooled, wrap each cupcake individually in plastic wrap, then place them in a freezer-safe bag or container. They will keep well for up to 2-3 months. Thaw them overnight in the refrigerator, then bring to room temperature before frosting and serving. Frosted cupcakes can also be frozen, but it’s best to flash-freeze them on a tray first until the frosting is firm, then wrap them individually to prevent smudging.
Troubleshooting Common White Cupcake Problems
Even experienced bakers encounter issues occasionally. Here are solutions to common white cupcake dilemmas:
- Cupcakes Sinking in the Middle: This is often a sign of over-mixing, under-baking, or an issue with leavening. Ensure you don’t over-mix the batter, especially after adding flour. Always bake until a toothpick comes out with moist crumbs. Check your baking powder’s freshness. At high altitudes, minor recipe adjustments (slightly less leavening, slightly more liquid) might be needed.
- Dry, Crumbly Cupcakes: The most frequent culprit here is too much flour or over-baking. Ensure you measure your flour correctly using the spoon-and-level method. Always bake for the minimum recommended time and check for doneness. Adding sour cream or oil, as suggested above, can also significantly combat dryness.
- Tough or Chewy Texture: This almost always points to over-mixing. Excessive mixing develops gluten, leading to a tough crumb. Mix only until ingredients are just combined, and no dry streaks of flour remain.
- Cupcakes Overflowing the Liners: This usually means the liners were filled too full. Remember to fill them only two-thirds full to allow room for rising. It can also happen if your leavening agent is too potent or you’re using too much.
- Unevenly Baked Cupcakes: This could be due to an inconsistent oven temperature (consider using an oven thermometer) or uneven heat distribution. Rotate your cupcake pan halfway through baking for a more uniform result.
We hope these detailed insights help you achieve perfectly light, velvety, and delicious white cupcakes every time. Enjoy the baking process and the delightful treats that follow!
If You Make This Recipe, Please Rate and Review it in the Comments Below. THANKS!
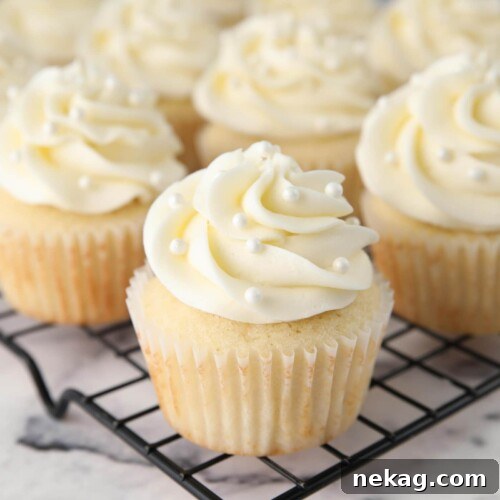
White Cupcakes Recipe
Amber Brady
20 mins
16 mins
36 mins
Pin
14 cupcakes
Ingredients
- 1⅓ cups (161 g) all-purpose flour, stir, spoon, & level
- 3 Tbsp cornstarch
- 1 tsp baking powder
- ½ tsp salt
- ½ cup (113 g) unsalted butter, (1 stick) room temperature
- 1 cup (200 g) granulated sugar
- 2 tsp clear vanilla, (for whiter cupcakes; regular vanilla is also fine)
- 3 large egg whites, room temperature (no yolks)
- ½ cup (118 ml) milk, room temperature
Equipment
- KitchenAid 5-Qt. Stand Mixer
- Silicone Spatula Set
- #24 scoop
- USA Bakeware 12-cup Muffin or Cupcake Pan
Instructions
- Preheat the oven to 350℉ (or 375℉ for high altitude) and line cupcake pan(s) with paper liners. Set aside.
- Sift the dry ingredients (flour, cornstarch, baking powder, and salt) together with a fine mesh sieve. Set aside.
- In the bowl of a stand mixer with the paddle attachment, cream the butter and sugar together on high speed for 2 minutes. (Set a timer.)
- Add the clear vanilla and egg whites. Beat on medium speed until combined. Add 1/3 of the flour mixture. Mix on low speed until just combined. Add 1/2 of the milk. Mix on low speed until just combined.
- Repeat, alternately mixing in another 1/3 of the flour mixture, the remaining milk, and ending with the final 1/3 of the flour mixture. Do not over-mix. The batter should be thick and smooth looking.
- Use a rounded #24 scoop to fill cupcake liners 2/3 full.
- Bake at 350℉ (or 375℉ for high altitude) for 16-18 minutes or until the cake springs back when touched in the center, or a toothpick inserted comes out with a few moist crumbs. NOTE: These cupcakes are better slightly less done. Do not over-bake!
- Allow cupcakes to cool in pan for 5 minutes before transferring to a wire rack to cool completely. Top with desired frosting once cool. I used my vanilla buttercream frosting recipe.
Notes
Nutrition
Calories: 119kcal
Carbohydrates: 26g
Protein: 2g
Fat: 1g
Cholesterol: 2mg
Sodium: 138mg
Sugar: 15g
Disclaimer: Nutritional values were calculated using a third-party tool and are provided as an estimation only.
Did you make this?
Don’t forget to leave a rating below and make sure to follow on Pinterest and Instagram for more!