
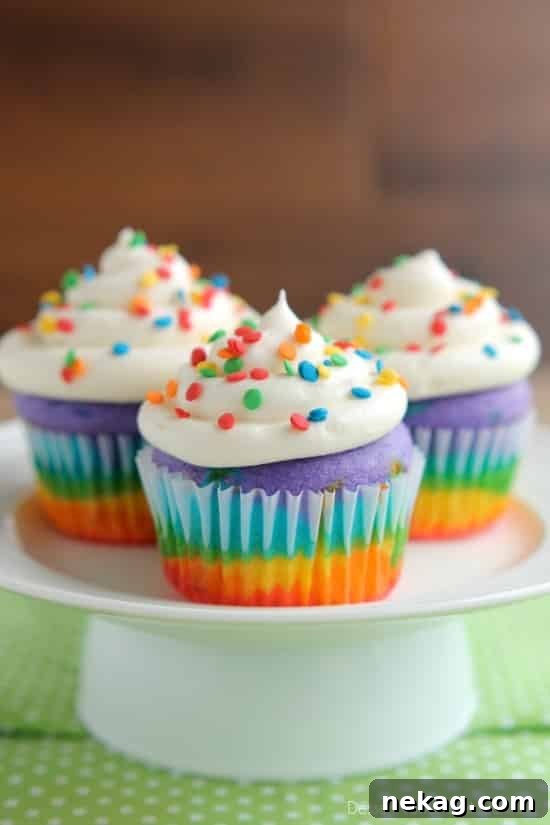
Mastering Easy Rainbow Cupcakes: Perfectly Peaked & Deliciously Colorful
Transform a basic boxed white cake mix into a spectacular centerpiece with these dazzling Rainbow Cupcakes! This comprehensive guide will show you how to achieve vibrant, distinct layers, beautifully peaked tops, and a light, fluffy whipped cream cheese frosting that will make every bite a pure delight.
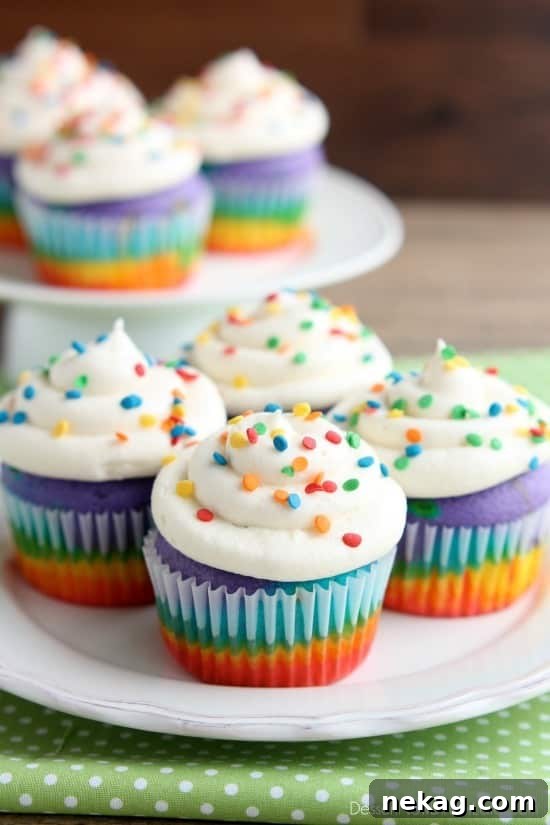
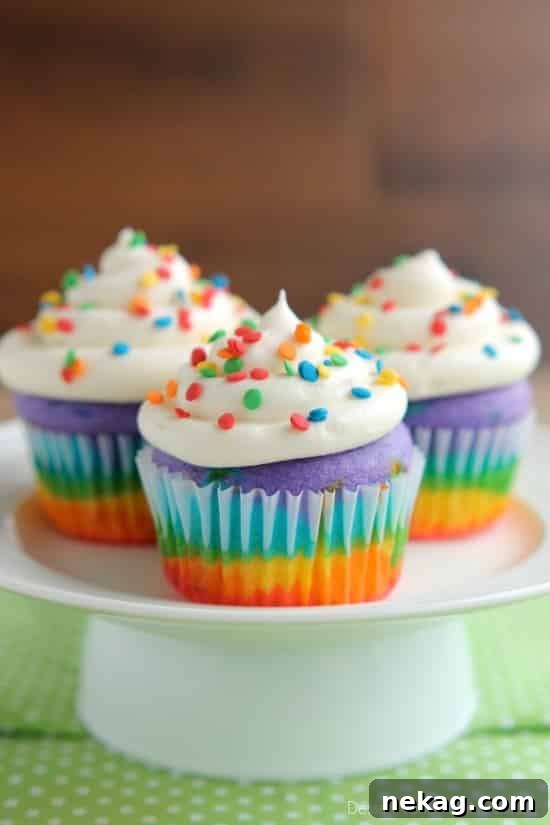
There’s an undeniable magic that happens when you present a batch of these exquisite Rainbow Cupcakes. The explosion of bright colors, arranged in perfect, symmetrical layers, beneath a cloud-like swirl of whipped cream cheese frosting, is simply mesmerizing. Each cupcake isn’t just a treat for the taste buds; it’s a feast for the eyes, promising joy and wonder. They’re an absolutely ideal dessert for celebrations like St. Patrick’s Day, adding a whimsical touch and a taste of pure happiness to your festive spread.
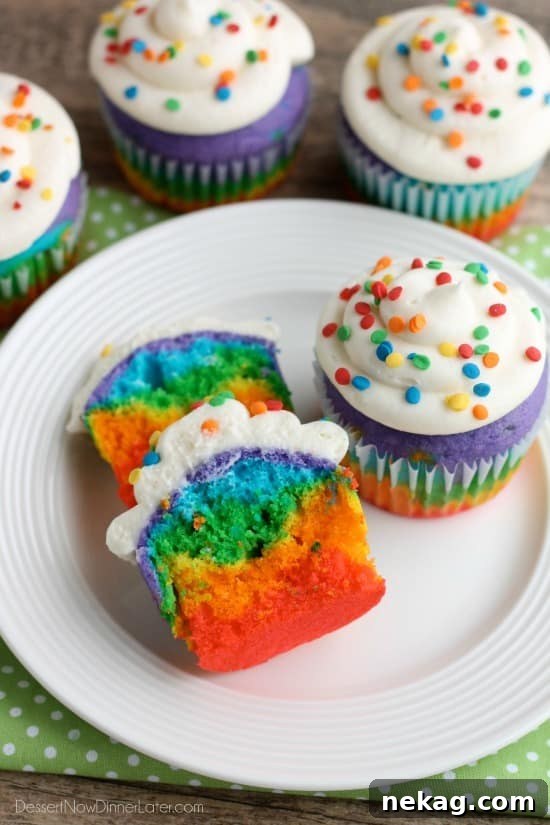
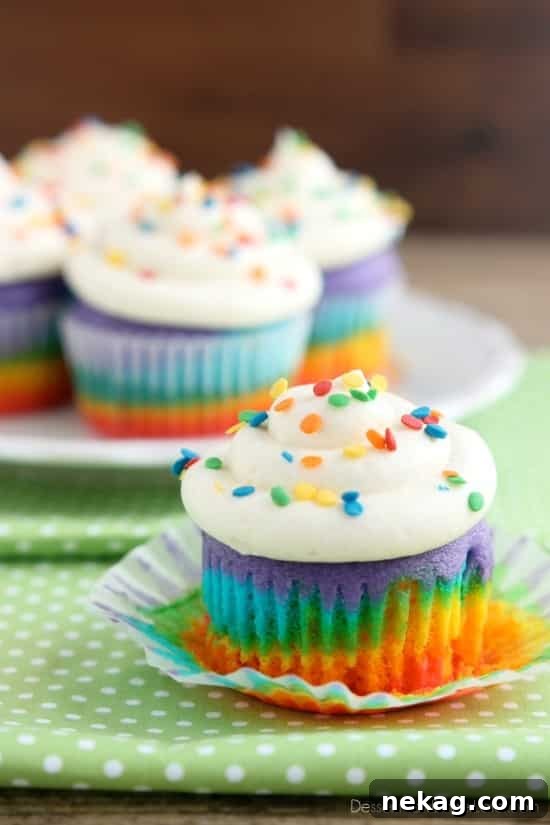
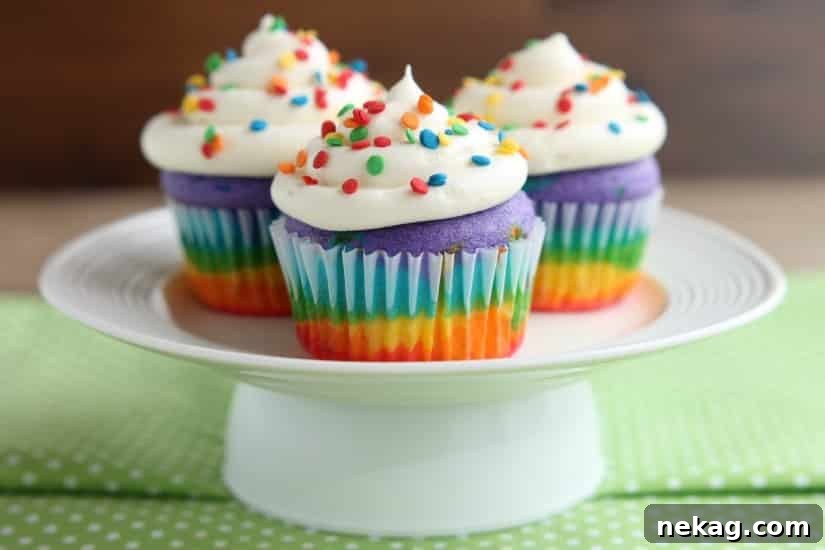
The true mark of success with these rainbow cupcakes comes when you slice through one and are greeted by a perfectly rounded top and clearly defined, vibrant layers of color. No frustrating sunken middles here! We’ll ensure your homemade rainbow cupcakes stand tall and proud, just like the masterpieces you see in professional bakeries. And speaking of delightful details, while I typically have a cautious relationship with sprinkles, the charm of these little confetti or sequin sprinkles is simply irresistible. They add just the right amount of playful sparkle, making these treats even more enchanting.
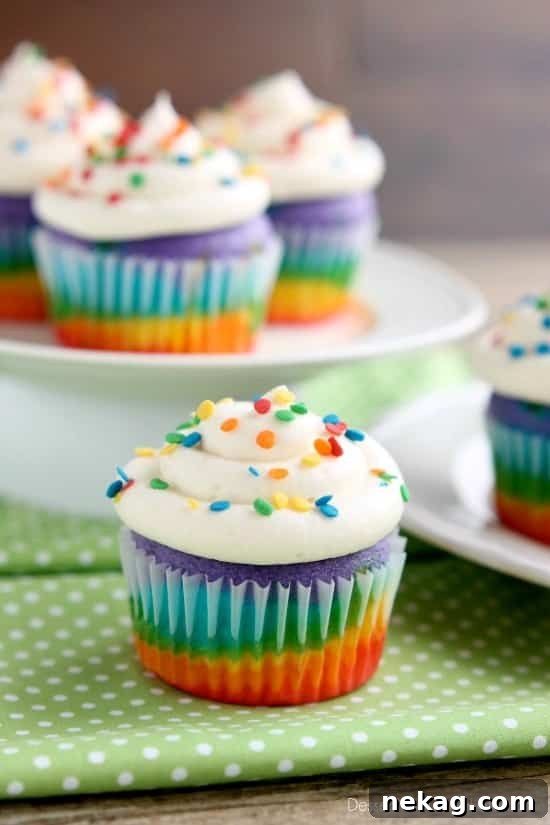
I genuinely had such an amazing time capturing the beauty of these colorful confections. There were so many wonderful pictures, it was hard to choose! But the most exciting part is getting to share exactly how you can recreate this magic in your own kitchen. Beyond the fun of layering, I’m going to reveal two indispensable tricks that will revolutionize your cupcake baking, helping you achieve consistently perfect, beautifully peaked cupcakes every single time. Get ready to bake rainbow cupcakes that are as impressive to look at as they are delicious to eat!
Creating Your Colorful Cupcake Canvas: From Box to Rainbow
Let’s embark on the journey of crafting these vibrant rainbow cupcakes. The beauty of this recipe lies in its simplicity: we start with a humble boxed white cake mix, making this an accessible and fun baking project for everyone, regardless of their baking experience. This smart shortcut means you can focus on the artistry of the colors and the joy of the process, rather than the complexities of a scratch recipe.
Selecting Your Mix and Preparing the Batter
Your first step is to grab a standard white cake mix from the store. White cake mix is crucial here because its neutral base allows your food colors to truly pop, creating bright, distinct rainbow layers without any yellow undertones muddying the hues. Once you have your mix, follow the instructions on the package to prepare the batter. A key recommendation for an even brighter and lighter cake is to opt for using only egg whites if your cake mix offers this option. Many white cake mixes will specify alternatives – choosing egg whites will result in a purer white canvas for your colors. For example, my preferred brand often suggests 1 ¼ cups water, ⅓ cup oil, and 4 egg whites.
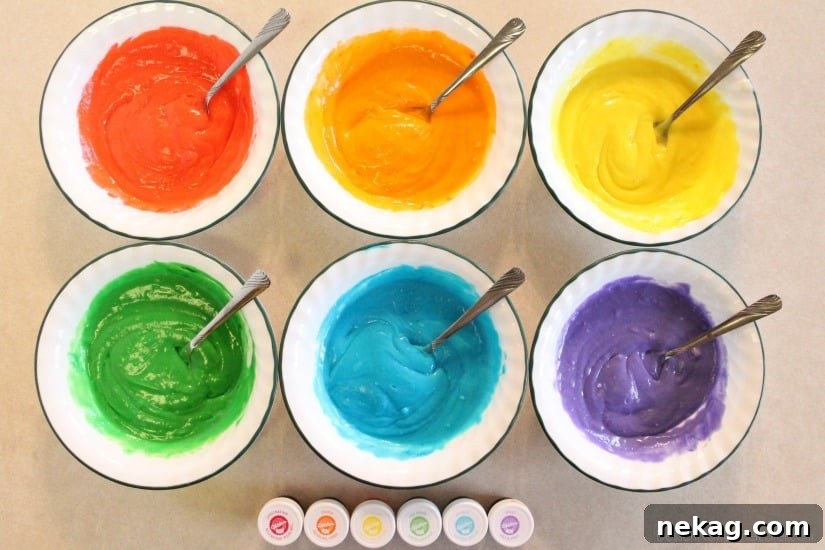
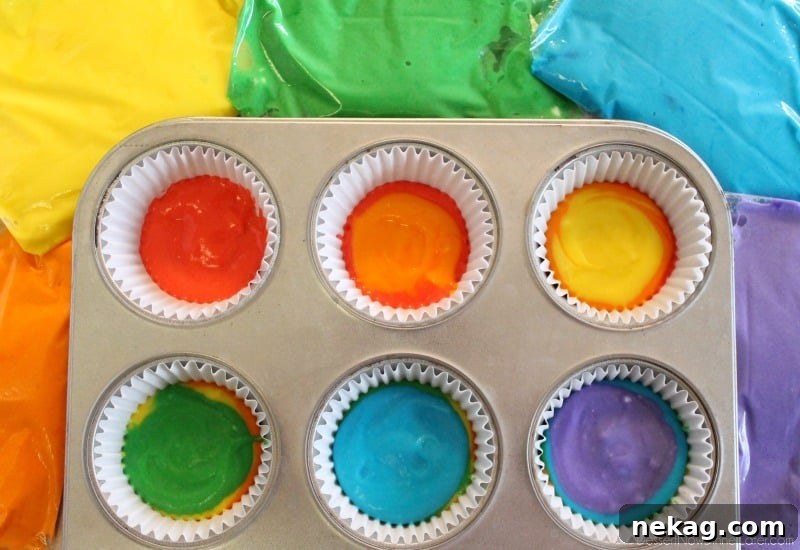
After your batter is smoothly mixed, it’s time to unleash the rainbow. Divide the entire batch of batter evenly into six separate bowls. These bowls will serve as your palette for the vibrant spectrum of colors. Next, select your food coloring. I highly recommend using gel food coloring over liquid, as it’s much more concentrated. This means you’ll achieve more intense, brilliant colors with less product, preventing your batter from becoming too thin. Liquid food coloring can work in a pinch, but you might need to use more, which could slightly alter the batter consistency.
Now, carefully mix a different color into each bowl: red, orange, yellow, green, blue, and purple. Stir each bowl gently until the color is fully incorporated and uniform, ensuring there are no white streaks left. This meticulous coloring step is essential for creating those crisp, eye-catching layers that define rainbow cupcakes.
The Art of Layering: Achieving Perfect Rainbow Stripes
Creating those distinct, even layers is arguably the most fun and visually rewarding part of making these rainbow cupcakes. While there are a couple of ways to do it, I have a method that I find yields the cleanest and most impressive results.
For unparalleled precision and beautifully defined stripes, I highly recommend transferring each colored batter into a separate zip-top sandwich bag. When you’re ready to pipe, snip off a tiny corner from one bag at a time. This small opening allows for controlled piping and prevents any accidental spills, which is particularly helpful as you layer the batters. If you’re looking for a slightly quicker approach and don’t mind slightly less defined edges, you can also spoon the colored batters directly into the liners and gently spread each layer to the edges with your finger or the back of a small spoon.
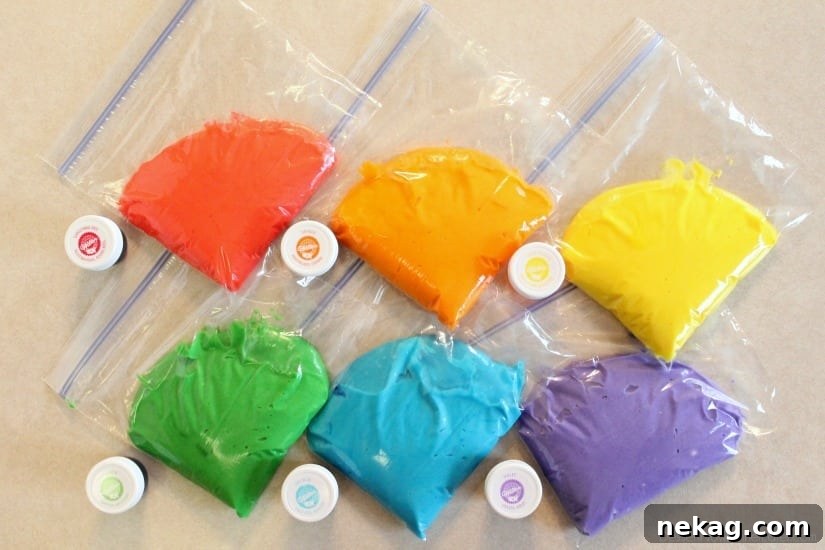
Before you start layering, prepare your cupcake pan(s) by lining them with paper liners. A critical note here: even if your boxed cake mix suggests it makes 24 cupcakes, I strongly recommend using only 18 liners. This allows for each cupcake to be generously filled, contributing to a better rise and a more satisfying finished product. Now, the layering begins! Pipe or spoon the colored batters into the liners one by one, following the classic rainbow order: red, orange, yellow, green, blue, and purple. To achieve a true rainbow arc when the cupcake is cut open (with red at the very top), you would pipe purple first, then blue, and so on, ending with red. Gently smooth each layer of batter to the edges with your finger before moving on to the next color. A pro tip for efficiency and consistency: pipe all the red batter into your 18 liners first, then go back and do all the orange, and so forth, until all colors are layered.
The Secrets to Perfectly Peaked Cupcakes: Your Two Game-Changing Tricks
Achieving those coveted, beautifully domed tops on your cupcakes – without any frustrating sunken centers – is easier than you think. These two invaluable tricks are my absolute staples for every cupcake and muffin recipe I bake, guaranteeing consistent, bakery-quality results every single time. Get ready to elevate your baking!
Trick #1: Fill Your Cupcake Liners Just Right
The first crucial step is to pay attention to how much batter goes into each liner. For those ideal peaked tops, you’ll want to fill each cupcake liner approximately 2/3 to 3/4 full. This might seem like a generous amount, especially if you’re used to half-filling, but it provides the necessary volume for the batter to rise beautifully and form that desirable dome. As mentioned earlier, I strongly advocate for making only 18 cupcakes from a standard boxed cake mix, even if the box claims a yield of 24. This ensures each cupcake is perfectly sized and has enough batter to achieve that impressive rise and shape.
Trick #2: Embrace High Heat for a Rapid Rise
The second, and perhaps most impactful, trick involves adjusting your oven temperature. Instead of the typical 350°F, we’re going to bake these cupcakes at a higher temperature: 400 degrees Fahrenheit (approximately 200 degrees Celsius) for 11 to 13 minutes. This elevated temperature works wonders! The intense initial heat causes the cake batter to rise rapidly and bake quicker, setting the edges and top faster. This encourages the batter to grow upwards, creating that lovely peaked dome, rather than spreading outwards and potentially overflowing. The rapid baking process is key to preventing the cupcakes from getting sunken middles, a common baking woe.
Baking at a higher temperature isn’t just a simple adjustment; it’s a strategic technique that results in a light, tender crumb and that professional, rounded dome. The quick bake time ensures moisture is sealed within, keeping your cupcakes wonderfully soft. While 11 minutes is an excellent starting point, remember that oven temperatures can vary significantly. Always begin checking for doneness around the 11-minute mark. A perfectly baked cupcake will spring back when lightly touched in the center, and a toothpick inserted into the middle will come out clean. Once baked, transfer your beautiful cupcakes to a wire rack and allow them to cool completely before even thinking about frosting. This method not only guarantees gorgeous cupcakes but also means you’ll need less frosting to achieve an impressive, towered look!
Delicious Rainbow Cupcakes Recipe
Below you’ll find a concise recipe card outlining all the ingredients and step-by-step instructions needed to create these delightful rainbow cupcakes. Get ready to bake a batch of pure happiness!
Rainbow Cupcakes
Created by Amber Brady
These Rainbow Cupcakes are made with a simple boxed white cake mix, colored, and layered to make a rainbow, with whipped cream cheese frosting on top!
Yields: 18 cupcakes
Ingredients
- 15.25 oz (432 g) box white cake mix
- Ingredients for cake mix as stated on box (Use only egg whites if that is an option. My box said 1 ¼ cups water, ⅓ cup oil, 4 egg whites.)
- Red, Orange, Yellow, Green, Blue, and Purple Food Coloring/Gel
- 1 recipe The BEST Cream Cheese Frosting
- 4 oz (113 g) whipped topping (half an 8oz tub of Cool Whip)
- Rainbow Sequins/Celebration Confetti/Rainbow Sprinkles
Instructions
- Prepare cake mix according to directions on the box (do the egg whites version over whole eggs, if there are two options), then divide the batter evenly into 6 bowls.
- Using food coloring or paste, mix these 6 colors: red, orange, yellow, green, blue, and purple.
- Prepare cupcake pan(s) with 18 paper liners.
- Put each batter into a zip-top sandwich bag and cut off one corner to pipe with. It’s best if you cut one bag at a time, so the cake mix doesn’t spill out as you layer the batter.
- Squeeze the colored batters, one at a time, into the paper liners. Pipe the edges of each cupcake first, right up against the cupcake liner, then fill in the centers. Pipe colored batter in the order the rainbow: red, orange, yellow, green, blue, purple. (If you want red on top, like a real rainbow, start with purple and go backwards.) Smooth each layer of batter with your finger before moving on to the next color. *TIP: Do all the red batter first, then all the orange, etc.
- Once all the layers are finished, bake the cupcakes at 400 degrees Fahrenheit for 11 to 13 minutes. Baking them at a higher temperature forces the cake to grow upwards and bake quicker, so it doesn’t have time to spill over the top and get sunken in the middle.
- Prepare The BEST Cream Cheese Frosting. Beat in half of an 8oz tub of whipped topping with a handheld electrical mixer. Fit a piping bag with a coupler (no tip or band) and then fill the bag with the frosting.
- Pipe the frosting on top of each cupcake from the outside in towards the middle. Sprinkle with rainbow sequins.
Notes
- Store cupcakes in an airtight container in the refrigerator up to 4 or 5 days.
- Optional: To save time, spoon the colored batters into the cupcake liners instead of squeezing the batter from bags, and spread each layer of batter with your finger.
Sharing this recipe with a link is both encouraged and appreciated. Copying/pasting and/or screenshots of full recipes to any social media is strictly prohibited. Content and photographs are copyright protected.
The Grand Finale: Frosting and Decorating Your Rainbow Masterpieces
Once your perfectly baked and cooled rainbow cupcakes have emerged from the oven, they’re ready for their dazzling final touch: the frosting! We’ve chosen a light, airy, and incredibly delicious whipped cream cheese frosting for these treats. This frosting provides a delightful tangy contrast to the sweet cake and creates a beautiful, cloud-like texture that’s perfect for piping. It’s the ideal crown for your colorful creations.
Crafting the Dreamy Whipped Cream Cheese Frosting
To begin, you’ll need to prepare The BEST Cream Cheese Frosting recipe as your base. This recipe provides a wonderfully rich and creamy foundation. The secret to making it light and perfectly pipeable lies in incorporating whipped topping. Using a handheld electric mixer, beat in about half of an 8oz tub of your preferred whipped topping (such as Cool Whip) until it’s thoroughly combined, smooth, and fluffy. This addition makes the frosting incredibly stable, allowing it to hold its shape beautifully when piped, while also giving it an irresistible airy texture.
Piping Techniques and Festive Sprinkles
For a professional and elegant finish, transfer your freshly made whipped cream cheese frosting into a piping bag. If you’re new to piping, a coupler without a tip can create a lovely, simple swirl. For more intricate designs, a large star tip (like a Wilton 1M) or a round tip can yield beautiful results. Begin piping from the outside edge of each cupcake, working your way inwards and upwards in a continuous motion to create a charming, elevated swirl or peak. The naturally domed tops of your perfectly baked cupcakes will actually make this step easier, as you’ll need less frosting to build an impressive height!
Finally, to complete the festive look, generously sprinkle your frosted rainbow cupcakes with rainbow sequins, celebration confetti, or your favorite variety of rainbow sprinkles. These embellishments don’t just add an extra pop of color; they also provide a delightful textural contrast and an undeniable spark of fun. The confetti-style sprinkles, in particular, lend a charming, playful finish that perfectly complements the joyful theme of these colorful treats.
Perfect for Every Occasion and Celebration
These rainbow cupcakes are wonderfully versatile, making them an ideal dessert for a wide array of celebrations and gatherings. While they are a spectacular choice for St. Patrick’s Day, symbolizing the legendary pot of gold at the end of the rainbow, their appeal extends far beyond a single holiday. Consider them for:
- Birthday Parties: Their vibrant colors are guaranteed to bring smiles and excitement to any birthday celebration, making them an instant party favorite.
- Pride Celebrations: A beautiful and delicious way to honor and show support for diversity and inclusion.
- Baby Showers: Especially charming for gender-neutral or rainbow-themed baby showers, adding a sweet and hopeful touch.
- Spring and Summer Gatherings: Their cheerful hues perfectly capture the lighthearted and joyous spirit of warmer months.
- Just Because Moments: Sometimes, the best reason to bake something this cheerful is simply to brighten someone’s day or your own!
Serving these colorful cupcakes alongside a tall glass of cold milk, a scoop of vanilla bean ice cream, or a warm cup of coffee can elevate the dessert experience even further. Their stunning visual appeal alone ensures they’ll be a delightful conversation starter at any event.
Storage Tips for Maximum Freshness
To ensure your beautiful rainbow cupcakes remain as delicious as the day they were baked, proper storage is essential. Due to the cream cheese in the frosting, these cupcakes require refrigeration. Store any leftovers in an airtight container in the refrigerator for up to 4 to 5 days. This will keep both the cake moist and the frosting fresh and stable. For the best flavor and texture, it’s always a good idea to let the cupcakes come to room temperature for about 15-20 minutes before serving. If you’re planning ahead, unfrosted cupcakes can be wrapped individually and frozen for longer storage, then thawed and frosted when you’re ready to enjoy them.
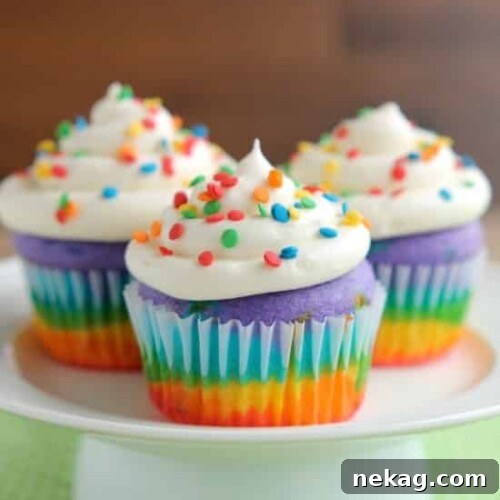
Update (January 25, 2017): We’ve revisited this post to include new photographs that proudly display these delightful cupcakes with the colors arranged in the traditional red-on-top, purple-on-bottom rainbow sequence. While both arrangements are undeniably beautiful, these updated visuals offer another perspective, allowing you to choose which vibrant order you prefer for your own stunning homemade creations. Happy baking, and enjoy these little bursts of color and happiness!