
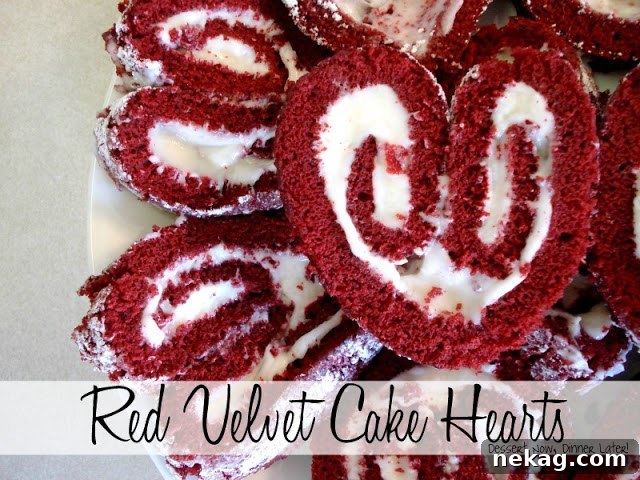
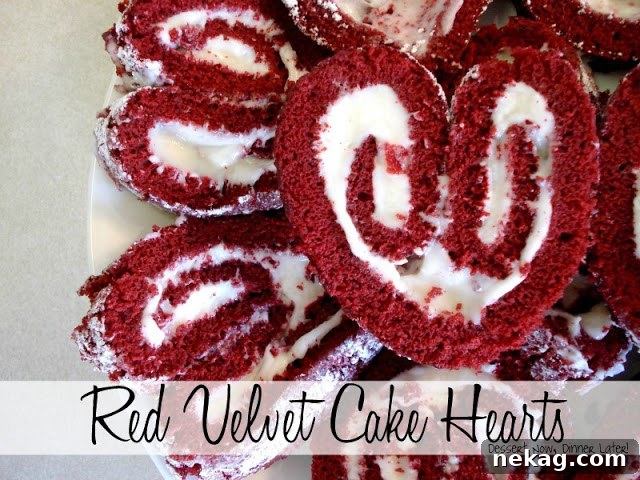
Red Velvet Cake Hearts: A Sweet Embrace for Valentine’s Day
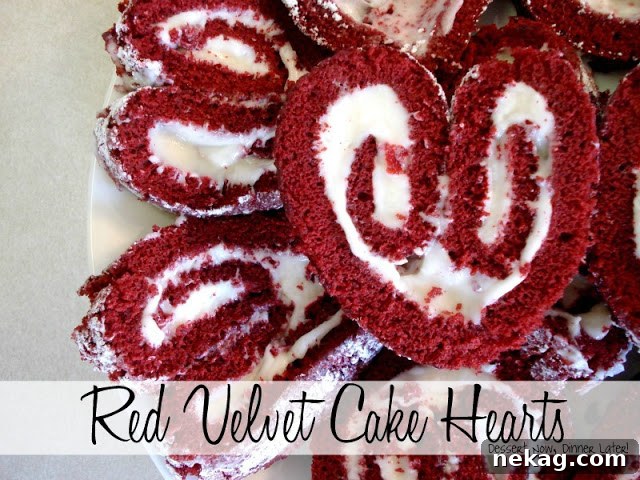
As Valentine’s Day draws near, the air buzzes with romantic anticipation and the delightful prospect of showering loved ones with affection. What could be a more heartfelt gesture than a homemade dessert, crafted with love and passion? This year, my goal was to create a truly special treat – something festive, visually stunning, and undeniably delicious for my dear family and, of course, for all of you. The result? These utterly enchanting Red Velvet Cake Hearts, a classic cake roll ingeniously transformed into an irresistible symbol of affection. The moment this creation came together, I knew it was a resounding success.
Imagine the pure delight on your child’s face discovering one of these charming heart-shaped slices nestled in their school lunch, or sharing an intimate moment over a slice with your significant other after a romantic dinner. My three-year-old’s reaction was priceless; his eyes lit up at the sight of the heart shape, and his enthusiastic declaration, “Mommy, this is the best cake!” was all the confirmation I needed. It brings me immense joy that he enjoyed this fun little cake, and I am absolutely confident that your loved ones, whether little ones or partners, will adore it just as much. This recipe isn’t just about baking a cake; it’s about creating a moment, a memory, and a tangible expression of love.
Red velvet cake holds a cherished spot in the dessert world, especially during holidays centered around love and warmth. Its signature deep red hue, subtly cocoa-flavored crumb, and classic tang from buttermilk and vinegar make it a dessert that is both visually captivating and incredibly palatable. When this beloved flavor profile is paired with a rich, creamy, and slightly tangy cream cheese filling, and then meticulously shaped into a heart, it transcends a mere dessert to become an ultimate edible declaration of love. This recipe takes the familiar red velvet experience and elevates it into an elegant cake roll, offering a sophisticated presentation that is surprisingly accessible for home bakers.
The Allure of the Red Velvet Cake Roll: Perfect for Romantic Occasions
Opting for a cake roll, often known as a Swiss roll, presents a delightful departure from traditional layered cakes. These desserts are celebrated for their exceptionally tender and moist crumb, paired with a visually appealing spiral of cake and filling that exudes both elegance and a touch of whimsy. The inherent beauty of a cake roll lies in its adaptability and its impressive, professional appearance. While the idea of rolling a cake might initially seem daunting, the technique is quite straightforward and profoundly rewarding once mastered. For this special Valentine’s Day rendition, the clever transformation of the rolled cake into a charming heart shape adds an extra layer of enchantment and thoughtfulness, making each slice a delightful surprise. It’s a dessert that not only tastes phenomenal but also beautifully conveys a message of affection and care with every delicate bite, cementing its status as an unforgettable romantic treat.
Unlocking the Secrets of Red Velvet: Flavor, Texture, and Color
The unique and beloved characteristics of a classic red velvet cake are born from a thoughtful combination of specific ingredients. A subtle hint of cocoa powder provides a gentle chocolate undertone, while the distinctive tang of buttermilk and white vinegar reacts with baking soda to yield an incredibly tender, moist crumb. This chemical reaction not only contributes to the cake’s texture but also helps to bring out the beautiful reddish hue. The vibrant red color, traditionally achieved with a generous amount of high-quality red food coloring, is truly what makes red velvet cake a standout, especially for festive occasions like Valentine’s Day. This particular recipe ensures that the iconic red velvet flavor profile shines brilliantly, perfectly complemented by the luxurious, sweet, and tangy cream cheese frosting that has become inseparable from the red velvet experience. Every element works in harmony to create a truly memorable dessert.
Essential Tips for Crafting a Flawless Cake Roll
Achieving a perfect cake roll, especially one as beautiful as these Red Velvet Cake Hearts, involves a few key techniques. Mastering these tips will ensure your cake is pliable, crack-free, and utterly delicious:
- Precision in Baking: The golden rule for a successful cake roll is to avoid overbaking at all costs. An overbaked cake will dry out and lose its elasticity, leading to cracks when you attempt to roll it. The cake is perfectly done when the top springs back gently after a light touch, usually within the 13-15 minute mark. Keep a close eye on it!
- The Warm Roll Technique: It is absolutely crucial to roll the cake while it is still warm, immediately after removing it from the oven. This process “trains” the cake to assume and hold its rolled shape as it cools. If you wait for the cake to cool completely before the initial roll, it will likely crack.
- Dusting for Non-Stick Success: Don’t underestimate the power of a generous dusting of powdered sugar on your clean kitchen towel. This fine layer acts as a barrier, preventing the warm cake from adhering to the towel. This step is essential for both the initial roll and the later unrolling process, ensuring a smooth separation.
- Even Batter Distribution: For a consistently baked cake and a uniform roll, ensure your batter is spread evenly across the entire jelly-roll pan. Use an offset spatula to gently smooth the surface, ensuring the thickness is consistent from edge to edge.
- Chilling for Structural Integrity: After you’ve applied the cream cheese filling and re-rolled your cake, a brief period of chilling in the refrigerator is highly recommended. This allows the cake and the filling to firm up, making the cake easier to slice cleanly and helping it to maintain its beautiful heart shape without squishing.
- Quality Food Coloring Matters: For the most vibrant and appealing red color without compromising the cake’s texture, opt for a high-quality gel food coloring. Liquid food colorings may require larger quantities, which can inadvertently thin the batter.
- Room Temperature for Frosting Ingredients: While the cream cheese itself should be cold for beating, ensure your butter is lightly softened (but not melted) for the cream cheese filling. This helps achieve a smooth, lump-free frosting that spreads beautifully.
Red Velvet Cake Hearts Recipe
Rating: 5 out of 5 stars (based on 2 ratings)
Recipe Creator: Amber Brady
Print Recipe |
Pin Recipe
Yields: 16 Servings
Ingredients
For the Cake:
- ¾ cup (90 g) all-purpose flour, (stir, spoon & level for accurate measurement)
- ¼ cup (20 g) cocoa powder
- 1 tsp baking powder
- ½ tsp salt
- 4 large eggs
- ¾ cup (150 g) granulated sugar
- 1 Tbsp canola oil
- 2 Tbsp buttermilk (or easily substitute with 2 Tbsp milk mixed with ½ tsp lemon juice or white vinegar)
- 1 tsp white vinegar
- 1 tsp vanilla extract
- 2 Tbsp red food coloring (gel food coloring recommended for best color)
- ½ cup (60 g) powdered sugar, for dusting the towel
For the Cream Cheese Filling:
- 8 oz (226 g) cream cheese, cold
- 6 Tbsp (85 g) unsalted butter, lightly softened
- 1 tsp vanilla extract
- 2 ½ cups (300 g) powdered sugar
Instructions
- Prepare Your Workspace: Preheat your oven to 350˚F (175˚C). Thoroughly grease a 15×10 inch jelly-roll pan and line it with wax paper, ensuring the paper extends slightly over the edges for easy removal. Grease and lightly flour the wax paper. On a clean, flat surface, generously sprinkle a thin, clean kitchen towel with approximately ½ cup of powdered sugar; this heavy coating is crucial to prevent sticking.
- Combine Dry Ingredients: In a medium-sized bowl, sift together the all-purpose flour, cocoa powder, baking powder, and salt. Sifting helps to eliminate lumps and ensures a light, even crumb. Set this dry mixture aside.
- Whip Eggs and Sugar: In the bowl of a stand mixer fitted with the whisk attachment, whip the large eggs on medium speed for a full 5 minutes until they are light, pale, and fluffy. Gradually and slowly add the granulated sugar and canola oil, continuing to beat until the mixture is well combined and smooth.
- Incorporate Wet Ingredients: To the egg and sugar mixture, add the buttermilk, white vinegar, vanilla extract, and red food coloring. Mix thoroughly until the color is vibrant and uniformly distributed throughout the batter. Carefully fold or gently stir in the sifted flour mixture until it is just combined. Be mindful not to overmix, as this can lead to a tough cake.
- Bake the Cake: Gently spread the cake batter evenly into the prepared jelly-roll pan. Ensure the batter covers the pan from edge to edge for consistent baking.
- Check for Doneness: Bake in the preheated oven for 13-15 minutes, or until the top of the cake springs back when lightly touched with your finger. It’s vital not to overbake, as an overly dry cake will crack when rolled.
- Initial Rolling (with Towel): Immediately after removing the cake from the oven, carefully loosen the edges from the pan. Invert the warm cake onto the powdered sugar-dusted kitchen towel. Gently peel off the wax paper from the cake.
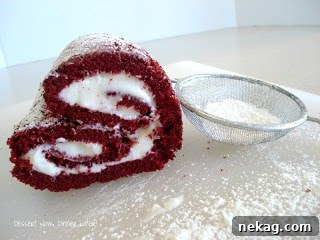
- Forming the Heart Shape (Initial Roll): To begin shaping the heart, carefully roll up each of the shorter ends of the cake towards the center, meeting in the middle. Once rolled, turn the cake onto its side so that both rolled ends are stacked one on top of the other, forming the characteristic top lobes of a heart. Gather the ends of the towel and secure them, perhaps with a rubber band, to help the cake hold its shape as it cools. Allow the cake to cool completely on its side on a wire rack. This step is crucial for the cake to “remember” its rolled form.
- Prepare the Cream Cheese Filling: While the cake cools, prepare your luscious filling. Using the paddle attachment of your stand mixer, beat the cold cream cheese and lightly softened butter together until thoroughly incorporated and perfectly smooth. This should take no more than 1 minute to avoid over-whipping the cream cheese. Add the vanilla extract and all of the powdered sugar at once. Mix on low speed until the sugar is just combined, then increase the speed to medium-high and beat until the frosting is light, fluffy, and smooth.
- Fill and Re-Roll the Cake: Once the cake is completely cool, carefully unroll it from the towel. Spread the prepared cream cheese mixture evenly over the entire surface of the cake. Pay special attention to leaving a generous amount of filling down the center seam where the two rolled ends will meet; this extra filling will help define the bottom point of the heart when sliced.
- Final Heart Shaping: Re-roll each end of the cake as tightly and neatly as possible until both ends meet again in the center, ensuring the filling is evenly distributed within the spirals. Stack the rolls on their side, one on top of the other, mirroring the position from the cooling step.
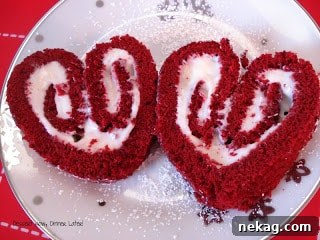
- Slice and Serve: Slice the cake into individual servings. If necessary, gently press and shape each slice into a more defined heart shape using your fingers before serving. Present your beautiful Red Velvet Cake Hearts and watch them disappear!
Recipe Notes & Expert Tips for Success
- Homemade Buttermilk: No buttermilk? No problem! For 2 tablespoons of buttermilk, simply combine 2 tablespoons of regular milk with ½ teaspoon of fresh lemon juice or white vinegar. Stir gently and let it sit for 5-10 minutes until it slightly curdles. This homemade version works perfectly in this recipe.
- Achieving Vibrant Color: For that truly striking, deep red color characteristic of red velvet, a good quality gel food coloring is your best friend. Liquid food colorings can sometimes dilute the batter and may not provide as intense a hue.
- Temperature is Key for Frosting: Ensure your cream cheese is cold when you start beating it for the frosting; however, your butter should be lightly softened, not melted. This contrast helps create a stable, fluffy, and smooth cream cheese frosting that won’t separate.
- Patience with the Roll: The initial rolling of the cake with the towel might feel a bit intimidating, but approach it with a gentle yet confident hand. The goal is to train the cake, not to achieve perfection in the first roll. The final roll with the frosting is where the neatness truly counts.
- Optimal Storage: Like most desserts featuring cream cheese frosting, these Red Velvet Cake Hearts should be stored in an airtight container in the refrigerator. They will remain fresh and delicious for 3-5 days. For the best flavor and texture, allow them to come to room temperature for about 15-20 minutes before serving.
- Elevated Serving Presentation: To add an extra touch of elegance, consider dusting the finished cake hearts with a light sprinkle of additional powdered sugar just before serving. You could also sprinkle with finely chopped red velvet cake crumbs or a few fresh berries for color contrast.
- Make-Ahead Option: The cake roll can be baked, rolled, and cooled a day in advance. Store the rolled cake (still in the towel) at room temperature. Prepare the frosting the next day, unroll, fill, and reshape. This helps split the work and makes holiday baking less stressful.
Disclaimer: Nutritional values provided for this recipe were calculated using a third-party online tool and are offered as an estimation only. They should not be considered precise or guaranteed.
Sharing this recipe with a link to this page is both encouraged and deeply appreciated. Copying, pasting, or taking screenshots of full recipes for publication on any social media platform or website is strictly prohibited. All content and photographs presented here are protected by copyright law.
Did you make these delightful Red Velvet Cake Hearts?
We’d love to hear from you! Don’t forget to leave a rating below and be sure to follow us on Pinterest and Instagram for more delicious and inspiring recipes to brighten your day!