
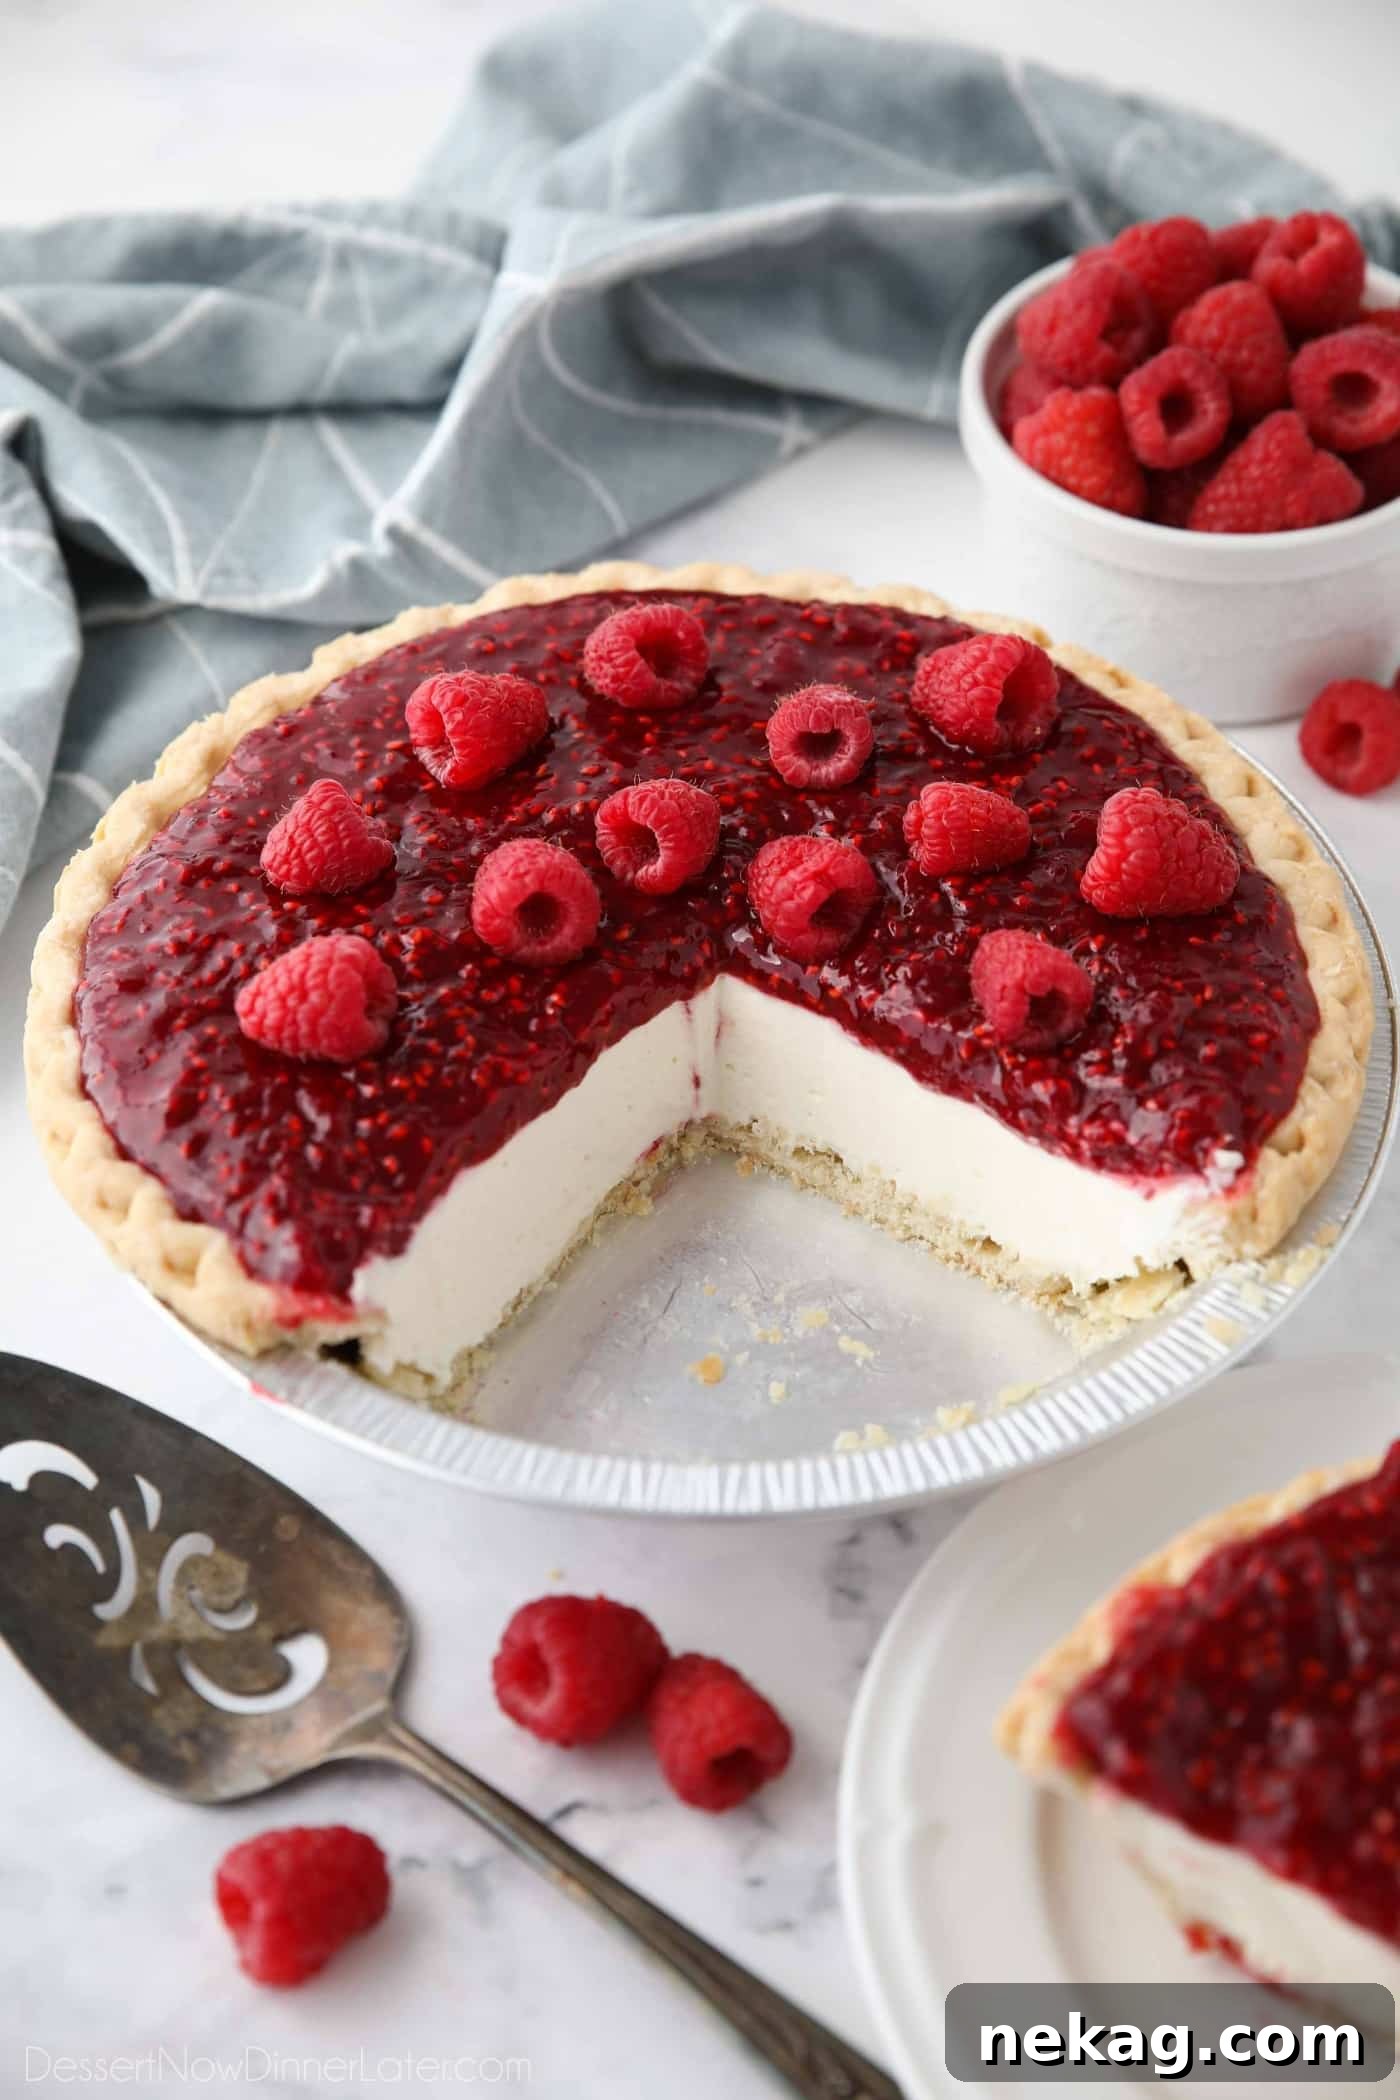
Indulge in the sublime pleasure of a homemade Raspberry Cream Pie, a dessert that masterfully balances a rich, creamy texture with the vibrant, fruity burst of fresh raspberries. This exquisite pie features a meticulously crafted flaky pastry crust, generously filled with layers of light, whipped cream cheese, and crowned with a luscious, jammy raspberry topping. Designed to be neither overly sweet nor excessively tart, it achieves a perfect harmony of flavors that will captivate your palate. What’s more, this delightful treat can be enjoyed all year round, whether you opt for plump fresh raspberries during the summer months or convenient frozen berries during colder seasons. It’s an ideal choice for any gathering, from casual family dinners to elegant holiday feasts, promising a memorable dessert experience every time.
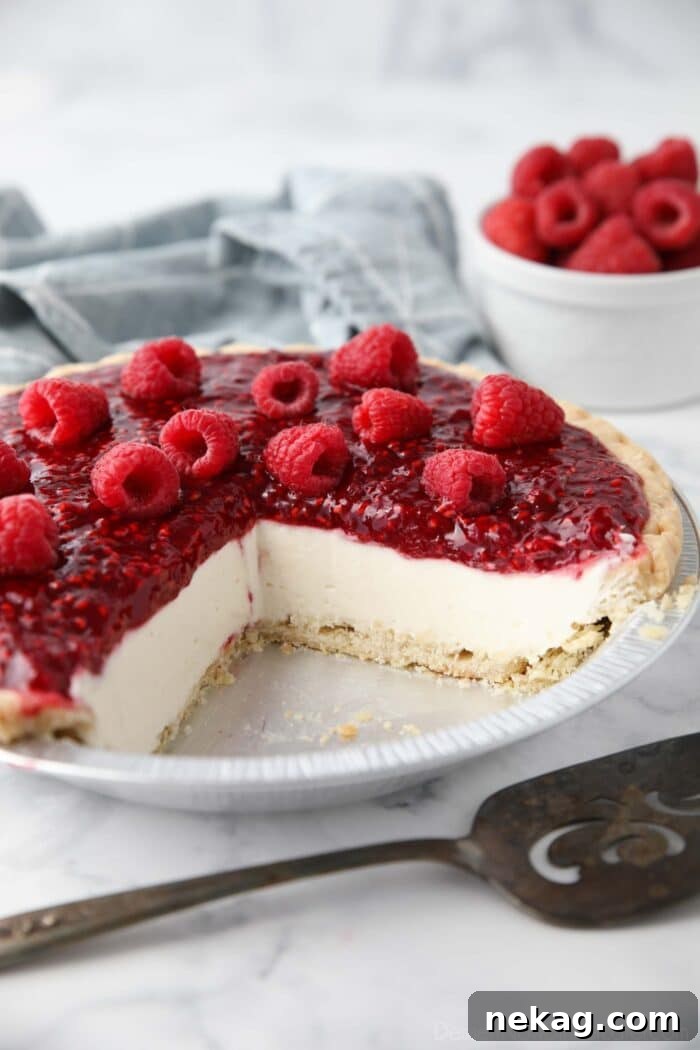
Raspberry Cream Pie: A Decadent Delight
If you’ve ever savored the light and refreshing taste of a strawberry cream pie, prepare to be enchanted by its equally delightful cousin: the raspberry cream pie. This particular recipe draws inspiration from beloved bakery favorites, such as the widely popular Kneaders Raspberry Cream Cheese Pie, renowned for its irresistible layers. Our homemade version captures that same magic, offering three distinct and equally delicious components that come together to create a truly unforgettable dessert.
Crafting this pie is a labor of love that yields impressive results, making it a showstopper for any occasion. Each element is carefully designed to contribute to the pie’s overall appeal, ensuring a harmonious blend of textures and tastes. Let’s delve into the distinctive characteristics of each layer:
- Crust – The foundation of any great pie is its crust, and for this recipe, a traditional pastry crust offers the perfect flaky base. For those new to pie making, a pie crust made with shortening is often more forgiving and easier to handle. Experienced bakers, or those seeking a richer flavor profile, might prefer an all-butter pie crust for its unparalleled taste and crispness. If time is of the essence, a high-quality store-bought refrigerated or frozen pie crust serves as an excellent shortcut without compromising too much on flavor. (I often opt for a frozen crust to streamline the process, proving that delicious doesn’t always mean complex.)
- Cream Cheese Filling – This isn’t just any filling; it’s a luscious, no-bake cheesecake-style creation. The secret lies in using real whipped cream, folded gently into softened cream cheese to achieve a light, airy, yet incredibly rich texture. Unlike fillings that rely on artificial substitutes like Cool Whip, our recipe ensures an authentic, luxurious mouthfeel that truly elevates the pie. The cream cheese provides a subtle tang that beautifully complements the sweetness of the other layers, creating a sophisticated flavor profile.
- Fruit Topping – The crowning glory of this pie is its vibrant raspberry topping. Whether you choose the freshness of seasonal berries or the convenience of frozen ones, this topping is remarkably simple to prepare. It’s designed to be a concentrated, jammy layer, providing an intense burst of raspberry flavor and a gorgeous ruby-red hue. While the cooked topping is delightful on its own, adding extra fresh raspberries on top just before serving enhances both the visual appeal and the textural experience, offering a delightful contrast to the smooth filling.
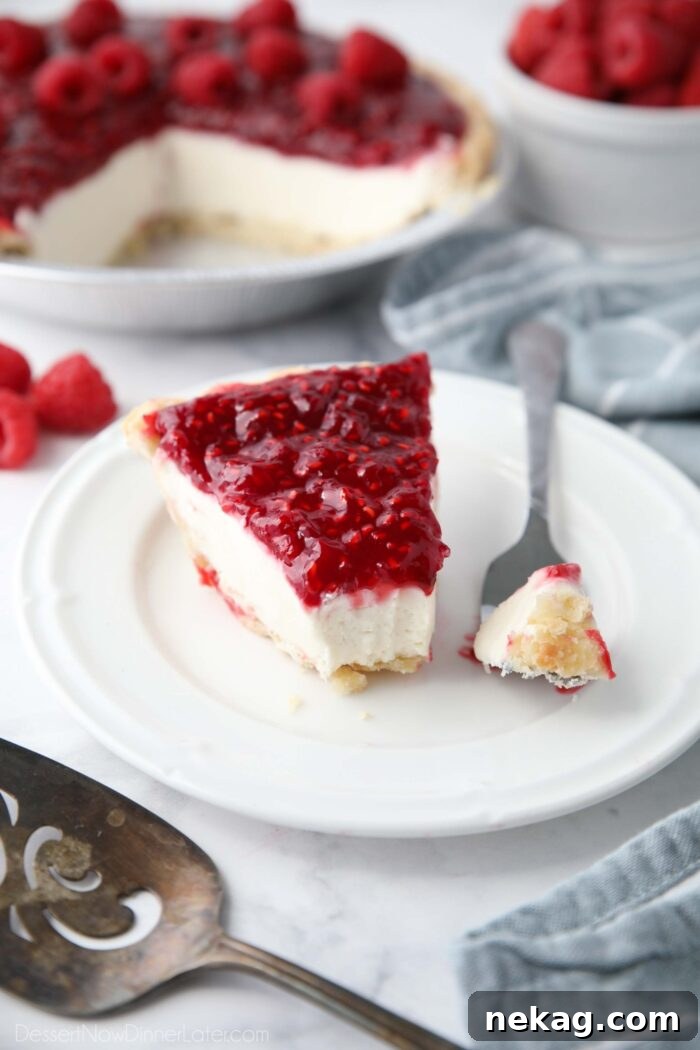
Crafting Your Own Raspberry Cream Pie: A Simple Guide
Making this raspberry cream pie is surprisingly straightforward, proving that gourmet desserts don’t have to be complicated. The most challenging aspect, arguably, is exercising the patience required for the pie to properly chill and set, allowing its flavors and textures to fully develop. Here’s a simplified overview of the process:
- The journey begins with preparing the pie crust. This involves a crucial step called blind baking, which ensures a crisp, non-soggy base for your creamy filling. Once baked, the crust must be allowed to cool completely.
- Next, you’ll prepare the indulgent whipped cream cheese filling. This involves beating softened cream cheese until smooth, then gently folding in freshly whipped heavy cream. Keep this creamy mixture refrigerated to maintain its perfect consistency until assembly.
- Simultaneously, you’ll create the vibrant raspberry topping. This easy-to-make, jammy concoction requires a short cooking time to thicken, followed by thorough cooling. A well-chilled topping will layer beautifully and provide a refreshing contrast.
- Finally, the magic happens during assembly, as you layer the chilled components into the cooled crust. Once assembled, the pie requires a final period of refrigeration. This crucial chilling time allows all the layers to firm up, marry their flavors, and achieve that irresistible, perfectly sliceable texture.
This raspberry cream pie is celebrated for its remarkable lightness and its impeccable balance of sweetness and tartness. It never feels heavy, allowing you to enjoy a generous slice without feeling weighed down. This makes it an extraordinarily versatile dessert, perfect after any meal – even a rich and hearty Thanksgiving dinner! Its refreshing qualities provide a delightful end to even the most elaborate feasts. I’m excited to share the detailed steps to help you create this magnificent dessert in your own kitchen.
Rave Reviews: What Our Bakers Are Saying
“For years, I’ve ordered a raspberry cream pie from Kneader’s for our Thanksgiving celebration. But not anymore! This year, with an abundance of fresh raspberries, I decided to try this recipe for a church pie baking contest – and I won! In my opinion, this pie is not only easy to make but also surpasses Kneader’s version. It was absolutely devoured at our church function, so much so that my husband didn’t even get a piece! Looks like I’ll be making it again very soon. I 10/10 recommend this recipe!”
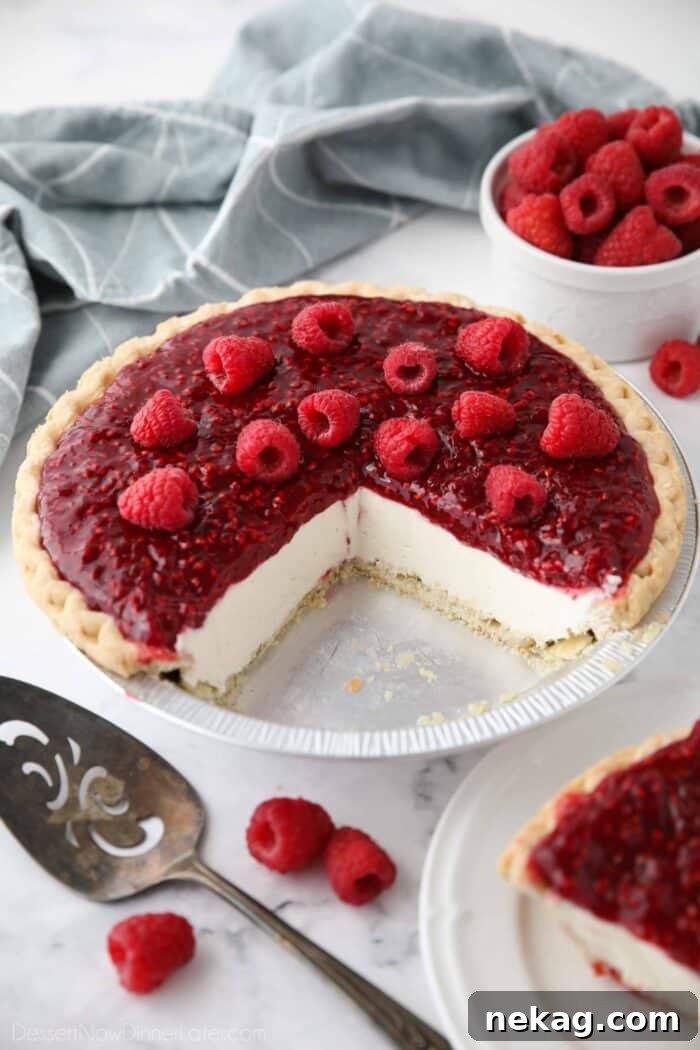
Essential Ingredients for Your Raspberry Cream Pie
Creating this magnificent Raspberry Cream Pie requires a careful selection of fresh, high-quality ingredients. While the full ingredient amounts and detailed instructions are conveniently located in the printable recipe card at the bottom of this post, let’s take a closer look at the key components that bring this dessert to life.
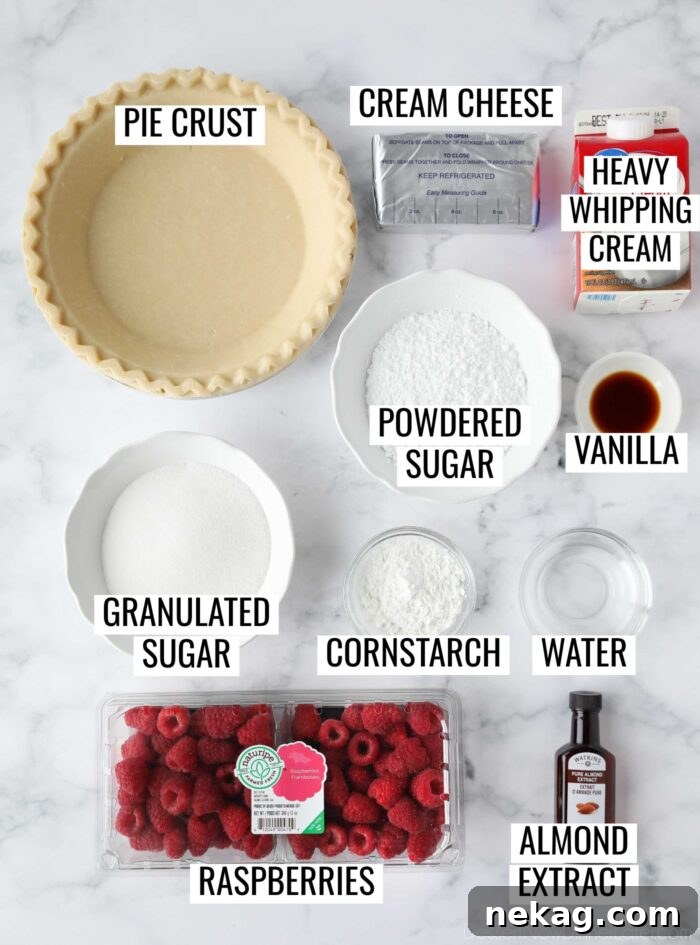
- Pie Crust – For simplicity and convenience, I often use a 9-inch frozen deep-dish pie crust. This saves valuable time without sacrificing taste. However, feel free to use a homemade crust if preferred.
- Cream Cheese – Always opt for the block-style, full-fat cream cheese, not the spreadable kind in a tub. Full-fat cream cheese provides the richness and stability essential for a decadent, no-bake filling. Ensure it’s at room temperature for optimal creaming.
- Powdered Sugar – This finely milled sugar dissolves beautifully into the cream cheese, ensuring a smooth, lump-free filling with just the right amount of sweetness.
- Vanilla Extract – A classic flavor enhancer that adds warmth and depth to the creamy filling. Its aromatic notes perfectly complement the tart raspberries.
- Heavy Whipping Cream – This is key to achieving a light and airy whipped texture for the filling. It must be very cold to whip properly to stiff peaks.
- Granulated Sugar – Used to sweeten the raspberry topping, balancing the natural tartness of the berries.
- Cornstarch – The thickening agent for our vibrant raspberry topping, ensuring it sets into a lovely, jammy consistency.
- Water – Helps dissolve the sugar and cornstarch, forming the base for the cooked raspberry topping.
- Raspberries – The star of the show! Both fresh and frozen raspberries work wonderfully. Fresh berries offer a bright, vibrant burst of flavor, while frozen berries are convenient and equally delicious when cooked into the topping.
- Almond Extract – An optional but highly recommended addition. A small amount of almond extract significantly boosts and enhances the natural flavor of the raspberries, adding a sophisticated twist.
Mastering the Blind Bake: Your Guide to a Perfect Pie Crust
Blind baking the pie crust is a critical step to prevent a soggy bottom and ensure a perfectly crisp base for your Raspberry Cream Pie. This technique pre-cooks the crust before the filling is added, creating a barrier against moisture. Through extensive testing with various store-bought pie crusts, I’ve found that Marie Callender’s deep-dish pie crust yields excellent results. For best outcomes, allow your frozen crust to thaw at room temperature for 20-30 minutes before pricking it with a fork. This prevents cracking and ensures an even bake.
Furthermore, attention to detail in your baking setup can make all the difference. Always place your foil pie pan directly onto a sturdy baking sheet. In one of my early tests, using a thin, flimsy baking sheet caused it to warp during baking, resulting in a tilted crust and an unevenly baked pie. A robust baking sheet provides the necessary support for an even and perfectly golden-brown crust.
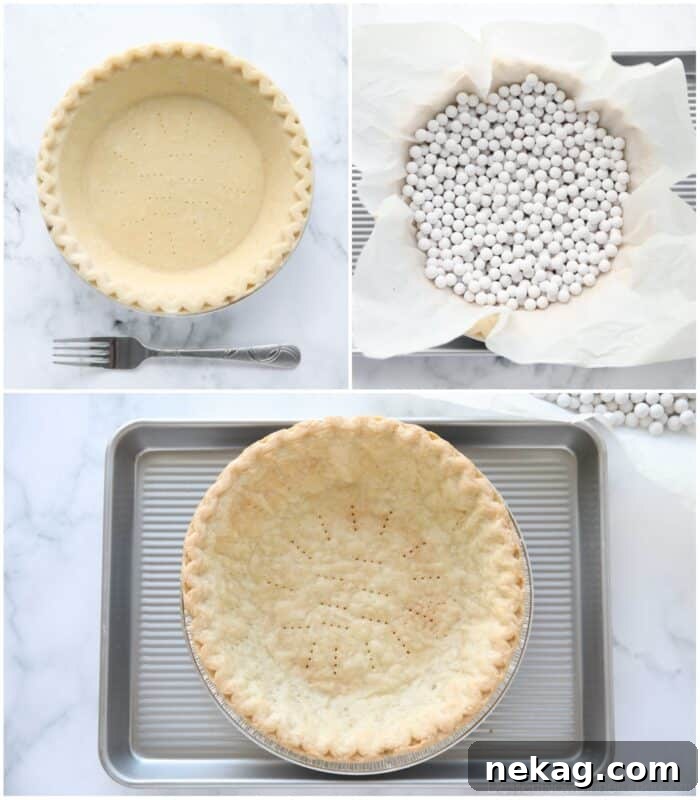
- Preheat your oven to 350 degrees Fahrenheit (175°C). Proper preheating is essential for an even bake.
- Remove your frozen pie crust from the freezer and let it sit at room temperature for 20-30 minutes to thaw slightly. Once partially thawed, use a fork to dock (prick) the bottom and sides of the crust all over. This allows steam to escape, preventing large bubbles and ensuring a flat base. Place the docked crust onto a sturdy baking sheet for support.
- Line the inside of the crust with parchment paper (or aluminum foil), gently pressing it against the sides. Fill the parchment-lined crust with pie weights. If you don’t have pie weights, dry beans or uncooked rice can be used as an effective alternative to fill the crust to the top, preventing the sides from slumping during baking.
- Bake the weighted crust at 350°F (175°C) for 20 minutes. After this initial bake, carefully remove the parchment paper and weights. Immediately return the crust to the oven and continue baking for an additional 10 minutes, or until the crust is beautifully golden brown and fully baked through.
- Once baked, transfer the crust to a wire rack and allow it to cool completely. A fully cooled crust is crucial before adding the filling to prevent melting and maintain texture.
Crafting the Irresistible Whipped Cream Cheese Filling
This luscious, no-bake cheesecake filling is incredibly easy to prepare, offering a rich and creamy core to your Raspberry Cream Pie. To achieve its velvety smooth texture and light consistency, you’ll need two separate bowls for different mixing stages. The key to a perfect filling lies in starting with room temperature cream cheese and incorporating cold heavy cream correctly.
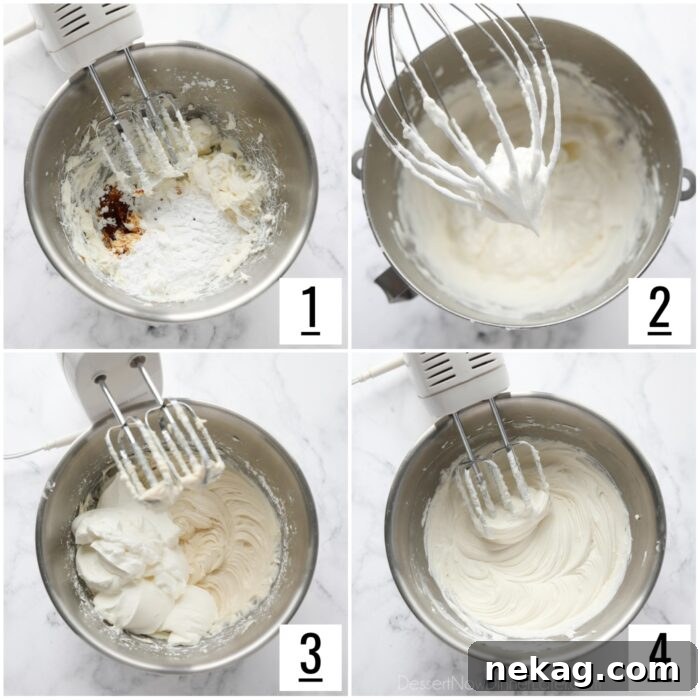
- In a large mixing bowl, using an electric hand mixer, beat the softened cream cheese for approximately 10-15 seconds. The goal is to achieve a smooth, creamy, and lump-free consistency. Then, add the powdered sugar, a pinch of salt (to enhance flavors), and vanilla extract. Continue to beat until all ingredients are thoroughly combined and the mixture is smooth.
- In a separate, chilled stand mixer bowl fitted with the whisk attachment, pour the cold heavy cream. Whip the cream on medium-high speed until it forms stiff peaks. Stiff peaks mean the cream holds its shape firmly when the whisk is lifted. Exercise caution not to over-whip, as heavy cream can quickly turn into butter if beaten for too long.
- Gently add the freshly whipped cream to the prepared cream cheese mixture. This step requires a delicate touch to maintain the airiness of the whipped cream.
- Using the electric hand mixer on low speed, beat the mixture just until all ingredients are combined and no streaks of plain cream cheese or whipped cream remain. Overmixing at this stage can deflate the filling. Once combined, cover the filling and refrigerate it immediately. Keeping it chilled is essential until you are ready to assemble the pie, ensuring it remains firm and retains its structure.
Preparing the Vibrant Raspberry Topping
The raspberry topping is what truly makes this pie sing, offering a bright, fruity counterpoint to the creamy filling. This jammy topping can be prepared with either fresh or frozen raspberries, making this dessert adaptable to any season. The process is simple, resulting in a thick, glossy, and intensely flavored fruit layer that is simply irresistible.
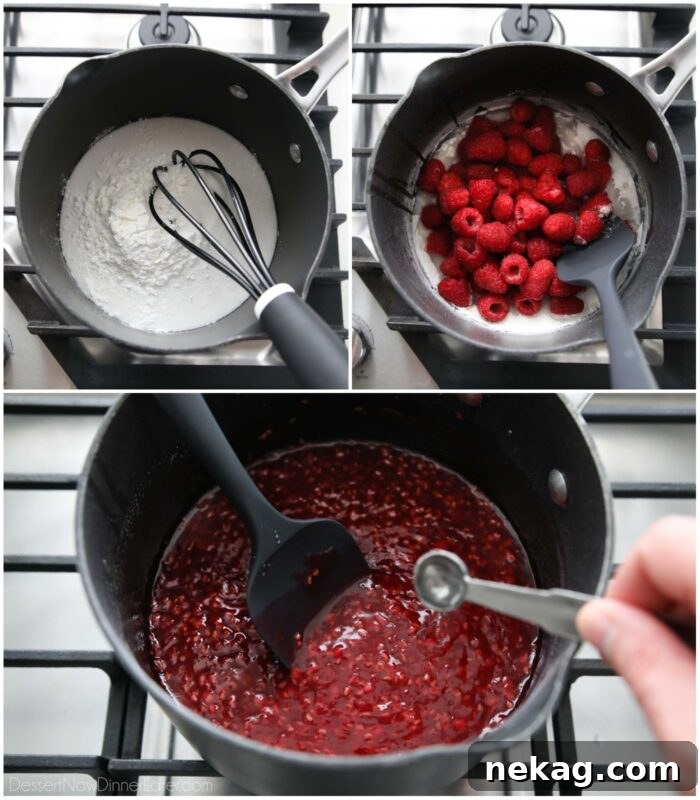
- In a medium saucepan, whisk together the granulated sugar and cornstarch until thoroughly combined. This dry mixing prevents lumps when liquids are added.
- Pour in the water, and then add some or all of the raspberries. If you desire a presentation with fresh berry garnish, you may wish to reserve about 1 cup of fresh raspberries for topping the pie later. The remaining berries will be cooked down into the jammy topping.
- Place the saucepan over medium heat and bring the mixture to a boil, stirring frequently. Continue to cook and stir until the mixture becomes very thick and translucent, resembling a fruit jam. Note that if you are using frozen raspberries, it will take a little longer for the mixture to thicken due to the extra moisture content.
- Once the topping has reached the desired consistency, remove the saucepan from the heat. If using, stir in the almond extract. Almond extract has a wonderful synergy with raspberries, enhancing their flavor beautifully, but it can be omitted if preferred.
- Transfer the raspberry topping to a heatproof bowl, cover it, and refrigerate until thoroughly chilled. A cold topping is crucial for proper layering and to prevent it from melting into the cream cheese filling.
Assembling Your Decadent Raspberry Cream Cheese Pie
Once all your individual components—the blind-baked crust, the creamy filling, and the luscious raspberry topping—are prepared and perfectly chilled, the exciting final step is to assemble your magnificent Raspberry Cream Pie. This is where the layers come together to create a visually stunning and incredibly delicious dessert.
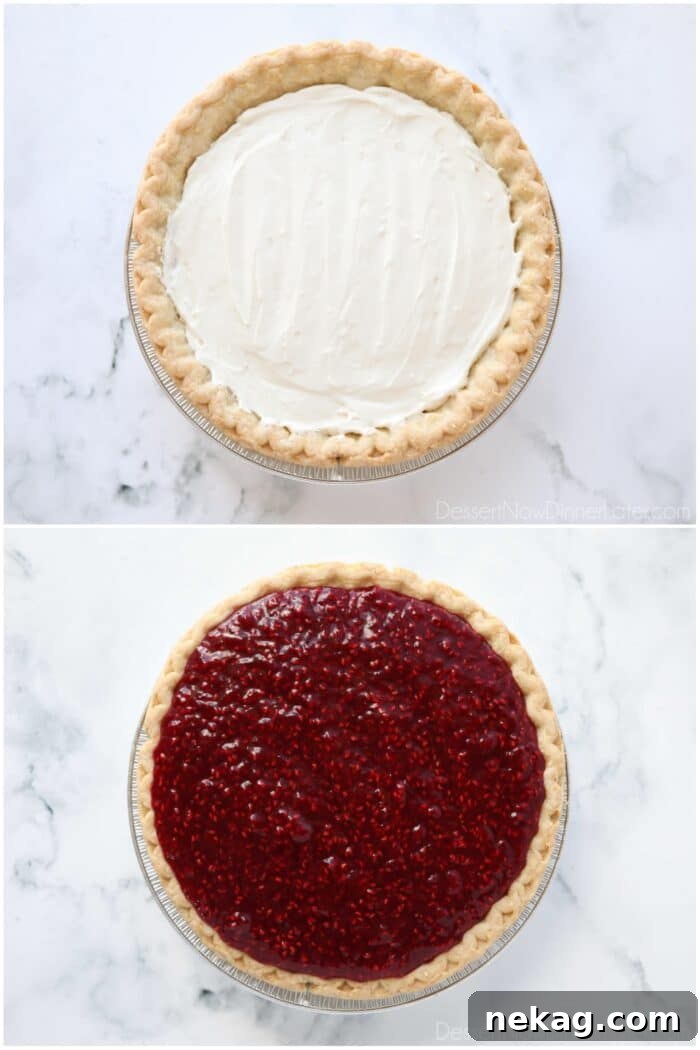
- Begin by spreading the chilled cream cheese filling evenly into the bottom of your completely cooled pie crust. Use an offset spatula or the back of a spoon to create a smooth, consistent layer that extends to the edges of the crust.
- Next, carefully dollop spoonfuls of the chilled raspberry pie filling over the cream cheese layer. Gently spread the raspberry topping with a spatula, ensuring it covers the cream cheese layer without mixing too much. The goal is distinct, beautiful layers.
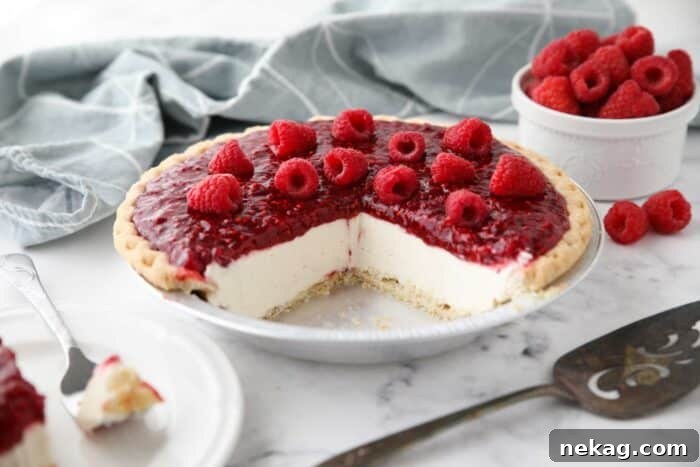
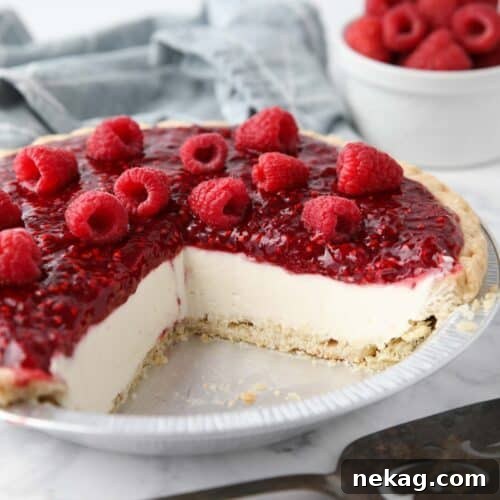
- For an extra touch of elegance and fresh flavor, you can top the pie with additional fresh raspberries, if desired. These whole berries add a lovely textural contrast and visual appeal. Once assembled, lightly cover the pie with plastic wrap, being careful not to press down on the topping.
- Refrigerate the pie for a minimum of 4 hours, or ideally, overnight. This extended chilling time is paramount; it allows the cream cheese filling and raspberry topping to fully set, ensuring the pie holds its shape beautifully when sliced and that all the flavors meld together perfectly. The texture is undeniably at its best when adequately chilled.
Serving and Storing Your Raspberry Cream Pie
To fully enjoy your homemade Raspberry Cream Pie, proper serving and storage techniques are key. These simple tips will help you achieve clean, beautiful slices and keep your leftovers fresh and delicious for days to come.
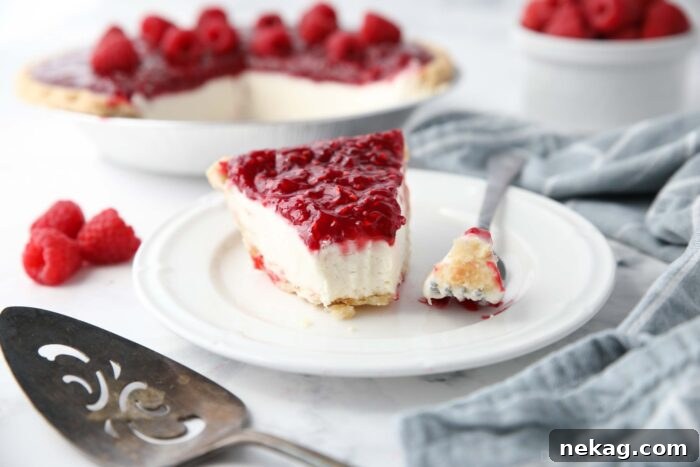
- For pristine, crisp slices, always cut your pie with a hot, dry knife. A common trick is to rinse the knife in hot water and thoroughly dry it with a clean towel between each cut. This prevents the filling from sticking and ensures each slice looks as perfect as it tastes.
- To store any leftover pie, simply cover it lightly but securely with plastic wrap. Place the covered pie in the refrigerator. When stored correctly, your Raspberry Cream Pie will remain fresh and delightful for up to one week, allowing you to savor its flavors over several days.
Expert Tips for Raspberry Cream Pie Success
Elevate your Raspberry Cream Pie experience with these helpful tips, designed to streamline your baking process, enhance flavor, and ensure a perfect outcome every time.
- Make it Faster: Efficiency is key when preparing a multi-layered dessert. To minimize waiting time, plan your preparation so that the whipped cream cheese filling is made last. This allows your blind-baked pie crust and your cooked raspberry topping to cool simultaneously, significantly cutting down on the overall preparation duration.
- Make it Ahead of Time: This pie is an excellent choice for entertaining, as it can be prepared up to 2 days in advance. In fact, making it ahead often allows the flavors to deepen and the layers to set even more firmly, resulting in a more cohesive and delicious pie. Simply cover it tightly with plastic wrap and store it in the refrigerator until ready to serve.
- For the Raspberries: When preparing the raspberry topping, you might find that if you use all the berries, especially if they are very juicy, the total volume of the cooked topping might slightly exceed what fits comfortably inside a standard 9-inch pie crust. Don’t worry if you have leftover filling! This extra jammy goodness is absolutely delicious on its own, served like a fruit spread, or enjoyed with yogurt for a quick and delightful snack.
- Flavor Variations: While almond extract perfectly complements raspberries, feel free to experiment. A hint of lemon zest folded into the cream cheese filling or added to the raspberry topping can add a bright, citrusy note.
- Garnishing Ideas: Beyond fresh raspberries, consider a light dusting of powdered sugar, a sprig of fresh mint, or a few white chocolate shavings for an elegant finish.
Explore No-Bake Crust Alternatives
For those seeking a completely no-bake dessert or simply wishing to skip the oven, this raspberry cream cheese pie can be easily adapted. The only baked component in the traditional recipe is the pie crust itself. By opting for a cookie crumb crust, you transform this delicious dessert into an entirely no-bake treat, perfect for warm weather or when you just want to keep things simple.
Cookie crumb crusts are wonderfully versatile and add a different textural dimension to the pie. Instead of baking, these crusts are typically pressed into the pie dish and then chilled or frozen until firm. Here are a couple of fantastic options for a no-bake base:
- Graham Cracker Crust: A classic choice, offering a subtly sweet and crumbly texture that pairs beautifully with the creamy filling and tart raspberries. Its mild flavor ensures the berries remain the star.
- Vanilla Wafer Crust: This crust provides a slightly richer, buttery vanilla flavor that complements the cream cheese and raspberries exceptionally well. It’s a delightful alternative for those who enjoy a richer crumb.
Each of these no-bake crusts can be either briefly baked for added stability and a slightly crisper texture, or simply frozen until they are properly set, which typically takes about 20-30 minutes. When I originally published this recipe back in 2018, I often used a vanilla wafer crust, showcasing its versatility and deliciousness. The beauty of these options is that you can choose the crust that best suits your taste preferences and desired effort level.
Of course, you also have the convenience of purchasing a pre-made graham cracker or shortbread crust from the store. While these might be slightly smaller, potentially leaving you with a bit of leftover filling, enjoying that extra creamy goodness with a spoon is always a perfectly acceptable and delicious solution!
If You Make This Recipe, Please Rate and Review it in the Comments Below. THANK YOU!
Raspberry Cream Pie
Pin
Rate
Ingredients
Crust:
- 1 (9-inch) frozen deep dish pie crust
Filling:
- 8 oz (226 g) cream cheese, room temperature/softened
- ¾ cup (90 g) powdered sugar
- 1 pinch salt
- 1 tsp vanilla extract
- 1 cup (237 ml) heavy whipping cream, cold
Topping:
- 1 cup (200 g) granulated sugar
- 3 Tbsp cornstarch
- 3 Tbsp water
- 12 oz (340 g) raspberries, fresh or frozen (about 2 1/2 cups), divided*
- 1/4 tsp almond extract, optional
Equipment
-
Electric Hand Mixer
-
6-Quart Steel Mixing Bowl
-
KitchenAid 5-Qt. Stand Mixer
-
Silicone Spatula Set
Instructions
-
Preheat oven to 350 degrees Fahrenheit (175°C). Ensure your oven is fully preheated for consistent baking results.
-
CRUST: Thaw your chosen frozen pie crust at room temperature for 20-30 minutes to make it pliable and prevent cracking. Once thawed, use a fork to dock (prick) the entire bottom and sides of the crust. This helps steam escape during baking. Place the crust onto a sturdy baking sheet. Line the inside of the crust with parchment paper or aluminum foil, then fill it generously with pie weights, dry beans, or uncooked rice to prevent shrinking and bubbling.
-
Bake the weighted crust at 350˚F (175°C) for 20 minutes. After this initial bake, carefully remove the parchment paper and weights. Immediately return the crust to the oven and continue baking at 350˚F (175°C) for an additional 10 minutes, or until it achieves a beautiful golden color and is thoroughly baked through. Allow the crust to cool completely on a wire rack before proceeding.
-
FILLING: In a large mixing bowl, use an electric hand mixer to beat the room temperature cream cheese for 10-15 seconds, until it becomes smooth and creamy. Add the powdered sugar, a pinch of salt, and vanilla extract. Continue beating until all ingredients are well combined and the mixture is uniformly smooth.
-
In a separate, chilled stand mixer bowl with the whisk attachment, whip the cold heavy cream to stiff peaks. Be vigilant not to over-whip, as heavy cream can quickly turn to butter. Once stiff, gently add the whipped cream to the cream cheese mixture. Use the electric hand mixer on low speed to beat just until the two mixtures are combined and no streaks remain. Place the finished filling in the fridge until you are ready to assemble the pie.
-
TOPPING: In a medium saucepan, whisk the granulated sugar and cornstarch together until thoroughly blended. Add the water and either some or all of the raspberries. If you prefer to garnish with fresh berries, you may reserve 1 cup of fresh raspberries for topping the assembled pie. Bring the mixture to a boil over medium heat, stirring frequently. Continue cooking and stirring until the topping becomes very thick and jam-like. Note that frozen raspberries may require a slightly longer thickening time. Remove from heat and stir in the almond extract, if desired, for an enhanced raspberry flavor. Refrigerate the topping until it is completely chilled and set.
-
ASSEMBLE: Spread the thoroughly chilled cream cheese filling evenly inside the cooled pie crust, ensuring it forms a smooth layer. Carefully dollop spoonfuls of the chilled raspberry pie filling on top of the cream cheese layer. Gently smooth the raspberry topping with a spatula, maintaining distinct layers. If desired, artfully arrange extra fresh raspberries on top for an added pop of color and texture.
-
Cover the assembled pie lightly with plastic wrap, being careful not to touch the top layer. Refrigerate the pie for at least 4 hours, or preferably overnight. This crucial chilling period allows the layers to set completely and the flavors to fully meld, resulting in the best possible texture and taste.
Notes
- Recipe altered from Taste of Home
- Pie Crust: For those who prefer to make their crust from scratch, you can follow instructions for a Pie Crust with Shortening or an All-Butter Pie Crust. If making a homemade pie crust, remember to use these detailed instructions for Blind Baking to ensure a crisp, non-soggy base.
- How to Cut: Achieve clean, beautiful slices by cutting the pie with a hot, dry knife. Rinsing the knife in hot water and thoroughly drying it between cuts will prevent sticking and yield crisp, attractive portions.
- Storage: To store any leftovers, cover the pie securely with plastic wrap and refrigerate. It will remain delicious for up to 1 week.
- Make it Faster: To save time, plan to make the whipped cream cheese filling last. This way, your pie crust and raspberry topping can cool completely while you prepare the filling, allowing for a more efficient process.
- Make it Ahead of Time: This pie is an excellent make-ahead dessert. It can be prepared up to 2 days in advance, allowing the flavors to meld beautifully and the pie to set firmly.
- For the Raspberries: If you incorporate all the raspberries into the cooked topping, you might find that the total volume slightly exceeds what fits into your pie crust. Any leftover delicious raspberry filling is perfect to use as a jam or simply enjoyed with yogurt.
Nutrition
Disclaimer: Nutritional values were calculated using a third-party tool and are provided as an estimation only.
Sharing this recipe with a link is both encouraged and appreciated. Copying/pasting and/or screenshots of full recipes to any social media is strictly prohibited. Content and photographs are copyright protected.
Did you make this?
Don’t forget to leave a rating below and make sure to follow on Pinterest and Instagram for more!
*Originally published 8/19/2018. This post has been updated and enhanced in April 2024 to provide more detailed instructions, additional tips, and improved clarity for an even better baking experience.