

These 100% Whole Wheat Dinner Rolls are remarkably soft, light, fluffy, and moist, enhanced with a delicate hint of honey. Ideal for celebrating holidays such as Thanksgiving, Christmas, and Easter, or simply elevating any everyday meal.
The Ultimate Recipe for 100% Whole Wheat Dinner Rolls: Soft, Fluffy, and Perfectly Sweet
Returning to the comforting classics today with this exceptional whole wheat dinner rolls recipe. My journey with these delightful rolls began back in 2014 when I first sought to create some Whole Wheat Bunny Rolls for an Easter celebration. The success and joy they brought were undeniable. With the festive holiday seasons consistently around the corner, I felt it was the perfect moment to revisit and share this truly delicious whole wheat roll recipe, ensuring your table is graced with warmth and homemade goodness.
In a culinary world often dominated by refined grains, finding a truly wholesome yet incredibly palatable bread recipe can feel like a quest. Many recipes might claim to be “whole wheat,” yet they frequently incorporate white whole wheat flour or blend traditional all-purpose flour with a small amount of whole wheat. This particular recipe, however, is a proud testament to 100% WHOLE WHEAT goodness, delivering a result that defies expectations by being astonishingly soft, tender, and fluffy – a true delight for any bread lover.
Why Choose 100% Whole Wheat for Your Dinner Rolls?
Opting for 100% whole wheat flour means embracing a wealth of nutritional benefits. Unlike refined flours, whole wheat flour retains the bran, germ, and endosperm of the wheat kernel, which are packed with fiber, vitamins (especially B vitamins), minerals (like iron and magnesium), and antioxidants. This makes our whole wheat dinner rolls a healthier choice for you and your family.
A common misconception about whole wheat bread is that it’s inherently dense and heavy. This recipe shatters that myth, proving that whole wheat rolls can be just as light, airy, and inviting as their white flour counterparts, all while offering superior nutritional value. The secret lies in a carefully balanced ingredient list and precise technique, ensuring a fluffy texture that will surprise and delight even the most skeptical eaters.
The Secret to Soft and Fluffy Whole Wheat Dinner Rolls
The primary key to achieving light and fluffy whole wheat dinner rolls lies in one crucial aspect: avoiding the temptation to use too much flour. It’s a common pitfall in baking, especially with whole wheat, which can absorb liquid differently. If you add excessive flour, it will inevitably dry out the dough, leading to dense, heavy bread. What you’re aiming for is a dough that is distinctly slightly wet and sticky to the touch. This stickiness is a sign that your dough has the right hydration level, crucial for a tender crumb.
Essential Ingredients and Their Roles
- Yeast (Quick Rise or Instant Dry Yeast): This is the lifeblood of your rolls, responsible for the beautiful rise and airy texture. Ensure your yeast is fresh and active for best results. Quick rise or instant yeast means no proofing required before mixing with other ingredients, though we do a quick dissolve here for even distribution.
- Warm Water: Crucial for activating the yeast. The temperature should be just right – around 105-115°F (40-46°C) – warm to the touch but not hot enough to kill the yeast.
- Softened Butter: Adds richness, flavor, and contributes significantly to the rolls’ tender crumb and moisture. Softened butter creamed with honey creates a luxurious base.
- Honey: Not only does honey provide a wonderful, subtle sweetness that complements the whole wheat flavor beautifully, but it also helps feed the yeast and contributes to a lovely golden-brown crust.
- Large Eggs (Room Temperature): Eggs add richness, structure, and a beautiful golden hue to the rolls. Using room temperature eggs helps them incorporate more smoothly into the dough.
- Lukewarm Milk or Buttermilk: Adds moisture and further tenderizes the dough. Buttermilk specifically adds a slight tang and extra softness due to its acidity reacting with the other ingredients. If you don’t have buttermilk, you can easily make your own (see notes below recipe).
- Salt: A critical ingredient for flavor, balancing the sweetness, and also regulating yeast activity. Don’t skip it!
- 100% Whole Wheat Flour: The star of the show. Proper measurement (stir, spoon, and level) is key to preventing a dense dough.
- Oil (Canola, Vegetable, Olive): Used for greasing the bowl during the first rise, preventing the dough from sticking and aiding in even development.
The Power of Your Stand Mixer for Perfect Dough
I cannot stress enough the importance of using a stand mixer to knead this dough. It’s an invaluable tool that prevents you from inadvertently over-flouring the dough, which is easy to do when kneading by hand with sticky whole wheat dough. My personal preference, and one I highly recommend for any serious bread baker, is the Bosch Universal Plus Mixer. Its unique dough hook design truly gets underneath the dough, ensuring a thorough and consistent knead.
Proper kneading is foundational for developing those crucial flexible gluten strands that give bread its structure, elasticity, and, most importantly, a soft, fluffy texture. A Bosch mixer is renowned for its robust motor and efficient design, making it perfectly suited for handling bread dough, especially denser whole wheat varieties, without strain. It truly takes the hard work out of bread making, allowing you to focus on the joy of baking.
Mastering the Rise: Perfect Proofing
After kneading, the dough needs to rise, a process also known as proofing. This is where the yeast gets to work, fermenting the sugars and producing carbon dioxide, which creates those airy pockets. For optimal rising, place your oiled dough in a large bowl, covered with plastic wrap, in a warm, draft-free environment. An ideal temperature is around 75-80°F (24-27°C). You can achieve this by placing the bowl in a slightly warmed (but turned off) oven, near a sunny window, or in a pantry. The first rise typically takes about an hour, or until the dough has roughly doubled in size. Don’t rush this step; patience here rewards you with superior texture.
How to Shape Dinner Rolls Like a Pro
One of the most valuable tricks I picked up during my bakery internship and culinary school days was a simple, efficient method for shaping rolls. This technique saves a tremendous amount of time and prevents achy wrists that can come from individually rolling each piece of dough.
- Begin by gently flattening the dough on a lightly floured surface. This recipe yields a generous two dozen (24) whole wheat dinner rolls, so make sure your surface is adequately sized.
- To shape each individual roll, cup your hand over a portion of the dough. Using a gentle but firm pressure, push the dough through the opening created by your thumb and pointer fingers. This motion naturally forms a smooth, round ball.
- Once shaped, pinch the ends of the dough together at the bottom to create a neat seam. Place the rolls seam-side down onto a greased baking sheet. I find a 12×18-inch pan to be the perfect size for holding all 24 rolls with adequate spacing.
- After all rolls are shaped and placed, cover them lightly with greased plastic wrap and allow them to rise for their second proofing until they are noticeably puffy and almost doubled in size. Then, they are ready for baking until beautifully golden brown.
This shaping method is not only efficient but also ensures uniformly shaped rolls that bake evenly and look professionally made. It’s a technique that will elevate your bread-making game.
Baking and Serving Your Irresistible Rolls
Once your whole wheat dinner rolls have completed their second rise, they are ready for the oven. Preheat your oven to 350 degrees Fahrenheit (175°C) to ensure a consistent bake. Bake them for approximately 20-25 minutes, or until the tops are beautifully golden brown and they sound hollow when tapped on the bottom. The aroma filling your kitchen will be absolutely divine!
Upon removing the hot rolls from the oven, immediately brush the tops with a little extra melted butter. This simple step adds an incredible sheen, extra flavor, and keeps the crust soft. The warmth of the rolls will quickly absorb the butter, creating an even more indulgent experience.
Serving Suggestions and Storage Tips
These versatile whole wheat dinner rolls are perfect for any occasion. My own children devour them without any hesitation, often “fighting” over them to make sandwiches for their school lunches – a true testament to their deliciousness. They are guaranteed not to disappoint for your holiday feasts, serving as the ideal accompaniment to a roasted turkey at Thanksgiving, a festive ham at Christmas, or a delicious lamb at Easter. Beyond holidays, they are fantastic with soups, stews, pot roasts, or simply enjoyed on their own with a spread of butter and jam.
To store any leftover rolls, place them in an airtight container or zip-top bag at room temperature for up to 2-3 days. For longer storage, these rolls freeze exceptionally well. Once completely cooled, transfer them to a freezer-safe bag, removing as much air as possible, and freeze for up to 2-3 months. To reheat, thaw at room temperature, then warm them in a preheated oven at 300°F (150°C) for 5-10 minutes, or microwave for 15-30 seconds until warm and soft.
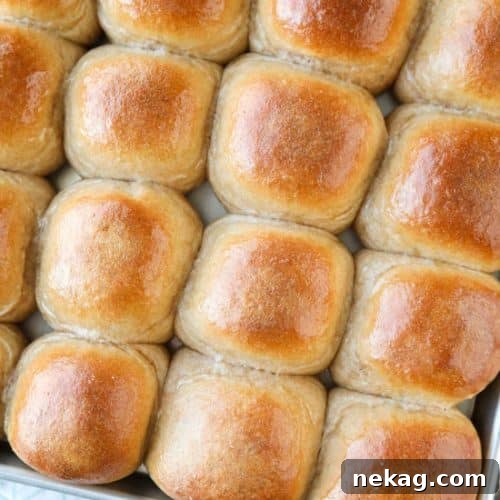
Whole Wheat Dinner Rolls
Pin
Rate
Ingredients
- 2 Tbsp yeast, (quick rise or instant dry yeast)
- ½ cup (118 ml) warm water
- ½ cup (113 g) butter, softened
- ¼ cup (84 g) honey
- 3 large eggs, room temperature
- 1 cup (237 ml) milk or buttermilk, lukewarm
- 2 tsp salt
- 4 ½ – 5 cups (684-760 g) 100% whole wheat flour, (stir, spoon, and level when measuring)
- 1 Tbsp oil, (canola, vegetable, olive)
Instructions
-
Stir yeast in warm water to dissolve. Set aside.
-
In the bowl of a stand mixer fitted with the paddle attachment, cream together the softened butter and honey.
-
Add the eggs. Mix well, then scrape down the sides of the bowl. Add the milk, salt, and the dissolved yeast mixture. Mix thoroughly to combine all wet ingredients.
-
Measure 4 1/2 cups of whole wheat flour by stirring it, then spooning it into a measuring cup and leveling it off. Add this flour to the wet mixture. Switch to a dough hook attachment and knead on medium speed for 5 minutes, until a soft, pliable dough is formed. The dough will be sticky; if it’s too wet to handle, add extra whole wheat flour 1 Tablespoon at a time, until the dough, when lightly touched with a clean finger, comes away without excessive stickiness.
-
Pour 1 Tablespoon of oil into a large, clean bowl. Scrape the dough out of the mixer bowl and transfer it into the oiled bowl. Flip the dough over once or twice to ensure all sides are coated with oil. Cover the bowl tightly with plastic wrap and let the dough rise in a warm place for 1 hour, or until it has roughly doubled in size.
-
Turn the risen dough out onto a lightly floured surface (either whole wheat or all-purpose flour works fine for dusting). Gently flatten the dough into a large rectangle, then divide it evenly into 24 individual pieces.
-
To shape each roll: Cup your hand over a piece of dough and push it through your thumb and pointer fingers, creating a smooth ball. (Refer to the image in the post above for a visual guide.) Pinch the ends together to seal the seam, then place the rolls seam-side down onto a greased baking sheet, spacing them about an inch apart. A 12×18-inch pan is ideal for this recipe.
-
Cover the shaped rolls loosely with greased plastic wrap and let them rise for a second time in a warm place for another 1 hour, or until they look puffy and have nearly doubled in size.
-
While the rolls are completing their second rise, preheat your oven to 350 degrees Fahrenheit (175°C).
-
Bake the rolls for 20-25 minutes, or until they achieve a beautiful golden brown color on top. Remove them from the oven immediately and brush the tops with a little extra melted butter while they are still hot. Serve warm and enjoy!
Notes
Recipe lightly altered from An Oregon Cottage
Nutrition Info.
Disclaimer: Nutritional values were calculated using a third-party tool and are provided as an estimation only.
Sharing this recipe with a link is both encouraged and appreciated. Copying/pasting and/or screenshots of full recipes to any social media is strictly prohibited. Content and photographs are copyright protected.
Did you make this?
Don’t forget to leave a rating below and make sure to follow on Pinterest and Instagram for more delicious recipes!
Conclusion: Bake Your Way to Happiness
These 100% whole wheat dinner rolls are more than just a side dish; they are a wholesome, comforting addition to any meal, promising softness, flavor, and satisfaction with every bite. By following these detailed steps and tips, you’ll master the art of making homemade whole wheat bread that rivals any bakery. Whether for a grand holiday feast or a simple weeknight dinner, these honey-kissed rolls are guaranteed to become a family favorite. So roll up your sleeves, gather your ingredients, and get ready to experience the joy of baking the perfect soft and fluffy whole wheat dinner rolls!