
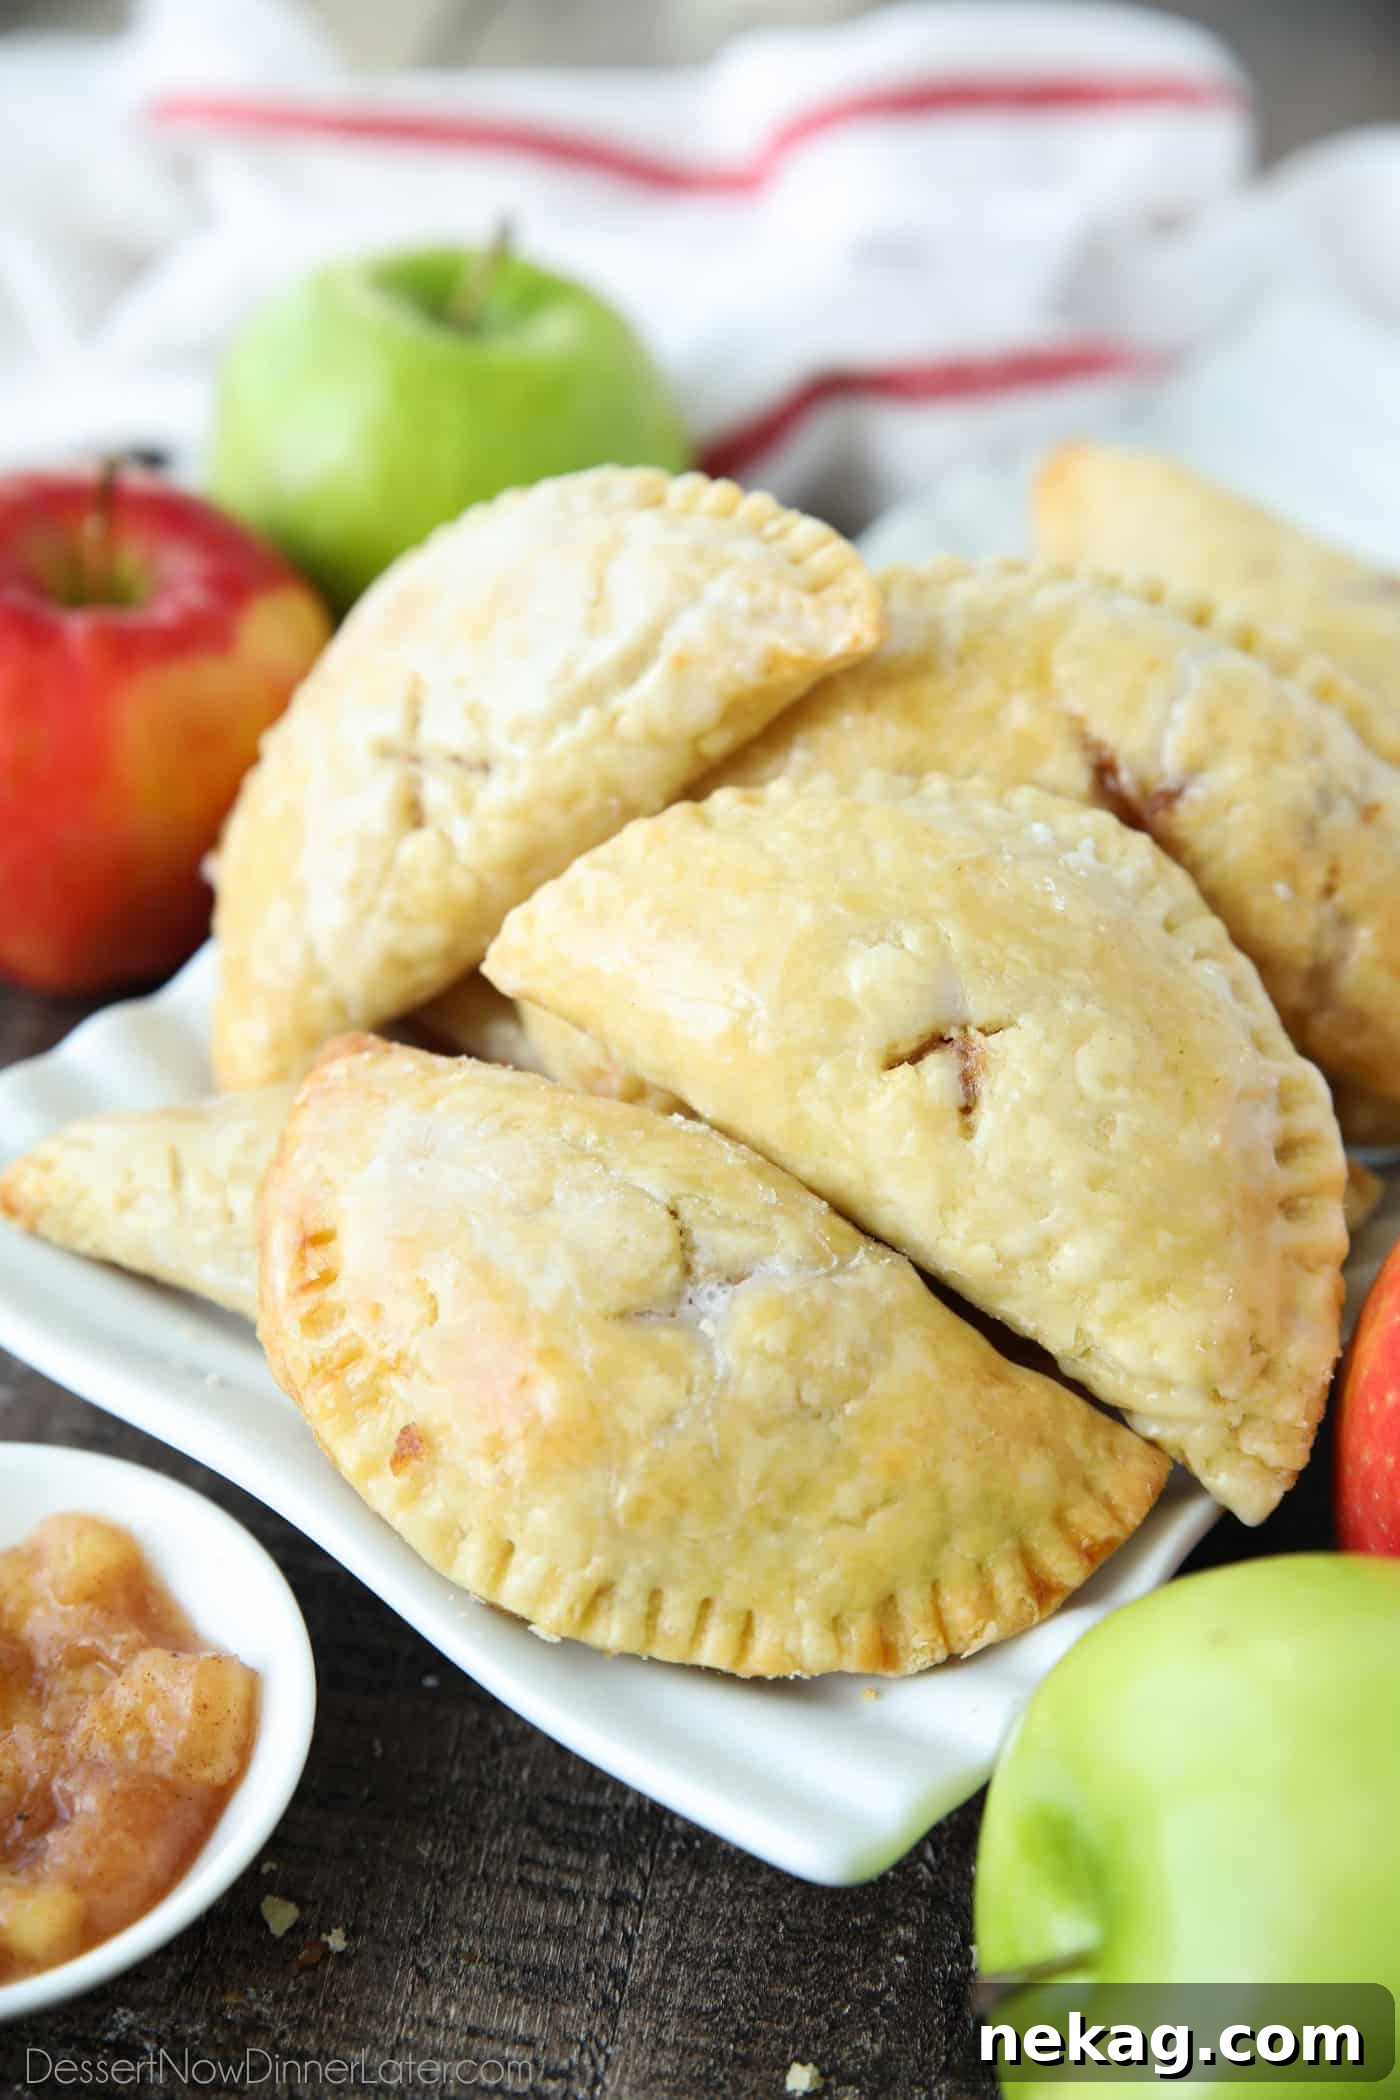
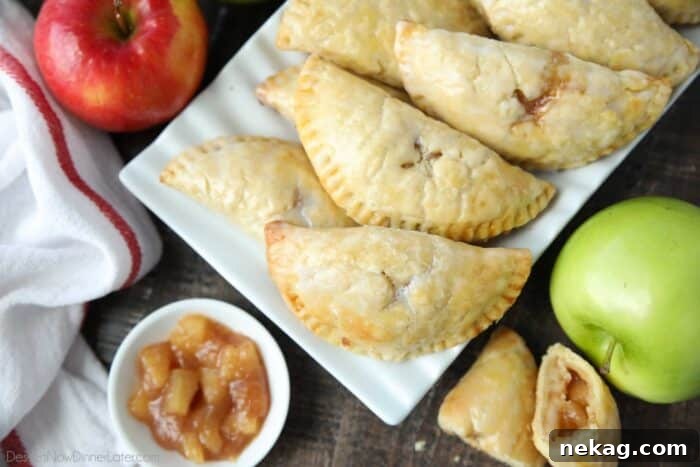
Indulge in the sweet nostalgia of childhood with these exquisite homemade Apple Hand Pies. Imagine a buttery, incredibly flaky pie crust embracing a luscious, spiced fresh apple pie filling, all crowned with a delicate, sweet glaze. These individual pocket pies are not just a treat for your taste buds but also a delightful experience for the senses, promising a perfect bite of apple pie goodness in a convenient, portable package.
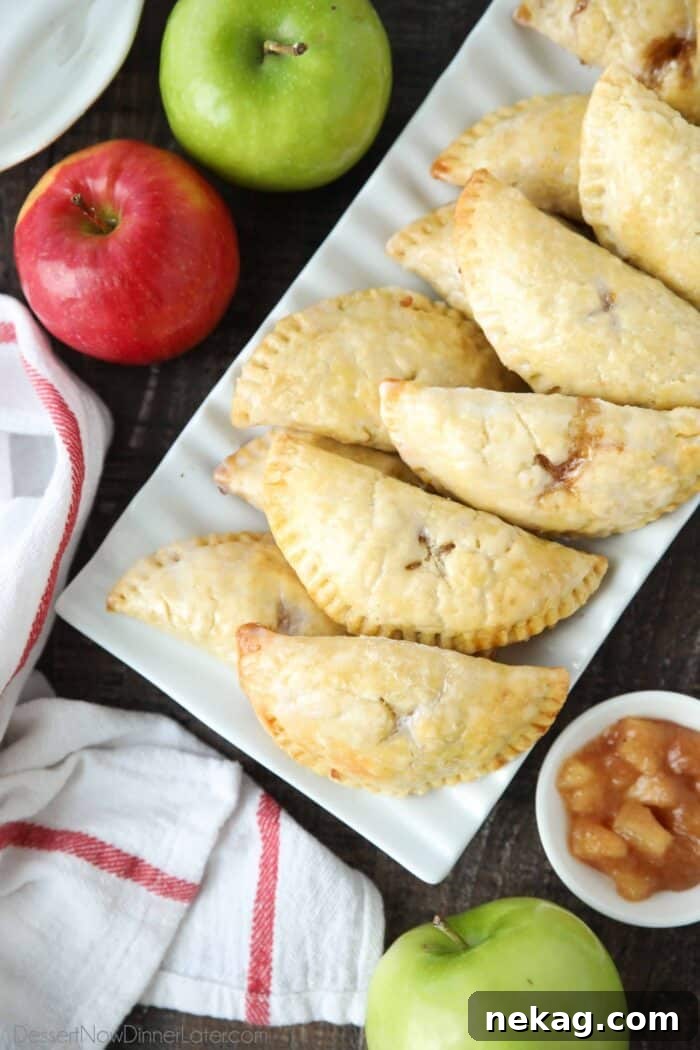
The Wonderful World of Hand Pies
What exactly is a hand pie? At its heart, a hand pie is a miniature, self-contained pie designed to be eaten with your hands, hence its charming name. It offers all the comforting flavors and textures of a classic full-sized pie but in a convenient, single-serving format. Think of it as your favorite pie, perfectly portioned for on-the-go enjoyment or a delightful individual dessert.
While often compared to turnovers or empanadas, hand pies stand apart. The key distinction lies in the crust: hand pies traditionally feature a rich, tender, and incredibly flaky pie crust, while turnovers are made with puff pastry, and empanadas typically use a more savory, often fried, dough. Our recipe celebrates the quintessential pie crust, ensuring that signature flakiness with every bite.
Traditionally, hand pies are a sweet variation of the concept, filled with fruits, creams, or other dessert fillings. While they are most commonly baked to achieve a golden-brown, crisp crust and warm, bubbly filling, some traditions prefer them fried for an extra layer of crispy indulgence. You can even experiment with modern cooking methods, like making them in an air fryer for a quick and easy option. The beauty of hand pies lies in their versatility and the joy of creating a personalized dessert.

Crafting the Perfect Apple Hand Pies
This particular recipe for Apple Hand Pies is a labor of love, combining the best elements of homemade baking to create an unforgettable dessert. We start with a tried-and-true flaky pie crust, an essential foundation for any stellar pie. This crust is then generously filled with our very own homemade apple pie filling, bursting with the sweet, spiced flavors of fresh apples. To complete this delightful package, each hand pie is elegantly topped with a simple yet irresistible powdered sugar glaze.
My inspiration for these glazed beauties comes from a fond childhood memory: those irresistible mini glazed fruit pies often found near the checkout aisles of grocery stores. As a child, these tiny treasures held an almost magical allure, and I would often beg my mom for one during our shopping trips. Now, as an adult with a passion for baking, I can recreate that beloved experience right in my own kitchen, producing a whole batch of these delicious glazed apple hand pies to share (or keep all to myself!). While a traditional apple pie often gets a sprinkle of cinnamon-sugar, the delicate glaze on these hand pies truly mimics that nostalgic store-bought charm, elevating them to a new level of sweet perfection.
Creating these hand pies from scratch allows you to control the quality and flavor of every component. The homemade pie crust, with its tender, flaky layers, is far superior to any store-bought alternative. The apple filling, prepared with fresh, perfectly spiced apples, offers a vibrant, authentic taste that canned fillings simply cannot match. And the simple glaze provides just the right amount of sweetness and a beautiful, glossy finish, making each hand pie a miniature work of art.

Homemade vs. Store-Bought: Your Choice!
While I firmly believe that homemade ingredients yield the absolute best flavor and texture, I also understand that life can be busy, and sometimes a time-saving alternative is exactly what you need. My recipe for apple hand pies is designed for a completely from-scratch experience, offering that unparalleled taste and satisfaction.
However, if you’re short on time or new to baking, don’t let that deter you from enjoying these delightful treats. You absolutely can “cheat” a little by using store-bought pie crust and canned apple pie filling. These shortcuts significantly reduce prep time, allowing you to assemble and bake these hand pies with minimal effort. In this scenario, your main task would be to prepare the simple pie glaze, which requires only two basic ingredients: powdered sugar and milk (or water). This adaptability makes apple hand pies a perfect recipe for both seasoned bakers and beginners alike.
Regardless of whether you choose the homemade route or opt for convenient store-bought ingredients, the assembly process remains the same. The steps I’m about to share will guide you through creating beautifully formed and delicious hand pies, ensuring a successful baking experience every time. The most important thing is to enjoy the process and savor the outcome of your efforts!

How to Master the Art of Making Apple Hand Pies
Creating these adorable and delicious apple hand pies is a rewarding process. Follow these step-by-step instructions for assembling them perfectly:
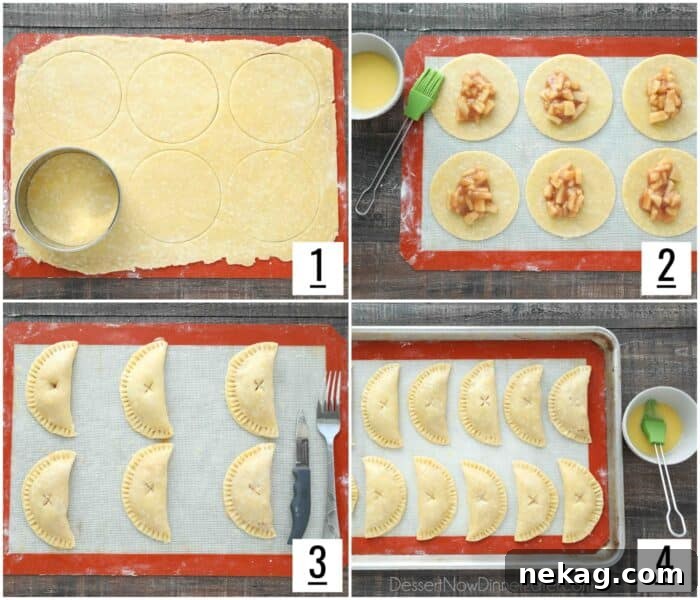
- Prepare the Pie Crust Circles: Begin by lightly flouring your work surface. Take your chilled pie crust dough and roll it out evenly to approximately 1/8-inch thickness. This ensures a delicate, flaky crust that isn’t too dense. Using a 4.5-inch round cookie cutter, carefully cut out circles from the rolled dough. Gather any dough scraps, gently press them together, and set them aside to re-roll for additional hand pies.
- Fill and Seal with Precision: Place a generous tablespoon of your cooled apple pie filling directly in the center of each dough circle. Be mindful not to overfill, as this can make sealing difficult. Next, prepare an egg wash by whisking one large egg with one tablespoon of water. Lightly brush the edges of each dough circle with this egg wash. The egg wash acts as a natural “glue,” helping the edges adhere firmly when folded. Remember, a little goes a long way; too much egg wash can make the dough slippery, preventing a proper seal.
- Fold, Crimp, and Ventilate: Carefully fold one side of the pie crust over the apple filling to meet the other side, forming a half-moon shape. Gently press the edges together to seal the filling inside. To ensure a secure and decorative seal, use the tines of a fork to crimp all along the curved edge of the hand pie. This not only looks lovely but also helps prevent the filling from leaking during baking. Finally, use a small, sharp knife to cut a few small slits (an “x” pattern works well) into the top of each hand pie. These slits are crucial for ventilation, allowing steam to escape as the pies bake, which prevents them from bursting and ensures a beautifully crisp crust.
- Arrange and Prepare for Baking: Repeat the filling and sealing process with the remaining pie crust circles and apple filling. Arrange the prepared hand pies about an inch apart on a baking sheet that has been lined with parchment paper or a silicone baking mat. This spacing allows for even baking and prevents the pies from sticking together. Before baking, lightly brush the top of each hand pie with more of the egg wash. This final brush will give your hand pies a beautiful, golden-brown sheen as they bake.
Pro Tip: Chilling your hand pies before baking is a game-changer! After assembling, place the mini pies in the refrigerator or freezer for 10-15 minutes. This crucial step helps to solidify the fat (butter or shortening) in the pie crust, which is essential for maintaining the pie’s shape during baking and creating those coveted, distinct flaky layers. A cold crust hits the hot oven, creating steam that separates the fat layers, resulting in an irresistibly flaky texture.
Baking and Glazing Your Hand Pies to Perfection
The final steps involve baking your beautifully assembled hand pies and then adding that irresistible sweet glaze.
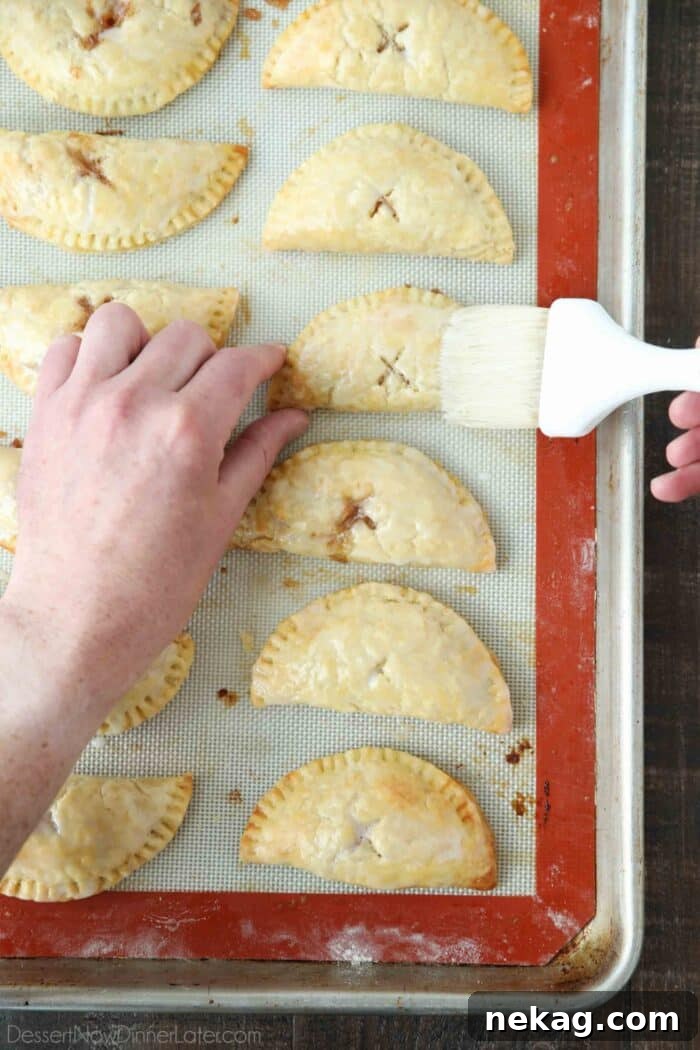
- Baking Instructions: Preheat your oven to 400 degrees Fahrenheit (200°C). Once hot, carefully place the baking sheet with your apple hand pies into the oven. Bake for approximately 20-25 minutes, or until the tops and bottoms of the pies are beautifully golden brown and the filling is visibly bubbling through the ventilation slits. Keep a close eye on them during the last few minutes to prevent over-browning.
- The Sweet Glaze: While your hand pies are baking, prepare the simple glaze. In a small bowl, whisk together the powdered sugar with milk (or water) until smooth and free of lumps. You’re looking for a consistency that is thick enough to coat a spoon but still pourable. As soon as you remove the hot apple hand pies from the oven, immediately brush the tops generously with the prepared glaze. The warmth of the pies will help the glaze melt slightly and adhere beautifully, creating a shiny, sweet finish. Allow the glazed hand pies to cool slightly on the baking sheet before transferring them to a wire rack to cool completely. This brief cooling period helps the glaze set and prevents the pies from becoming soggy.
The combination of the warm, spiced apple filling, the golden, flaky crust, and the sweet, slightly crisp glaze creates a truly magical dessert experience. These hand pies are best enjoyed warm, allowing their aromas and flavors to shine through.
Storing Your Delicious Apple Hand Pies
While apple hand pies are undeniably at their peak when eaten fresh from the oven, you can certainly store them to enjoy later. Proper storage ensures they retain as much of their deliciousness as possible.
For immediate enjoyment, apple hand pies are truly best eaten right away. However, if you have leftovers, they can be stored in an airtight container at room temperature for up to 1-2 days. If you need to extend their freshness, place them in the refrigerator, where they will keep well for up to 2-3 days. To bring refrigerated hand pies back to life, a quick reheat in the microwave for 10-20 seconds can work wonders, warming the filling and softening the crust slightly. Alternatively, a few minutes in a toaster oven can help restore some of their crispiness.
Freezing Apple Hand Pies for Future Indulgence
Yes, you can absolutely freeze hand pies, making them an excellent make-ahead dessert! This is a fantastic option if you want to bake a large batch for future treats or have leftovers you don’t want to go to waste. However, there’s a crucial tip when it comes to freezing glazed hand pies: fruit-filled hand pies freeze best without the glaze on top. The glaze tends to “sweat” and dissolve into a sticky mess upon thawing, affecting both texture and appearance. Therefore, if you anticipate freezing a portion of your batch, it’s best to only glaze the hand pies you plan to consume within a day or two and freeze the unglazed ones. Of course, this is a matter of preference, and some might not mind the slightly altered glaze after thawing.
To freeze your hand pies effectively, first allow them to cool completely if they have been baked. Then, wrap each individual pie tightly in plastic wrap. This protective layer helps prevent freezer burn and preserves their flavor. Once wrapped, place the individual pies inside a larger freezer-safe zip-top bag or an airtight container. They can be stored in the freezer for up to 6 months. When you’re ready to enjoy them, you have a couple of thawing options: you can thaw the hand pies in the refrigerator overnight, or simply let them sit at room temperature for a few hours. For a quick treat, unwrap a frozen hand pie and microwave it for about 1 minute until warmed through. If you froze them unglazed, you can whip up a fresh batch of glaze after thawing or warming for that perfect finishing touch.

More Irresistible Apple Dessert Recipes
If you’ve fallen in love with these apple hand pies, you’re likely an apple dessert enthusiast! Here are more fantastic apple-infused recipes to satisfy your sweet tooth and expand your baking repertoire:
- Irish Apple Cake
- Apple Fritter Monkey Bread
- Caramel Apple Cheesecake Bars
- Apple Sheet Cake with Brown Sugar Glaze
- Apple Crumble Bars
- How to cut apples for apple crisp (+ Recipe!)
- Classic Apple Fritters

Apple Hand Pies
Created by Amber Brady
Prep: 45 mins | Cook: 20 mins | Additional Time: 15 mins | Total: 1 hr 20 mins
These mini homemade apple hand pies are made with a super flaky pie crust, fresh apple pie filling, and topped with a sweet glaze.
Yields: 18 hand pies
Ingredients
Pie Crust:
- 3 cups (360 g) all-purpose flour
- 1 tsp salt
- 1 cup (189 g) all-vegetable shortening (butter flavored or regular)
- 1 large egg
- 1 Tbsp white distilled vinegar
- 5 Tbsp (+) ice cold water
Apple Pie Filling:
- 2 ½ cups (233 g) apples, peeled, cored, and diced (about 2-3 apples)
- 1 Tbsp lemon juice
- ¼ cup (50 g) light brown sugar, packed
- 2 Tbsp granulated sugar
- 1 tsp ground cinnamon
- ⅛ tsp ground nutmeg
- 1 Tbsp (14 g) unsalted butter
- 1 Tbsp corn starch
- ½-¾ cup (118-177 ml) cold water
Glaze:
- ¾ cup (90 g) powdered sugar
- 2 Tbsp milk (or water)
Additional Ingredients:
- 1 large egg (for egg wash)
- 1 Tbsp water (for egg wash)
Equipment
- Mini Rolling Pin
- 4.5-Inch Round Cutter
- Apple Peeler, Corer, Slicer
- Aluminum Half Sheet Tray (2 Pack)
- Silicone Baking Mat
Instructions
Pie Crust:
- Combine flour and salt in a large bowl. Stir well. Add shortening and cut it into small pea-sized pieces using a pastry blender or two forks.
- In a separate small bowl, whisk together the egg, vinegar, and 5 Tablespoons of ice cold water. Gradually add this liquid mixture to the flour and shortening mixture. Mix with your hands until the dough just comes together. If needed, add extra water one tablespoon at a time, being careful not to add too much, as this can make the crust tough.
- Divide the dough in half and gently shape each half into a flat disc. Wrap each disc tightly in plastic wrap and refrigerate or freeze for at least 15 minutes to chill thoroughly. This resting period is crucial for developing a tender, flaky crust.
Apple Pie Filling:
- Peel, core, and dice the apples into small, uniform pieces. In a large bowl, toss the diced apples with lemon juice, both brown and granulated sugars, ground cinnamon, and ground nutmeg until the apples are evenly coated.
- In a medium-sized skillet or saucepan, melt the butter over medium heat. Add the seasoned apples to the skillet. Cover and cook for 3 minutes, allowing the apples to soften slightly and release their juices.
- In a small bowl, combine the corn starch with the cold water, whisking slowly until smooth and no lumps remain. Add this corn starch slurry to the apples in the skillet. Continue cooking for an additional 5 minutes, stirring frequently, until the apples are fork-tender and the sauce has thickened to your desired consistency. (If the sauce becomes too thick, you can add a little more water, a tablespoon at a time.)
- Remove the apple pie filling from the heat and allow it to cool completely to at least room temperature before using. Using warm filling can melt the pie crust, making it difficult to work with.
Assembling Hand Pies:
- Preheat your oven to 400 degrees Fahrenheit (200°C).
- On a lightly floured surface, roll out one disc of chilled pie crust to about 1/8-inch thick. Use a 4.5-inch round cookie cutter to cut out circles from the dough. Gather any dough scraps, gently press them together, and set aside to re-roll for more hand pies.
- Place a heaping tablespoon of the cooled apple pie filling in the center of each dough circle. Prepare an egg wash by whisking 1 large egg with 1 tablespoon of water. Lightly brush the edges of each dough circle with the egg wash. This acts as a sealant. Remember: a small amount is sufficient; too much can make the edges slippery.
- Fold one half of the pie crust over the filling to meet the other edge, creating a half-moon shape. Press the edges together firmly to seal. Use a fork to crimp the edges, which further seals the pie and adds a decorative touch. With a small knife, cut a few slits (an “x” is common) into the top of each hand pie to allow steam to escape during baking.
- Repeat this process with the remaining pie crust and apple filling. Arrange the assembled hand pies about an inch apart on a baking sheet lined with parchment paper or a silicone baking mat. Brush the top of each hand pie with the remaining egg wash for a golden finish. (Optional, but highly recommended: Chill the assembled pies in the fridge or freezer for 10-15 minutes before baking. This helps the crust retain its shape and flakiness.)
- Bake the apple hand pies in the preheated oven for 20-25 minutes, or until the crust is golden brown on both the top and bottom. The filling may bubble and leak slightly through the slits, which is normal.
- Prepare the glaze: While the pies are baking, mix the powdered sugar and milk (or water) together in a small bowl until smooth. Immediately after removing the hot apple hand pies from the oven, brush the tops generously with the prepared glaze while they are still warm. Allow them to cool slightly on the baking sheet for the glaze to set before enjoying.
Notes
- Apple hand pies are best enjoyed fresh. Store any leftovers in an airtight container at room temperature for up to 2 days, or in the refrigerator for up to 3 days. Reheat briefly in the microwave for 10-20 seconds if desired.
- For freezing, unglazed hand pies are recommended as the glaze can become watery upon thawing.
Nutrition
Serving: 1 hand pie | Calories: 237kcal | Carbohydrates: 27g | Protein: 3g | Fat: 13g | Saturated Fat: 5g | Polyunsaturated Fat: 7g | Cholesterol: 29mg | Sodium: 141mg | Fiber: 1g | Sugar: 10g
Disclaimer: Nutritional values were calculated using a third-party tool and are provided as an estimation only.
Sharing this recipe with a link is both encouraged and appreciated. Copying/pasting and/or screenshots of full recipes to any social media is strictly prohibited. Content and photographs are copyright protected.
Did you make this?
Don’t forget to leave a rating below and make sure to follow on Pinterest and Instagram for more!