
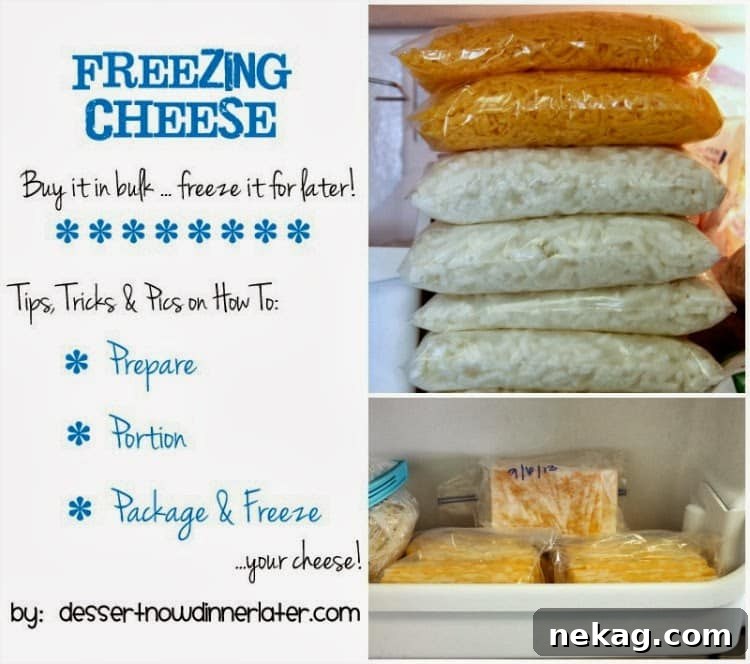
Smart Savings: Your Ultimate Guide to Freezing Cheese in Bulk
In today’s economic climate, every smart shopper seeks innovative ways to stretch their grocery budget. For many households, cheese is a beloved staple, but its rising cost can quickly inflate weekly expenses. What if you could enjoy your favorite cheeses without the premium price tag, simply by leveraging the power of bulk buying and clever freezer storage? This comprehensive guide will reveal the secrets to saving significantly on cheese, ensuring you always have a supply of delicious dairy on hand, perfectly preserved for future use.
The strategy is simple yet profoundly effective: purchase cheese in bulk when prices are low or sales are abundant, then prepare and freeze it for long-term storage. Imagine finding a generous two-pound block of your favorite cheddar for just $5 – that’s a prime opportunity to stock up! But simply tossing a whole block into the freezer won’t yield the best results. The key to successful cheese freezing lies in proper preparation, which we’ll meticulously detail in this article.
Freezing cheese incorrectly can lead to a crumbly, unappetizing mess once thawed, diminishing both flavor and texture. This happens because the inherent structure of cheese undergoes changes when ice crystals form within it. To avoid this common pitfall, it’s crucial to get your cheese into its desired usable form – whether shredded or sliced – before it ever sees the inside of your freezer. This proactive approach ensures that when you’re ready to use it, your cheese thaws beautifully, ready for grating over pasta, melting into a quesadilla, or layering onto a sandwich.
Through years of personal experience, I’ve successfully frozen various popular cheese types, including mozzarella, sharp cheddar, versatile Colby Jack, and robust Parmesan. My methods have consistently yielded excellent results, maintaining the cheese’s integrity and flavor. This confidence extends to most semi-hard and hard cheeses, making this technique a reliable money-saver for nearly any cheese enthusiast. Let’s dive into the specifics of how to prepare and freeze your cheese, optimizing both its shelf life and your savings.
The Undeniable Benefits of Freezing Cheese
Beyond the immediate cost savings, freezing cheese offers a plethora of advantages for the savvy home cook:
- Significant Cost Reduction: Buying cheese in larger quantities, especially during sales or from warehouse clubs, almost always results in a lower price per pound compared to smaller packages. Freezing allows you to capitalize on these deals without worrying about spoilage.
- Reduced Food Waste: Cheese, even when refrigerated, has a limited shelf life. By freezing portions you won’t use immediately, you effectively extend its usability, preventing precious food and money from going to waste.
- Convenience and Time-Saving: Having pre-portioned, frozen cheese means less last-minute grating or slicing. Whether you need a cup of shredded cheese for a casserole or a few slices for a sandwich, it’s ready to go, saving valuable time during meal preparation.
- Meal Planning Efficiency: A well-stocked freezer is a cornerstone of efficient meal planning. Knowing you have a ready supply of cheese simplifies your grocery list and empowers you to whip up your favorite cheesy dishes at a moment’s notice.
- Variety at Your Fingertips: Freezing allows you to keep a wider variety of cheeses on hand without concern for quick consumption, enabling more diverse culinary adventures.
Understanding the Science: Why Pre-Preparation Matters
Before delving into the how-to, it’s beneficial to understand why freezing a whole block of cheese doesn’t work as well as preparing it beforehand. Cheese is an emulsion, containing fats, proteins, and water. When cheese freezes, the water content forms ice crystals. These crystals disrupt the delicate protein structure of the cheese, especially if the block is large and dense. Upon thawing, the water separates from the fats and proteins, resulting in a drier, crumbly, and often oilier texture. This is particularly noticeable if you try to shred or slice a thawed block, which will inevitably fall apart.
By shredding or slicing the cheese *before* freezing, you mitigate this textural damage. The smaller pieces freeze and thaw more uniformly, minimizing the impact of ice crystal formation on the overall structure. Additionally, surfaces created during shredding or slicing allow for better air removal during packaging, which is crucial for preventing freezer burn and preserving quality.
Essential Tools for Your Cheese Freezing Project
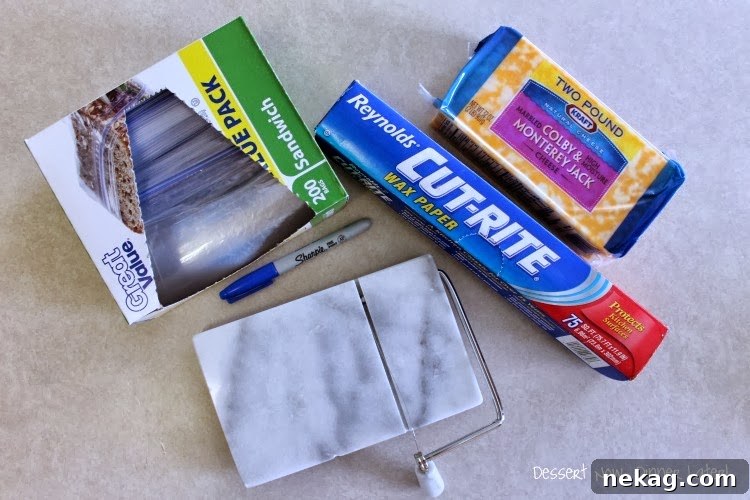
To embark on your cheese-freezing journey, gather a few basic supplies:
- Freezer Bags or Vacuum Sealer Bags: High-quality bags are essential for protecting your cheese from freezer burn.
- Permanent Marker and Labels: Crucial for dating and identifying your cheese.
- Food Scale (Optional but Recommended): For precise portioning.
- Cheese Grater or Food Processor: If you’re shredding block cheese.
- Cheese Slicer: For uniform slices (a marble cheese slicer is highly recommended).
- Wax Paper or Parchment Paper (Optional): For separating sliced cheese.
Mastering the Art of Freezing Shredded Cheese
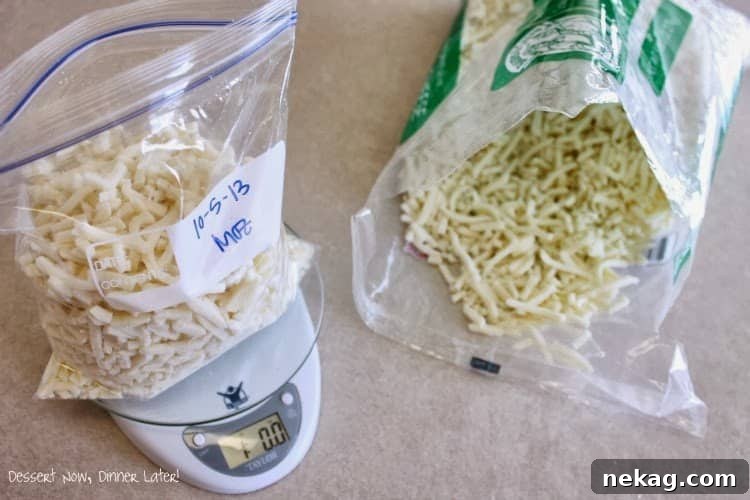
Shredded cheese is a versatile kitchen hero, perfect for pizzas, tacos, casseroles, and more. Freezing it correctly ensures you always have a ready supply. Here’s how to do it, whether you buy pre-shredded or shred your own block cheese:
Freezing Pre-Shredded Cheese
One of the easiest ways to stock up is by purchasing large bags of pre-shredded cheese, often available at warehouse clubs like Sam’s Club or Costco. These larger bags, such as a 5-pound bag for around $13, represent significant savings compared to smaller supermarket packages. A common benefit of pre-shredded cheese is that manufacturers often apply a light coating of cellulose or starch to prevent the shreds from sticking together. This is a huge advantage when it comes to freezing, as it naturally helps prevent clumping.
Once you bring your bulk bag home, the process is straightforward:
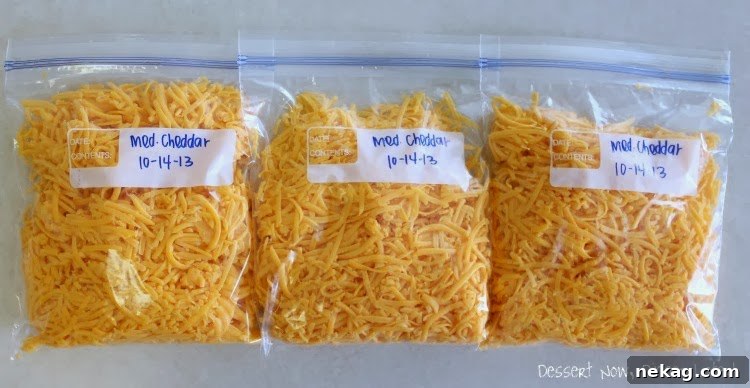
- Label Your Bags: Before you begin filling, grab a stack of quart-sized freezer bags (or even sturdy regular sandwich bags, if you plan to rotate your stock quickly). Use a permanent marker to clearly write the current date and the type of cheese on each bag. This simple step is vital for proper inventory management and ensures you use older cheese first.
- Portioning: Divide the large bag of cheese into smaller, more manageable portions. A good rule of thumb is to aim for 1-pound portions, as this is a common amount used in many recipes. While a food scale offers precision, you can easily eyeball it to achieve approximate amounts.
- Remove Air: This is a critical step for preventing freezer burn. Once you’ve added your desired portion of cheese, flatten the bag as much as possible, pressing out all excess air before sealing it shut. The less air in the bag, the better your cheese will be protected from ice crystals and flavor degradation. A quick trick is to leave a small opening, gently squeeze out the air, then quickly seal it.
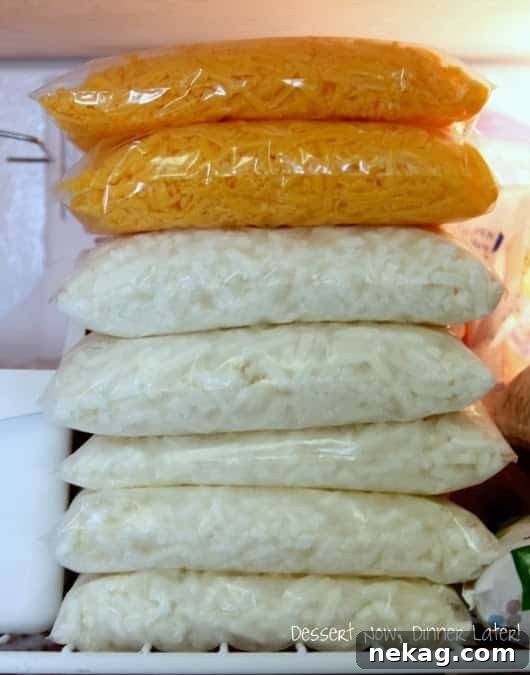
- Freeze Flat: Arrange the filled bags flat on a baking sheet or directly onto a freezer shelf. Freezing them flat allows them to take up less space once frozen solid and also prevents them from clumping into an awkward shape. Once frozen, you can stack them vertically or horizontally to maximize freezer space.
Freezing Block Cheese You Shred Yourself
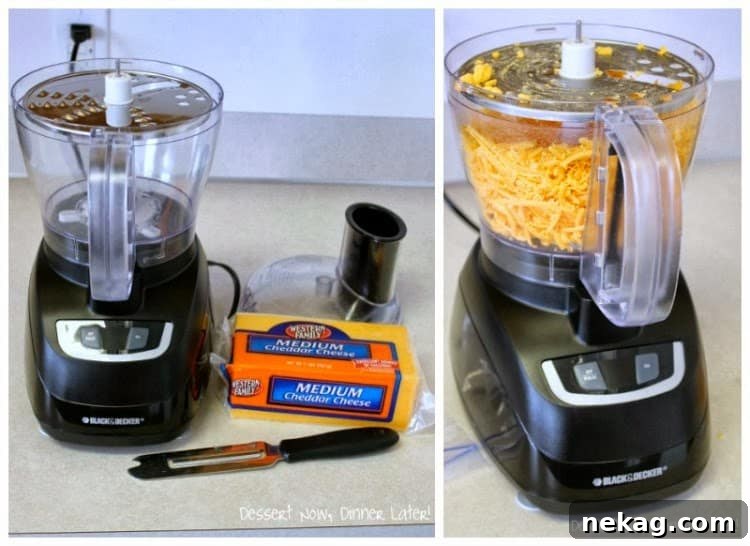
Buying block cheese on sale – perhaps a 2-pound block for $5 or less – is arguably the most economical option. While it requires a bit more effort upfront, the savings and control over quality are well worth it. Here’s how to prepare and freeze your own shredded cheese:
- Prepare the Block: Start by cutting the large block of cheese into smaller, more manageable pieces. This makes it easier to handle and prevents overcrowding your shredding tool.
- Shredding Techniques:
- Food Processor: For speed and efficiency, a food processor fitted with a grating disc is your best friend. Work in batches to avoid packing the cheese too tightly, which can cause it to stick together. Pulse the cheese rather than continuously running the machine to prevent it from warming up too much.
- Hand Grater: If you don’t own a food processor, a standard box grater works perfectly well. Again, shred in batches to prevent the cheese from clumping due to friction and heat from your hands.
A crucial tip here: do not shred all the cheese at once and then try to separate it. As it heats slightly from the shredding process, it can compact and stick. Shred directly into your portioning bags or a large bowl from which you immediately portion.
- Portioning and Packaging: A 2-pound block of cheese typically yields enough shredded cheese to fill about three quart-sized bags, each containing roughly 10-11 ounces. This helps keep the cheese from getting overly packed and stuck together. Follow the same steps as with pre-shredded cheese: label the bags with the date and cheese type, portion the shredded cheese, and meticulously squeeze out as much air as possible before sealing.
- Final Freezing: Once packaged, lay the bags flat on top of each other in your freezer. Freezing them flat allows for faster freezing and easier storage, creating neat, stackable packages that optimize space.
The Art of Freezing Sliced Cheese for Sandwiches and More
For those who love cheese slices for sandwiches, burgers, or even homemade cheese and crackers, freezing sliced cheese is an absolute game-changer. It ensures you always have perfectly portioned slices ready to go. The key here is achieving uniform slices and preventing them from sticking together in the freezer.
Achieving Perfect Slices
When it comes to slicing cheese for freezing, precision makes all the difference. Uniform thickness not only looks better but also ensures even thawing. I cannot emphasize enough how much I adore my marble cheese slicer for this task. It cuts incredibly smooth and straight, allowing me to achieve far more consistent and thinner slices than any traditional knife or handheld slicer I’ve ever used. This not only maximizes the number of slices you get from a block but also contributes to better texture upon thawing.
Preventing Stickage: Two Effective Methods
The biggest challenge with freezing sliced cheese is preventing the slices from fusing into an impenetrable block. Here are two reliable methods:
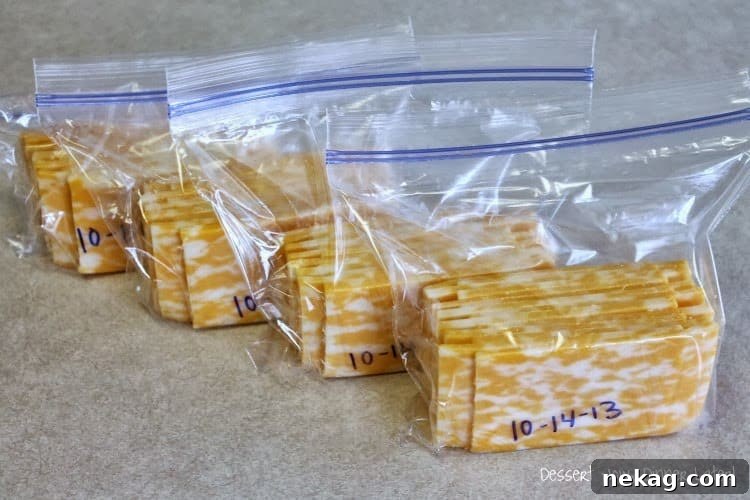
- The Staggering Method (My Preferred Choice): This technique is both simple and cost-effective. After slicing your cheese, create a stack but slightly offset each slice from the one below it. This slight staggering creates small gaps and minimizes direct surface contact, making it much easier to peel individual slices apart once frozen. Colby Jack cheese tends to separate the easiest with this method, but harder cheeses like cheddar also do quite well. When you need a slice, you might require the gentle assistance of a butter knife to pry it away from the stack, but it should generally remain intact and separate cleanly.
- Wax Paper/Parchment Paper Interleaving: For an absolutely foolproof separation, you can cut small squares of wax paper or parchment paper and place one between each slice of cheese as you stack them. While this method guarantees easy separation, it does involve a bit more upfront work and requires purchasing additional supplies. For me, the staggering method proves sufficient and saves on both time and material costs.
Packaging Sliced Cheese
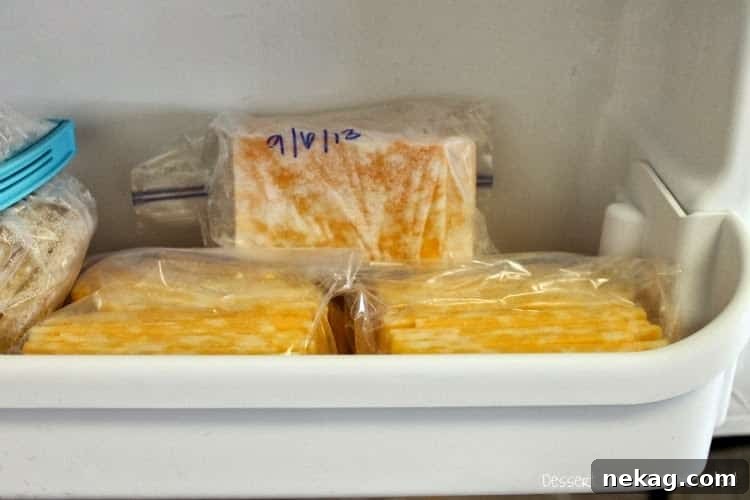
Once your cheese is sliced and prepared to prevent sticking, it’s time for packaging. I typically use plain old sandwich-sized freezer bags for sliced cheese. As with shredded cheese, remember to label your bags clearly with the date and type of cheese before filling them. Place the stack of sliced cheese into the bag, pressing out as much air as possible before sealing. I often find that storing these flatter bags of cheese slices vertically in the side door of the freezer works wonderfully, keeping them organized and easily accessible.
Thawing and Usage Best Practices
Proper thawing is just as important as proper freezing to ensure your cheese maintains its quality and remains safe to eat. Whenever you retrieve any of your frozen cheeses from the freezer, always allow ample time for it to thaw slowly in the refrigerator. This gradual thawing process helps minimize further textural changes and is essential for good food safety practices. Avoid thawing cheese at room temperature, as this can encourage bacterial growth.
- Refrigerator Thawing: Transfer the frozen bag of cheese to the refrigerator and let it thaw overnight, or for at least 6-8 hours. Larger portions may take longer.
- Optimal Uses for Thawed Cheese: While perfectly safe, thawed cheese, especially shredded varieties, may have a slightly different texture than fresh cheese. It can be a bit drier or more crumbly. For this reason, thawed shredded cheese is best utilized in cooked dishes where its texture won’t be as prominent. Think:
- Casseroles and baked pasta dishes
- Pizzas and flatbreads
- Soups and sauces
- Melted over nachos or tacos
- Mixed into scrambled eggs or omelets
Thawed sliced cheese, particularly if you used the wax paper method, often holds up well for sandwiches and cold applications, though some people might notice a subtle difference in firmness. Experiment to see what works best for your preferences.
Maximizing Shelf Life and Battling Freezer Burn
The enemy of all frozen foods is freezer burn, which occurs when food is exposed to air and dehydrates, leading to dry, discolored spots and off-flavors. The good news is that with proper technique, you can largely prevent it for your frozen cheese.
- Aggressive Air Removal: This is the single most important step. Whether using freezer bags or a vacuum sealer, remove as much air as humanly possible. For freezer bags, you can try the “straw method” (suck the air out with a straw before sealing the last inch) or the “water displacement method” (submerge the bag in water, leaving a small opening at the top, allowing the water pressure to push out the air before sealing).
- Choose the Right Bag: While regular sandwich bags can work for short-term storage and quick rotation, dedicated freezer bags are thicker and more robust, offering superior protection against freezer burn. For the absolute best protection, consider investing in a vacuum sealer, which removes nearly all air and dramatically extends shelf life.
- Don’t Overload Your Freezer: Ensure there’s enough space around items for cold air to circulate efficiently. Overloading can lead to warmer spots and less effective freezing.
- Rotate Your Stock (FIFO): Practice the “First In, First Out” (FIFO) principle. Always use the oldest frozen cheese first to ensure you’re consuming it within its optimal quality window.
Generally, my cheese slices last beautifully for about 2-3 months without any noticeable freezer burn. Shredded cheese tends to fare even better, often maintaining excellent quality for up to 4 months. While using specialized freezer bags or a vacuum sealer can push these timelines further, we typically use up our frozen cheese long before any significant effects of freezer burn become an issue. The key is consistent air removal and smart inventory management.
Which Cheeses Freeze Best?
As mentioned, most semi-hard to hard cheeses freeze exceptionally well. These include:
- Cheddar (mild, medium, sharp)
- Mozzarella (low-moisture, part-skim – ideal for pizza)
- Colby Jack
- Monterey Jack
- Swiss
- Provolone
- Gouda (especially aged varieties)
- Parmesan (grated or in blocks to be grated later)
Softer, high-moisture cheeses, such as ricotta, cream cheese, cottage cheese, goat cheese, and fresh mozzarella (like bocconcini), typically do not freeze well. Their high water content means they become watery, grainy, and lose their desirable creamy texture upon thawing. It’s generally best to consume these fresh.
Final Thoughts: Happy Freezing, Happy Savings!
Freezing cheese is a simple, effective, and incredibly rewarding habit that will save you money, reduce food waste, and add immense convenience to your culinary routine. Remember these core principles: prepare your cheese into its desired form (shredded or sliced) before freezing, portion it out wisely, and package it meticulously, removing as much air as possible.
Embrace the power of your freezer as a tool for smart budgeting and efficient meal preparation. With these tips, you’ll never again hesitate to snatch up that incredible cheese deal, knowing you have the knowledge and skills to preserve its deliciousness for months to come. Happy freezing, and enjoy the delicious savings!