
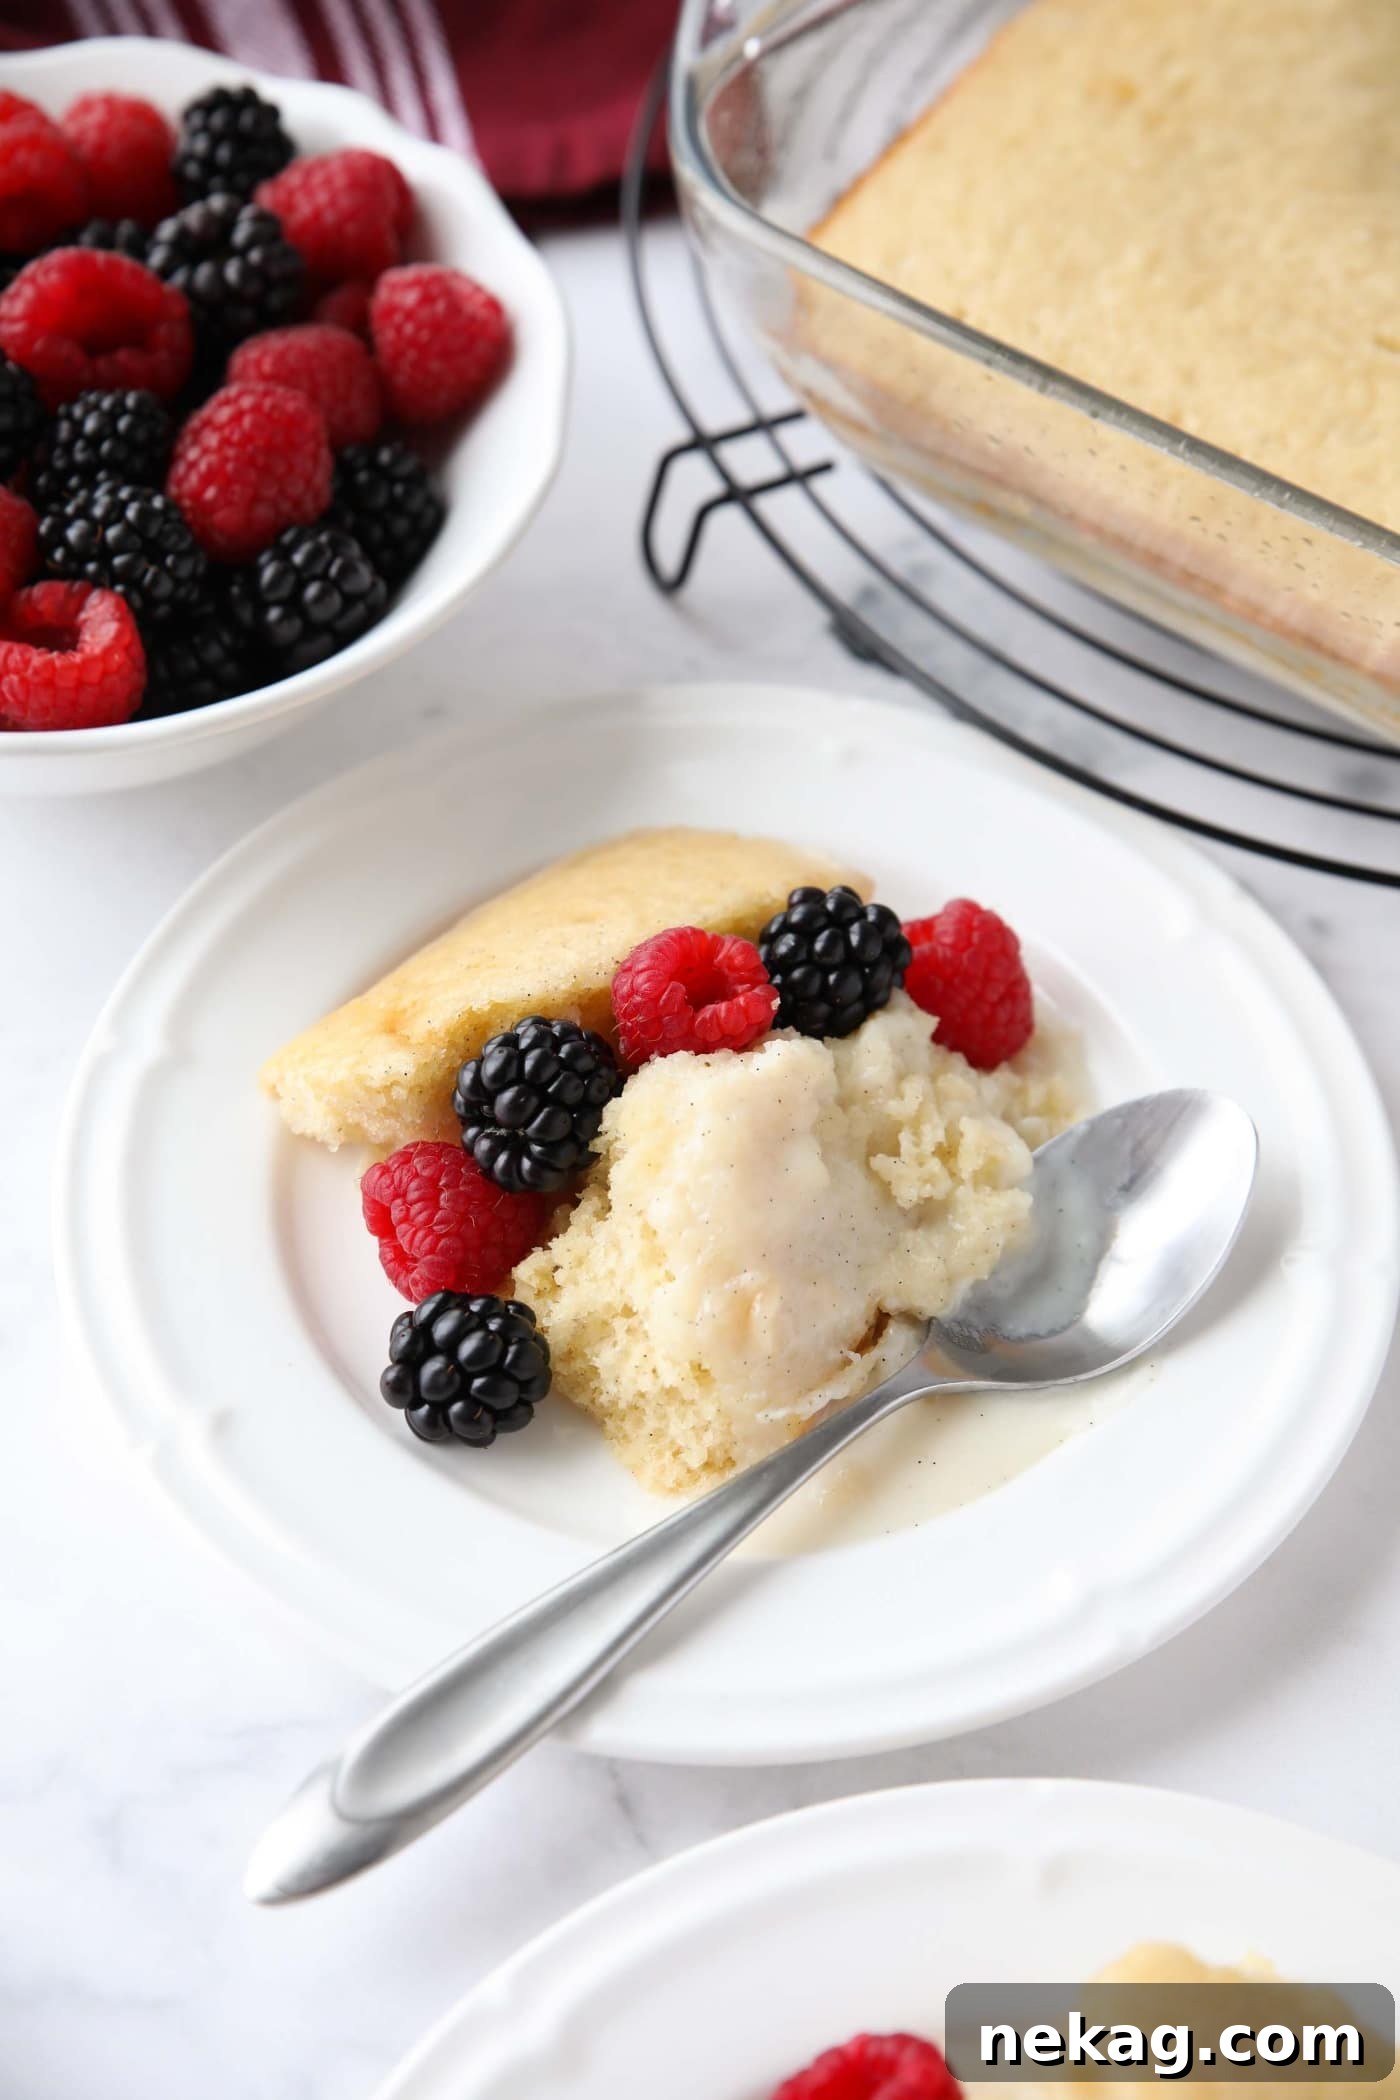
Welcome to the magical world of homemade desserts! This incredibly easy vanilla pudding cake bakes itself into two distinct layers, offering a delightful surprise with every spoonful. Imagine a luscious, creamy vanilla pudding forming the base, perfectly crowned by a soft, fluffy vanilla cake. Crafted entirely from scratch using simple pantry staples, this dessert is not only a breeze to prepare but also promises pure comfort, especially when served warm.
Craving more warm, comforting desserts? Indulge in my hot fudge pudding cake, a rich and gooey treat, or try the classic skillet brownie for an irresistible chocolate fix. For breakfast-inspired sweetness, whip up a cinnamon roll cake. If you prefer something more elegant, my chocolate lava cake recipe is a showstopper, and for a refreshing twist, don’t miss these delicate lemon pudding cakes.
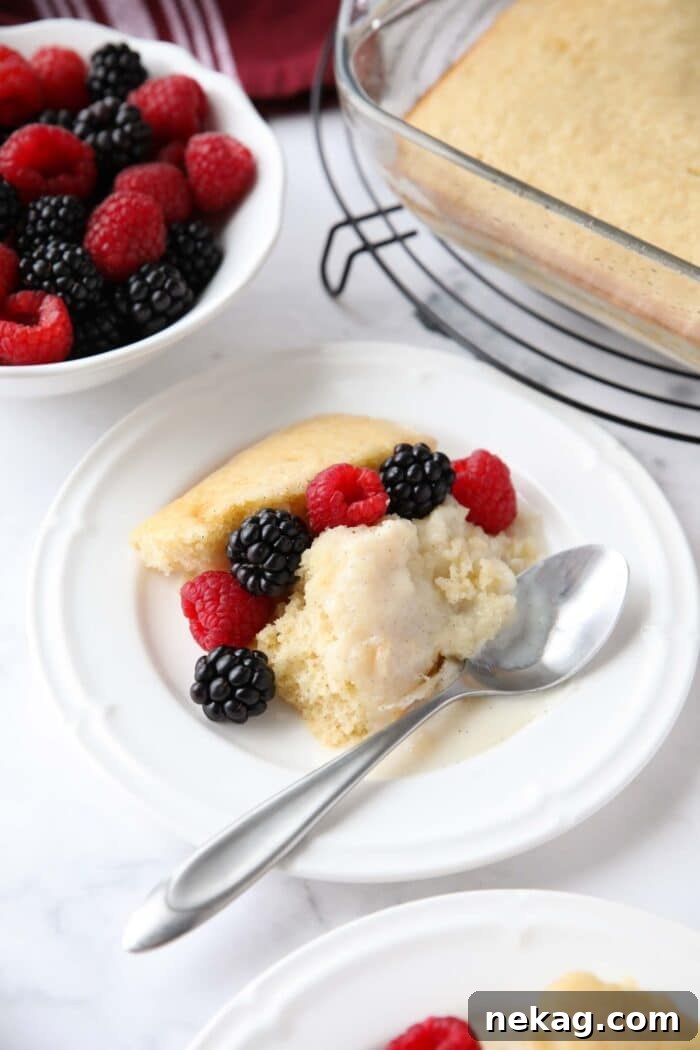
The Irresistible Allure of Homemade Vanilla Pudding Cake
Forget about relying on boxed cake mixes or instant pudding packets. This vanilla pudding cake from scratch is proof that making delicious, wholesome desserts doesn’t have to be complicated. Despite being entirely homemade, this recipe is remarkably simple and just as convenient as any store-bought mix. In fact, it’s so straightforward that you’ll likely find yourself making it on repeat. Chances are, you already have all the necessary ingredients in your kitchen right now, making it the perfect go-to dessert for any last-minute gathering or spontaneous sweet craving. We’ve certainly made it countless times, and its appeal never wanes.
The Magical Science Behind This Two-Layer Dessert
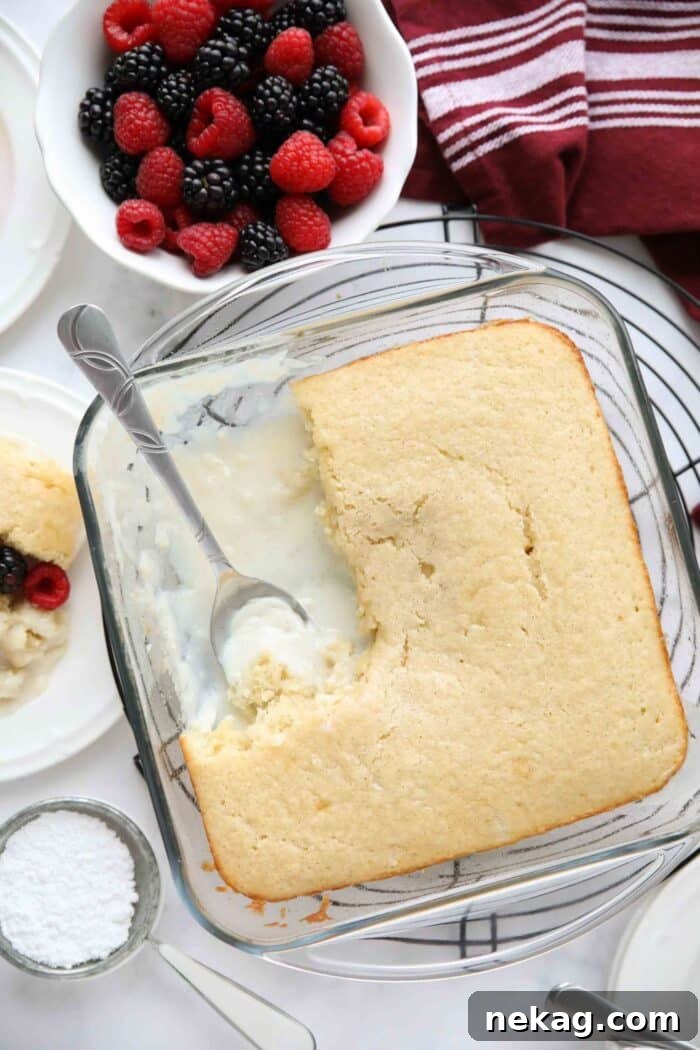
The true genius of this homemade vanilla pudding cake lies in its unique layering process. It begins with a silky, homemade vanilla pudding sauce poured into the baking dish, followed by a simple vanilla cake batter gently spread on top. You might initially doubt its success, much like when preparing a fruit cobbler where the batter seems to meld with the fruit. However, a delightful transformation occurs during baking:
- The light and tender vanilla cake gracefully rises and sets on top, forming a beautiful golden crust.
- Simultaneously, the rich and silky vanilla pudding settles at the bottom, becoming luxuriously creamy.
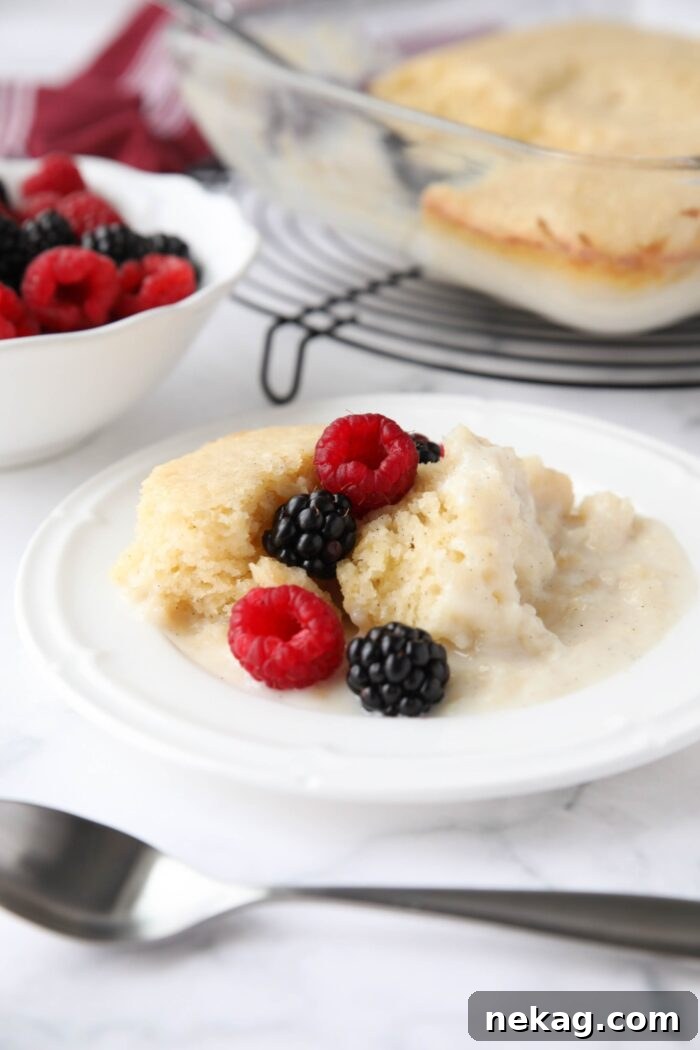
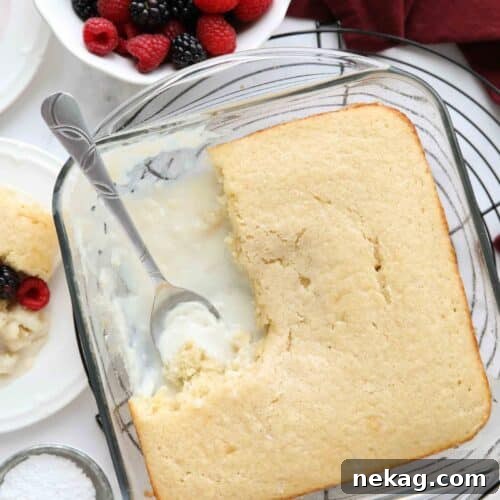
- The result is a single pan holding two perfectly distinct textures – a fluffy cake and a decadent pudding – that complement each other harmoniously.
Serving this dessert warm unlocks its full potential, revealing why it has been a beloved classic for generations. This easy vanilla pudding cake embodies pure comfort baking, offering a heartwarming experience without any complex techniques or specialty ingredients. It’s an old-fashioned treat that feels profoundly special every time. This isn’t a cake you meticulously slice; it’s a dessert you joyously spoon, savoring each delightful bite. For an elevated experience, pair it with some fresh, tart berries to perfectly balance the sweet vanilla notes.
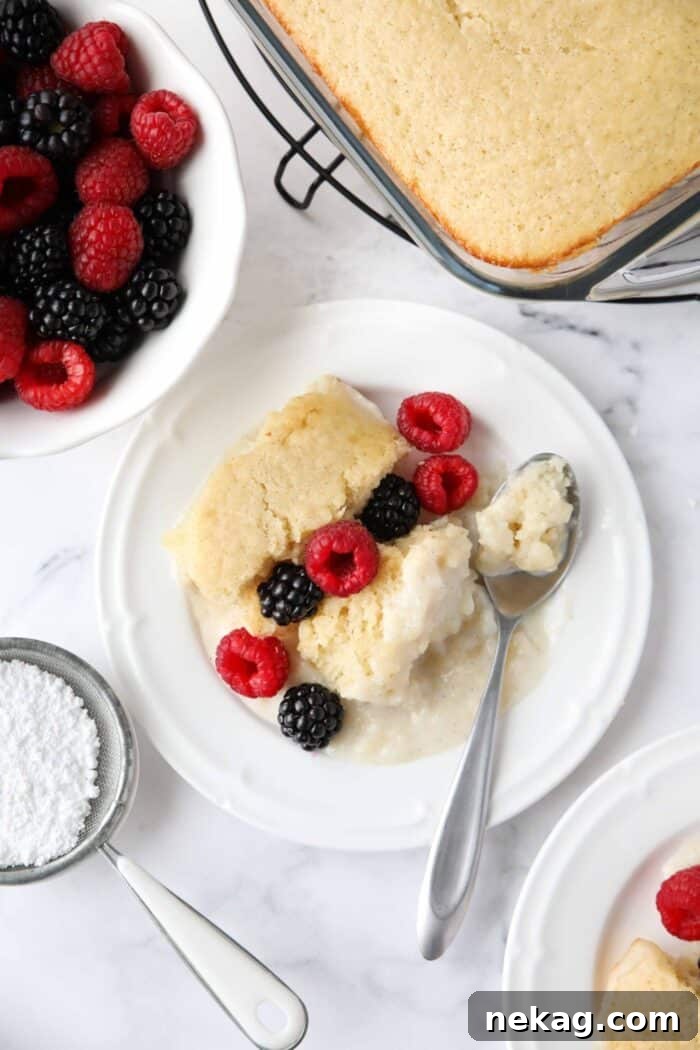
Essential Ingredients for Your Vanilla Pudding Cake
Crafting this delicious vanilla pudding cake from scratch requires a handful of basic ingredients that are likely already staples in your pantry. Using high-quality components ensures the best flavor and texture for your dessert.
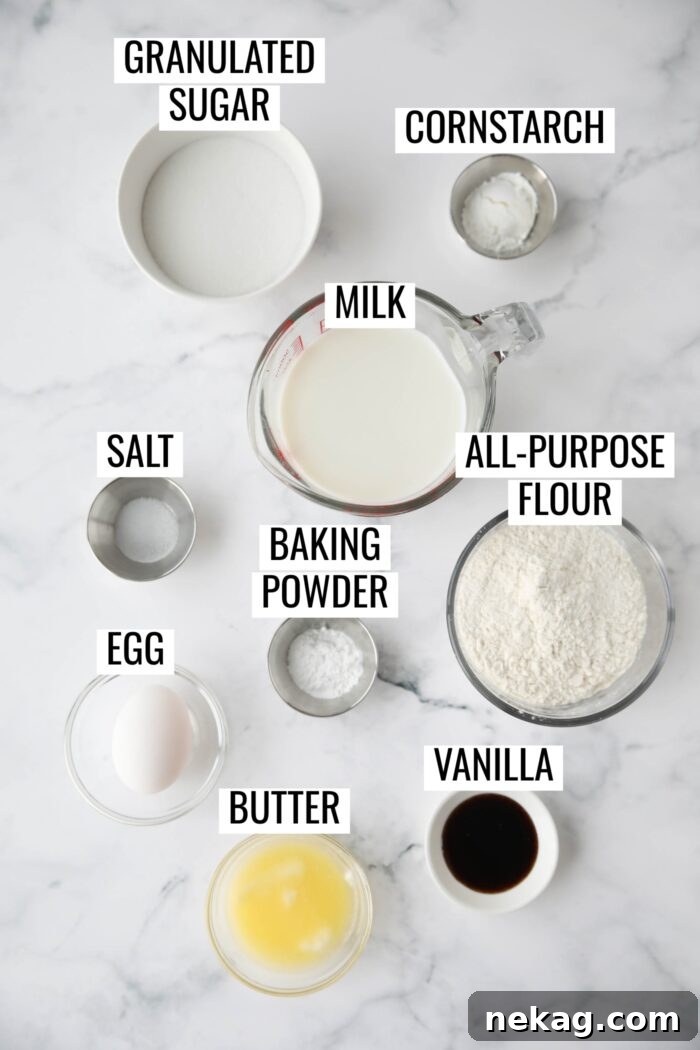
Pantry Staples You’ll Need:
- Granulated Sugar: Essential for sweetening both the smooth pudding layer and the tender cake itself. It provides the foundational sweetness.
- Cornstarch: The key thickening agent for the pudding. It ensures a velvety smooth consistency that holds its shape beneath the cake.
- Milk: For the creamiest pudding and a moist cake, whole milk is highly recommended. Its fat content contributes significantly to the richness and texture.
- Vanilla: When making a vanilla-centric dessert, the quality of your vanilla truly shines. Vanilla bean paste is preferred for its intense flavor and beautiful speckled appearance, elevating the vanilla essence. However, good quality vanilla extract can be used interchangeably with excellent results.
- All-Purpose Flour: The structural backbone of your cake. Accurate measurement is crucial for baking success. Remember to stir the flour, then spoon it into your measuring cup and level it off, or for ultimate precision, use a kitchen scale.
- Baking Powder: This leavening agent is responsible for the cake’s light, airy, and fluffy texture, giving it a delightful rise.
- Salt: A small amount of salt is vital for balancing and enhancing all the sweet flavors in both the pudding and the cake, preventing it from tasting flat.
- Egg: Acts as a binder, providing structure and richness to the cake batter. Ensure it’s at room temperature for optimal emulsification.
- Unsalted Butter: Melted and slightly cooled butter is incorporated into the cake batter. Using unsalted butter allows you to control the overall salt content of the recipe. Cooling it slightly before adding prevents it from cooking the egg prematurely.
Simple Steps to Create Your Vanilla Pudding Cake
Making this incredible vanilla pudding cake is a straightforward process, broken down into three easy stages: preparing the pudding, mixing the cake batter, and finally, baking it to golden perfection.
- Preheat your oven to 350 degrees Fahrenheit (175°C). Lightly grease an 8×8-inch or a 2.5 to 3-quart baking pan with cooking spray. Set it aside, ready for action.
Step 1: Craft the Creamy Vanilla Pudding Sauce
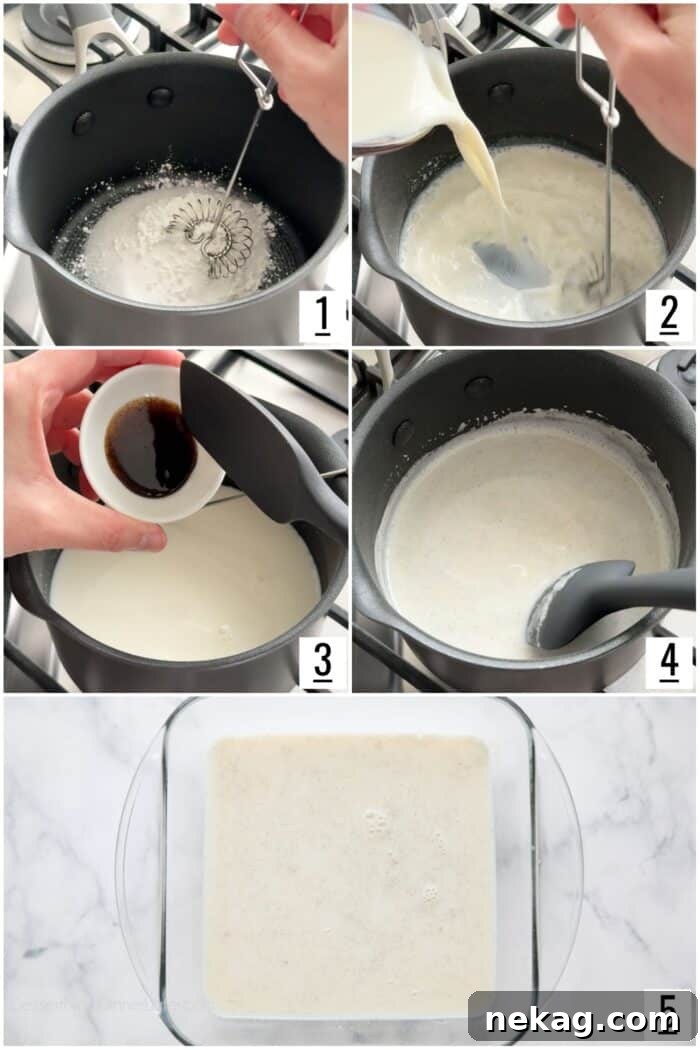
- In a medium saucepan, combine the granulated sugar, cornstarch, and salt. Whisk these dry ingredients together thoroughly to ensure no lumps remain.
- Gradually pour in the milk, whisking continuously until the mixture is smooth and fully combined.
- Stir in the vanilla bean paste or vanilla extract until well integrated.
- Place the saucepan over medium heat, stirring frequently. Continue to cook for approximately 3-5 minutes, until the mixture begins to simmer gently and thickens slightly. It won’t be as thick as finished pudding yet, just a light custardy consistency.
- Carefully pour this warm pudding sauce into your prepared baking pan, spreading it evenly across the bottom. Set the pan aside as you prepare the cake batter.
Step 2: Prepare the Fluffy Vanilla Cake Batter
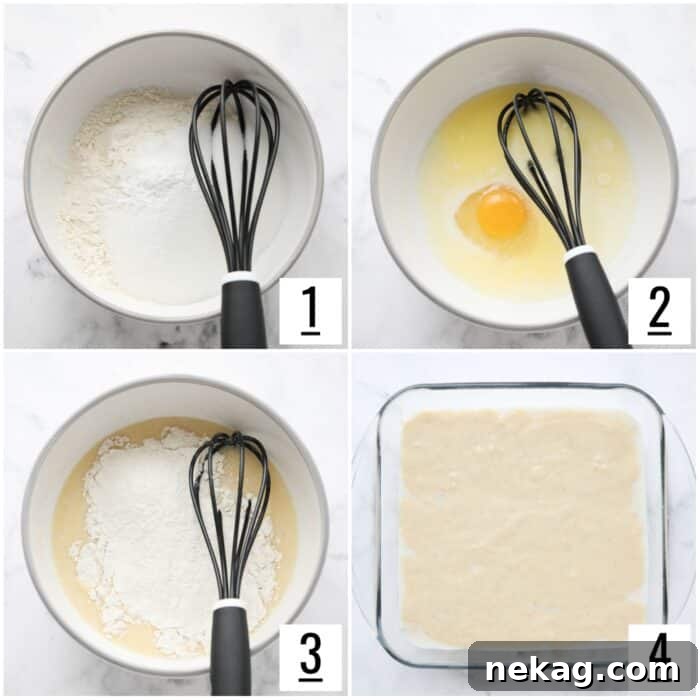
- In a large mixing bowl, whisk together the all-purpose flour, granulated sugar, baking powder, and salt. Make sure these dry ingredients are well combined.
- In a separate bowl, whisk together the milk, egg, slightly cooled melted butter, and vanilla. This creates your wet ingredient mixture.
- Pour the wet ingredients into the bowl with the dry ingredients. Stir gently until just combined. A few small lumps are perfectly fine; avoid over-mixing, as this can lead to a tough cake.
- Carefully and slowly pour the cake batter over the pudding sauce in the baking pan, distributing it as evenly as possible. Don’t worry if some of the cake batter sinks into the pudding; this is part of the magic! Just aim for an even spread.
Step 3: Bake Your Vanilla Pudding Cake to Perfection
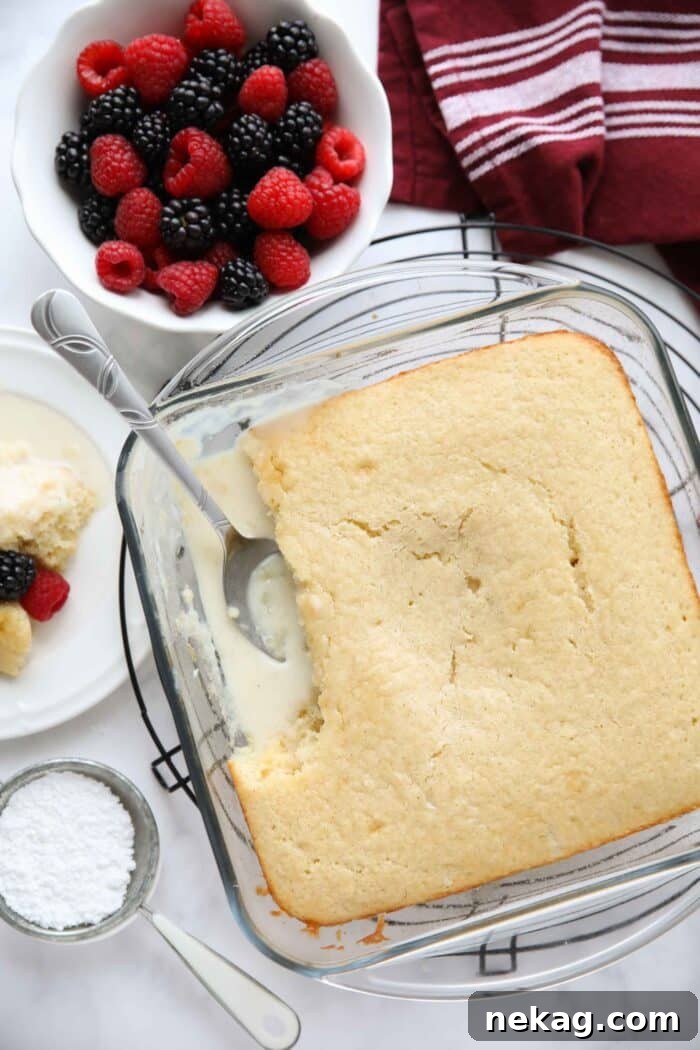
- Place the baking pan in the preheated oven and bake for approximately 30 minutes. The cake is done when its top is golden brown and a toothpick inserted into the center of the cake comes out clean. You’ll also notice the pudding sauce bubbling around the edges of the pan.
- Once baked, remove the pan from the oven and allow it to cool on a wire rack for about 15 minutes before serving. This brief cooling period is crucial for the pudding sauce to set and thicken slightly, achieving its optimal creamy consistency.
We’d Love Your Feedback!
Did you try this incredible vanilla pudding cake recipe? Your feedback is incredibly valuable! Please take a moment to leave a review and rating, letting us know how much you enjoyed this comforting dessert. Your support helps our small business continue to provide free, delicious recipes for everyone to enjoy.
Serving Suggestions and Storage Tips
Maximizing the enjoyment and longevity of your homemade vanilla pudding cake is simple with these helpful tips.
- Serving: This dessert is truly at its best when served warm. The warmth enhances the creamy texture of the pudding and the tender crumb of the cake. A generous handful of fresh berries (raspberries, blueberries, or blackberries) adds a delightful tart contrast to the sweet vanilla. Consider a dollop of whipped cream or a scoop of vanilla ice cream for an extra indulgent treat.
- Storage: Any leftover vanilla pudding cake should be covered tightly with plastic wrap or aluminum foil and refrigerated. It will keep well for up to 3-4 days.
- Texture Changes: When chilled, the pudding layer will naturally thicken significantly, creating a more solid, custardy texture that is equally delicious. Over time, the cake layer may absorb some of the pudding’s moisture, becoming even more tender.
- Reheating: To enjoy warm leftovers, gently reheat individual portions in the microwave until heated through, being careful not to overcook, which can dry out the cake.
Expert Recipe Notes and Tips for Success
Achieving the perfect vanilla pudding cake is easy when you keep a few key tips in mind. These insights will help you bake like a pro and ensure your dessert turns out wonderfully every time.
- Embrace Vanilla Bean Paste: For the most profound and authentic vanilla flavor, vanilla bean paste is your secret weapon. It offers a richer, more complex vanilla profile and delightful little specks of vanilla bean that enhance the visual appeal. While vanilla extract works perfectly fine and is completely interchangeable, the paste truly elevates this vanilla-forward dessert.
- Prep Ahead for Smooth Sailing: “Mise en place” is a baker’s best friend! Having all your ingredients measured and ready before you start will make the process incredibly smooth and stress-free. If you have an extra set of hands, one person can tackle the pudding while the other prepares the cake batter. This is beneficial because if the pudding is still warm when the cake batter is added, the cake tends to bake slightly faster and more evenly. If the pudding has cooled significantly, the cake might take a little longer to bake and could potentially sink a bit in the middle.
- The Importance of Room Temperature Ingredients: For the cake batter, ensuring your milk and egg are at room temperature is crucial. Cold ingredients can cause melted butter to seize (curdle or clump) when combined, leading to an uneven batter and a less-than-perfect cake texture. Room temperature ingredients emulsify more effectively, resulting in a smoother batter and a consistently tender cake.
- Choose the Right Pan: To prevent any bubbling over accidents during baking, make sure your baking pan has sides at least 2.25 inches high. An 8×8-inch pan is ideal. If you’re concerned about spills, especially if your pan is on the shallower side, place it on a rimmed baking sheet before putting it into the oven. Keep in mind that baking on a rimmed sheet might slightly affect the bake time, as the additional pan can influence heat conduction.
More Desserts You’ll Love
Hot Fudge Pudding Cake
Lemon Pudding Cakes
Chocolate Lava Cake Recipe + Video
Cinnamon Roll Cake + Video
Vanilla Pudding Cake from Scratch
Created by Amber Brady
Cook: 30 mins
Total: 50 mins
A warm, delightful vanilla pudding cake that magically bakes with a soft, fluffy cake on top and a creamy pudding beneath. Made effortlessly with everyday pantry staples and best enjoyed warm.
Pin Recipe
Rate This Recipe
Save Recipe
Yields: 8 servings
Ingredients
Pudding Sauce:
- ⅓ cup (68 g) granulated sugar
- 1 Tbsp (8 g) cornstarch
- ⅛ tsp salt
- 1 ½ cups (355 ml) milk (whole milk preferred for best results)
- 1 tsp vanilla bean paste or vanilla extract
Cake:
- 1 cup (125 g) all-purpose flour (stir, spoon & level for accurate measurement)
- ½ cup (100 g) granulated sugar
- 1 ½ tsp baking powder
- ¼ tsp salt
- ¾ cup (177 ml) milk, at room temperature
- 1 large egg, at room temperature
- 3 Tbsp (42 g) unsalted butter, melted and cooled slightly
- 1 Tbsp vanilla bean paste or vanilla extract
Equipment
- 8-inch Square Baking Pan
- Medium Saucepan
- Silicone Spatula Set
- Whisk
- Glass Mixing Bowl Set
Instructions
- Preheat your oven to 350°F (175°C). Lightly grease an 8×8-inch (or 2.5 to 3-quart) baking pan with cooking spray. Set aside.
- FOR THE PUDDING SAUCE: In a medium saucepan, whisk together the sugar, cornstarch, and salt. Gradually whisk in the milk until thoroughly combined. Stir in the vanilla.
- Cook the mixture over medium heat, stirring frequently, until it comes to a gentle simmer and thickens slightly (approximately 3-5 minutes). Pour the warm sauce into the prepared baking pan and set it aside while you prepare the cake batter.
- FOR THE CAKE: In a large bowl, whisk together the flour, sugar, baking powder, and salt. In a separate bowl, combine the room temperature milk, egg, melted and slightly cooled butter, and vanilla. Whisk until smooth.
- Add the wet ingredients to the dry ingredients and stir just until combined. Avoid over-mixing; a few small lumps are acceptable. Gently and evenly pour the cake batter over the pudding sauce in the pan. It’s normal for the batter to sink slightly into the pudding.
- Bake for 30 minutes, or until the top of the cake is golden brown and a toothpick inserted into the center comes out clean. The pudding around the edges will be bubbling.
- Remove the cake from the oven and let it cool on a wire rack for about 15 minutes before serving. This allows the pudding sauce to thicken to its perfect creamy consistency. Serve warm with fresh berries.
Notes
- Using vanilla bean paste will impart the richest vanilla flavor, and you’ll see lovely specks of vanilla bean. Vanilla extract can be used as a direct substitute.
- For a smoother baking process, have all your ingredients measured and ready before you start. If the pudding is still hot when the cake batter is added, the cake tends to bake more evenly and slightly faster. If the pudding cools significantly, the cake might take longer to bake and could sink a little in the middle.
- Ensure milk and egg are at room temperature for the cake batter. This helps the ingredients emulsify correctly, preventing the butter from seizing and ensuring a uniform cake texture.
- Use a baking pan with sides at least 2.25 inches high to prevent overflow during baking. If you’re concerned about spills, especially with a shallower pan, place it on a rimmed baking sheet before putting it in the oven. This might slightly extend the bake time due to increased insulation.
Nutrition
Serving: 1 serving | Calories: 238 kcal | Carbohydrates: 39g | Protein: 5g | Fat: 7g | Saturated Fat: 4g | Polyunsaturated Fat: 0.4g | Monounsaturated Fat: 2g | Trans Fat: 0.2g | Cholesterol: 40mg | Sodium: 224mg | Potassium: 129mg | Fiber: 0.4g | Sugar: 26g | Vitamin A: 272IU | Calcium: 135mg | Iron: 1mg
Disclaimer: Nutritional values are calculated using a third-party tool and are provided as an estimation only. Actual values may vary.
Sharing this recipe with a link is both encouraged and appreciated. Copying, pasting, and/or screenshots of full recipes to any social media platform are strictly prohibited. All content and photographs are copyright protected.
Enjoyed this recipe?
Don’t forget to leave a rating below and be sure to follow us on Pinterest and Instagram for more delicious recipes!