
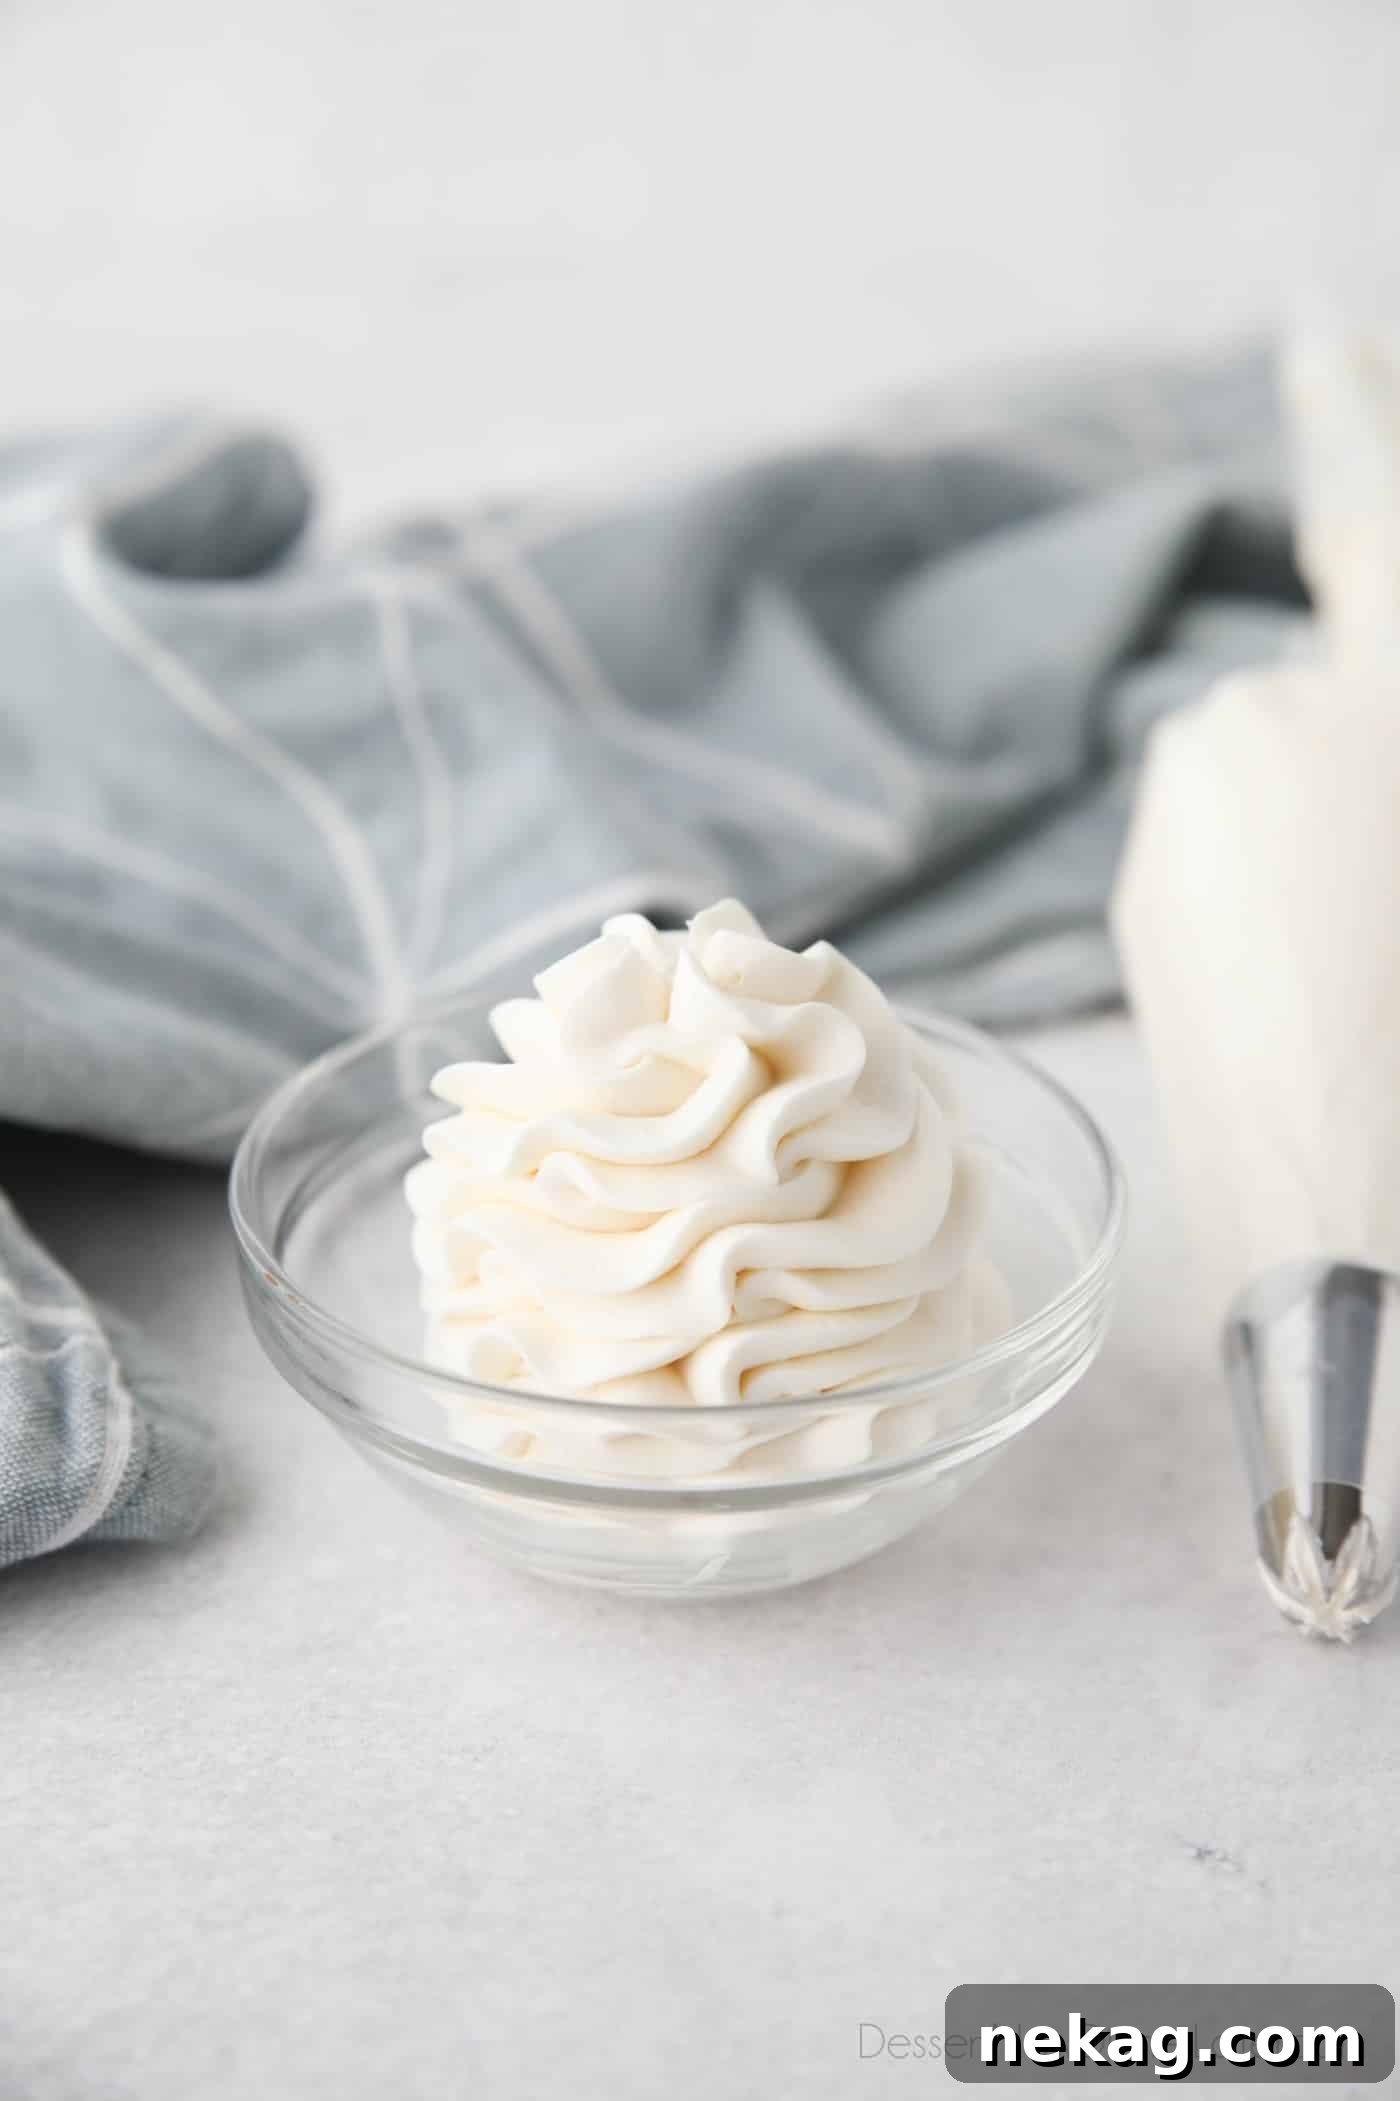
Welcome to the ultimate guide for creating the most delightful and versatile Whipped Cream Cheese Frosting! This heavenly blend marries the rich tang of classic cream cheese frosting with the airy lightness of sweetened whipped cream. The result is a uniquely fluffy, less sweet, and incredibly pipeable frosting that’s perfect for elevating any dessert. Whether you’re a seasoned baker or just starting, our easy-to-follow recipe, available in both one-bowl and two-bowl methods, will help you achieve bakery-quality results right in your own kitchen. Prepare to transform your cakes, cupcakes, and other treats with this irresistibly smooth and stable whipped cream cheese frosting.
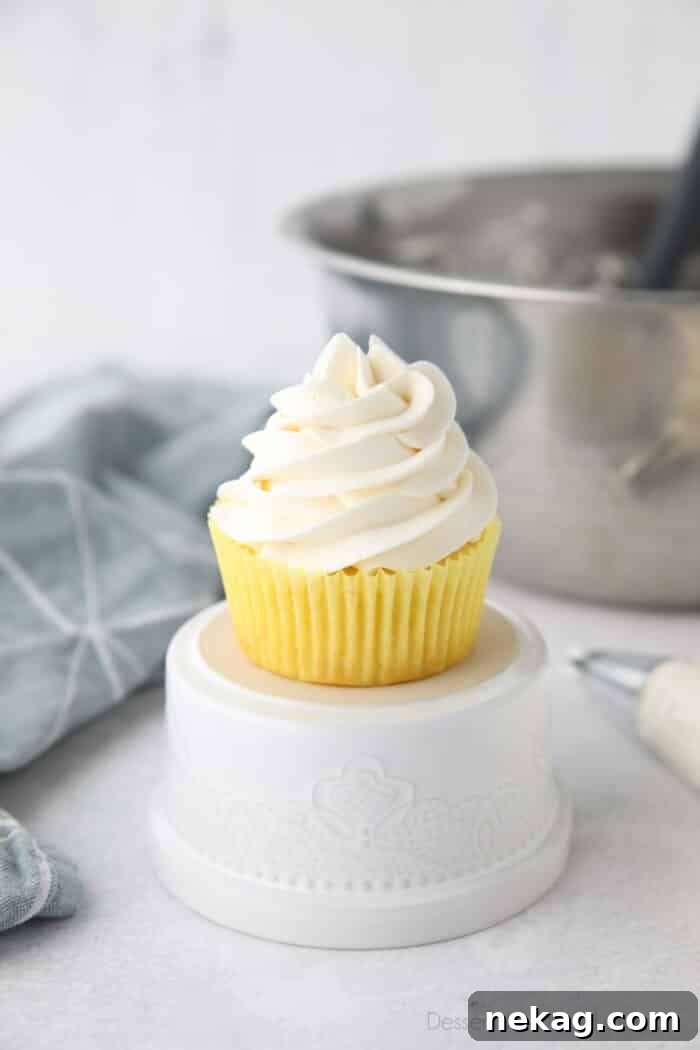
Discover the Best Frosting You’ll Ever Make
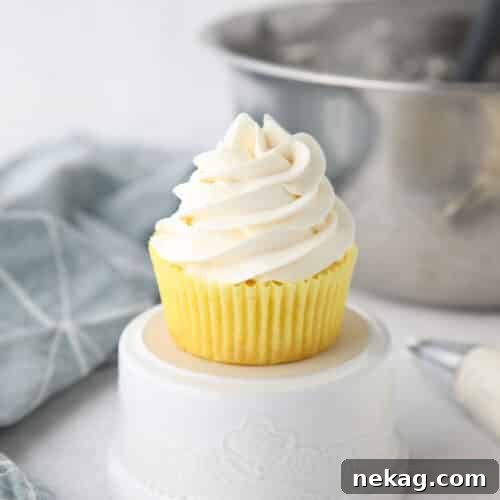
If you have a soft spot for traditional cream cheese frosting, prepare to fall even more in love with this exquisite whipped cream cheese frosting. It stands out from the crowd, offering a dreamy texture that’s remarkably light, wonderfully creamy, and perfectly balanced in sweetness. Unlike dense buttercreams or overly rich traditional frostings, this recipe ensures you can indulge without feeling overwhelmed. Its consistency is ideal for both elegant spreading and intricate piping, making it a dream to work with for any decorating project.
Yielding approximately 4 cups, this recipe provides a generous amount of frosting, enough to beautifully adorn a two-layer cake or a full batch of 24 cupcakes. You can spread it thickly for a rustic, homemade charm, or pipe it high to create stunning, professional-looking desserts. Because this frosting is intentionally less sweet than most buttercream frostings, it truly enhances the flavor of your baked goods rather than overpowering them. This allows you and your guests to enjoy every delicious bite to the fullest, making it an instant favorite for any occasion.
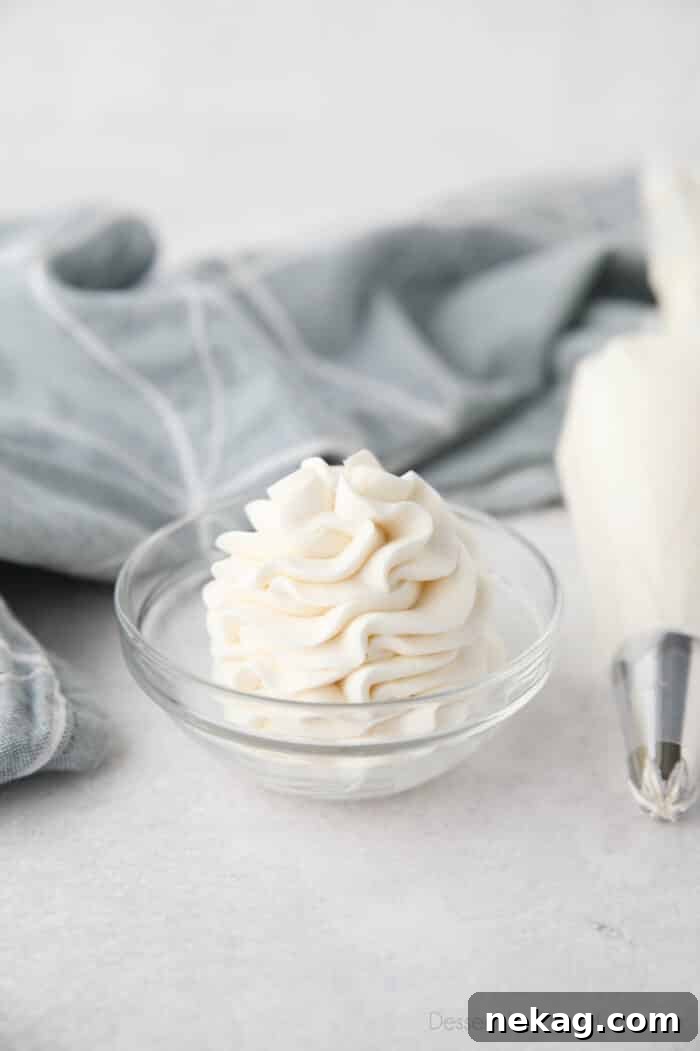
Essential Ingredients for Perfect Whipped Cream Cheese Frosting
Crafting the perfect batch of whipped cream cheese frosting relies on a few key ingredients, each playing a vital role in achieving its signature light and stable texture. Here’s what you’ll need and why:
- Heavy Whipping Cream (30-36% fat): This is the secret to the frosting’s incredible volume and airy texture. The high-fat content allows the cream to whip up beautifully, incorporating air and providing a stable base that holds its shape. For best results, ensure your heavy cream is very cold when you start.
- Cream Cheese: The star ingredient that delivers that irresistible tangy flavor. It also acts as a natural stabilizer for the whipped cream, preventing it from deflating too quickly. You can use full-fat cream cheese or Neufchatel (which is a lower-fat cream cheese but still works well). The most crucial tip here is to use it COLD, straight from the fridge. This firmness is essential for preventing a soupy consistency. Always opt for the traditional “brick” cream cheese, not the spreadable kind found in tubs, which has a higher water content and won’t yield the desired texture.
- Powdered Sugar: Also known as confectioners’ sugar, this fine sugar not only sweetens the frosting but also contributes to its smooth, silky texture. Its fine consistency dissolves easily, ensuring no gritty bits in your final product.
- Salt: Just a small pinch of salt is vital for balancing the sweetness and enhancing the overall flavor profile of the frosting. It brings out the subtle notes of the cream cheese and vanilla, creating a more complex and satisfying taste.
- Vanilla Extract: A splash of good quality vanilla extract adds a warm, aromatic depth that complements the cream cheese beautifully. Feel free to experiment with other extracts like almond or lemon for different flavor variations.
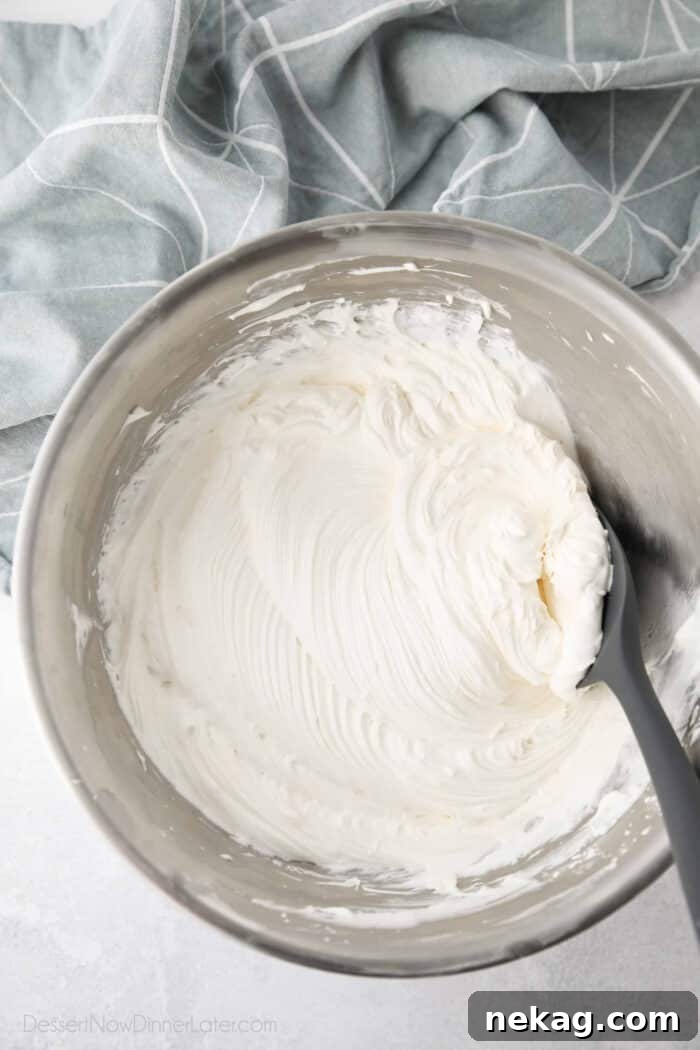
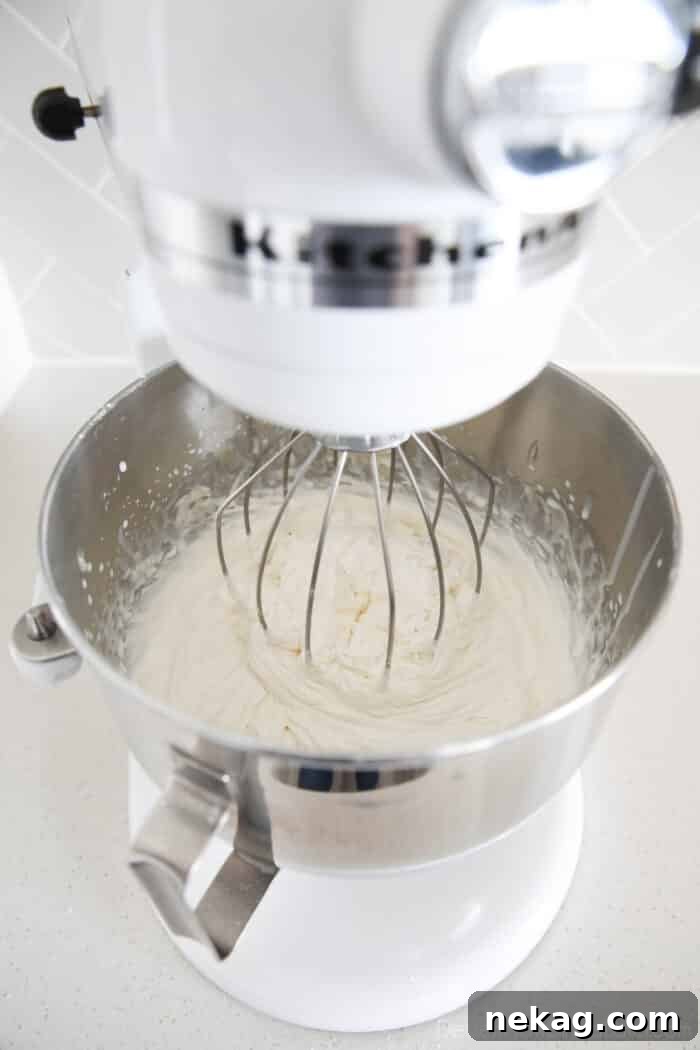
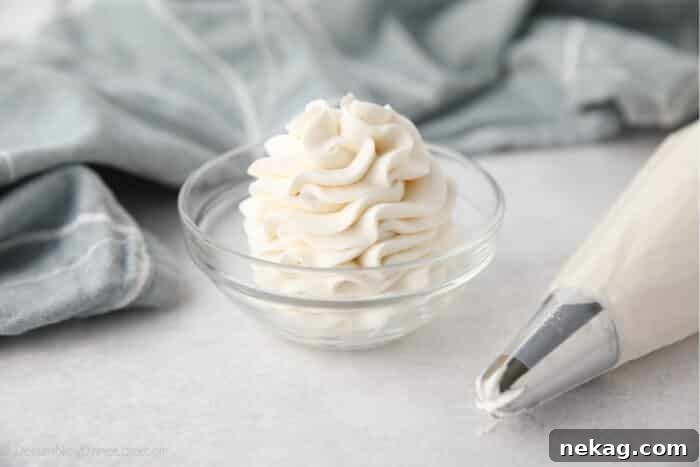
You’ll know your whipped cream cheese frosting is ready when it forms distinct ripples in the bowl and achieves a thick, stiff peak consistency. It should be firm enough to pipe just like a traditional buttercream, but with a much lighter mouthfeel, thanks to the absence of actual butter.
Optimal Use and Storage for Your Whipped Cream Cheese Frosting
Due to its high dairy content, this exquisite whipped cream cheese frosting requires careful handling, especially when it comes to temperature. It is essential for this frosting to remain refrigerated to maintain its stability and freshness. Frosted cakes or cupcakes should not sit out for more than 2 hours at comfortable room temperature (around 70°F / 21°C). If you’re planning an outdoor event or it’s a particularly hot day (90°F / 32°C or above), this window shortens to a maximum of one hour to ensure food safety and prevent the frosting from melting or spoiling.
For the absolute best results in terms of presentation and taste, we recommend frosting your cakes or cupcakes with this delicate whipped cream cheese frosting just before you plan to serve them. This ensures the frosting is at its peak freshness and texture. However, if you need to prepare your desserts in advance, don’t worry! Simply frost them and store them promptly in the refrigerator.
Tip 1: Serving Refrigerated Desserts. When serving cakes or cupcakes that have been frosted and refrigerated, it’s a good idea to remove them from the fridge about 20-30 minutes before serving. This allows them to come to a slightly cooler room temperature, which helps soften the cake structure slightly, preventing it from tasting too dense or cold. The frosting will also become a bit creamier as it loses its chill.
Tip 2: Storing Frosting Separately. If you prefer to keep your unfrosted cakes or cupcakes at room temperature, you can store the frosting separately in the refrigerator. Transfer the whipped cream cheese frosting into a piping bag fitted with your desired decorating tip, then place the entire piping bag inside a sealed zip-top bag. This method keeps the frosting fresh, prevents it from absorbing refrigerator odors, and makes it ready for easy piping just before serving, without needing to re-whip. This strategy is perfect for last-minute decorating!
Beyond Cakes and Cupcakes: Versatile Uses for Your Whipped Cream Cheese Frosting
While this whipped cream cheese frosting is undoubtedly a showstopper on cakes and cupcakes, its light, creamy, and less sweet profile makes it incredibly versatile for a myriad of other desserts and treats. Don’t limit its potential; explore these delicious alternative uses:
- No-Bake Cheesecake Filling: Spoon a generous amount into a pre-made graham cracker crust for an instant, incredibly easy no-bake cheesecake. Chill for a few hours, and you have a refreshing dessert that requires zero oven time.
- Elegant Breakfast Topping: Elevate your morning meal by dolloping this frosting onto waffles, pancakes, or even a bowl of oatmeal. It adds a touch of indulgence and a creamy texture that transforms a simple breakfast into a special treat.
- Luxurious Pie Topping: Replace traditional whipped cream with this stabilized version on your favorite pies. Its slight tang beautifully cuts through rich fruit or chocolate pies, and its firm texture will hold up much better.
- Delicious Cookie Sandwich Filler: Use it to fill whoopie pies, soft sugar cookies, or any other cookie sandwiches. The creamy center provides a wonderful contrast to the cookies’ texture.
- Fruit Dip or Graham Cracker Spread: Serve it as a delightful dip for fresh berries, sliced apples, banana rounds, or any seasonal fruit. It also pairs wonderfully with graham crackers, vanilla wafers, or pretzels for a sweet and salty snack.
- A Spoonful of Happiness: Let’s be honest, sometimes the best way to enjoy a delicious frosting is straight from the bowl! Its light consistency makes it surprisingly easy to enjoy on its own.
This frosting’s unique balance of sweetness and tang means it can adapt to many culinary roles, offering a delightful twist wherever it’s used.
Crafting Perfection: The One-Bowl Method for Whipped Cream Cheese Frosting
One of the true beauties of this whipped cream cheese frosting recipe lies in its adaptability. You can achieve perfect results with either a one-bowl or two-bowl approach. The one-bowl method is a favorite for its sheer convenience and minimal cleanup, proving that you don’t need a pile of dishes to create something extraordinary. While it requires a few bowl scrapes to ensure even mixing, the streamlined process is incredibly efficient.
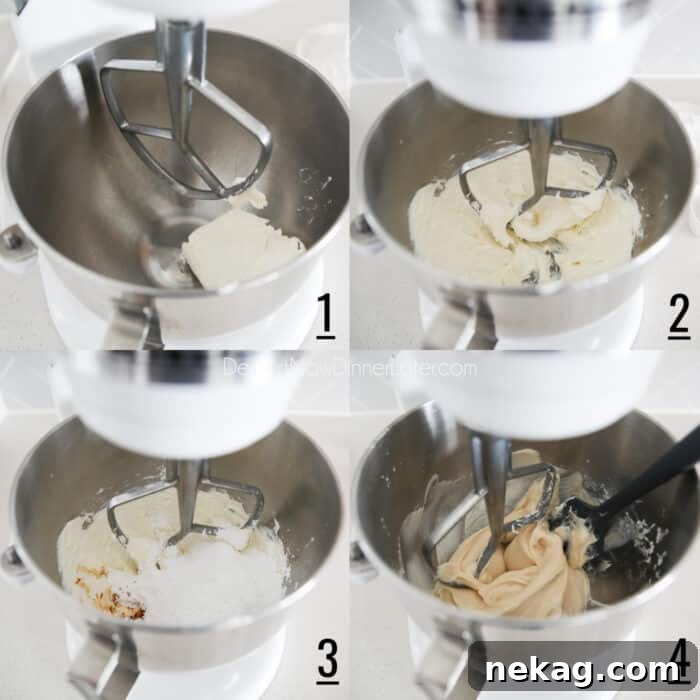
- Begin by placing your cold brick of cream cheese into the bowl of a stand mixer. Fit the mixer with the paddle attachment. This sturdy attachment is ideal for breaking down and creaming the firm cream cheese.
- Beat the cream cheese on medium speed for about 10-15 seconds, just until it begins to soften slightly and become creamy. Stop the mixer and use a spatula to scrape down the sides and bottom of the bowl, ensuring all the cream cheese is gathered in the center.
- Next, add the powdered sugar, a pinch of salt, and the vanilla extract directly into the bowl with the cream cheese. These dry and liquid components will begin to integrate into the softened cream cheese.
- Mix these ingredients on low speed until they are just combined. Overmixing at this stage can incorporate too much air into the cream cheese, which we want to avoid for the initial blend. Once combined, stop and scrape the bowl thoroughly one more time. This ensures an even mixture, free of unmixed pockets.
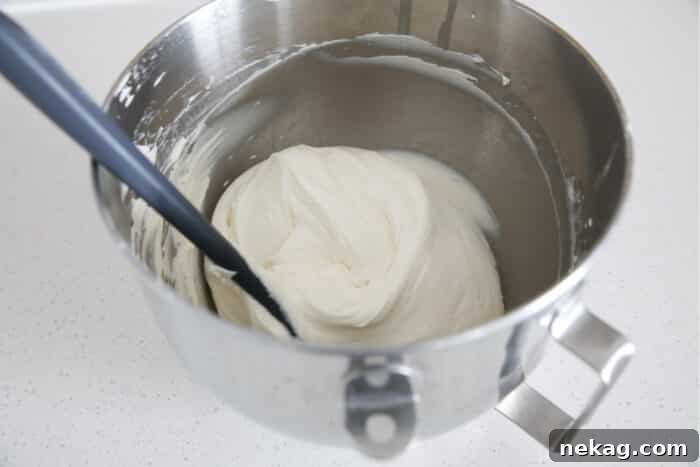
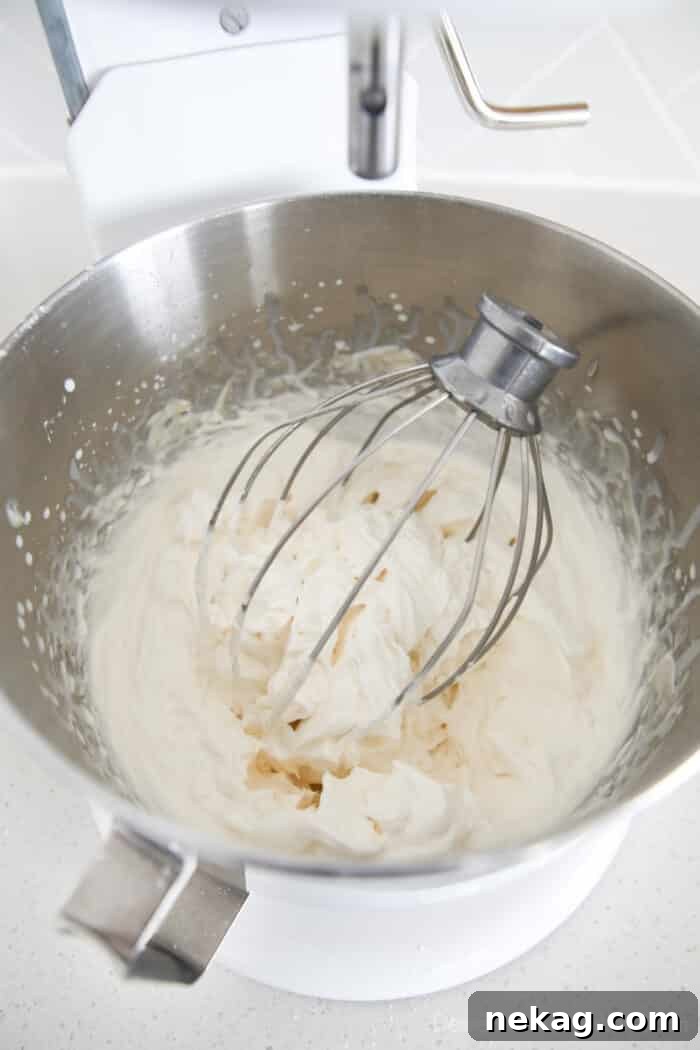
- Now, switch from the paddle attachment to the whisk attachment. This is where the magic happens! With the mixer on medium speed, begin slowly pouring the cold heavy cream into the bowl. Add the cream gradually, allowing it to incorporate into the cream cheese mixture. As you continue to whip, the frosting will visibly transform, becoming lighter, fluffier, and gradually thickening. Continue to whip until it reaches a thick, pipeable consistency with stiff peaks. Don’t hesitate to stop and scrape down the sides of the bowl as needed to ensure all parts of the frosting are whipped evenly. The collage image below beautifully illustrates this progression.
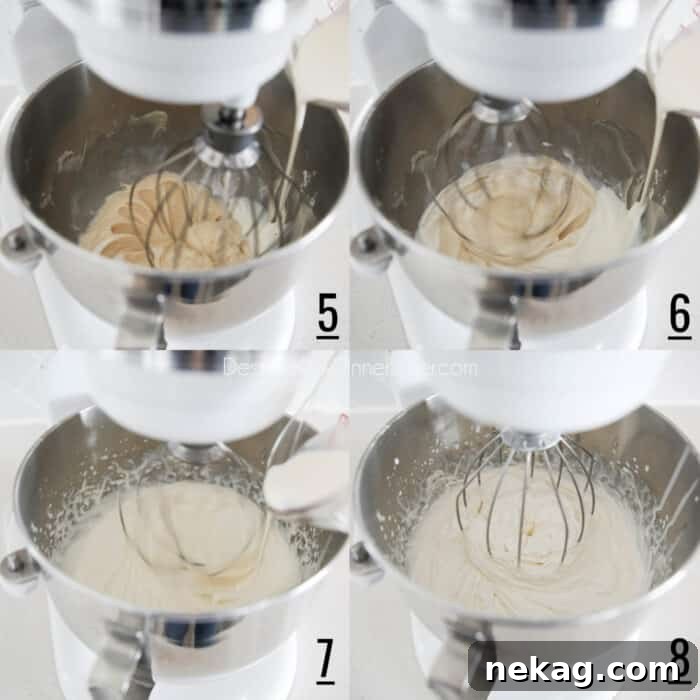
A helpful note: During the whipping process, the edges of the bowl where the heavy cream is first added might remain slightly softer than the denser center. This is why thorough scraping of the bowl is crucial. After all the cream has been added and the frosting is whipped, you might also find it beneficial to gently fold the frosting a few times with a spatula to ensure a perfectly uniform consistency throughout.
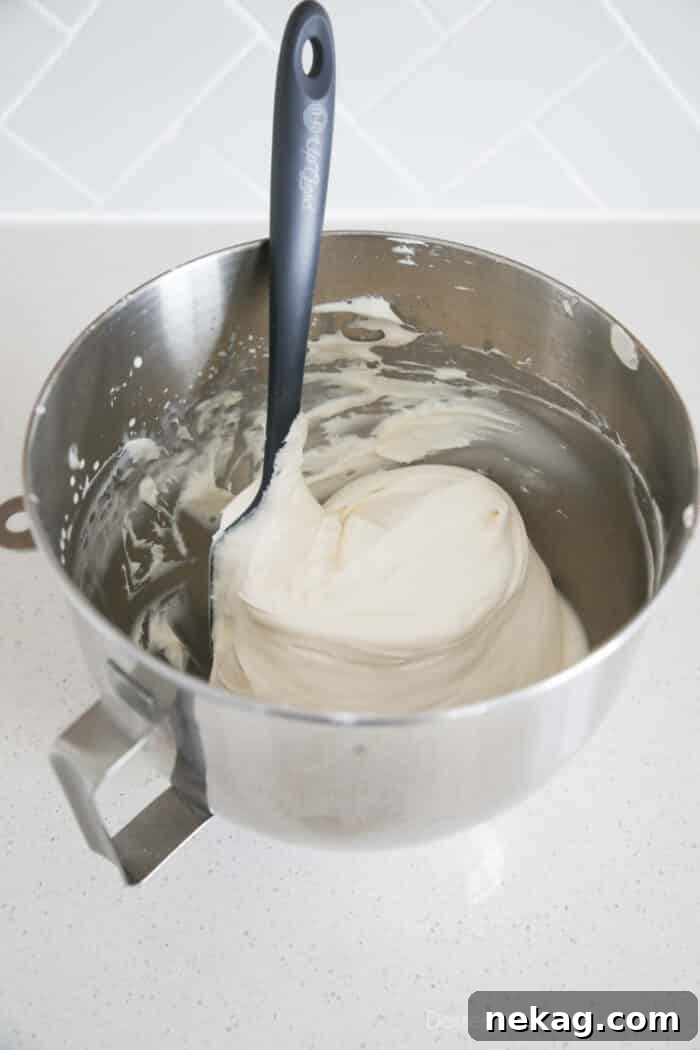
For the absolute best results in terms of volume and texture, use this whipped cream cheese frosting immediately after preparation for spreading, piping, or filling your desserts. While it can be refrigerated and used later, be aware that it may lose a small amount of its initial airy volume upon chilling. However, its delicious flavor and pipeable consistency will largely remain intact.
The Two-Bowl Method: An Alternative Approach for Whipped Cream Cheese Frosting
While the one-bowl method offers convenience, the two-bowl method for making whipped cream cheese frosting provides a slightly different workflow that some bakers prefer. This approach allows you to prepare the cream cheese base and whip the heavy cream simultaneously, which can be advantageous if you have two mixers or simply prefer to keep the components separate until the very end. The main trade-off, of course, is a few extra dishes to wash.
Regardless of whether you choose the one-bowl or two-bowl method, rest assured that the final product – a perfectly light, creamy, and stable whipped cream cheese frosting – will be exactly the same. The choice ultimately comes down to your personal preference for workflow and kitchen cleanup.
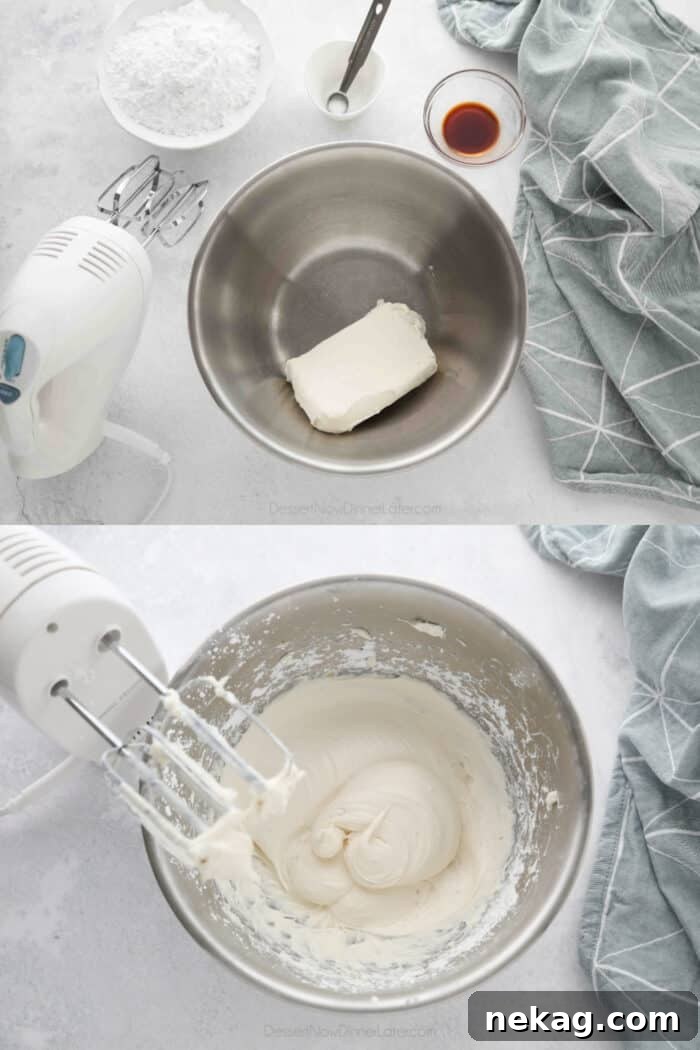
- In a large mixing bowl, begin by beating the cold cream cheese with an electric hand mixer for about 10-15 seconds. Continue until the cream cheese is smooth and creamy. This initial beating helps to break down the firm texture and prepare it for the other ingredients.
- Add the powdered sugar, salt, and vanilla extract to the cream cheese. Continue to beat with the hand mixer until all ingredients are well combined and the mixture is smooth. Be careful not to over-beat at this stage; excessive mixing can sometimes make the cream cheese mixture stringy, which can affect the final texture.
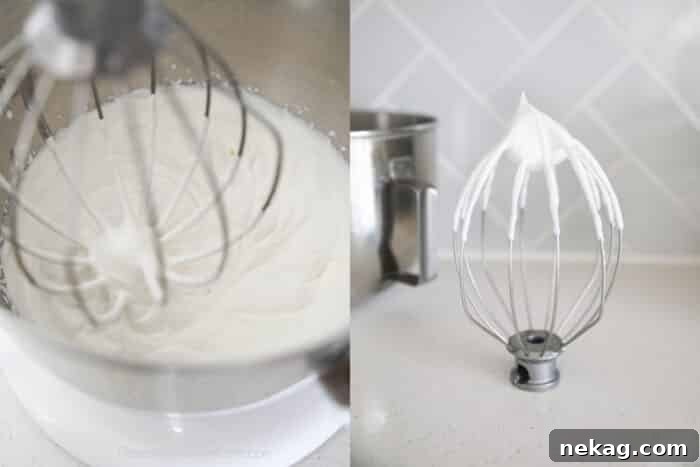
- In a separate, chilled stand mixer bowl (or another large bowl if using a hand mixer), fit it with the whisk attachment. Pour in the very cold heavy cream. Whip the heavy cream on medium-high speed until it forms stiff peaks. This means the cream will hold its shape firmly when the whisk is lifted. Exercise caution not to over-whip, as heavy cream can quickly turn into butter if beaten for too long.
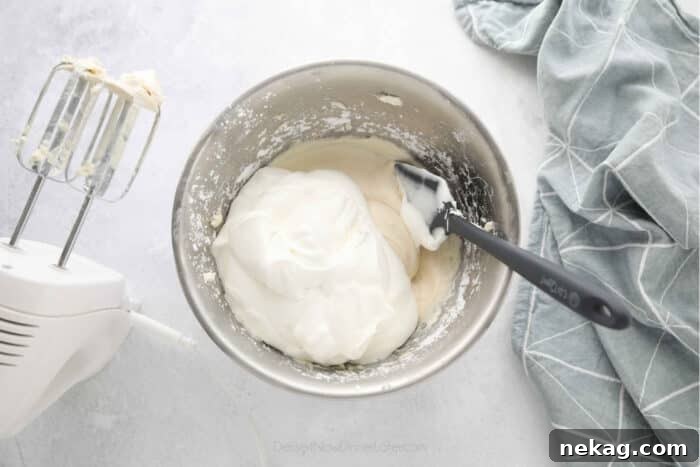
- Gently add the freshly whipped cream to the cream cheese mixture you prepared earlier. Using the electric hand mixer on low speed, beat the two components together just until they are fully combined and the frosting is smooth and uniform. Avoid overmixing once combined to preserve the airy texture. This delightful frosting is now ready to be used immediately for spreading, piping, or filling your favorite desserts.
Expert Tips and Important Information for Flawless Frosting
Achieving the perfect whipped cream cheese frosting every time is easy with these essential tips and bits of information:
- Immediate Use for Optimal Results: For the best volume and the most beautiful pipeable texture, it’s always recommended to use the frosting immediately after you’ve made it. This ensures it’s at its peak airy consistency for decorating.
- Temperature is Key: Always start with very cold ingredients. Both your brick cream cheese and heavy cream should be straight from the refrigerator. For an extra boost in achieving stiff peaks, consider chilling your mixing bowl and whisk attachments in the freezer for 10-15 minutes before you begin.
- Refrigeration for Leftovers: Any leftover frosting, or any cakes and cupcakes that have been frosted, must be stored in the refrigerator due to the dairy content. This preserves freshness and prevents spoilage.
- Smart Storage for Unused Frosting: To keep unused frosting fresh and ready for future use, transfer it to a piping bag (with or without a tip) and place the piping bag inside a larger zip-top bag, squeezing out any excess air. Alternatively, store it in an airtight container. While the frosting remains delicious for up to 5 days when refrigerated, be aware that it might lose a small amount of its original volume and airy texture after the first day.
- Coloring Your Frosting: This versatile frosting can be easily tinted with food coloring for any festive occasion or theme. For the best results and vibrant colors without affecting the frosting’s consistency, it’s highly recommended to use gel food coloring. Start with a small amount and gradually add more until you achieve your desired shade.
Explore More Delicious Frosting Recipes
If you love experimenting with different frosting flavors and textures, you’re in for a treat! Discover our collection of other incredible frosting recipes that are perfect for any baking project:
- Classic Cream Cheese Frosting (a less sweet version for purists)
- Decadent Chocolate Cream Cheese Frosting
- Bright Lemon Cream Cheese Frosting
- Sweet Strawberry Cream Cheese Frosting
- Tropical Coconut Cream Cheese Frosting
- Smooth Vanilla Buttercream Frosting
- Fruity Strawberry Buttercream Frosting with Jam
- Rich Chocolate Buttercream Frosting
- Velvety Pudding Frosting
- Indulgent Nutella Frosting
- Exotic Blackberry Frosting (Pina Colada inspired)
Whipped Cream Cheese Frosting
Pin
Rate
Ingredients
- 8 oz (226 g) brick cream cheese, COLD (full fat or Neufchatel)
- 1 ½ cups (180 g) powdered sugar
- ⅛ tsp salt
- 1 tsp vanilla extract
- 1 ½ cups (355 ml) heavy whipping cream or heavy cream, COLD
Equipment
-
Electric Hand Mixer
-
Wilton 2D Tip
Instructions
ONE-BOWL METHOD:
-
In a stand mixer fitted with the paddle attachment, beat the cream cheese for 10-15 seconds. Scrape bowl. Then add the powdered sugar, salt, and vanilla and mix until combined. Scrape bowl.
-
Switch to the whisk attachment and whip frosting on medium speed while slowly adding the heavy cream until light, fluffy, and thick. Scraping the bowl as needed. Use the frosting immediately for spreading, piping, or filling.
TWO-BOWL METHOD:
-
In a large bowl, beat the cream cheese for 10-15 seconds with an electric hand mixer, until creamy.
-
Add the powdered sugar, salt, and vanilla. Beat until combined. (Take care not to beat too long or it may become stringy.)
-
In a stand mixer with the whisk attachment, whip the heavy cream to stiff peaks. (Be careful not to whip too long or it will turn to butter.)
-
Add the whipped cream to the cream cheese mixture. Use the electric hand mixer to beat until combined. Use the frosting immediately for spreading, piping, or filling.
Video
Notes
- TIP: Use a cold bowl and beaters for optimum results.
- YIELD: Makes about 4 cups of frosting. Enough to frost a 2-layer 9-inch cake or 24 cupcakes.
- You can tint/color this frosting. It’s best to use gel food coloring.
- STORING: Store leftover frosting or frosted cakes/cupcakes in the refrigerator.
- Remove frosted cakes or cupcakes from fridge 20-30 minutes before serving to remove the chill, so the cake isn’t too dense from being cold.
- Refrigerate the frosting separately in a piping bag placed inside of a zip-top bag for added freshness. Or refrigerate frosting in an airtight container. May lose some volume after 1 day, but can be refrigerated up to 5 days.
- SERVING: Frosted cakes or cupcakes should only sit out for up to 2 hours at room temperature (inside/climate controlled), or one hour if it’s a hot day or brought to an outdoor picnic.
Nutrition
Disclaimer: Nutritional values were calculated using a third-party tool and are provided as an estimation only.
Sharing this recipe with a link is both encouraged and appreciated. Copying/pasting and/or screenshots of full recipes to any social media is strictly prohibited. Content and photographs are copyright protected.
Did you make this?
Don’t forget to leave a rating below and make sure to follow on Pinterest and Instagram for more!
Frequently Asked Questions About Whipped Cream Cheese Frosting
When a recipe specifically calls for brick cream cheese, it’s always best to use it. Whipped cream cheese, typically sold in tubs, has a lighter, airier texture and often contains added ingredients or more moisture, which can alter the consistency and stability of your frosting. Traditional full-fat block cream cheese or Neufchatel provides the necessary structure and richness for a stable and creamy whipped cream cheese frosting.
While both whipped cream and frosting are delightful toppings, they are not the same. Whipped cream is primarily made from heavy cream and powdered sugar, and it’s known for its delicate, airy texture. While it can be spread, dolloped, or piped, it tends to be less stable and will quickly lose its shape at room temperature. Frosting, on the other hand, typically contains more fat (like butter or cream cheese) and sugar, giving it a much more stable structure that holds up significantly better at room temperature, making it ideal for decorating cakes and cupcakes for longer periods.
Making whipped cream cheese frosting from scratch is quite simple! Using the one-bowl method: start by beating cold brick cream cheese with powdered sugar, a pinch of salt, and vanilla extract in a stand mixer fitted with a paddle attachment until combined. Then, switch to the whisk attachment and slowly incorporate very cold heavy cream, whipping on medium speed until the frosting becomes light, fluffy, and forms stiff peaks. Remember to scrape the bowl as needed to ensure all ingredients are thoroughly mixed.
Due to the inclusion of heavy cream, whipped cream cheese frosting is highly perishable and requires refrigeration. It should not be left out at typical room temperature (around 70°F / 21°C) for more than 2 hours. If the ambient temperature is particularly warm, for instance, 90°F (32°C) or higher, the safe consumption window shrinks to just 1 hour. Always err on the side of caution and refrigerate any frosted desserts promptly to maintain freshness and food safety.