
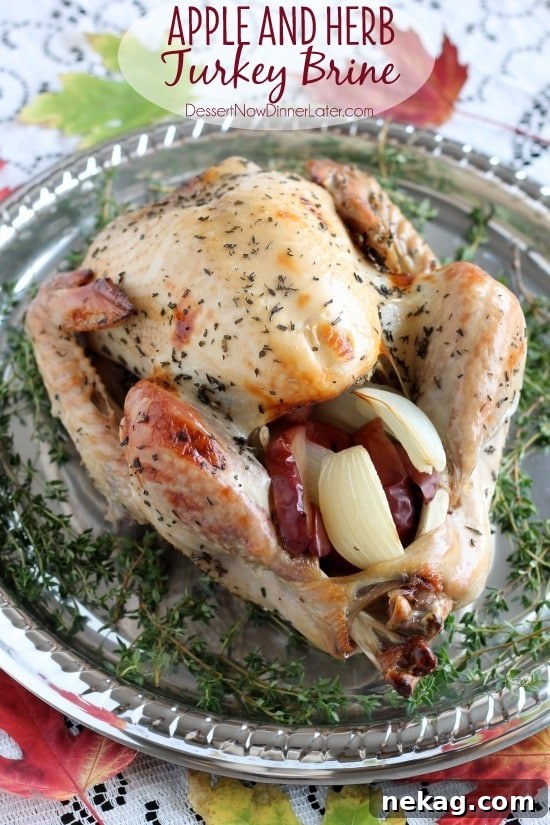
Our favorite Apple and Herb Turkey Brine with step-by-step photos on how to brine and cook a turkey to juicy perfection, just in time for Thanksgiving!
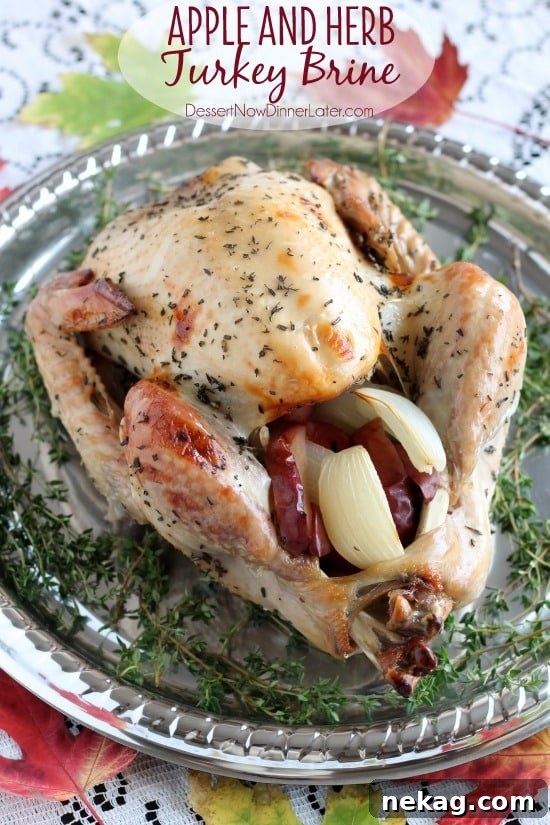
Unlock the Secret to a Perfectly Juicy Thanksgiving Turkey: Apple & Herb Brine
Thanksgiving is just around the corner, bringing with it the joyous anticipation of family, friends, and, of course, a spectacular holiday meal. The centerpiece of this grand feast is undoubtedly the turkey. Forget dry, disappointing birds of the past! We’re here to share the ultimate secret to achieving a remarkably moist, flavorful, and succulent turkey every single time: our cherished Apple and Herb Turkey Brine recipe. This comprehensive guide will walk you through every step, ensuring your holiday centerpiece is nothing short of perfection.
Why Brining is a Game-Changer for Your Thanksgiving Turkey
For years, the quest for a perfectly juicy Thanksgiving turkey has stumped many home cooks. The lean nature of turkey meat, especially the breast, makes it prone to drying out during the long roasting process. This is where brining comes in – a culinary technique that transforms an ordinary turkey into an extraordinary one. Brining involves soaking the turkey in a solution of salt, water, and various aromatics, which works wonders on two fronts:
- Moisture Retention: The salt in the brine solution penetrates the turkey’s muscle fibers. Through a process called osmosis, the salt causes the turkey to absorb some of the brining liquid. More importantly, the salt denatures the proteins in the meat, causing them to unwind and form a kind of matrix that traps moisture more effectively during cooking. This means your turkey stays incredibly moist, even if cooked slightly beyond the minimum safe temperature.
- Flavor Infusion: Beyond just moisture, the brine also acts as a vehicle for flavor. The herbs, spices, fruit juices, and other ingredients you add to your brine permeate the meat, infusing it with a delicious depth that a simple seasoning rub can’t achieve. Our Apple and Herb brine, for instance, imparts a delightful balance of sweet, savory, and aromatic notes that complement the turkey beautifully.
Once you try a brined turkey, you’ll never go back. It’s the simplest yet most impactful way to guarantee a tender, flavorful bird that will impress everyone at your holiday table.
Essential First Steps: Thawing Your Turkey Safely
Before you even think about brining, your frozen turkey needs to be completely thawed. Proper thawing is crucial for both food safety and the success of your brining process. The safest and most recommended method is thawing in the refrigerator. Plan ahead, as this takes several days:
- For every 4-5 pounds of turkey, allow one full day of thawing in the refrigerator.
- A smaller bird, like our 9 1/2 lb turkey in this tutorial, typically requires about 4 days to thaw completely.
- Larger turkeys (15-20 lbs) might need up to 5-6 days.
Always keep your turkey in its original wrapper or a sealed bag on a tray or in a pan to catch any drips and prevent cross-contamination. Place it on the lowest shelf of your refrigerator. Never thaw a turkey at room temperature on the counter, as this allows bacteria to multiply rapidly in the “danger zone” between 40°F (4°C) and 140°F (60°C).
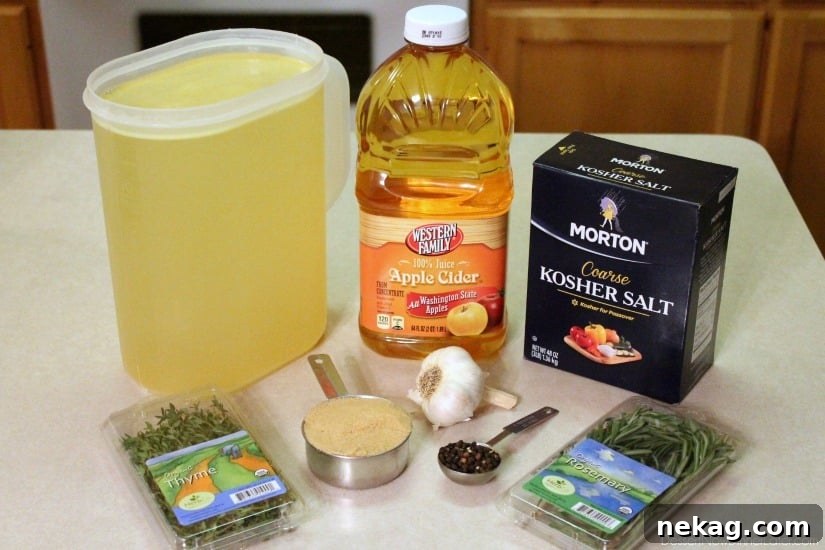
Crafting the Perfect Apple & Herb Brine
Our signature Apple and Herb Turkey Brine is renowned for its ability to produce an exceptionally tender and flavorful turkey. It’s a simple yet powerful combination of ingredients that work in harmony to elevate your bird. Here’s a closer look at what goes into it and why:
- Chicken Broth: Forms the flavorful liquid base of our brine, adding savory depth that water alone cannot provide.
- Apple Cider (or Apple Juice): Introduces a subtle sweetness and fruity aroma, perfectly complementing the rich turkey flavor and creating a beautiful golden-brown skin during roasting.
- Brown Sugar: Helps balance the saltiness, adds another layer of sweetness, and aids in caramelization for that irresistible crispy skin.
- Kosher Salt: The star ingredient of any brine. Kosher salt crystals dissolve easily and season the meat evenly, ensuring moisture is locked in. It’s crucial not to substitute with table salt, which is much finer and can lead to an overly salty result.
- Fresh Rosemary and Thyme: These classic poultry herbs infuse the brine with fragrant, earthy notes that are quintessentially Thanksgiving. Using fresh herbs provides a more potent and vibrant flavor than dried alternatives.
- Whole Peppercorns: Contribute a mild, aromatic spice that enhances the overall savory profile without adding heat.
- Garlic Cloves (smashed): Pervades the brine with its pungent, savory essence, a fundamental building block of delicious cooking. Smashed cloves release more flavor than whole ones.
The beauty of this brine lies in its simplicity and effectiveness. You’ll prepare this delicious solution the night before you plan to roast your turkey, giving it ample time to work its magic and infuse every fiber of the meat with incredible flavor and moisture.
Gather Your Essential Tools for Brining and Roasting
To successfully brine and roast your turkey, you’ll need a few specific items. Having these ready beforehand will make the process smooth and stress-free:
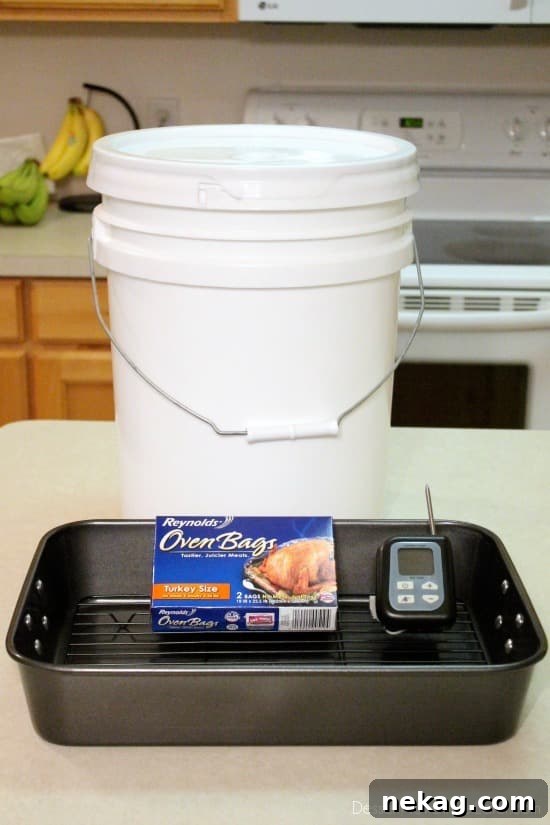
- Large Clean Bucket or Stock Pot with a Lid: This is critical for submerging your turkey in the brine. We highly recommend using a food-grade 5-gallon bucket (like a brand-new, thoroughly washed paint bucket) or a very large stockpot. Designate this container for your Thanksgiving turkey to ensure cleanliness.
- Reliable Oven-Safe Meat Thermometer: Absolutely essential for ensuring your turkey is cooked to a safe internal temperature without overcooking. A probe thermometer with a digital display that stays in the turkey while it roasts, and an alarm that sounds when it reaches the target temperature, is ideal.
- Turkey-Size Oven Bag: While optional, we strongly recommend an oven bag. It creates a steamy environment that helps keep the turkey incredibly moist and can significantly reduce cooking time. It also makes for much easier cleanup.
- Heavy-Duty Roasting Pan: A sturdy roasting pan is needed to hold the turkey (especially when using an oven bag) and catch any drippings.
- Plenty of Ice: You’ll need ice to rapidly cool your brine and to keep the turkey submerged in the cold brine safely overnight. Plan on buying a 10-lb bag or two.
The Brining Process: A Step-by-Step Guide for a Juicy Turkey
Now that you have your supplies ready, let’s dive into the life-changing process of brining. Say goodbye to dry turkey forever! This method guarantees a juicy and tender bird, even when cooked to 180 degrees Fahrenheit, well beyond the standard 165 degrees Fahrenheit for poultry, as we found in our own testing.
Step 1: Prepare the Brine Solution
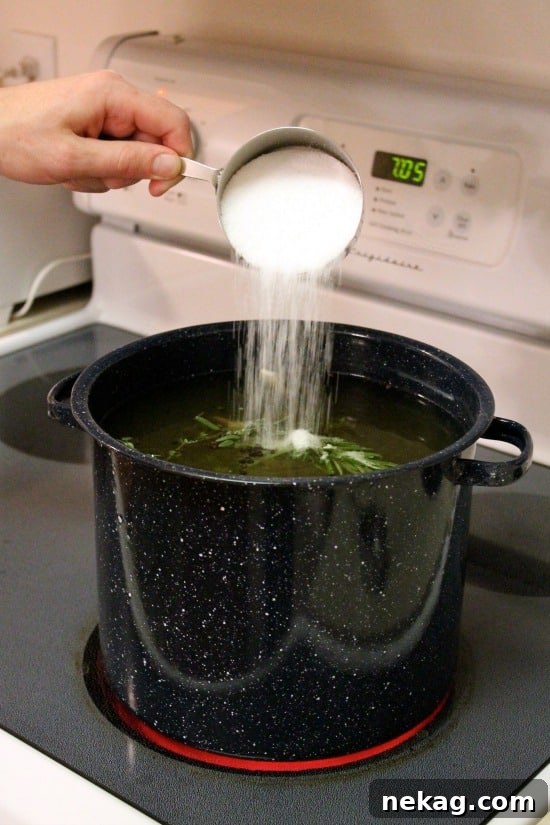
In a very large stockpot, combine all the brining ingredients except for the ice (chicken broth, apple cider, brown sugar, kosher salt, rosemary, thyme, whole peppercorns, and smashed garlic cloves). Bring this mixture to a boil over high heat, stirring occasionally, until the salt and sugar are completely dissolved. Once dissolved, remove the pot from the heat. This step is crucial for infusing the flavors and dissolving the solids. Now, allow the brine to cool down completely to room temperature. This can take 1 to 2 hours, so plan accordingly. Never add a hot or warm brine to your turkey, as this can begin to cook the meat prematurely.
Step 2: Prepare Your Turkey and Brining Container
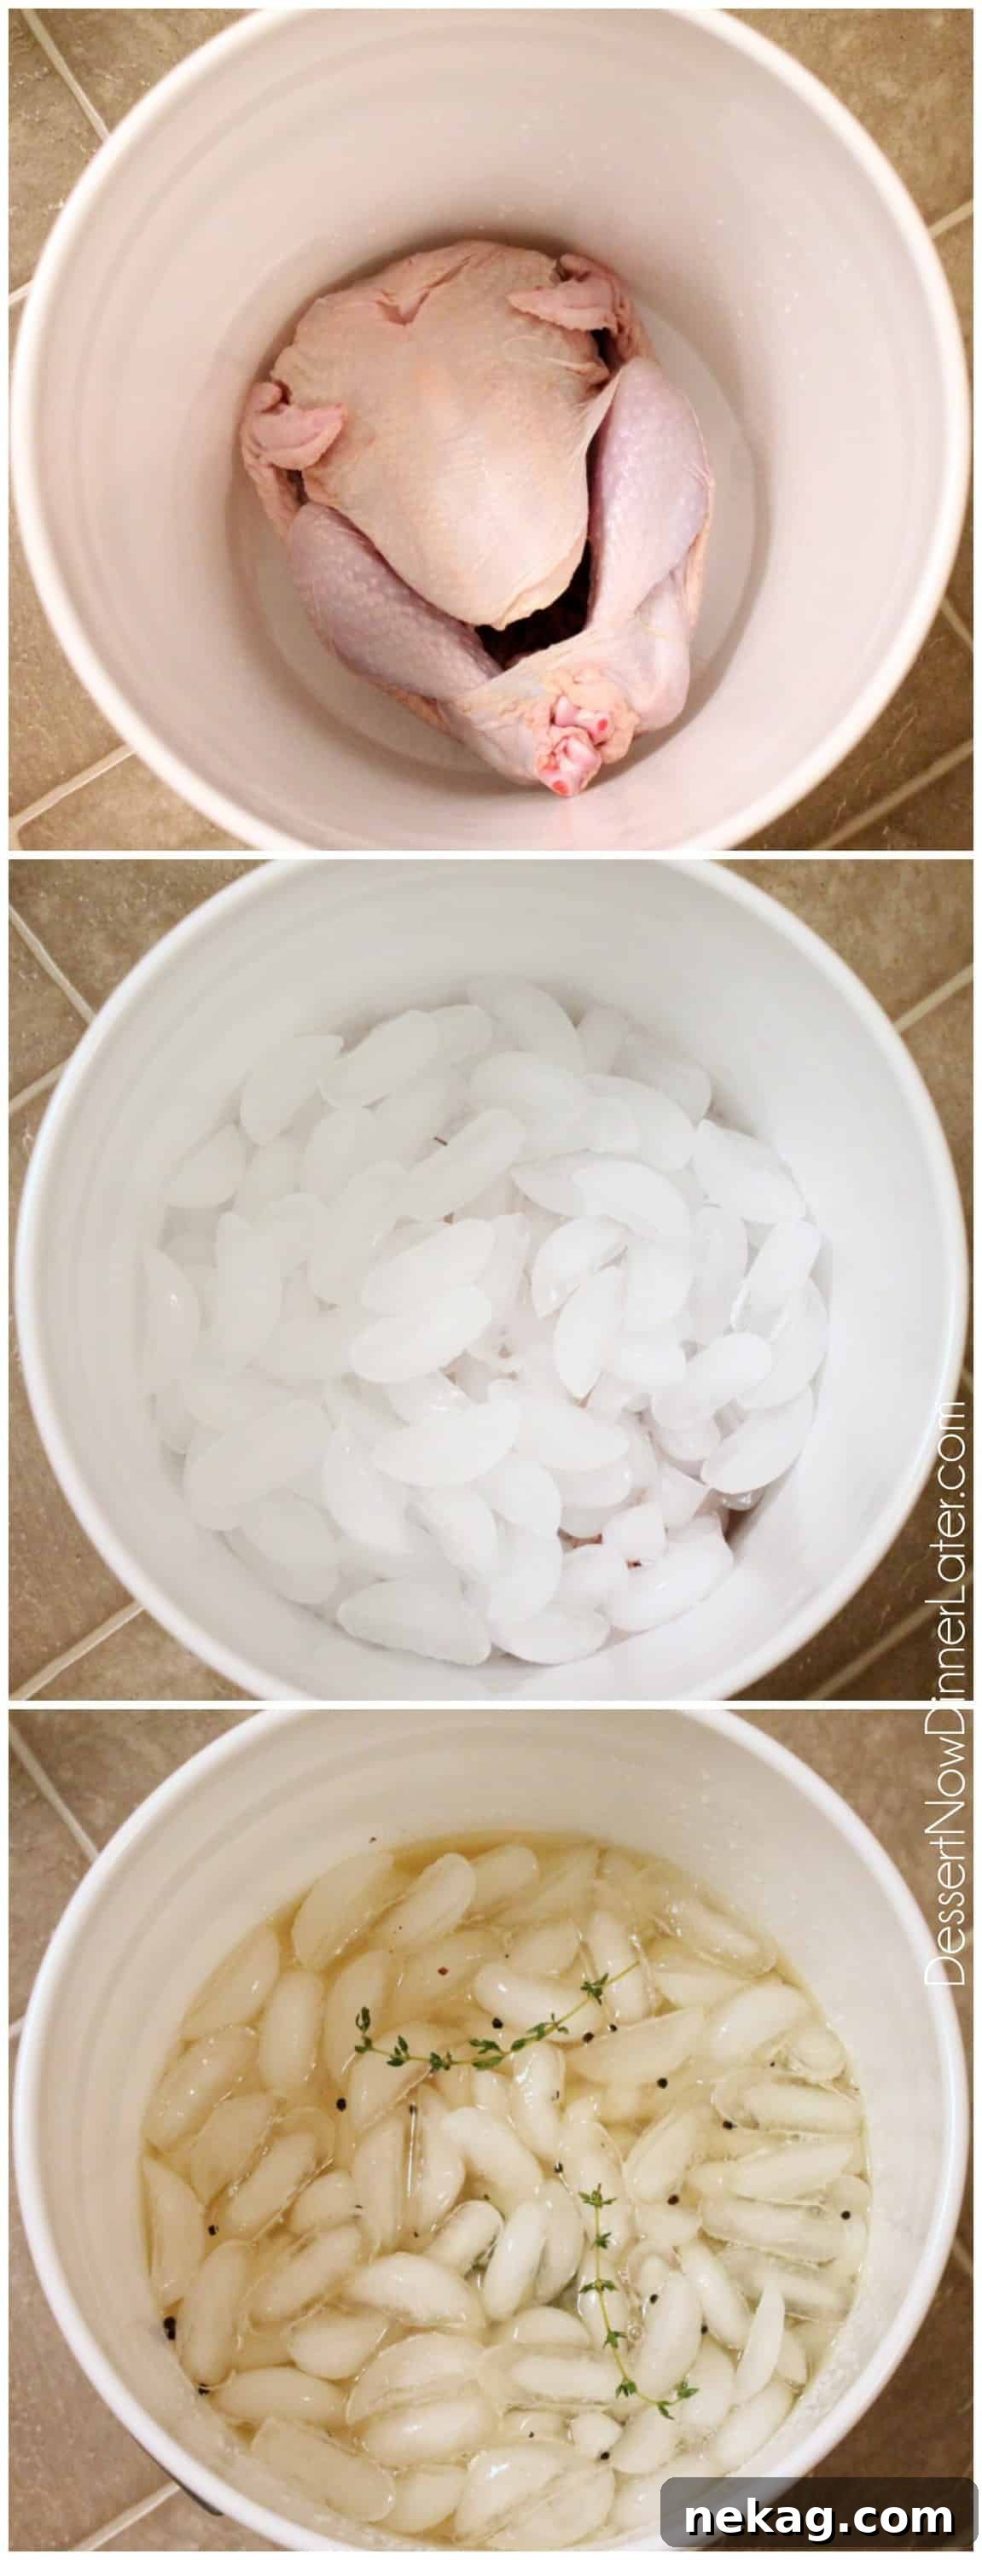
While the brine cools, prepare your turkey and brining container. Thoroughly clean your 5-gallon bucket or stockpot that you will be submerging the turkey in. Rinse your thawed turkey under cold running water, both inside and out. Reach into the cavity and remove the neck and any giblets (often found in a small bag), discarding them or saving them for gravy if desired.
Step 3: Submerge the Turkey in Brine with Ice
Carefully place the cleaned turkey inside your prepared bucket. Now, cover the turkey completely with ice. Depending on the size of your turkey and bucket, you may need a 10-lb bag or two of ice. The ice serves a dual purpose: it keeps the turkey at a safe, cold temperature during the brining process, and it helps ensure the turkey remains submerged in the liquid. Once the turkey is nestled in ice, carefully pour your completely cooled brine solution into the bucket. The turkey should be fully submerged in the liquid. If it’s not quite covered, add a little more cold water or chicken broth until it is.
Step 4: Chilling and Brining Overnight
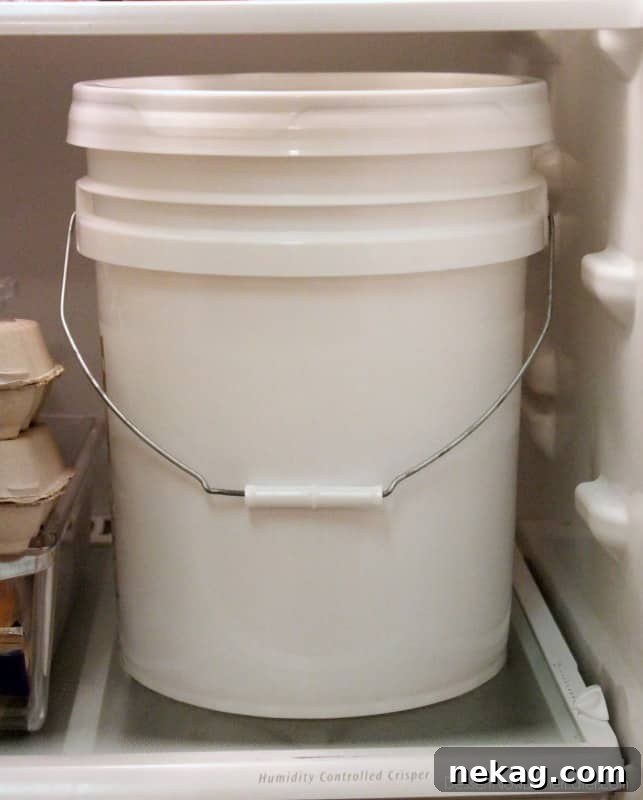
Cover the bucket with its tight-fitting lid. Now, your turkey needs to soak in the cold brine for 12 to 24 hours. This extended period allows the salt and flavors to fully penetrate the meat. The ideal place for this is in your refrigerator. If your fridge is overflowing with pies and other Thanksgiving preparations, don’t worry, there are alternatives:
- Cold Outdoor Storage: If the weather is consistently cold (below 40°F / 4°C but above freezing), you can store the covered bucket outside in a shaded area.
- Cold Indoor Room: A cool basement or an unheated garage (if temperatures are safe) can also work. Ensure it’s in a spot where it won’t be disturbed by pets or children.
Regardless of where you store it, it is absolutely vital to maintain a safe temperature below 40°F (4°C) throughout the entire brining period. Periodically check the ice and add more as needed throughout the night and day to keep the turkey consistently cold. Food safety is paramount.
Roasting Your Brined Turkey to Golden Perfection
Once the brining period is complete, it’s time to roast your turkey. Brining, especially when combined with an oven bag, can significantly reduce cooking time. For instance, our 9 1/2 lb bird consistently cooks in just under 2 hours with this method.
Step 5: Prepare the Turkey for Roasting
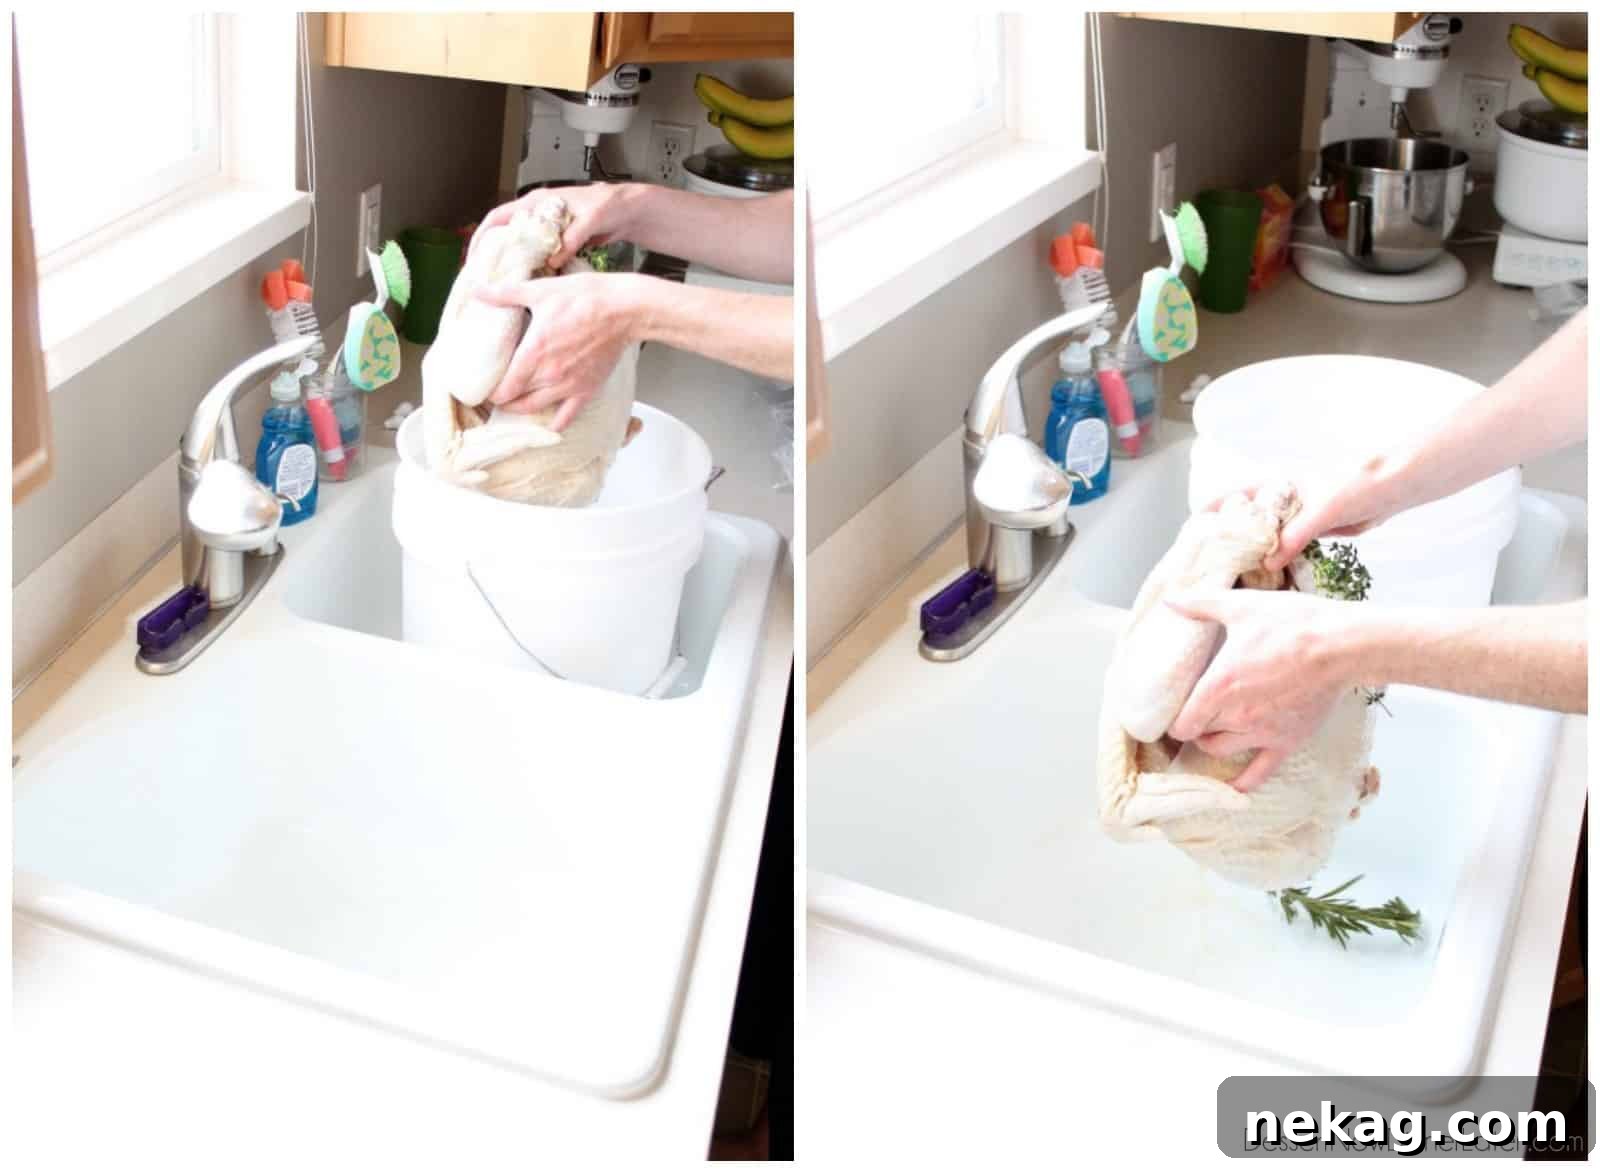
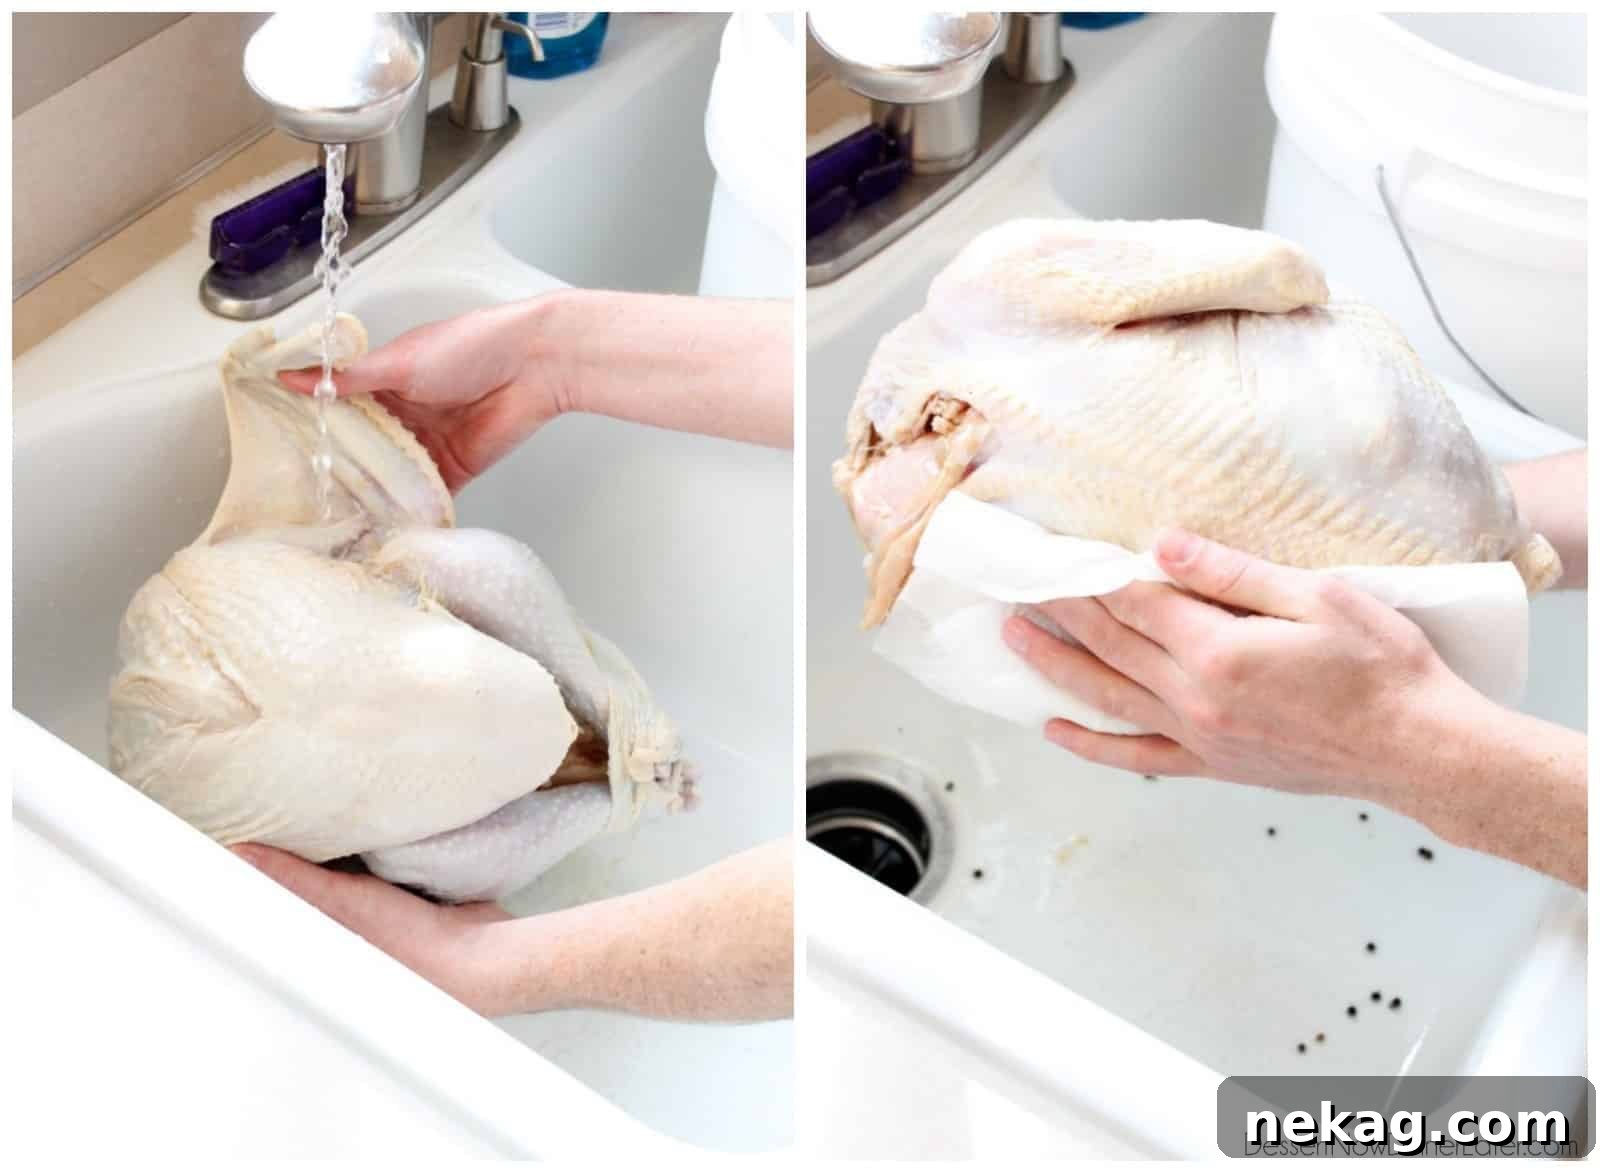
When you’re ready to cook, carefully remove the turkey from the brine and place it in a clean sink. Discard the spent brine solution. Thoroughly rinse the turkey under cold running water, both inside and out, to remove any excess salt from the surface. This step is important to prevent the turkey from being overly salty. Once rinsed, pat the turkey completely dry with paper towels. A dry skin is key to achieving that beautiful, crispy, golden-brown exterior.
Step 6: Seasoning and Aromatics
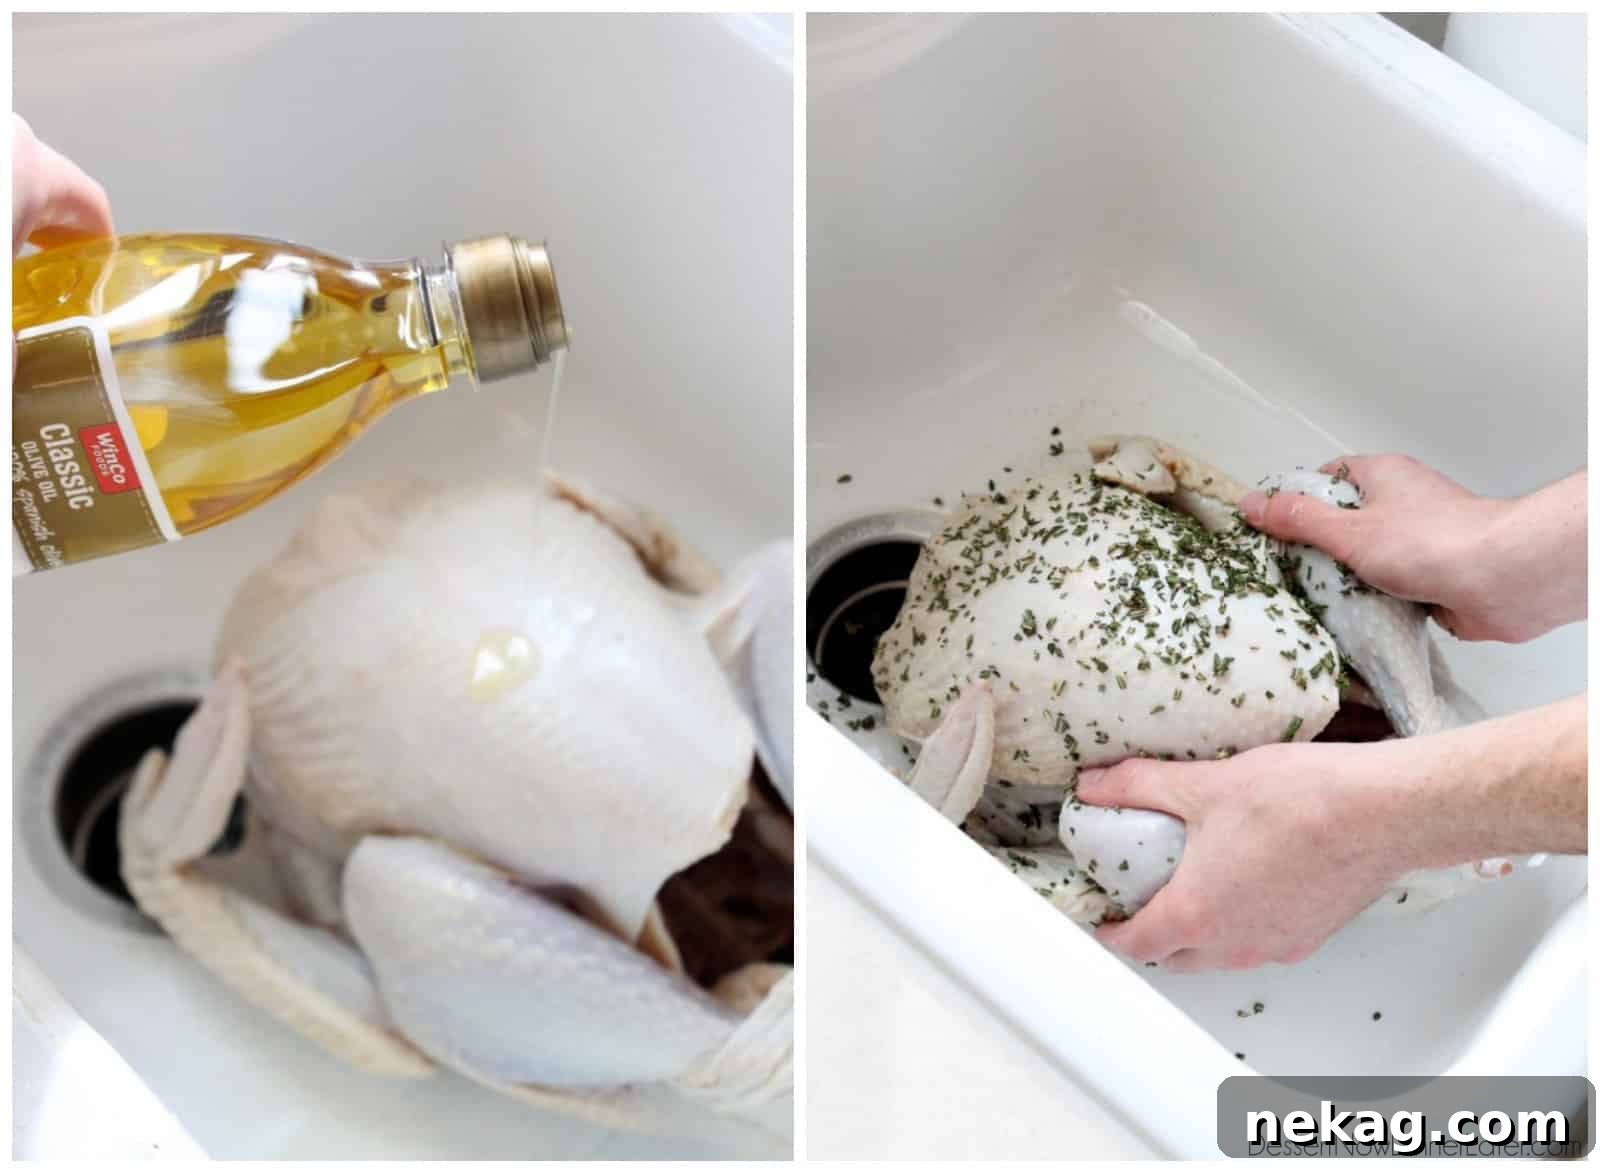
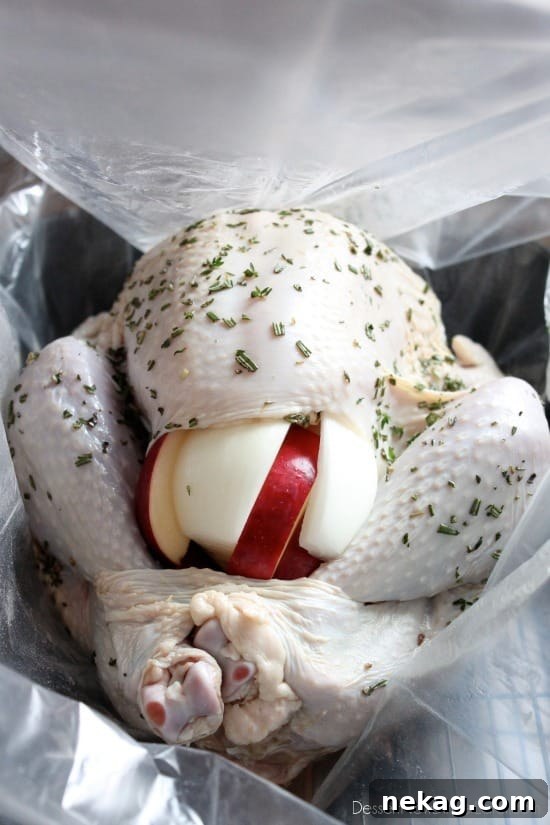
For an extra layer of flavor and a beautifully browned skin, rub the entire outside of the turkey with a light coating of olive oil. Then, generously sprinkle it with fresh chopped herbs – in our case, thyme and rosemary. The olive oil helps the herbs adhere and contributes to a crispier skin. Next, prepare your oven bag according to package directions (some recommend shaking a tablespoon of flour inside to prevent it from sticking). Place the turkey inside the oven bag, which should then be placed into a sturdy roasting pan. To further enhance the turkey’s flavor and moisture from within, stuff its cavity with aromatics like apple chunks, onion slices, and even celery stalks if you have them on hand. These will gently steam inside the bird, adding subtle flavors to the meat and drippings.
Step 7: Roasting and Temperature Monitoring
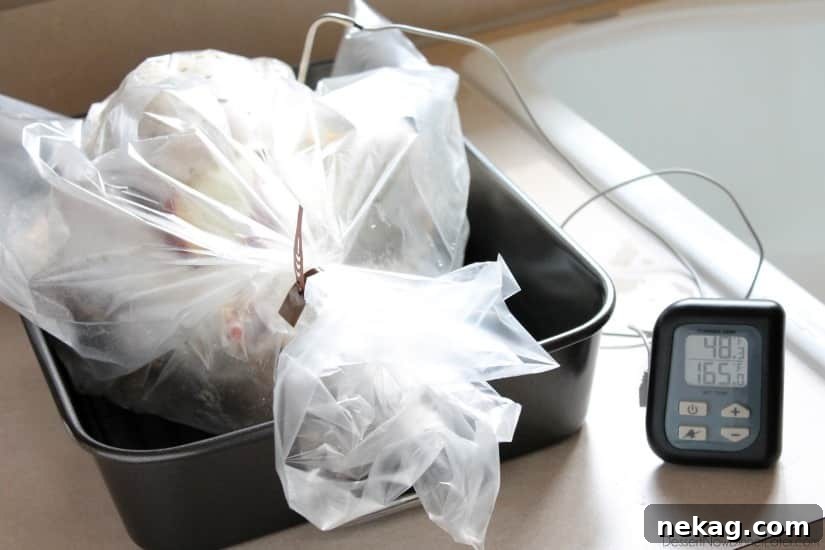
Close the oven bag securely, making sure to cut any 1/2-inch air vents if instructed by the oven bag manufacturer. Insert your oven-safe meat thermometer into the thickest part of the turkey breast, ensuring it does not touch any bones. Set your thermometer to alert you once the internal temperature reaches 165 degrees Fahrenheit (74 degrees Celsius). Preheat your oven to 350 degrees Fahrenheit (175 degrees Celsius). Place the roasting pan with the bagged turkey into the preheated oven. Bake until your thermometer beeps. Our 9 1/2 lb turkey typically reaches 165 degrees Fahrenheit in just under 2 hours. While the minimum safe temperature is 165°F, you can cook it a little longer for deeper browning or personal preference; we’ve found that even at 180°F, a brined turkey remains incredibly juicy and tender.
Step 8: Rest and Carve
Once the turkey reaches the desired internal temperature, carefully remove the roasting pan from the oven. Using kitchen shears, carefully cut open the oven bag. At this point, you can collect the flavorful pan juices for making an incredible gravy – a recipe we’ll share soon! The most crucial final step is to let the turkey rest. Loosely tent the turkey with foil and allow it to rest for at least 15 to 20 minutes before you begin carving. This resting period is vital: it allows the muscle fibers to relax and reabsorb the juices that have migrated to the center of the bird during cooking. If you carve immediately, all those precious juices will simply run out onto your cutting board, leaving you with less moist meat. After resting, carve and serve your perfectly juicy Thanksgiving turkey!
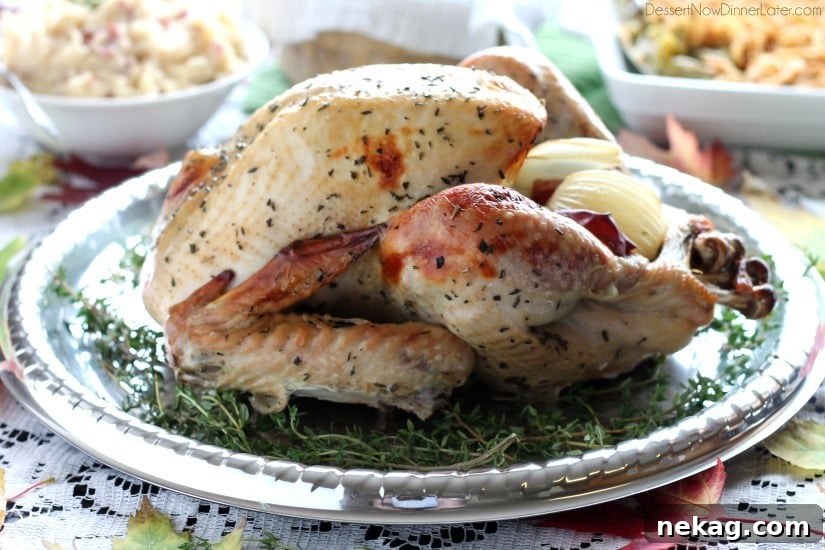
We hope this detailed tutorial empowers you to achieve the most delicious Thanksgiving turkey you’ve ever tasted! This Apple and Herb Turkey Brine recipe is truly a game-changer. Get ready for rave reviews!
Apple and Herb Turkey Brine Recipe
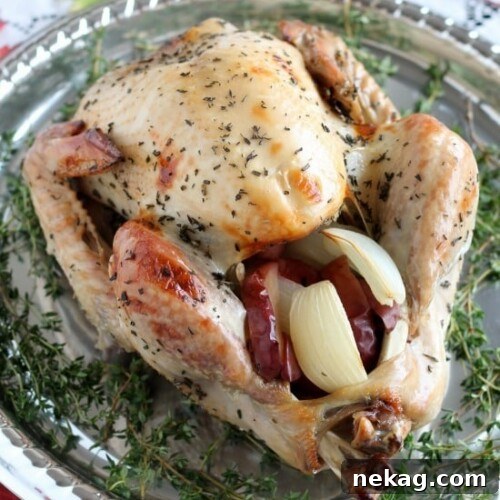
Yields: 12 to 14 servings
Equipment:
- 5-gallon food-grade bucket and lid (or very large stockpot), washed well
- Reliable oven-safe meat thermometer
- 1 Turkey-size oven bag
- Heavy-duty roasting pan
Ingredients for Brine:
- 1 turkey (up to 12 or 14 lbs; for more meat, consider an additional turkey breast or a second turkey, as larger birds can sometimes be gamey)
- 1 gallon chicken broth
- ½ gallon apple juice or cider
- ½ cup brown sugar
- 1 cup kosher salt
- 1 sprig fresh rosemary
- 2 or 3 sprigs fresh thyme
- 1 Tbsp whole peppercorns
- 5 garlic cloves, smashed
- ICE (consider buying a 10lb bag or two)
Ingredients for Roasting:
- 1 to 2 Tbsp olive oil
- 2 Tbsp fresh rosemary, chopped
- 2 Tbsp fresh thyme, chopped
- 1 apple, cut in chunks or thick slices
- 1 onion, cut in chunks or thick slices
- (Optional: 1-2 celery stalks, cut in chunks)
Instructions:
- Thaw Your Turkey: Approximately one week before you plan to brine, place your frozen turkey in the refrigerator to defrost completely. A 9-10 lb turkey takes about 4 days; larger turkeys need more time (allow 1 day per 4-5 lbs).
- Prepare the Brine: The day before roasting, combine chicken broth, apple juice/cider, brown sugar, kosher salt, rosemary, thyme, whole peppercorns, and smashed garlic cloves in a very large stockpot. Bring to a boil, stirring until salt and sugar are dissolved. Remove from heat and let it cool completely to room temperature (1-2 hours).
- Clean Turkey & Container: Thoroughly clean your 5-gallon bucket or large stockpot. Rinse the turkey under cold water, removing and discarding the neck and giblets from the cavity.
- Brine the Turkey: Place the turkey in the bucket. Cover it completely with ice. Pour the cooled brine into the bucket, ensuring the turkey is fully submerged. Add a little more cold water or broth if needed to cover.
- Chill & Soak: Cover the bucket with a tight-fitting lid. Brine the turkey in the refrigerator for 12 to 24 hours. If fridge space is limited, store it in a consistently cold place (below 40°F/4°C, like a cold garage or basement, not above freezing) and periodically add ice to keep it chilled.
- Prepare for Roasting: When ready to roast, remove the turkey from the brine and place it in a clean sink. Discard the brine. Rinse the turkey thoroughly inside and out under cold running water to remove excess salt. Pat the turkey completely dry with paper towels.
- Season the Turkey: Rub the entire outside of the dried turkey with olive oil. Sprinkle generously with fresh chopped rosemary and thyme.
- Bag and Stuff: Prepare the oven bag according to package instructions (e.g., shaking with flour). Place the seasoned turkey inside the oven bag, then place the bagged turkey into a heavy-duty roasting pan. Stuff the turkey’s cavity with apple chunks, onion slices, and optional celery stalks for added aromatics.
- Insert Thermometer & Bake: Close the oven bag securely and cut 1/2-inch air vents as instructed. Insert an oven-safe meat thermometer into the thickest part of the turkey breast, avoiding bones. Preheat your oven to 350°F (175°C). Set your thermometer to beep at 165°F (74°C).
- Roast: Bake the turkey at 350°F (175°C) until the thermometer signals 165°F (74°C). A 9-1/2 lb turkey takes approximately 2 hours.
- Rest Before Carving: Once cooked, remove the turkey from the oven. Carefully cut open the oven bag and save the delicious pan juices for gravy. Tent the turkey loosely with foil and let it rest for a minimum of 15-20 minutes before slicing. This allows the juices to redistribute, ensuring a moist and tender carved turkey. Enjoy your perfectly juicy masterpiece!
Notes:
- When planning, account for approximately 1 lb of turkey weight per person, as the carcass will be discarded.
Disclaimer: Nutritional values were calculated using a third-party tool and are provided as an estimation only.
Sharing this recipe with a link is both encouraged and appreciated. Copying/pasting and/or screenshots of full recipes to any social media is strictly prohibited. Content and photographs are copyright protected.
Did you make this?
We’d love to hear from you! Don’t forget to leave a rating and share your experience. Follow us on Pinterest and Instagram for more delicious recipes and cooking tips!