
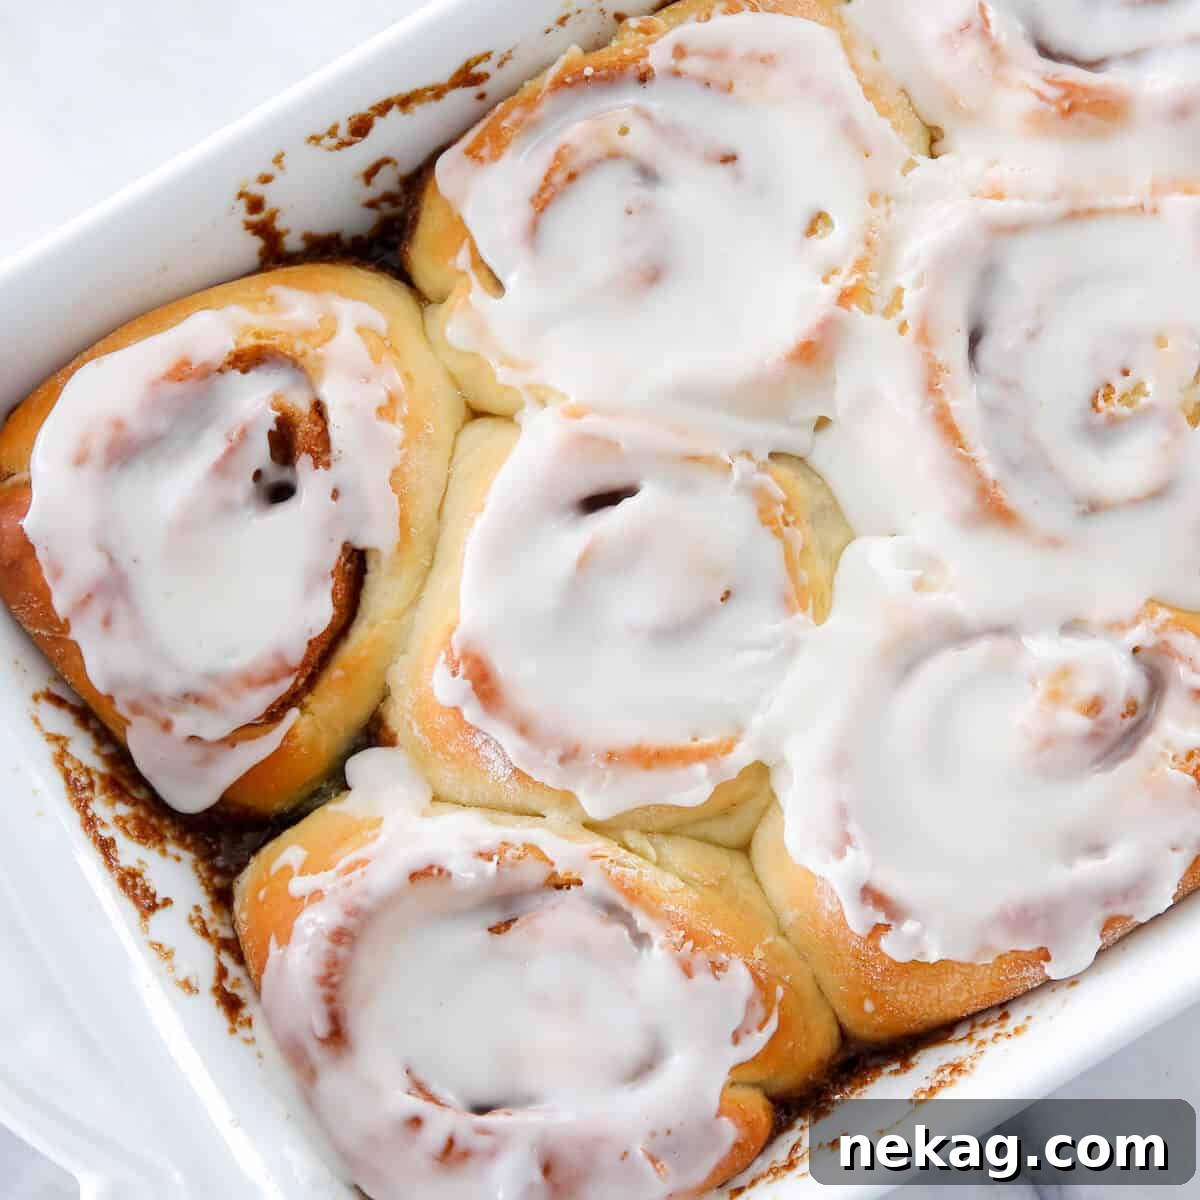
Indulge in Perfection: The Ultimate Sourdough Cinnamon Rolls Recipe
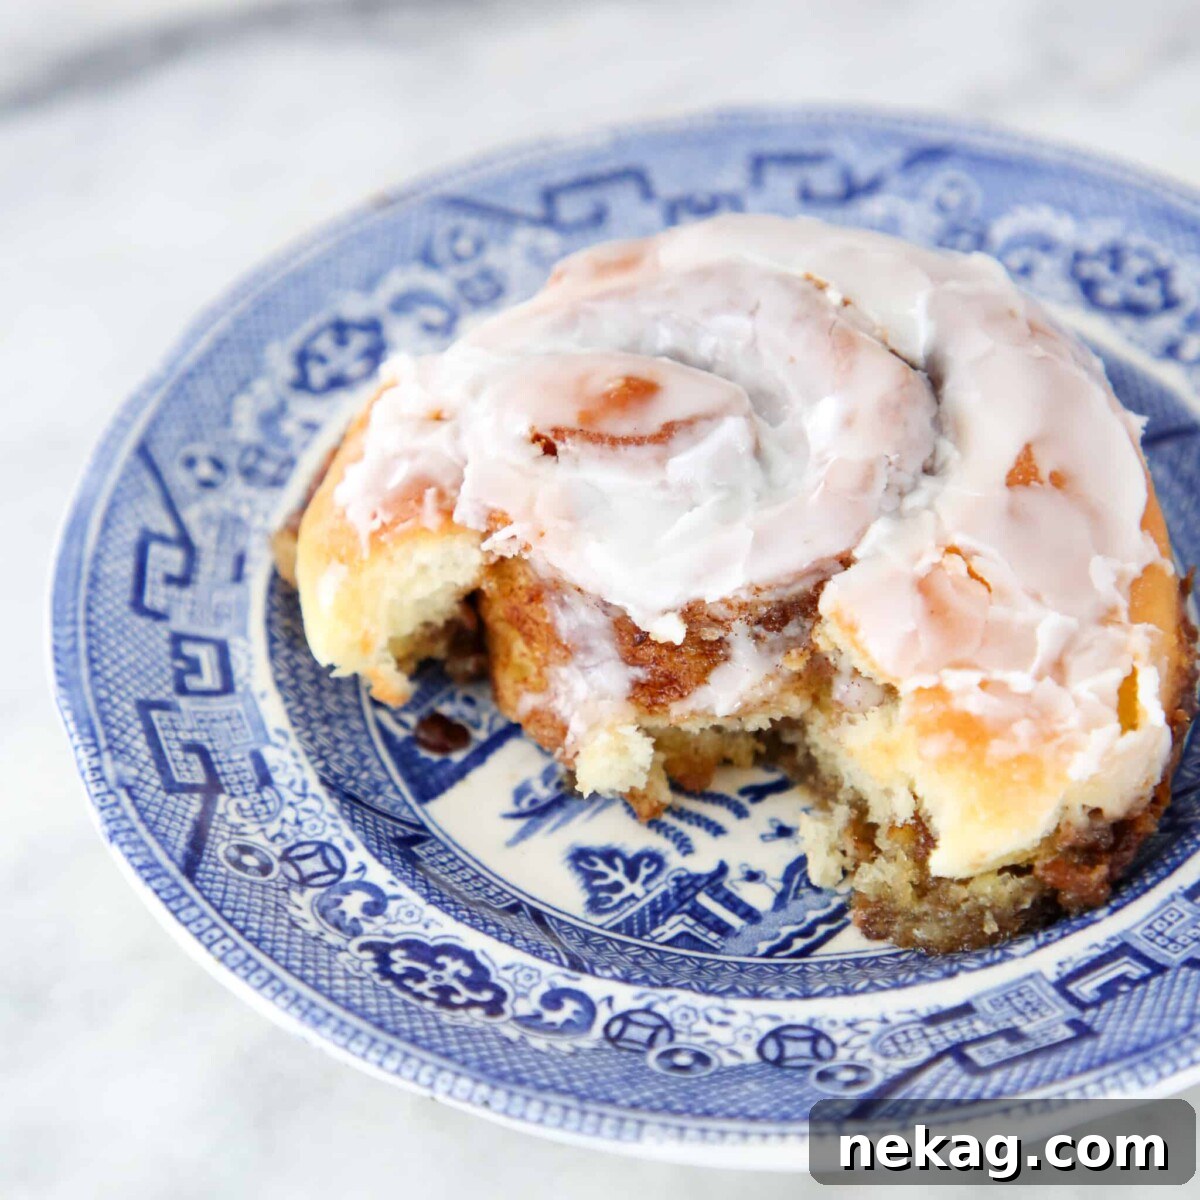
Prepare to experience cinnamon rolls like never before! These **sourdough cinnamon rolls** are the epitome of soft, tender, and cinnamon-sugar perfection. After extensive testing and refining, we’re confident this is the actual best cinnamon roll recipe you’ll ever find, delivering that irresistible gooey center in every single bite. Forget dry, crumbly pastries – these rolls promise an experience that will redefine your expectations for homemade baked goods.

A Quick Look At The Recipe
This is a brief summary of the recipe. Jump to the recipe section below to get the full details.
Jump to Recipe
Prep Time
30 minutes
Cook Time
18 minutes
Proof
50 minutes
Total Time
1 hour 38 minutes
Servings
8 rolls
Difficulty
Intermediate yet easy, with a forgiving dough and clear, guided steps.
Calories *
521 kcal per serving
Technique
Bloom yeast, mix dough, proof, fill, roll, cut, proof, and bake until golden.
Flavor Profile
Soft, tender rolls with a gooey cinnamon swirl and rich, buttery dough.
* Based on nutrition panel
Summarize & Save this content on
google ai
perplexity
grok
[…] I have to say these are some of the best cinnamon rolls I’ve ever had. The roll is light and full of flavor, and I love the filling and that it stays in the rolls. I will be making these on repeat for sure! ⭐⭐⭐⭐⭐
Mara
Why You Will Love These Sourdough Cinnamon Rolls
These aren’t just any cinnamon rolls; they are a labor of love, meticulously developed to bring you the ultimate breakfast indulgence. Here’s why these sourdough cinnamon rolls will become your new favorite:
- Enhanced Texture from Sourdough Starter: While our sourdough starter doesn’t dramatically alter the flavor profile of these rolls, it plays a crucial role in developing an unbelievably superior texture. The natural fermentation process of the starter contributes to gluten development over time, giving these rolls a head start in achieving their signature pillowy softness and tenderness. This results in a dough that is not only easier to work with but also delivers a more complex and satisfying chew.
- Years of Perfection Through Rigorous Testing: Trust us when we say, these sourdough cinnamon rolls are the result of countless hours of testing and refining. Every ingredient ratio, every proofing time, and every baking temperature has been precisely calibrated. We’ve gone through numerous iterations to ensure each roll is consistently soft, perfectly gooey, and utterly delicious from the very first bite to the last, making even the outermost edge as delightful as the coveted center.
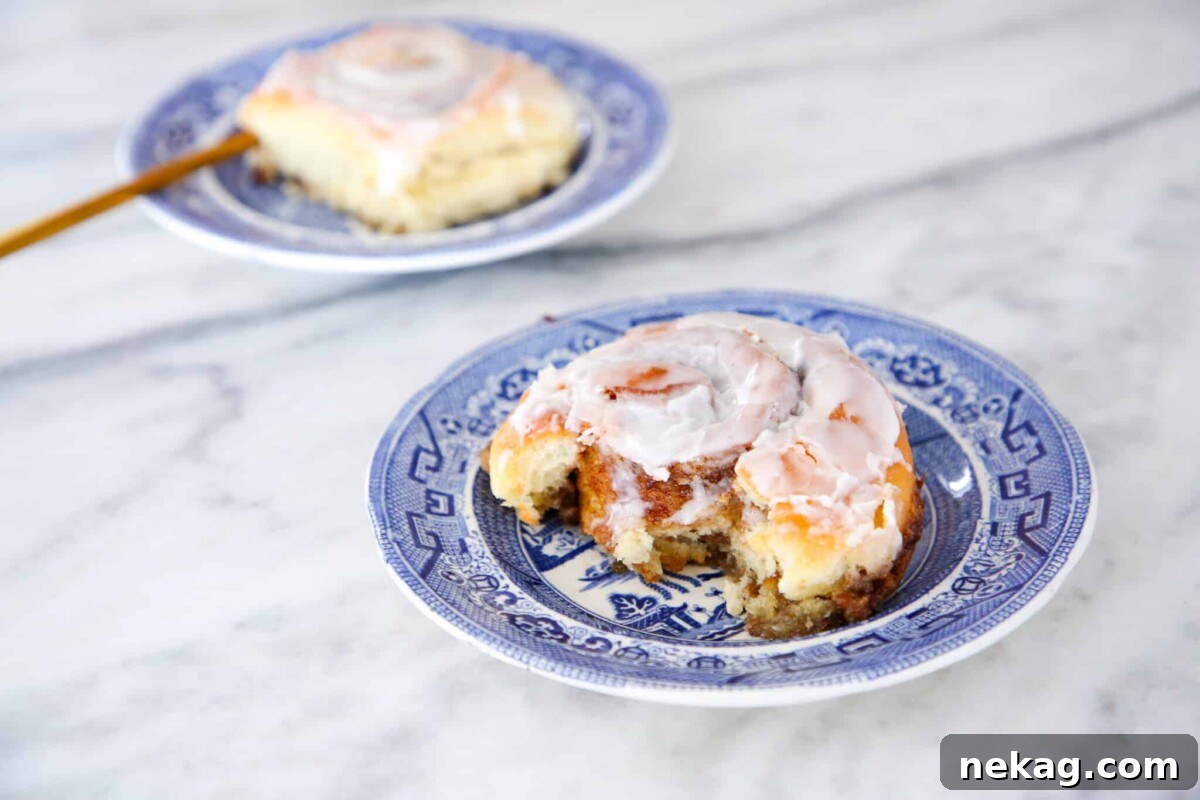
- Moist Rolls with a Non-Escaping Filling: Say goodbye to dry cinnamon rolls and filling that melts away during baking. Our recipe’s meticulous ratios in the dough, combined with a crucial addition of heavy cream just before baking, ensure that these sourdough cinnamon rolls remain incredibly moist. This soft, rich dough harmoniously mingles with a luscious, buttery cinnamon sugar filling that stays beautifully contained within the swirls, creating a satisfyingly gooey texture in every mouthful.
- The Perfect Special Occasion Breakfast: Elevate any morning into a celebration with these spectacular cinnamon rolls. They are a beloved staple in our household for birthday breakfasts, a festive treat on Christmas morning, or simply a luxurious way to make a Sunday morning feel extra special with family and friends. Their impressive appearance and unforgettable taste make them ideal for creating cherished memories.
Table of Contents
- Why You Will Love These Sourdough Cinnamon Rolls
- The Journey to the Perfect Cinnamon Roll
- Essential Ingredients & Smart Substitutions
- Creative Variations for Sourdough Cinnamon Rolls
- Professional Tips for Success
- How to Make Sourdough Cinnamon Rolls: A Step-by-Step Guide
- Chef Lindsey’s Recipe Tip
- Recipe FAQs: Your Questions Answered
- Recommended Cinnamon Dessert Recipes
- Full Sourdough Cinnamon Rolls Recipe Card
- Before You Go: Explore More Sourdough Delights
The Journey to the Perfect Sourdough Cinnamon Roll
My culinary journey is often a testament to patience and persistence. Some recipes, like my delightful carrot cake roll, come together with relative ease, nearly perfect from the first attempt. Others, however, demand a dedication that pushes the boundaries of recipe development. This sourdough cinnamon roll recipe falls into the latter category, standing as a proud second only to my bergamot molten chocolate cake, which underwent nearly 30 iterations to achieve its ideal form.
Through countless batches, meticulous adjustments, and a passionate pursuit of perfection, I can confidently present you with what I believe is THE BEST sourdough cinnamon roll recipe. These rolls are a triumph of texture and taste – unbelievably tender and soft, boasting a pillowy dough that melts in your mouth, perfectly complemented by just the right amount of sweet, aromatic cinnamon sugar filling. Every element has been finely tuned to create a harmonious balance that will leave you craving more.
For those days when you desire the incredible flavor of cinnamon rolls but with a little less fuss, I highly recommend my cinnamon scones with cream cheese glaze, offering all the warmth and spice in a simpler format. And if you’re ready to further elevate your cinnamon roll game, be sure to explore my seasonal apple cinnamon rolls, bursting with autumnal flavors, or venture into the creative world of cereal milk cinnamon rolls for a truly unique twist.
Essential Ingredients & Smart Substitutions
Crafting the perfect sourdough cinnamon roll begins with understanding each ingredient and its role. Here’s a detailed look at what you’ll need and potential substitutions:
- Whole Milk: We opt for whole milk in all our yeasted bread recipes for its richer flavor and higher fat content. The fat contributes significantly to keeping the rolls incredibly tender and moist, while its lower water content helps achieve the ideal dough consistency. You can substitute with any milk alternative, though the richness might slightly vary.
- Active Dry Yeast: This recipe utilizes active dry yeast to give the sourdough starter a gentle boost, ensuring a reliable and relatively quick rise, similar to its function in my popular sourdough raisin bread. If you prefer to rely solely on your sourdough starter, the commercial yeast can be omitted, but be prepared for a longer proofing time. Alternatively, you can substitute active dry yeast with double the weight of fresh yeast.
- Large Egg: The egg adds richness, helps bind the ingredients, contributes to the dough’s structure, and gives the rolls a beautiful golden hue.
- Unsalted Butter: Used generously in both the dough and the filling, unsalted butter is key for flavor, tenderness, and creating that melt-in-your-mouth texture. Ensure it’s softened for the dough and very soft for the filling.
- All-Purpose Flour: Our go-to flour for most bread recipes, all-purpose flour provides the perfect balance of gluten for developing a strong yet tender network, resulting in soft, pillowy rolls. While bread flour can be used (it will yield a slightly chewier roll), we strongly advise against using pastry or cake flour, as their low protein content is insufficient for proper gluten development in a yeasted dough.
- Active Sourdough Starter: This recipe calls for a 100% hydration active starter, meaning the starter has been fed within the last 4-12 hours and is bubbly, active, and at its peak. This is standard for my sourdough starter recipe. Avoid using inactive or “discard” starter for the primary leavening in this recipe, as its strength will be insufficient.
- Salt: A fundamental ingredient in baking, salt enhances all the flavors in the rolls and helps regulate the yeast activity. We prefer kosher salt for its clean taste.
- Granulated Sugar: Beyond sweetness, granulated sugar serves multiple purposes in the dough: it aids in caramelization, contributing to a golden crust, and acts as an immediate food source for the yeast, helping it activate quickly.
- Dark Brown Sugar: Essential for the rich, deep molasses notes in our signature cinnamon filling. Dark brown sugar creates a more robust and gooey filling than granulated sugar. Light brown sugar can be used as an equally delightful substitute if dark brown sugar is unavailable.
- Ground Cinnamon: The star of our filling! Freshly ground cinnamon provides the most potent and aromatic flavor. Don’t skimp on quality here.
- Heavy Cream: This is our secret weapon! Poured over the rolls just before baking, heavy cream infuses them with moisture, ensuring an incredibly soft, tender texture and a perfectly gooey bottom.
- Confectioner’s Sugar: The base for our smooth, delectable icing. It dissolves easily for a silky finish.
- Vanilla Extract: Adds a warm, aromatic depth to the icing, complementing the cinnamon beautifully.
See the recipe card below for full information on specific ingredient quantities.
Creative Variations for Sourdough Cinnamon Rolls
While these sourdough cinnamon rolls are divine on their own, don’t hesitate to get creative! Here are a few ideas to customize your batch and make them uniquely yours:
- Decadent Caramel Cinnamon Rolls: Transform your cinnamon rolls into a hybrid masterpiece inspired by our pecan sticky buns recipe. Simply spread a generous layer of homemade salted caramel sauce at the bottom of your baking pan before placing the cut rolls. As they bake, the caramel will bubble up, creating a sticky, sweet coating. For an extra touch of indulgence, drizzle more caramel on top after baking for caramel in every bite!
- Add a Fruity or Nutty Twist: Take inspiration from delicious creations like strawberry cinnamon rolls and incorporate your favorite fruits or nuts. Swirl in a vibrant cherry pie filling, or a sweet easy peach preserves recipe alongside the cinnamon sugar for a burst of fruitiness. Alternatively, for a delightful crunch, sprinkle toasted pecans, walnuts, or almonds over the filling before rolling the dough.
- Luxurious Cream Cheese Frosting: While our simple glaze is fantastic, a rich cream cheese frosting takes these rolls to the next level of indulgence. Top your warm cinnamon rolls with my easy-to-make cream cheese buttercream frosting for a tangy, creamy complement to the sweet rolls. You could also try the lighter glaze from these overnight cinnamon rolls for a different texture.
- Individual Sourdough Cinnamon Buns: For perfect portion control and easy serving, bake your cinnamon rolls in a greased muffin tin. This method ensures each roll is beautifully shaped and consistently baked, ideal for brunches or gifting.
Professional Tips for Success
Achieving bakery-quality sourdough cinnamon rolls at home is entirely possible with a few professional insights. Pay close attention to these key tips for the best results:
- Precision in Measurements is Paramount: Baking, especially with enriched doughs like these, is a science. For the ultimate filling-to-dough ratio and a consistently perfect cinnamon roll, precise measurements are non-negotiable. I measure everything down to the gram because even slight discrepancies can affect the final texture and taste. For the most accurate results, I highly recommend using a digital kitchen scale. This small investment will dramatically improve your baking accuracy and success.
- The Art of Softened Butter: Resist the temptation to microwave your butter! Melted butter and properly softened, “tempered” butter behave very differently in a recipe. For the filling, you need butter that is incredibly soft, almost spreadable like a paste, but not melted. If your butter is too warm and liquid, the filling will seep out during baking and won’t achieve that desirable gooey texture. Achieving the perfect level of softness requires patience, but it’s absolutely worth the wait for a filling that stays put and bakes beautifully.
- Utilize a Ruler for Uniformity: For aesthetically pleasing and evenly baked cinnamon rolls, a ruler is your best friend. When rolling out the dough, aim to maintain sharp, even corners to ensure a consistent rectangle. Then, when it comes to dividing the dough into individual rolls, a ruler will help you cut precisely 2 ½ inch pieces, ensuring each roll is the same size. This uniformity isn’t just for looks; it guarantees that all your rolls bake at the same rate, preventing some from being overdone while others are still raw. A clear plastic ruler kept specifically for baking tasks is an invaluable tool in my kitchen.
How to Make Sourdough Cinnamon Rolls: A Step-by-Step Guide
Follow these detailed instructions to create incredibly soft, tender, and easy sourdough cinnamon rolls. You’ll find further specific details and exact measurements in the recipe card below.
Making the Dough: The Foundation of Flavor and Texture
The dough for these cinnamon rolls is designed for a perfect balance of richness and elasticity, resulting in a wonderfully soft texture. Pay attention to the temperature of your milk and the consistency during mixing.
Step 1: Activate the Yeast. Begin by preparing your stand mixer. In its bowl, add the warm milk. The ideal temperature is just slightly warmer than body temperature, around 105°F (40°C), which is crucial for yeast activation without killing it. Gently sprinkle the active dry yeast evenly over the surface of the milk. Use a whisk to carefully break up any clumps, ensuring the yeast is well distributed. Allow this mixture to “bloom,” meaning let it sit undisturbed for 10 minutes. This period allows the yeast to rehydrate and become active, indicated by a bubbly, frothy surface, confirming it’s ready to work its magic.
Step 2: Combine Remaining Dough Ingredients. Once your yeast is active and bubbly, add all the remaining ingredients for the dough directly into the stand mixer bowl. This includes the egg, softened unsalted butter, all-purpose flour, active sourdough starter, kosher salt, and granulated sugar. There’s no need for incremental additions; simply dump everything in at once for efficiency.
Step 3: Mix Until Smooth. Attach the paddle attachment to your stand mixer. Begin mixing on a low speed, gradually increasing to medium-low, until all the flour is fully incorporated and the mixture forms a smooth, cohesive dough without any dry pockets or lumps. This initial mixing step helps to bring all the ingredients together uniformly before gluten development truly begins.
Step 4: Develop the Dough. Now, switch from the paddle attachment to the dough hook attachment. Continue mixing on a medium-low speed for approximately 3-4 minutes. It’s important to note that this is a relatively wet and sticky dough, so it will not completely pull away from the sides of the bowl or climb the hook like some firmer doughs. This is perfectly normal and exactly the desired consistency for ultra-soft cinnamon rolls. Do not be tempted to add more flour at this stage, as it would alter the delicate balance of the recipe.
Bulk Fermentation: The First Rise
This critical step allows the yeast and sourdough starter to work together, developing flavor and structure.
Step 5: First Rise (Bulk Proof). Carefully turn the sticky dough out into a large bowl that has been lightly sprayed with cooking spray. This prevents sticking and makes it easier to remove the dough later. Cover the bowl tightly with plastic wrap to prevent the dough from drying out. Place the covered bowl in a warm spot to bulk proof for 30-45 minutes, or until the dough has visibly doubled in size. A warm environment, ideally around 85°F (29°C), will facilitate a good rise. Many ovens have a “proof” setting that works perfectly. Alternatively, for a slower, more manageable rise, you can “retard” the dough by proofing it in the refrigerator overnight. Cold dough is often easier to handle and develops deeper flavors.
Crafting the Irresistible Filling
The filling is what truly makes a cinnamon roll special. Its consistency is key to ensuring it stays put and bakes into a gooey delight.
Step 6: Prepare the Cinnamon Sugar Filling. While your dough is undergoing its first proof, take this opportunity to prepare the delicious cinnamon sugar filling. In a medium-sized bowl, combine the unsalted butter (ensure it’s very soft, almost to the point of melting but still solid enough to hold its shape), the dark brown sugar (packed firmly), and the ground cinnamon. Mix these ingredients thoroughly with a spoon or spatula until they form a smooth, thick paste. Set this aromatic mixture aside, ready to be spread onto your perfectly proofed dough.
Assemble and Second Rise: Shaping and Final Proof
This is where your rolls take shape and prepare for their glorious bake.
Step 7: Prepare Work Surface and Dough. Once the dough has doubled in size, generously flour your clean work surface. Turn the sticky dough out onto the floured counter. A bowl scraper or a sturdy rubber spatula can be incredibly helpful here to cleanly release the dough from the bowl. Sprinkle another generous layer of flour on top of the dough and lightly flour your rolling pin. This prevents sticking and allows for easier handling of the soft dough.
Step 8: Roll the Dough into a Rectangle. Using your floured rolling pin, gently and evenly roll the dough out into a rectangle approximately 12 inches long by 10 inches high (30 cm x 25 cm). Strive to maintain relatively sharp corners as you roll, which helps ensure uniform rolls later. It can be a little challenging with a soft dough, but focusing on this goal will improve your final product!
Step 9: Spread the Filling. Once your dough rectangle is formed, take your cinnamon-sugar paste and spread it evenly across the entire surface of the dough using an offset spatula. For really consistent coverage, sometimes using your clean fingers can help gently spread the filling without tearing the delicate dough. It’s a good idea to leave a small border (about half an inch) along the top and bottom edges of the rectangle; this helps create a cleaner roll and prevents excessive filling from oozing out during shaping.
Step 10: Shape and Cut the Rolls. Starting from the bottom 12-inch edge of the rectangle, begin to tightly roll the dough away from you, working your way up to the top edge. Ensure the roll is snug but not overly compressed. Once fully rolled, gently pinch and seal the top edge seam to secure the roll. Using a very sharp knife (or a bench scraper for precision), cut the rolled dough into approximately 2 ½ inch (6.3 cm) thick pieces. This should yield 8 perfectly sized cinnamon rolls.
For the cleanest cuts and to prevent the filling from being pushed out, a very sharp knife is recommended. A sharp serrated knife can also work well. If you prefer the dental floss method, always use unflavored dental floss to avoid any unwanted minty notes in your delicious cinnamon rolls.
Step 11: Arrange for Second Proof. Lightly spray a 9”x 11” baking dish with cooking spray. Carefully place the cut cinnamon rolls into the prepared dish, ensuring they are spaced about 2 inches apart. I find that offsetting them – placing two in a row, followed by one in the center of the next space, then another row of two, and so on – provides optimal room for them to proof and expand without crowding each other. This also ensures even baking.
Step 12: Second Rise (Proof) and Preheat. Cover the baking dish loosely but securely with plastic wrap. Return the rolls to your warm spot for their second fermentation (proof) for an additional 20-40 minutes. During this time, the rolls should visibly puff up and become soft and airy. While they are proofing, preheat your oven to 350°F (175°C).
I typically proof my rolls for about 20 minutes, then remove the dish from the warm spot and proceed with preheating my oven to 350°F (175°C), often using the convection setting for more even heat distribution.
Baking to Golden Perfection
The heavy cream is our secret weapon for unbelievably moist rolls!
Step 13: Add Heavy Cream. Just before placing the rolls into the preheated oven, gently remove the plastic wrap. Pour the heavy cream evenly over the tops of all the rolls. This step is crucial for achieving an incredibly moist, tender texture and that signature gooey bottom.
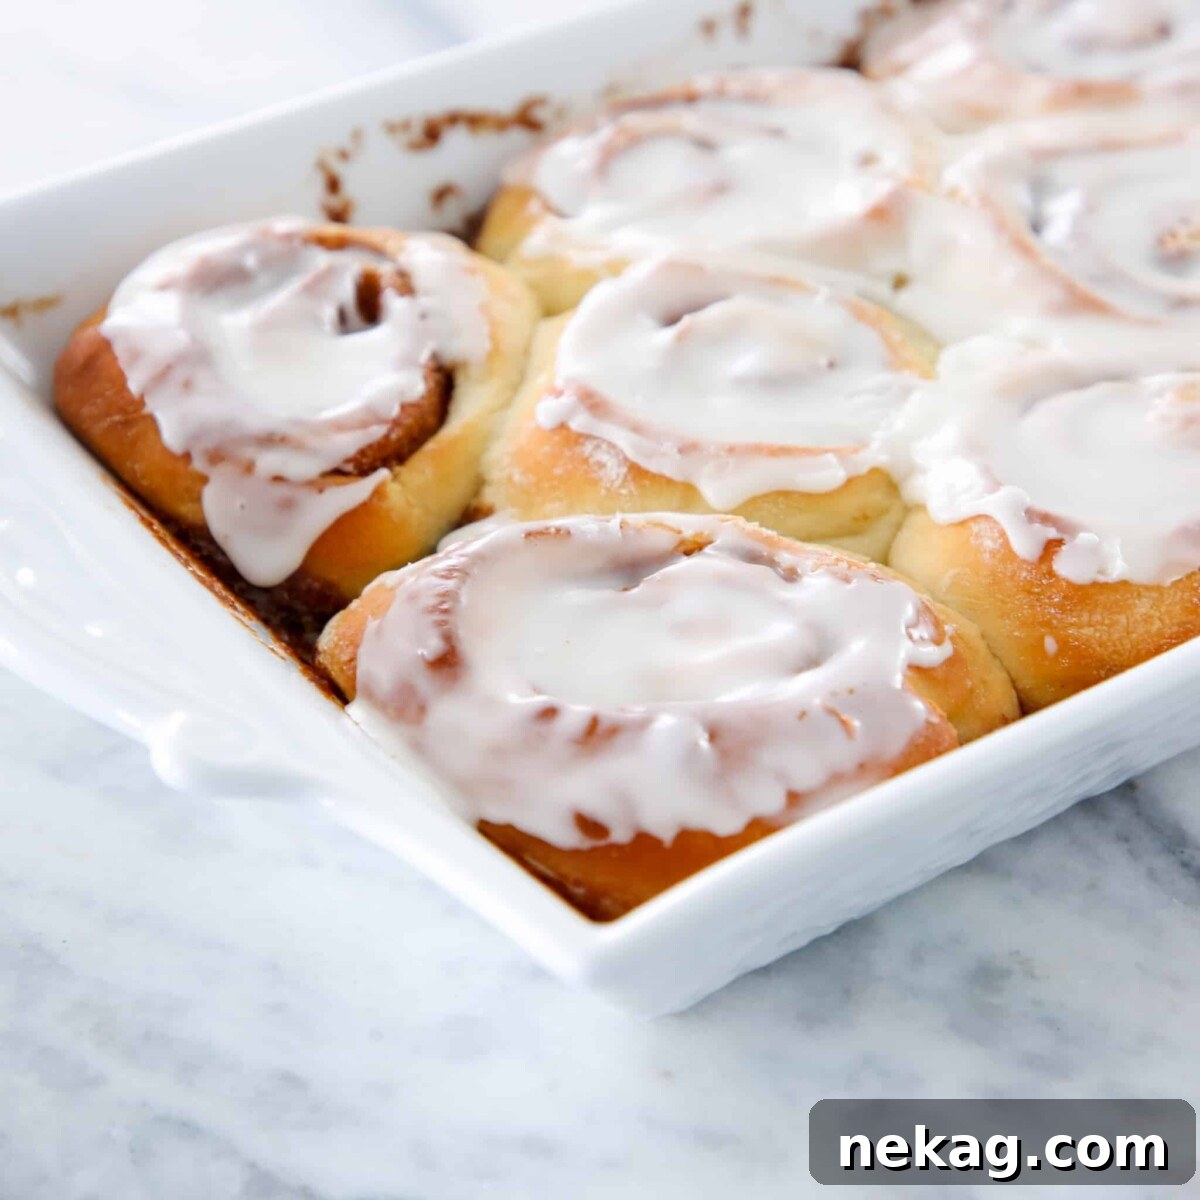
Step 14: Bake. Place the baking dish into your preheated 350°F (175°C) oven. Bake for approximately 15-20 minutes. Keep a close eye on them; mine usually bake perfectly in 18 minutes. The rolls are done when their edges are beautifully golden brown, the tops have a slight golden hue, and the centers no longer appear or feel doughy. A slight jiggle should indicate they are set.
Whipping Up the Icing
The final touch that makes these rolls utterly irresistible.
Step 15: Allow to Cool Slightly. While it’s tempting to ice them immediately, allow the baked cinnamon rolls to cool in the baking dish for about 10-15 minutes after removing them from the oven. This brief cooling period helps the rolls set and prevents the icing from melting entirely and simply running off the sides.
Step 16: Whisk the Icing. In a small bowl, combine all the ingredients for the icing: confectioner’s sugar, vanilla extract, and milk. Whisk thoroughly until the mixture is completely smooth and free of lumps. You can adjust the consistency by adding more milk, a tiny bit at a time, until it reaches your desired thickness. I personally prefer a slightly thicker icing so that it can be generously spread on the still-warm cinnamon rolls, creating a luscious topping that truly feels like a little bit of heaven on earth!
Chef Lindsey’s Recipe Tip
My original sourdough cinnamon roll recipe called for 207g of all-purpose flour. However, after extensive feedback and testing with home bakers, I’ve increased the flour amount to 257g. This adjustment makes the dough significantly easier for bakers of all skill levels to work with, resulting in a more manageable and forgiving consistency without sacrificing flavor or tenderness. The current recipe yields a dough more akin to my widely loved classic cinnamon roll recipe with cream cheese icing. For the truly adventurous and experienced sourdough baker who desires an even lighter, more delicate crumb, you’re welcome to try the original 207g flour quantity, but be prepared for a much softer, stickier dough!
Recipe FAQs: Your Questions Answered
Have questions about making or storing your sourdough cinnamon rolls? Find answers to common queries here:
For optimal freshness and softness, sourdough cinnamon rolls are best stored tightly wrapped at room temperature. Place them in an airtight container or wrap them individually in plastic wrap to prevent them from drying out. While they are undoubtedly at their peak deliciousness on the day they are baked, they will maintain good quality for up to 3 days at room temperature. If you need to store them for longer, they can be refrigerated for up to a week, though they may gradually lose some moisture and tenderness over time. To revive refrigerated rolls, a quick warm-up in the microwave or oven can bring back some of their original softness.
Absolutely! This recipe is adaptable for overnight preparation, making it perfect for a fresh-baked breakfast without the early morning effort. If you plan to bake them the next day, I recommend omitting the active dry yeast from the dough recipe and relying solely on your active sourdough starter. Prepare the dough, allow it to complete its bulk proof, then assemble the rolls and place the unbaked rolls in your baking dish. Cover them tightly with plastic wrap and “retard” them by placing them in the refrigerator overnight. The cold temperature will significantly slow down the proofing process. The following morning, take them directly from the fridge and bake as directed. They may require a few extra minutes in the oven since they are starting cold.
Yes, freezing is an excellent option for meal prepping these delicious cinnamon rolls. You can assemble the rolls up to the second proofing stage. Once the rolls are shaped and placed in their baking dish, cover them very tightly with multiple layers of plastic wrap and aluminum foil to prevent freezer burn. They will keep well in the freezer for up to one week before baking. When you’re ready to bake, you can often transfer them directly from the freezer to a preheated oven (though they may require a longer baking time) or allow them to thaw and proof at room temperature for a couple of hours before baking. If the rolls were already proofed before freezing, they can usually go straight into the oven.
Recommended Cinnamon Dessert Recipes
If you’re a true cinnamon enthusiast, you’ll love exploring these other delicious recipes that celebrate the warm, inviting spice:
Breakfast Pastry Recipes
Cinnamon Roll Recipe with Cream Cheese Icing
Apple Recipes
Apple Cinnamon Rolls
Breakfast Pastry Recipes
Pecan Sticky Buns Recipe
Cookie Recipes
Cinnamon Sugar Cookies
If you tried this recipe and loved it, please leave a 🌟 star rating and let me know how it goes in the comments below. I love hearing from you; your comments make my day!
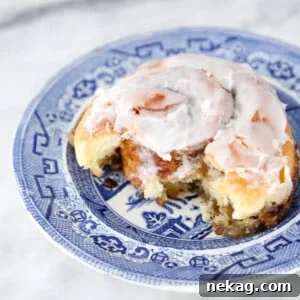
Sourdough Cinnamon Rolls
Comment
Print Recipe
Ingredients
For the Dough:
- ½ cup warm milk a little warmer than body temperature. 105°F if you want a number
- 1 ¼ teaspoon dry active yeast see Notes for substitutions
- 1 large egg
- ½ stick unsalted butter softened
- 1 ⅔ cups all purpose flour
- ⅓ cup 100% hydration active sourdough starter fed 12 hours prior, not discard
- ½ teaspoon kosher salt
- 3 ½ tablespoons granulated sugar
For the Cinnamon Sugar Filling:
- 1 stick unsalted butter so soft that it is almost melted and will spread easily with a spatula
- ¾ cup dark brown sugar PACKED
- 1 tablespoon ground cinnamon
- 1 ½ tablespoons heavy cream reserve for right before baking
For the Icing:
- 2 cups confectioner’s sugar
- ½ teaspoon vanilla extract
- 2 tablespoons milk or more as needed to thin it out
Instructions
Make the Dough:
-
In the bowl of a stand mixer, add the warm milk, then sprinkle the yeast over the surface. Whisk to break up any clumps. Allow to bloom (sit unperturbed) for 10 minutes or until the mixture is bubbly.
-
Add the remaining ingredients for the dough to the bowl. All at once! Just dump it in there!
-
Fit the mixer with the paddle attachment and mix until all the flour is incorporated and no lumps remain.
-
Switch to the dough hook attachment. Mix on medium speed for 3-4 minutes. The dough will not pull away from the sides of the bowl or climb the hook. It is a wet dough, and this is not in its nature. That is OK!
Bulk Fermentation:
-
Turn out into a large bowl sprayed with cooking spray, cover with plastic wrap, and bulk proof in a warm spot for 30-45 minutes. When it has doubled, it is done!
Make the Filling:
-
While the dough proofs, make the filling. In a bowl, mix the soft butter, sugar, and cinnamon. Mix until a paste forms. Set aside.
Assemble and second proof:
-
Generously cover your work surface with flour and turn out your dough onto the counter. A bowl scraper or rubber spatula helps here because the dough is sticky. Sprinkle a generous amount of flour on top of the dough and flour a rolling pin.
-
Roll the dough out into a 12-inch-long by 10-inch-high rectangle. (Try to keep those sharp corners! It’s harder than it looks, but it’s good to have goals, right?)
-
Once you have your rectangle, spread your filling with an offset spatula. Sometimes it is necessary to let your fingers join the party to help spread/hold the dough. I purposefully keep a border on the top and the bottom edge.
-
Starting at the bottom edge (12 inches across), start to roll away from you. Seal the top edge. Cut approximately 2 ½ inch pieces with a sharp knife (or your bench scraper). This makes 8 rolls.
-
Spray a 9“x 11” baking dish with cooking spray, and then place the cinnamon rolls about 2 inches apart. I offset them so I have a row with two, followed by one in the center, and then another row of two, and so on. This gives them space to proof and grow without crowding.
-
Cover with plastic wrap and return to your warm spot to proof for an additional 20-40 minutes. Preheat the oven to 350°F
Baking:
-
Right before baking, remove the plastic wrap and pour the heavy cream over the tops of the rolls.
-
Bake at 350°F for approximately 15-20 minutes. Mine baked 18. They will be golden brown around the edges and a bit on top, and the centers will no longer look or feel doughy.
Make the Icing:
-
Allow to cool before icing.
-
Whisk all the ingredients for the icing together. I kept mine a bit thicker so that I could spread it on the still-warm cinnamon rolls from the oven. A little bit of heaven on earth to be sure!
Video
Notes
Yield – This recipe makes 8 deliciously generous sourdough cinnamon rolls.
Presentation Tips – For the most appealing presentation, allow the rolls to cool for at least 10 minutes before spreading the icing on top. This crucial resting period allows the rolls to set slightly and prevents the icing from completely melting and running off, ensuring it remains a luscious layer on each roll. Additionally, making your icing a bit thicker will help it stay on top even more effectively, creating a beautiful finish.
Flavor Enhancement – Do not, under any circumstances, skip the heavy cream addition just before baking! This is a little trick I learned from the wonderful ladies at Taste of Lizzy. While I don’t use as much as their recipe, even a small amount makes an enormous difference. It’s the secret to keeping the cinnamon filling smooth, rich, and gooey, and ensures the bottoms of the rolls remain incredibly soft and moist, preventing any dryness.
Sourdough Technique – If you choose to modify the recipe and use sourdough discard (instead of active starter) for any part of the leavening, ensure it’s not an old, dormant discard that has been neglected in the back of your refrigerator for months. For best results, use a relatively fresh discard or feed your starter at least once before incorporating it, even if just for flavor contribution. For recipes specifically designed for sourdough discard that require a longer fermentation, like my sourdough pizza dough recipe, it’s typical for the dough to sit for 2-3 days before baking, allowing sufficient time for flavor and structure development.
Storage Guidelines – Sourdough cinnamon rolls are truly at their best on the day they are baked, when they are warm, fresh, and exceptionally soft. For short-term storage, keep them tightly wrapped in an airtight container at room temperature for up to 3 days. While they can be refrigerated for up to a week, be aware that they will slowly begin to dry out. Reheating them gently can help restore some of their delightful texture.
Nutrition
Before You Go: Explore More Sourdough Delights
Thank you for embarking on this delicious journey with our sourdough cinnamon rolls recipe! We truly hope you enjoyed creating and savoring this incredible brunch treat. The world of sourdough baking is vast and rewarding, offering endless possibilities for flavorful homemade goods.
If you’re eager to continue your sourdough adventure and explore more of its versatility, be sure to check out our other fantastic sourdough bread recipes. You might fall in love with the rustic charm and perfect texture of our sourdough rolls, ideal as a side for any meal, or perhaps indulge in the sweet and savory notes of this unique cherry pecan sourdough bread. Happy baking, and we look forward to hearing about your culinary successes!