
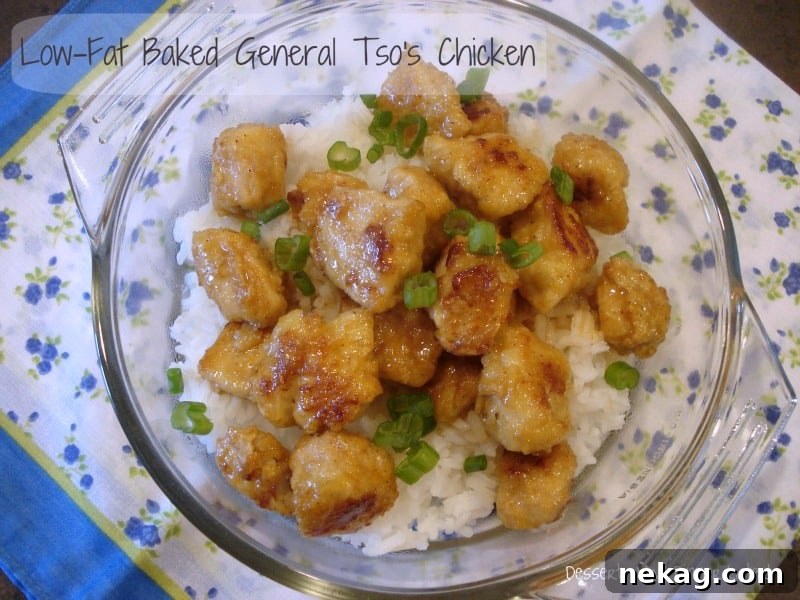
Indulge in Homemade General Tso’s Chicken: A Healthier Baked Delight
Craving the vibrant, sweet, and spicy flavors of your favorite Chinese takeout but want a healthier option? Look no further! This recipe for Low-Fat Baked General Tso’s Chicken is a game-changer that will undoubtedly rock your world. Forget the deep fryer; we’re bringing all the irresistible taste and satisfying texture right to your oven. Bursting with robust flavors from fresh ginger, pungent garlic, and a perfectly balanced sauce with an adjustable hint of heat, this dish is a testament to how incredible homemade Chinese cuisine can be. Every bite delivers a delightful blend of savory, sweet, and spicy notes that will have you coming back for more. It’s an authentic-tasting meal that’s surprisingly easy to make, transforming your weeknight dinner into an exciting culinary adventure.
While preparing a homemade Chinese dish might seem like a significant undertaking, this recipe proves otherwise. The process is streamlined to ensure you spend less time fussing in the kitchen and more time enjoying a gourmet meal. Even the most “challenging” part – coating the chicken for that essential textured exterior – becomes a breeze, especially if you enlist a helpful partner. The result is beautifully browned, tender chicken that, while not ultra-crisp like its deep-fried counterpart, offers a wonderfully satisfying bite straight from the oven. We’ve also included some crucial tips for mastering the sauce, particularly its delicate caramel base, so be sure to read through the entire recipe thoroughly before you begin. Get ready to elevate your home cooking with this incredibly flavorful and healthier General Tso’s Chicken!
Why Opt for Baked General Tso’s Chicken? A Healthier Takeout Favorite
In the expansive realm of classic Chinese American dishes, General Tso’s Chicken reigns supreme with its irresistible combination of crispy chicken coated in a rich, flavorful sauce. Traditionally, this iconic dish involves deep-frying the chicken, which, while undeniably delicious, adds significant calories and fat. Our innovative baked version offers a fantastic alternative, allowing you to savor all the authentic tastes without the guilt or the substantial mess associated with deep-frying. Baking transforms the chicken into tender, juicy pieces with a beautifully browned, slightly crisp exterior, skillfully mimicking the desirable texture of fried chicken without excessive oil. This ingenious method not only makes the dish significantly lighter and healthier but also simplifies the overall cooking process, making it far more accessible and enjoyable for home cooks of all skill levels.
Choosing to bake your General Tso’s chicken provides a multitude of practical and health-conscious benefits. Firstly, it drastically reduces the amount of oil needed in the preparation, leading to a dish that’s considerably kinder to your waistline and cholesterol levels. Secondly, it offers a far less messy cooking technique; there’s no hazardous splattering oil to contend with and minimal cleanup afterward, which is a huge bonus on busy weeknights. Thirdly, the oven takes on most of the heavy lifting, freeing you up to dedicate your attention to crafting the incredible General Tso’s sauce and preparing other essential accompaniments like fluffy steamed rice or vibrant sautéed vegetables. The chicken bakes uniformly, developing a delightful crispness on the outside while remaining incredibly moist and succulent inside. This healthier twist on a beloved classic ensures that you can savor every single spoonful, knowing you’re making a mindful and delicious choice for yourself and your family.
Mastering the Chicken: Achieving Perfect Baked Texture and Flavor
The secret to creating exceptional General Tso’s chicken, even when baked, lies in the meticulous preparation of the chicken pieces themselves. We recommend starting with high-quality boneless chicken thighs or breasts, which should be cut into uniform, bite-sized chunks. This consistent sizing is crucial for ensuring even cooking and optimal coating, allowing each piece to become a perfect vehicle for the sauce. The coating process, though simple, is fundamental to achieving the desired texture: each piece of chicken is first thoroughly dipped in a light egg wash, which acts as a crucial binder, and then dredged generously in a meticulously seasoned all-purpose flour mixture. This flour blend is expertly enhanced with finely ground black pepper, a touch of cayenne pepper for a subtle but satisfying kick, aromatic dried ginger for an undeniable depth of flavor, and salt to bring everything into perfect balance. This carefully crafted coating creates a flavorful crust that browns beautifully and evenly in the oven.
Once expertly coated, the chicken pieces are carefully arranged in a single layer on a lightly greased baking sheet. It’s important to ensure that the pieces do not touch each other, as overcrowding can lead to steaming rather than baking, preventing them from achieving that coveted crisp-tender exterior. A light drizzle of olive oil or a quick spray with cooking oil over the tops of the coated chicken ensures that the flour coating browns to a lovely golden hue, developing a wonderfully satisfying texture that holds up exceptionally well to the rich, glossy sauce. Baking at a precise 375˚F (190˚C) for approximately 25-30 minutes, with a crucial flip halfway through the cooking time, guarantees that the chicken cooks through completely and evenly, while also developing that desirable crisp-tender quality without becoming dry or tough. This method perfectly prepares the chicken to absorb the incredible, complex flavors of the General Tso’s sauce, making each piece an ideal canvas for our vibrant and unforgettable sauce.
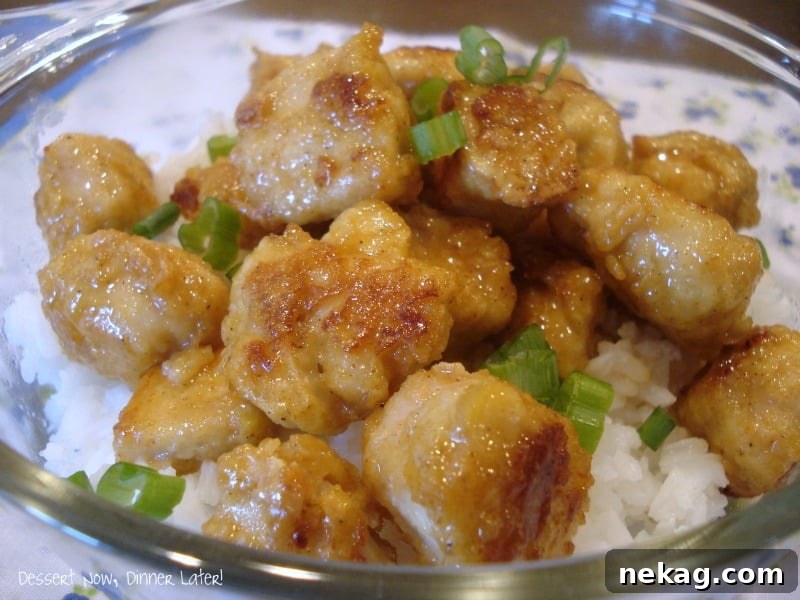
The Irresistible General Tso’s Sauce: A Symphony of Sweet, Spicy, and Savory Flavors
The true heart and soul of any outstanding General Tso’s Chicken recipe is its signature sauce – a complex and harmonious balance of sweet, savory, tangy, and spicy elements that create an explosion of flavor in every bite. Our homemade sauce meticulously captures this quintessential essence, starting with a unique caramel base that imparts an unparalleled depth of flavor and a beautiful sheen. For optimal preparation, the sauce ingredients are thoughtfully divided into two distinct parts: the intensely flavorful liquid components and the essential caramel foundation.
Part I meticulously combines high-quality soy sauce, versatile rice wine vinegar (or plain rice vinegar for a readily available option), a measured amount of water, fragrant toasted sesame seed oil, vibrant hot chili paste (Sriracha is an excellent and popular choice), a touch of salt, cornstarch for thickening, finely minced garlic, and either freshly grated ginger or its dry ground counterpart. This expertly blended mixture forms the savory and spicy backbone of the sauce, with cornstarch ensuring a perfectly thick and glossy consistency, and the ginger and garlic infusing it with their irresistible aromatic warmth. The inherent beauty of this particular recipe lies in its adaptability – you possess complete control to easily adjust the amount of chili paste, allowing you to tailor the heat level precisely to your preference, from a gentle, warming spice to an exhilarating, fiery kick.
Part II is where the culinary magic of caramelization truly unfolds. Granulated sugar and water are gently combined in a medium saucepan, then heated over medium heat. A crucial step here is to resist the urge to stir the mixture once it begins to heat. This “no-stir” technique is paramount, as it allows the sugar to melt undisturbed and transform into a beautiful, glistening light amber caramel. This delicate process demands your undivided attention, as caramel can transition from perfect to burnt in a matter of mere seconds. The resulting rich, slightly nutty, and deeply sweet flavor of the caramel is what profoundly elevates this sauce beyond ordinary, providing a complex sweetness that perfectly complements the other vibrant and bold ingredients.
Once the caramel reaches its ideal, captivating amber color, the thoroughly mixed liquid ingredients from Part I are swiftly and carefully added to the hot caramel. Be mentally prepared for a dramatic and vigorous reaction! The intensely hot caramel will foam up considerably upon contact with the cooler liquid, and it may even temporarily seize and harden. This phenomenon is entirely normal and expected. Continue stirring diligently and vigorously over the heat, and the hardened caramel will rapidly dissolve back into the liquid, quickly transforming into a wonderfully thick, beautifully glossy, and incredibly fragrant sauce. Allow the sauce to simmer for just a few minutes, then remove it from the heat and let it cool slightly. If you happen to prefer an even thicker sauce, a simple cornstarch slurry (consisting of 1.5 parts cornstarch to 1 part COLD water) can be gradually added to the simmering sauce, stirring continuously until it reaches your preferred luscious consistency, then remove from heat. This meticulous yet immensely rewarding process guarantees a General Tso’s sauce that is rich, authentic, and utterly delicious, perfectly ready to coat your exquisitely baked chicken.
Serving Suggestions & Customization for Your Family Table
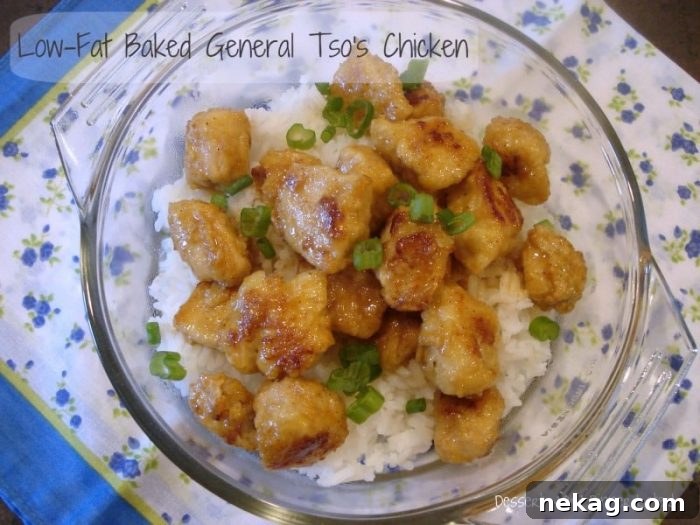
Once your perfectly baked General Tso’s chicken is generously coated in that glorious, rich sauce, it’s time to serve up this culinary masterpiece and delight your taste buds! The quintessential and classic pairing for this dish is undoubtedly fluffy, perfectly steamed white rice, which brilliantly soaks up any excess sauce, ensuring no drop of flavor goes to waste, and provides a neutral, comforting base for the chicken’s bold and vibrant flavors. A generous sprinkle of freshly chopped green onions (also known as scallions) not only adds a striking, vibrant splash of color to the presentation but also introduces a fresh, mild oniony bite that expertly cuts through the richness of the sauce, significantly enhancing the overall dining experience.
Beyond the cherished traditional accompaniments, feel entirely free to unleash your creativity and experiment with various side dishes and garnishes. Steamed or stir-fried broccoli florets, crisp snap peas, or a colorful medley of bell peppers can add a delightful crunch, an array of appealing textures, and invaluable extra nutrients, effortlessly transforming this already delicious dish into a complete, well-balanced, and highly satisfying meal. For an additional layer of intriguing texture and a wonderfully nutty aroma, a light sprinkle of toasted sesame seeds over the finished dish is highly recommended and adds an elegant touch. If you happen to enjoy a bit more heat in your culinary adventures, a small dash of extra Sriracha or chili flakes served on the side allows individual diners to effortlessly customize their spice level according to their personal preference. This remarkably versatile dish is perfectly suited for a quick, hassle-free weeknight dinner, yet it is simultaneously impressive enough to gracefully entertain guests, offering an authentic taste of beloved Chinese American cuisine right in the comfort of your very own kitchen.
Essential Tips for a Flawless General Tso’s Experience
To ensure your homemade Low-Fat Baked General Tso’s Chicken is a resounding and unforgettable success, here are a few expert tips and critical insights:
- Read Through Completely: Before even thinking about starting the cooking process, take the time to read the entire recipe from beginning to end. This crucial step helps you to fully understand the logical flow of the recipe and allows you to anticipate each critical step, especially the nuanced techniques involved in preparing the sauce.
- Mise en Place is Key: Adopt the French culinary practice of “mise en place,” meaning “everything in its place.” This involves meticulously preparing all your ingredients – chopping the chicken, mincing garlic, grating ginger, and precisely measuring all liquids – before you commence any actual cooking. This organized approach is especially invaluable for Asian cooking, where many steps can be fast-paced and require quick additions.
- Sauce Vigilance: The caramelization step for the General Tso’s sauce demands your absolute and constant attention. Under no circumstances should you walk away from the saucepan during this critical phase! Watch the sugar and water mixture closely as it undergoes its magical transformation, and be fully prepared to add the liquid ingredients from Part I as soon as it achieves that perfect light amber color to prevent any undesirable burning.
- Avoid Overcrowding the Pan: When baking the seasoned chicken pieces, it is paramount to ensure they are arranged in a single, even layer on the baking sheet, with sufficient space between each piece. Overcrowding the pan can unfortunately cause the chicken to steam instead of properly baking and browning, preventing it from developing that wonderfully crisp texture. Use two baking sheets if necessary to achieve adequate spacing.
- Adjust Spice to Taste: The recommended amount of hot chili paste is merely a guideline. If you prefer milder flavors, begin with a lesser amount; for those who crave a bolder, spicier kick, feel absolutely free to add more to the sauce during Part I preparation, or even stir in a bit extra at the very end when tossing the chicken.
- Cool the Sauce Slightly: While the sauce is undeniably delicious when hot, allowing it to cool slightly before enthusiastically tossing it with the baked chicken pieces helps it to thicken further and cling much more effectively to each succulent piece. This ensures maximum flavor distribution and a truly gratifying culinary experience.
Low-Fat Baked General Tso’s Chicken
Authored by Amber Brady
Rated 5 out of 5 stars by 1 user.
Pin Recipe
Yields: 6 to 8 Servings
Ingredients
FOR THE CHICKEN:
- 2 pounds boneless chicken thighs or breasts, cut in chunks
- 1 egg + 2 Tbsp water, whisked together to make an egg wash
- 1 cup all-purpose flour
- ½ tsp black pepper
- ¼ tsp cayenne pepper
- 3 Tbsp ground dried ginger
- 2 tsp salt
- Olive oil
PART I FOR THE SAUCE:
- 4 Tbsp soy sauce
- 4 Tbsp rice wine vinegar (I used just plain rice vinegar)
- ¼ cup water
- 2 Tbsp toasted sesame seed oil
- 1 Tbsp + hot chili paste or sauce (also known as Sriracha; I would start at 1 Tbsp, but you can add more if you like it super spicy.)
- ½ tsp salt
- 2 Tbsp cornstarch
- 3 cloves minced garlic
- 3 Tbsp freshly grated ginger, or 1 Tbsp dry ground ginger
PART II FOR THE SAUCE:
- 1 cup granulated sugar
- ¼ cup water
Instructions
- FOR THE CHICKEN: Make egg wash and place in a bowl. On a large plate combine the flour, black pepper, cayenne pepper, dried ginger, and salt.
- Dip the chicken pieces in the egg wash then dredge them in the flour mixture, ensuring they are fully coated.
- Place coated chicken on a lightly greased baking sheet and lightly drizzle the tops with a little olive oil (or spray the tops with pan spray). Bake at 375˚F (190˚C) for about 25-30 minutes. Flip the pieces halfway through the cooking time to ensure even browning. While the chicken is baking, prepare your sauce. Don’t walk away from this sauce; it gets very hot when making the caramel base and can burn easily, so pay careful attention while cooking it.
- PART I FOR THE SAUCE: In a small bowl, mix together the soy sauce, rice wine vinegar, water, toasted sesame oil, chili paste, salt, cornstarch, minced garlic, and grated ginger. Stir until well combined and the cornstarch is dissolved. Set this mixture aside.
- PART II FOR THE SAUCE: In a medium saucepan, give the sugar and ¼ cup water a quick stir to get all the sugar wet. Then, DO NOT STIR for the remainder of the cooking period until adding the other sauce components. Next, boil the sugar and water over medium heat, watching constantly until the caramel starts to turn a light amber color (again, NO STIRRING) and you can begin to smell the caramel.
- When it reaches this stage, give the other ingredients in the bowl (Part I sauce mixture) a quick stir to make sure the cornstarch is dissolved, then add it all at once to the hot caramel. Be careful when combining the two mixtures because this sauce can foam up considerably for a few seconds, and it is very hot. (Your caramel may seize up for a minute; just keep stirring, and it will work itself out and become smooth again.)
- Simmer for only a few minutes and remove from the heat and allow to cool down slightly. (If the sauce isn’t as thick as you would like, go ahead and add a cornstarch slurry [1.5 parts cornstarch to 1 part COLD water] to the boiling sauce, and it should thicken up some more, then you can let it cool down.)
- Toss the finished sauce with the cooked chicken pieces until every piece is gloriously coated. Serve immediately over plain steamed rice and top generously with chopped green onions for a fresh finish.
Recipe Notes & Troubleshooting
The success of this recipe hinges on a few key details. Firstly, ensure your chicken pieces are roughly uniform in size for even baking. Don’t rush the caramelization of the sugar; patience here will yield a far richer, deeper flavor for your sauce. However, once it starts to change color, it moves quickly, so stay attentive! If your sauce seems too thick after cooling, a small splash of hot water or chicken broth can help loosen it to your desired consistency. Conversely, if it’s too thin, the cornstarch slurry trick works wonders. Always taste and adjust seasonings, especially the chili paste, to match your personal spice preference. For an extra aromatic boost, consider using fresh ginger for both the chicken coating and the sauce for a brighter, more pungent flavor.
Disclaimer: Nutritional values were calculated using a third-party tool and are provided as an estimation only.
Sharing this recipe with a link is both encouraged and appreciated. Copying/pasting and/or screenshots of full recipes to any social media is strictly prohibited. Content and photographs are copyright protected.
Did you make this?
Don’t forget to leave a rating below and make sure to follow us on Pinterest and Instagram for more delicious recipes!