
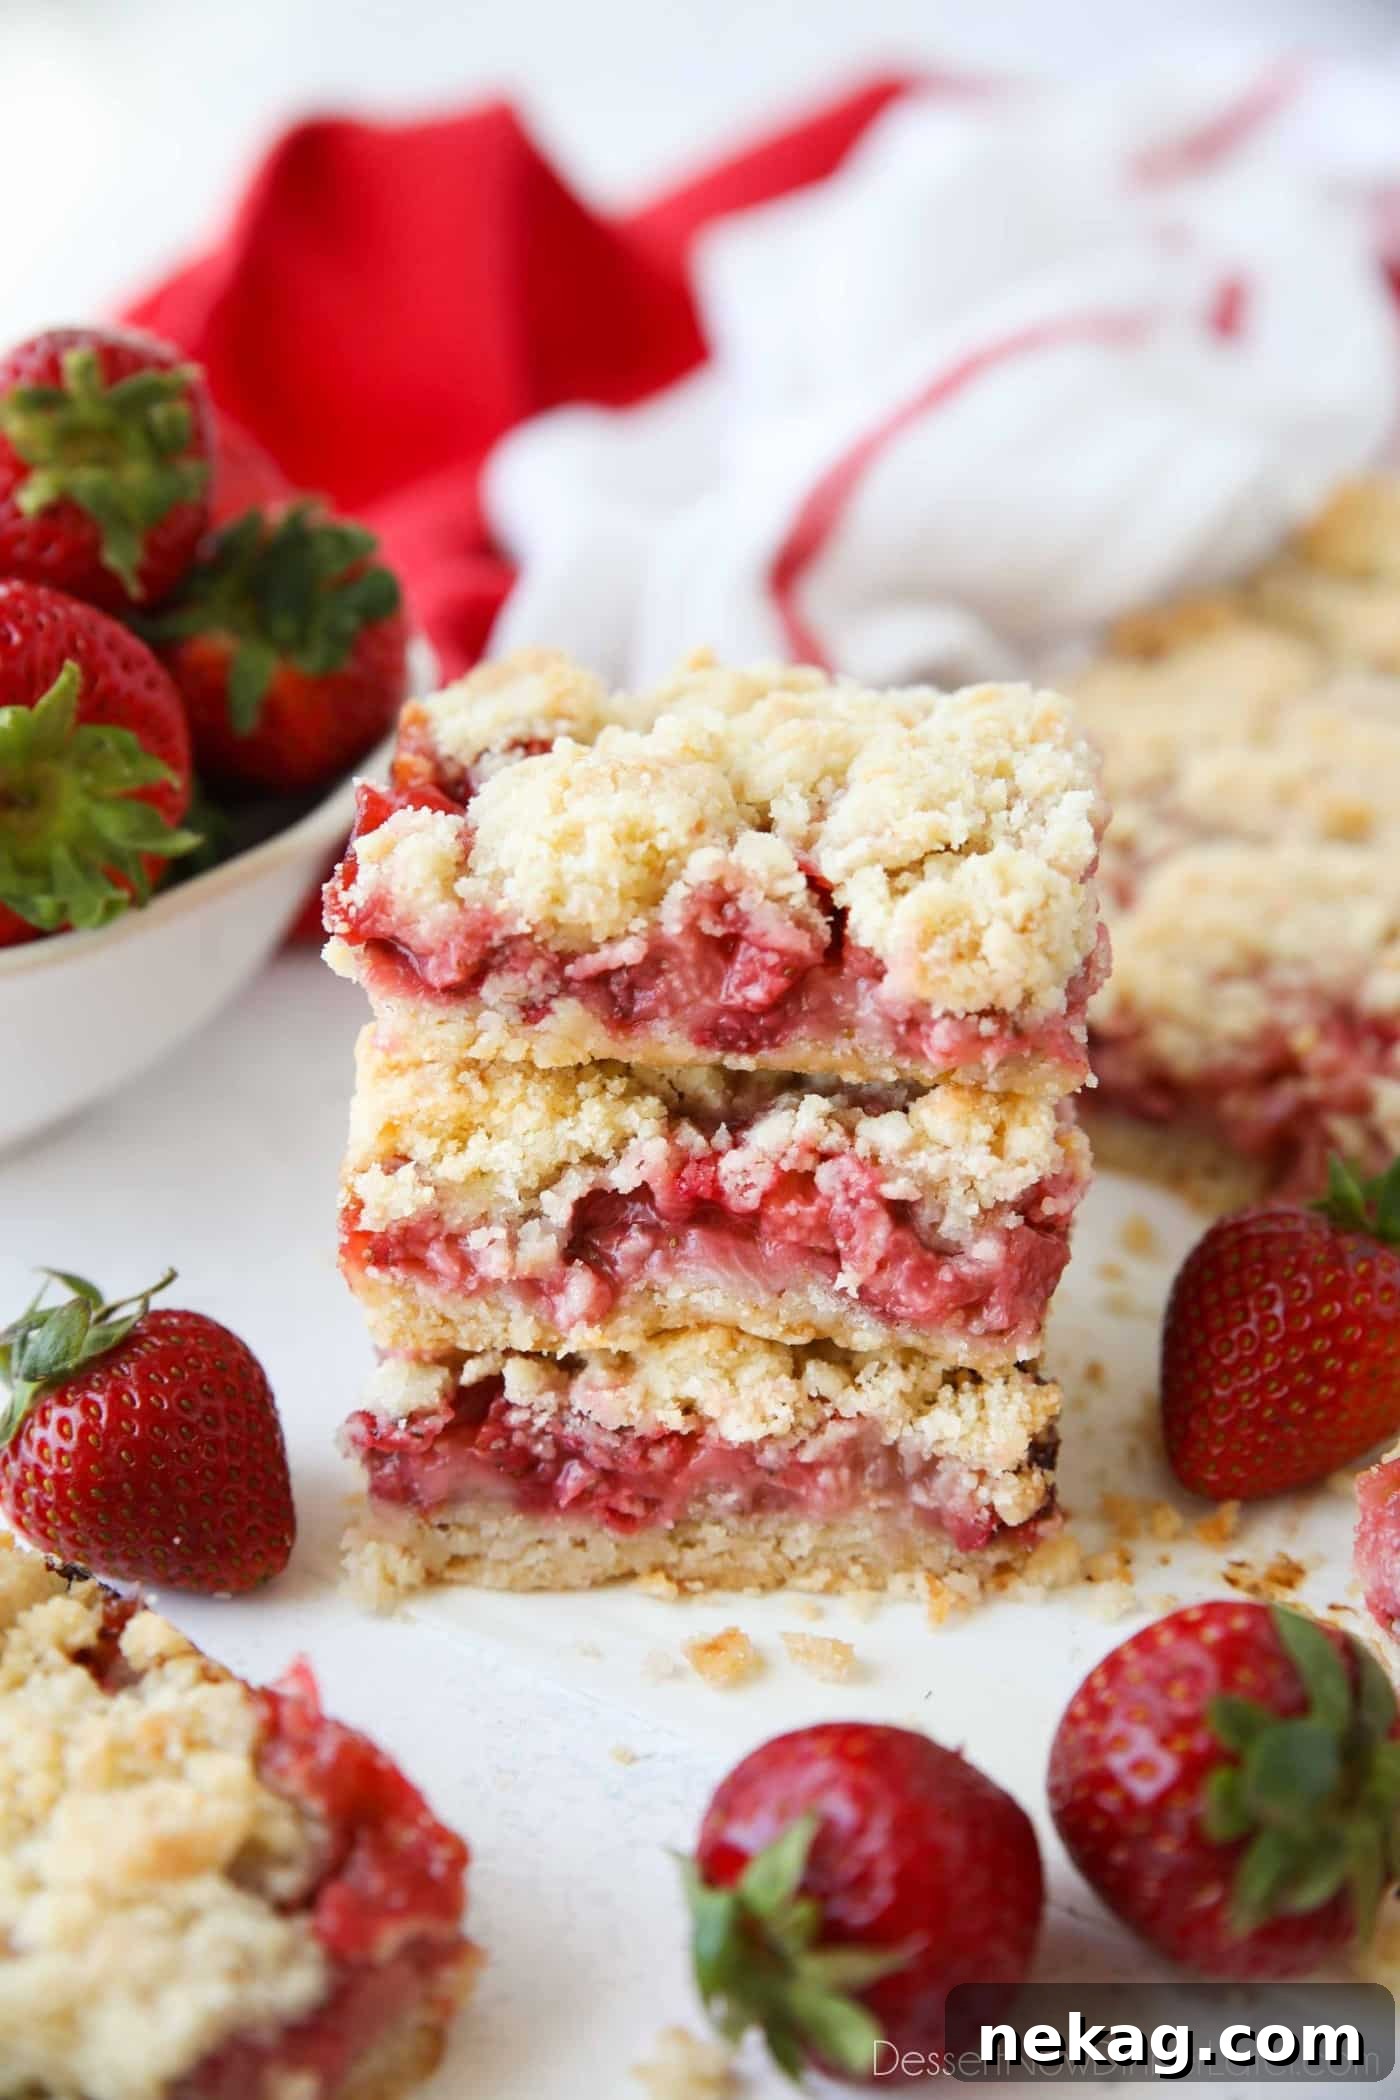
Irresistible Strawberry Crumb Bars: Your Go-To Summer Dessert
Prepare to fall in love with these easy-to-make Strawberry Crumb Bars! Featuring a luscious layer of fresh, sweet strawberries nestled between a rich, buttery shortbread crust and a perfectly golden, crumbly streusel topping, these bars are a delightful alternative to traditional strawberry pie. Bursting with vibrant flavor and an irresistible texture, they are perfect for potlucks, picnics, or simply as a sweet treat to brighten any day. Get ready to bake a batch of pure bliss that captures the essence of summer in every bite.
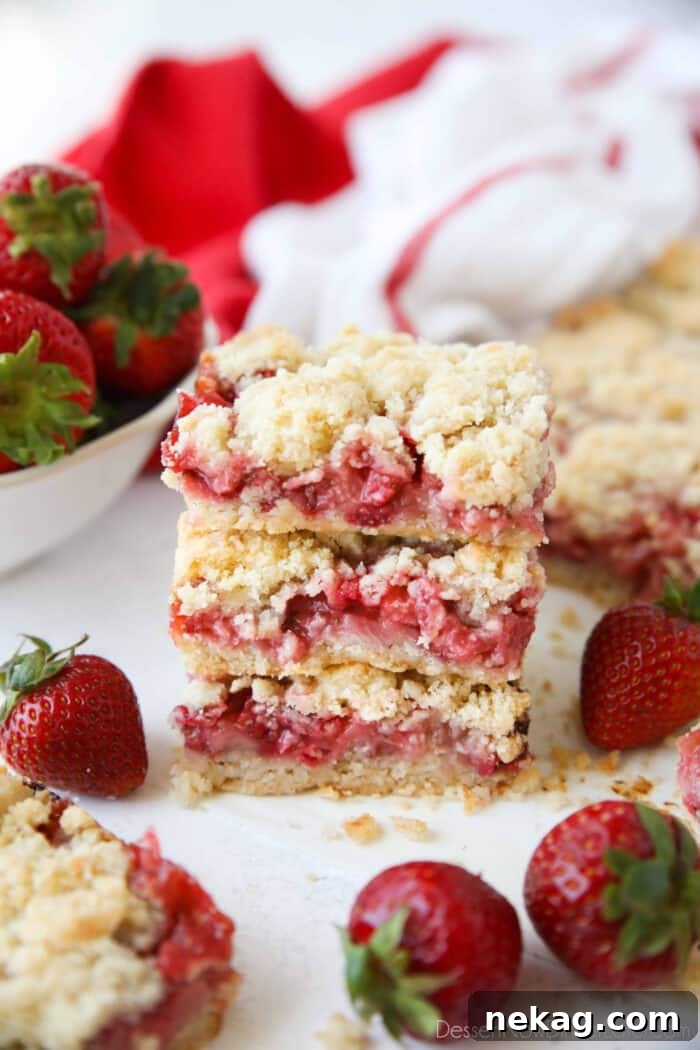
The Allure of Perfectly Crumbly Dessert Bars
Who can resist the comforting charm of a buttery streusel? These Strawberry Crumb Bars take that universal love to the next level by utilizing a single, incredibly versatile mixture for both the tender shortbread crust and the delectable crumble topping. This brilliant hack simplifies the baking process significantly, making these bars far less intimidating than a traditional pie and just as, if not more, satisfying.
Our signature buttery crumb recipe has proven to be a resounding success across a spectrum of fruit-filled desserts. We’ve perfected this foundational crumb for a variety of popular treats, including luscious blueberry crumb bars, juicy peach crumb bars, classic apple crumb bars, and even bright, zesty lemon crumb bars. Each variation showcases the adaptability and deliciousness of this easy-to-master base. Forget the fuss of intricate pie crusts; this crumb mixture delivers an equally delicious, sophisticated, and utterly irresistible result with minimal effort, making it a go-to for any baking enthusiast.
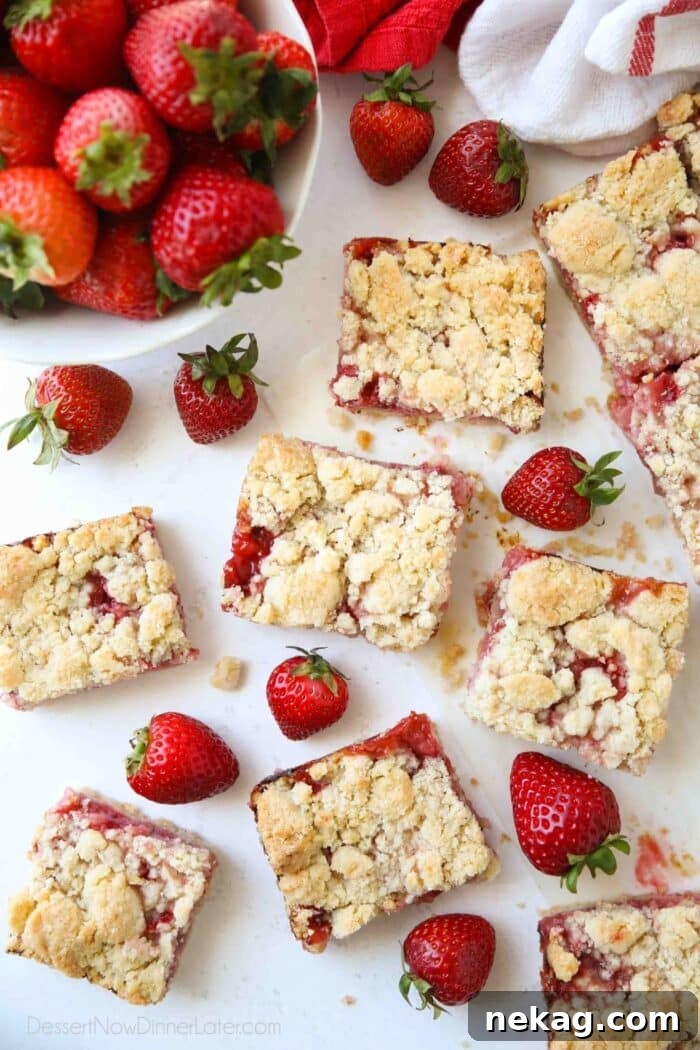
Embracing the Freshness: Why Strawberry Crumb Bars Shine
After exploring various delightful fruit combinations, it was an absolute must to bring the vibrant taste of fresh strawberries into our beloved crumb bar collection. While we do have a cherished recipe for strawberries and cream crumb bars that cleverly uses canned pie filling for convenience, this particular recipe celebrates the peak season of strawberries by featuring an abundance of fresh, diced berries for the filling.
Utilizing fresh strawberries is what makes this dessert truly exceptional, especially during the warmer months. The natural sweetness and slight tartness of ripe strawberries, combined with the buttery crumble, create a harmonious symphony of flavors and textures that is utterly irresistible. This recipe is specifically designed to highlight the glorious simplicity and pure taste of seasonal produce, making it an ideal summer baking project or a fantastic way to utilize a bountiful harvest of berries. The bright, juicy burst of fresh fruit in every bite elevates these bars from a simple dessert to a truly memorable experience, perfect for any occasion where you want to impress with homemade goodness.
Crafting the Perfect Buttery Crumb: Crust & Topping in One
The foundation of these outstanding Strawberry Crumb Bars lies in our signature buttery crumb mixture, which ingeniously serves as both the pressed bottom crust and the delightful streusel topping. This streamlined approach not only saves time but also ensures a cohesive flavor profile throughout the entire bar. Here’s what you’ll need to create this essential component:
- All-Purpose Flour: The structural backbone of our crumb, providing the necessary body.
- Granulated Sugar: For that perfect touch of sweetness, enhancing the overall flavor.
- Baking Powder: A leavening agent that contributes to a light, tender crumb, preventing it from becoming too dense.
- Salt: Essential for balancing the sweetness and enhancing all flavors, making them pop.
- Unsalted Butter: The star ingredient, providing unparalleled richness and tenderness. Crucially, it needs to be very cold to achieve the desired crumbly texture.
- Large Egg: Binds the mixture slightly and adds to the richness, ensuring the crumbs hold together just enough.
Begin by combining the dry ingredients—all-purpose flour, granulated sugar, baking powder, and salt—in the bowl of a stand mixer. Give them a quick whisk to ensure they are thoroughly combined and evenly distributed. Next, cut your very cold unsalted butter into tablespoon-sized pieces and add them to the flour mixture. Using the paddle attachment of your stand mixer, mix on low speed until the butter is broken down into small, pea-sized flakes and the mixture resembles coarse sand. The key here is to keep the butter cold, which prevents it from fully incorporating and allows for that wonderfully flaky texture. If you don’t have a stand mixer, a food processor can achieve this quickly with a few pulses, or you can use a pastry blender or even your fingertips for a more hands-on approach, ensuring you work quickly to keep the butter cold.
Once the butter is incorporated, crack in a large egg and continue mixing only until it is just combined. Overmixing at this stage can develop the gluten too much, leading to a tough crust. The resulting mixture will have a unique texture: mostly dry and powdery, much like wet sand, with distinct small clumps of butter scattered throughout. This is exactly what you’re looking for to achieve that classic crumb bar texture that is both tender and delightfully crisp.
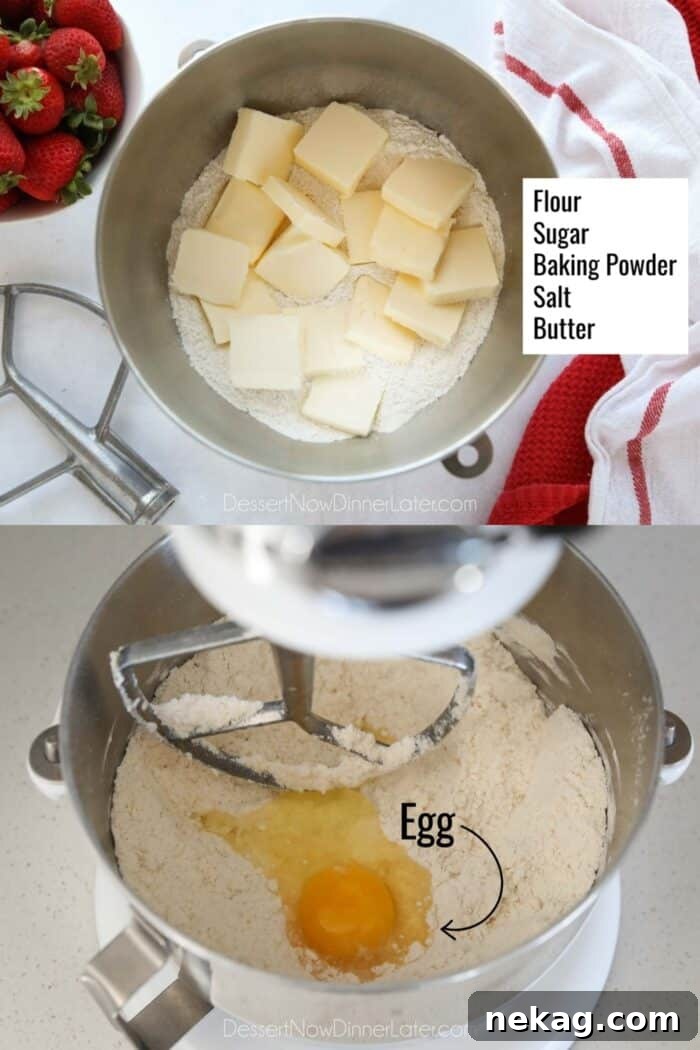
Pro Tip for Crumb Perfection: The temperature of your butter plays a pivotal role in the final texture of your crumb bars. For a distinctively crumbly and flaky streusel, it’s vital to use very cold butter. The tiny pieces of butter will create pockets of steam during baking, resulting in a lighter, more tender crumb. If you prefer a slightly more solid, chunkier crust and topping, you can opt for butter that is just slightly softened, but never overly soft or melted, as this will result in a greasy, dense texture rather than a light and airy crumble. Experiment to find your preferred consistency, but always err on the side of colder butter for superior results. This versatile crumb is the secret to countless delicious desserts!
Preparing the Base: The Crust Layer
With your versatile crumb mixture ready, it’s time to prepare your baking vessel for these delightful Strawberry Crumb Bars. Lightly grease a 9×13-inch baking pan, ensuring all inner surfaces are covered to prevent sticking. For even easier removal and a cleaner presentation, we highly recommend lining the pan with parchment paper, allowing a generous overhang of a few inches on the longer sides. This parchment paper sling will be your best friend when it comes to lifting the cooled bars cleanly from the pan without any hassle.
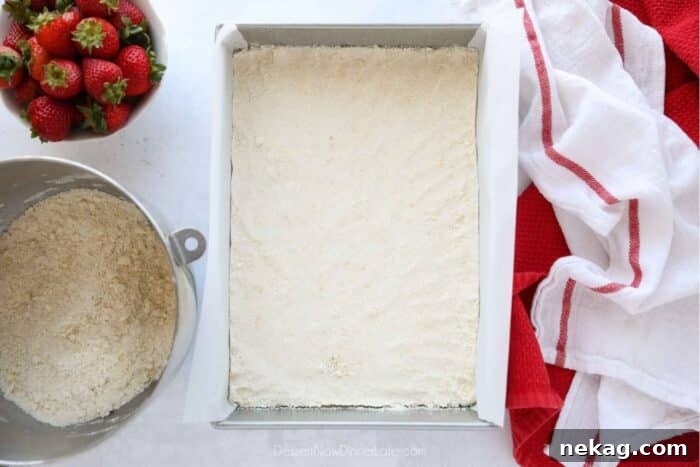
Carefully divide your prepared crumb mixture in half. Take one half and sprinkle it evenly over the bottom of the prepared baking pan. The goal is to create an even layer that will serve as the sturdy, flavorful base for your vibrant strawberry filling. Using your hands or the back of a spoon, gently but firmly press the mixture into a compact layer across the entire bottom of the pan. Don’t be alarmed if the crust appears a bit dry or sandy at this stage; this is perfectly normal. It will beautifully come together and turn golden and buttery during baking, forming the perfect foundation that holds all the delicious layers together. Pressing it firmly now ensures a solid, sliceable crust later.
Crafting the Vibrant Strawberry Filling
The heart of these delightful bars is a simple yet incredibly flavorful fresh strawberry filling. Its natural sweetness and vibrant color truly make this dessert shine, especially when using seasonal, ripe berries. Here are the essential ingredients you’ll need to create this bursting-with-flavor layer:
- Fresh Strawberries: The undisputed star of the show! Always opt for ripe, fragrant strawberries for the best flavor and sweetness. Their natural juices will contribute immensely to the filling’s texture and taste.
- Granulated Sugar: While strawberries are naturally sweet, a bit of granulated sugar enhances their flavor, draws out their juices, and helps create a delicious, syrupy consistency.
- Cornstarch: This acts as a crucial thickening agent. It ensures your filling sets perfectly during baking and cooling, preventing it from being too runny and keeping your bars neat and easy to slice.
- Lemon Juice: A splash of fresh lemon juice is a secret weapon here. It brightens the strawberry flavor significantly, adds a subtle zesty counterpoint to the sweetness, and prevents the filling from tasting flat.
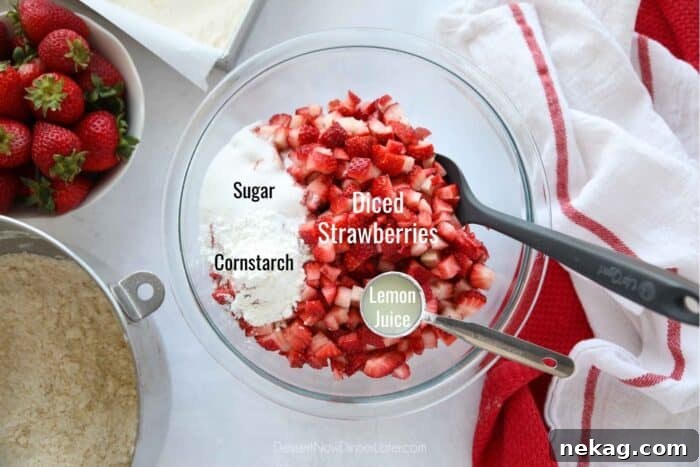
Start by preparing your strawberries. Rinse them thoroughly under cool water to remove any dirt. Then, hull them by removing the green leafy tops and the small, firm core. Once hulled, dice the strawberries into roughly half-inch pieces until you have approximately 5 cups. This usually equates to about 1 ½ to 2 pounds of fresh strawberries, depending on their size and how much you trim. Once diced, transfer them to a medium bowl.
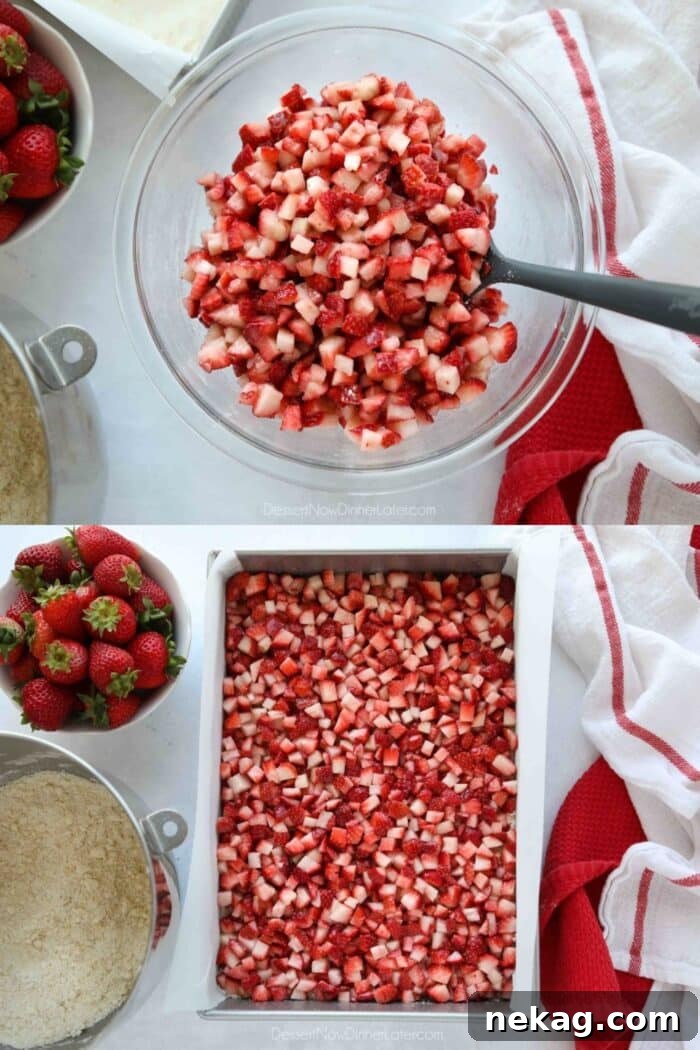
To the diced strawberries, add the granulated sugar, cornstarch, and fresh lemon juice. Stir everything gently but thoroughly until the strawberries are well coated. You’ll notice the sugar starting to draw out the natural juices from the berries almost immediately. The cornstarch will then work its magic during baking, thickening these juices and creating a wonderfully jammy, luscious consistency. Once mixed, spoon the vibrant strawberry mixture, along with any accumulated juices, evenly over the pressed crumb crust in your baking pan. Distribute the berries from edge to edge, ensuring every single bite of your finished crumb bar is filled with fruity goodness. This generous layer of fresh fruit is what makes these bars so incredibly appealing and irresistible.
The Final Flourish: Topping and Baking for Golden Perfection
With the vibrant strawberry filling generously spread across the prepared crust, it’s time for the crowning glory of our Strawberry Crumb Bars: the remaining crumb topping. This top layer will bake into a beautiful golden streusel, adding both visual appeal and a delightful textural contrast to the soft fruit filling.
Evenly sprinkle the second half of your buttery crumb mixture over the entire surface of the strawberries. You have a little control over the final texture of your topping at this stage, allowing you to customize it to your preference:
- For a Chunky Topping: If you love distinct, crisp nuggets of streusel, gently squeeze handfuls of the crumb mixture together before sprinkling. This creates larger, more defined clumps that will bake into satisfyingly crisp morsels with a wonderful chew.
- For a Finer Topping: If you prefer a more uniform, delicate streusel, simply sprinkle the mixture as is, allowing it to remain more powdery. This will result in a smoother, more finely textured topping.
We often find that a combination of both techniques yields the most appealing result – some delicate crumbs and some substantial, buttery chunks for a truly dynamic textural experience. Whichever method you choose, ensure the topping is distributed evenly across the berries for consistent baking and an attractive finish.
Now, it’s time to bring these beauties to life in the oven! Bake your Strawberry Crumb Bars in a preheated oven at 375 degrees Fahrenheit (190 degrees Celsius) for approximately 45-50 minutes. The baking time can vary slightly depending on your oven, so keep an eye on them. You’ll know they’re perfectly baked when the streusel topping has turned a beautiful light golden brown, and the strawberry filling beneath is visibly bubbling in the center, indicating it has thickened and cooked through. The enticing aroma filling your kitchen will be another clear sign of success – a sweet promise of the deliciousness to come!
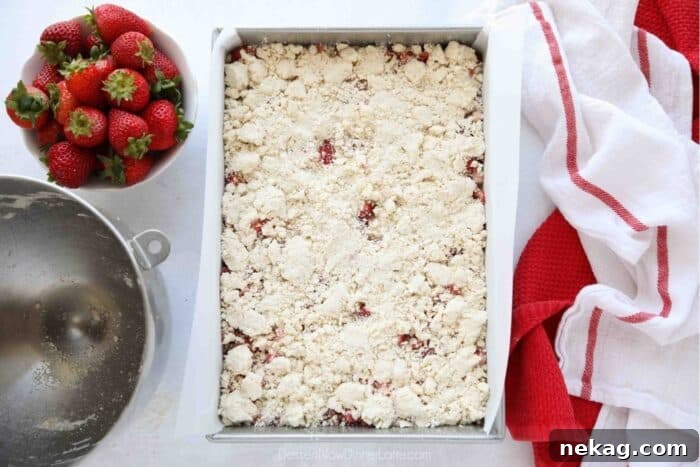
Cooling, Cutting, and Serving Your Delicious Crumb Bars
Patience is a virtue, especially when it comes to crumb bars! It is absolutely crucial to allow your freshly baked Strawberry Crumb Bars to cool completely before attempting to cut them. Rushing this step will result in a messy, crumbling disaster, as the fruit filling needs ample time to set and solidify, and the crust needs to firm up to prevent it from falling apart. Ideally, let them cool for at least 2-3 hours at room temperature, or for the cleanest cuts, you can even chill them in the refrigerator for an hour or two once they’ve reached room temperature. This firming-up process is key to achieving those perfect, neat squares.
If you wisely opted for the parchment paper sling when preparing your pan, your job just got much easier. Once cooled, carefully run a thin knife along any pan edges not covered by parchment paper to loosen them. Then, grasp both ends of the parchment paper overhang and gently lift the entire slab of bars out of the pan and onto a sturdy cutting board. This method prevents any sticking to the pan and allows for perfectly clean, crisp edges on your bars.
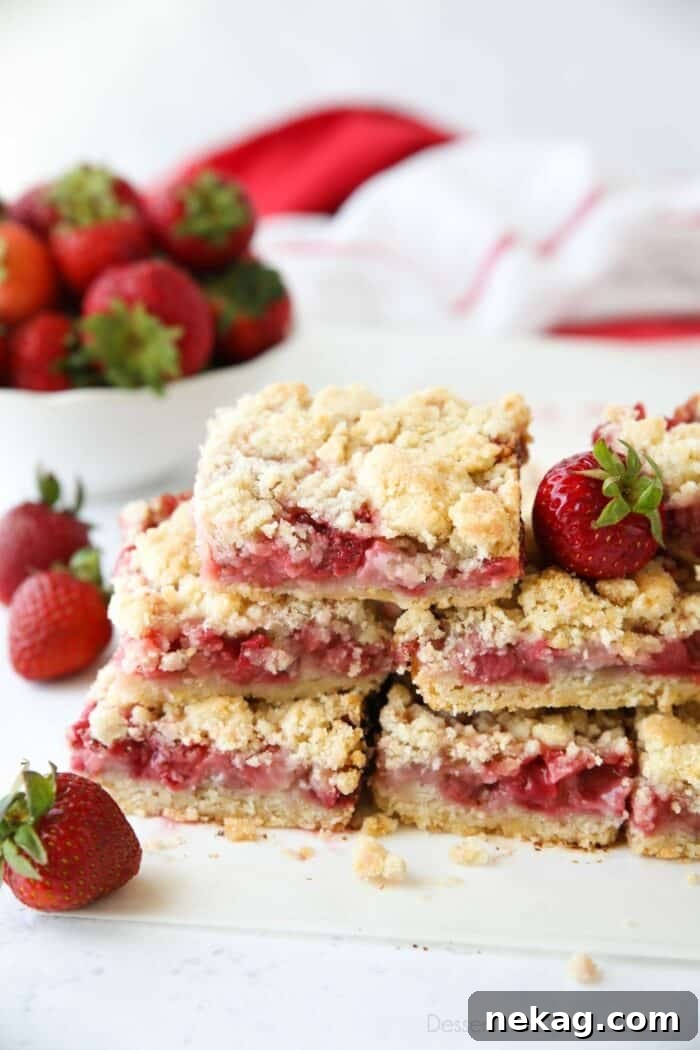
Using a long, sharp knife, trim off the very edges of the slab if desired for a neater presentation (though many argue the edges are the most delicious and chewy part!). Then, precisely cut the cooled slab into a grid. For a standard 9×13-inch pan, we recommend making 5 rows by 4 rows, yielding 20 perfectly sized, individual strawberry pie squares. Each bar will showcase a beautiful cross-section of the golden buttery crust, the luscious and vibrant strawberry filling, and the irresistible crumbly topping. Serve them as is for a simple treat, or elevate the experience with a scoop of premium vanilla ice cream, a dollop of fresh whipped cream, or a delicate dusting of powdered sugar for an extra touch of elegance. These bars are delicious at room temperature or slightly chilled.
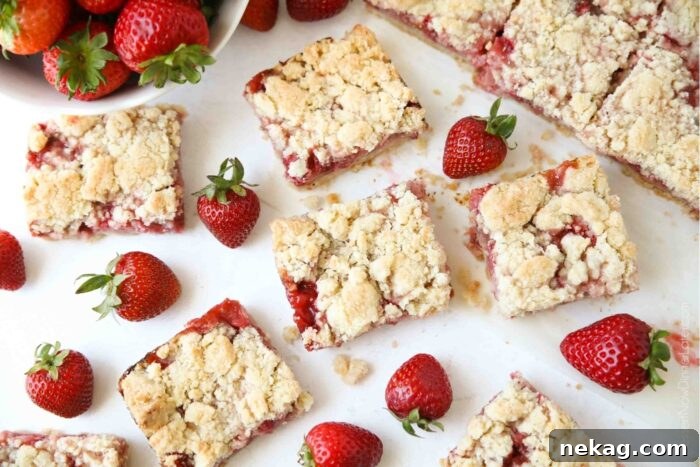
Storage Tips for Maximum Freshness
Proper storage is key to enjoying your Strawberry Crumb Bars for days to come, ensuring every bite remains as delicious as the first. If you find yourself with leftovers (a rare occurrence, we predict, given how addictive they are!), they are incredibly easy to store and maintain their deliciousness.
For optimal freshness, transfer any leftover bars to an airtight container. This will protect them from drying out and absorbing other odors. Alternatively, if you prefer the convenience of keeping them in the original baking pan, ensure it is covered tightly with plastic wrap or aluminum foil to create a good seal. These bars can be kept at room temperature for up to 3 days, making them a fantastic make-ahead dessert for parties or weekly treats. For extended freshness, especially in warmer climates or if your home is particularly warm, refrigerate the bars for up to 5 days. Chilled bars are often even more delightful, offering a firmer texture and a refreshing coolness that’s particularly perfect on a hot day. Simply bring them back to room temperature before serving, or enjoy them cold directly from the fridge!
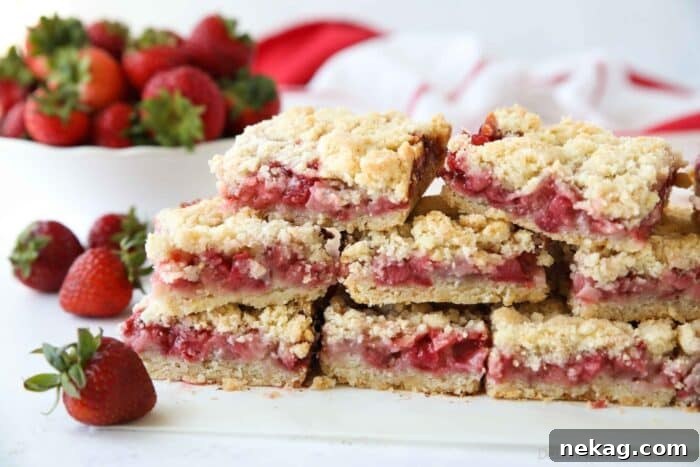
Freezing for Later: These crumb bars also freeze beautifully, making them an excellent option for meal prep or saving for unexpected guests. Once completely cooled and cut into individual squares, arrange them in a single layer on a baking sheet and freeze until solid (about 1-2 hours). Once firm, transfer the frozen bars to a freezer-safe airtight container or a heavy-duty freezer bag, separating layers with parchment paper to prevent sticking. They can be frozen for up to 2-3 months without significant loss of quality. To enjoy, simply thaw at room temperature for a few hours or overnight in the refrigerator before serving. This way, you can enjoy the taste of fresh strawberry bars long after strawberry season has passed!
Explore More Irresistible Fresh Strawberry Desserts
If you’ve fallen in love with these Strawberry Crumb Bars, you’re undoubtedly a fan of the delightful versatility of fresh strawberries! Their sweet-tart flavor profile makes them a star in countless desserts, from comforting baked goods to refreshing no-bake treats. Don’t let your strawberry season end here; dive into more delicious recipes that celebrate this beloved berry:
- Strawberry Delight: A light and airy layered dessert perfect for warm weather and potlucks.
- Fresh Strawberry Cupcakes: Moist, fluffy cupcakes infused with real strawberry flavor and topped with a lovely frosting.
- Low Sugar Strawberry Freezer Jam: Preserve the vibrant taste of summer for months to come with this easy, less-sweet jam.
- Strawberry Cream Pie: A classic no-bake pie featuring a creamy, dreamy strawberry filling in a delicious crust.
- Lemon Curd Sweet Rolls with Strawberries: A delightful fusion of bright citrus and sweet berries baked into soft, pillowy sweet rolls.
- Favorite Strawberry Cake with Jello: A wonderfully moist and flavorful cake that’s always a crowd-pleaser, boasting an irresistible strawberry essence.
- Strawberry Lemon Bars: A zesty and refreshing treat with a perfect balance of sweet and tart, ideal for a sunny day.
- Strawberry Crumble: A warm, comforting dessert with a buttery oat topping that bakes down into a soft, fruit-filled center.
- Lemon Strawberry Shortcake: A bright and fresh take on a beloved classic, featuring a zesty lemon cream sauce.
- Strawberry Swirl Bread: A beautiful and tasty loaf, perfect for breakfast or brunch, with sweet strawberry swirls.
- Strawberry Fluff Salad: A light, fruity, and fun dessert salad for any occasion, quick to whip up.
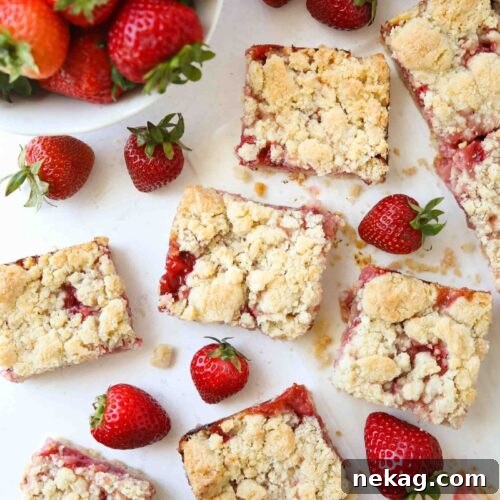
Strawberry Crumb Bars Recipe
Yields: 20 bars
Prep time: 15 mins
Cook time: 45-50 mins
Total time: 1 hour 5 mins (plus cooling time)
Ingredients
Crust/Crumble:
- 3 cups (360 g) all-purpose flour (stir, spoon & level)
- 1 cup (200 g) granulated sugar
- 1 tsp baking powder
- ½ tsp salt
- 1 cup (226 g) unsalted butter, cold (2 sticks)
- 1 large egg
Strawberry Filling:
- 5 cups (681-908 g) fresh strawberries, diced (about 1 ½ to 2 lbs)
- ½ cup (100 g) granulated sugar
- 2 Tbsp cornstarch
- 1 Tbsp lemon juice
Equipment
- Norpro Strawberry Huller
- Parchment Paper
- 9×13-inch Pan
Instructions
- Preheat your oven to 375°F (190°C). Lightly grease a 9×13-inch baking dish or line it with parchment paper, leaving a few inches of overhang on the sides for easy lifting.
- In the bowl of a stand mixer, whisk together the all-purpose flour, granulated sugar, baking powder, and salt.
- Cut the cold unsalted butter into tablespoon-sized pieces and add them to the dry mixture. Using the paddle attachment, mix on low speed until the butter is broken down into small flakes and the mixture resembles coarse sand. (Alternatively, use a food processor or a pastry blender if you don’t have a stand mixer).
- Add the large egg and mix until just combined. The mixture will be mostly dry and powdery with some small clumps.
- Sprinkle half of the crumb mixture evenly over the bottom of the prepared pan. Press it down firmly with your hands or the back of a spoon to form a compact crust.
- Rinse, hull, and dice enough fresh strawberries to yield 5 cups (approximately 1 ½ to 2 pounds). Transfer them to a medium bowl.
- Add the ½ cup granulated sugar, cornstarch, and lemon juice to the diced strawberries. Stir gently until the strawberries are well coated and juicy.
- Evenly spoon and spread the strawberry mixture (including all juices) over the pressed bottom crust in the baking pan.
- Sprinkle the remaining half of the crumb mixture evenly over the top of the strawberries. For a chunkier topping, gently squeeze portions of the mixture before sprinkling; for a finer topping, simply sprinkle as is.
- Bake for 45-50 minutes, or until the topping is a light golden brown and the strawberry filling is visibly bubbling in the center, indicating it has thickened.
- Allow the strawberry crumb bars to cool completely in the pan before cutting. This is a crucial step to ensure the filling sets and the bars hold their shape. If using parchment paper, lift the bars out using the overhang and place them on a cutting board.
- Using a sharp knife, cut the cooled bars into 5 rows by 4 rows, yielding 20 delicious squares.
Notes
- For a very crumbly texture, always use very cold butter when making the crumb mixture. For a slightly more solid, chunkier crust and topping, you can use butter that is just slightly softened, but never overly soft or melted, as this will lead to a greasy result.
- Leftover strawberry crumb bars can be stored in an airtight container or covered tightly in the baking pan. Store at room temperature for up to 3 days or refrigerated for up to 5 days. These bars also freeze exceptionally well for up to 2-3 months; thaw at room temperature for a few hours or overnight in the refrigerator before serving.
Nutrition Information (Estimated Per Serving)
Serving Size: 1 bar
- Calories: 225kcal
- Carbohydrates: 33g
- Protein: 3g
- Fat: 10g
- Saturated Fat: 6g
- Polyunsaturated Fat: 1g
- Monounsaturated Fat: 2g
- Trans Fat: 0.4g
- Cholesterol: 33mg
- Sodium: 85mg
- Potassium: 82mg
- Fiber: 1g
- Sugar: 17g
- Vitamin A: 300IU
- Vitamin C: 21mg
- Calcium: 25mg
- Iron: 1mg
Disclaimer: Nutritional values are estimates and may vary based on specific ingredients, preparation methods, and serving sizes. This information is provided for general guidance only.
Share Your Baking Success!
We absolutely love seeing your creations! If you tried this recipe for Strawberry Crumb Bars, we’d be thrilled if you shared your experience. Don’t forget to leave a comment and rating below to let us know how they turned out. Your feedback helps other bakers, too!
For more delightful dessert ideas, baking tips, and culinary inspiration, be sure to follow us on Pinterest and Instagram. Join our community of food lovers and never miss out on our latest recipes!